Arts and Crafts
- Arts and Crafts, Building and Landscaping, Gardening adventures, Permaculture and Edible Forest Gardening Adventures, Recycling and Repurposing
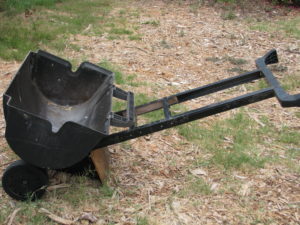
Repurposing At Its Best: The Bar-Be-Rolla
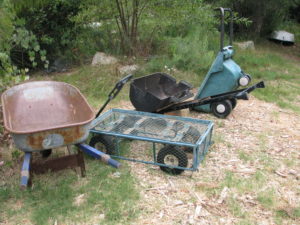
When your garden carts just won’t do the job: Introducing the Bar-Be-Rolla. Its a lightweight wheeled cart that can hold liquids or solids, piles of wood, scraps of urbanite, mulch, wet mud, etc. And as you can see, its almost entirely made from an abandoned Bar-B-Que grill.
 My friend Louis, who has contributed inventions and repairs to Finch Frolic Garden, saw the neighbor’s grill set out for garbage, and then saw possibilities.
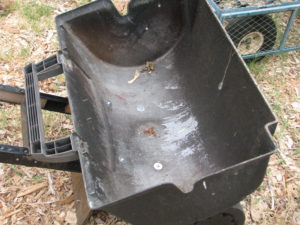
 Because the dome, which became the bucket, is made of aluminum, this gadget is super light.
 The original tires may need to be replaced with stronger ones, but otherwise it works just great. And one less item for the dump.
The legs became the handle, with added wood in between for connection.
 A board was used to make it stand up when resting, only because that was at hand. If you make your own, be sure that the board, or whatever you use as a kickstand, is high enough to clear the ground when the device is being wheeled.
 I think this is a brilliant re-purposing of someone else’s junk. And fun to say. Bar-Be-Rolla. Even Jane Fonda might like one!
- Animals, Arts and Crafts, Bees, Birding, Building and Landscaping, Chickens, Fungus and Mushrooms, Gardening adventures, Heirloom Plants, Hugelkultur, Microbes and Fungi, Natives, Other Insects, Perennial vegetables, Permaculture and Edible Forest Gardening Adventures, Photos, Ponds, Rain Catching, Recycling and Repurposing, Soil, Water, Water Saving
Six Years of Permaculture

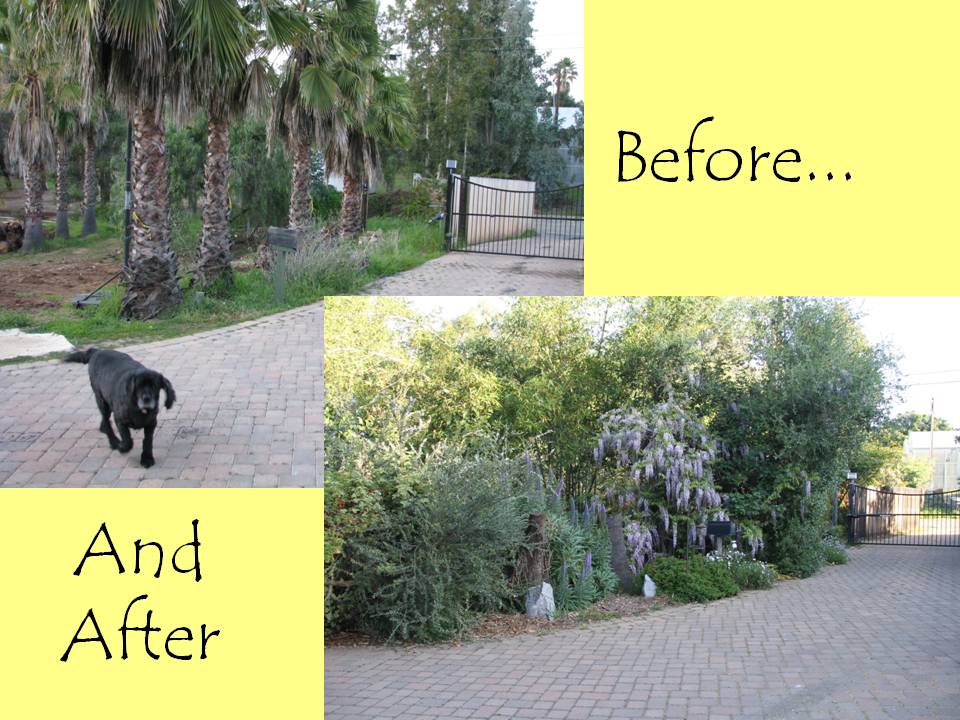
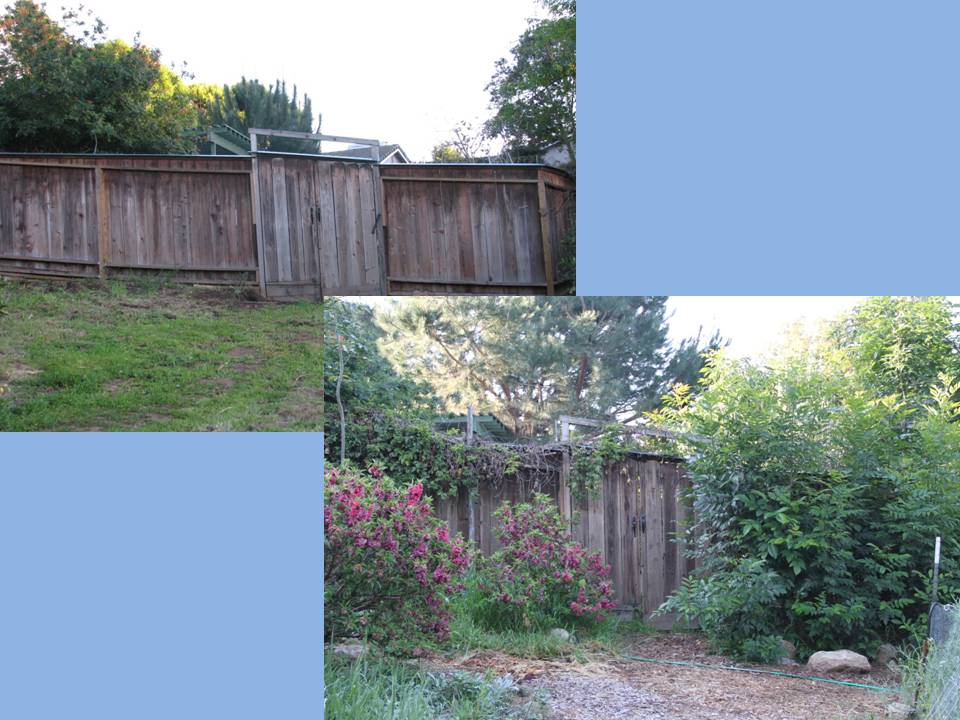
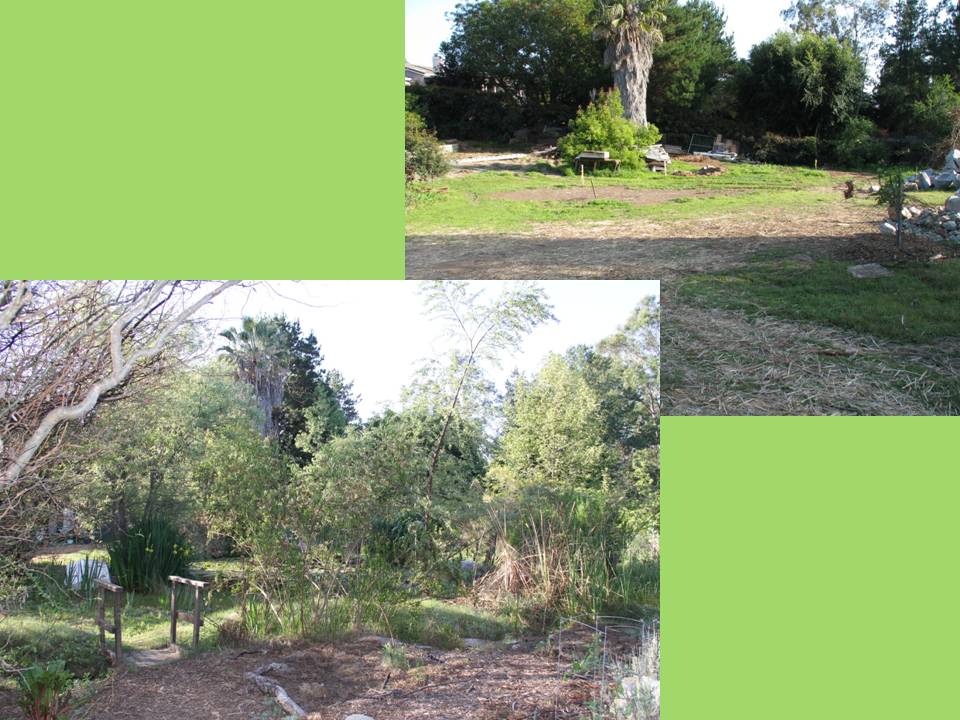
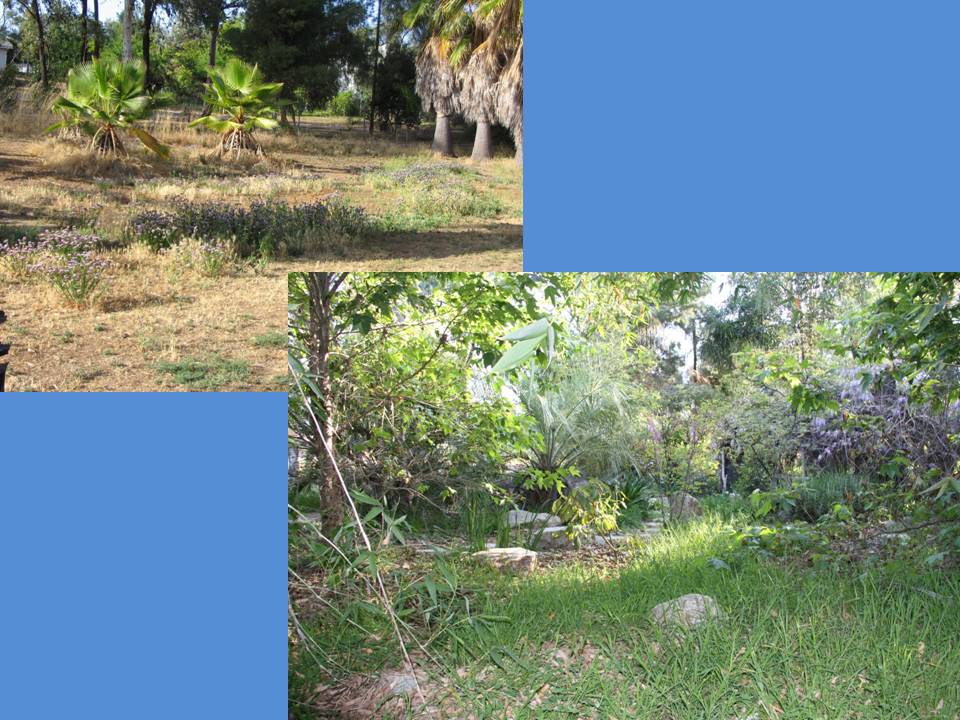
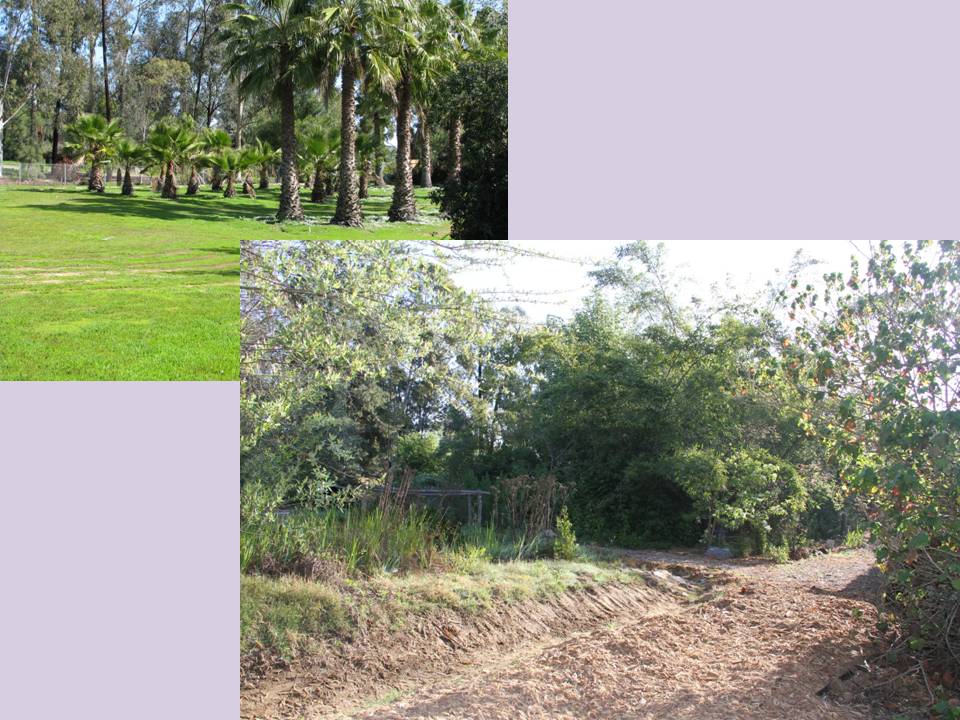
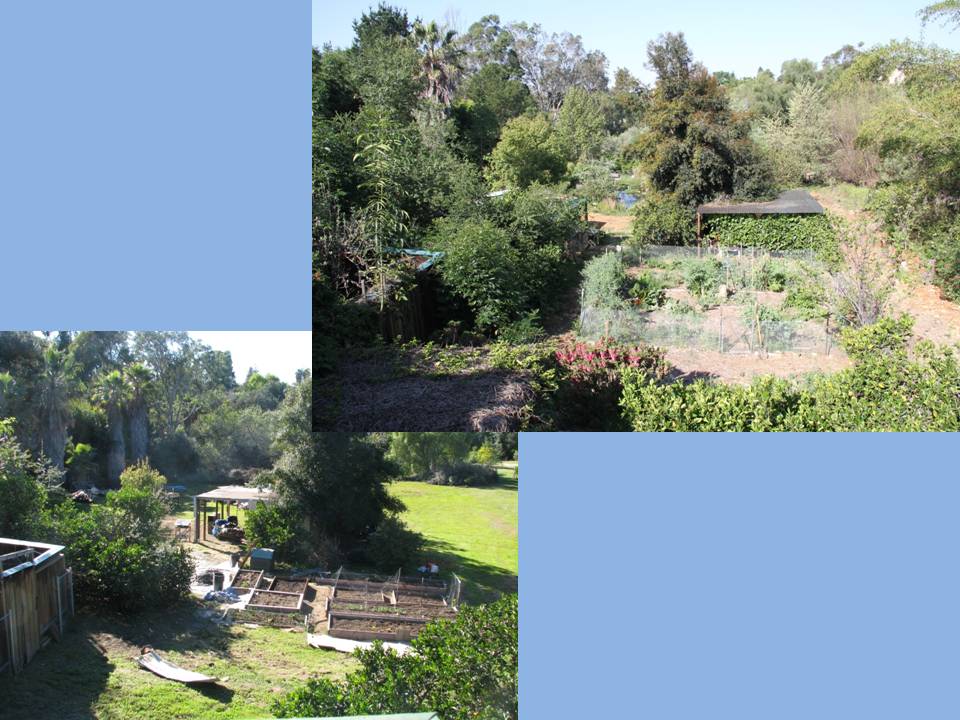
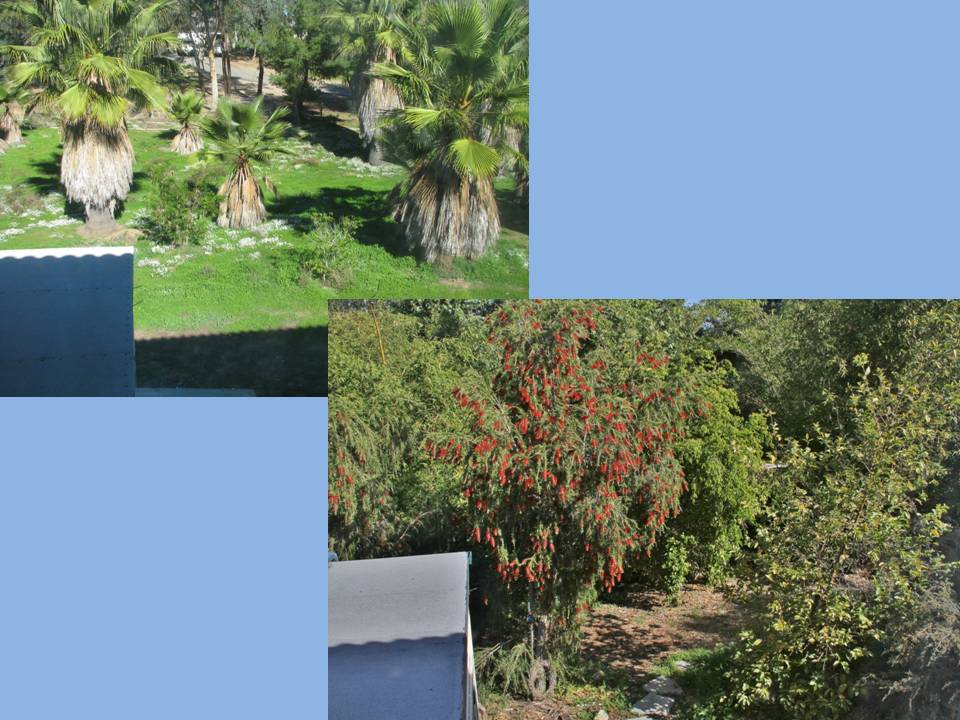
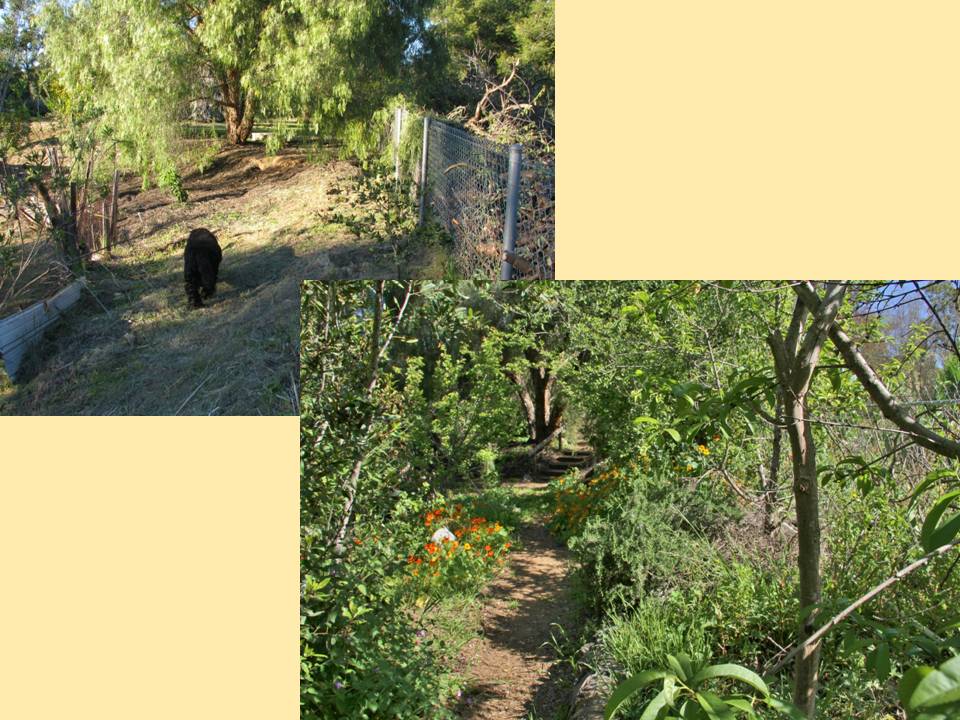
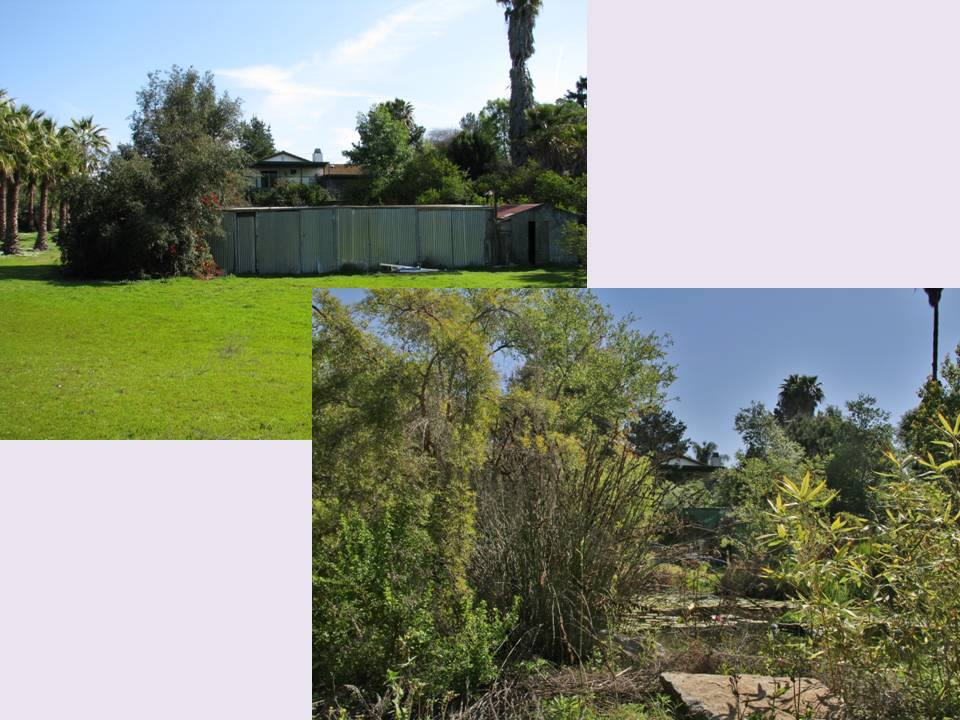
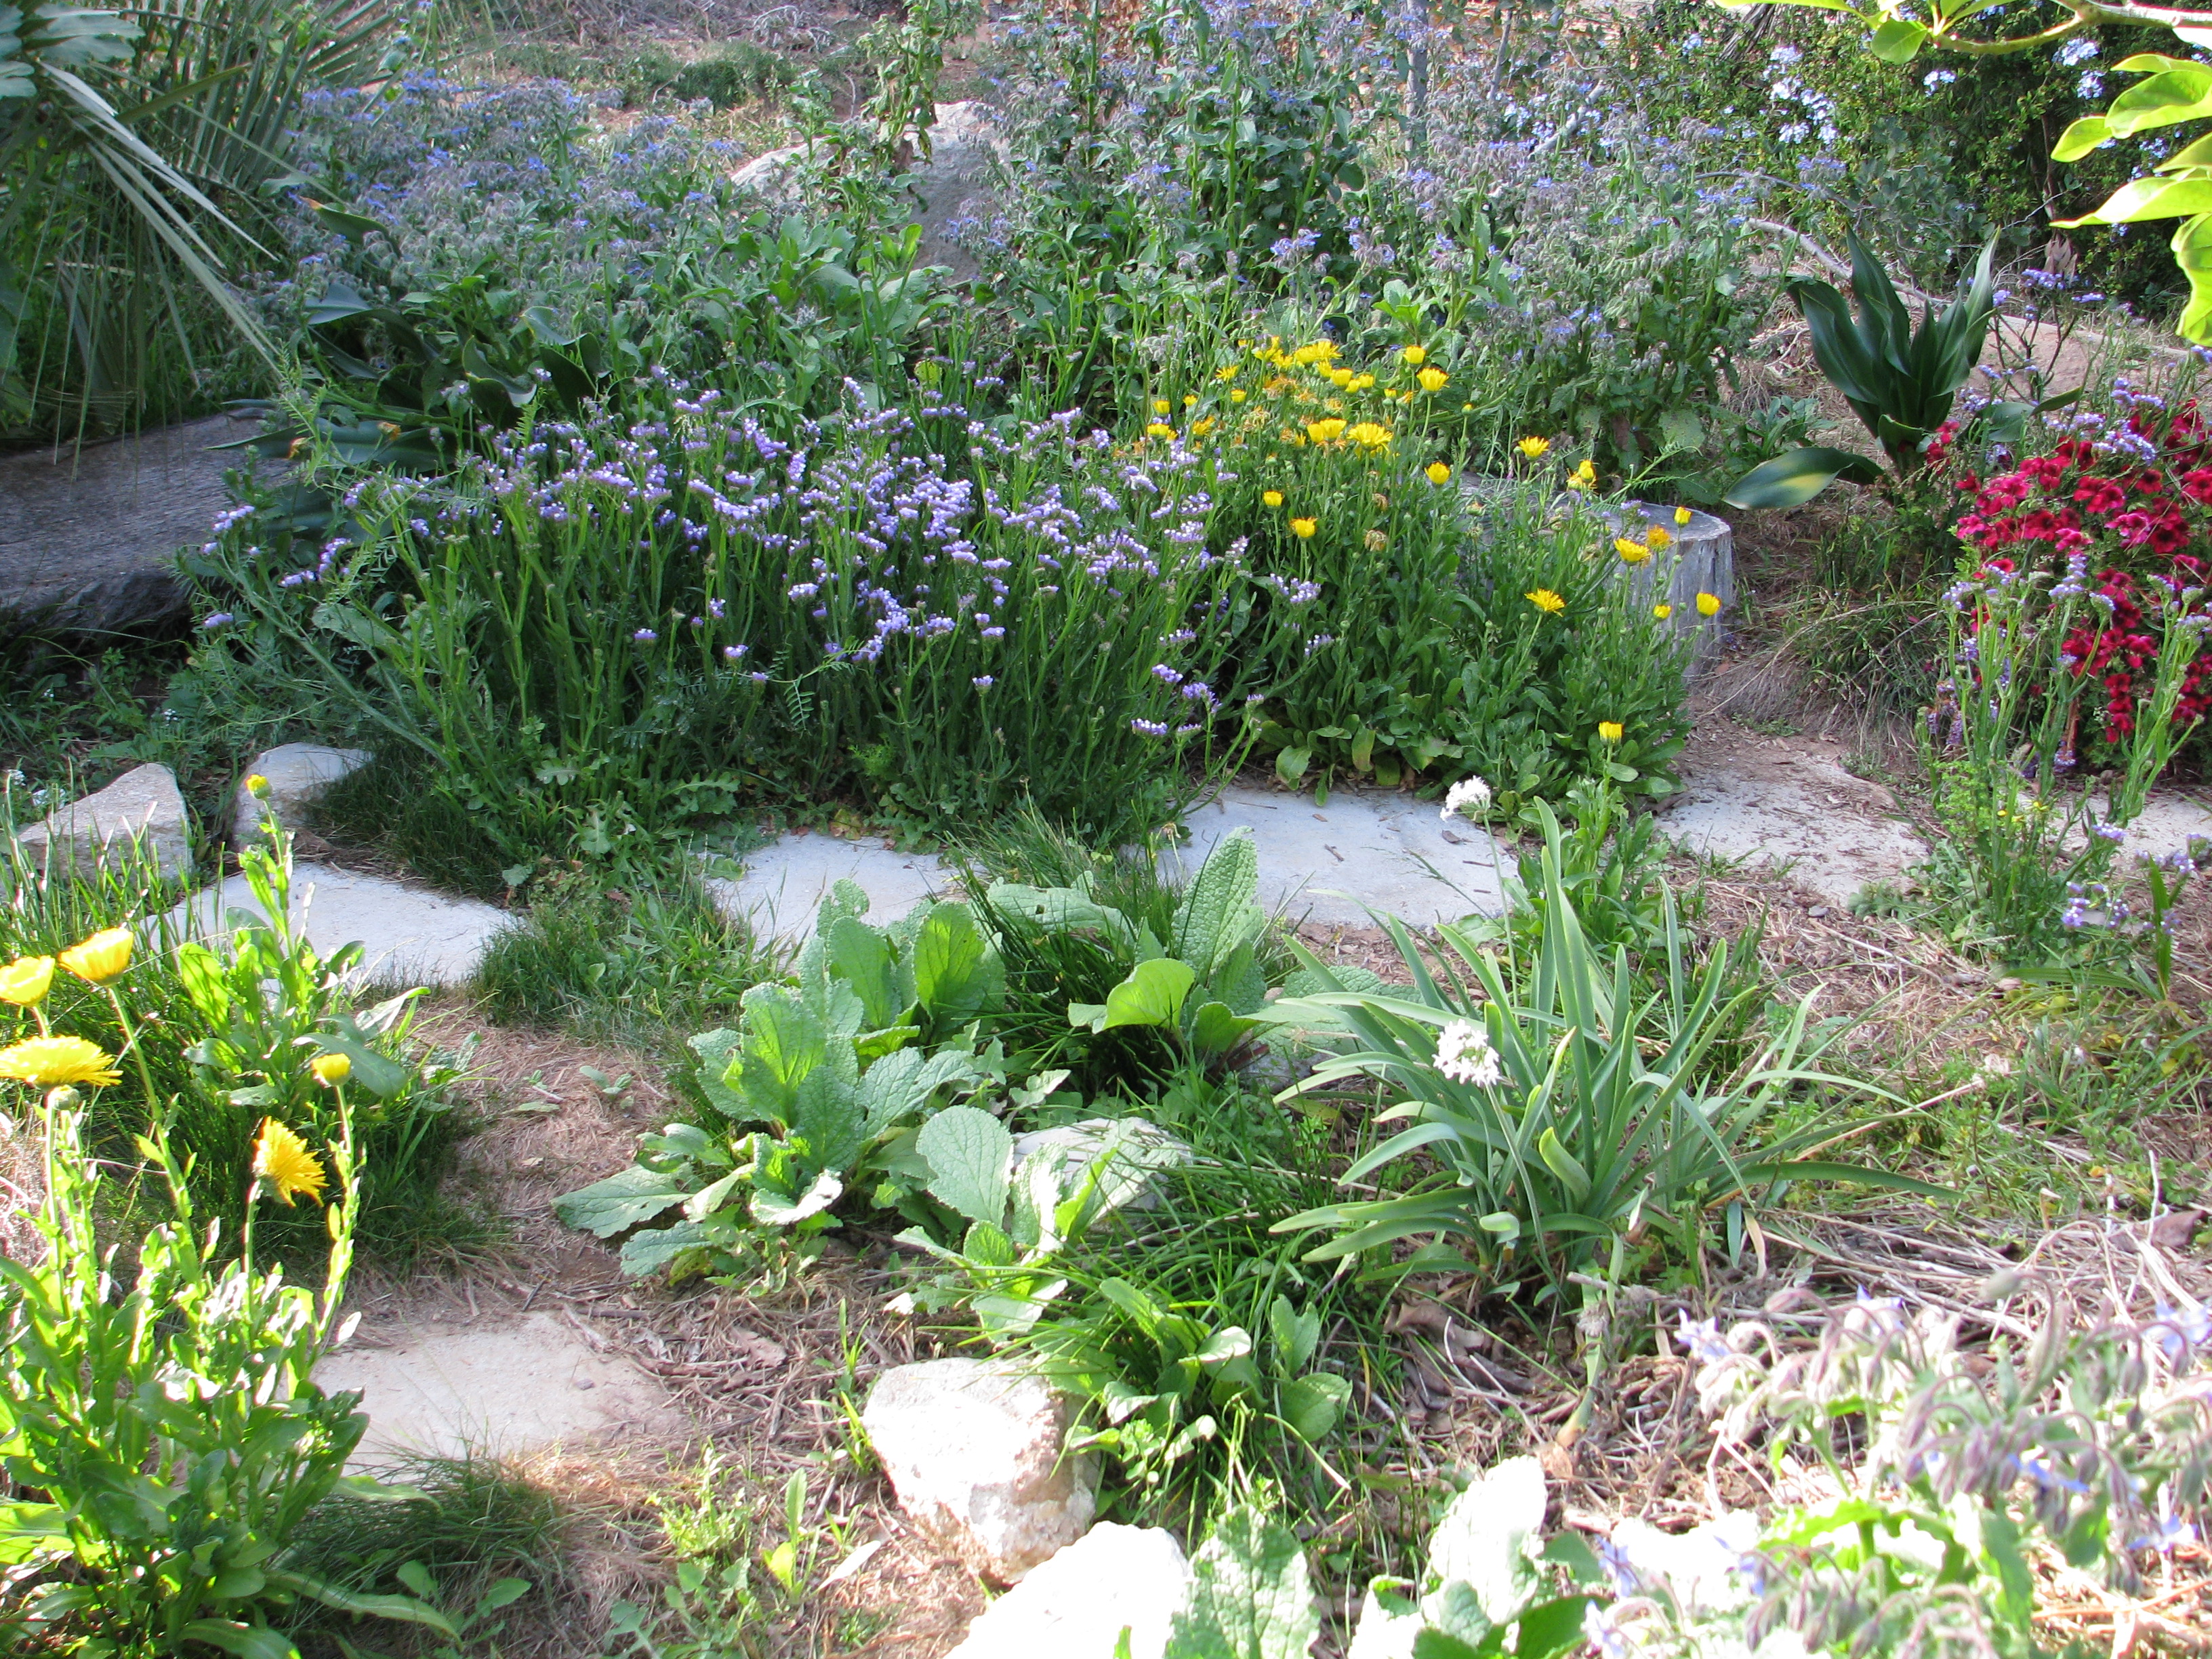
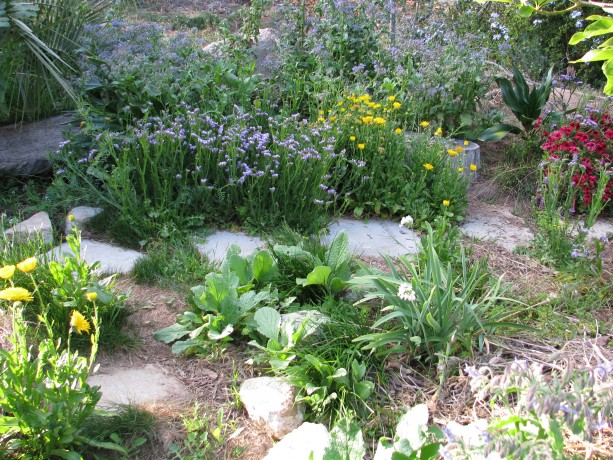
 In February, 2011, I signed the contract with Roger Boddaert to create a permaculture food forest. The goals at that time were to stop the erosion on the property, to create a wildlife habitat, and to grow food, medicine, native plants, building materials, herbs and ornamentals in a sane way: no chemicals. So the journey began, and it hasn’t been easy. Nor did I at that time know that the garden would evolve into Finch Frolic Garden and my business would be education.
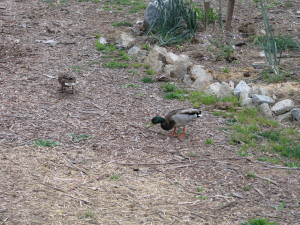
 In preparing for a talk about our garden, Miranda and I worked on before and after photos. The garden this April, 2017, is stunning, with blooming wisteria, fruit trees, red bud, roses, angel-wing jasmine, iris, and so much more. Best of all Mrs. Mallard has brought her annual flock of ducklings from wherever she nests, and the four babies are still alive and thriving after a week! So I thought I’d share the incredible difference between what had been, and what is now. All done with low water use, no fertilizer, herbicide, insecticide, additives or supplements. Come visit when you can! Slideshow images change in ten seconds:
You May Also Like

Native Insects and IPM
- Arts and Crafts, Breads, Cake, Condiments, Dessert, Fruit, Gardening adventures, Herbs, Vegan, Vegetables, Vegetarian
2016 Marketplace and Last Tours of the Year
Our Marketplace is extended to Sunday, Nov. 20th, 9 – 2!
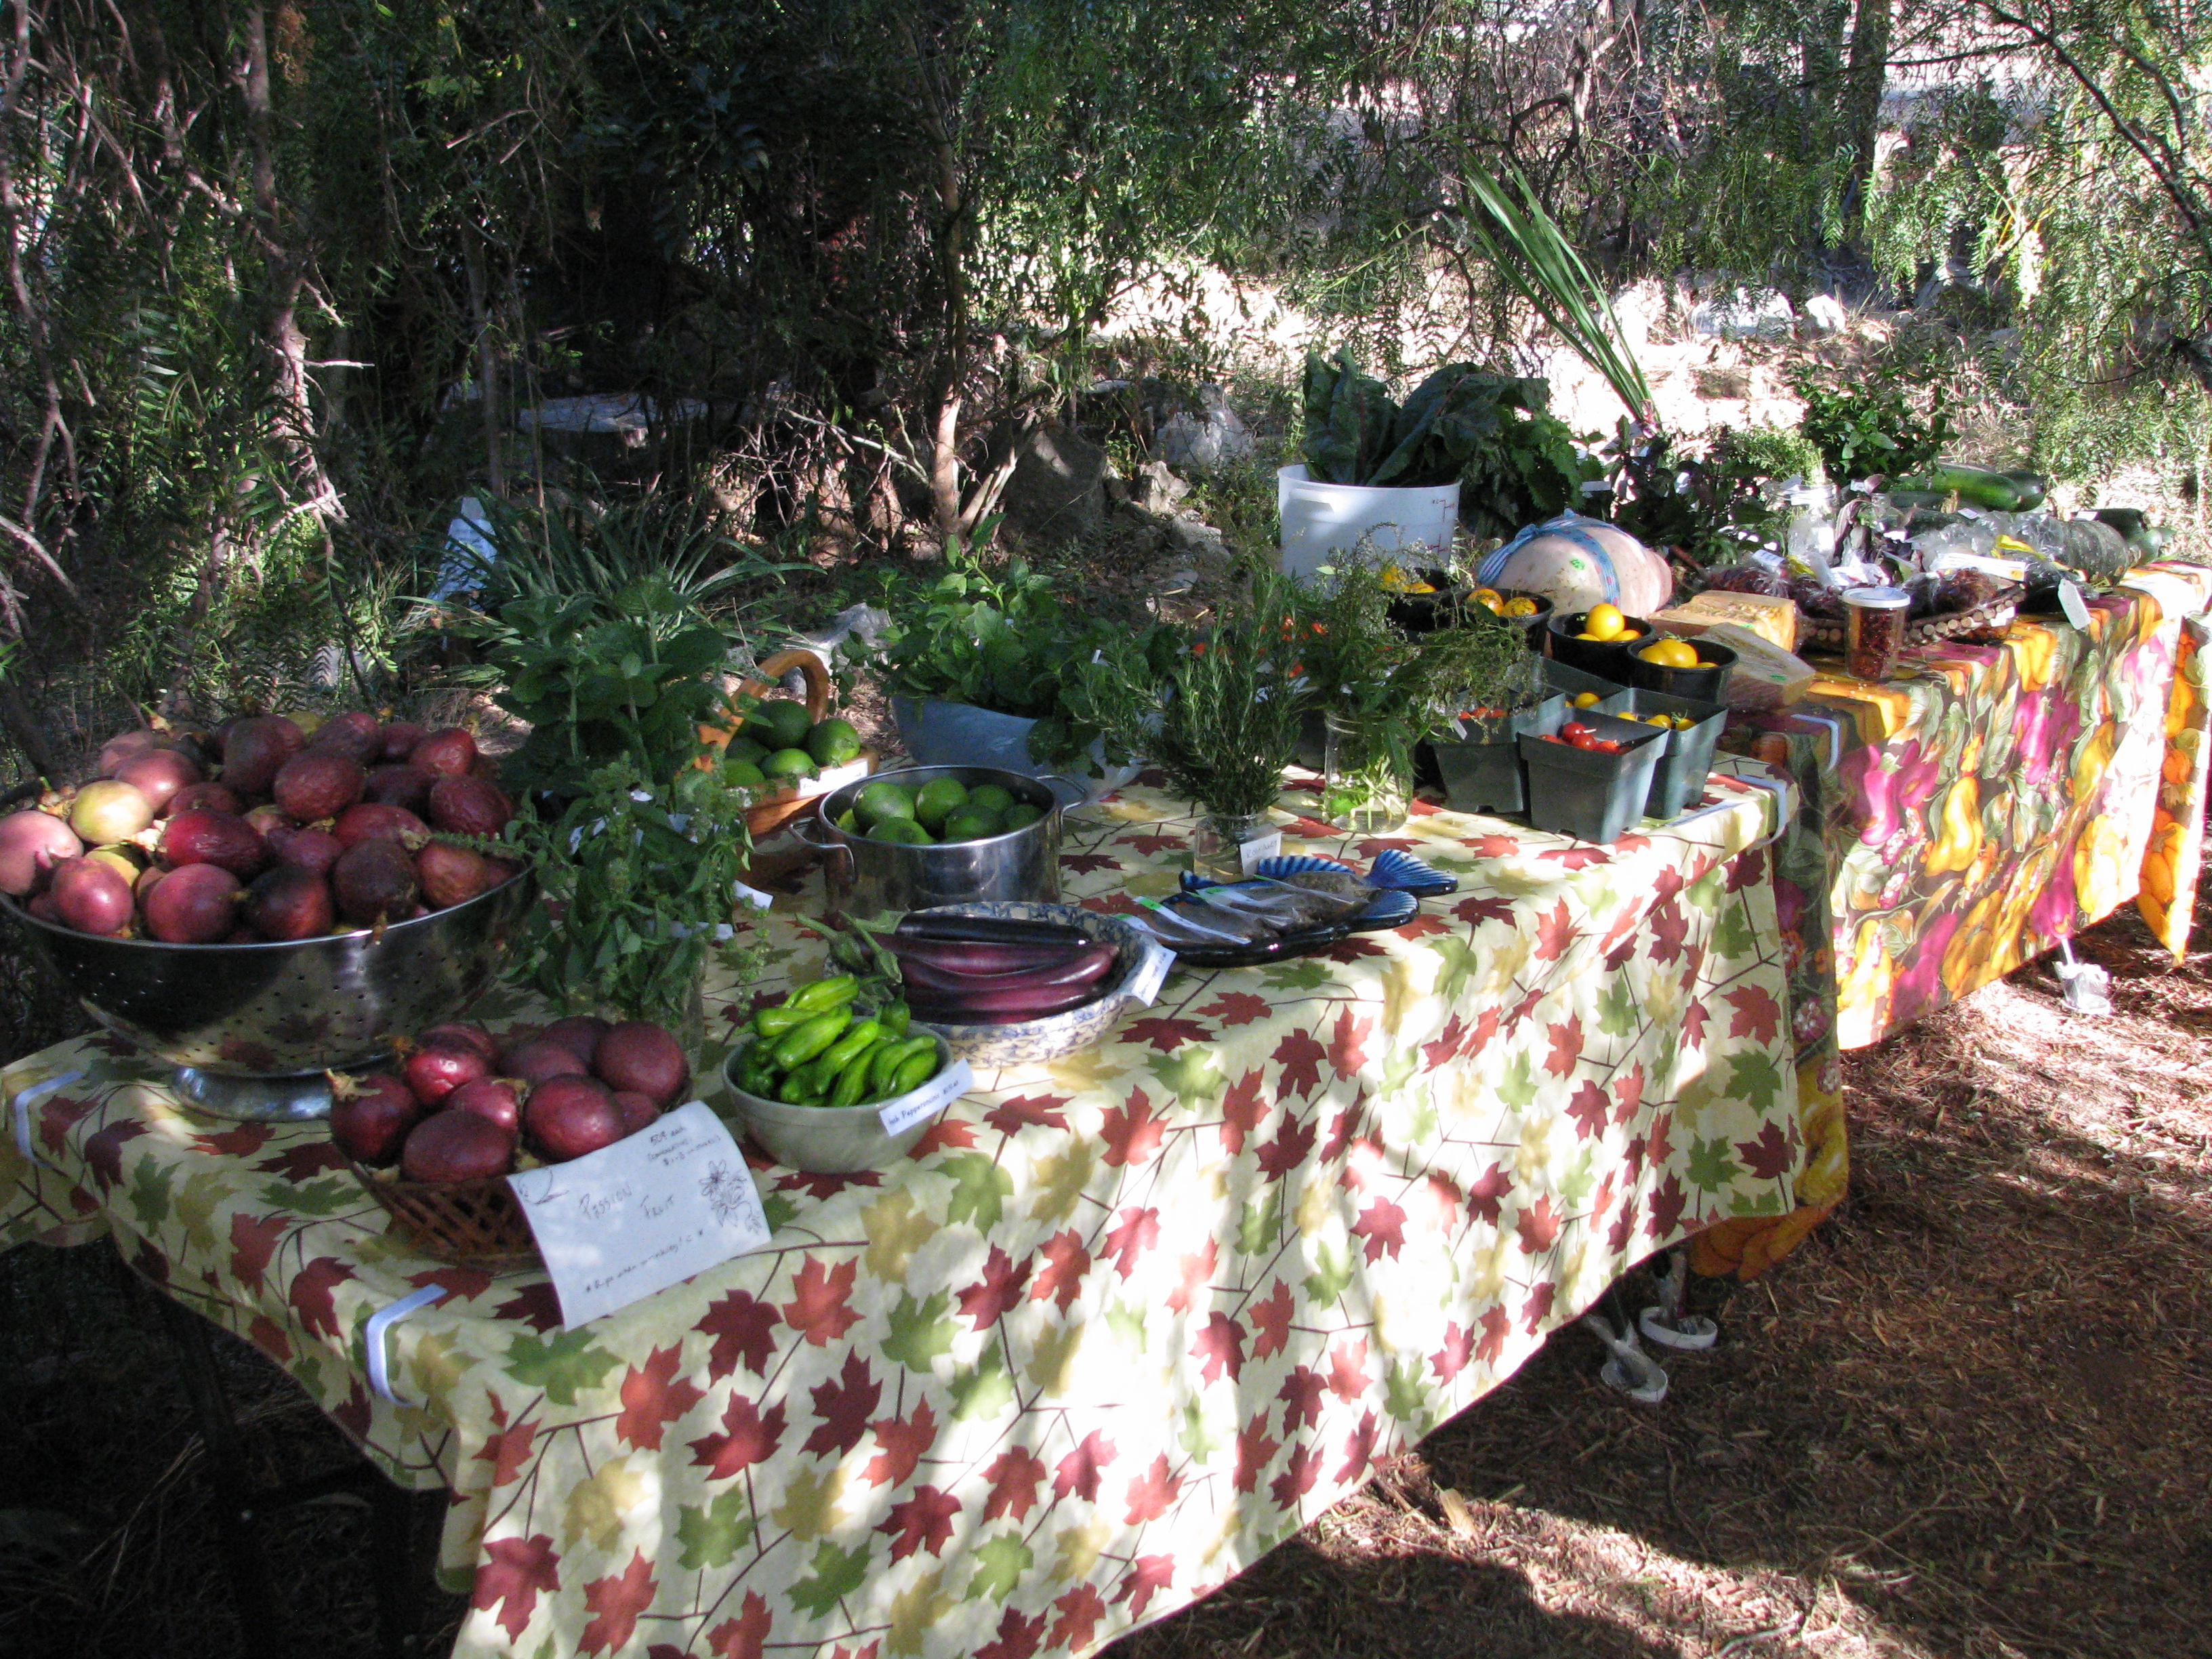
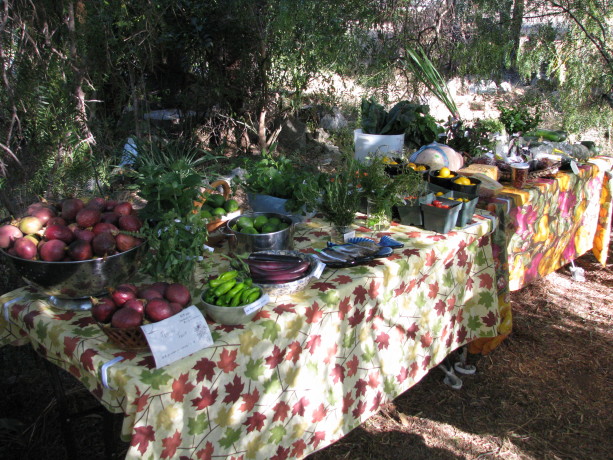
 At Finch Frolic we’ve come to celebrate the end of our season with a Marketplace. This year our Marketplace will happen one day only, this Sat. Nov. 19th from 8-3. Finch Frolic is located at 390 Vista del Indio, Fallbrook, CA. We’ll be selling our abundance. Here’s some of the goodies you’ll find:
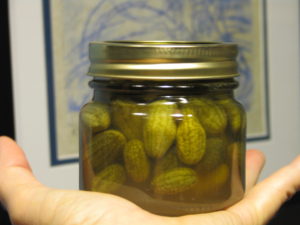
Tiny Cocktail Mouse Melons (cucumbers… so cute!)
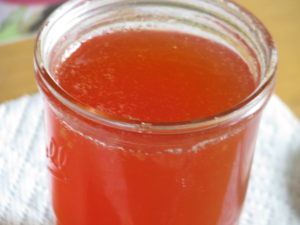
Amazing, milk-free Passionfruit Curd
Incredible tropical Guava Jam
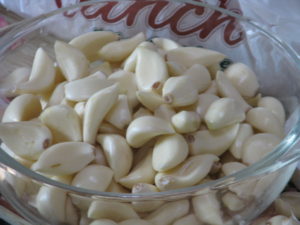
Pickled Garlic
Whiskey Cranberry Relish

Nectarine Amaretto Jam
Tangy Plum Jam
Our very best dill Pickles

Jelly Palm Jelly
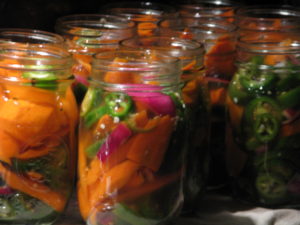
Spicy Jalapeno Carrots
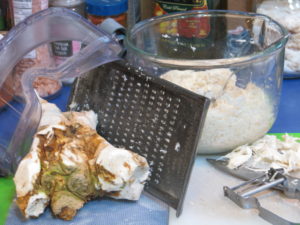
Hand-grated, homegrown organic Horseradish Sauce
Guava Halves in Simple Syrup
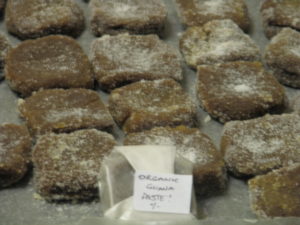
Guava Paste squares – eat as is or put them in baked goods, or pair with slices of cheese. Ummm!
Frozen Passionfruit Juice cubes
Our famous Pomegranate Gelato
Frozen Pomegranate Arils, all ready to sprinkle on your baked goods or mix in a salad or stuffing.
Clear, amazing Guava Jelly
Frozen Plum, Guava and Peach slices
Frozen strained cooked organic home-grown pumpkin, all ready for a pie or bread!
Our best-selling Cranberry Biscotti
Gingerbread Houses. Pair them with our Passionfruit Curd for a memorable dessert!
Lilikoi (Passionfruit) Poundcakes. Small amazing tropical bundles of yum.
Guava Sauce, like applesauce but guava. Very low sugar!
Fresh Jerusalem Artichoke (Sunchoke) roots. Cook them or plant them!
Layered Curry Mix – a sensual trip to the Middle East, either layered in cute little jars for a gift or in bags for use at home. Make a curry with these organic spices!
Lime Juice Cubes
Candied Orange Peels. From our organic oranges. A much better stocking stuffer than hard candy. Or top your baked goods with a twist.
Fresh, fragrant guavas, both white and pink

Fresh kiwanos, those thorny African fruit that sell for a fortune at the stores.
And more!
Plus, we’ll be selling some knick-knacks, and a few garage sale items . A punching bag anyone?
PLUS, we’ll have a selection of native plants lovingly grown locally.
And we’ll have amazing succulents from our neighbor Rosa of Roja’s Succulents. You’ll pass by her business on the way in, so please stop by on the way out and see her incredible inventory of plants, all organically hand-grown by Rosa. I never loved succulents until I saw her collection, and her very low prices!
Except for the gelato, we’re dairy (milk) free this year. We use organic eggs from cage-free hens, and otherwise use vegan butter that I make at home which is coconut-oil and rice milk based.
Our last two tours of the year (the garden closes from Thanksgiving until March 1. We will still be available for consultations and appearances) will be this weekend, Nov. 19th and 20th, both at 10. [UPDATE: THE SATURDAY TOUR IS FULL. THERE IS STILL ROOM FOR THE SUNDAY TOUR]. The tours are our usual 2-hour concentrated Intro to Permaculture walks through the garden. The tours cost $15/adult and you will come away with so many ideas and so much information that you’ll spend the next week working in your garden! Please RSVP for the tours to dianeckennedy@prodigy.net.
Your continued support helps Miranda and I keep our consultation and tour prices low, and enables us to keep teaching and spreading the word on permaculture. So thank you!
-
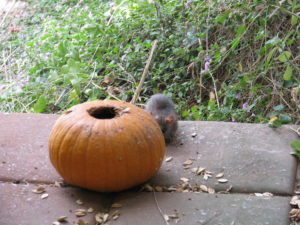
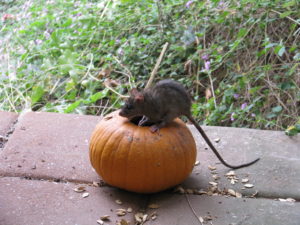
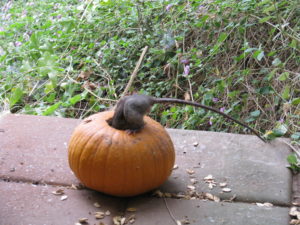
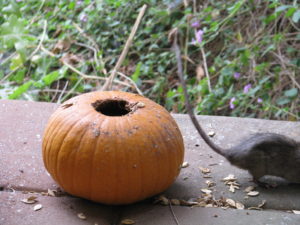
Happy Autumn!
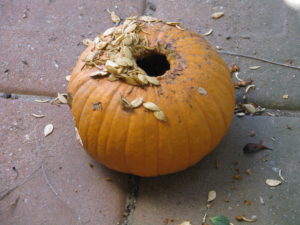 Some night creature has been enjoying our pumpkins… if I see a Jack O’Lantern face being chewed into the side of it, then I’ll be setting up the night camera!
Update: I suspected that this was the culprit! Bon appetite, Madam Rat.

You May Also Like
Native Insects and IPM
- Animals, Arts and Crafts, Birding, Building and Landscaping, Gardening adventures, Houses, Natives, Permaculture and Edible Forest Gardening Adventures, Ponds, Predators, Water
A Mallard House

The Finch Frolic Garden Mallard Nesting Tube, by Miranda. For about four years now a pair of wild mallards have called Finch Frolic Garden home. They visit most of the year, especially in mating season as it is now. The male guards her closely as she goes off to lay an egg a day in some secluded, secret nest. This is Mrs. Mallard’s best time of the year.
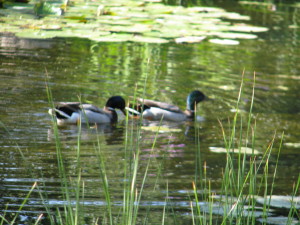
Mrs. Mallard leading her mate all over the property as he protects her. She’ll stroll all over the property while he has to follow, and it is hilarious to watch. They get in more walking time now than in the whole year put together. She deserves to enjoy the attention because the rest of mating season isn’t so much fun for her.
The mating occurs in the water, with the male biting her neck and holding her head under water. Ducks have drowned during mating. A couple of years ago Mr. Mallard was losing his mating plumage and decided to allow a rather mean drake have at Mrs. Mallard. It was a violent mating, and she tried hard to get away.
Mr. Mallard and his terrible surrogate. The next time the imposter flew in Miranda and I were close to the pond by a lime tree, with some bushes between us and the pond. Suddenly we noticed Mrs. Mallard slowly walking around the bushes, her head held low. If she could have tip-toed with webbed feet she would have. She slowly approached us and hid behind the lime tree next to us. We took action and chased the males away, then spoke soothingly to Mrs. Mallard in a sense of female solidarity. It was quite touching to have a wild creature so trust us as to come to us for rescue.
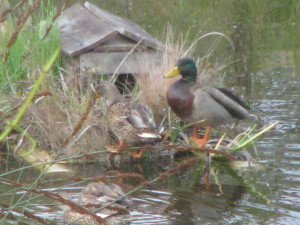
The Mallards checking out the duck island. Once the eggs have been laid the female is entirely in charge of the eggs and the hatchlings. However, if the clutch fails, the male will keep re-mating with her and she’ll keep re-nesting. Mrs. Mallard has attempted to lay eggs on our property in the bushes, but rats or other creatures have eaten them. She had a nest right next to our garage one year, perhaps hoping that we could protect the eggs even though by the time we realize why we’d meet a duck on the pathway by the house every day it was too late. The stress of the mating, the egg production and laying is taxing to a wild duck’s health. Last year she appeared leading several ducklings to our pond. We have no idea how far she’d lead them, or how many there were to begin with, and we knew the babies probably wouldn’t last long. We were right; they were gone by the next day. Predation by the invasive bullfrogs in the pond, rats, weasels, hawks or any number of animals. So sad for the mallard family.
This year Mrs. Mallard has been disappearing daily, obviously to lay an egg a day elsewhere again. However Miranda decided to help out for future nests. She built a mallard nesting tube. Following instructions she found online from people who have proven this design works, she rolled the first three feet of a piece of 7’x3′ hardware cloth to form a tube.
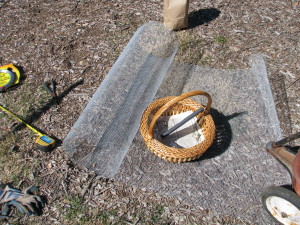
A 7′ x 3′ piece of hardware cloth. Larger wire would let too much debris fall into the pond. This was wired together, and the last four feet was layered with natural plant materials and rolled.
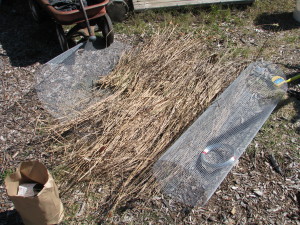
The first 3′ are rolled and fastened, then Miranda lay dry cattails on the rest. 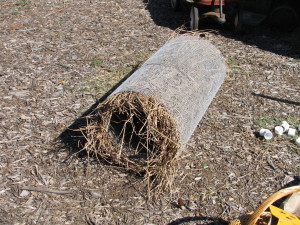
The nesting tube. Kind of like a jelly roll for mallards. 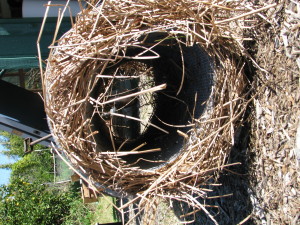
The inside of the tube isn’t large, but apparently it is large enough. This tube was wired onto a cradle she made mostly of recycled PVC parts, and painted dark green.
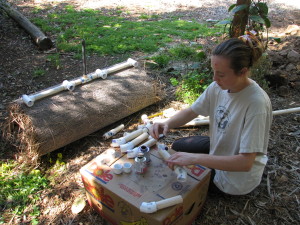
Gluing together the cradle. All of the pipe we had salvaged from old irrigation systems. 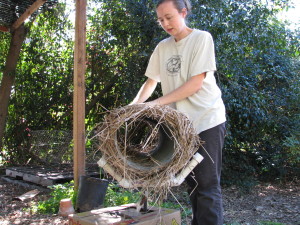
The cradle supports the tube, but is also loosely wired onto it. 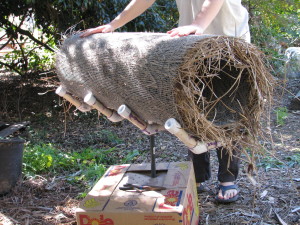
A sprinkler riser is what will fit into the support pipe.  Also, to prevent hawks, egrets and other opportunistic birds from perching on top and snacking on eggs or hatchlings, Miranda attached strips of pokey chicken wire along the top.
Since egrets visit the pond regularly, the top of the tube had to be inhospitable. 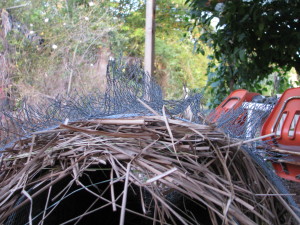
Miranda cut strips of chicken wire and these were bent and wired on top to prevent birds from landing. Slipping into the chilly February pond was a shock until our legs became acclimated (or “numb”). We pounded a hollow pipe, then slipped another pipe into it (both found materials), and then mounted the tube on top.
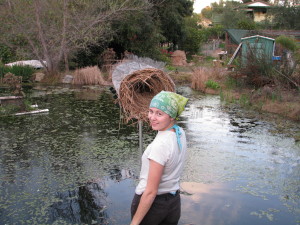
After mounting the nesting tube, Miranda stuffed leaves and dry grass inside, because mallards don’t carry in their own nesting materials. Miranda then lined the inside of the tube with soft nesting materials – dried grass and leaves – because mallards don’t bring them in. A little interior decorating for future lodgers. A sprinkler riser screwed into the PVC cradle slipped into the pipe. This way the nesting tube can be easily removed for maintenance. The tube is about three feet above the water surface.
Mrs. Mallard hasn’t shown any interest at this point, but she’s involved with her other nest right now. We have high hopes for a successful nest. Anyone want to come catch bullfrogs?
You May Also Like
Native Insects and IPM
- Arts and Crafts, Books, Breads, Cake, Dessert, Fruit, Giving, Herbs, Perennial vegetables, Permaculture and Edible Forest Gardening Adventures, Recipes, Sauces, Seeds, Special Events, Spices, Vegan, Vegetables
Finch Frolic Marketplace, Revisited
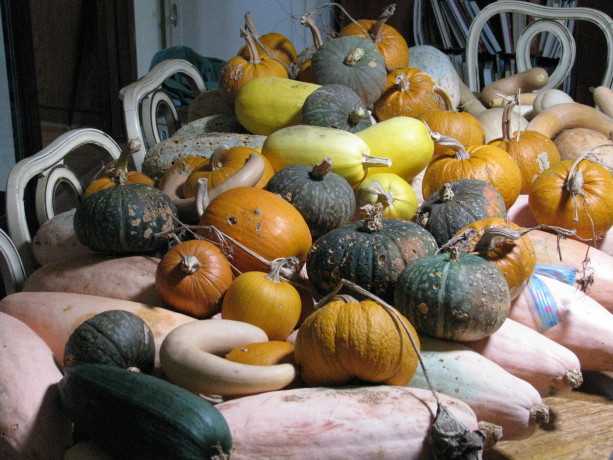
Wonderful, tasty winter squash of all kinds! Due to popular demand, we’re having one more short Marketplace this Saturday, 9 – 1.
Join us on Saturday, November 29nd from 9-1 for the annual Finch Frolic Marketplace, the Extended Version! We’ll have for sale fresh and prepared foods straight from our permaculture gardens. All are excellent gifts, or will grace your holiday table. We’ll have the much-desired Pomegranate Gelato again, and new this year, Passionfruit Gelato! Squash, fruit, veg, preserves, passionfruit curd, baked goods, and much more.
Herbs, veggies, frozen juice, gelatos, curds, jams, preserves… and much more! Finch Frolic Garden is located at 390 Vista del Indio, Fallbrook, CA.
Directions:
Finch Frolic Garden is open by appointment only for tours, lectures and other activities. The address is 390 Vista del Indio, Fallbrook, CA 92028-2548. Please call only if you are lost or delayed; we use our house phone only and are often not inside. Please use the email above for any other communication.
From the North (Temecula and above): take 1-15 South to Exit 51 and turn right. Make the next right onto E. Mission Rd/County Hwy-S13. In .8 of a mile turn left onto E. Live Oak Park Rd. In 1.6 miles turn right onto Alvarado St. In .7 miles at the top of the hill turn left onto Vista Del Indio, at Roja’s Succulents. Make the very first right; 390 is at the end to the left.
From the South (Escondido and below): take I-15 North to Exit 51 and turn left over the freeway. Make the next right onto E. Mission Rd/County Hwy-S13. In .8 of a mile turn left onto E. Live Oak Park Rd. In 1.6 miles turn right onto Alvarado St. In .7 miles at the top of the hill turn left onto Vista Del Indio, at Roja’s Succulents. Make the very first right; 390 is at the end to the left.
From the West (I-5): take CA-76 East, Exit 54A and drive for 12.6 miles. Turn left onto S. Mission Road/County Hwy S13 for 4.1 miles. Turn right onto S. Stagecoach Lane (at the high school). In 2.8 miles turn right onto Alvarado St. At the top of the hill turn right onto Vista del Indio, at the Roja’s Succulents sign. Make the very first right; 390 is at the end on the left.
- Arts and Crafts, Building and Landscaping, Gardening adventures, Permaculture and Edible Forest Gardening Adventures, Recycling and Repurposing
Urbanite, the New Name for Chunks of Cement
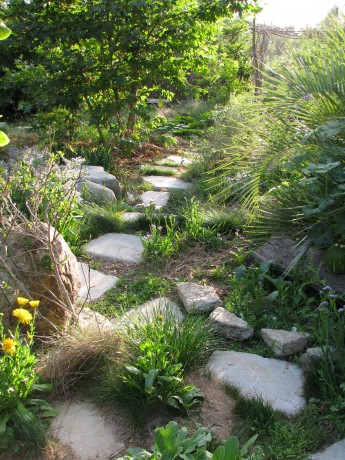
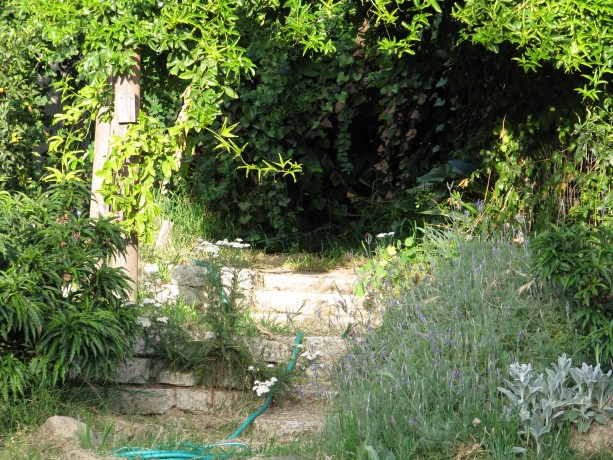
Urbanite stepping stones work beautifully in the garden allowing plants to grow in between. Just as old LPs or records are now called vinyls, so are chunks of a neighbor’s patio called urbanite. I like the term because it makes the mental transition from a waste product – cement chunks – to building material. Put an ‘ite’ at the end, and you can use it. The name urbanite also makes me envision pieces of nature-less cities being used for more natural landscapes. There are spaces around chunks of cement for plants to grow.
Urbanite lasts a long time, too, and it is free. The idea of working with cement chunks doesn’t sound aesthetically pleasing, but done well it always has visitors to Finch Frolic Garden enthusiastic. A pathway and two retaining walls were made of urbanite, and they are all wonderful.
A friend and former co-worker called me a few weeks ago to offer urbanite from a piece of her patio that had to be repoured. It took awhile but I found some help to go pick it up. With a small pickup truck we managed two loads; the pieces were stacked on the patio, but the only way to access them was to drive the pickup below the patio wall. Unfortunately, the ground was at an unnerving angle, and quite sandy so there was little traction. I handed pieces of urbanite over the wall and down to Jacob, who loaded them into the tilted truck. It was quite warm that day so we were well cooked. There was a lot left.
You can see the retaining wall and stairs made from urbanite peeking out from under the plants. Then Jacob arranged for me to borrow an old 2-ton pickup with 4-wheel drive. My daughter and I headed over two days ago during a cloudy morning intending to get the truck very close to the wall. No way. The truck tilted dangerously and began to slide, so I had to park it out on the driveway. Of course the sun came out. We spent three hours taking turns tossing huge chunks of cement over the patio wall, shot-putting the pieces so that they wouldn’t hurt the plants at the base of the wall, and then picking them up (finding some of them that had rolled downhill) and carrying them across the shifty dirt to hoist the pieces up and into the bed of the large truck. We swept rubble into nursery containers and dumped them into the truck as well.
Well cooked and completely exhausted, we made it home with the whole load, the truck tires just a little squished. Now we have urbanite to replace some of the stairs made from palms that are beginning to soften or which have been eaten by bunnies.
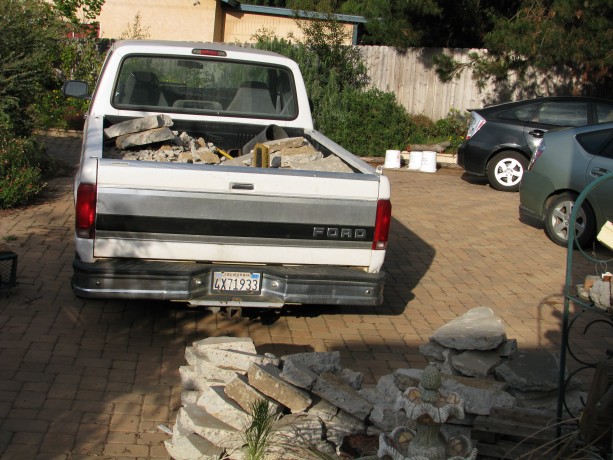
Ugh! Unfortunately, we still have to unload the truck.
- Arts and Crafts, Gardening adventures, Heirloom Plants, Living structures, Permaculture and Edible Forest Gardening Adventures, Seeds, Soil, Vegetables
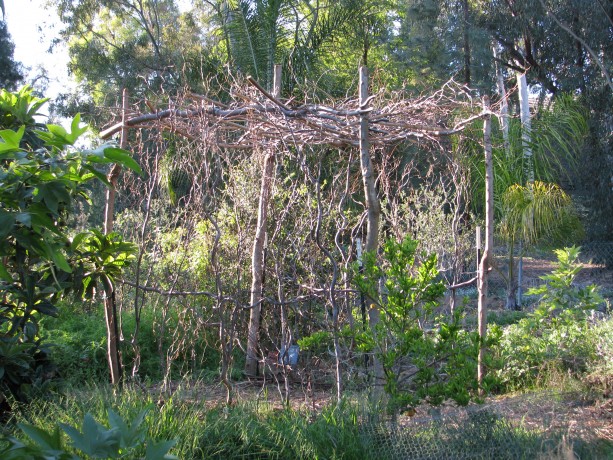
Curly Willow Trellis
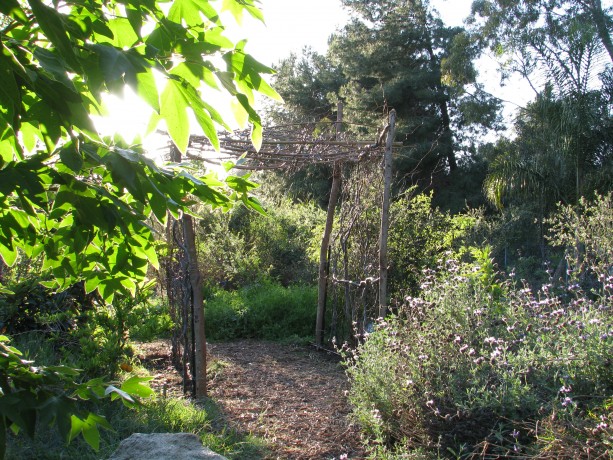
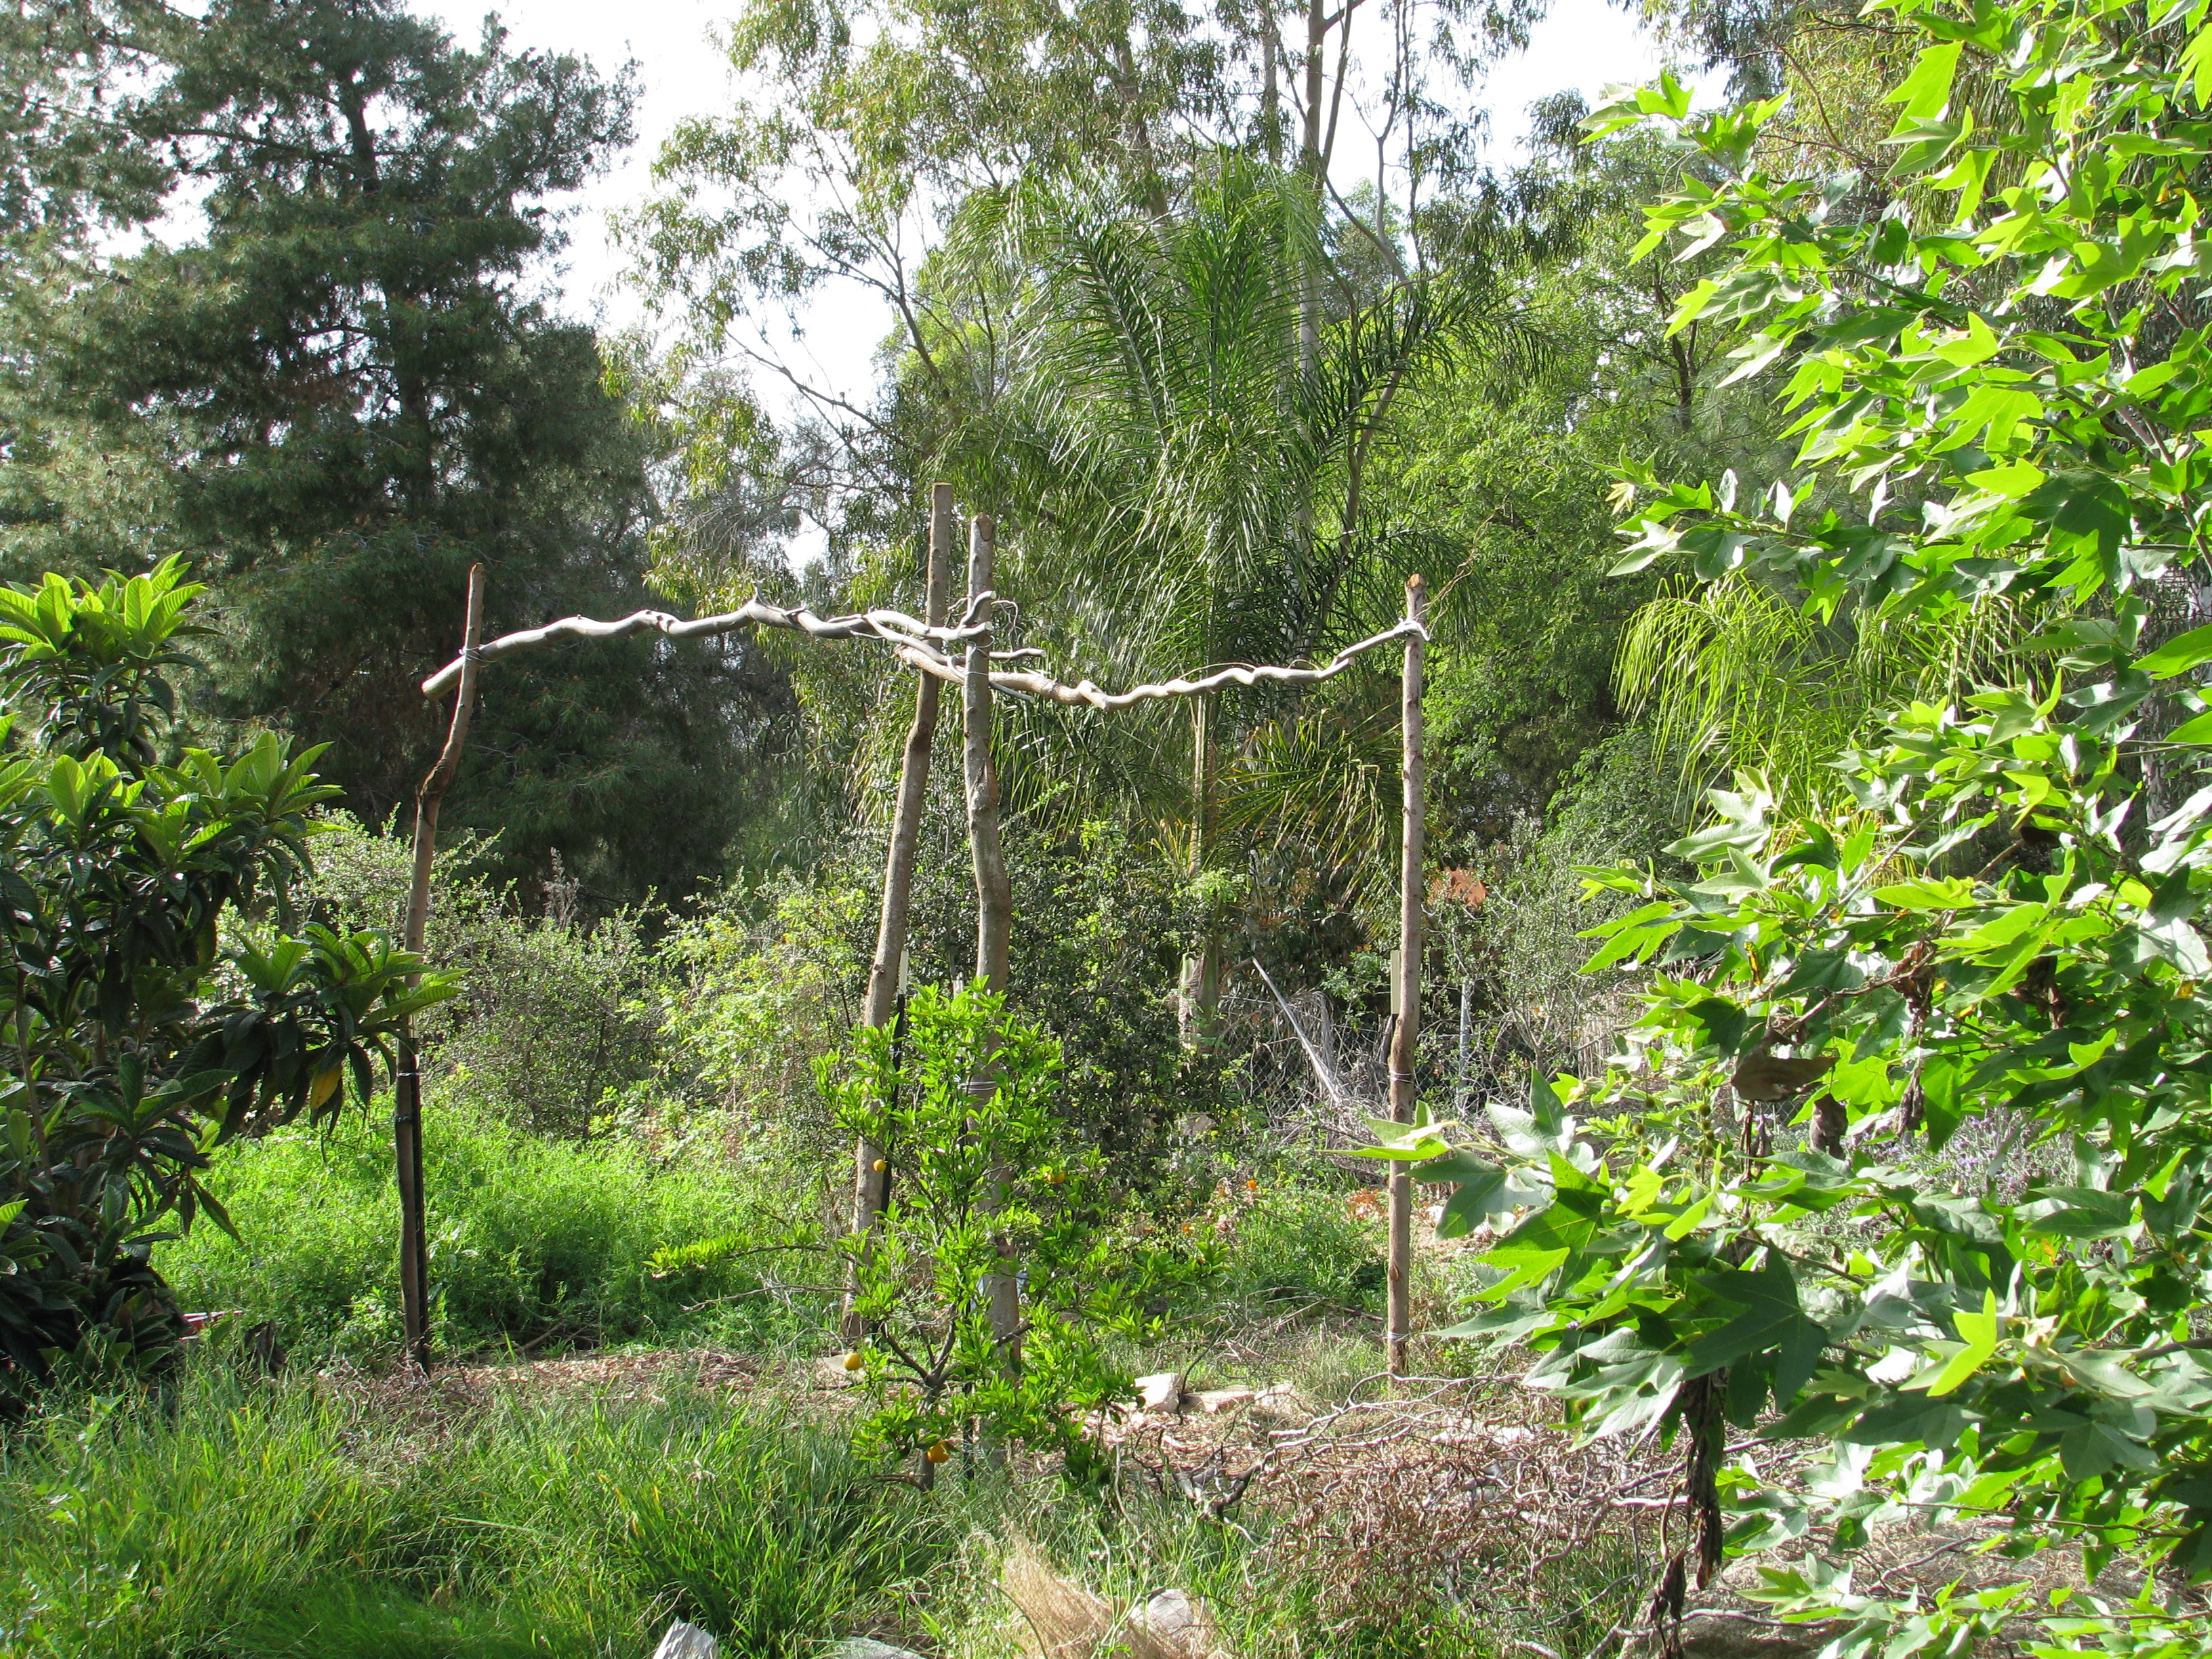
A walk-through squash trellis. The vines will give it stability, and hang through. Thanks to generous friends, free seed opportunities and wonderful seed catalogs, we have many, many squash varieties to choose from this year. We also want to grow vertically where we can to save space so my daughter and I are creating trellises. No builder, I, but we’re hoping these will last for years to come.
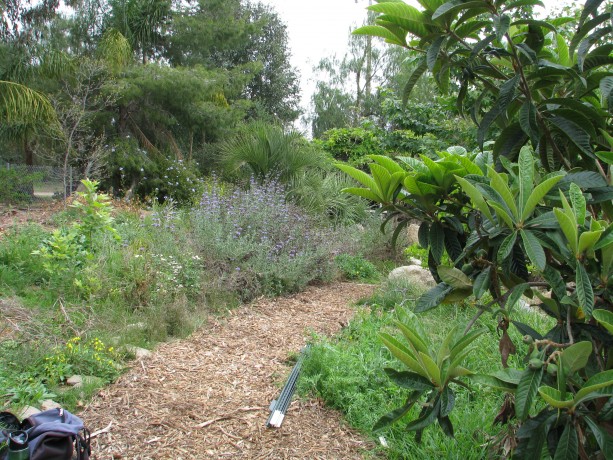
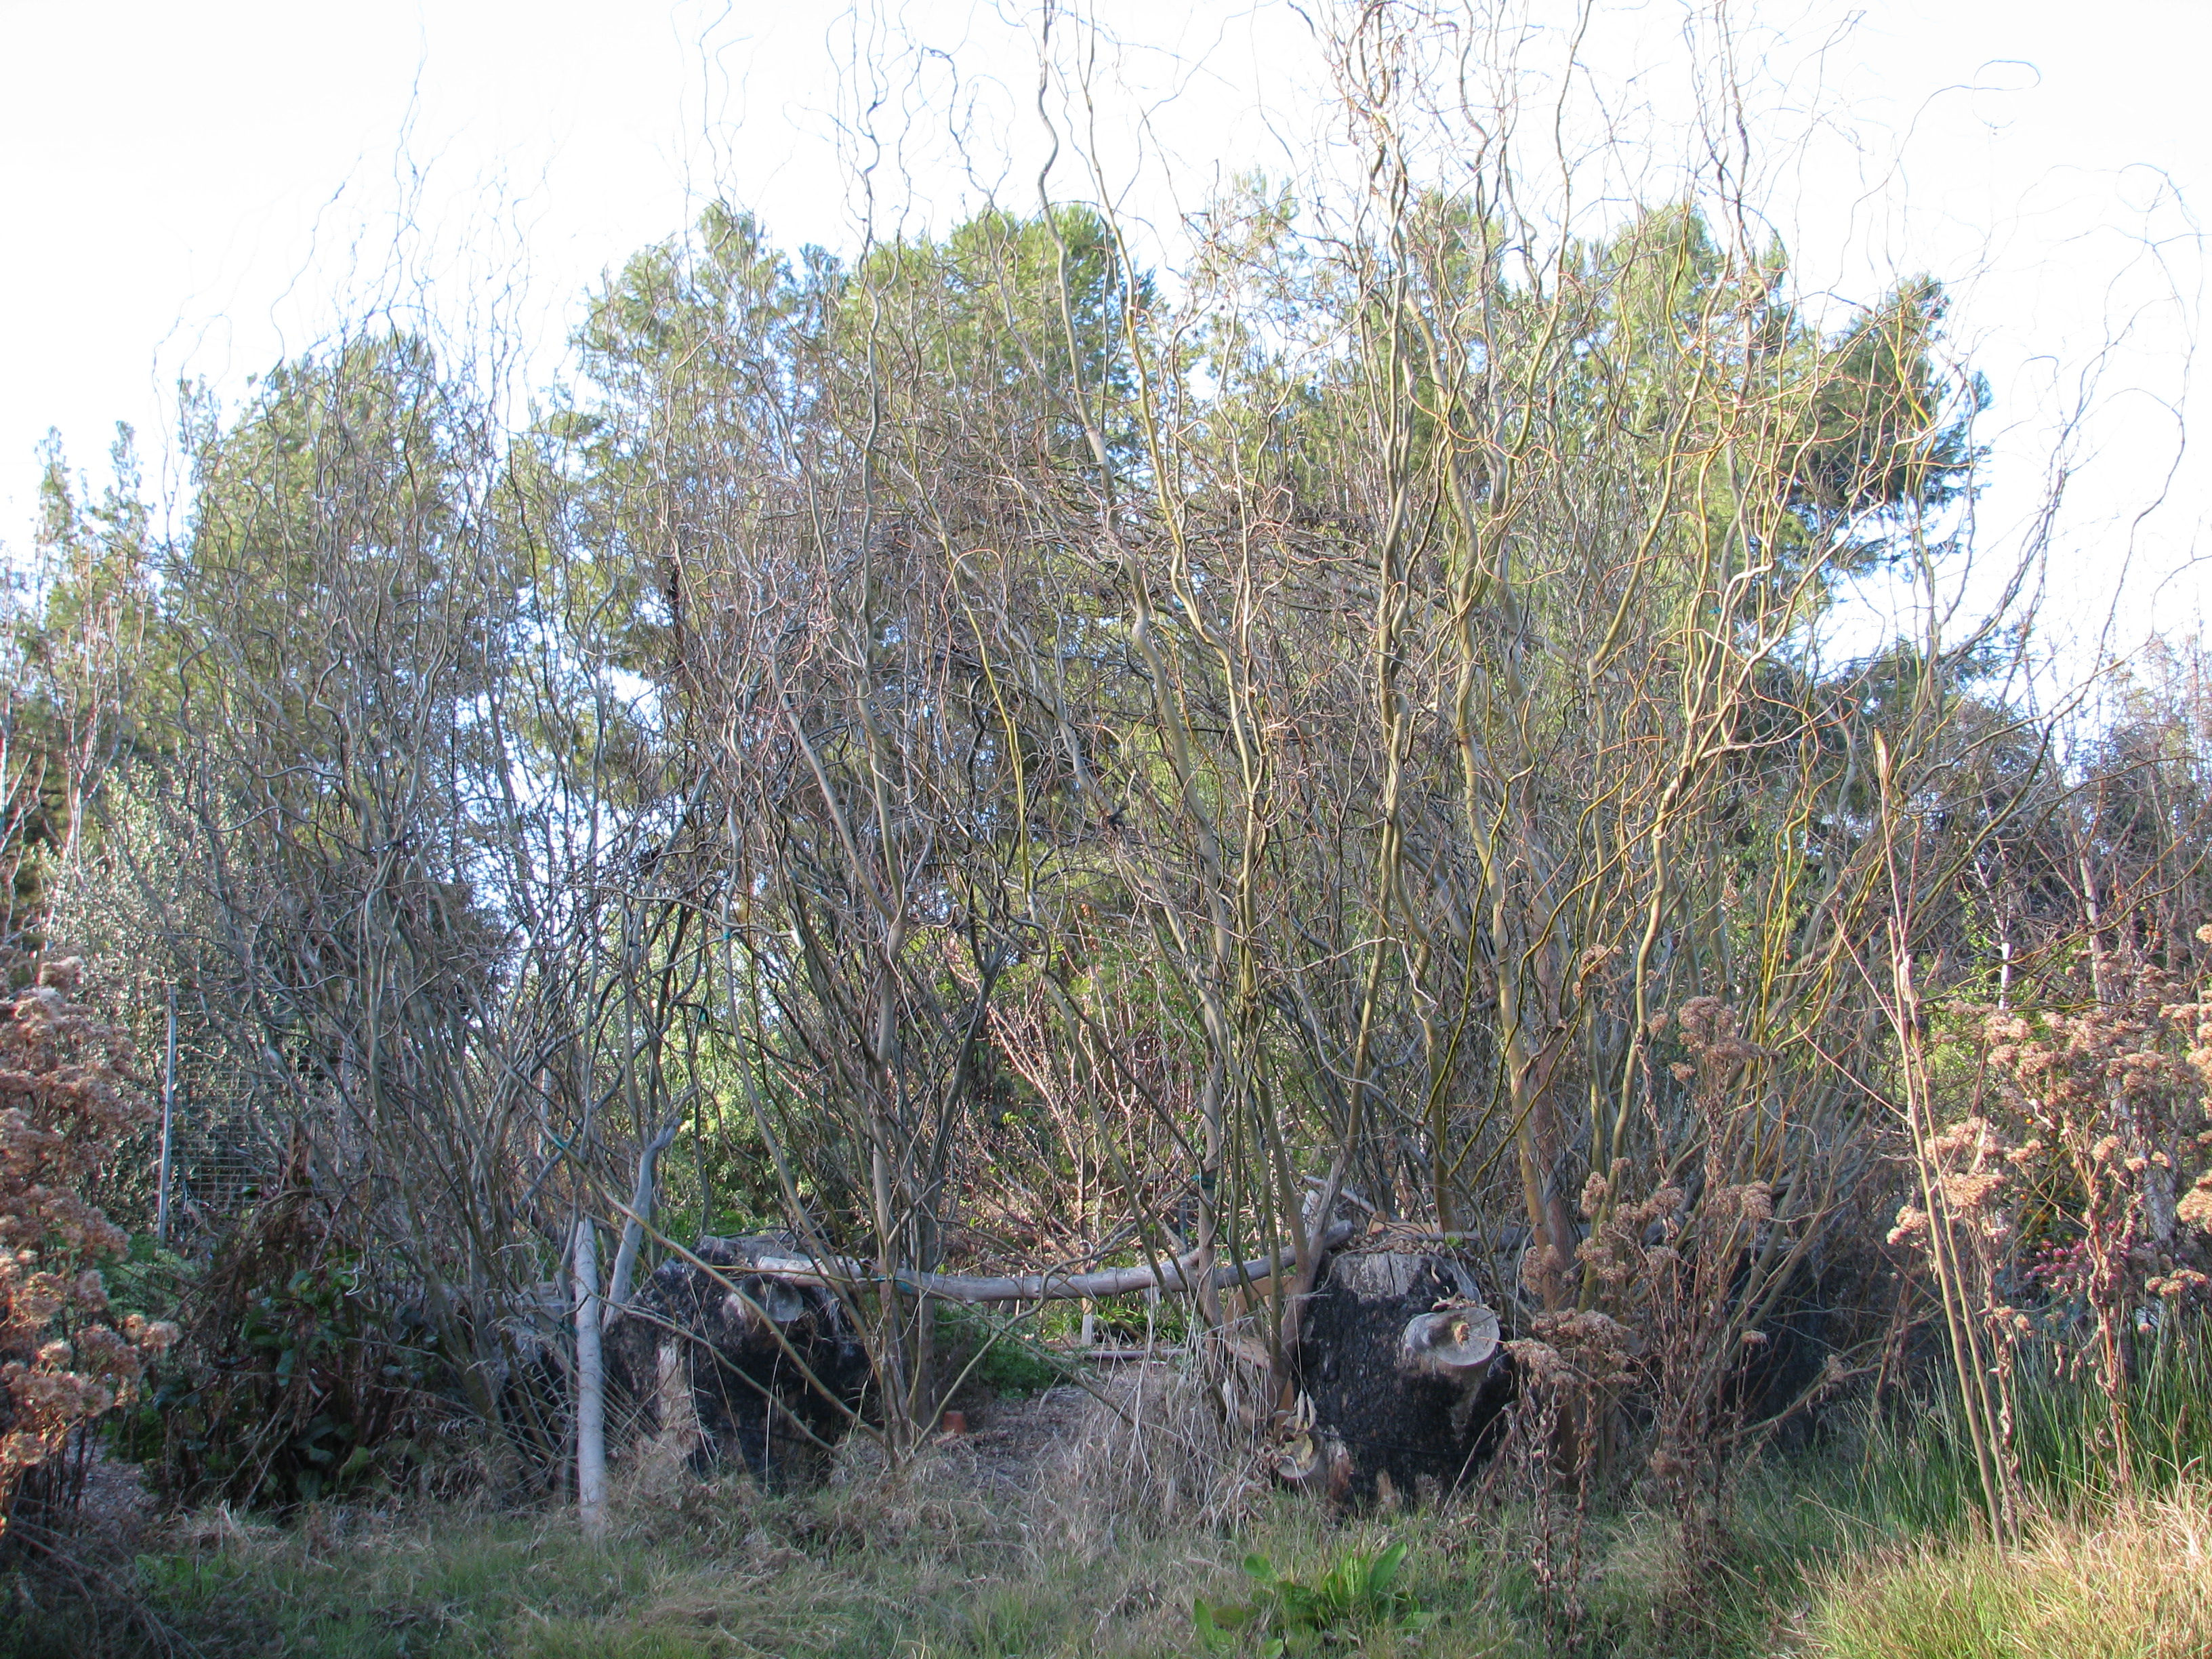
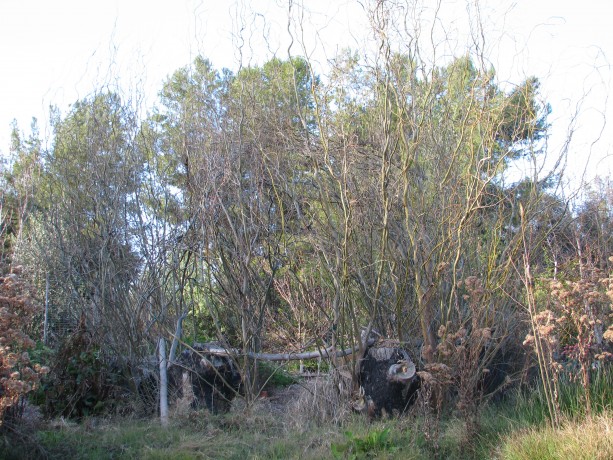
This part of the trail was perfect for vertical growing space. This area of the upper trail isn’t lovely when not covered by vines. It is also quite warm when people are touring and it could use some shade and interesting focal point. Miranda had cut down a large curly willow tree a few months back (it was taking too much water from an avocado). We used a couple pieces of the trunk to inoculate with mushroom spores, and the rest was fair game for a trellis.
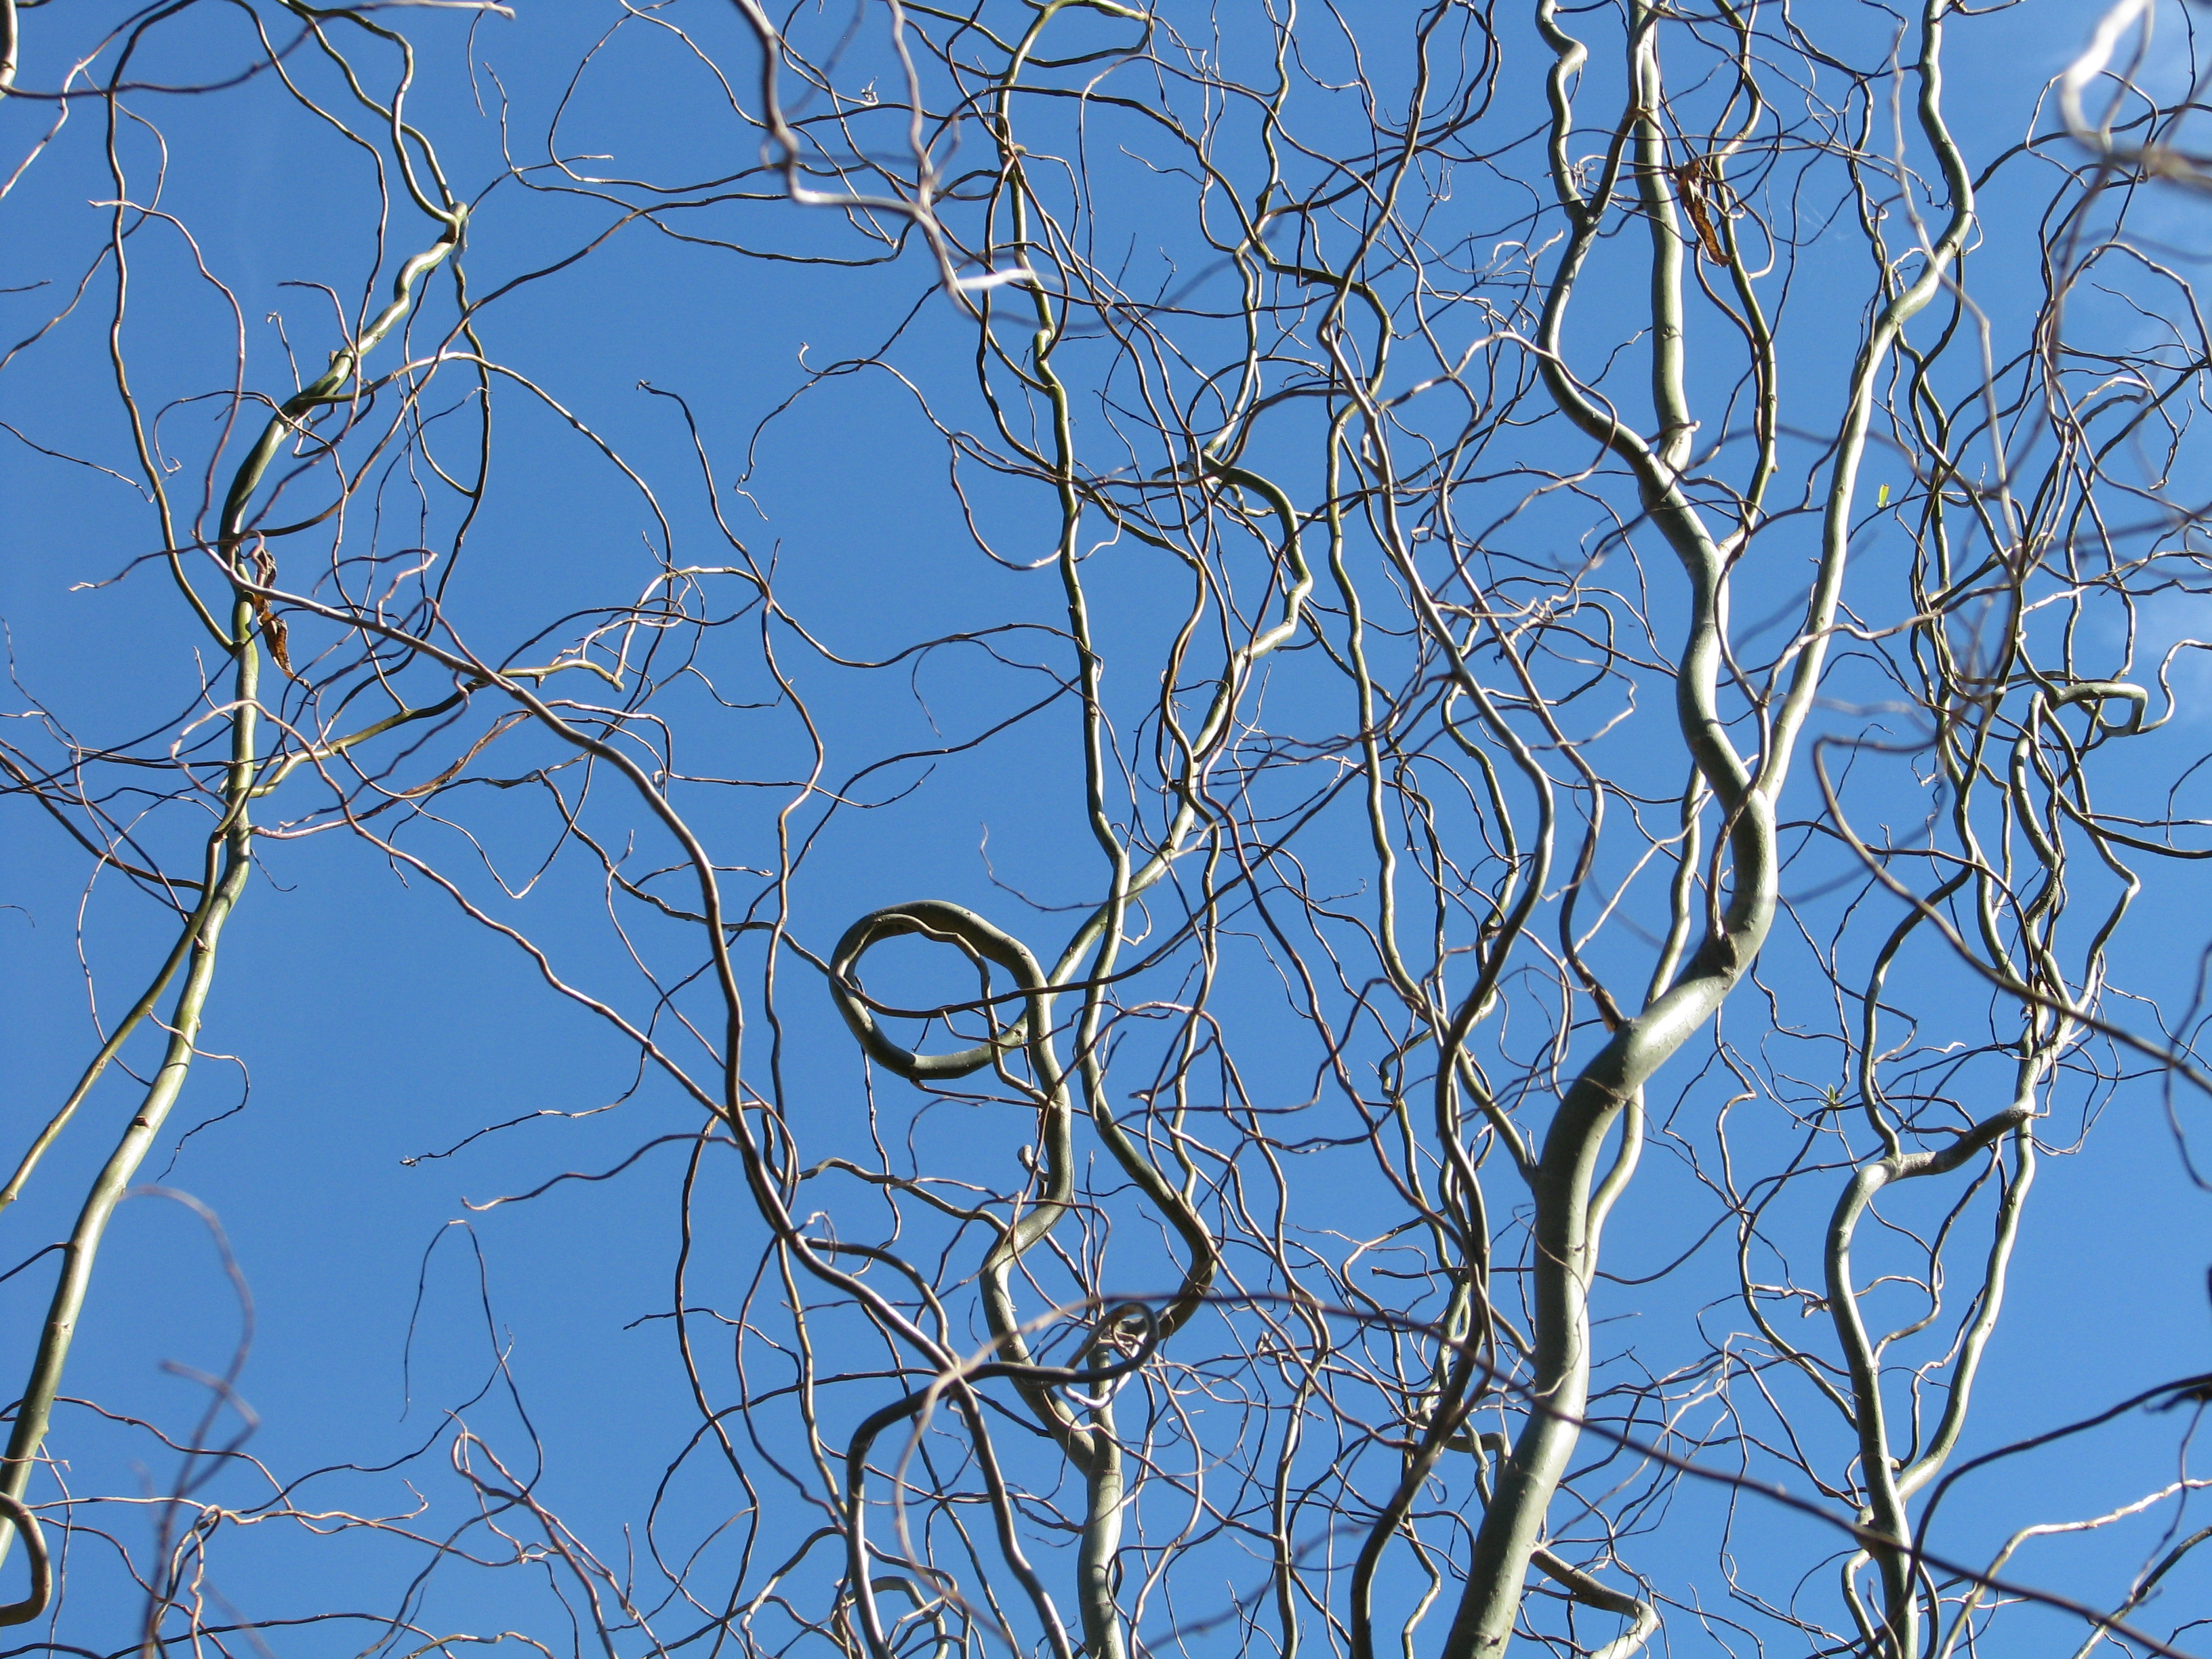
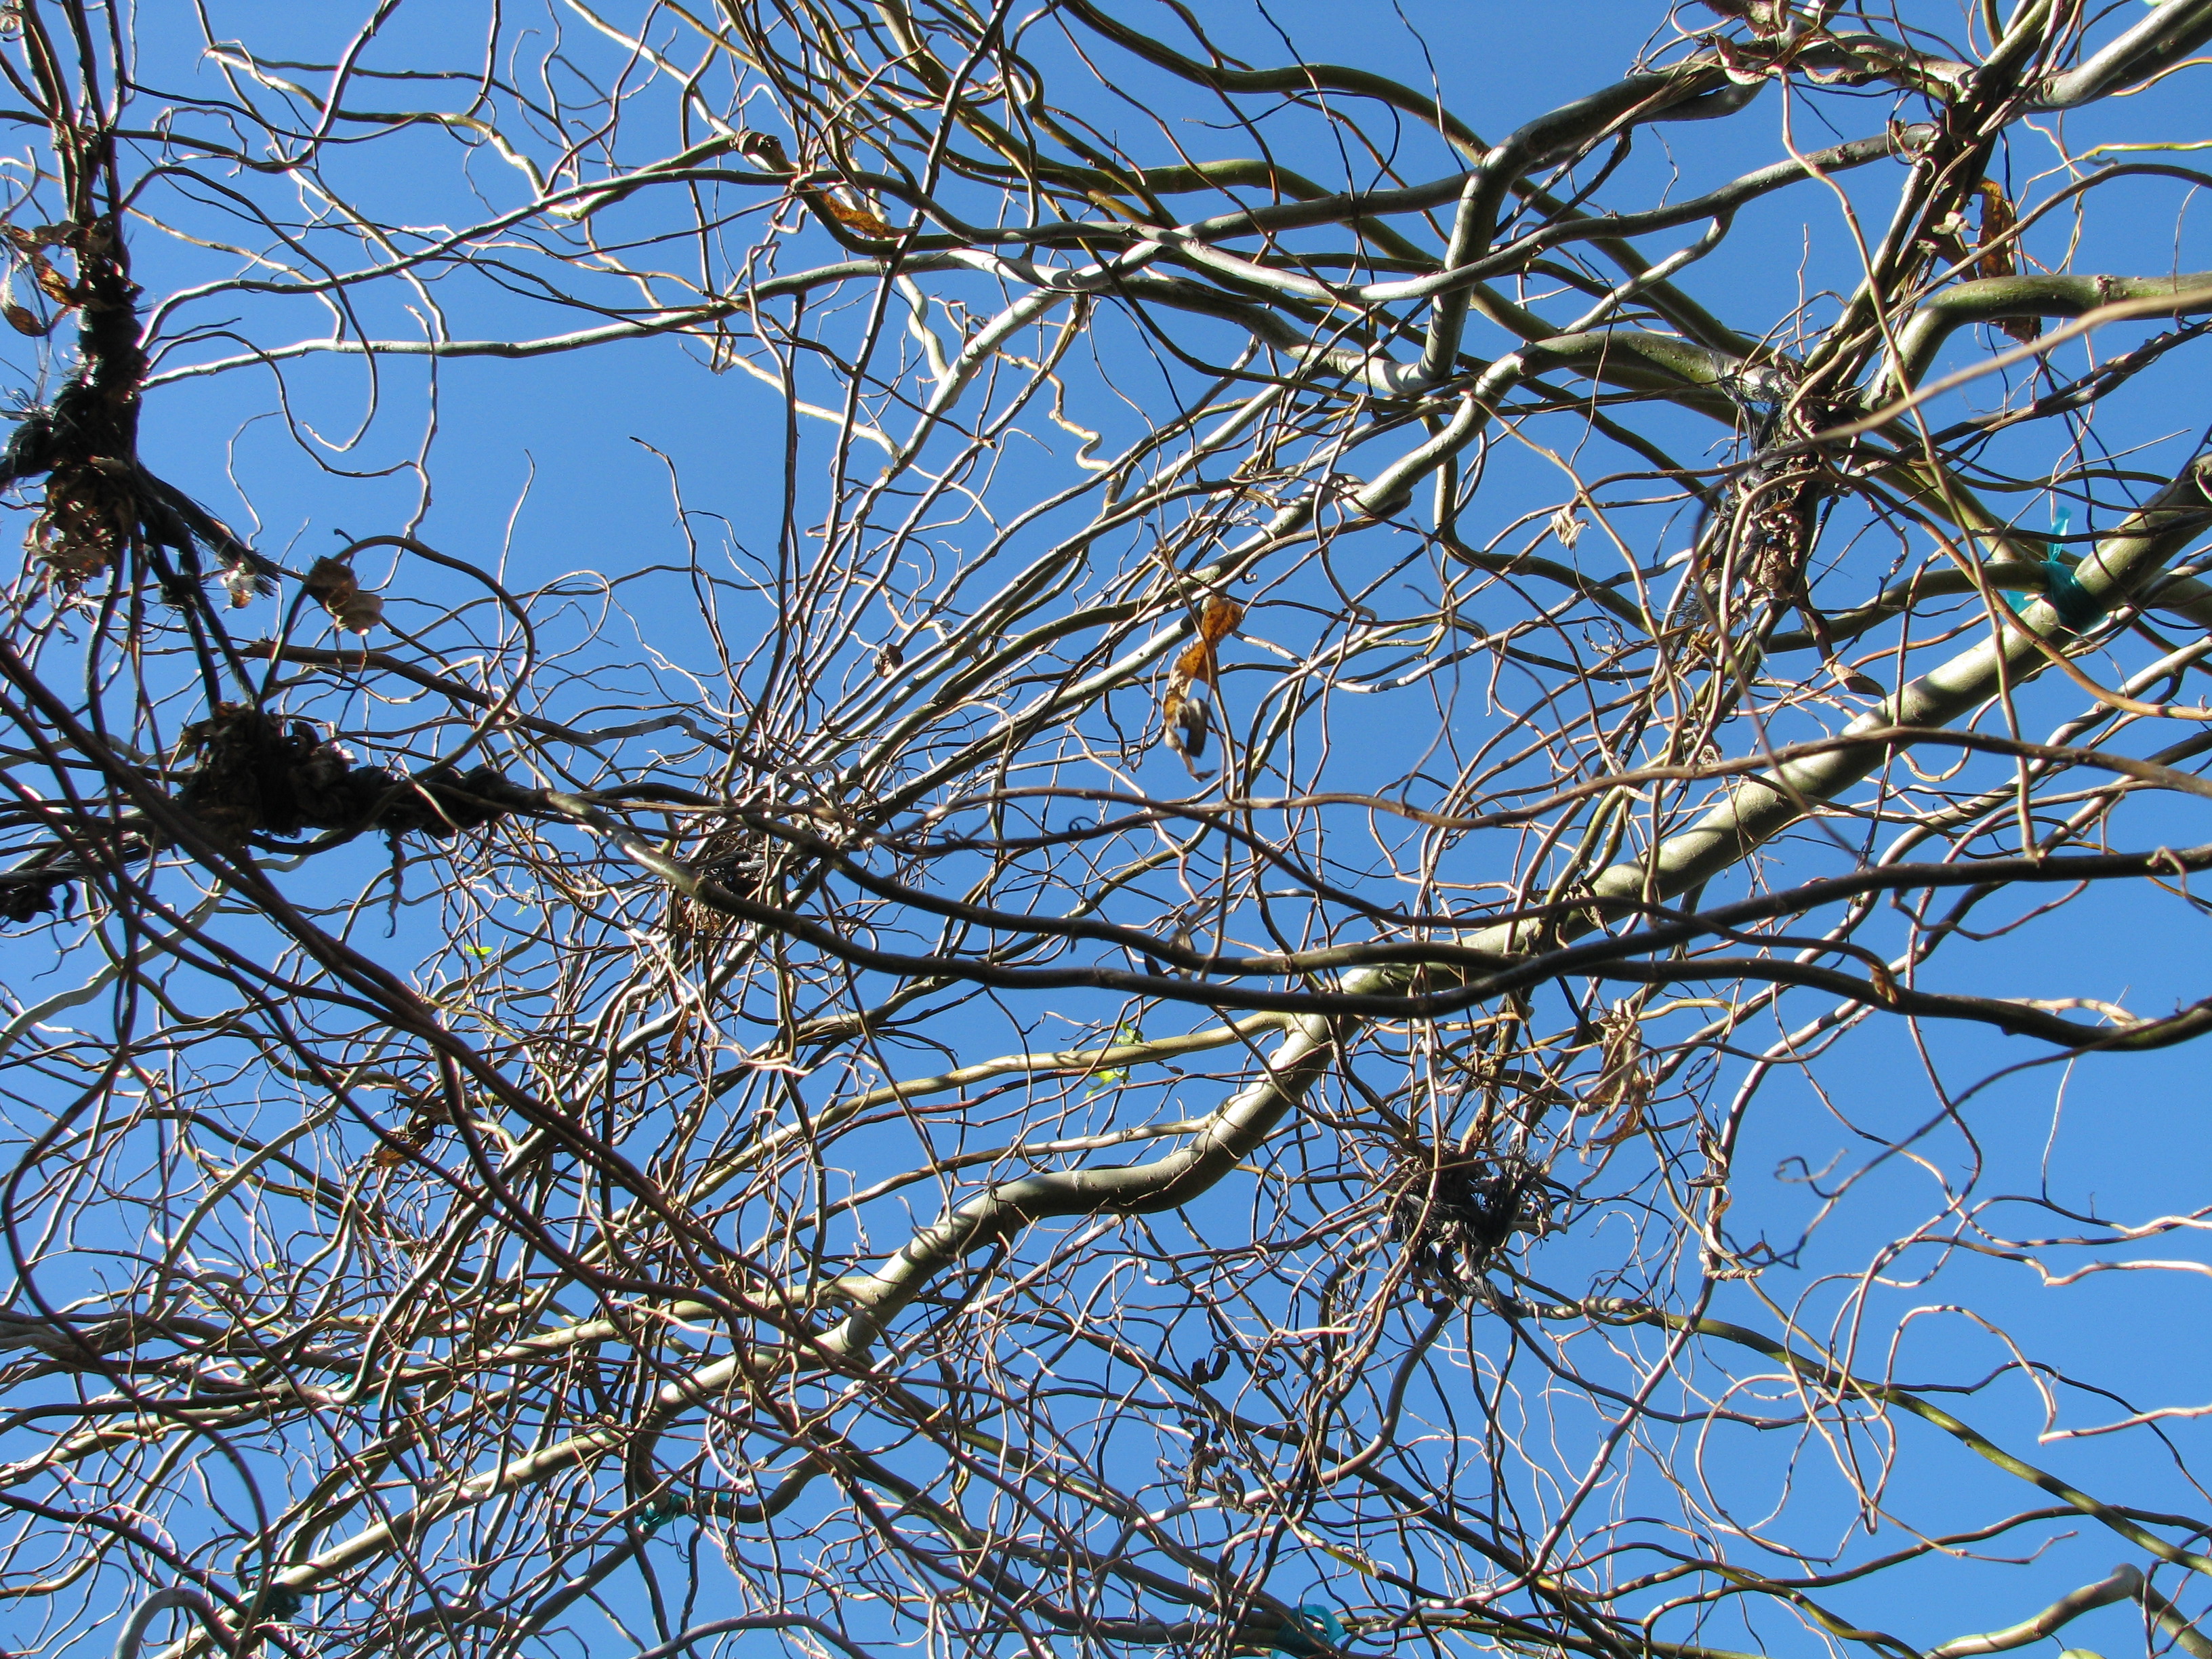
Curly willow (Salix matsudana ‘Tortuosa’) has wonderfully shaped branches that twist and curl naturally. You’ll see it often in bouquets, where it usually roots while in water. This willow enjoys more sun and a little less water than native willows do. Willows all produce salicin, the pain-killing ingredient that has now been synthetized as aspirin. Willows also produce a rooting hormone which can be used to encourage sprouting and rooting of other plants. Cut up a willow branch, soak it in water for a couple of days (if water is chlorinated, leave it sit for a day before adding willow) and use to water seedlings.

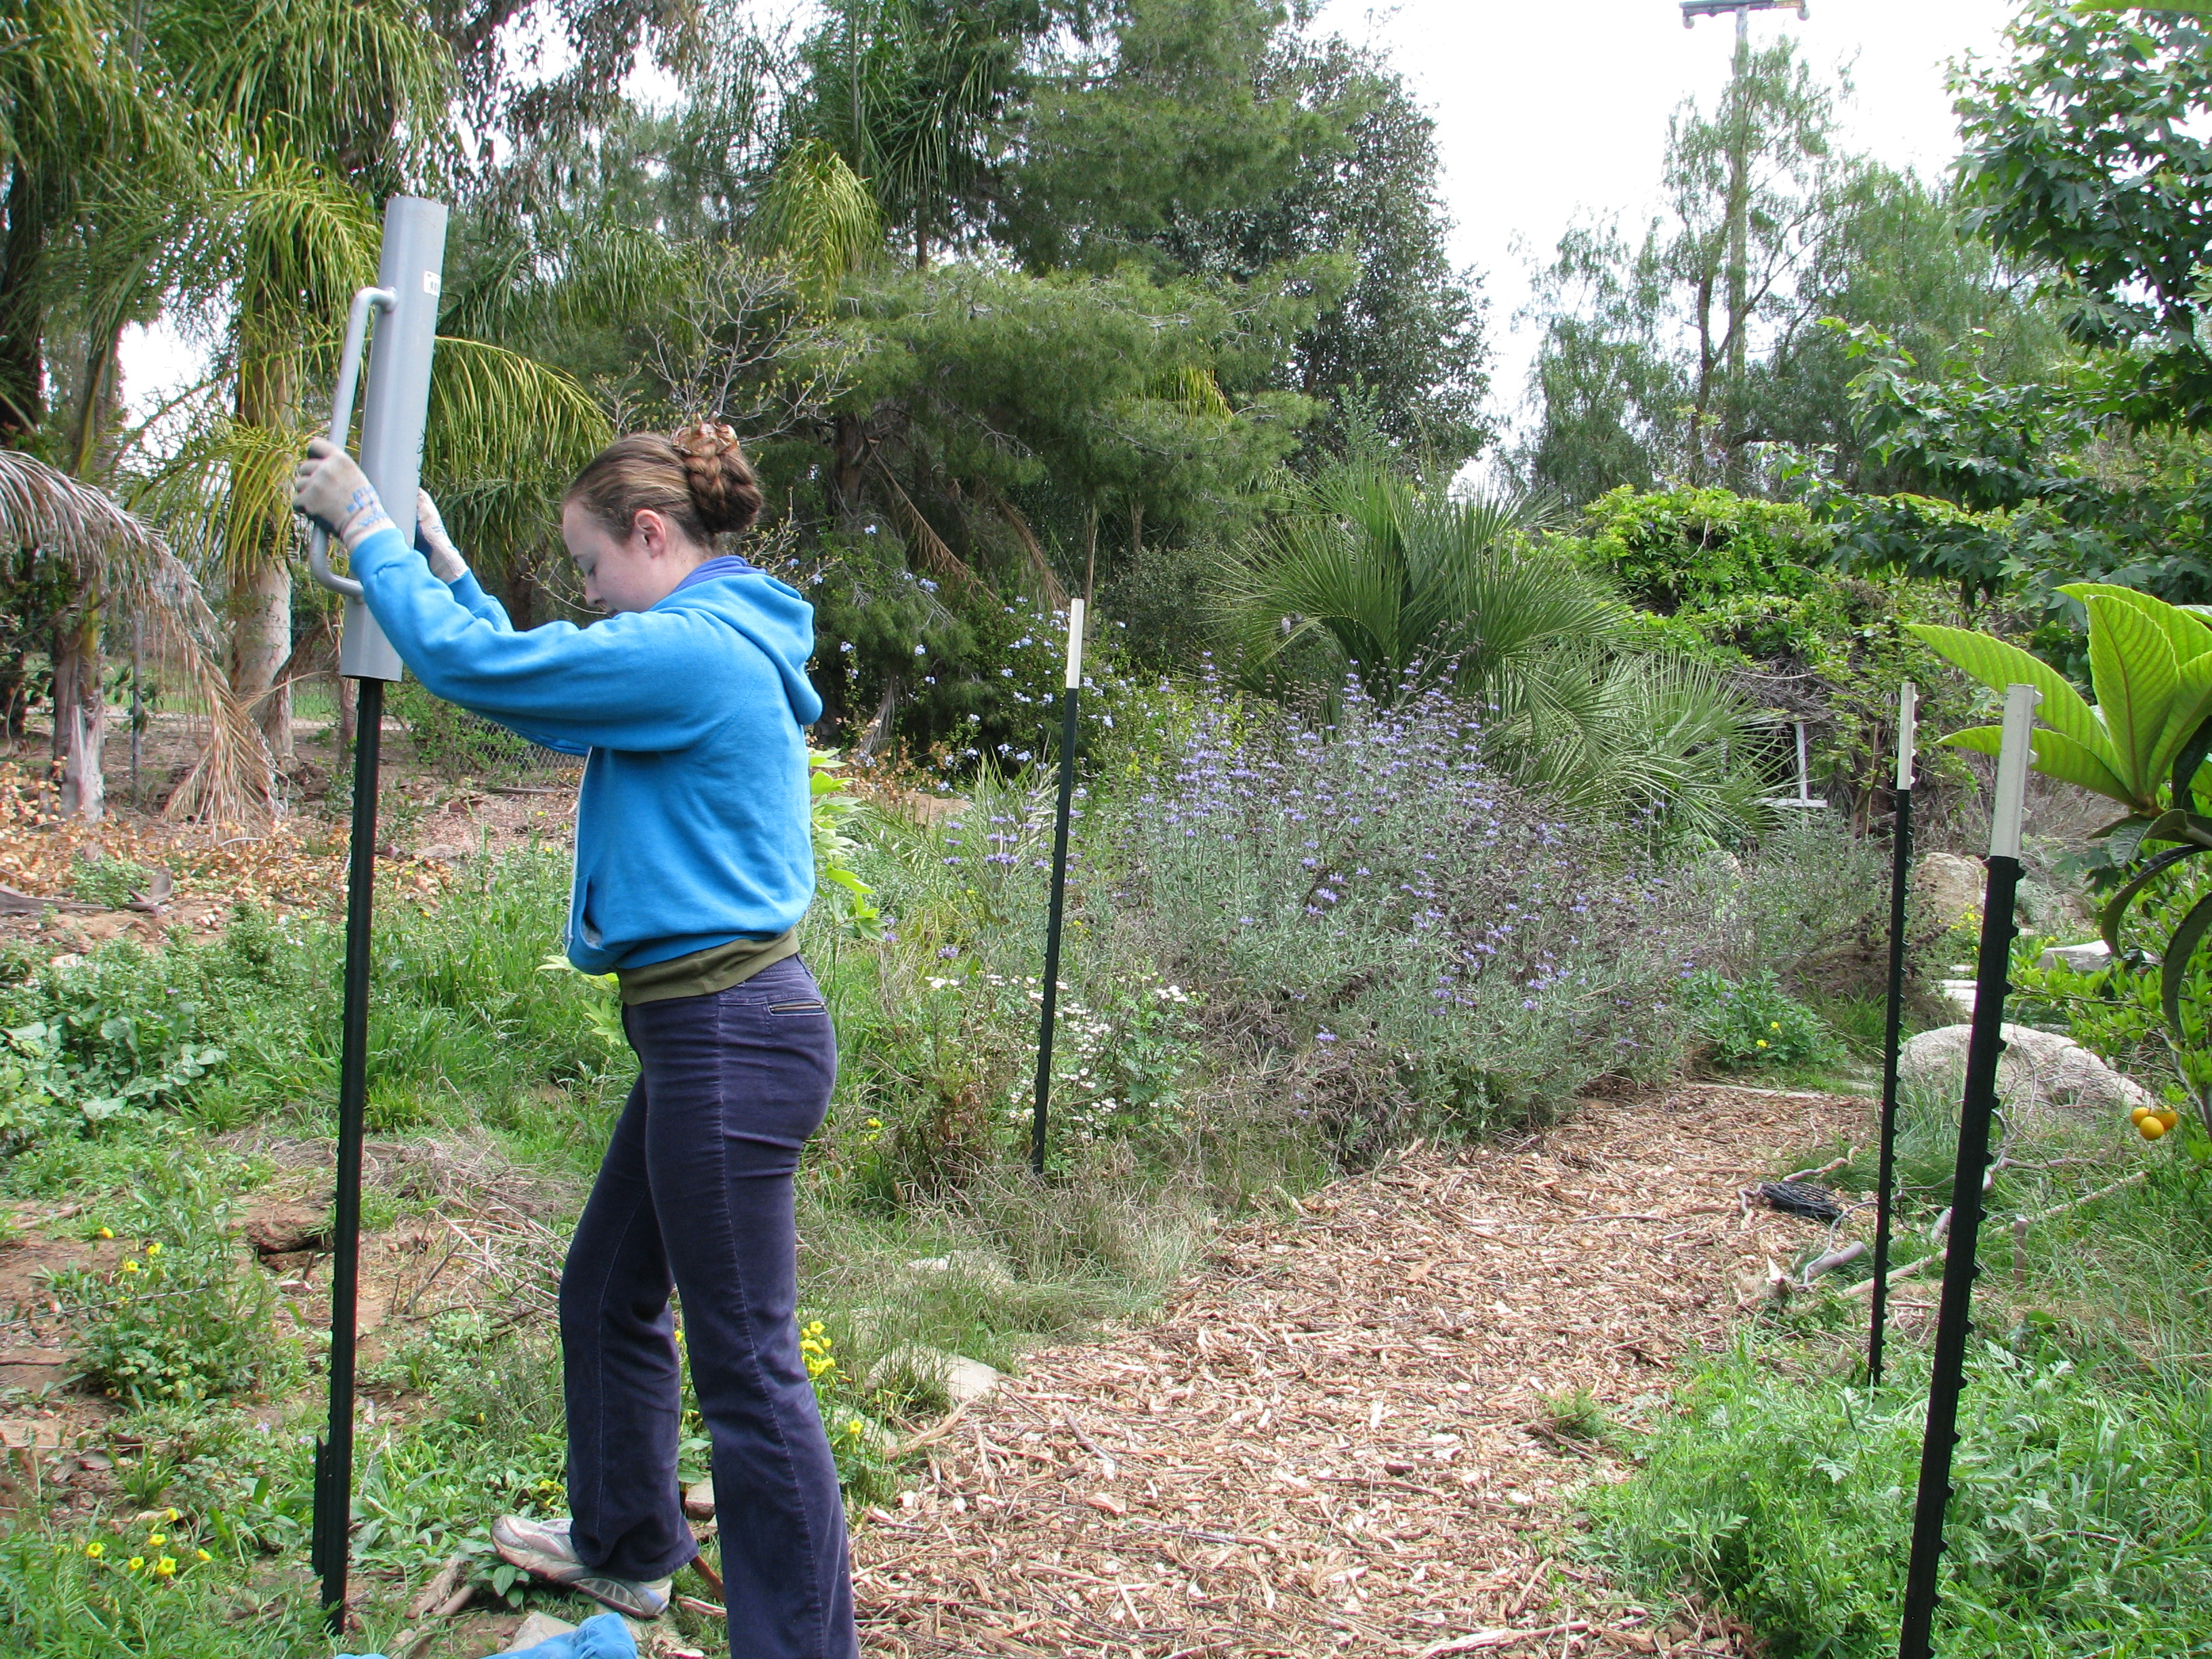
Miranda makes this look so easy! After we’d put these in, a friend recommended sliding the post pounder over the post before standing it up… for we short people who have trouble lifting the really heavy thing over our heads! Wanting to avoid cutting wood and nailing things together, we sunk four T-posts into the corners. The trellis is six feet across and eight feet wide; any wider and we would have put a center post on each side as well.

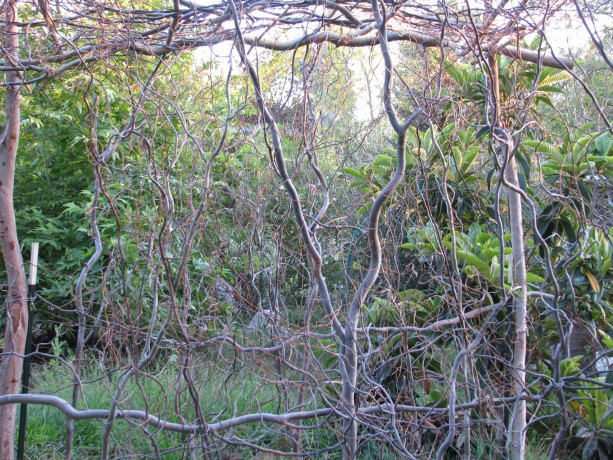
We wired on curly willow trunks in the corners, and wired long branches across the tops and the middle. We wired on the side posts and cross posts, cutting long branches from the willow. This willow was long dead; fresh willow could be sunk into the ground and it would root to make a living trellis, like the Withy Hide. We didn’t want that here, though.

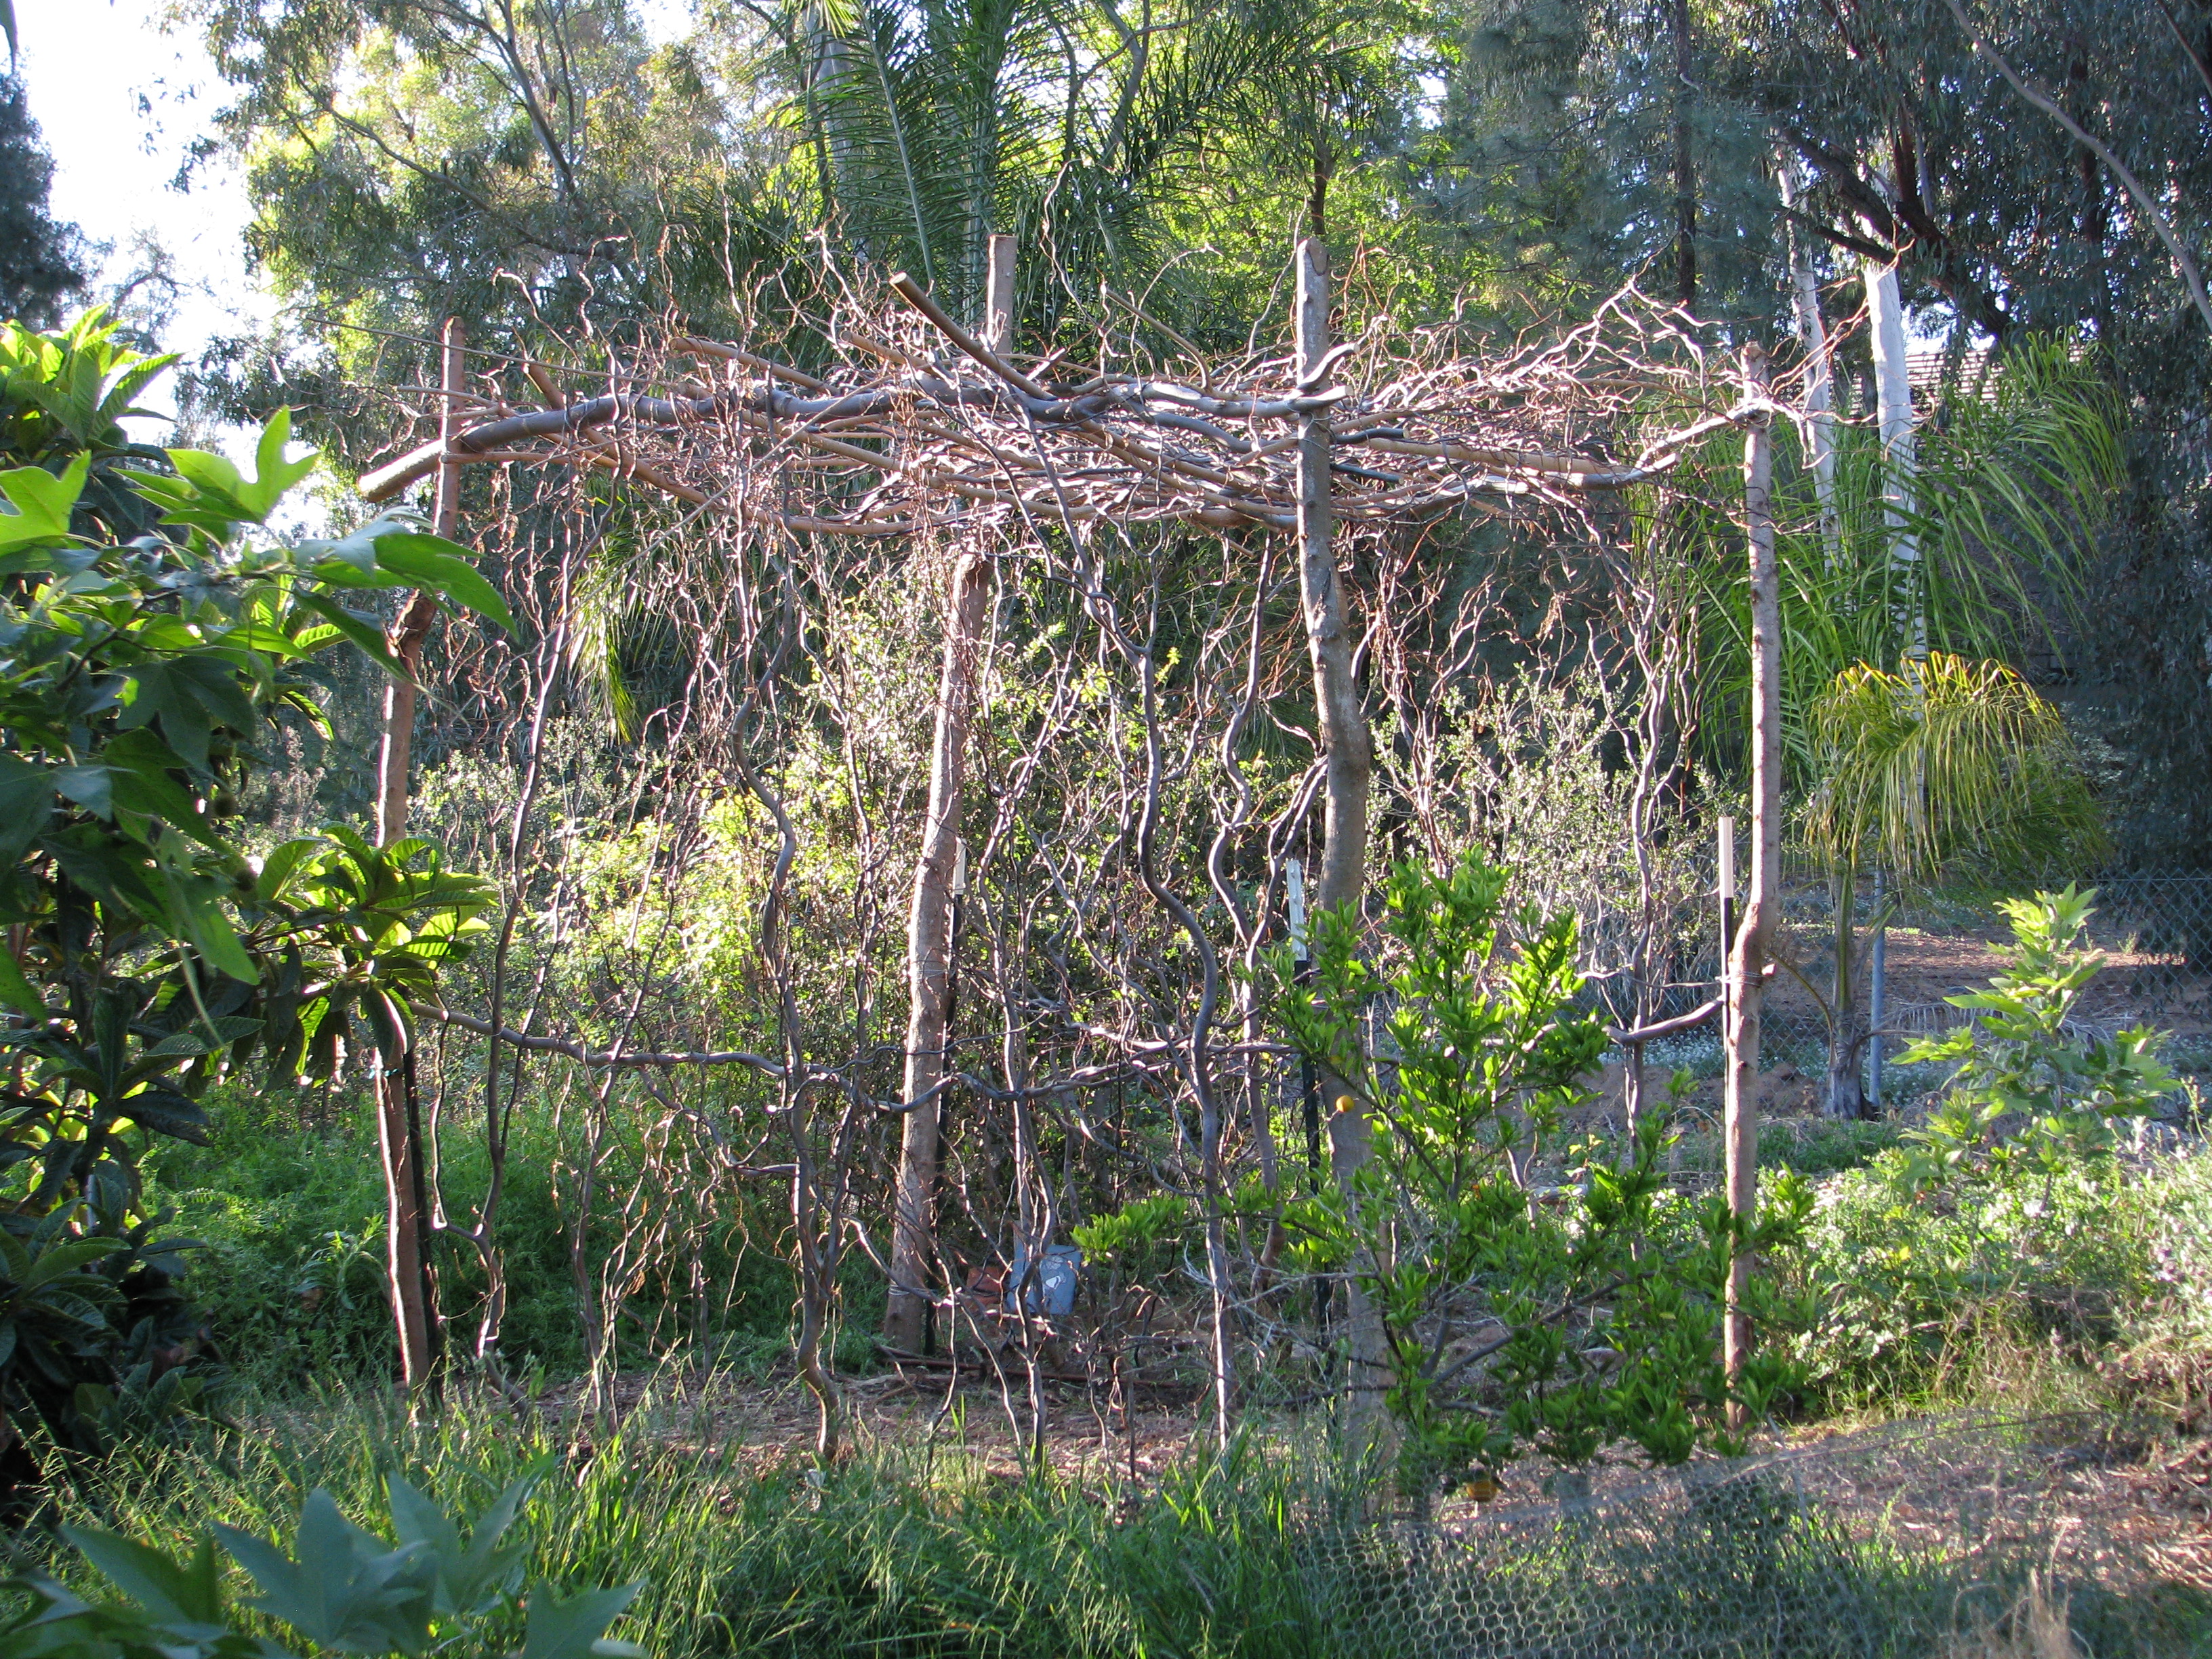
We laid long whips from a Brazilian pepper tree across, then wove curly willow through for the top. We stood smaller branches upright along the sides and wired them on, keeping in mind spaces where the squash vines will want to find something on which to grab. Over the top we laid long slim branches from a Brazilian pepper that is growing wild in the streambed and really needs to come out. By pruning it and using the branches, we’re making use of the problem. In permaculture, the problem is the solution! I wanted to make an arched top and tried to nail the slim branches in a bended form, but this was difficult and didn’t work for me. I didn’t want to spend days finishing this… too much else to do! So we laid the branches over the top, wiring some on, and then wove curly willow branches long-wise through them. This weaving helps hold the branches in place, will give the vines support, and brings together the look.
We planted four kinds of squash along the poles. And it was done. It should stand up to wind. We may need to add some vertical support depending upon the weight of the squash vines. We planted four varieties of squash that have small (2-3 lb.) veg. We planted four seeds of each, two on either side. We also planted some herbs, flowers and alliums, and some perennial beans, the Golden Runner Bean.
Architecturally interesting when not covered by squash as well. If nothing else, it is lovely and interesting to look at; better in person than in the photos. We can’t wait for the squash to start vining! Now, onto the next trellis.
-
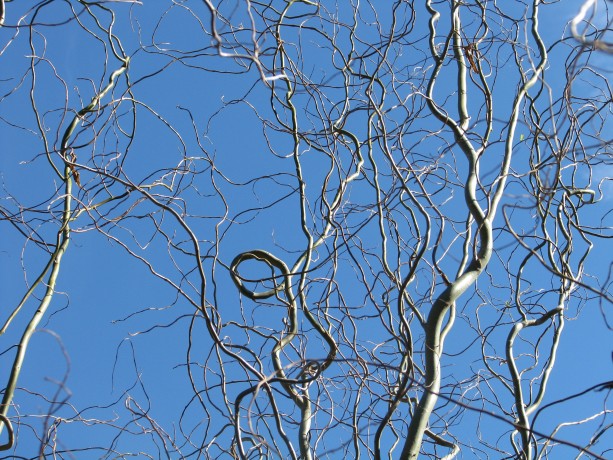
The Fine Art of Pleaching or Plashing
Pleaching in the sky. My daughter and I pleached today, although I’ve had the pleasure of pleaching before this , and even later. Pleaching, or its synonym plashing, refers to the interweaving of branches, both live or dead. Basketry is one form, but more notably is the pleaching of living branches to form secure living fences, buildings or artwork. The withy (willow) bird hide (a covered place from which to watch birds) is a living building I planted two years ago. We pleached our withy hide today. Not many people can say that! (or admit to it).
Pleaching is where stems, usually from two plants, grow together. Pleaching can be done on many vigorous trees such as willow, or even fruit trees such as plum. The branches grow together making separate plants become part of a whole. The trees then share nutrients and water and can pull what it needs from roots a long distance away.
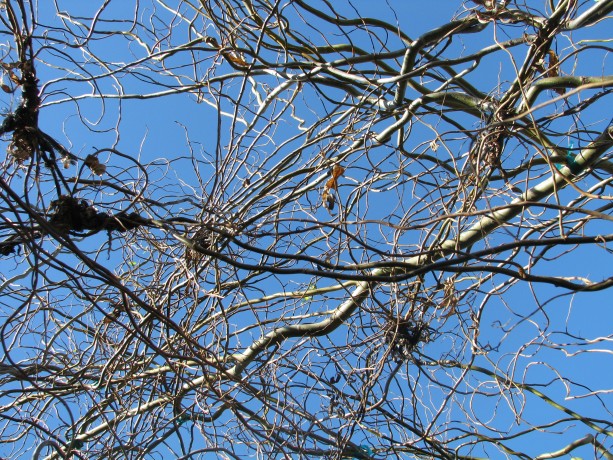
Curly willow is beautiful on its own. Pleaching essentially makes many plants into one living organism. Pleached hedgerows make a living barrier to keep in livestock; pleached trees can be woven into furniture, living artwork, decorative fences, and living trellises. Pleaching livestock fences was practiced a lot in Europe prior to the invention of barbed wire, and then was forgotten for awhile only to be revived as a form of artistic gardening.
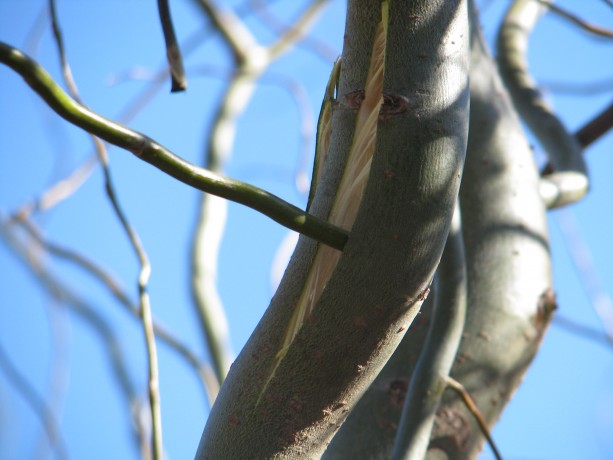
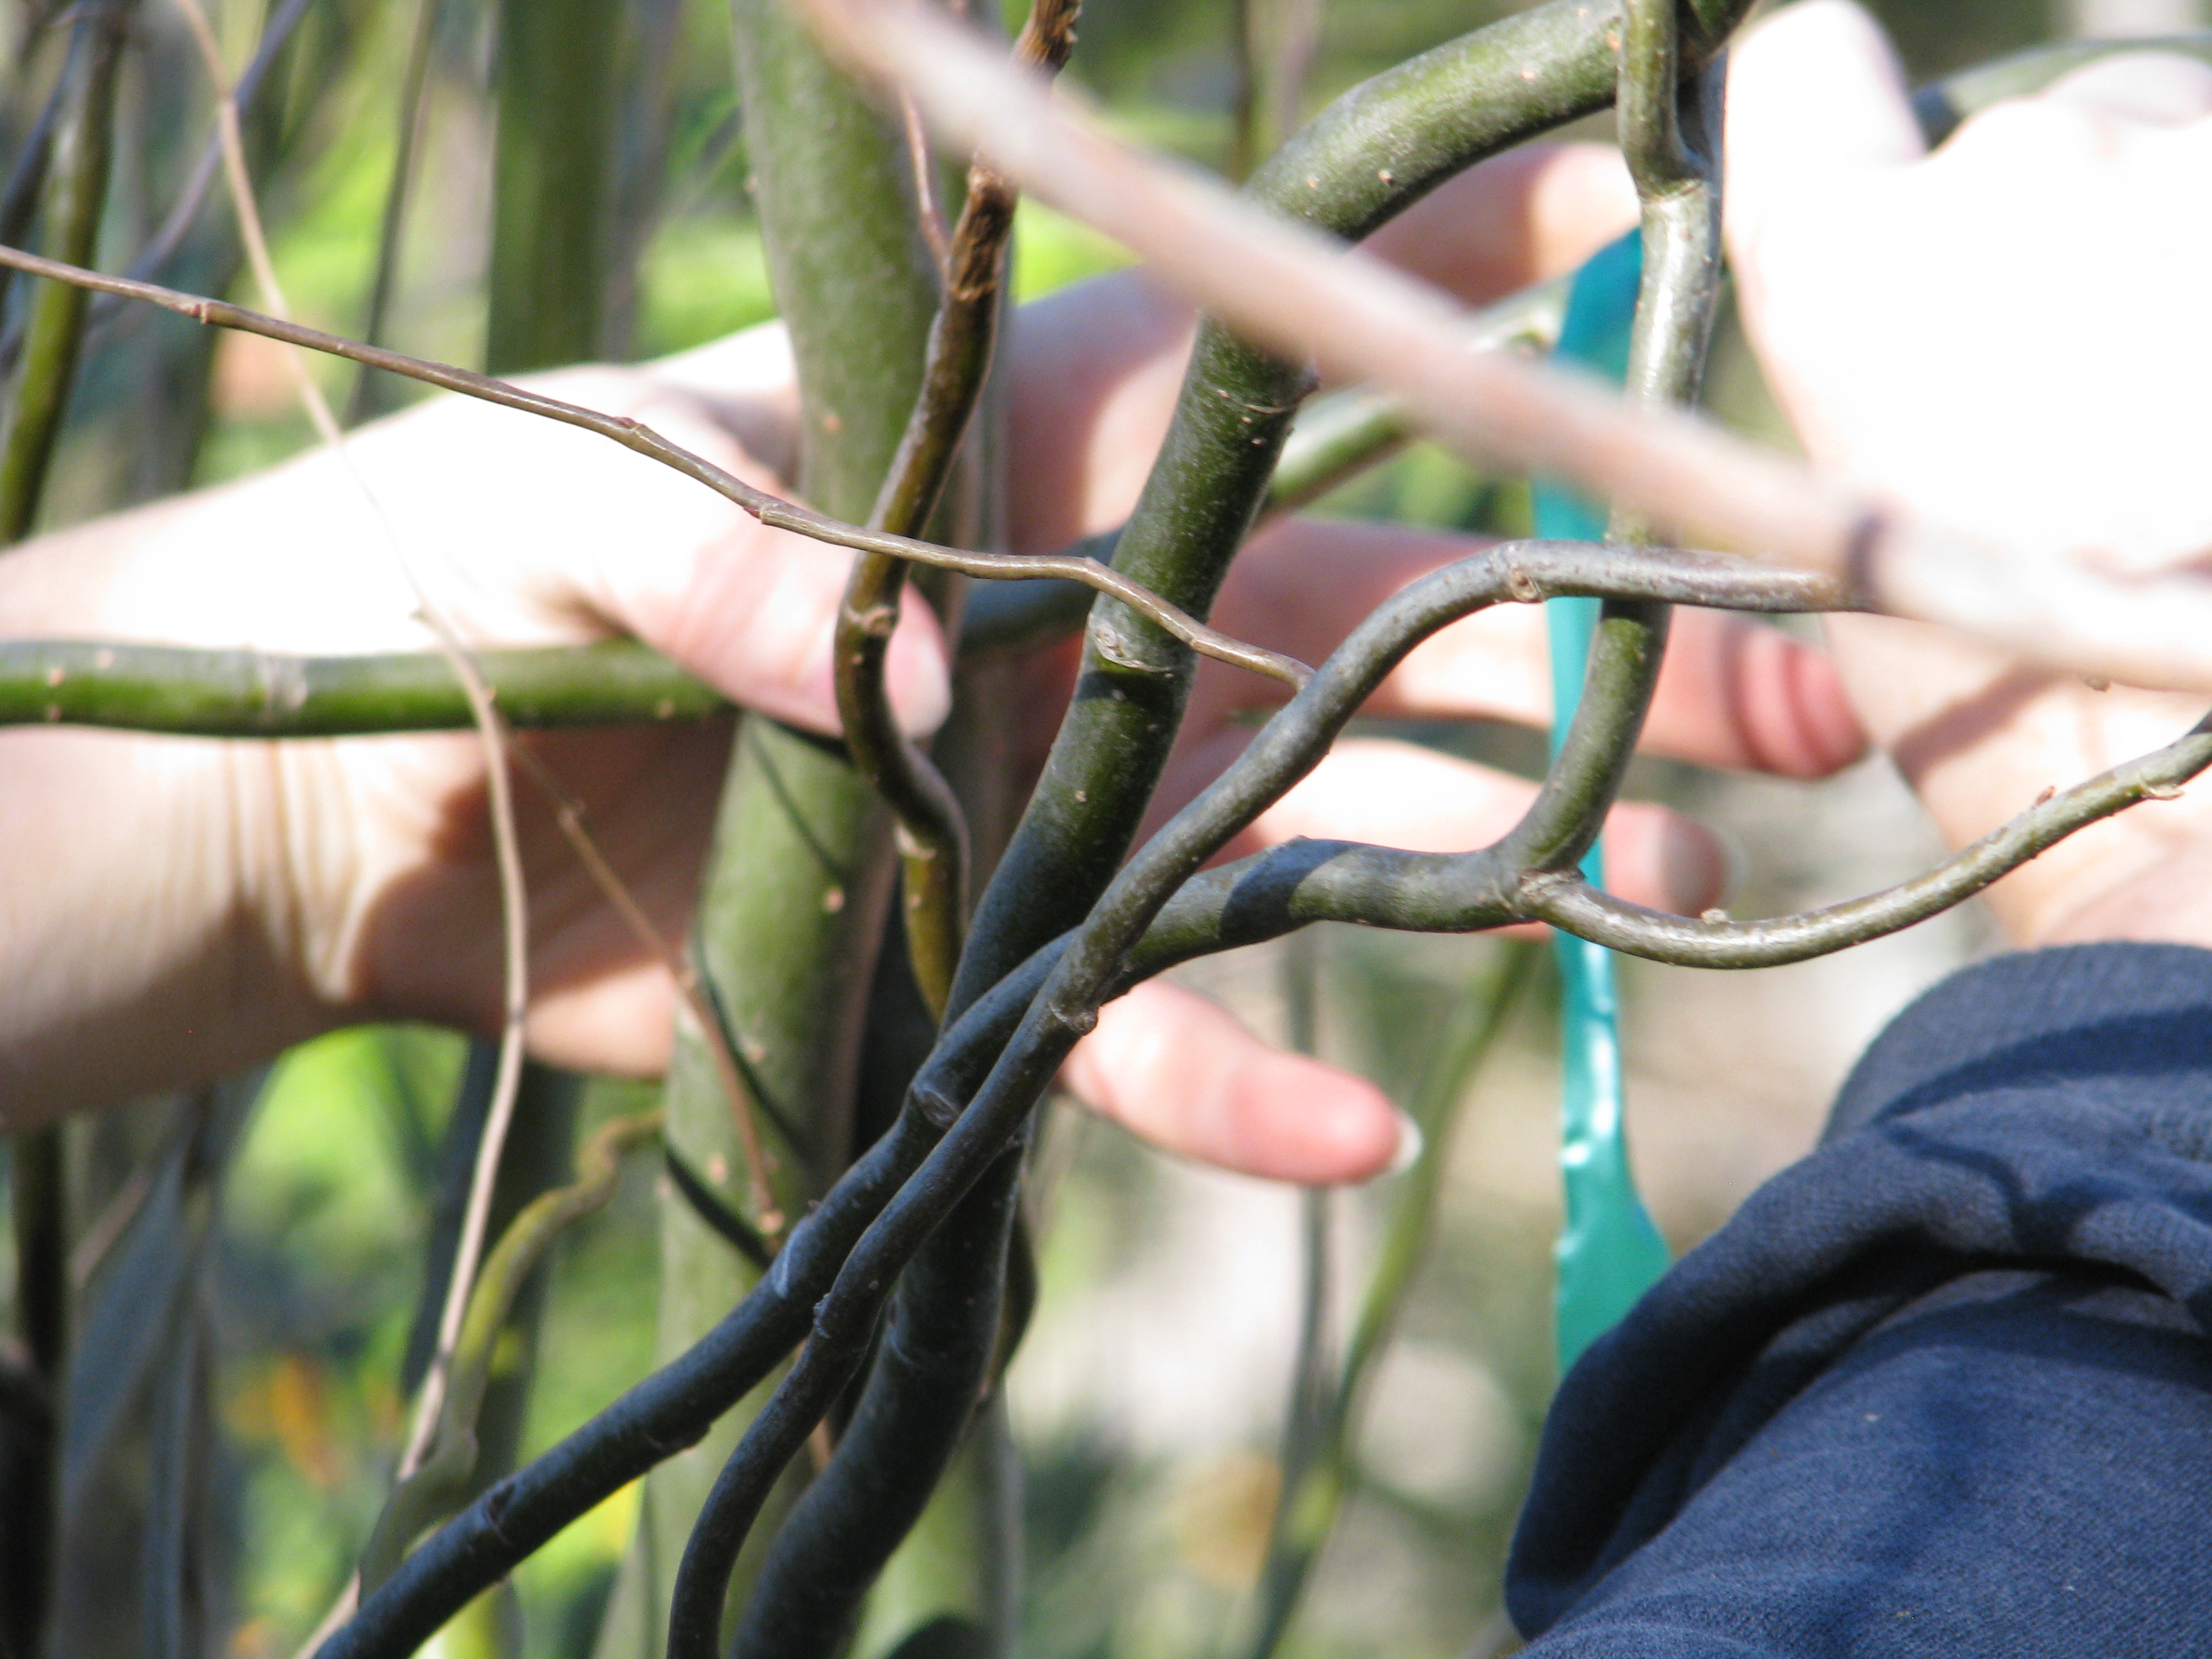
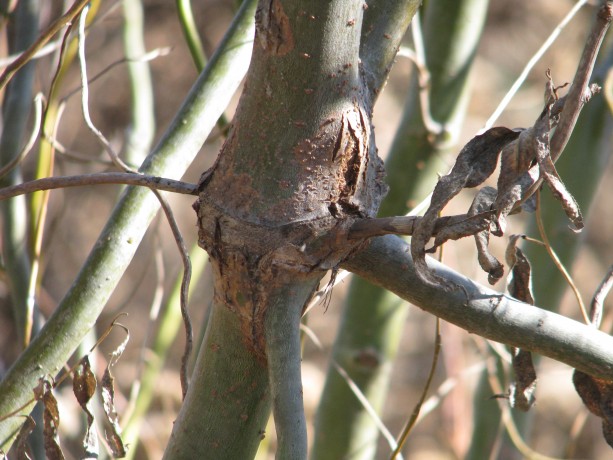
This trunk unfortunately cracked while I pulled on it. As it is willow, it will heal quickly. My daughter used the opportunity to put a twig from the next willow through the crack, which will grow over it. Today I of course, as is my habit, waited until the sun was directly above the area where I was working so that I had to look into it as I worked. I don’t recommend this, however. My daughter used a fruit-picking pole to snag some of the taller, whippier branches of the curly willow that make up the withy hide. I stood on a ladder, squinting, and pulled two branches together.
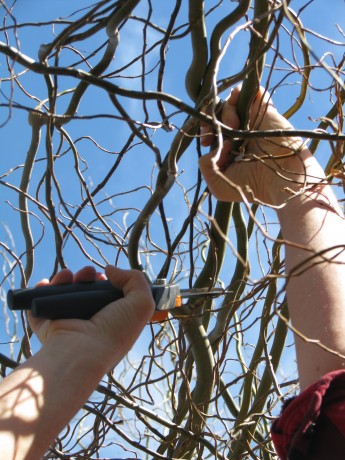
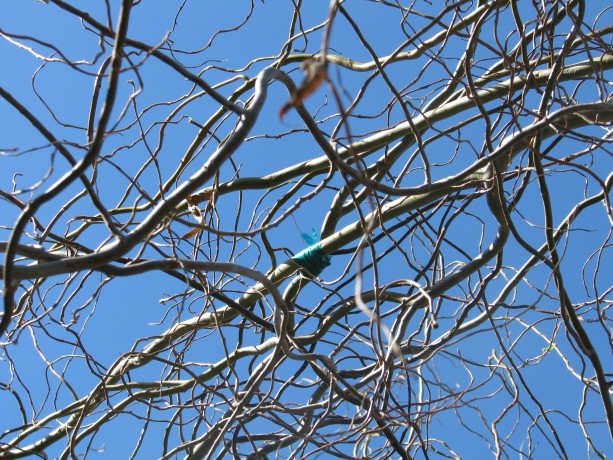
Me on a ladder reaching over my head to pull two branches together to form a roof. To insure that you have a good pleach going, it is best to lightly scrape the bark from both pieces just where they are going to meet; something like you see blood brothers do with their hands in the movies, but with no blood involved.

Lightly scraping the bark from both branches where they will meet is important. Next time I’ll use a vegetable peeler, which will allow me better angles. Then you make sure the pieces fit snugly, then tie them on. I’ve use various materials to do this. Twist-ties hold securely but the wire can eventually girdle the growing branches. Twine is more difficult to use in that it doesn’t grip the branches well enough for a firm hold, but it will eventually break down, hopefully after the pleach is successful. This time I used green tree tape. It grips well, is easy to tie, and will stretch with the growing branches and eventually break. The green color won’t be noticeable when the willow leafs out, either.
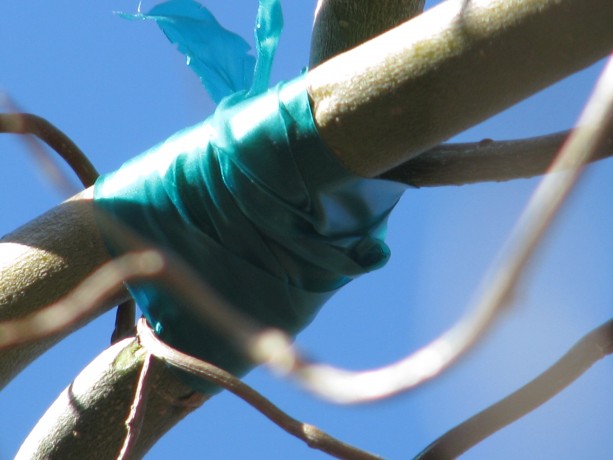
Tying the scraped branches together so they stay put. They can’t move around in the wind or they won’t be able to grow together. As I pleached from the top of the ladder, working overhead while the sun and curly twigs attacked my eyes, my daughter pleached pleasing arches over the ‘windows’ of the hide.

Weaving curly willow can be a twisty challenge. The hide looks lopsided because the willows on one side have found sent out roots to drink from the small pond. With more pleaching, the thirsty trees on the other side will probably take advantage of that water source, too, and have a drink via their overhead connection. I think it is part of its charm. A half-wild building.
The withy hide as a duck on the big pond sees it. The willow is just about to begin leafing out. Try pleaching a small fence or a living bench or chair. It is tremendous fun and if you don’t like it, you can always cut it down. Oh, and work on a cloudy day.
A willow roof. - Arts and Crafts, Gardening adventures, Hugelkultur, Permaculture and Edible Forest Gardening Adventures, Soil
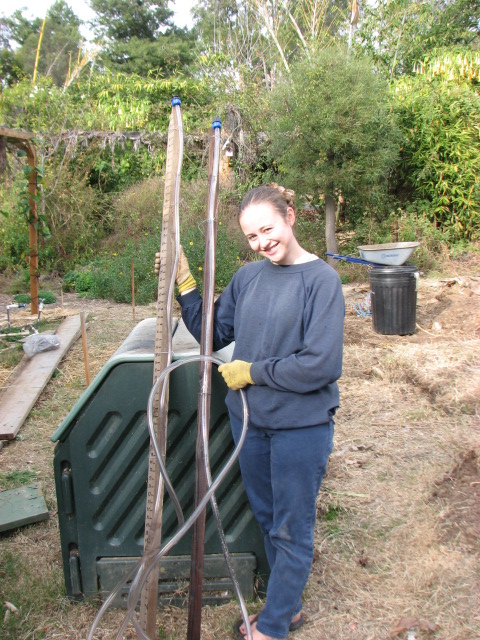
Bunyips: Fun to Say, Easy to Make and Use

Making a bunyip. Hi! I’m back. Its not as though I’ve been vacationing. Someday I might tell you about how important it is to question your doctor, about how under-producing thyroids affect every part of your body, about neighbor’s in-laws who skip their meds for a day and crash through your gate, and about strange and fatal chicken illnesses, but not today.
My big garden project for the winter is to turn the raised vegetable bed area into a sunken hugelkultur sheet-mulched vegetable area. I’ll go into details about that in another post as well. What I am going to describe is how to take measurements using a bunyip.
A bunyip is a water level that you can make very inexpensively and quickly, which relies upon gravity to give a reading. It even works around corners. I really don’t know how it came to be called a bunyip… its an Australian thing. A bunyip is an ancient aborigine water monster. More recently the name has come to be synonymous with imposter. Maybe this simple home-made water level is impersonating a laser level. Maybe bunyip is just so gosh-darn more fun to say.
Anyway, if you need to measure the difference in elevation, use a bunyip. If you want to find level ground, for instance if you are building a level swale on contour, use a bunyip.
The equipment for your bunyip are: two slim boards with at least one end flat, and at least 5 feet tall. You also need about 30 feet of clear fishtank hose. A waterproof marker, a ruler, a level and six pieces of wire to tie around the posts, and you are ready to go. If you have a couple of corks or stoppers that fit in the tops of the tubing, it will make it easier to carry without receiving a surprise shower.
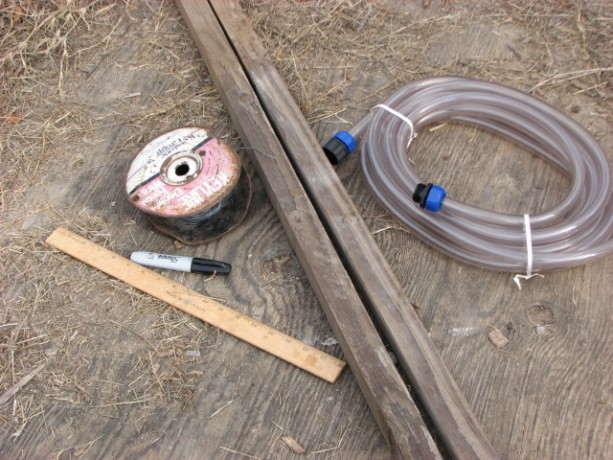
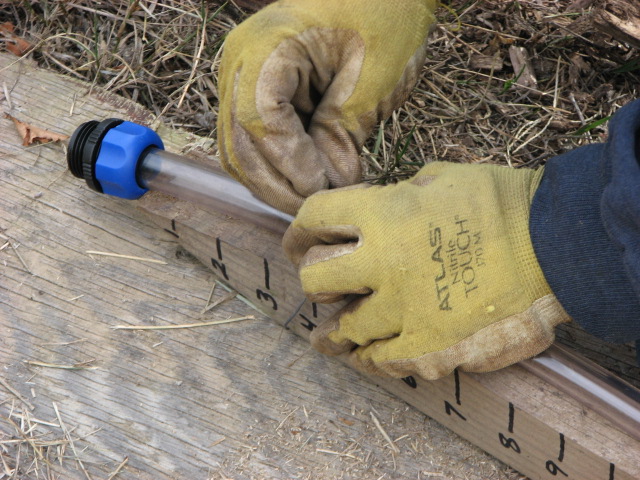
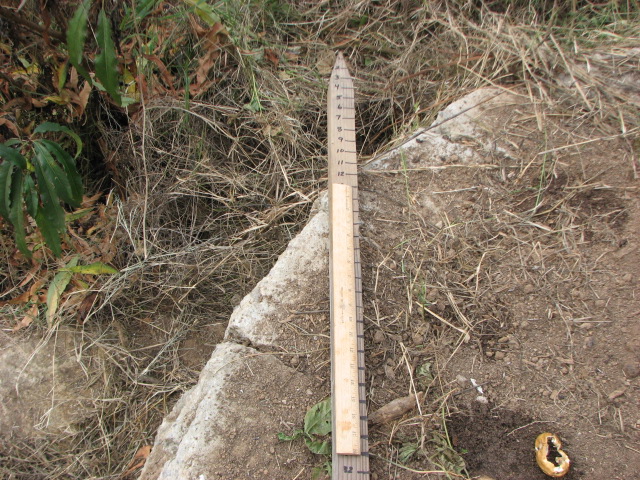
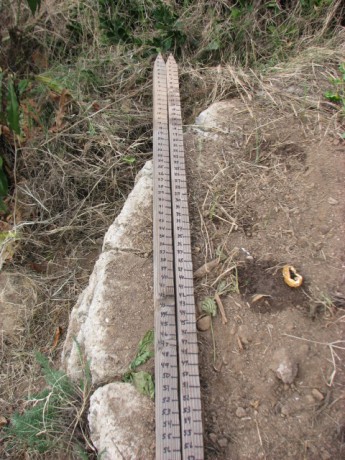
You will need two slim posts, 30′ of tubing (the only kind I could buy in town was for cleaning fishtanks, hence the threaded ends. You don’t need these!), a ruler, wire and a waterproof marker. Be sure at least one of the ends of each board is flat, which will be what touches the earth when measuring. Along one of the boards begin to mark off inches (or centimeters) from the top. Make the marks readable from a short distance. Number the inches beginning with 1 at the top of the post, down to at least four feet (if you are measuring more dramatic slopes you’ll want to mark off more). Numbering from the top down allows you to do simple subtraction easily without becoming mixed-up, especially when you’re tired.
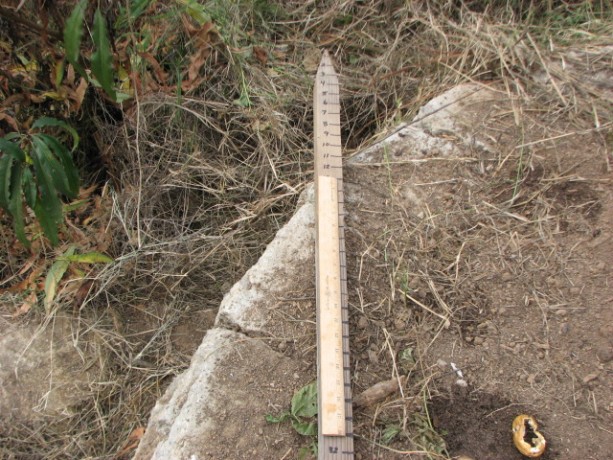
Using a ruler or yardstick (or meterstick), mark inches down from the top of the post. Next, stand the two posts together on level ground, making sure they are straight. It doesn’t matter if the tops aren’t exactly even, just the bottoms. Now with the two posts standing on even ground, mark the second post in one spot evenly with a mark on the first post; it doesn’t really matter which inch you mark because you can then use the ruler to fill in all the others.

With the bottoms of each post level, begin to mark the second post from the top, even if the tops of the posts aren’t even. So, using that mark and a ruler, mark inches all along the second post. The point is that the measurements are even from the bottom of the posts, where they will be resting on the ground.
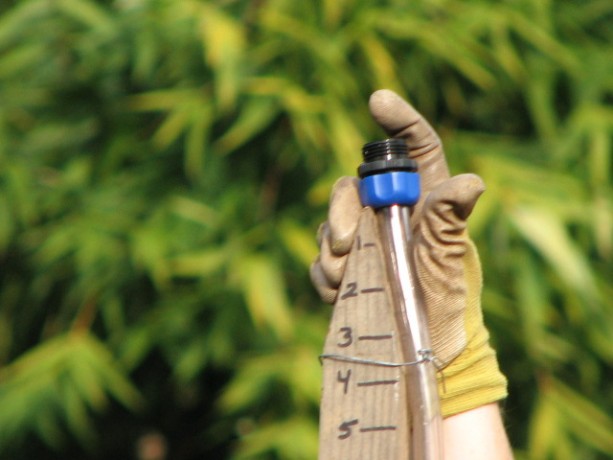
You will have two posts with inches marked from the top. That done, tie the tubing onto the posts, allowing the tubing to reach a little higher than the top of the posts. The tubing in the photo is all I could find in town, and it is an extension for a fish tank cleaner, hence the threaded ends. You don’t need threaded ends, just the tubing.

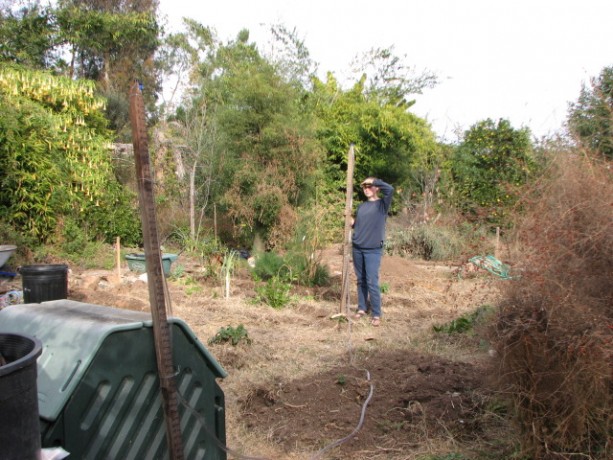
Wire the tubing onto the posts, allowing the top of the tubing to be above the top of the post. With the tubing tied to the marked posts, you are almost ready to measure. Having someone to hold a post really helps here. With both posts straight up, fill the tubing with water. You can use a watering can (with the spray end off), or a hose. A funnel might help. Fill the tubing as completely as you can, but don’t worry about having the water go end to end. A gap at either end is okay.

Miranda holding the completed and filled bunyip. Work the air bubble out of the hose by lifting the bottom. Take out the air bubbles by lifting the center of the hose and feeding the air bubble through.
You are ready to measure!
The tubing doesn’t need to be off the ground to work; it can even work around corners. One person stands with their side of the bunyip at one area you want to measure, and the other person stands at the other. You don’t need to make the tubing lift off the ground; it will accurately measure with the tubing in almost any position. The water in the tubing will bob around; tap the top of the tubing with your finger to help it settle faster.
Tapping on the end helps make the water settle faster. Then take the readings from each post. Subtract the readings and you will get the distance in elevation between the two points. For instance, if the water level on one post is at the 19″ mark, and the water level on the other post is at the 7″ mark, then there is a 12″ difference in elevation between the two points. So easy!
If you are building swales on contour, keep moving one side of the bunyip until you find a spot where both readings are even, then mark those spots and repeat farther on. In this way you can find what land is level.
My daughter and I used our bunyip today to measure the change in elevation in our vegetable bed. We won’t be leveling the bed itself, but we will be digging deep, level swales, and we now know just how radically, and in which direction, our slope lies. This reaffirms what our eyes tell us about how rainwater flows across the veggie area and therefore how we’re to dig the swales to best catch rainfall.
Best of all, bunyips can be quickly disassembled and the parts used for other projects, or emptied and carried to other locations. Just add water, and you get a bunyip!