Bunyips: Fun to Say, Easy to Make and Use
Hi! I’m back. Its not as though I’ve been vacationing. Someday I might tell you about how important it is to question your doctor, about how under-producing thyroids affect every part of your body, about neighbor’s in-laws who skip their meds for a day and crash through your gate, and about strange and fatal chicken illnesses, but not today.
My big garden project for the winter is to turn the raised vegetable bed area into a sunken hugelkultur sheet-mulched vegetable area. I’ll go into details about that in another post as well. What I am going to describe is how to take measurements using a bunyip.
A bunyip is a water level that you can make very inexpensively and quickly, which relies upon gravity to give a reading. It even works around corners. I really don’t know how it came to be called a bunyip… its an Australian thing. A bunyip is an ancient aborigine water monster. More recently the name has come to be synonymous with imposter. Maybe this simple home-made water level is impersonating a laser level. Maybe bunyip is just so gosh-darn more fun to say.
Anyway, if you need to measure the difference in elevation, use a bunyip. If you want to find level ground, for instance if you are building a level swale on contour, use a bunyip.
The equipment for your bunyip are: two slim boards with at least one end flat, and at least 5 feet tall. You also need about 30 feet of clear fishtank hose. A waterproof marker, a ruler, a level and six pieces of wire to tie around the posts, and you are ready to go. If you have a couple of corks or stoppers that fit in the tops of the tubing, it will make it easier to carry without receiving a surprise shower.

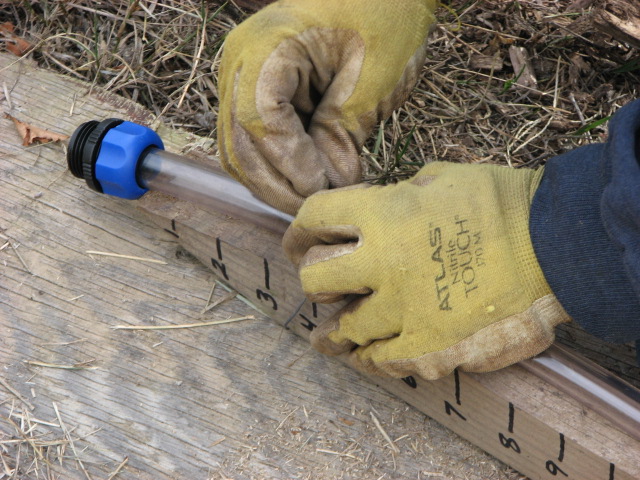
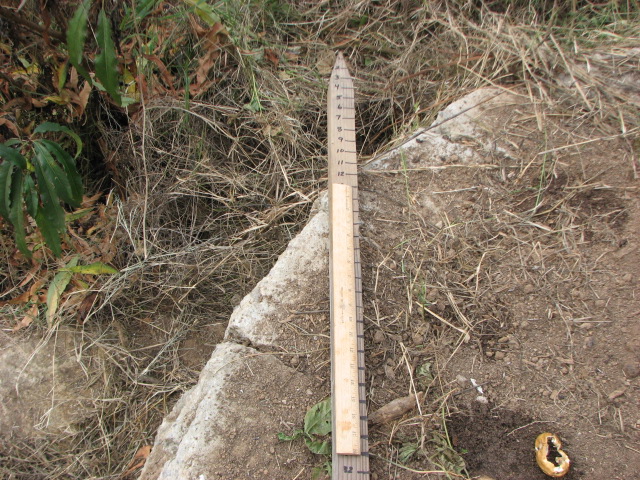
Be sure at least one of the ends of each board is flat, which will be what touches the earth when measuring. Along one of the boards begin to mark off inches (or centimeters) from the top. Make the marks readable from a short distance. Number the inches beginning with 1 at the top of the post, down to at least four feet (if you are measuring more dramatic slopes you’ll want to mark off more). Numbering from the top down allows you to do simple subtraction easily without becoming mixed-up, especially when you’re tired.
Next, stand the two posts together on level ground, making sure they are straight. It doesn’t matter if the tops aren’t exactly even, just the bottoms. Now with the two posts standing on even ground, mark the second post in one spot evenly with a mark on the first post; it doesn’t really matter which inch you mark because you can then use the ruler to fill in all the others.

So, using that mark and a ruler, mark inches all along the second post. The point is that the measurements are even from the bottom of the posts, where they will be resting on the ground.

That done, tie the tubing onto the posts, allowing the tubing to reach a little higher than the top of the posts. The tubing in the photo is all I could find in town, and it is an extension for a fish tank cleaner, hence the threaded ends. You don’t need threaded ends, just the tubing.

With the tubing tied to the marked posts, you are almost ready to measure. Having someone to hold a post really helps here. With both posts straight up, fill the tubing with water. You can use a watering can (with the spray end off), or a hose. A funnel might help. Fill the tubing as completely as you can, but don’t worry about having the water go end to end. A gap at either end is okay.
Take out the air bubbles by lifting the center of the hose and feeding the air bubble through.
You are ready to measure!

One person stands with their side of the bunyip at one area you want to measure, and the other person stands at the other. You don’t need to make the tubing lift off the ground; it will accurately measure with the tubing in almost any position. The water in the tubing will bob around; tap the top of the tubing with your finger to help it settle faster.

Then take the readings from each post. Subtract the readings and you will get the distance in elevation between the two points. For instance, if the water level on one post is at the 19″ mark, and the water level on the other post is at the 7″ mark, then there is a 12″ difference in elevation between the two points. So easy!
If you are building swales on contour, keep moving one side of the bunyip until you find a spot where both readings are even, then mark those spots and repeat farther on. In this way you can find what land is level.
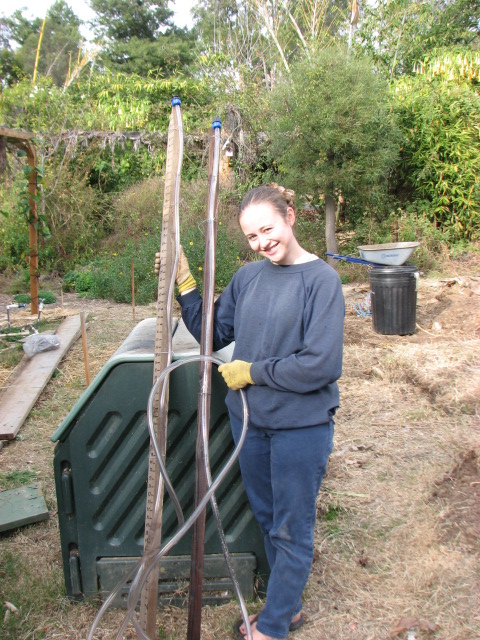
My daughter and I used our bunyip today to measure the change in elevation in our vegetable bed. We won’t be leveling the bed itself, but we will be digging deep, level swales, and we now know just how radically, and in which direction, our slope lies. This reaffirms what our eyes tell us about how rainwater flows across the veggie area and therefore how we’re to dig the swales to best catch rainfall.
Best of all, bunyips can be quickly disassembled and the parts used for other projects, or emptied and carried to other locations. Just add water, and you get a bunyip!