- Gardening adventures, Permaculture and Edible Forest Gardening Adventures, Recipes, Seeds, Vegan, Vegetables, Vegetarian
Glorious Beet Greens
 Did you know that beet greens are gloriously edible? That they are tender, not bitter, mild, easily cooked and full of nutrition? As I was never a beet lover, I didn’t know that either. I’ve loved Swiss chard with its slight bitterness, intense flavor,
 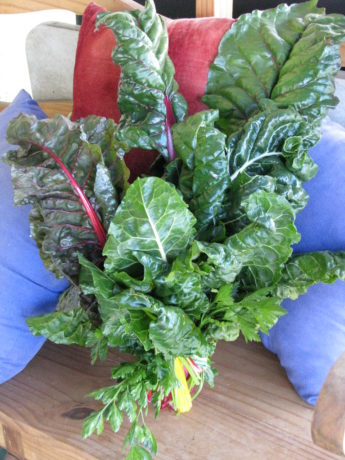 and huge leaves
  but I wouldn’t go near a beet until a few years ago. I would make vegetarian borscht (Russian beet soup) for my father but never taste it and hope that it came out well. Then I was gifted with a jar of pickled beets and I had to try them to not insult the giver… and I liked them. Strangely, pickled beets go really well with curry. So Miranda and I grew beets, and let some go to seed.
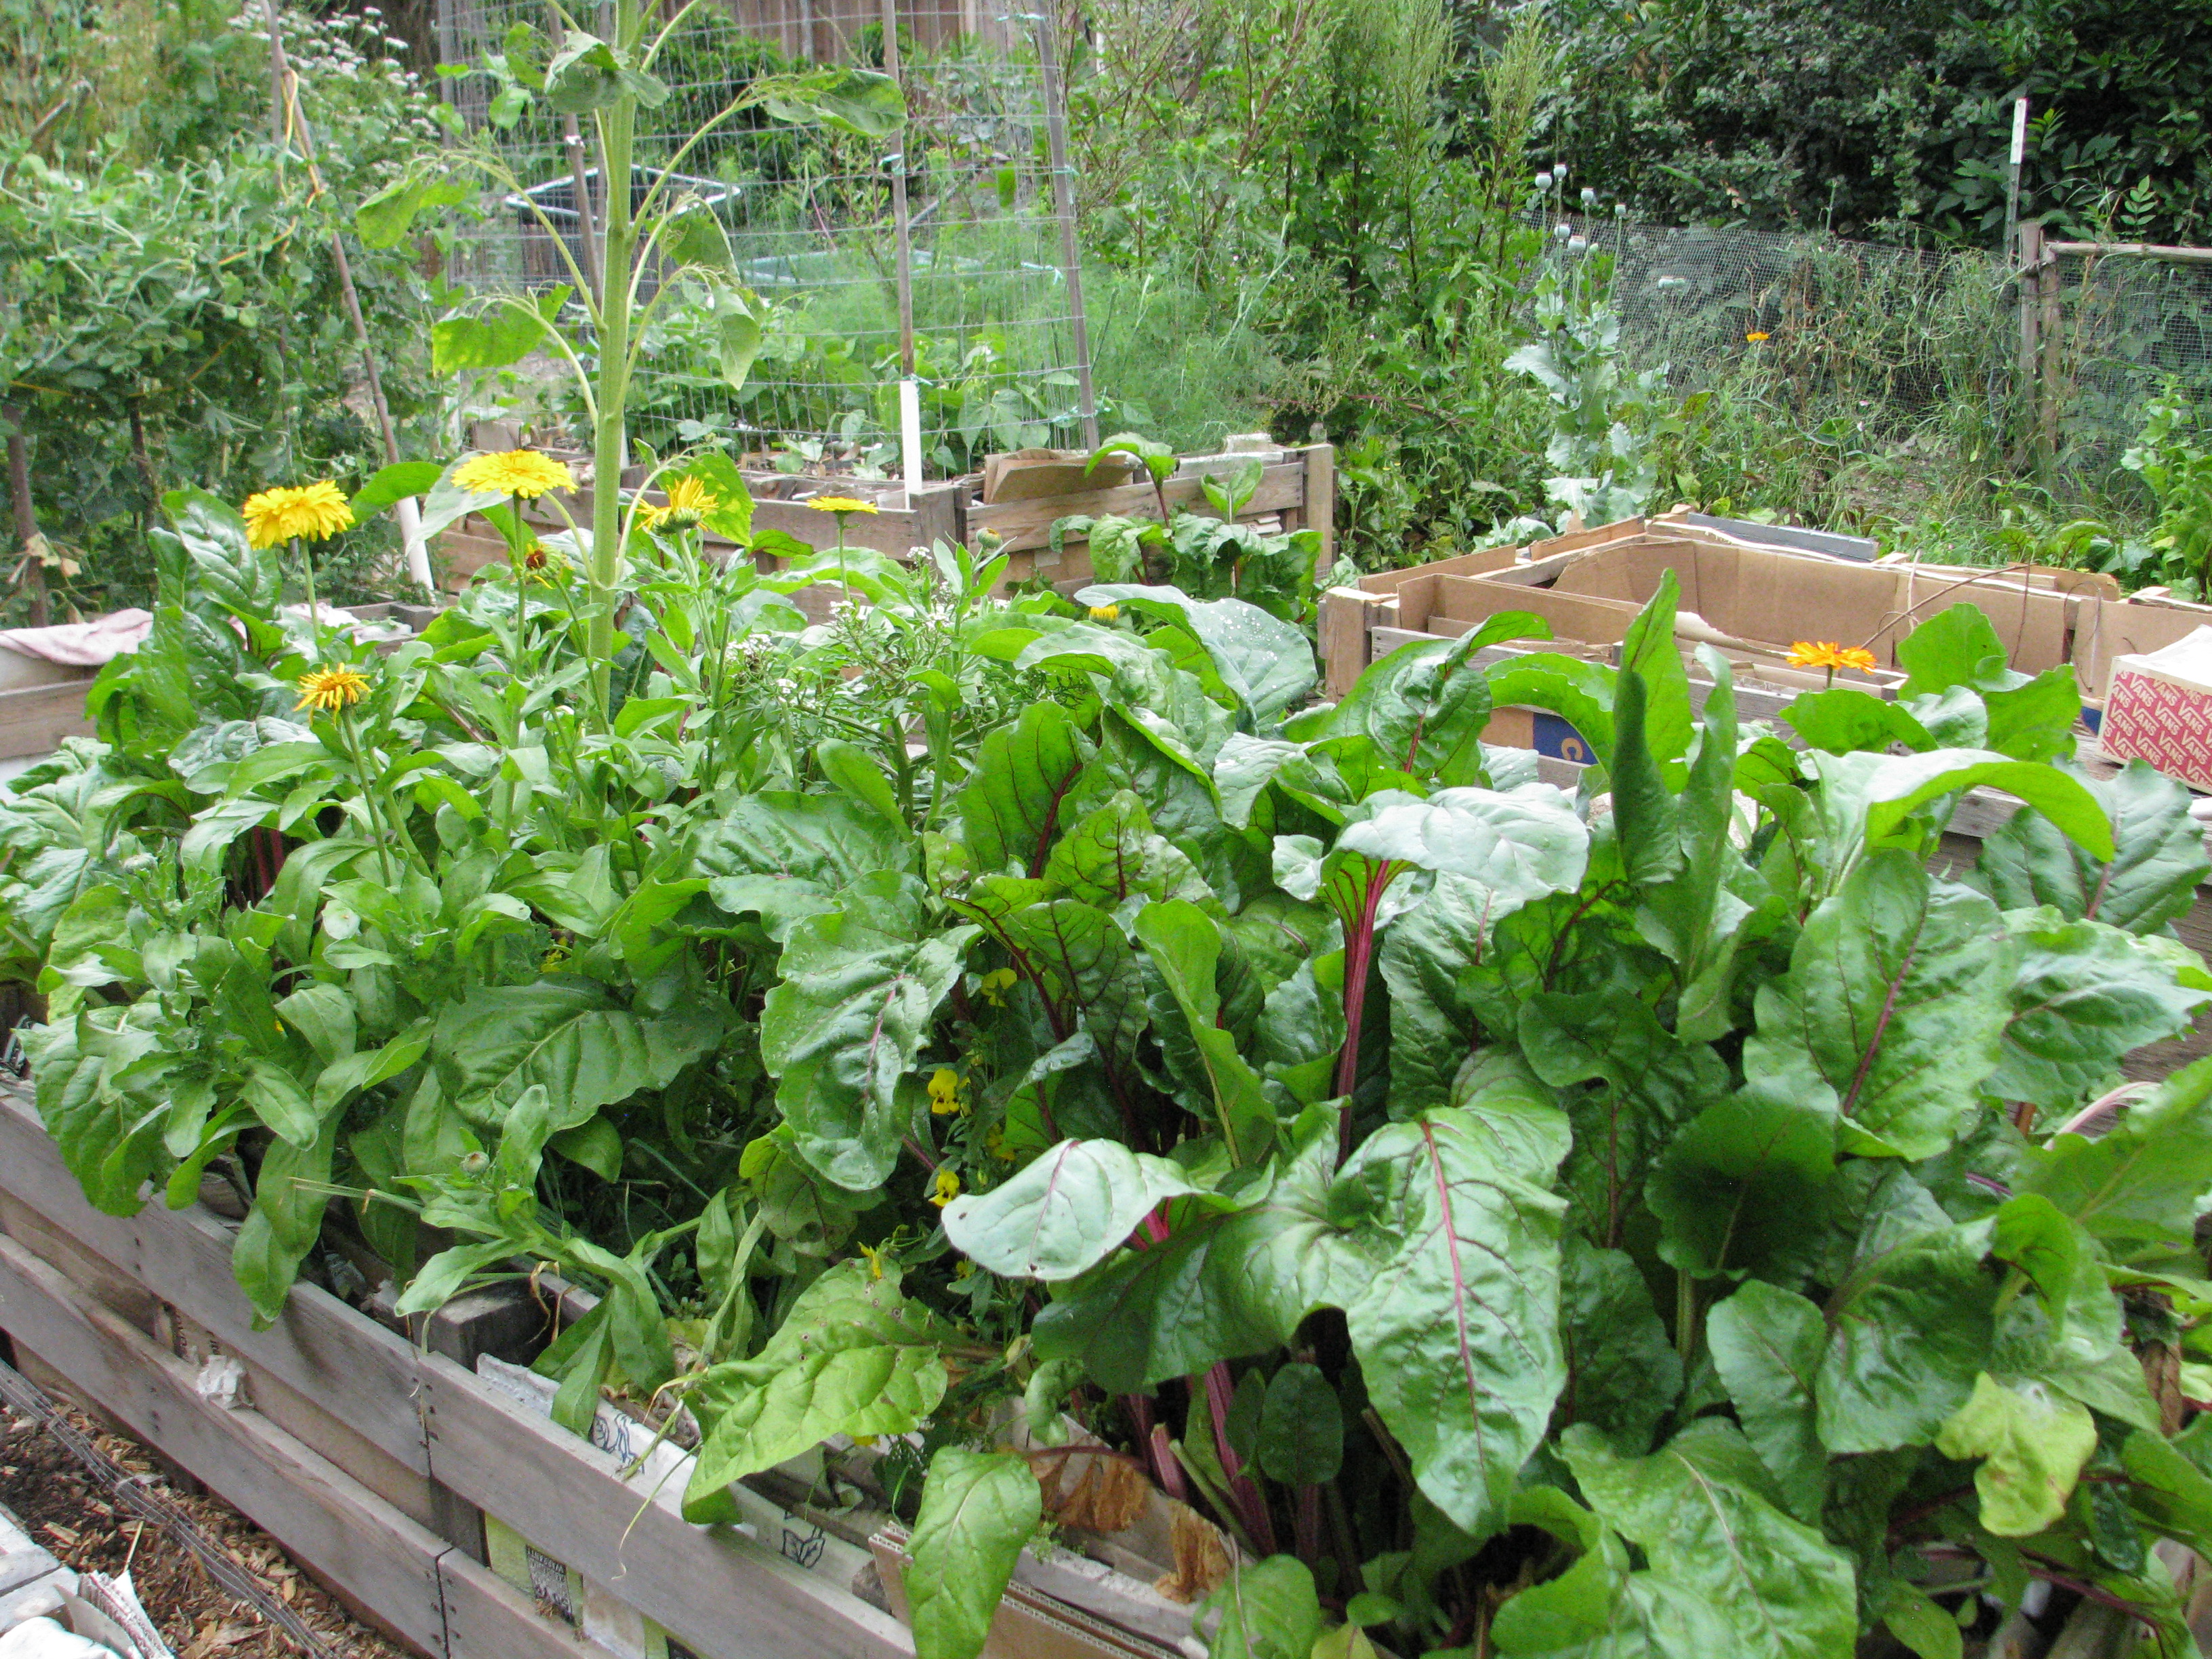
 This year we had hundreds coming up in the garden.
 Good thing that we found out about the greens. Now I’d grow beets just for their greens and pull some early for the root. Just keep cutting the greens and the beet root will continue to produce leaves, although the root will grow large and too tough to eat. Then allow it to go to seed.
 We planted many different kinds of beets, and although the roots tasted a little different the tops all tasted just as good. We also planted sugar beets, and they were so very sweet and yet earthy that I really didn’t care for them as a vegetable. My favorite beet root is chioggia which as lovely red circles when sliced. We purchased all of our beet seeds from Baker Creek Organics.
Beets have deep tap roots, therefore they are excellent ‘mining’ plants in a plant guild. They bring nutrients up from deep in the soil, and what leaves you don’t eat can be put back on or in the ground to create topsoil.
Beet greens can be torn up and put into a salad raw or used in place of lettuce on a sandwich. To cook beet greens, wash and tap off excess water, tear up and put into a medium hot pan that has a little olive oil coating the bottom. Stir until wilted. You can eat them from this point as they are not stringy. If the leaves are older I’ll put a little more water in if needed, turn down the heat, cover the pan and let the leaves steam for a few minutes. You don’t need salt or salty broth as the leaves have a strong enough taste. Eat them with vegan butter as a side dish, stir them into omelettes or frittatas, or use them any way you would spinach.
Freezing beet greens is easy. Wash them, shake off excess water, and put into freezer bags. They aren’t mushy black when thawed and cooked.
Grow your extra organic beets and leave some of them just for harvesting greens. You’ll want to fill your yard and your plate with them!
- Arts and Crafts, Books, Breads, Cake, Dessert, Fruit, Giving, Herbs, Perennial vegetables, Permaculture and Edible Forest Gardening Adventures, Recipes, Sauces, Seeds, Special Events, Spices, Vegan, Vegetables
Finch Frolic Marketplace, Revisited
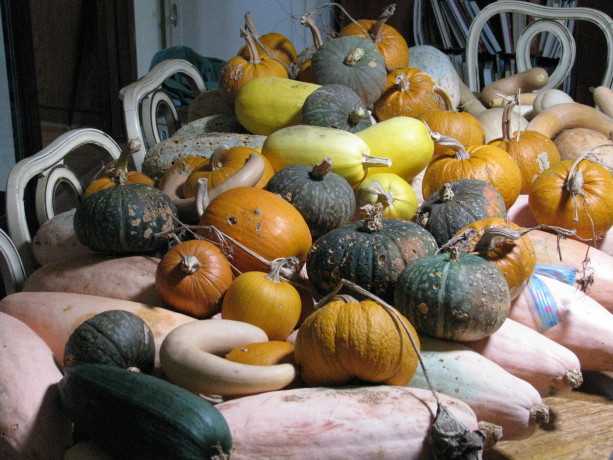
Wonderful, tasty winter squash of all kinds! Due to popular demand, we’re having one more short Marketplace this Saturday, 9 – 1.
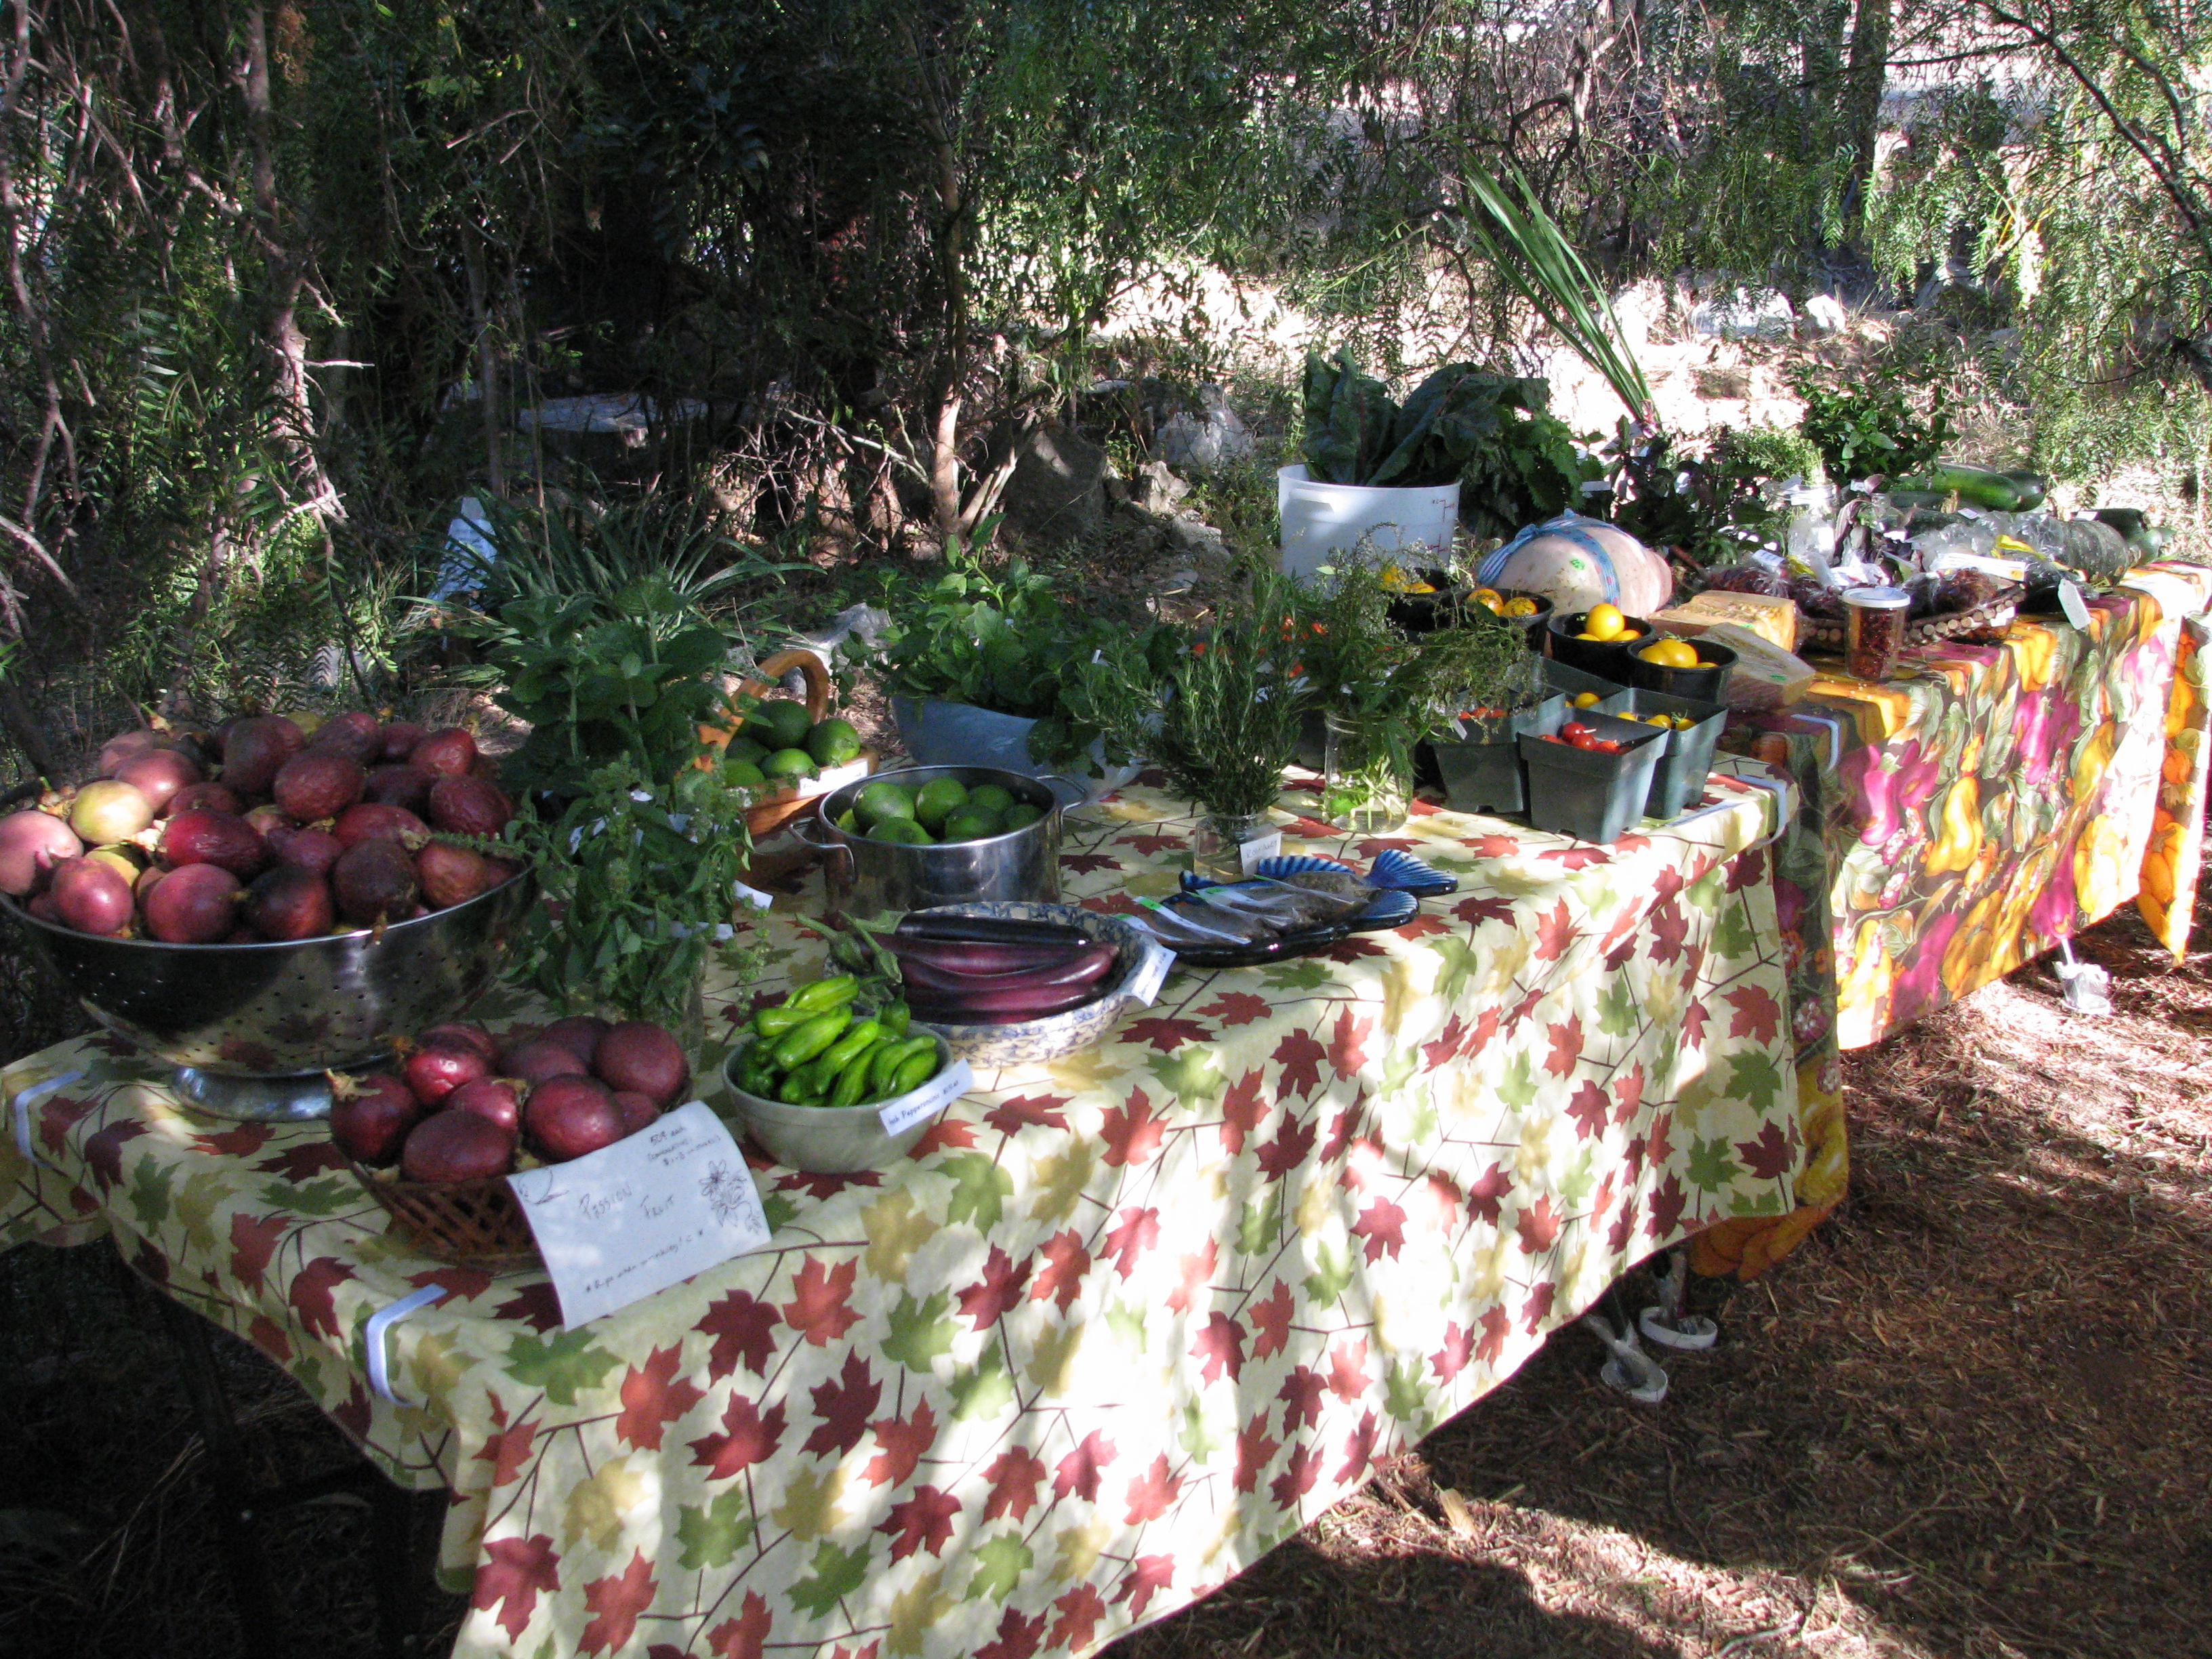
Join us on Saturday, November 29nd from 9-1 for the annual Finch Frolic Marketplace, the Extended Version! We’ll have for sale fresh and prepared foods straight from our permaculture gardens. All are excellent gifts, or will grace your holiday table. We’ll have the much-desired Pomegranate Gelato again, and new this year, Passionfruit Gelato! Squash, fruit, veg, preserves, passionfruit curd, baked goods, and much more.
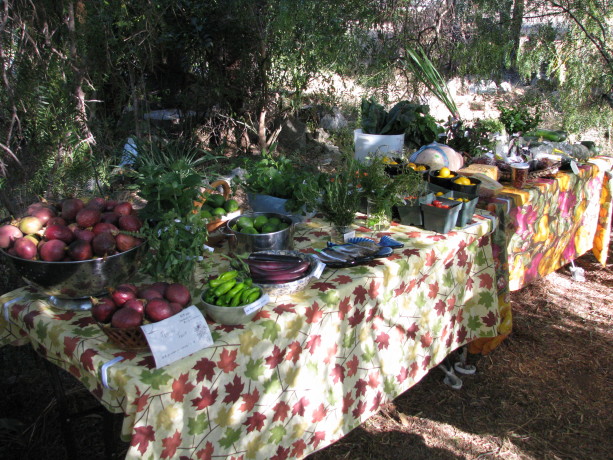
Herbs, veggies, frozen juice, gelatos, curds, jams, preserves… and much more! Finch Frolic Garden is located at 390 Vista del Indio, Fallbrook, CA.
Directions:
Finch Frolic Garden is open by appointment only for tours, lectures and other activities. The address is 390 Vista del Indio, Fallbrook, CA 92028-2548. Please call only if you are lost or delayed; we use our house phone only and are often not inside. Please use the email above for any other communication.
From the North (Temecula and above): take 1-15 South to Exit 51 and turn right. Make the next right onto E. Mission Rd/County Hwy-S13. In .8 of a mile turn left onto E. Live Oak Park Rd. In 1.6 miles turn right onto Alvarado St. In .7 miles at the top of the hill turn left onto Vista Del Indio, at Roja’s Succulents. Make the very first right; 390 is at the end to the left.
From the South (Escondido and below): take I-15 North to Exit 51 and turn left over the freeway. Make the next right onto E. Mission Rd/County Hwy-S13. In .8 of a mile turn left onto E. Live Oak Park Rd. In 1.6 miles turn right onto Alvarado St. In .7 miles at the top of the hill turn left onto Vista Del Indio, at Roja’s Succulents. Make the very first right; 390 is at the end to the left.
From the West (I-5): take CA-76 East, Exit 54A and drive for 12.6 miles. Turn left onto S. Mission Road/County Hwy S13 for 4.1 miles. Turn right onto S. Stagecoach Lane (at the high school). In 2.8 miles turn right onto Alvarado St. At the top of the hill turn right onto Vista del Indio, at the Roja’s Succulents sign. Make the very first right; 390 is at the end on the left.
- Breads, Breakfast, Cake, Condiments, Dessert, Frosting, Permaculture and Edible Forest Gardening Adventures, Recipes, Sauces, Vegan, Vegetables, Vegetarian
Making Ethical Butter

Vegan butter! I’ve labeled myself an ‘ethical vegetarian’ for nearly two decades. I stopped eating animals when I became horrified at the dichotomy of having glue traps under the house to catch wild rats and mice (and any poor, poor animal that happened upon it, such as lizards. Glue traps are horrendously cruel. I hadn’t put them there.) and a cage with an exercise wheel and specialty food for ‘pet’ mice in the bathroom. Justice is a man-made effort, and by not eating animals I was no longer approving of mass torture by buying into it. Although I no longer ate animals, I have still indulged in animal products, namely dairy products. Slowly it has sunk in how badly animals are treated for those, too. As someone who loves cooking, it has been difficult for me to wean away from dairy products. Butter is especially difficult. Unlike hens who have been bred to continuously lay without needing the services of a rooster, dairy cows must be lactating to produce milk. Cows are usually artificially inseminated, then after giving birth their calves are replaced by milking machines. The calves are most often slaughtered for veal. This process is repeated until the cow is used up from the constant pregnancies and lactating, and then she is slaughtered. This horrible practice is disguised by advertisements showing happy cows grazing in fields. That is a fantasy. ‘Grass fed’ and ‘pasture raised’ are sly terms that give you an image that is nowhere near to the truth. Please read Michael Pollen’s Omnivore’s Dilemma to understand where your food comes from and why.
To find an acceptable butter substitute has been an expensive and frustrating endeavor. For awhile I used a dairy substitute from Trader Joe’s, who I swear keeps tabs on what I buy the most and then discontinues it. All other butter substitutes either taste horrible, can only be used for spreading, or more commonly contain palm oil. The sudden fad for palm oil has created extreme clearance for the growing of palm in the areas which are habitat for the orangutan; indeed, if we don’t curtail our consumption of palm oil quickly the orangutan will go extinct within our lifetimes.
I finally found a recipe for a butter substitute that works pretty well for both spreading and baking. It is made mostly of refined coconut oil. At this point coconut oil is sustainably produced – please make sure that you support companies that do so. Refined organic coconut oil has no flavor or scent; unrefined has a mild coconut flavor and a toasted coconut scent. If you are using a batch of this butter for baking where coconut flavor is desired, then use the unrefined.
This recipe is by no means my own. I found it and a detailed description of the science behind it at VeganBaking.net . There are several options listed and a lot of cooking science behind the butter.
The mouth-feel is amazingly creamy and satisfying. I used the basic recipe, Regular Vegan Butter, Coconut Oil Base. The recipe calls for curdling the soy milk, which will drive the butter flavor. I tried the full teaspoon of cider vinegar, then half cider vinegar and half coconut vinegar, then just half a teaspoon of coconut vinegar, and finally no vinegar, and thus no curdling, at all. I found for my taste that the vinegar flavor carried through and was much too dominant. Even at just half a teaspoon it was so noticeable to me that I didn’t like it on toast. It was good, however, when my daughter used it on sourdough and topped it with fresh avocado. The slight vinegar flavor enhanced the avocado deliciously.
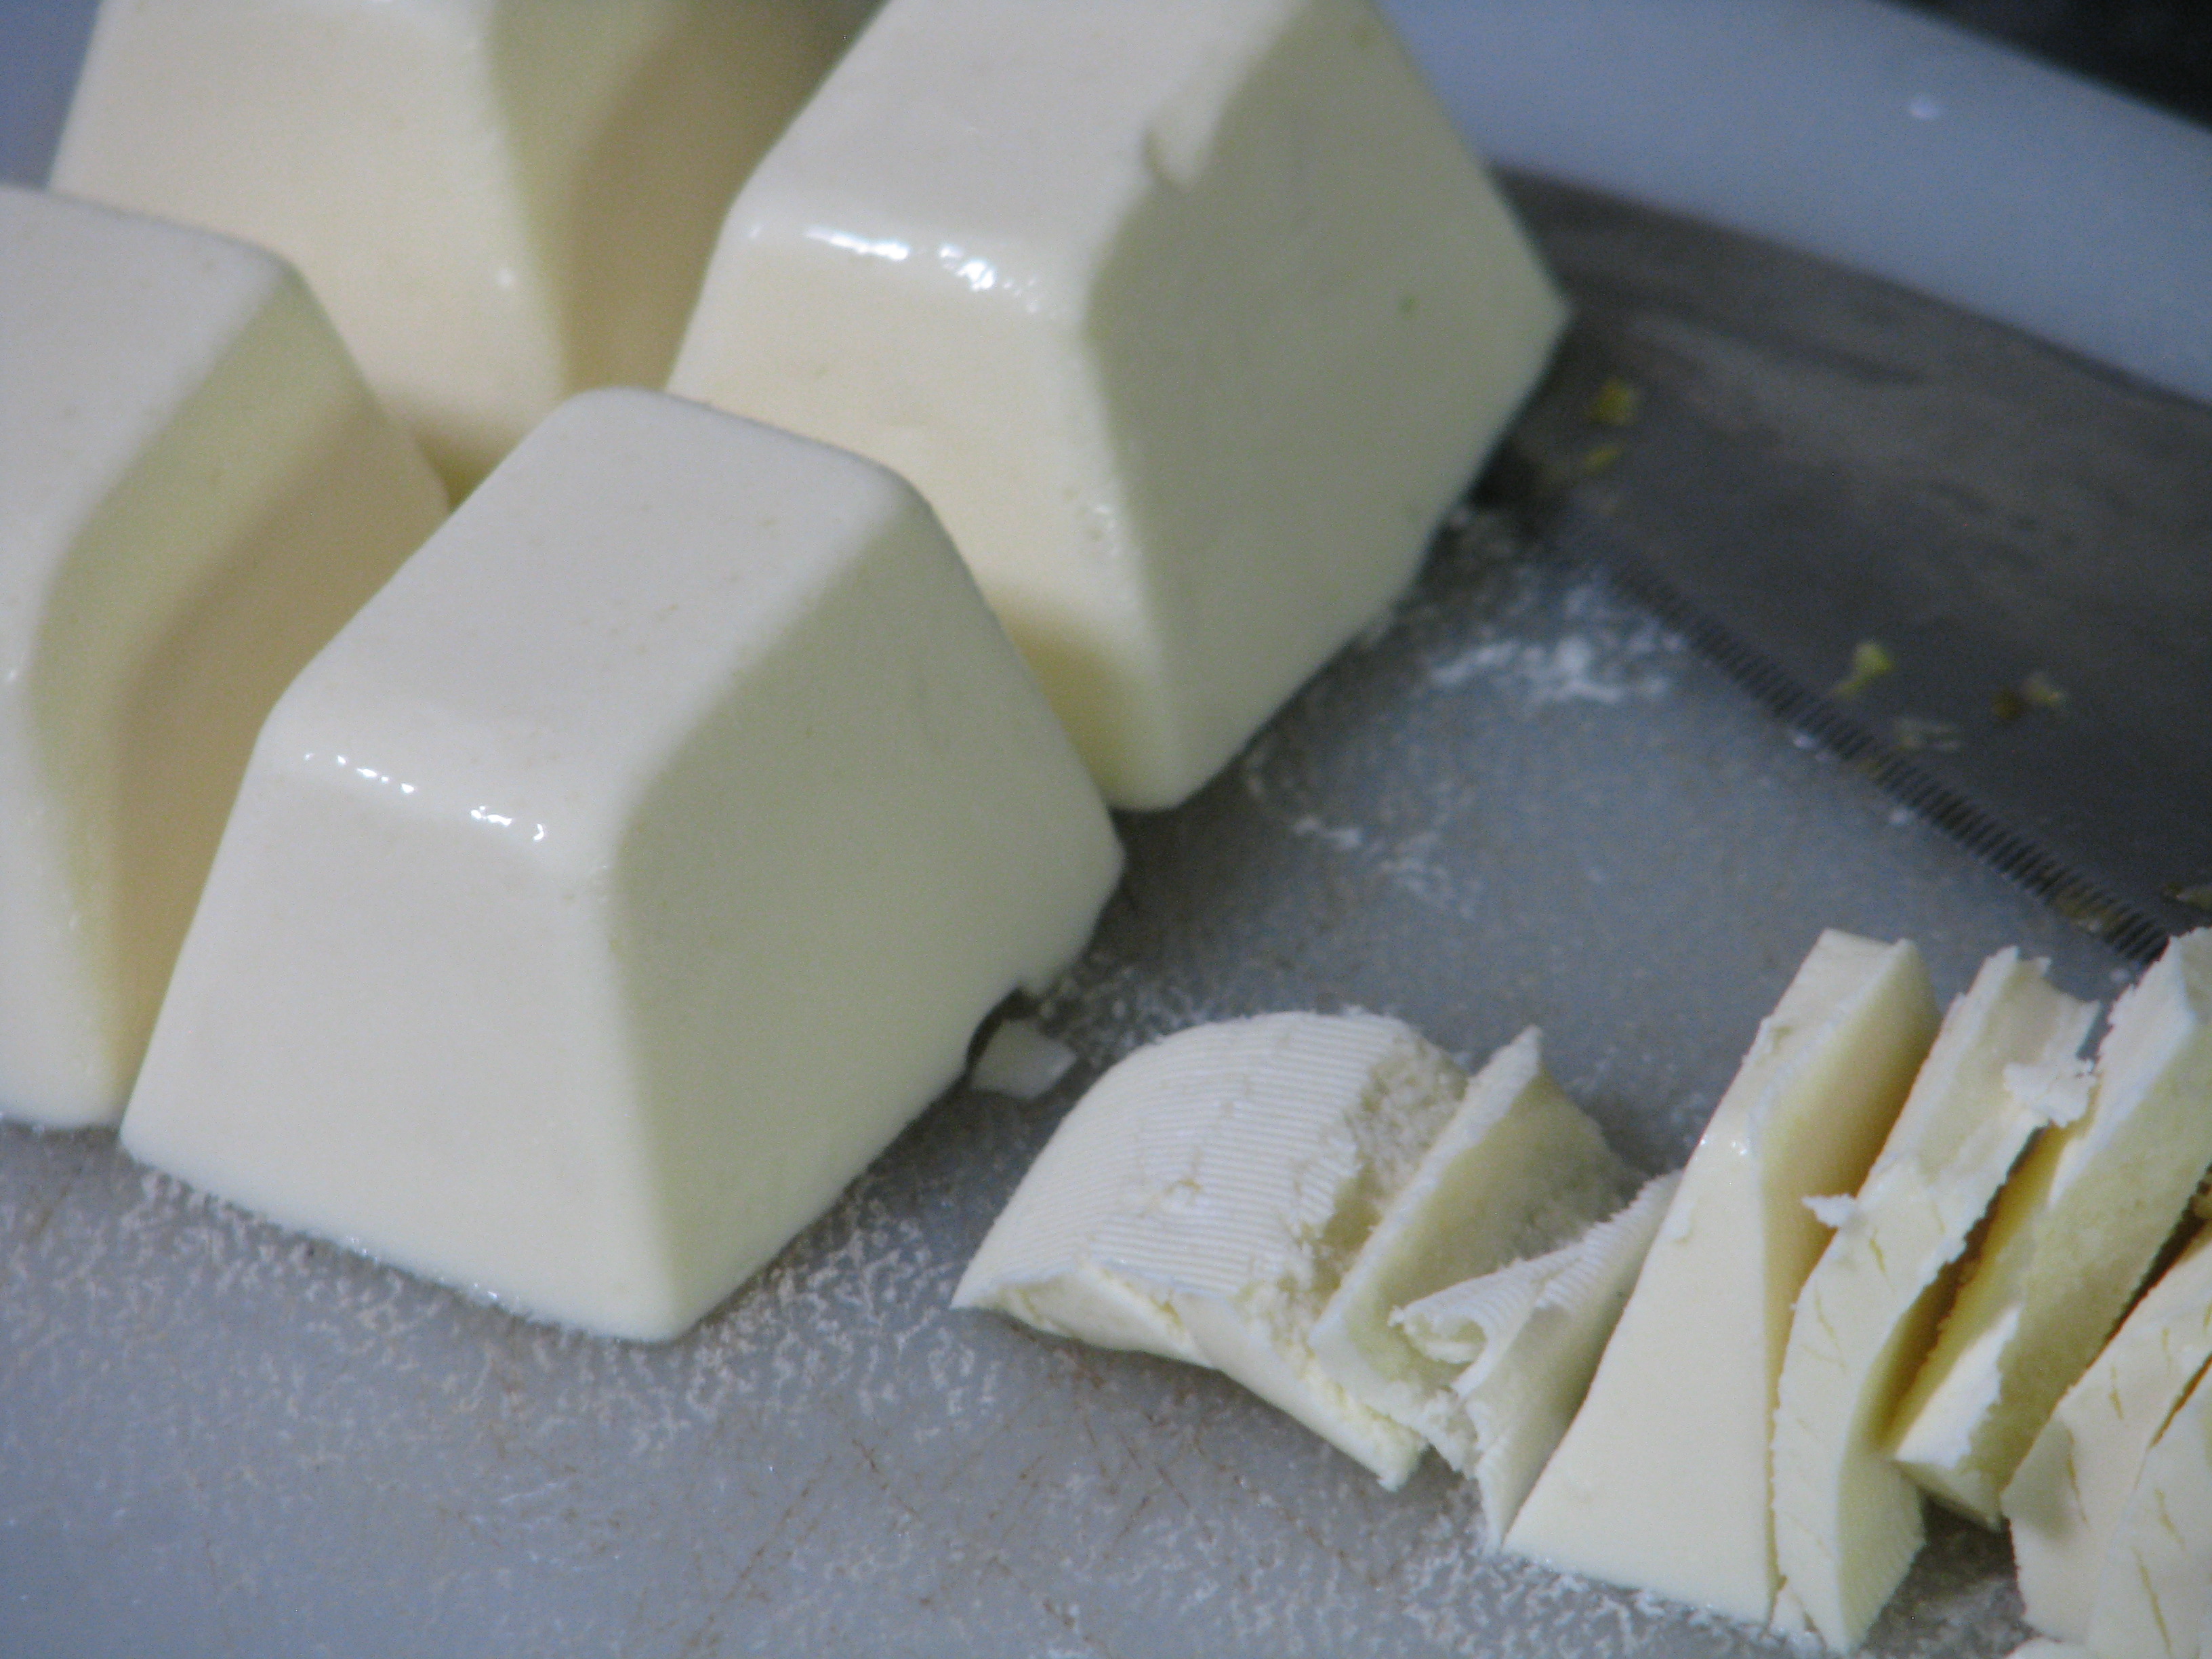
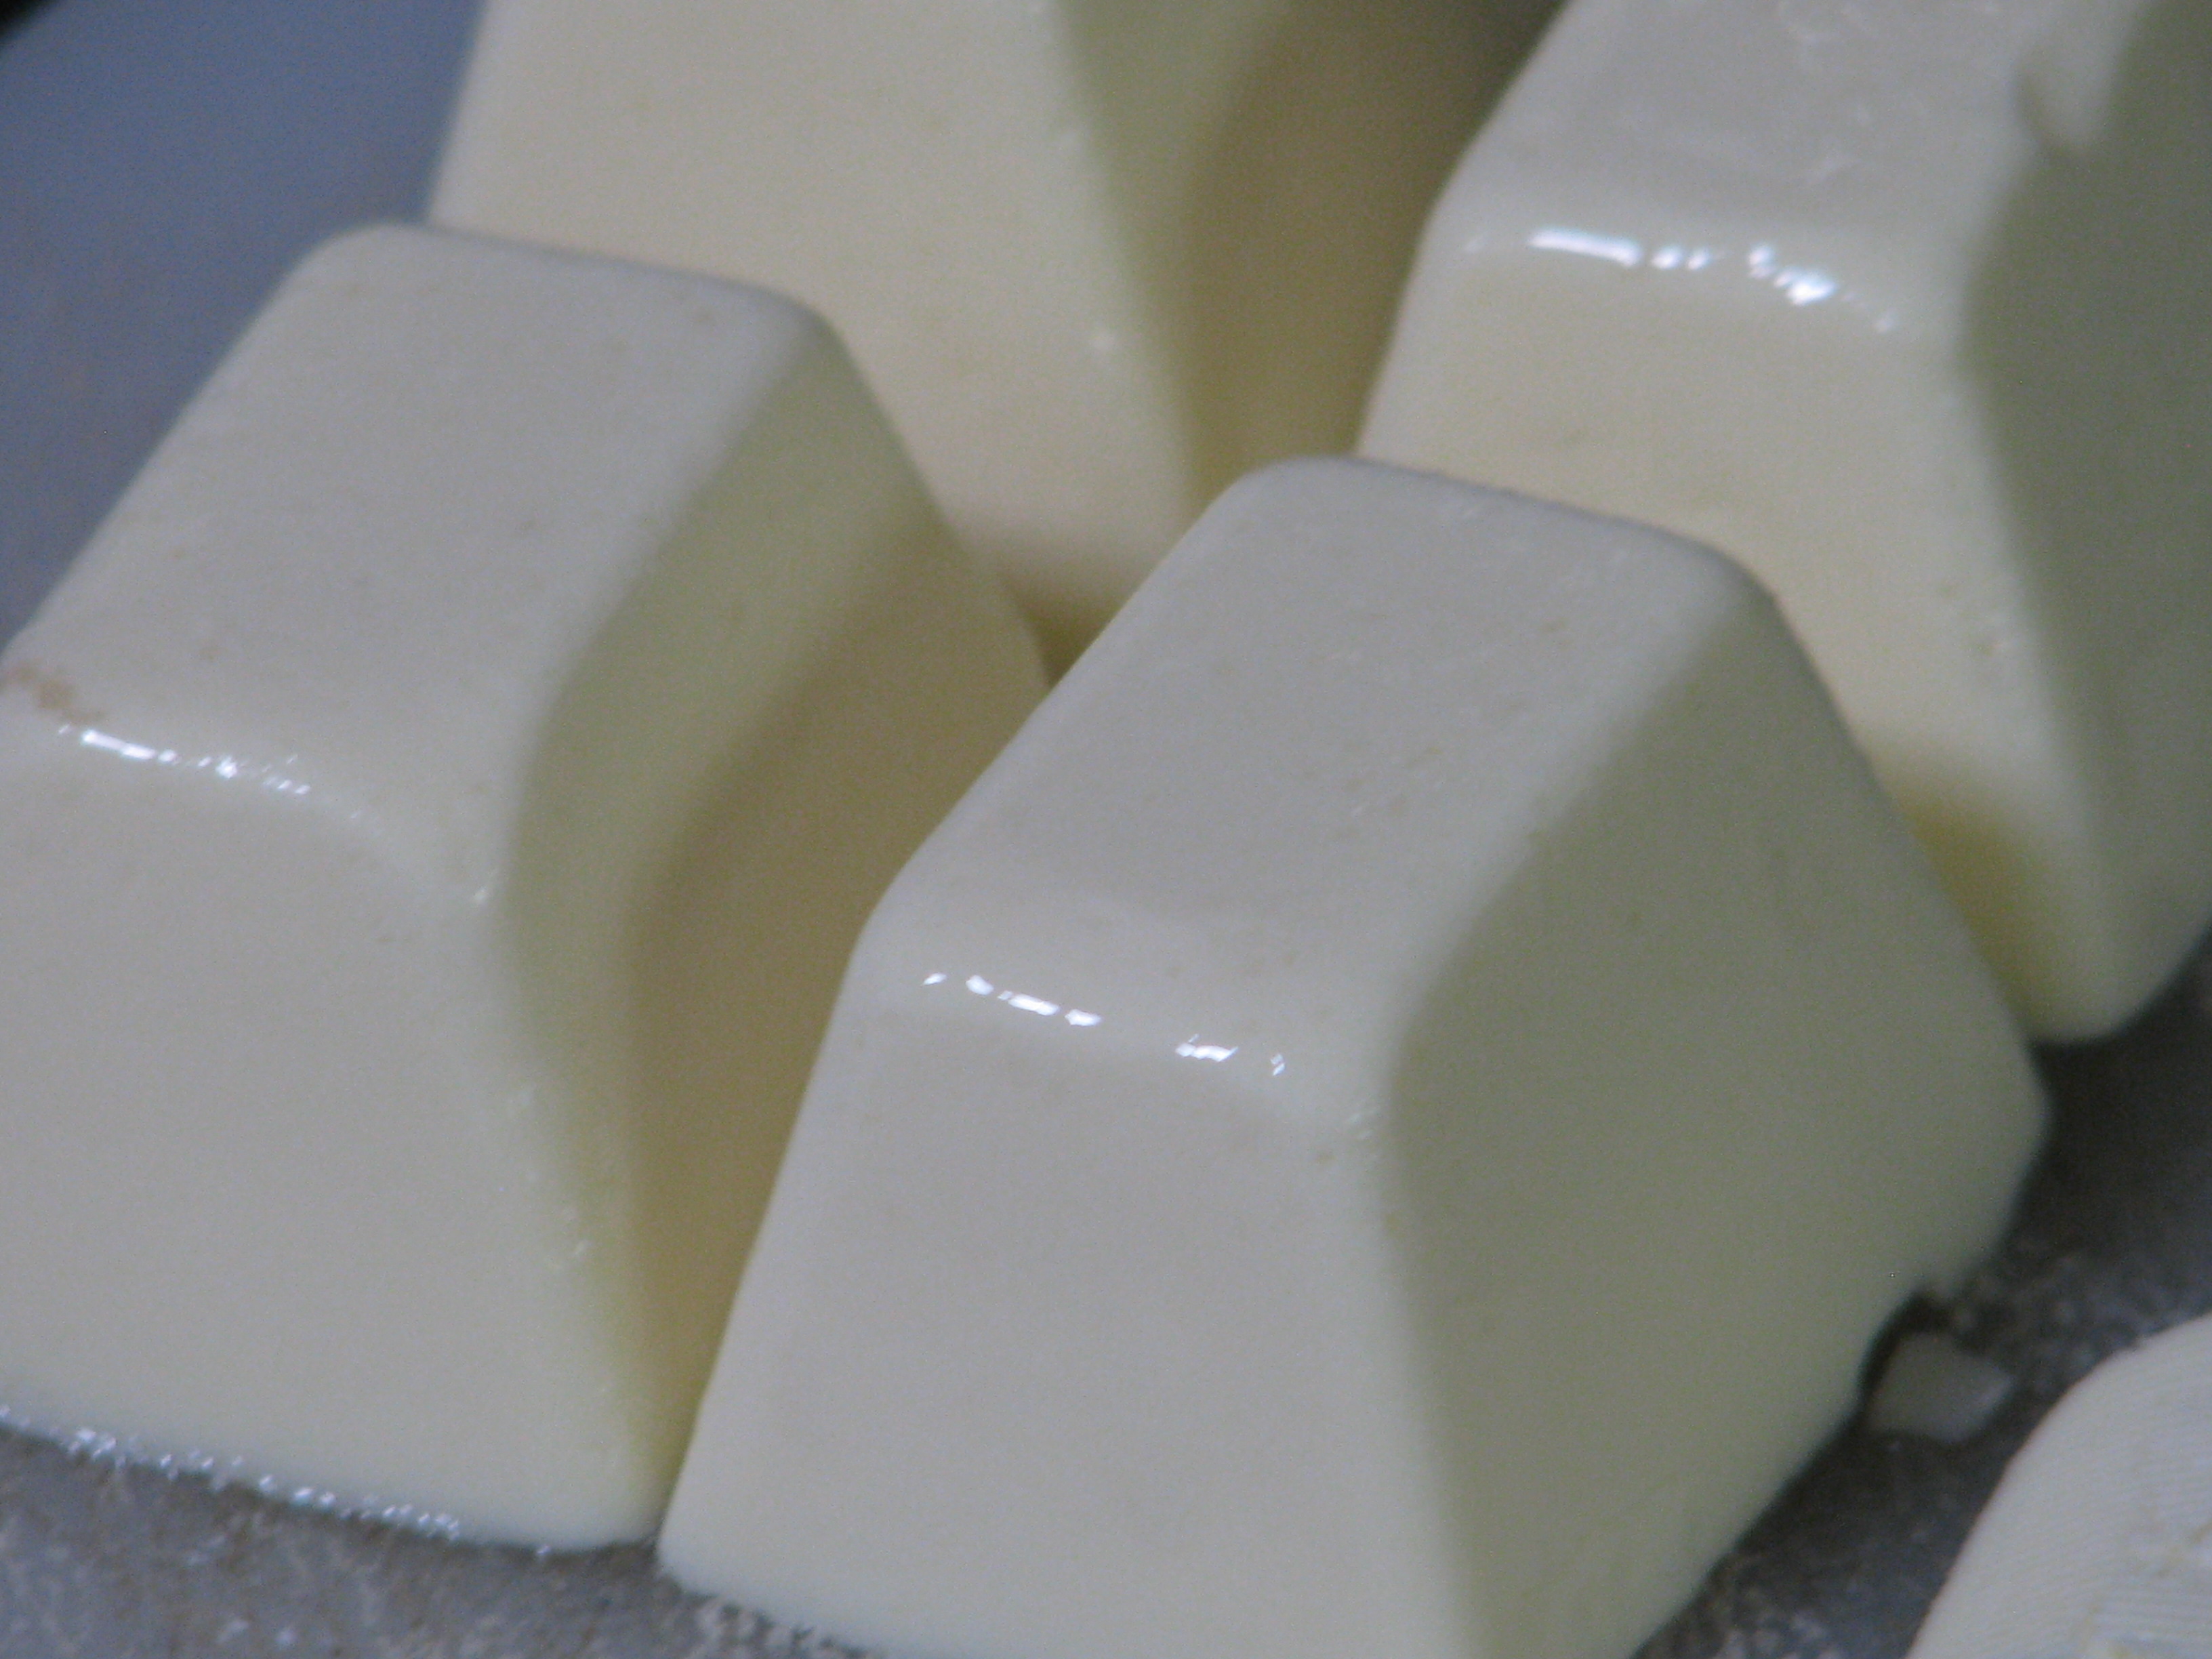
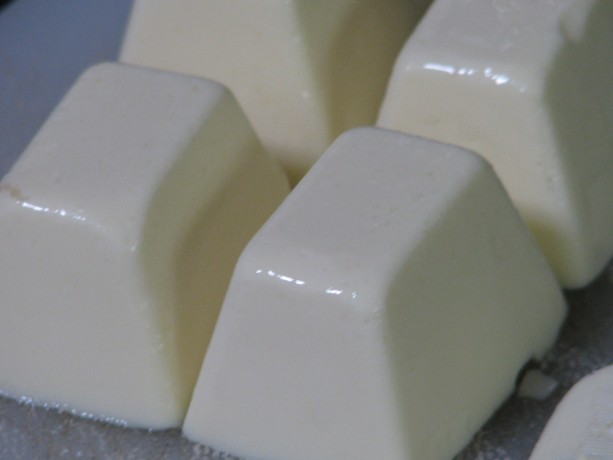
The batch I made without vinegar seemed perfect. The mouth-feel of this butter with or without the vinegar is creamy and all that a high-fat butter should be. It looks, cuts and spreads like butter. The flavor is creamy and very mild, almost like a slightly salted sweet butter. This was a winner for me. For the soy milk I used Trader Joe’s Organic Plain, which does have some sweetener in it. I’ll try with an unsweetened plain organic soy milk another time.
I keep my butter on the counter. I know that organic butter holds its shape better in the heat than processed butter, but both stay stable unless the temperature is in the 80’s. Coconut oil melts at 76F, and in my summertime Southern Californian kitchen, this vegan butter must be kept in the refrigerator. The butter is hard when needed, so the next batch I will take the author’s advice and swap out a tablespoon of coconut oil with regular oil to make it more spreadable.
I wanted to test the butter in cooking and baking. I melted it in a pan and cooked eggs and other breakfast items in it successfully. I used it on toast and on mashed potatoes with great success. The experiment with shortbread cookies went wrong, however, but I don’t think that that was the butter’s fault. These were lemon rosemary shortbread cookies, and contrary to my baking sense I followed the author’s (another blog) directions and didn’t sift the powdered sugar before adding it. There were lumps, therefore, in the batter and I mixed it extra to try and beat them out, which I believe was responsible for making the cookies tough. They were flavorful, but not crumbly. Oh well, I’ll just have to try again! The cookies rolled out, cut, and baked well, retaining their shape and performing as well as with cow’s butter.
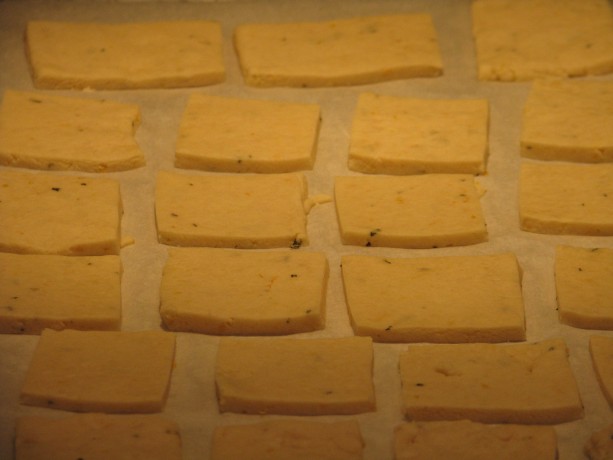
Shortbread didn’t spread using this butter, which was great. I don’t have a finished photo of the lemon-rosemary cookies because, well, they were eaten. As with all substitutions, there is always a difference and vegetarians and vegans have to embrace it. Of course fake bacon and ground ‘meat’ is not quite the same: the great part is that it is far more healthy for your body (lower fat, few preservatives if any, often organic, and not the pesticide-drenched and drugged animals that people eat) and doesn’t perpetuate the extreme cruelty to animals about which humans have become nonchalant. Yes, other animals aren’t kind when feeding off of other animals (those which aren’t vegetarians). Yet we as humans have the option the others don’t, to make eating choices.
Here is the basic revised recipe; please see the original blogpost on VeganBaking.net and give the options a try. I found xanthan gum from Bob’s Red Mill at my local grocery store, and liquid lecithin and coconut vinegar online through Amazon.com.
You can double or triple the recipe with no problem! Enjoy.
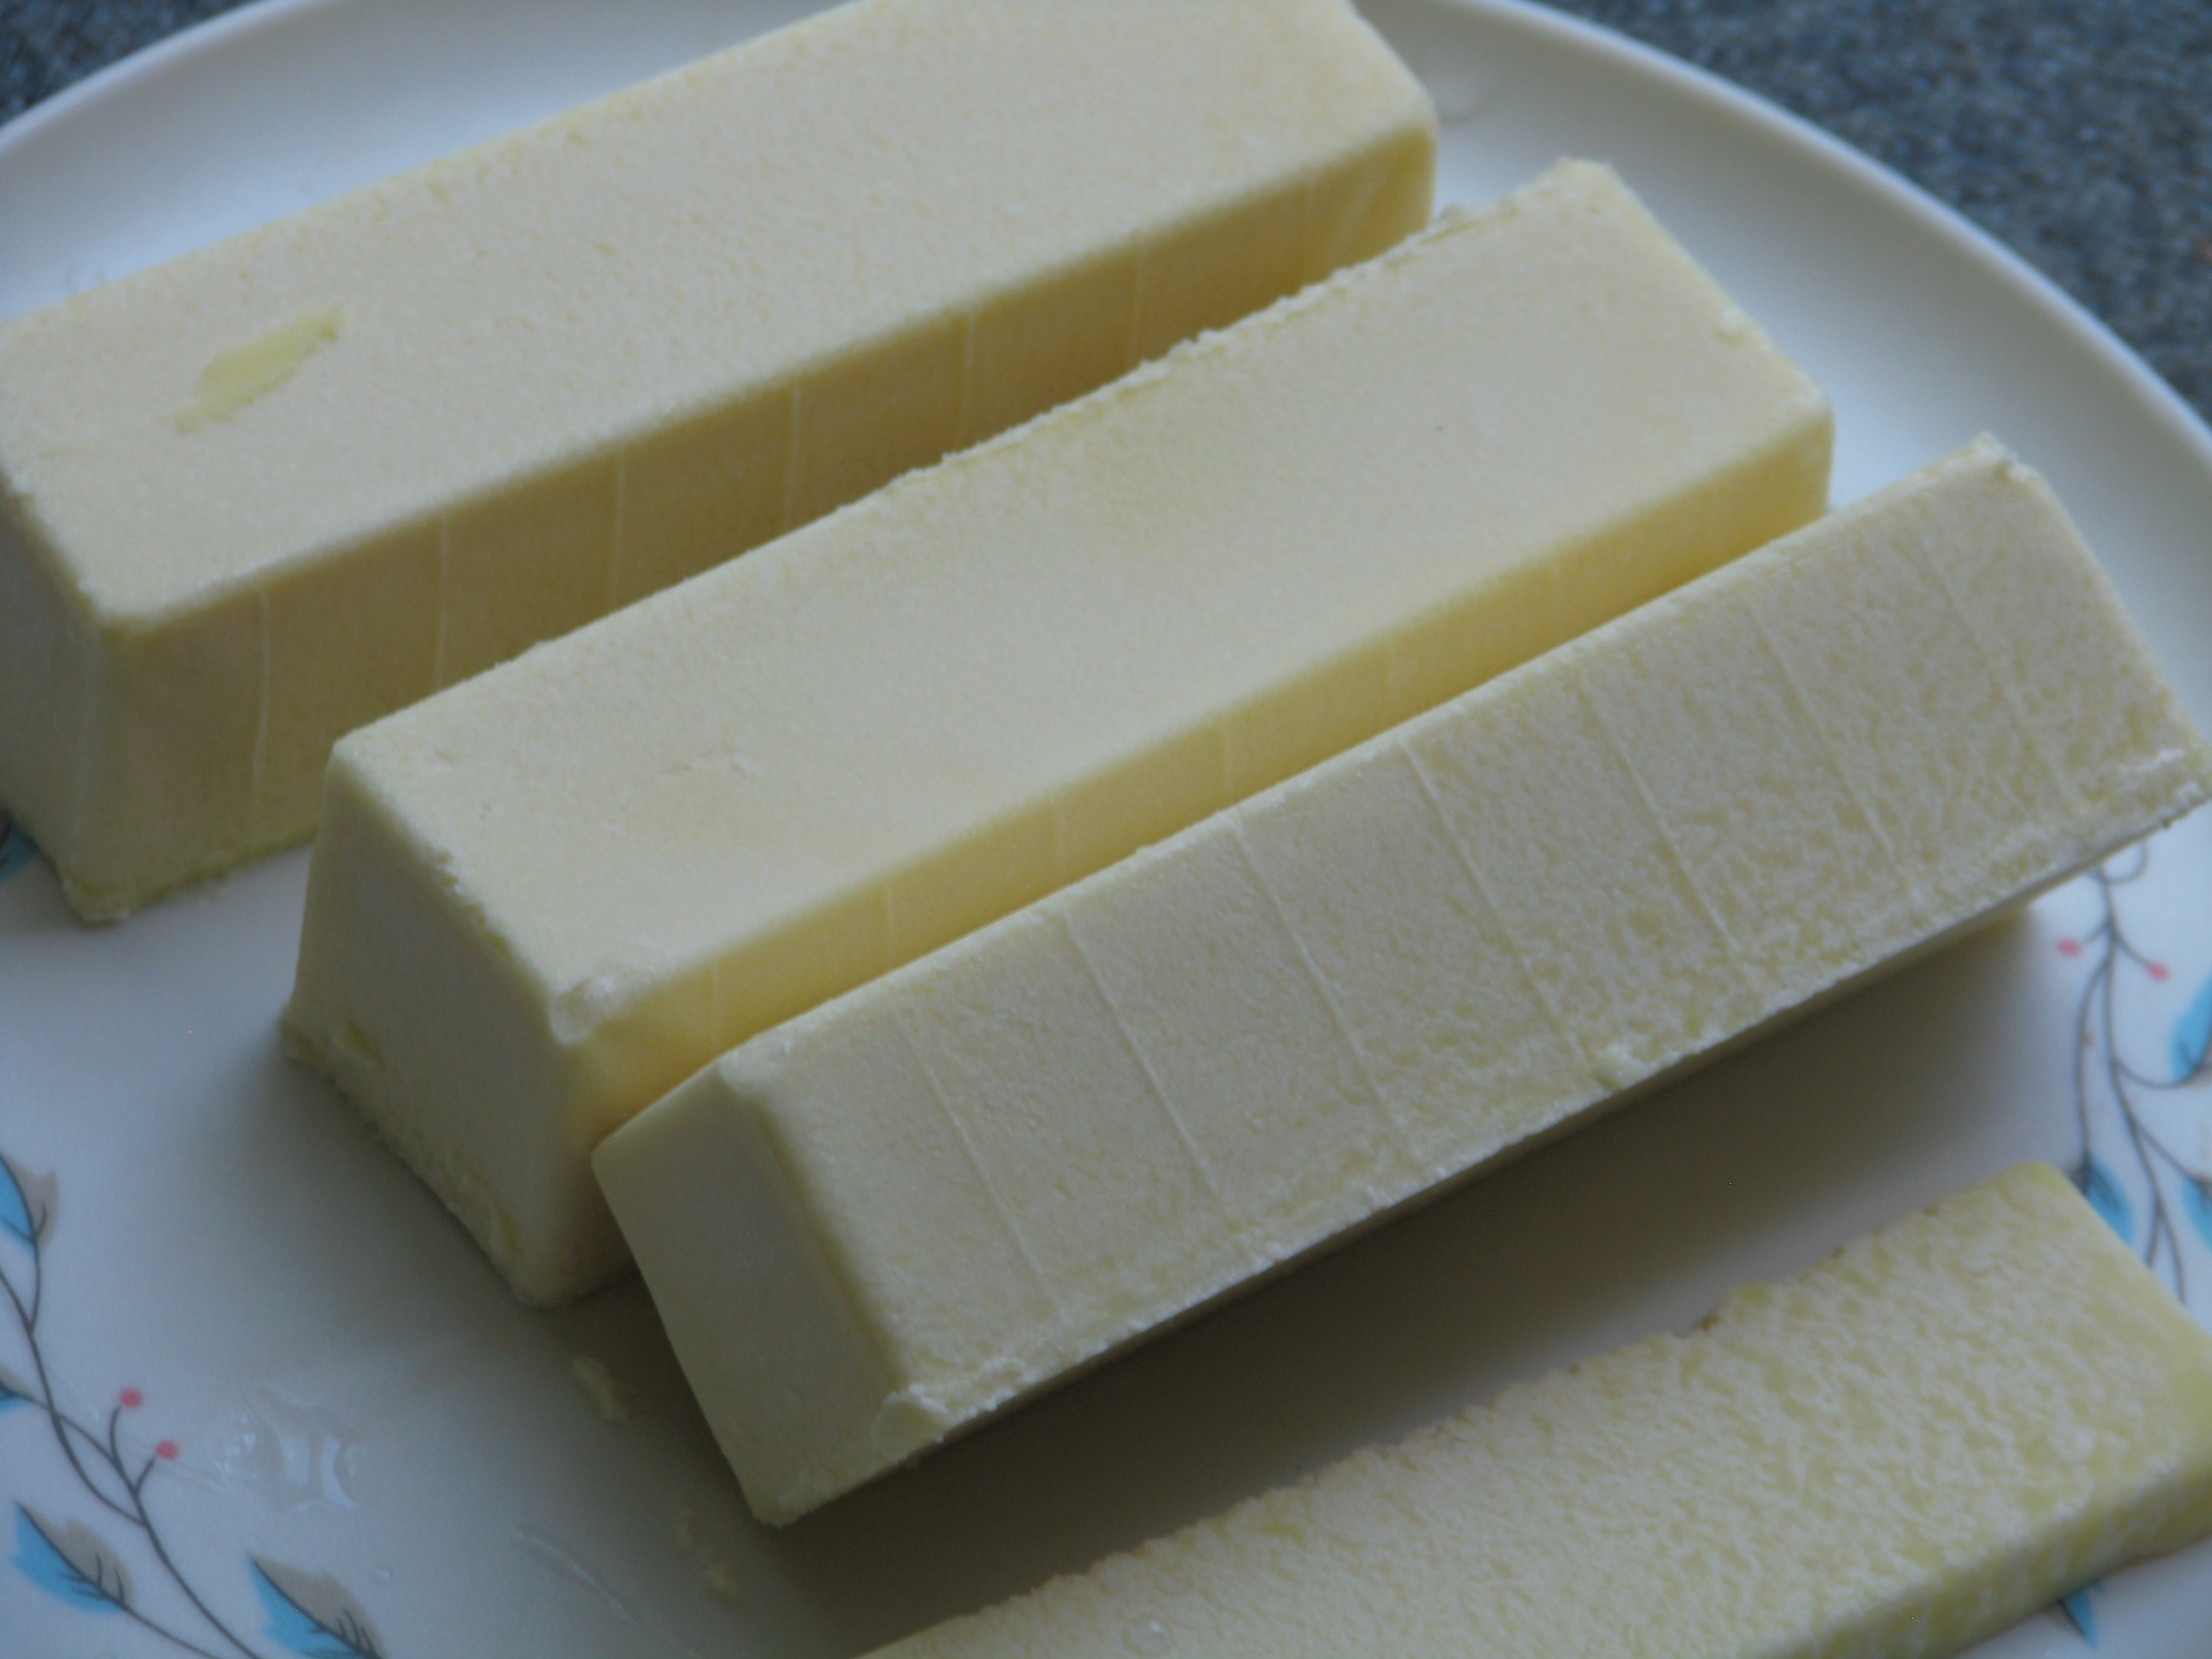
Recipe update: I’ve since made some changes to the recipe, exchanging some vegetable oil for some coconut oil for more spreadability, and adding a little more salt for a more satisfying (to me) taste when spread on toast. I’ve been using this butter for a month now, and have noted that: when melting in a hot pan it will brown faster than regular butter, so keep the temperature down, that it will melt and separate at room temperature (its summer now, so the kitchen is usually in the 70’s – in the winter it will be different) so I keep it in the refrigerator. I found butter stick molds that have the teaspoon markings along the side, so I’ve made 8x the original recipe and poured it into the butter molds, then wrapped each unmolded stick in wax paper and frozen them.
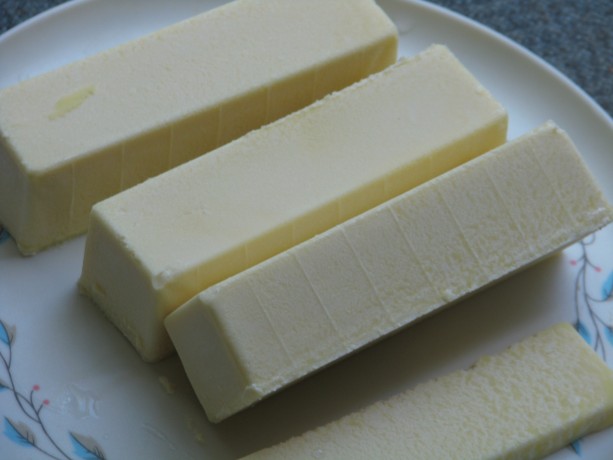
Vegan butter sticks with teaspoon markings along the side for ease in baking. I’ve also poured it back into the cleaned coconut oil jars and frozen them, keeping one in the refrigerator for unmeasured use. I’ve used it along with a non-dairy creamer in the Chocolate Ganache recipe and it is very chocolaty, but not as rich as the original. Part of that is due to the creamer; heavier creamer will produce creamier results, but in no way was it disappointing. It was very tasty, but not as heavy. When refrigerated it didn’t solidify as much as the other, so more chocolate might need to be added depending upon the type of creamer used but it was still spreadable and yummy.
Another Recipe Update:
I’ve been making the butter with unsweetened organic rice milk and it turns out well. At first it tasted too light to be satisfying, but when I had dairy butter at a restaurant it tasted greasy and heavy – my taste buds wanted the vegan butter! I found out that even when the kitchen is colder than the melting point of the coconut oil, it isn’t a good idea to leave the butter refrigerated because unlike dairy butter it will grow mold. The rice milk butter with the increased vegetable oil makes it perfectly usable from the refrigerator. I make sticks and freeze them in a freezer bag for baking and pour the rest into glass jars with screw-on caps for spreading. The jars are kept in the freezer until needed, then switched to the refrigerator. I’ve made biscuits, cookies, cakes, scones and breads with this butter, and with proper handling they all come out just fine. We offered both dairy and vegan butter to our holiday guests and they didn’t detect much of a difference. Since vegan butter is so much lower in calories, and coconut oil is so good for you, I don’t have to hesitate to use it. It is actually part of my weight maintenance program!
Ethical ButterAuthor: Mattie, at VeganBaking.netRecipe type: CondimentCuisine: VeganPrep time:Cook time:Total time:A wonderful vegan butter with no palm oil, but lots of options. My version is without curdling the soy milk. Please see the original excellent post for more explanations and options.Ingredients- ¼ cup + 2 teaspoons organic plain soy milk
- ¼ + ⅛ teaspoon salt (I increased the total salt to ½ t. for spreading butter)
- ½ cup + 2 Tablespoons + 1 teaspoon (130 grams) refined coconut oil, melted to room temp. (For more spreadability, I used ½ cup coconut oil and changed the 2T and 1 t to vegetable oil, along with the following 1 T for a total of 2 Tablespoons and 1 teaspoon vegetable oil.)
- 1 Tablespoon vegetable oil or light olive oil
- 1 teaspoon liquid soy lecithin or liquid sunflower lecithin or 2 ¼ teaspoons soy lecithin granules
- ¼ teaspoon xanthan gum or ½ + ⅛ teaspoon psyllium husk powder (I used xanthan gum)
Instructions- Combine soy milk and salt in a food processor or blender.
- Melt the coconut oil until it is just room temperature and barely melted.
- Add the coconut oil and the rest of the ingredients to the soy milk.
- Blend or process for about 2 minutes on low.
- Pour into ice cube trays, or into butter molds or trays.
- Freeze until firm, about an hour.
- Serve.
- Keep wrapped in refrigerator for a month, or frozen for a year.
- Makes one cup.
- Animals, Birding, Chickens, Gardening adventures, Heirloom Plants, Humor, Permaculture and Edible Forest Gardening Adventures, Photos, Ponds, Reptiles and Amphibians
Happy Easter!

Heirloom irises from my good friend Jean are blooming. 
A Western fence lizard suns and guards his territory atop a clary sage leaf. See the flash of blue under his chin to attract the ladies? 
This green calla lily is gorgeous. 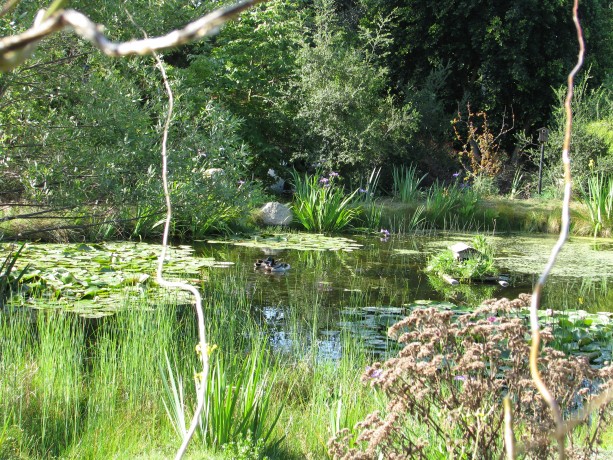
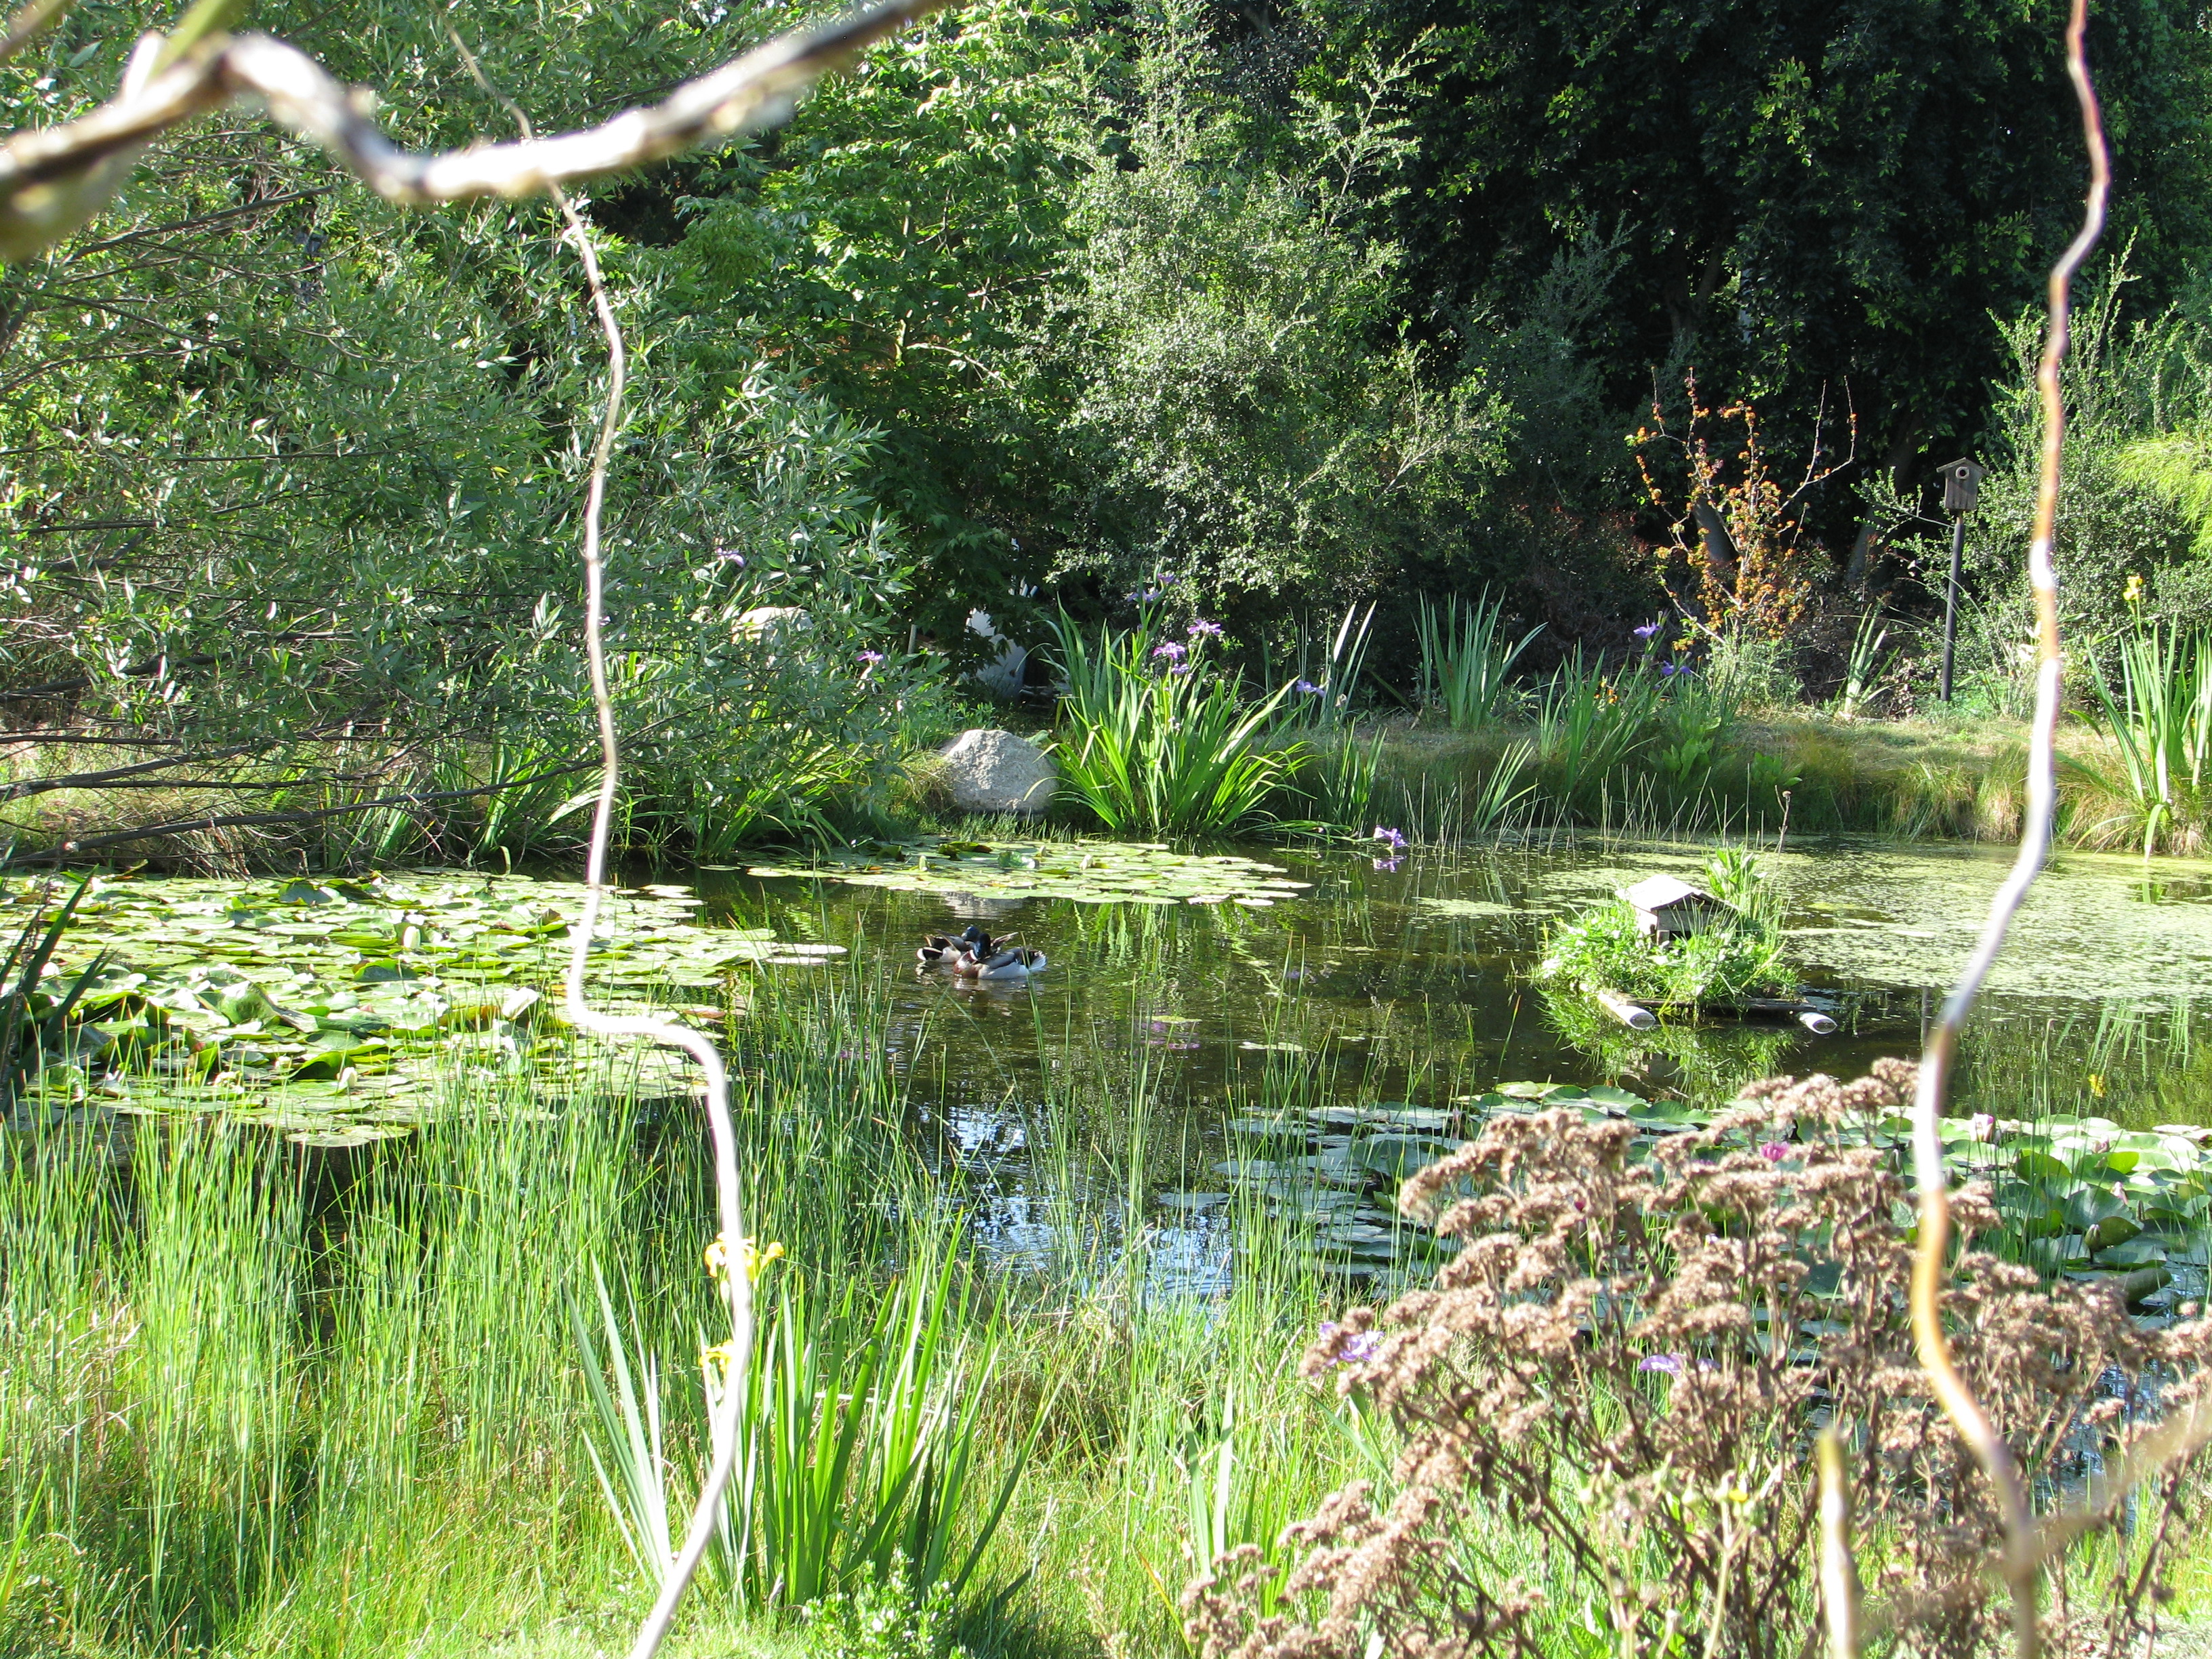
Framed by curly willow from the Withy Bird Hide, two drakes swim in the pond on Easter morning. 
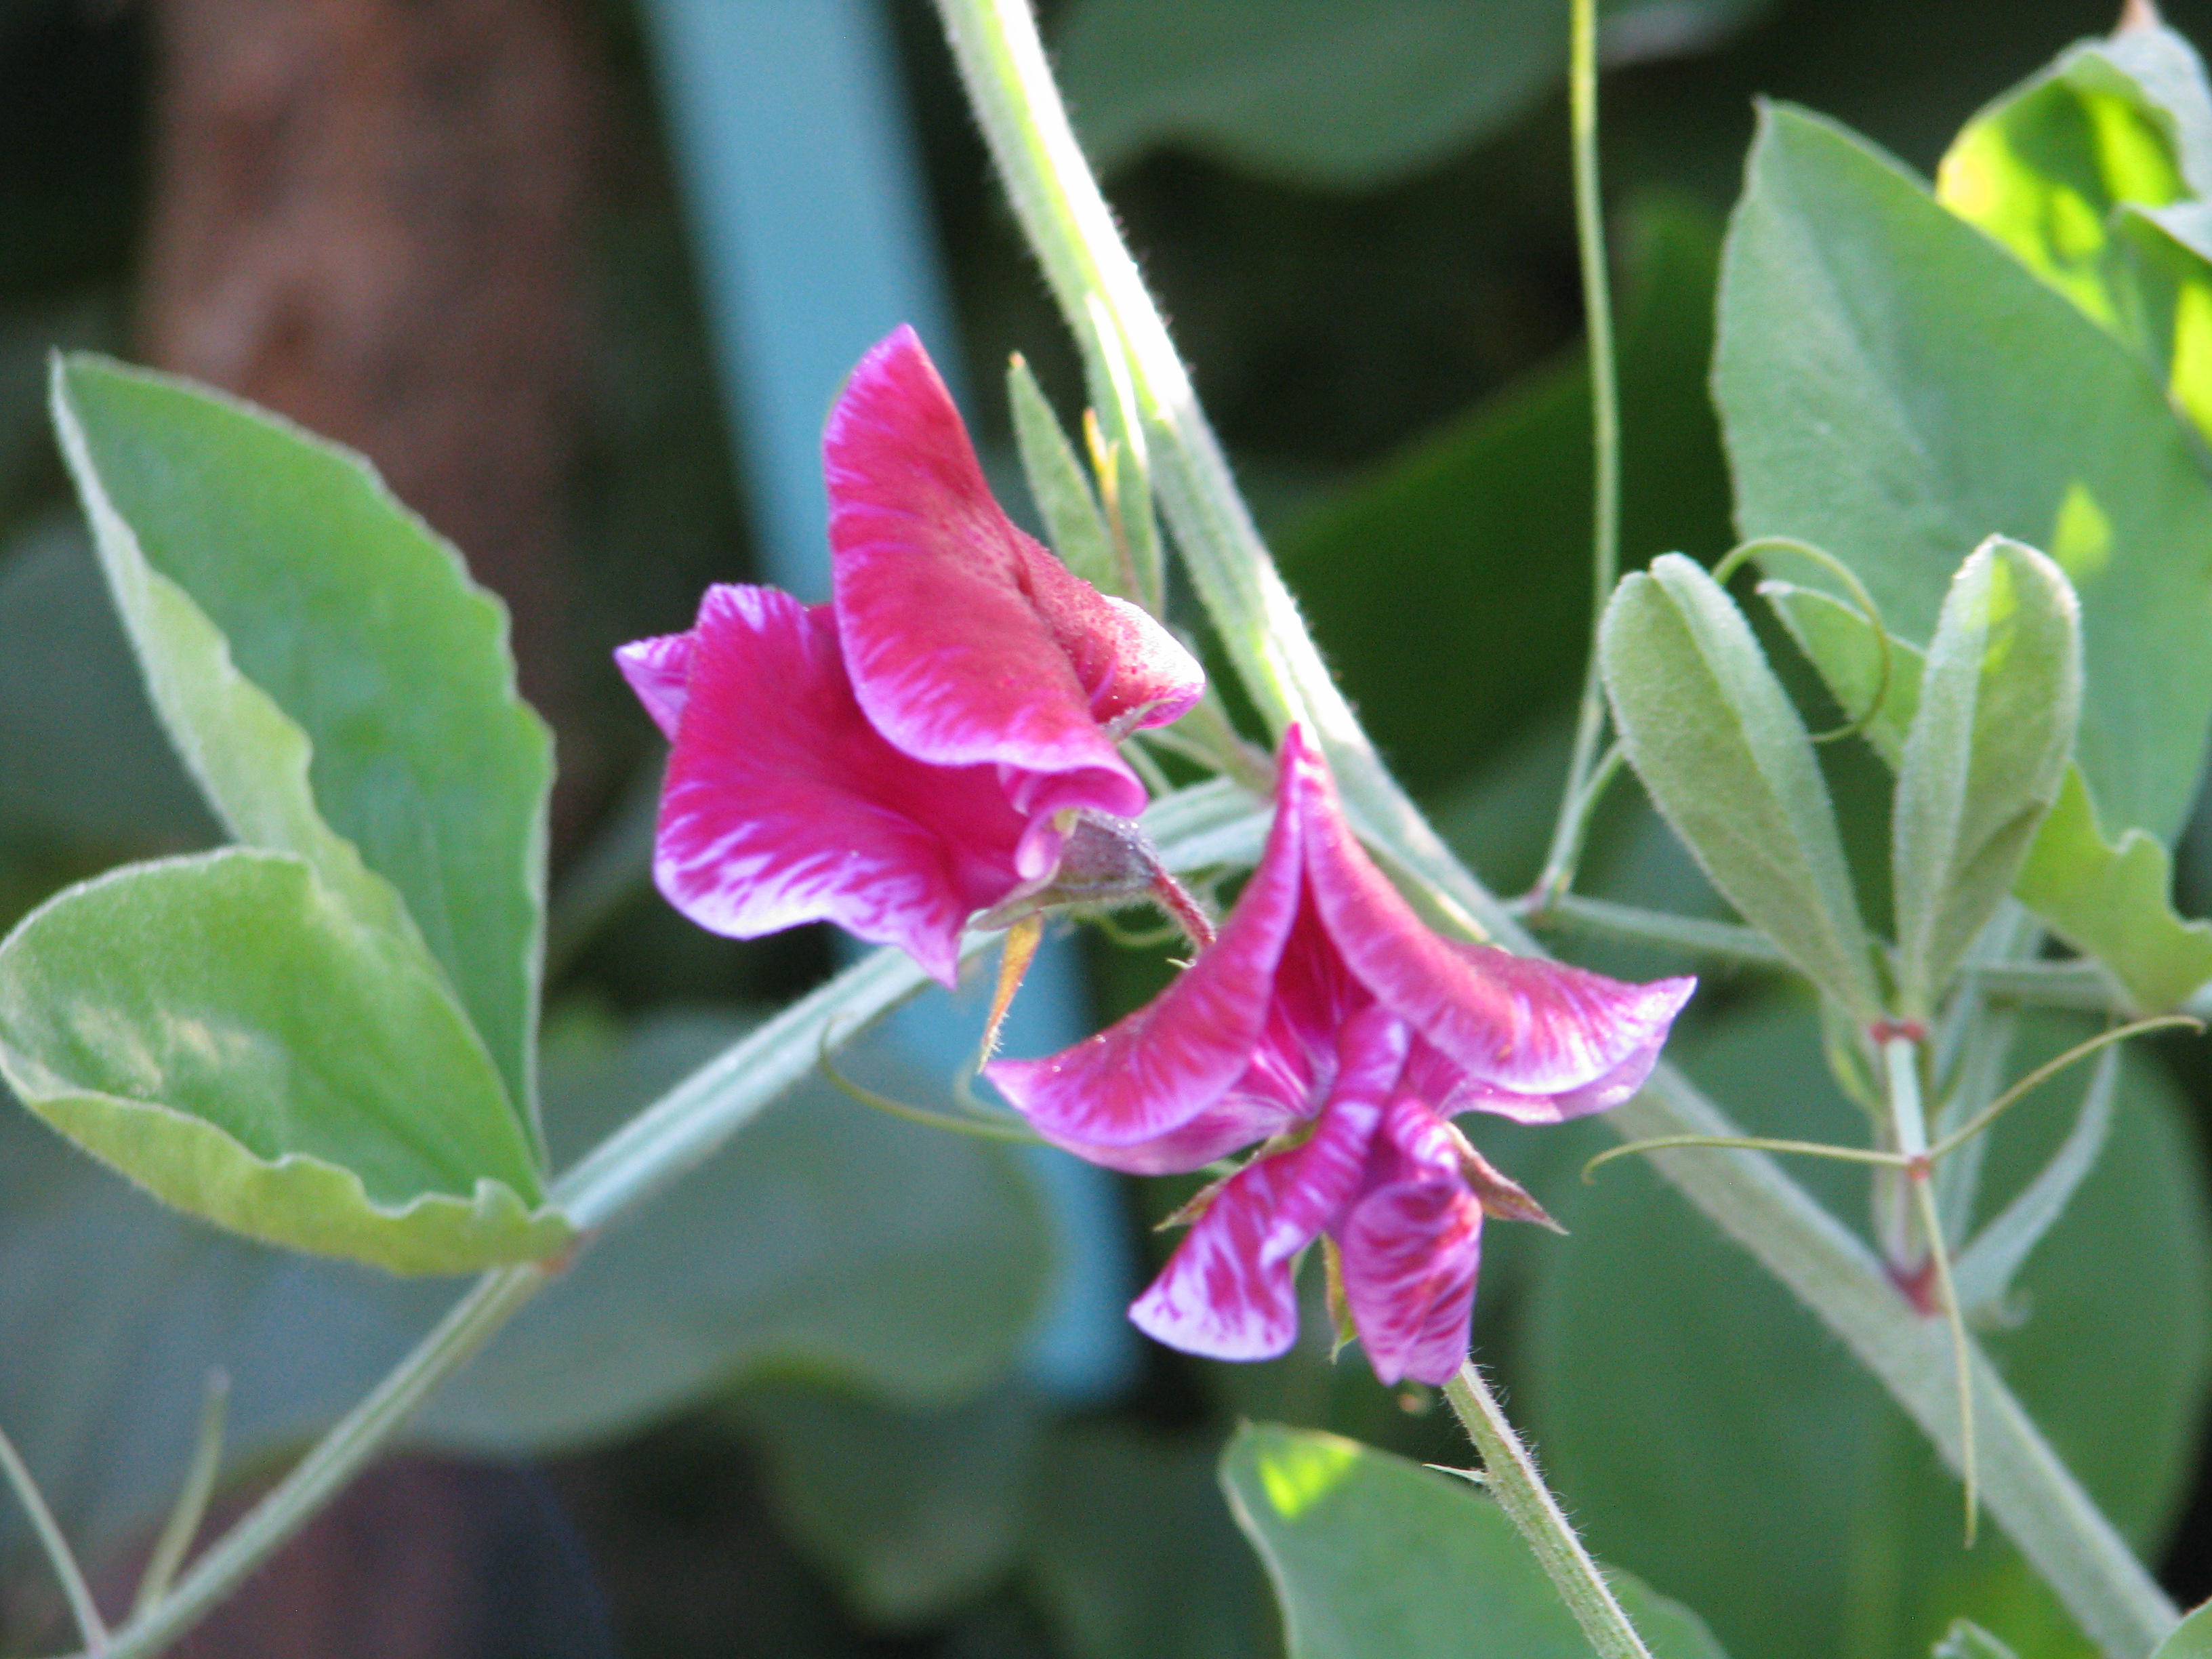
Sweet peas are still blooming. They hold the permaculture precept of everything having three purposes: they are nitrogen fixers, they are edible, and they are gorgeous. 
A fancy drake who showed up this morning. 
The irises surrounding the pond are spectacular right now. Blue, dark blue and yellow flag. 
Baby bunny has been growing out his ears. He’s enjoying a warm dirt bath. 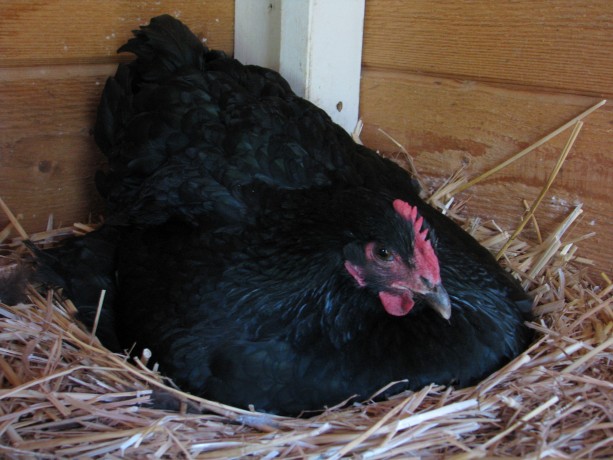
Mulan has gone broody. Such a large chicken puddles out over the wooden egg she’s trying to hatch. We’re feeding her an oatmeal mixture in a dish because she won’t come down during the day. 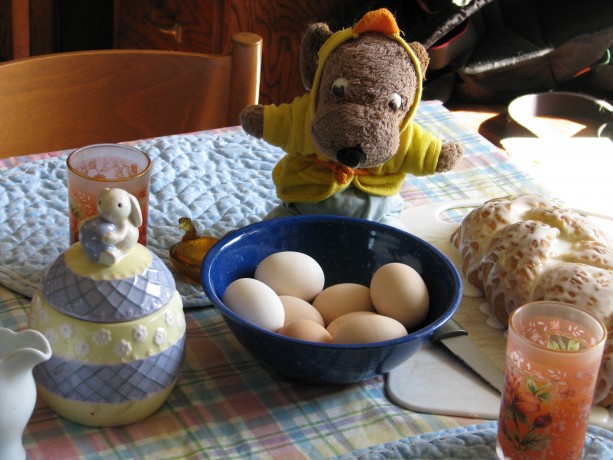
Easter breakfast. Hard boiled eggs, naturally colored by our hens, fresh tangerine juice, our traditional stollen from my mother’s recipe, and Peanut in his chicky robe ready to launch into the food. Peanut doesn’t act his age, of about 40+ years, but has traveled and been photographed extensively in Europe and Ecuador. Its nice that he wakes up for holidays. You May Also Like

Native Insects and IPM
-
Plum Clafoutis!

Plum clafouti. Yum. OMG! How could I not have told you about clafoutis yet? If you have ripe plums, peaches, apricots… any stonefruit… and you need something to do with them, this is it! Clafoutis (clow-FOO-tee) is a baked dessert (or breakfast!) that is simple to make and absolutely yummy. Ripe fruit, especially those that are a little too ripe to eat fresh because of the texture, is topped with a flour and custard batter and baked.

Serve plum clafouti warm or at room temperature. So yum. The result is firm enough to not gross out those who don’t like the texture of custard (like my daughter), not too sweet, and makes the flavor of the fruit bloom in your mouth. This is different than Plummy Skillet Cake, which is also wonderful. Of course clafoutis

Because of its simple ingredients and low sugar, clafouti is wonderful for breakfast. Peach clafouti is shown here along with asparagus and soy sausage. is good with ice cream, but just powdered sugar on top for decoration or plain is fine. You can make it with liquid egg substitute and non-dairy milk substitutes; I used our hen’s eggs and organic soy milk. Plums are absolutely delicious in a clafoutis, but we’ve used peaches and apricots as well with great results.
Plum ClafoutisAuthor: Diane KennedyRecipe type: Dessert or BreakfastCuisine: FrenchPrep time:Cook time:Total time:Serves: 6A simple and delicious baked fruit dessert.Ingredients- (You can halve the ingredients and bake in a square pan instead)
- ¼ cup butter (or veg oil or coconut butter)
- Pitted plums cut into thin wedges (think what size you like to bite into) (five cups)(you can use a mixture of stonefruit, too)
- ½ cup granulated sugar, divided (you can eliminate or reduce this amount if you like a tart dessert, if your fruit is very sweet, or use a sugar substitute)
- 4 eggs or equivalent liquid egg substitute
- ½ cup unbleached all-purpose flour (or a mix of other flours)
- ½ teaspoon salt (opt)
- 1 cup milk or milk substitute
- 1 tablespoon vanilla extract
- ½ teaspoon almond extract
- Confectioner's sugar for dusting
Instructions- Move oven rack to the middle and heat to 400F.
- Place butter in a 9 x 13 inch baking dish and put in oven to melt butter.
- In a medium bowl, toss the plums with ¼ cup sugar.
- With oven mitts, remove hot dish from oven and swirl melted butter to coat bottom and partially up the sides.
- Spread plums evenly on bottom of baking dish.
- In a medium bowl, whisk the eggs until blended.
- In a separate bowl, whisk the remaining ¼ cup sugar with the flour and salt.
- Whisk the sugar and flour mixture into the eggs.
- Whisk in the milk, vanilla and almond extracts.
- Pour the batter evenly over the plums.
- Bake 40 - 45 minutes until the clafoutis is lightly browned and the center has puffed up.
- Cool on a wire rack.
- Dust with confectioner's sugar and serve warm, plain or with ice cream. Or hard sauce. Or whatever you like. Use a French accent when announcing dessert.
- Eat within a couple of days or it becomes soggy.
- Store covered at room temperature.
-
Spicy Chocolate Squash Bread

Cocoa + squash + habinero = YUM. My collegiate daughter needed a recipe to use up leftover frozen kabocha squash. She found a chocolate kabocha bread recipe, adapted it for ingredients she had on hand, and sent me the recipe. I’m such a proud foodie mom: this is the first recipe she’s sent to me. She had substituted yogurt for the oil, and only had cinnamon as a spice, but really liked the results. She said that it was kind of like hot chocolate in bread form; not too sweet and not too plain. Hot chocolate in bread form? I’m so there.
Today has been cold and a little rainy. My shoes and socks were wet from standing in wet grass trying to coerce my 100-lb tortoise back inside his heated room before he became too cold to move. I had some thawed pink banana squash puree leftover from making pumpkin scones for my son last weekend. It was so squash bread time.
I had all the spices, but I changed them up a little. I added some freshly ground nutmeg in place of some of the cinnamon. Due to conversations with others in my exercise class about eating fresh homegrown fruit with chili pepper and other warming spices sprinkled on them (spring fantasies!) I thought I’d heat up this recipe, too. Before Christmas I purchased some habinero powder at Old Town Spice Merchants in Temecula, and fell in love with their habinero sugar which they sprinkled over samples of dark chocolate brownies. I added some habinero powder to this recipe and it is fantastic.
The loaf took an hour and five minutes to bake. It was slightly crispy on the crust and dense, moist and dark on the inside. Yet it wasn’t cloyingly heavy or too wet. The cocoa flavor was satisfying; too often cocoa recipes taste as if the chocolate was just a coloring rather than a flavoring. This was good. The spices were just enough and not overpowering. The habinero powder was just right, making just a little heat in the mouth that really accented the chocolate flavor and warmed me up from the inside. I am freezing the rest of it, just so I don’t eat any more today. It was really wonderful, and it had vegetable in it, too! Thanks, daughter of mine!
I’m sure you could eat this with cream cheese, marscapone cheese, or dust it with powedered sugar, but it doesn’t need anything. Not even, apparently in my case, a fork or plate. So much for dieting today.
Spicy Chocolate Squash BreadAuthor: Diane and Miranda KennedyRecipe type: DessertPrep time:Cook time:Total time:Like spicy hot chocolate in bread form.Ingredients- 1½ cups all-purpose flour
- ⅓ cup unsweetened cocoa powder
- 1 teaspoon baking soda
- ½ teaspoon ground cinnamon
- ¼ teaspoon ground nutmeg
- ¼ teaspoon ground ginger
- ¼ teaspoon ground cloves
- ⅛ teaspoon habinero powder (or ¼ teaspoon if you like it spicier. It will be a slow warm heat in your mouth)
- ¼ teaspoon salt
- 1⅓ cups sugar
- ⅓ cup vegetable oil or plain yogurt
- 1 cup squash or pumpkin puree (or plain canned pumpkin)
- 1 large egg
Instructions- Preheat oven to 350 degrees F.
- Grease and lightly flour an 8½ x 4½ inch loafpan.
- In a medium bowl, sift together all the dry ingredients.
- In a large bowl combine the oil, puree and egg until well combined. Beat in dry ingredients until well blended. (If using electric mixer, beat on low speed. You don't want a lot of air in the batter).
- Pour batter into prepared pan.
- Bake 350 degrees F for 1 hour and five minutes, or until a toothpick stuck into the center comes out clean.
- Cool on a wire rack for fifteen minutes then cut around loaf and turn out onto a plate or wire rack.
- Serve warm, or any way you'd like to!
- (Options: serve with cream cheese, marscapone cheese, or dust with powdered sugar. It is also great drizzled with chocolate frosting (what isn't?) or with chocolate ganache. Both recipes can be found on my blogpost on Buttermilk Chocolate Ganache Cake).
-
Cooking with Nettles
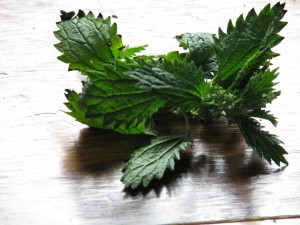
Stinging Nettle Yes, I mean stinging nettles. I’ve already covered in another post about the highly nutritious qualities of this lawn and wetlands weed. One of my friends has taken up the cause and has prepared nettles in soup and as a cooked green for her family. Eat your weeds! (Just be sure what they are, first.)
Stinging nettles (Urtica dioica) are annual plants that come up in nitrogen-rich soil that is well watered, such as in lawns, around farm animals and by streams. The plants are covered with tiny sharp hairs that are tipped with chemicals that cause a stinging sensation when handled. The sting may cause a slight bump on the skin and will go away on its own without spreading. A dab of vinegar will de-acidify the affected parts and should reduce or eliminate the sting. The effect is not like that of poison oak (Toxicodendron diversilobum) which contains an oil that spreads to whatever touches it.
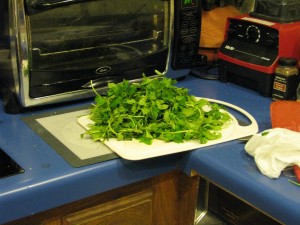
This amount of nettles cooks down to 1/4 – 1/2 cup. You’ll need a lot more for this recipe. Nettles are known throughout Europe as a spring green and there are many recipes available for cooking it. The leaves are delicate and fresh-tasting, and the stems a little tougher but also edible.

Crustless nettle quiche tartlet To harvest nettles, wear gloves or use a plastic bag turned inside-out over your hand for protection. As with most greens the youngest are the most tender. Wash the nettles while wearing rubber gloves. Blanch the nettles 1 – 2 minutes in a pot of boiling water. That eliminates the stinging chemicals completely. Don’t cook longer at this point because the leaves will fall apart. You can now eat the nettles or use them in another dish. I’d advise chopping up the stems before or after blanching because they can be stringy. Use blanched nettles in soups, quiches, or fillings as you would spinach. Hint: don’t tell your family what they’re eating until after they’ve eaten it!
Crustless Nettle QuicheAuthor: Diane KennedyRecipe type: Main dish, side dish or breakfastCuisine: EuropeanPrep time:Cook time:Total time:Serves: 6Substitute blanched nettles for spinach in this simple crustless quiche for more nutrition and fewer weeds!Ingredients- 1 Tablespoon olive oil
- 1 chopped onion
- 10 ounces blanched chopped nettles (measured after cooking)
- 5 eggs, beaten
- 3 cups grated cheese such as Munster, or a mixture of parmesan and mozzerella, or whatever you have that isn't too tangy.
- A pinch of ground nutmeg
- Salt and pepper to taste
- Optional: cooked vegetarian bacon or sausage, crumbled.
Instructions- Preheat oven to 350 degrees F.
- Lightly grease one 9-inch pie pan or 6 - 8 tart tins or Pyrex custard cups.
- Wearing gloves, harvest and wash enough nettles to make 10 ounces cooked, about one stuffed plastic grocery bag full or more.
- Blanch nettles in boiling water for 1 -2 minutes.
- Chop nettles into fine pieces (the stems can be stringy if kept long)
- Heat olive oil in a medium skillet over medium-high heat.
- Cook onion until translucent, 8 - 10 minutes
- Add nettles and stir until the extra water is absorbed.
- Add ground nutmeg to the nettles.
- In a large bowl combine the beaten eggs, cheese, salt and pepper and vegetarian meat if using.
- Add spinach mixture to eggs and stir to combine.
- Pour into prepared pan or pans.
- Bake 30 minutes or until centers have just set. Don't over bake.
- Cool for ten minutes before serving.
- Animals, Bees, Birding, Chickens, Gardening adventures, Heirloom Plants, Permaculture and Edible Forest Gardening Adventures, Pets, Photos, Ponds
It Might As Well Be Spring: an Indulgence in Prose

First daffodil, face to the dawn. Mornings find me waking before sunrise, throwing cats off my bed, rousing my elderly dog for her morning ablutions, and scampering down to the hen house in my robe and slippers (and some mornings warm hat and scarf) to feed the hens and the wild ducks, and the tortoise.
Viola seeing what new seed is available since the night before. Last night when I let Sophie out for her final walk of the night the Santa Ana winds were like a warm caress, riffling through the palm fronds in the dark. Orion sparkled overhead, moving into the position it was in for the birth of both my March babies half a lifetime ago.

Mourning doves in a morning sky. This morning the air was expectant. The garden seemed to emit a trembling energy; an excitement roiling to the surface, but afraid to burst out in full in case of another frost.

Vanilla-scented heliotrope. Indeed another cold front will be moving in with much-needed rainfall later this week. For now, the bold grasses are up and reckless early stonefruit have blossomed out, much to the joy of the hungry bees.

White peach. I could almost hear Browning’s Pippa chanting in my head. But not too much.
The ornamental pear trees all around town are in full glorious bloom. Yesterday while driving from the Community Center to the bookstore there were enough petals strewn in the road as to cause a whirlwind of white as I drove through. An eddy of petals around my car. Joy.
Almond just breaking bud. This weekend is the Great Backyard Bird Count, as well as my two regular bird count days for Project Feederwatch. Before breakfasting I filled seed feeders and enjoyed the show while eating my fresh egg, asparagus, toast and cinnamon tea. Twitterpating is definitely in the air as birds pair up and rival mallards chase each other over the big pond.
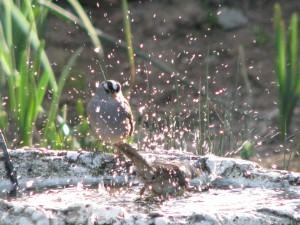
A white crowned sparrow splashing his friend. A Northern mockingbird sips from the bird bath dripper sizing up his territory and listening for new sounds to add to his repertoire. A buzzy rufous hummingbird guards the nectar feeder from the larger and flashier Anna’s. A long-mated pair of crows hang out preening each other on the telephone wire.

A green-white pond calla. Frogs are croaking amorously in the damp rushes. To my complete joy, far earlier than the bulbs strewn across the property which are just peeking green out of the earth, just outside my window are early daffodils and sweet violets, two of my favorite flowers.

Daffodils, Earlicheer narcissus and a little blue squill. It is still February, and I’m not that great a fan of such a beastly month as February , but for today the paperwork will lie ignored, the cold weather clothes will stay in the laundry basket, and after I take my cat to the vet I will spend the day in the garden (although that isn’t so unusual for me, is it?) listening to the Nuttall’s woodpecker try to drum holes into the telephone pole and smell the scent of Gideon’s trumpet flowers.

Sweet violets. I look forward to tomorrow when I’ll be making two new friends, and to casting seed which will add new life to the garden.

Easter will be early this year. It is all about possibilities, and possibility is definitely in the air today. I will believe Punxsutawney Phil that although it is technically winter, for today it might as well be spring.

A meeting of the minds. You May Also Like
Native Insects and IPM
-
Preserving Squash and a Terrific Pumpkin Chai Recipe!

Beautiful patterns on the banana squash shell. Four sugar baby pumpkins that I’d kept for myself, and three pink banana squash, were all in need of preservation. They were not keeping well due to the warmth of our hot San Diego county Fall. During a rainy break in the weather I did something about it. You can preserve cooked pumpkin and winter squash best by freezing it. If you have a pressure canner you may can pureed pumpkin or pumpkin pieces in liquid, but since I only use the water bath method that wasn’t an option.

Even sugar baby pumpkins can be difficult to cut when raw. There’s a better way! Roasting a squash isn’t difficult at all. In fact, you only have to wash it, put it on a tray in a 350F oven for about an hour (longer if its a really large pumpkin), and then slice when cooled.

Roasting a whole pumpkin makes the scooping so easy! Its easy to scrape out the seeds and then spoon out the cooked flesh out of the hardened shell. This is what I did for the sugar baby pumpkins. There was too much banana squash to fit whole into the oven, however, so I cut them into chunks, scooped out the seeds, covered them with aluminum foil (it helps steam them) and baked 350F for forty-five minutes.

Three banana squash is a lot of squash I have more details here. I also roasted the pumpkin seeds.
Then I had a lot of squash to puree! These squash and pumpkins were dry, so I added a little water to the VitaMix and tossed in the chunks.

Pumpkin and seeds. I pureed batches until smooth, then spooned cups full into freezer bags. My pumpkin scone recipe calls for only half a cup, so I froze one-cup batches, as well as two-cup batches for pie. The secret to ‘vacuum-packing’ freezer bags is to close the top of the bag around a straw and then suck all the air out. It really works well, and is kind of fun, too.

Get a straw, suck out the air and presto: vacuum packed! However, the best thing that happened out of all this squashing was that I had a little less than a cup of pureed roasted squash left in the VitaMix, too little to freeze and really irritating to scoop out. It was a cold day and past lunchtime. I had an idea and spooned in what was left of some Chai tea mix, poured in vanilla soy milk, blended it until it warmed up and sat down to drink. Heaven! I’m not one for pumpkin flavored things, but this was the real deal.

Pumpkin puree. It was so good that the next day I took a cup of the pureed squash that I refrigerated, poured in 1 1/2 cups of vanilla soy milk, a touch of orange syrup left over from candying orange peel, added cinnamon and blended until it was hot. It was thick, satisfying, a little sweet, spicy and full of beta carotene, fiber, protein and other good things. I’m sure you can do the same thing with canned pumpkin and other liquids, such as milk, rice milk, almond milk or coconut milk. If fact, I insist that you try it.

Hot Yum! Pumpkin ChaiAuthor: Diane C. KennedyRecipe type: BeverageCuisine: AmericanPrep time:Cook time:Total time:Serves: 2Cold or hot, spiced pureed pumpkin or squash mixed with the milk of your choice is extreme comfort food that is actually terrific for you!Ingredients- 1 cup cooked pumpkin or squash puree, fresh or canned.
- 1½ - 2 cups vanilla soy milk, or milk of your choice. (Less for a thick drink).
- ½ - ¾ teaspoon cinnamon, pumpkin pie spice or up to 1 scoop Chai tea mix.
- Sweetener (optional); a natural syrup would do or honey.
- ½ teaspoon vanilla (optional)
Instructions- For cold pumpkin chai mix all ingredients briefly in a blender or VitaMix.
- Taste to adjust seasonings, thickness and sweetener, and serve.
- For hot pumpkin chai, heat milk and add to the rest of the ingredients in a blender and process. If you have a VitaMix, you can add all cold ingredients and then process until it is hot.
I’m going to make some more for me right now. -
Two Sure-fire Zucchini Recipes
Zucchini plants are like cats: They both look harmless when small, so you think the more the merrier. One plant is always enough, but it is hard to plant just one seed in case it doesn’t come up. Then the sprouts are hard to thin.. what if something eats it? Then before you know it, there are five enormous plants growing giant green clubs in the dead of night, just after you’ve checked all the plants. Well, that’s my situation anyway. Too many cats; too many zucchinis. When there are enough all at one time, we’re taking them (the zucchinis, not the cats) to the Fallbrook Food Pantry along with pumpkins and tomatoes. Until then, we’re exploring new ways to eat them. And I refuse to sully cheesecake with zucchini! (yes, there is such a recipe!).
My son who is studying Culinary Arts at the University of Hawaii sent me a link to smittenkitchen.com with an exceptional zucchini pancake recipe… not sweet, very light and completely tasty. I’ll include my version. But first I want to explain my ‘discovery’, which everyone but me probably knows about anyway.
SAUTEED ZUCCHINI
I had grated zucchini for bread and had some left over. It was dinnertime and I was alone, so I experimented. I heated a skillet with a little olive oil in it, threw in the grated, undrained zucchini, and stirred it around on medium-high heat for about five minutes. When it was beginning to wilt and brown a little on the bottom, I sprinkled sesame oil on it lightly, and then gave it a touch of Bragg’s Amino Acids, which I use for many things. A light soy sauce may substitute, but Bragg’s is high in nutrition, low in salt and a wonderful flavoring. Buy it online or in health food stores. The zucchini came out tasty and with a mouth-feel of wet wide noodles. It was fantastic. I’ve since made it for my daughter a couple of times, and each time we wanted more! Imagine that! On the plus side, it used up a medium zucchini.
You really must give these pancakes a try.
Fabulous Zucchini PancakesAuthor: Diane C. Kennedy (adapted from smittenkitchen.com)Recipe type: BreakfastPrep time:Cook time:Total time:Serves: 4A light, flavorful, really good pancake that uses up a lot of zucchini and tastes like zucchini bread.Ingredients- 2 large eggs
- 3 tablespoons olive oil
- 2 tablespoons sugar (optional)
- ¼ cup buttermilk or soured milk
- ½ teaspoon vanilla extract
- 2 cups shredded zucchini
- 1 cup all-purpose flour
- ¼ teaspoon table salt
- 1 teaspoon baking soda
- 1 teaspoon ground cinnamon
- ⅛ teaspoon ground or freshly grated nutmeg
- ¼ cup semi-sweet chocolate chips (optional)
- Oil, for coating skillet
Instructions- In a large bowl whisk eggs, olive oil, sugar, buttermilk and vanilla until smooth.
- Stir in zucchini.
- In a smaller bowl, combine flour, salt, baking soda, cinnamon and nutmeg.
- Stir dry ingredients into zucchini batter, mixing until just combined.
- Stir in chocolate chips.
- Heat oil or butter in a large, heavy skillet over medium heat.
- Scoop ¼-cup rounds of batter in pan so they do not touch.
- Cook until bubbles appear on the surface, about 2 to 3 minutes.
- Flip pancakes and cook another minute or two.
- Keep pancakes warm in on a tray in the oven set on low or in a toaster oven.
- Repeat with remaining batter.
- Serve warm with or without traditional pancake toppings.
- Pancakes freeze well.