Frosting
- Breads, Breakfast, Cake, Condiments, Dessert, Frosting, Permaculture and Edible Forest Gardening Adventures, Recipes, Sauces, Vegan, Vegetables, Vegetarian
Making Ethical Butter

Vegan butter! I’ve labeled myself an ‘ethical vegetarian’ for nearly two decades. I stopped eating animals when I became horrified at the dichotomy of having glue traps under the house to catch wild rats and mice (and any poor, poor animal that happened upon it, such as lizards. Glue traps are horrendously cruel. I hadn’t put them there.) and a cage with an exercise wheel and specialty food for ‘pet’ mice in the bathroom. Justice is a man-made effort, and by not eating animals I was no longer approving of mass torture by buying into it. Although I no longer ate animals, I have still indulged in animal products, namely dairy products. Slowly it has sunk in how badly animals are treated for those, too. As someone who loves cooking, it has been difficult for me to wean away from dairy products. Butter is especially difficult. Unlike hens who have been bred to continuously lay without needing the services of a rooster, dairy cows must be lactating to produce milk. Cows are usually artificially inseminated, then after giving birth their calves are replaced by milking machines. The calves are most often slaughtered for veal. This process is repeated until the cow is used up from the constant pregnancies and lactating, and then she is slaughtered. This horrible practice is disguised by advertisements showing happy cows grazing in fields. That is a fantasy. ‘Grass fed’ and ‘pasture raised’ are sly terms that give you an image that is nowhere near to the truth. Please read Michael Pollen’s Omnivore’s Dilemma to understand where your food comes from and why.
To find an acceptable butter substitute has been an expensive and frustrating endeavor. For awhile I used a dairy substitute from Trader Joe’s, who I swear keeps tabs on what I buy the most and then discontinues it. All other butter substitutes either taste horrible, can only be used for spreading, or more commonly contain palm oil. The sudden fad for palm oil has created extreme clearance for the growing of palm in the areas which are habitat for the orangutan; indeed, if we don’t curtail our consumption of palm oil quickly the orangutan will go extinct within our lifetimes.
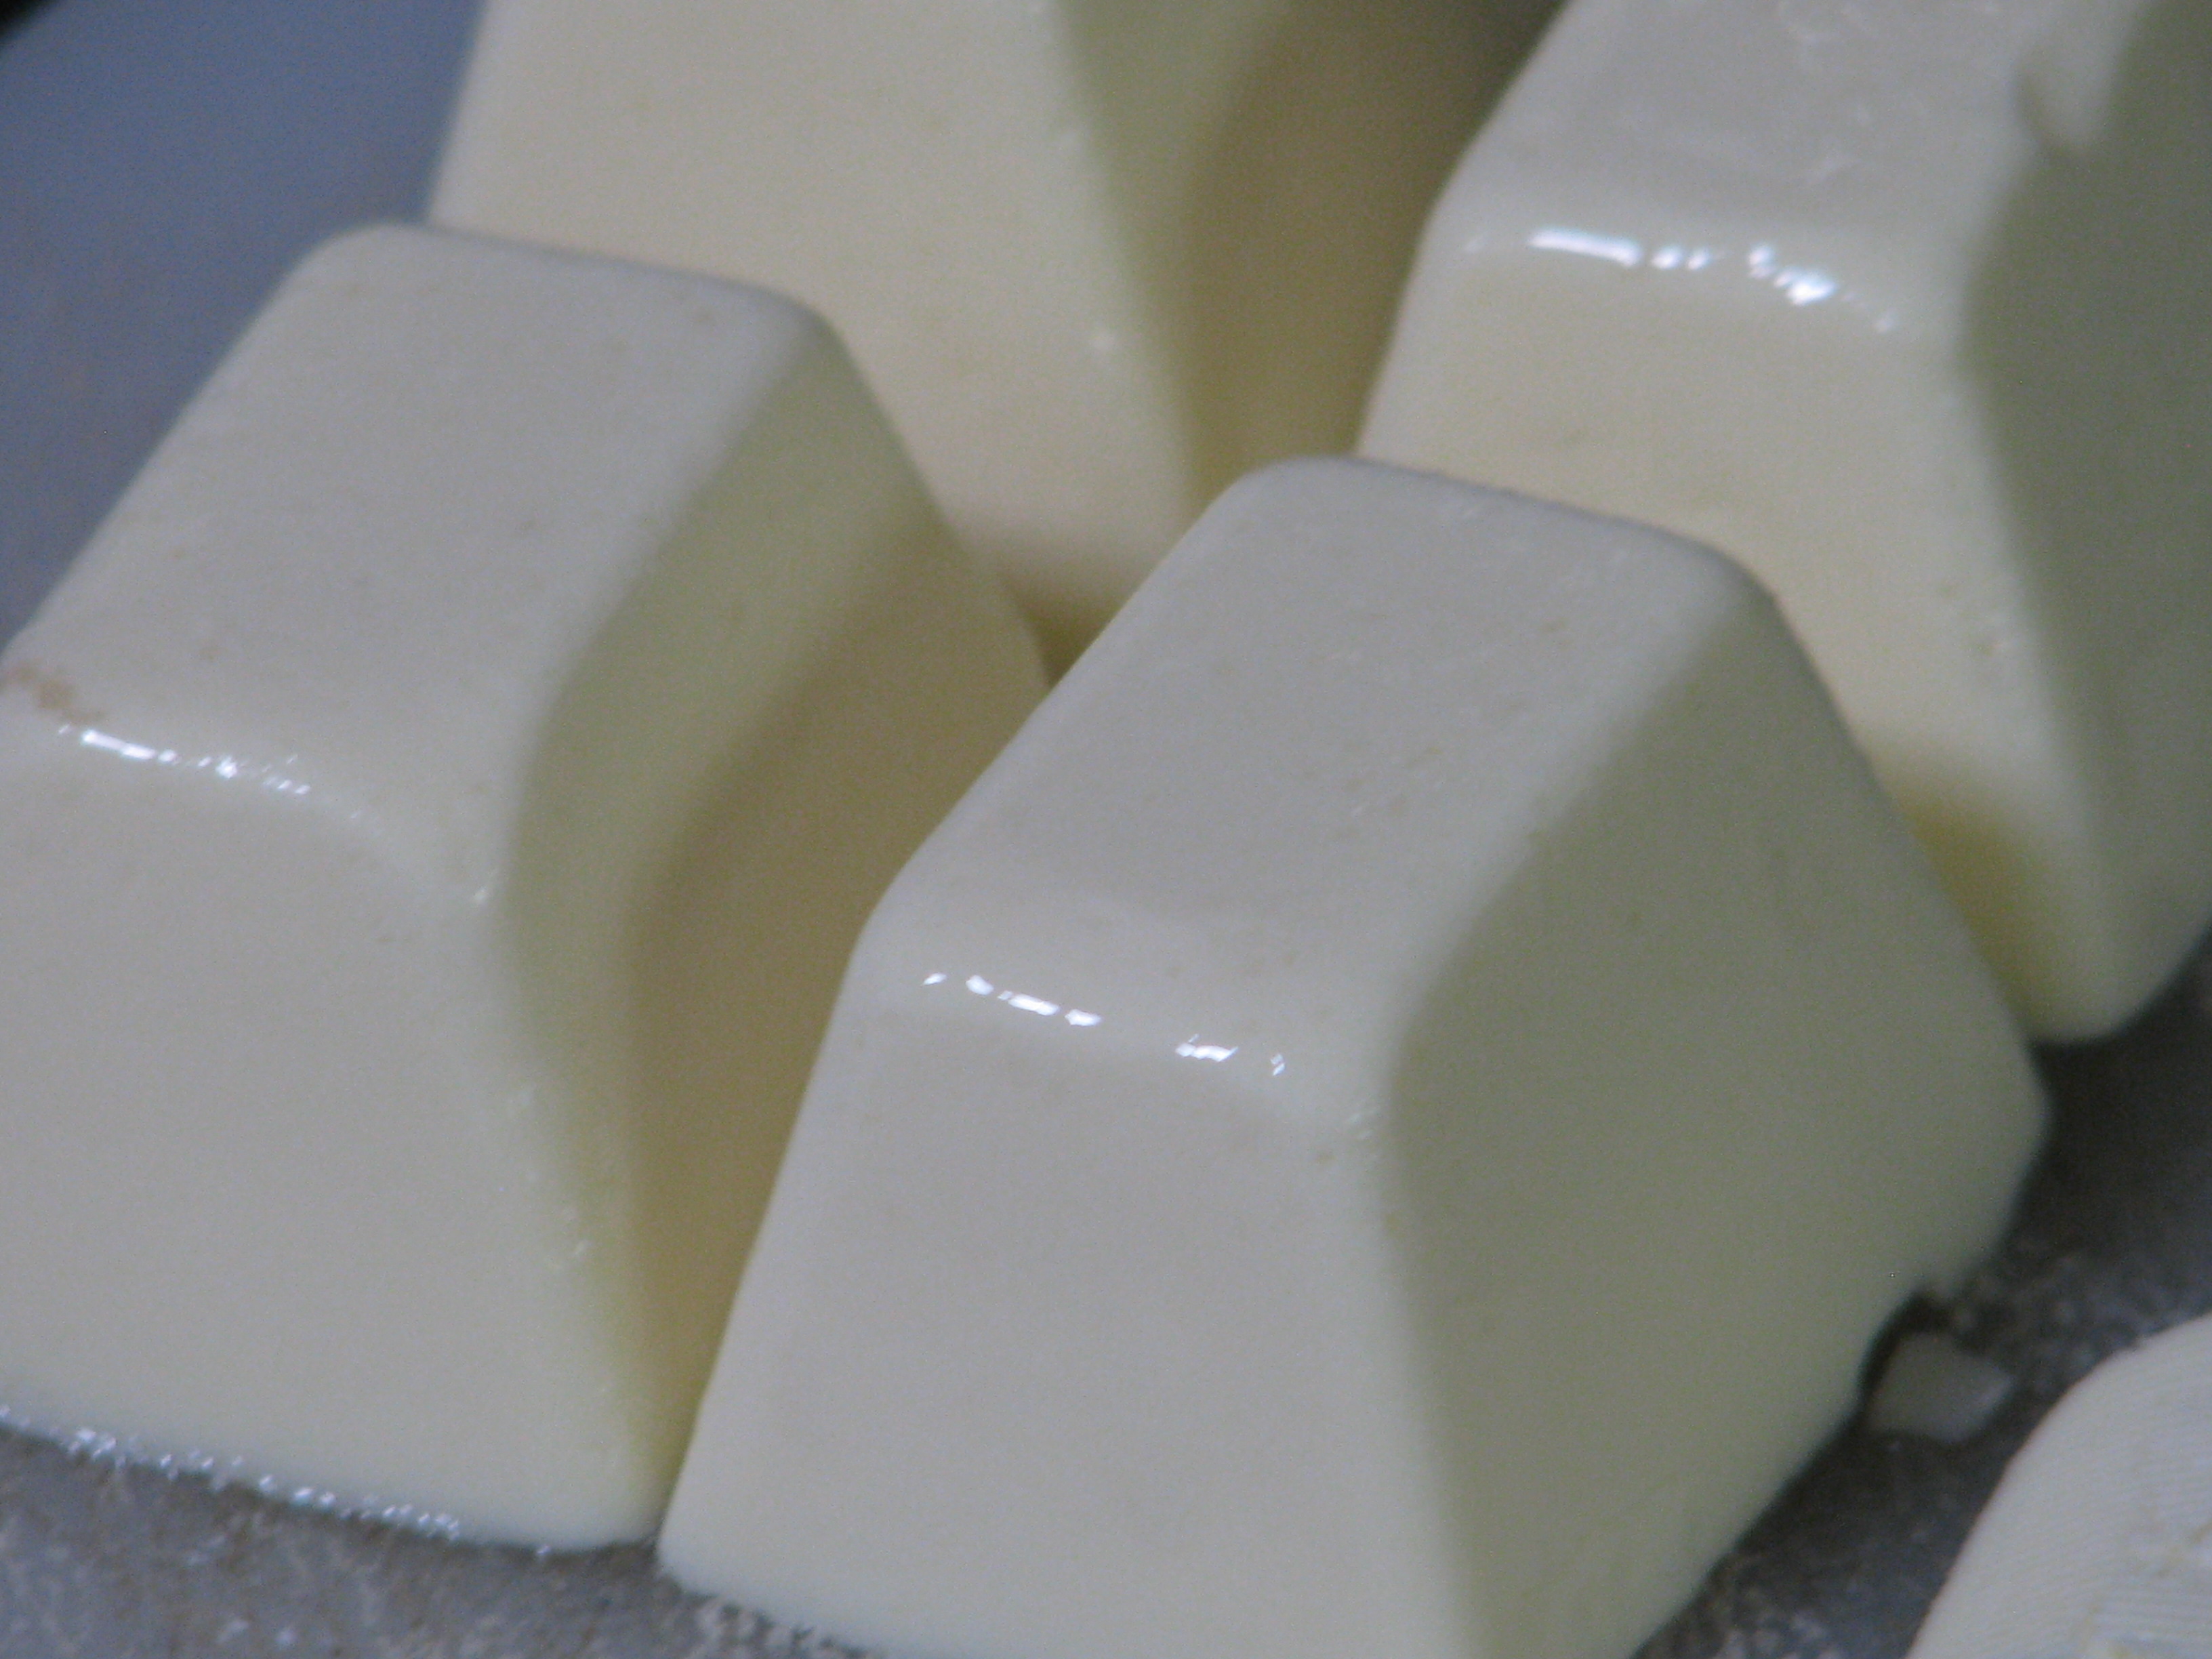
I finally found a recipe for a butter substitute that works pretty well for both spreading and baking. It is made mostly of refined coconut oil. At this point coconut oil is sustainably produced – please make sure that you support companies that do so. Refined organic coconut oil has no flavor or scent; unrefined has a mild coconut flavor and a toasted coconut scent. If you are using a batch of this butter for baking where coconut flavor is desired, then use the unrefined.
This recipe is by no means my own. I found it and a detailed description of the science behind it at VeganBaking.net . There are several options listed and a lot of cooking science behind the butter.
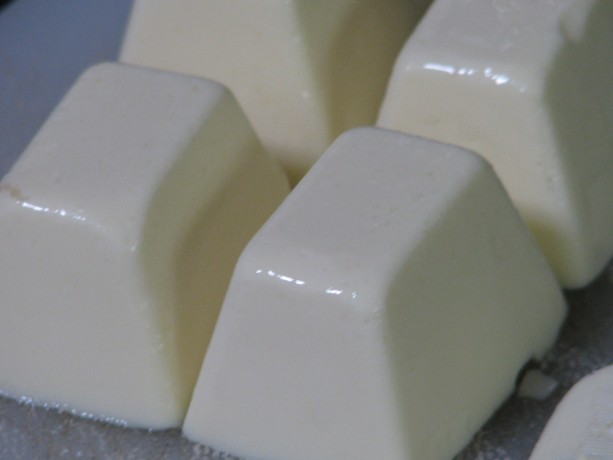
The mouth-feel is amazingly creamy and satisfying. I used the basic recipe, Regular Vegan Butter, Coconut Oil Base. The recipe calls for curdling the soy milk, which will drive the butter flavor. I tried the full teaspoon of cider vinegar, then half cider vinegar and half coconut vinegar, then just half a teaspoon of coconut vinegar, and finally no vinegar, and thus no curdling, at all. I found for my taste that the vinegar flavor carried through and was much too dominant. Even at just half a teaspoon it was so noticeable to me that I didn’t like it on toast. It was good, however, when my daughter used it on sourdough and topped it with fresh avocado. The slight vinegar flavor enhanced the avocado deliciously.
The batch I made without vinegar seemed perfect. The mouth-feel of this butter with or without the vinegar is creamy and all that a high-fat butter should be. It looks, cuts and spreads like butter. The flavor is creamy and very mild, almost like a slightly salted sweet butter. This was a winner for me. For the soy milk I used Trader Joe’s Organic Plain, which does have some sweetener in it. I’ll try with an unsweetened plain organic soy milk another time.
I keep my butter on the counter. I know that organic butter holds its shape better in the heat than processed butter, but both stay stable unless the temperature is in the 80’s. Coconut oil melts at 76F, and in my summertime Southern Californian kitchen, this vegan butter must be kept in the refrigerator. The butter is hard when needed, so the next batch I will take the author’s advice and swap out a tablespoon of coconut oil with regular oil to make it more spreadable.
I wanted to test the butter in cooking and baking. I melted it in a pan and cooked eggs and other breakfast items in it successfully. I used it on toast and on mashed potatoes with great success. The experiment with shortbread cookies went wrong, however, but I don’t think that that was the butter’s fault. These were lemon rosemary shortbread cookies, and contrary to my baking sense I followed the author’s (another blog) directions and didn’t sift the powdered sugar before adding it. There were lumps, therefore, in the batter and I mixed it extra to try and beat them out, which I believe was responsible for making the cookies tough. They were flavorful, but not crumbly. Oh well, I’ll just have to try again! The cookies rolled out, cut, and baked well, retaining their shape and performing as well as with cow’s butter.
Shortbread didn’t spread using this butter, which was great. I don’t have a finished photo of the lemon-rosemary cookies because, well, they were eaten. As with all substitutions, there is always a difference and vegetarians and vegans have to embrace it. Of course fake bacon and ground ‘meat’ is not quite the same: the great part is that it is far more healthy for your body (lower fat, few preservatives if any, often organic, and not the pesticide-drenched and drugged animals that people eat) and doesn’t perpetuate the extreme cruelty to animals about which humans have become nonchalant. Yes, other animals aren’t kind when feeding off of other animals (those which aren’t vegetarians). Yet we as humans have the option the others don’t, to make eating choices.
Here is the basic revised recipe; please see the original blogpost on VeganBaking.net and give the options a try. I found xanthan gum from Bob’s Red Mill at my local grocery store, and liquid lecithin and coconut vinegar online through Amazon.com.
You can double or triple the recipe with no problem! Enjoy.
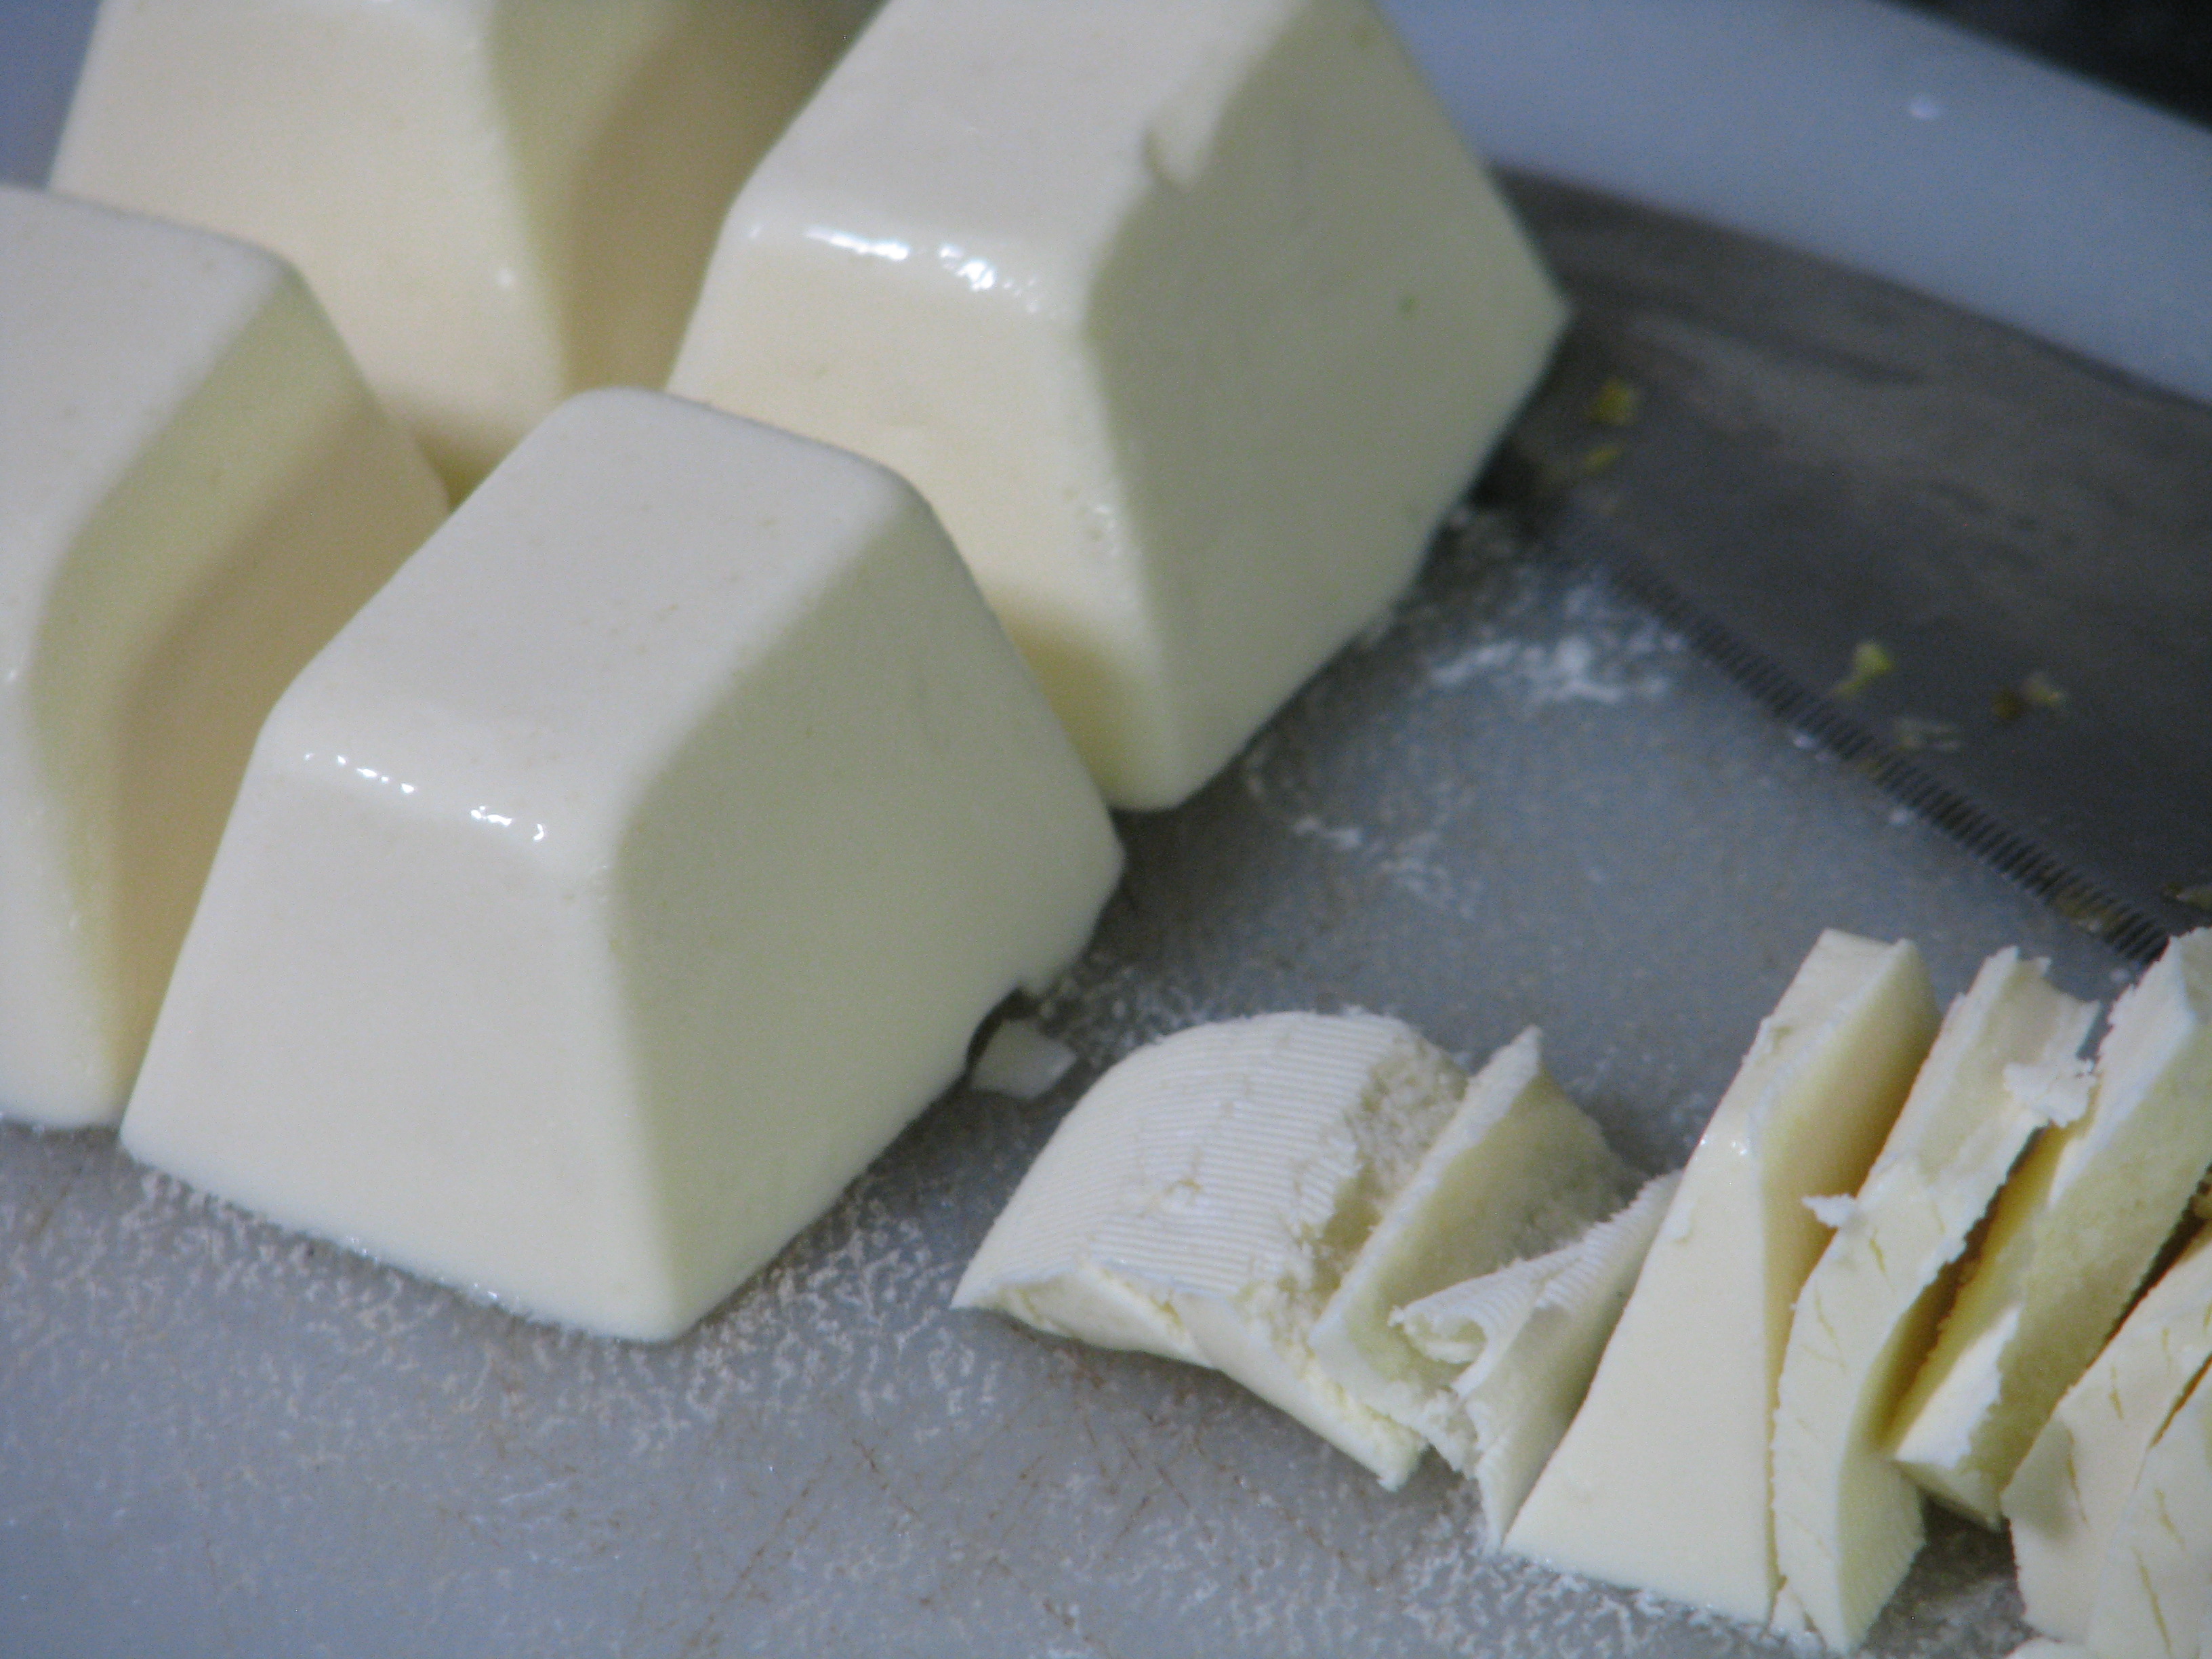
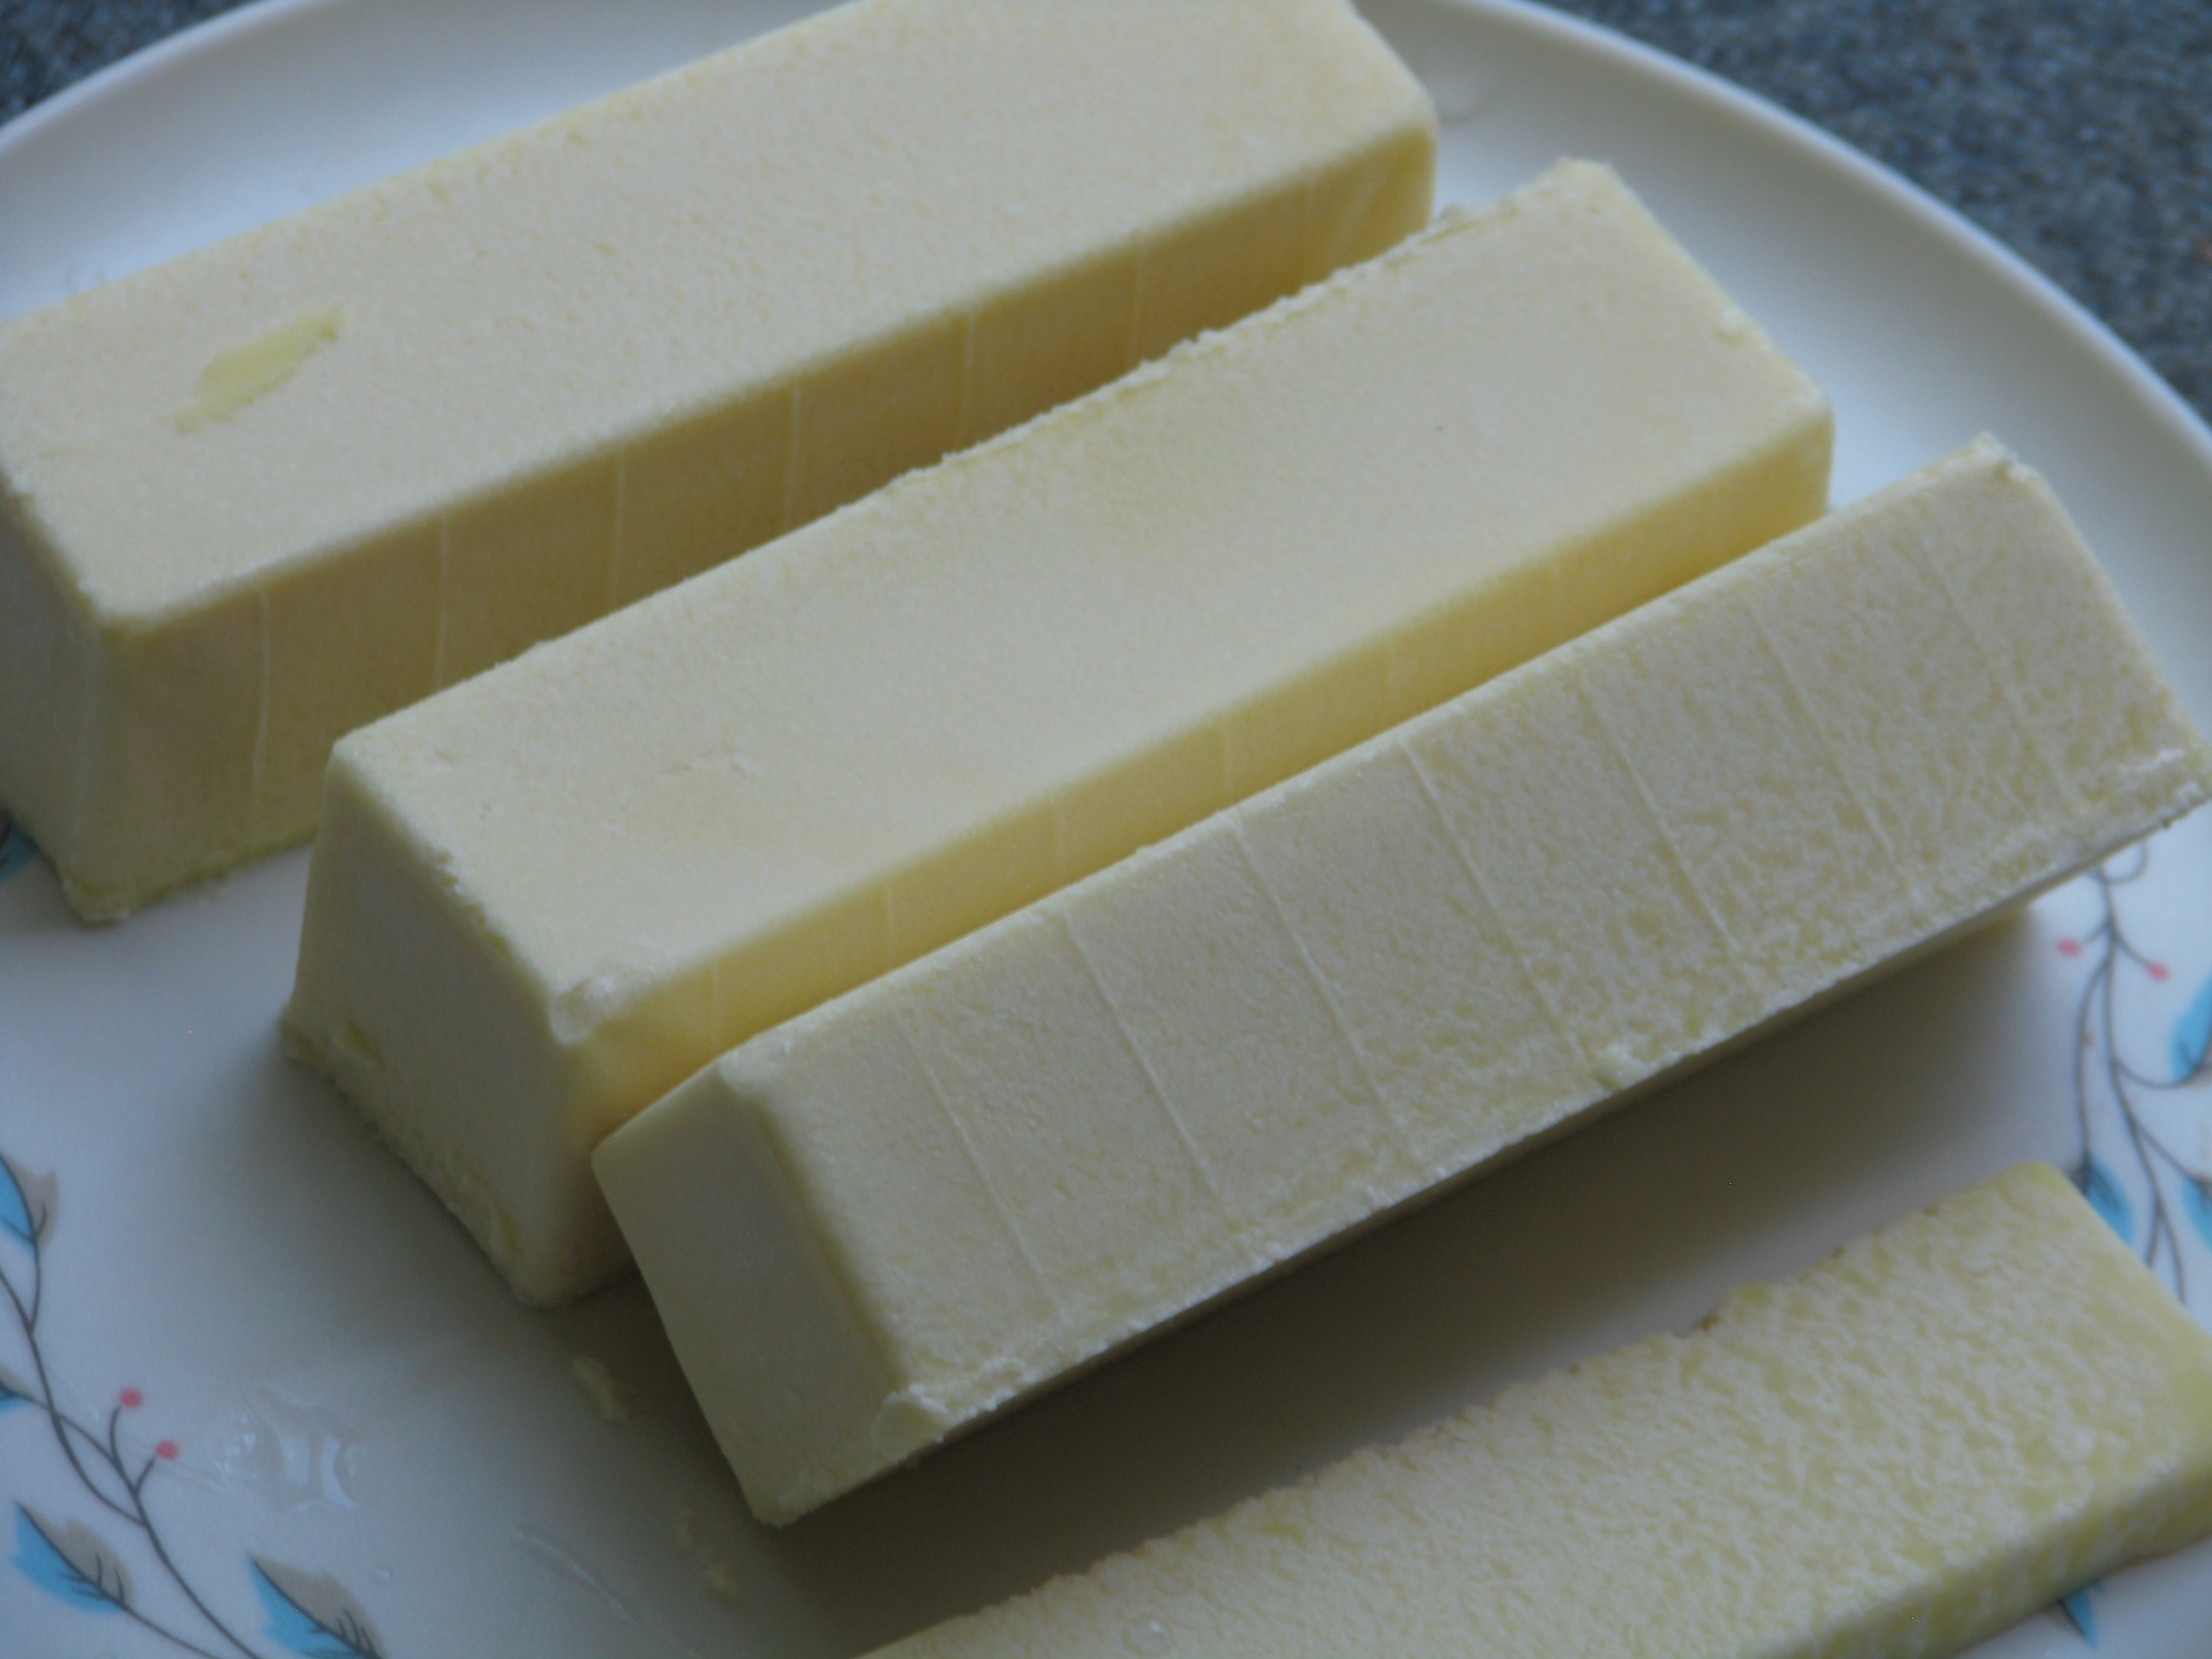
Recipe update: I’ve since made some changes to the recipe, exchanging some vegetable oil for some coconut oil for more spreadability, and adding a little more salt for a more satisfying (to me) taste when spread on toast. I’ve been using this butter for a month now, and have noted that: when melting in a hot pan it will brown faster than regular butter, so keep the temperature down, that it will melt and separate at room temperature (its summer now, so the kitchen is usually in the 70’s – in the winter it will be different) so I keep it in the refrigerator. I found butter stick molds that have the teaspoon markings along the side, so I’ve made 8x the original recipe and poured it into the butter molds, then wrapped each unmolded stick in wax paper and frozen them.
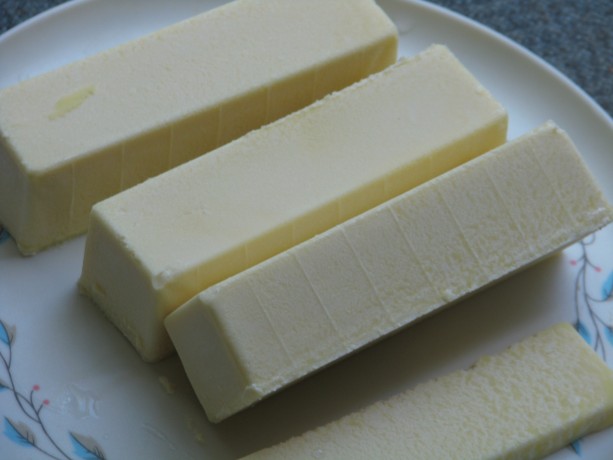
Vegan butter sticks with teaspoon markings along the side for ease in baking. I’ve also poured it back into the cleaned coconut oil jars and frozen them, keeping one in the refrigerator for unmeasured use. I’ve used it along with a non-dairy creamer in the Chocolate Ganache recipe and it is very chocolaty, but not as rich as the original. Part of that is due to the creamer; heavier creamer will produce creamier results, but in no way was it disappointing. It was very tasty, but not as heavy. When refrigerated it didn’t solidify as much as the other, so more chocolate might need to be added depending upon the type of creamer used but it was still spreadable and yummy.
Another Recipe Update:
I’ve been making the butter with unsweetened organic rice milk and it turns out well. At first it tasted too light to be satisfying, but when I had dairy butter at a restaurant it tasted greasy and heavy – my taste buds wanted the vegan butter! I found out that even when the kitchen is colder than the melting point of the coconut oil, it isn’t a good idea to leave the butter refrigerated because unlike dairy butter it will grow mold. The rice milk butter with the increased vegetable oil makes it perfectly usable from the refrigerator. I make sticks and freeze them in a freezer bag for baking and pour the rest into glass jars with screw-on caps for spreading. The jars are kept in the freezer until needed, then switched to the refrigerator. I’ve made biscuits, cookies, cakes, scones and breads with this butter, and with proper handling they all come out just fine. We offered both dairy and vegan butter to our holiday guests and they didn’t detect much of a difference. Since vegan butter is so much lower in calories, and coconut oil is so good for you, I don’t have to hesitate to use it. It is actually part of my weight maintenance program!
Ethical ButterAuthor: Mattie, at VeganBaking.netRecipe type: CondimentCuisine: VeganPrep time:Cook time:Total time:A wonderful vegan butter with no palm oil, but lots of options. My version is without curdling the soy milk. Please see the original excellent post for more explanations and options.Ingredients- ¼ cup + 2 teaspoons organic plain soy milk
- ¼ + ⅛ teaspoon salt (I increased the total salt to ½ t. for spreading butter)
- ½ cup + 2 Tablespoons + 1 teaspoon (130 grams) refined coconut oil, melted to room temp. (For more spreadability, I used ½ cup coconut oil and changed the 2T and 1 t to vegetable oil, along with the following 1 T for a total of 2 Tablespoons and 1 teaspoon vegetable oil.)
- 1 Tablespoon vegetable oil or light olive oil
- 1 teaspoon liquid soy lecithin or liquid sunflower lecithin or 2 ¼ teaspoons soy lecithin granules
- ¼ teaspoon xanthan gum or ½ + ⅛ teaspoon psyllium husk powder (I used xanthan gum)
Instructions- Combine soy milk and salt in a food processor or blender.
- Melt the coconut oil until it is just room temperature and barely melted.
- Add the coconut oil and the rest of the ingredients to the soy milk.
- Blend or process for about 2 minutes on low.
- Pour into ice cube trays, or into butter molds or trays.
- Freeze until firm, about an hour.
- Serve.
- Keep wrapped in refrigerator for a month, or frozen for a year.
- Makes one cup.
-
Lavender Cookies with Rose Water Drizzle

This is not the everyday, lunchbox type of cookie. This is the cookie you put a sign next to with the name on it, and listen to the oohs and ahhs and hmmms when it is sampled. These coconut keto cookies are buttery and with no added extract have a very light lavender flavor. The rose water icing and coconut oil should be added sparingly; it is better even to make the icing the day before to let the rose fragrance mellow some. You don’t want cookies that taste like hand lotion.
That said, these are fun to make, smell great, taste good, and are perfect for teatime or to bring to a ladie’s function. Don’t forget the sign.
Most lavender recipes require dried blossom. This recipe calls for dried leaves. If you don’t have dried leaves, you can set a few sprigs in the sunshine on a hot day, or dry them at lowest temperature in the oven or toaster oven. My toaster oven has a ‘dehydrate’ setting, and it did an admirable job drying some fresh sprigs. You don’t want nasty bits of leaf in your cookie. Use a mortar and pestle to grind up the dried leaves. The result should be like fluff. Yep. It doesn’t powder, it fluffs.
Rose water can be found at International markets, some grocery stores, many liquer stores, or online. If you can’t find it, or just don’t like the smell or taste of rose, then leave the icing unflavored, or add a drop of vanilla.
 Lavender Cookies with Rose Water DrizzleAuthor: Diane C. KennedyRecipe type: DessertPrep time:Cook time:Total time:Serves: 4 dozenAn English teatime-type cookie.Ingredients
- ½ cup butter, softened
- 1 cup sugar
- 2 eggs
- 2 teaspoons lavender, crushed until fluffy
- 1½ cups flour
- 2 teaspoons baking powder
- ¼ teaspoon salt
- For icing:
- 2 cups powdered sugar, sifted
- 5 - 6 teaspoons water
- 6 teaspoons (or less... try it!) rose water
Instructions- Preheat oven to 375 degrees F.
- In a medium bowl, cream together the butter and sugar.
- Add the eggs.
- Add lavender, flour, baking powder and salt.
- Drop by small teaspoonfuls onto an ungreased cookie sheet. Leave space between for spreading.
- Bake 10 -12 minutes, until edges begin to turn brown.
- Cool on racks.
- To prepare icing, mix the powdered sugar with water and rose water until it has a nice, non-globby drizzly consistency.
- Drizzle over cooled cookies.
-
Spiced Pumpkin Scones
Spiced Pumpkin SconesAuthor: Diane C. KennedyRecipe type: BreadPrep time:Cook time:Total time:Serves: 6Tender, healthy, satisfying scones for breakfast, break or dessert.Ingredients- 2 cups all-purpose flour
- ¾ cup granulated sugar
- 1 tablespoon baking powder
- ¼ teaspoon salt
- ½ teaspoon ground cinnamon
- ½ teaspoon ground nutmeg
- ½ teaspoon ground ginger
- ¼ teaspoon ground cloves
- ½ cup pureed pumpkin, canned or fresh (make sure fresh is drained)
- 3 tablespoons milk or milk substitute
- 1 large egg
- 6 tablespoons cold butter, cubed
- For Icing (optional):
- ¾ cup powdered sugar, sifted
- 1-2 tablespoons milk or milk substitute
- ¼ teaspoon ground cinnamon
- ⅛ teaspoon ground nutmeg
- pinch each of ground ginger and ground cloves
Instructions- Preheat oven to 425 degrees F.
- Grease a cookie sheet and dust with flour
- In a large bowl, whisk together the flour, sugar, baking powder, salt and spices.
- In a separate bowl, whisk together the egg, milk and pumpkin.
- Cut butter into dry ingredients using a pastry cutter, forks or your fingers, until there are no butter chunks left, and it is like fine crumbs.
- Fold the wet ingredients into the dry.
- Form dough into a ball. Dough should be sticky, but not stick to baking sheet, so add a little more flour if necessary.
- Pat dough onto prepared baking sheet into 9x3x1" rectangle.
- Using a greased knife (spray with cooking spray), cut rectangle into thirds.
- Cut each third diagonally to form a total of six rectangles. (If you want smaller ones, cut these in half to form twelve).
- Gently pull each section apart so that there is a half an inch between each scone (for even baking).
- (Alternatively, form dough into large circle 1" high, and cut crossways into wedges, and pull slightly apart).
- For six large scones, bake 14 - 16 minutes until slightly browned; for twelve smaller scones, bake 10 - 12 minutes until slightly browned.
- Remove scones to wire cooling tray set over a plate or piece of foil, and cool completely.
- Meanwhile, mix together icing ingredients until smooth, if using.
- Drizzle icing over cooled scones and serve.
- Serve plain, with marscapone cheese, cream cheese or butter.
What to do with leftover pumpkin? Here is the perfect thing, spiced pumpkin scones. Hearty without being heavy, healthy without being icky, these scones are more than just a morning treat. I used fresh pureed sugar-baby pumpkin, but canned pumpkin (unseasoned) works fine, too. The dough is a little damp, so instead of cutting the scones and removing them to a baking sheet, it is easier to form the scone dough right on a floured baking sheet and then cut them. The way I show how to do it makes large scones; you may cut them smaller and reduce the baking time. The scones are great without the icing. Eat them plain, with butter or best of all, with a smear of marscapone cheese or cream cheese. They also keep well for the next day, and freeze beautifully. Wrap them individually in foil and freeze, and when defrosted they are just as good as fresh. -
Lemon Strawberry Jellyroll Cake

Lemon Strawberry Jellyroll Cake Have you ever made a jellyroll cake? It looks very fussy, but is extremly easy. My daughter, home from college for a week, wanted a birthday cake that wasn’t “heavy and gunky like college food”. So I made a Lemon Strawberry Jellyroll cake for her, and it was wonderful if I do say so myself! You will need a jellyroll pan, which everyone should have anyway because you can do so much with it. You can fill this basic sponge cake with whipped cream, custard, curd, or even… um… jelly or jam. You can make a chocolate version with chocolate ganache, or even with pastry cream and mixed candied fruit to follow an Italian meal. I’ve made one with whipped cream and mango. This is the basic Yule Log, too. This recipe is bright with lemon, which is saved from being too much by the fresh strawberries inside, and is very light. Yum!
Lemon Strawberry Jellyroll CakeAuthor: Diane C. KennedyRecipe type: DessertPrep time:Cook time:Total time:Serves: 8-10An easy and delicious cake that looks complex.Ingredients- For the cake:
- ½ cup all-purpose flour
- 1 teaspoon baking powder
- 4 eggs at room temperature, separated
- 1 teaspoon fresh lemon juice
- ½ teaspoon vanilla extract
- 1 teaspoon lemon zest
- ⅓ cup granulated sugar
- and ½ cup granulated sugar
- One cup lemon curd (see recipes)
- 2-3 large ripe strawberries, sliced, then halved
- Sifted powdered sugar
- Sweetened Whipped Cream, Lemon Icing (recipes follow) and Meringue Mushrooms (optional; see 'recipes' on blog)
- For Icing:
- 1 cup powdered sugar
- 1 teaspoon fresh lemon juice
- For Sweetened Whipped Cream:
- 1 cup heavy whipping cream
- 1 teaspoon granulated sugar
- ½ teaspoon vanilla
- Add meringue mushrooms to complement the 'log' if desired (see 'recipes').
Instructions- For cake:
- Line a 15x10x1-inch jellyroll pan with parchment paper (not waxed paper, it will stick), or grease and lightly flour it.
- In a small bowl stir together flour and baking powder.
- In a medium mixing bowl beat egg yolks and vanilla with an electric mixer on high speed for 3-4 minutes or until frothy.
- Gradually add the ⅓ cup granulated sugar, beating until sugar is almost dissolved.
- In another bowl beat egg whites with very clean, dry beaters on medium speed until soft peaks form.
- Gradually add the ½ cup sugar, turning up the speed and beating until stiff peaks form and stop the mixer.
- Gently fold the egg yolk mixture into the beaten egg whites.
- Sprinkle flour mixture over the batter and gently fold in until just combined.
- Spread batter evenly in prepared pan.
- Bake 375 degrees F. for 12 to 15 minutes or until cake springs back when lightly touched and is just golden brown.
- Lay a towel or piece of parchment that is larger than the cake pan on the counter and sprinkle liberally with powdered sugar.
- Quickly invert the hot cake onto the towel and peel off parchment that was on the bottom of the cake, if used.
- Roll up the towel and cake, making sure the cake doesn't touch itself, starting from the short side.
- Cool rolled cake on a wire rack. You can refrigerate the cake now for a day, slid into a plastic bag.
- When ready to fill (on the same day as being served) bring the cake back to room temperature and carefully unroll. I haven't had a lemon jellyroll that hasn't stuck a little to the towel because it's so moist. If it cracks, its okay. You can cover the cracks with icing.
- Spread with lemon curd leaving one inch around the edges.
- Arrange sliced strawberries across the cake in rows.
- Carefully re-roll cake without the towel.
- Place on serving plate.
- Spoon lemon icing along top of jellyroll cake; it will slowly drip down the sides.
- Spoon sweetened whipped cream on servings or into a frosting bag and pipe rosettes or other decorations around cake.
- Add meringue mushrooms to complement the 'log' if desired.

Baked sponge Lay a towel or piece of parchment that is larger than the cake pan on the counter and sprinkle liberally with powdered sugar.

Powder a towel Quickly invert the hot cake onto the towel and peel off parchment that was on the bottom of the cake, if used.

Peel off parchment Roll up the towel and cake, making sure the cake doesn’t touch itself, starting from the short side.

Roll it up Cool rolled cake on a wire rack. You can refrigerate the cake now for a day, slid into a plastic bag.
When ready to fill (on the same day as being served) bring the cake back to room temperature and carefully unroll. I haven’t had a lemon jellyroll that hasn’t stuck a little to the towel because it’s so moist. If it cracks, its okay. You can cover the cracks with icing. Spread with lemon curd leaving one inch around the edges. Arrange sliced strawberries across the cake in rows.

Mine cracked because I was too hasty, but cracks be hidden! Carefully re-roll cake without the towel. Place on serving plate.

Rolled cake ready for icing Spoon lemon icing along top of jellyroll cake; it will slowly drip down the sides.
Spoon whipped cream on servings or into a frosting bag and pipe rosettes or other decorations around cake.
Add meringue mushrooms to complement the ‘log’ if desired.

Yummy Slice Makes 8-10 servings.
-
Easy and Incredible Buttermilk Chocolate Ganache Cake with Perfect Chocolate Frosting

Spread ganache on cake layers, leaving some in the bowl for licking! A rare thunderstorm in San Diego, after days of 100+ degree heat. A few drops of rain and enough crashing to make my dogs nervous. They are happily taking advantage of my push-over self and are in the living room, while my cats are furious in the rest of the house. The cooler fallish weather and darker skies makes me want to cook!
I bake for friends, and this is one of my most requested cakes. It is easy, it is wonderful, it is satisfying: it is chocolate. I don’t like wimpy chocolate cakes; if I’m going to invest my calories in a dessert, it better pay off in flavor and texture. Making this cake a day ahead allows the flavors to meld, but it can be eaten right away in case of chocolate emergency. This recipe does use dairy products, and the acid reaction between the buttermilk and baking soda helps it rise and makes the chocolate flavor be yum. I have directions for a layer cake or sheet cake, but it makes great little bundt cakes, too. I have a humongous sheet cake pan and I quadruple the recipe with complete success. I’ve given directions for chocolate frosting, which is absolutely great, by the way, but feel free to use other colors for decorations. Although I enjoy dark chocolate, I find semi-sweet is best in the ganache, although I’ve used extra-dark baking cocoa for the batter and frosting with much success. Enjoy!
Easy and Incredible Buttermilk Chocolate Ganache Cake with Perfect Chocolate FrostingAuthor: Diane KennedyRecipe type: DessertPrep time:Cook time:Total time:Serves: 10 - 12My best and most satisfying chocolate cake recipe, without a lot of hassle!Ingredients- Buttermilk Chocolate Ganache Cake
- For Cake:
- 2 cups white sugar
- 1 ¾ cups all-purpose unbleached flour
- cups powdered unsweetened baking cocoa
- 1 ½ teaspoon baking powder
- 1 ½ teaspoon baking soda
- 1 teaspoon salt
- 2 eggs
- 1 cup buttermilk
- cup vegetable oil
- 2 teaspoons vanilla extract
- 1 cup boiling water
- For Ganache:
- cup heavy cream
- 2 tablespoons unsalted butter
- 4 ounces semi-sweet chocolate in pieces
- For Frosting:
- 1 stick (1/2 cup) butter
- ⅔ cups powdered unsweetened baking cocoa
- 2 cups powdered sugar, sifted
- ⅓ cups milk, water or buttermilk
- 1 teaspoon vanilla
Instructions- Heat oven to 350 F.
- Grease and flour 2 9-inch round baking pans, or one sheet cake pan.
- Combine dry ingredients in a large bowl.
- Add eggs, milk, oil and vanilla; beat on medium speed for 2 minutes.
- Stir in boiling water (batter will be thin).
- Pour evenly into baking pan(s).
- Bake 30 – 35 minutes, or until wooden toothpick inserted in center comes out cleanly.
- Cool ten minutes.
- For layer cake, or for the more adventurous sheet cake bakers, turn cake(s) out onto wire racks and cool completely.
- For ganache, combine heavy cream and butter in a small saucepan and bring to a simmer.
- Turn off heat.
- Add the chocolate pieces and swirl around to cover them with the hot milk mixture, and then cover for five minutes until chocolate is melted.
- Stir until smooth and creamy.
- Pour into a small bowl, cover and refrigerate until ganache is thick enough to spread.
- For frosting, melt butter and pour into bowl.
- Stir in the cocoa.
- Alternately add sifted powdered sugar and milk, beating on medium speed to spreading consistency.
- Add more milk if needed.
- Stir in vanilla.
- Makes about 2 cups.
- To finish: If making a layer cake use the ganache as filling.
- Cake may then need to be chilled to keep ganache firm before and after frosting. Ganache can also be used both as filling and as a coating for the top layer, and the frosting spread around the sides of the cake and piped decoratively around the top edge as a barrier to contain the ganache.
- If making a sheet cake, spread thickened ganache on top of cooled cake.
- Pipe frosting decoratively around edge to contain ganache and, if you’ve managed to turn the cake out of the pan, spread the frosting around the sides.
- This cake is excellent if made the day before serving, to give the flavors a chance to meld.

