- Compost, Fungus and Mushrooms, Gardening adventures, Hugelkultur, Irrigation and Watering, Microbes and Fungi, Other Insects, Permaculture and Edible Forest Gardening Adventures, Planting, Recycling and Repurposing, Reptiles and Amphibians, Seeds, Soil, Water Saving, Worms
Building and Filling Free Raised Beds
 I grew vegetables in raised beds made of old bookshelf wood for many years. Then several years ago we buried that wood along with other biodegradable material in the vegetable garden and grew in the earth This is the best method of growing vegetables. However, the ongoing drought caused plant scarcity and otherwise manageable wildlife then foraged in desperation. Gophers began an onslaught of our vegetables and being a no-kill garden (except for Argentine ants) we tried many kind methods of discouraging them. Finally this year after a dry warm winter, anticipating more animal depredation, I took a friend up on their offer of free used pallets.
  We sorted through stacks of pallets and found those stamped with the same name. These pallets are untreated raw pine and of a manageable and portable size. I cut each pallet in half and then nailed and screwed them together. One raised bed needed three pallets. We then covered the bottom with hardware cloth. The areas where the raised beds were to go were leveled and in several cases, de-Bermuda grassed.
 The pernicious weed had infiltrated our good soil and so shovelful by shovelful we turned and picked. The stolens were unceremoniously tossed into a trashcan which will solarize in the burning hot summer to come, and will then be used in compost.
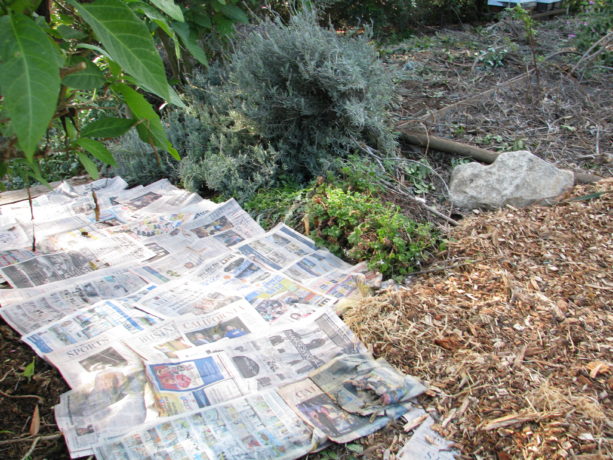
 On top of the leveled ground we placed cardboard. This provided a grass and gopher barrier to the bottom of the bed. Although the cardboard will break down over time, it will in the short run discourage gopher tunneling and weeds. The new pallet bed was placed on top of the cardboard.
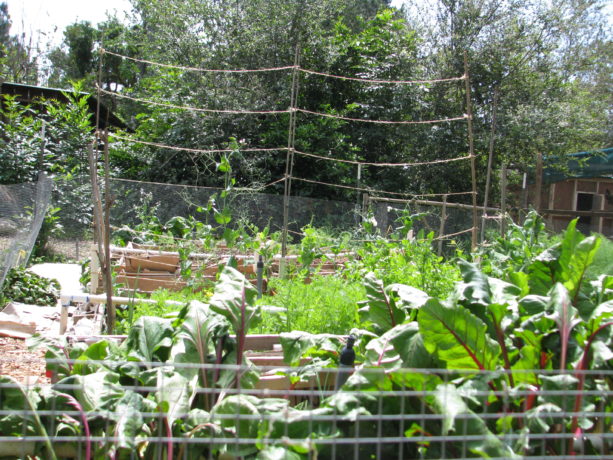
 Here is one of the tricks of having a raised bed in a hot climate: insulate it! Anything raised above soil level in hot climates are quickly heated and dried out. Raised beds notoriously have dead zones around the edges where the heat cooks the soil, killing microbes and sucking water out of the bed. Lining the inside of the bed with thick cardboard is one way to help insulate the bed, as well as planting cascading plants on the southwest side, or bushy herbs in the ground outside of the bed, or even fastening flakes of straw around the outside. With the pallets we had room to not only line the inside of the bed, but stuff cardboard down into the gaps all around the bed. We repurposed a lot of cardboard.
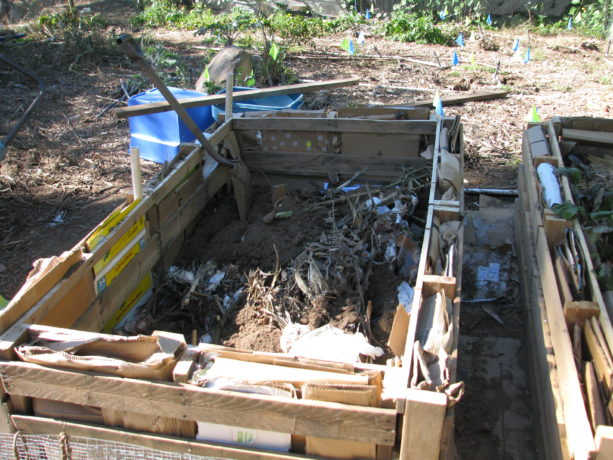 To fill the bed, we began with old sticks, limbs and logs as we had them. We layered these items as they were available, making sure that earth was touching each layer, and balancing green plant material with the brown as you would in a compost situation: dried tomato vines, fresh passionvine prunings,
  cut back rose canes, sycamore leaves, heavy clay taken from a new asparagus bed, silt from the rain catchment basins,
 kitchen scraps including bags of orange rinds after juicing, poopy chicken dirt from inside the hen house,
 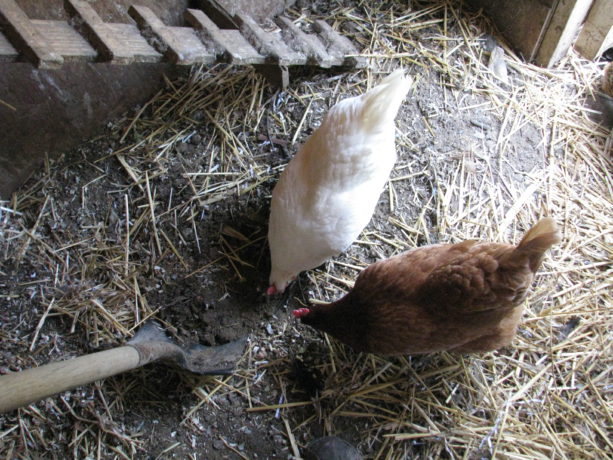 poopy newspapers from the cages in which we kept sick hens indoors (crop binding), decomposable trash such as used tissues, paper towels, cotton ear swabs, junk mail (not glossy or plastic),
 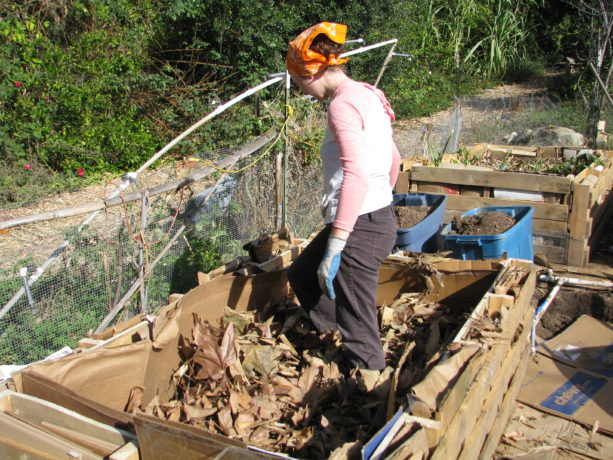 hair, cotton balls, old cotton T-shirts, and corn husks which many people don’t know are used for compost purposes (visit https://homewarranty.firstam.com/blog/corn-husks-not-just-tamales to get all the details). As we built the beds, we’d take our time filling them as we produced ‘waste’ materials, and threw them in.
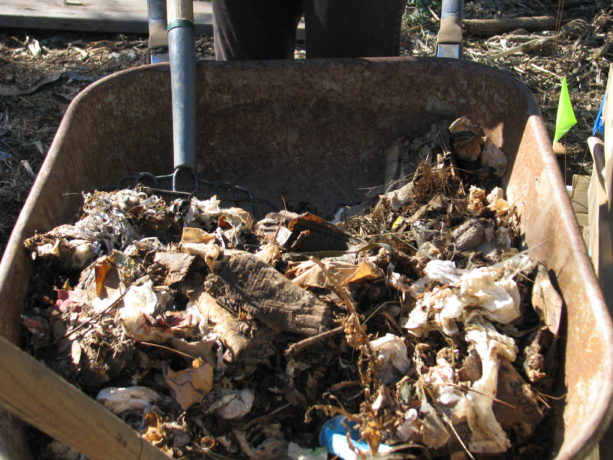


 When the bed was filled (and understanding that the contents would settle) and watered in with rainwater from our 700 gallon tank, we topped it with microbially rich soil from the garden beds (making sure there weren’t any grass bits hiding in it).
 I stuck pieces of old 1′ PVC pipe evenly along the sides of the pallets prior to stuffing with cardboard, so that if needed I could insert wood or bamboo pieces and either build an upright sturdy trellis for climbers, or even make arches from bed to bed on which I can grow vines.
 For irrigation, I connected each bed to its own set of overhead sprinklers. Each bed has its own shut off.
 The pipe is resting on the opposite pallet as support, and the joint where it els across the bed are threaded pieces, so the entire length can be raised and pulled out of the way so working in the bed can be easy.
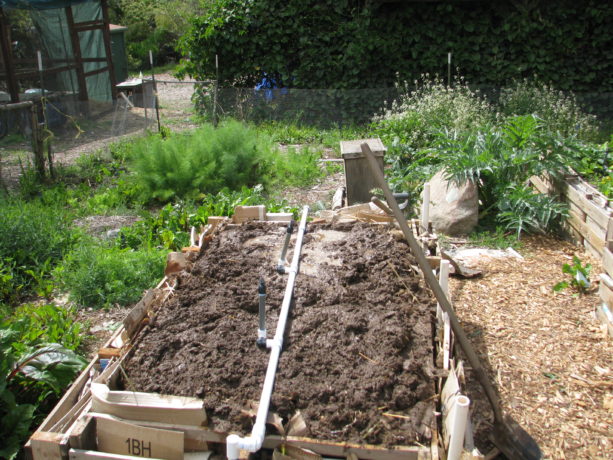 The irrigation is hooked up to our well water and is on the irrigation timer for a brief shower every other day. With a lasagna garden, once saturated water will be held in the organic materials that make it up, so after initial regular watering for seed sprouting or hardening off transplants you won’t need to water as much. Roots will grow very deeply.
Because we allow some vegetables to go to seed, we had to transplant vegetables from the ground where the raised beds were placed, into the raised beds.
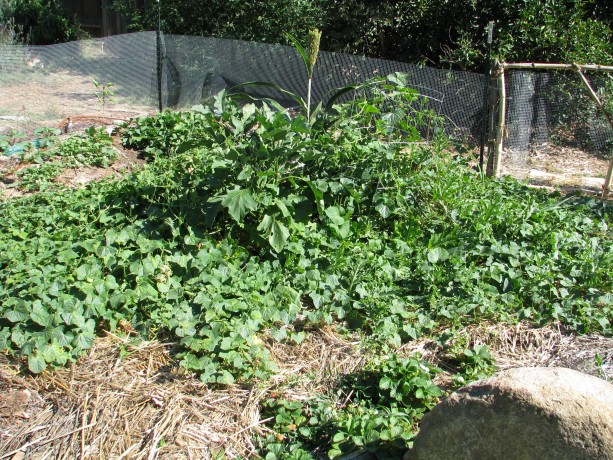
 We have a forest of beets, fennel, perpetual spinach, onions, peas, arugula and lettuce in what is still in the ground, and have transplanted selections from these into the beds along with planting seeds. Fortunately we love beet greens, which don’t taste like beets and are more mild than Swiss chard.
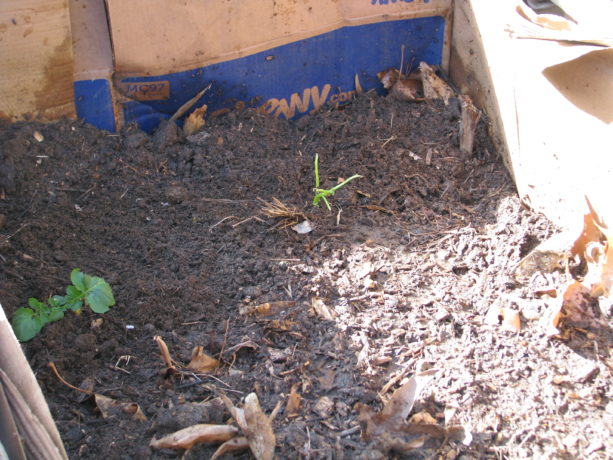
Into one bed we’ve planted potatoes in good soil at the bottom, and are gradually filling in with straw as the plants grow. We used leaves in the soil mix, but no woody bits or other lasagna garden materials because we didn’t want to dig potatoes out of piles of old wood, nor burn the potatoes with composting materials in the shallow soil layer.
I am not a good carpenter. I however am great at figuring out what should have been done after I’ve done something. Here are some tips on building pallet beds:
I had thought about placing them on top of flat pallets to be raised off of the ground, so even less susceptible to gophers and grass, but I fortunately nixed that idea before it was enacted. The reason is that that space would be a wonderful habitat for mice or rats, or even snakes. Much as we welcome non-venomous snakes into our garden I really don’t want to startle one with my feet as I’m leaning over a bed. Of course, they would take care of the mouse and rat problem, so maybe it would be a good thing.
I had several bags of 16p galvanized nails given to me years ago, a rescue from a construction dumpster. I mean, kitchen trash-sized bags. I can’t move them, and they sit in my large shed. I opted to use some of them for this project. It was difficult hammering them into the knotty wood of the pallets, and often the holes had to be pre-drilled. Nailed wood also can pull apart, so braces across the width of the pallet to prevent bulging would have been a fantastic idea. For the last two I resorted to screws, which are far easier to both install and remove. Perhaps the nails will have to go to Temecula Recycling. If I can lift them.
We needed to build the beds quickly, as planting season bore down on us here in San Diego even earlier than usual. Here at the beginning of April we are far behind because we haven’t planted out tomato, squash, melon or cucumber seeds yet. Whew! So the beds are not beautiful, but they are functional. You can pretty up pallet beds by attaching wood around the outside, or straw flakes, or other material, and by putting wood around the top. Especially if it is repurposed wood. If you have mouse problems, then try attaching chimney flashing or other wide strips of metal around the base of the bed so that they cannot climb up the sides.
My entire vegetable patch is surrounded by a chicken wire fence, so bunnies can look but they cannot touch. We don’t have squirrels anymore in the garden because California ground squirrels like to see all around them, and our dense food forest is much too scary for them to be comfortable. Using a mild shock wire around the beds or garden fence, using metal flashing to prevent climbing, or enclosing a small garden with wire would all be ways to prevent squirrels and rats from feasting.
We covered the surrounding ground with cardboard and topped with free wood chips, for sheet mulching.
 This cools the soil, prevents weeds from emerging, helps choke out the Bermuda grass, and also keeps the gopher at bay. He or she must push droppings out of the hole, and if they hit cardboard, or have a shower of bark come down on them, they will go elsewhere.
Because we used non-sterile garden soil as a topper, we’ve had some weed seeds germinate but also some pleasant surprises. We planned on planting dill but found it popping up in our polyculture planting. We had several potato bits sprout, so they needed to be moved into the potato bed. Purslane, which is a weed but also one of the most nutritious greens you can eat, loves the beds so we are harvesting it regularly for chicken feed, personal use and also for making green smoothies as liquid compost for our citrus trees. Because we don’t use chemicals of any sort in the beds, there are a number of native western fence lizards loving the heck out of the beds and helping with our integrated pest management.
Some crops such as corn and tomatoes will need to go into the soil; so far gophers haven’t eaten corn, and the tomatoes can go into gopher cages up against fences or around the property on trellises or trees. The strawberries, Jerusalem artichokes and horseradish seem safe in the ground as well.
Our raised beds are working beautifully already, and the dirt and organics inside of them will be building good soil month after month until it is gorgeous compost. Except for labor, wire and a few PVC parts, they were free to build and free to fill. They can be topped off with good compost after a season, or even given another layer of old tomato vines and dried plant scraps topped with compost for the next planting season if needed. But it shouldn’t unless the height of the soil needs building, because the soil inside the bed is improving all the time.
Give it a try, and make it more attractive, and you’ll have wonderful, safe vegetables and no green waste at all.
- Animals, Building and Landscaping, Chickens, Compost, Gardening adventures, Irrigation and Watering, Other Insects, Permaculture and Edible Forest Gardening Adventures, Planting, Predators, Recycling and Repurposing, Seeds, Soil, Water Saving
A Garden Coop
 If you want chickens and vegetables, and have predators and opportunists trying to eat what you grow, and perhaps have limited space, this design may be for you. I did not come up with it; I don’t know who did and I give lots of credit to that person because this makes so much sense. I’ll be converting our Fowl Fortress into one as I can.
It is the Garden Coop. You build one structure of strong wire with small gauge holes to keep rats, mice and snakes out, keep your hens on one side and garden in the other, then switch.
Start with cemented posts. Your coop can be of any dimension depending upon how many chickens and how much gardening space you will need. Take that number and multiply it by two. Instead of wood you can use metal posts with metal spacers across the top if that is more cost effective for you. Make it 7 or 8 feet tall, for comfort to walk in and also to give you more vertical growing space.
Wrap the entire structure with wire, all sides and across the top, and at least six inches into the ground all the way around. This helps prevent digging animals from getting into the coop. As we have coyotes, I also pounded 6″ pieces of rebar into the perimeter every 6 inches. If you have gopher problems, then bury wire 2.5′ into the ground around the perimeter. Hardware cloth would be best although the small chicken wire is more flexible to work with. When you overlap the wire cloth be sure to sew it closed or wrap and tuck the edges, otherwise rats and mice will slip through.
Put your hen house in the center of the coop; the house should have doors on two sides.
Divide your coop in half with wire down the middle. The wire should go around the hen house, and the hen house doors should open into each half of the garden.
Now you can keep your hens in one half and garden in the other half. When a season ends, switch them.
You’ll have all of your fruit and vegetables safe from squirrels, rats, mice and birds. You’ll have vertical space on which to grow your vines. When you switch, you’ll be gardening in insect-free, well manured soil and your hens will have excellent food sources. They will be working without being let loose, and will have an active and healthy life without becoming prey. They will take apart your old garden and fix it for the next switch.
All of your water needs are in one place. All of your composting is in one place. All of your vegetable and egg gathering is in one place. You get to harvest all of your vegetables and eggs without feeding rodents. What you don’t want, you toss to the hens. All with one structure, one initial cost. Its a chicken tractor that doesn’t move!
Because you are keeping animals out physically and controlling insects with hens, you won’t be enticed to use traps, bait, sprays, etc.
You can also grow around the outside perimeter of the coop. Just be aware of shade issues from vines (maybe a good thing?) grown over the top. Summer shade with a deciduous vine may be just right for keeping your hens and garden cooler.
Its a great idea, and maybe the one that will help you succeed in your garden.
You May Also Like

Native Insects and IPM
- Animals, Birding, Building and Landscaping, Chickens, Compost, Fungus and Mushrooms, Gardening adventures, Health, Heirloom Plants, Houses, Hugelkultur, Microbes and Fungi, Natives, Other Insects, Perennial vegetables, Permaculture and Edible Forest Gardening Adventures, Ponds, Predators, Rain Catching, Reptiles and Amphibians, Seeds, Soil, Water, Water Saving
Podcasts with Diane Kennedy
Two podcasts with me talking about permaculture, Finch Frolic Garden, and how you can save money and the world through gardening! 🙂 Please let me know what you think:
This is a podcast with Sheri Menelli of earthfriendlyhomeowner.com, where I talk pretty much without a pause for breath for about the first ten minutes. Recorded in May, 2015.
http://www.earthfriendlyhomeowner.com/ep7-interview-with-diane-kennedy-of-finch-frolic-gardens-and-vegetariat-com/
This is a podcast with Greg Peterson of Urban Farm Podcasts, released Jan. 7, 2016, and you can listen to it several ways:
Urban Farm U:
http://www.urbanfarm.org/category/podcast/
iTunes:
https://itunes.apple.com/us/podcast/urban-farm-podcast-greg-peterson/id1056838077?mt=2
You can sign up for free to hear all their great podcasts here.
You May Also Like
Native Insects and IPM
- Building and Landscaping, Compost, Composting toilet, Gardening adventures, Health, Houses, Hugelkultur, Humor, Living structures, Natives, Permaculture and Edible Forest Gardening Adventures, Ponds, Rain Catching, Recycling and Repurposing, Soil, Special Events, Water, Water Saving
How To Evaluate Your Property: The July Lecture In The Garden at Finch Frolic
Finch Frolic Garden’s Program in the Garden Series for July:
Analyzing Property for Maximum Use:
Site Evaluation Step-by-Step
Sunday, July 26, 2 – 4 pm
Looking for property? Creating a landscape? Planting a garden? Building a house? Diane Kennedy of Finch Frolic Garden will take you through the steps of evaluating your site for maximum effectiveness with the least labor and cost.
This class is for the average homeowner, with little or no permaculture background. All terms will be defined and explored. Guaranteed, you will leave the class excited about your property, and able to find new potential in it.
In permaculture, 99% of the work should be in design, and only 1% in labor, so find out how to look at property with new eyes and start designing! Participants are encouraged to bring a Google Maps image of their property to work on.
We will, of course, offer homemade vegetarian refreshments. Cost is $25 per person, mailed ahead of time. Finch Frolic Garden is located at 390 Vista del Indio, Fallbrook. Please RSVP to dianeckennedy@prodigy.net . More information can be found at www.vegetariat.com. You’ll love what you learn!
- Animals, Bees, Birding, Building and Landscaping, Gardening adventures, Hugelkultur, Microbes and Fungi, Natives, Other Insects, Pets, Predators, Quail, Rain Catching, Reptiles and Amphibians, Water, Water Saving, Worms
Artificial Turf? Big Mistake.
Want a green lawn that needs no irrigation or mowing? That sounds ideal. As with most products that sound too good to be true, so it is with artificial turf. Modern artificial turf is not much like the Astroturf of old. Artificial grass blades are usually made of polyethylene, polypropylene or nylon, which create soft, harder or stiff blades respectively. These are anchored in an infill material that is usually a mixture of sand and ground up recycled automobile tires among other things. Utilizing recycled tires should give this product big bonus points; however, this material will leach heavy metals into the ground, contaminating the dirt for decades. When heated, the plastic and rubber will release toxins into the air as well.
Heat is the biggest problem with artificial turf, according to King Green. The infill made of plastic and rubber is a thermal mass: as it sits in the sun it absorbs and radiates heat. For example, at 6 pm, an hour before the Women’s World Cup in Canada began at the end of a nice 75 degree day, the artificial turf on which they were to play measured 120F. Where daytime temperatures rise to 100F, the turf could measure up to 180F. Having turf where children or animals play can cause burns.
Radiating heat from thermal mass such as hardscape (usually cements and asphalt), expanses of gravel, and especially artificial turf will heat up homes and is a contributor to more energy usage for air conditioners and fans. In arid areas there might not be much rainfall but there can be fog and ambient moisture that normally collects on leaves and drips as a form of irrigation. Good pollenization partially depends upon moist, still air because pollen dries rapidly. Radiating heat and reflected light (the albeido effect) from these surfaces help to dry out moist air and cause air movement as the heat rises. The more rising heat, the windier and drier the atmosphere becomes and the less fruit and vegetable set there is. As artificial turf heats up to a third again of the atmospheric temperature and continues to radiate into the evening it is even more damaging to atmospheric moisture than bright cement.
The claim that artificial turf greatly reduces the amount of toxins in the air that would be released from lawnmowers, and save thousands of gallons of water otherwise used to irrigate lawns is using select ideas while ignoring others. Artificial turf may not need mowing, but it needs leaf-vacuuming and hosing off, especially if there are animals using it. On soil bird, reptile and pet feces are part of the fertilization process and are quickly decomposed by microbes. On artificial turf the feces adhere to the plastic blades and are difficult to remove with even a power wash. Urine seeps into the rubber matting and cannot be completely removed, smelling strongly of urine for the life of the turf.
Native plants and grasses improve the soil, hold rainwater, moderate heat and wind, and offer habitat for hundreds of birds, mammals and insects. Areas that are covered in artificial turf are sterile, harmful to animals, people and the environment, and offer no educational value. Planted areas are magnets for wildlife that are starved – literally – for decent food, water and shelter.
The life of some artificial turf products is estimated to be 10 – 15 years, with a warranty usually for 8. If the grass is being heavily used the life is reduced. The turf doesn’t look new up until the warranty expires; the blades break off and the plastic and rubber slowly break down further been compressed, dried out and imbued with heavy metals.
The cost of installing artificial turf is heavy. It must be laid on scraped, level, rockless dirt, so there are earthworks involved. There are many types of artificial turf and they have a broad price range. A 12’ x 75’ strip of low-grade turf from a chain hardware store is currently over $1500.
What are the alternatives in this time of water scarcity? For areas that must have grass, tough native grass mixtures are a great alternative. See the selection that S&S Seeds has of native Californian grasses; they even offer sod. Lawns should be mowed higher and more frequently for best root growth, and the cuttings left to mulch in. For least evaporation and for pathogen control watering should be done between 3 AM and 9 AM. See this site for more lawn tips.
Stop using commercial fertilizers, which cause plants to need more water. Use actively aerated compost tea, which is easy and inexpensive to make, completely non-toxic and causes deeper root growth and therefore healthier, longer-lived and more resilient grass. Please explore the work of Dr. Elaine Ingham, soil microbiologist, who has perfected the use of AACT on properties worldwide. Instructions for making AACT can be found here.
For those who don’t need a lawn at all, native landscapes can be lush and beautiful and after being established dislike summer water. You can see what native and non-native plants are safe to plant near your house if you live in a fire zone with the County of San Diego’s Defensible Space Plant List. Please see the books The California Native Landscape by Greg Rubin and Lucy Warren, and California Native Plants for The Garden by Bornstein, Fross and O’Brien.
The secret to water storage in the soil for both lawns and plants is to dig in as much organic matter into the soil that you can. Artificial turf is also not permeable, so it channels rainwater rather than harvesting it. Old wood is best, but cuttings, organic fabric and paper can all be used to hold rainwater. One inch of rain on one acre in one hour is 27,154 gallons of water. The best place to hold that water for your plants –or to hold precious irrigation water – is in the soil. Wood in the soil along with top mulch will water and feed plants for months, as well as cleanse and build soil. This practice is called hugelkultur. Please research hugelkultur on the Internet for more information.
If you are considering purchasing artificial turf or gravel for your yard or common area, please think again. It is adding to the problem of global warming, it is an elimination of even more habitat – even the scarce habitat that a lawn can offer – and will become an expensive problem in a short time.
You May Also Like
Native Insects and IPM
-
Seitan: An Easy Mock Meat

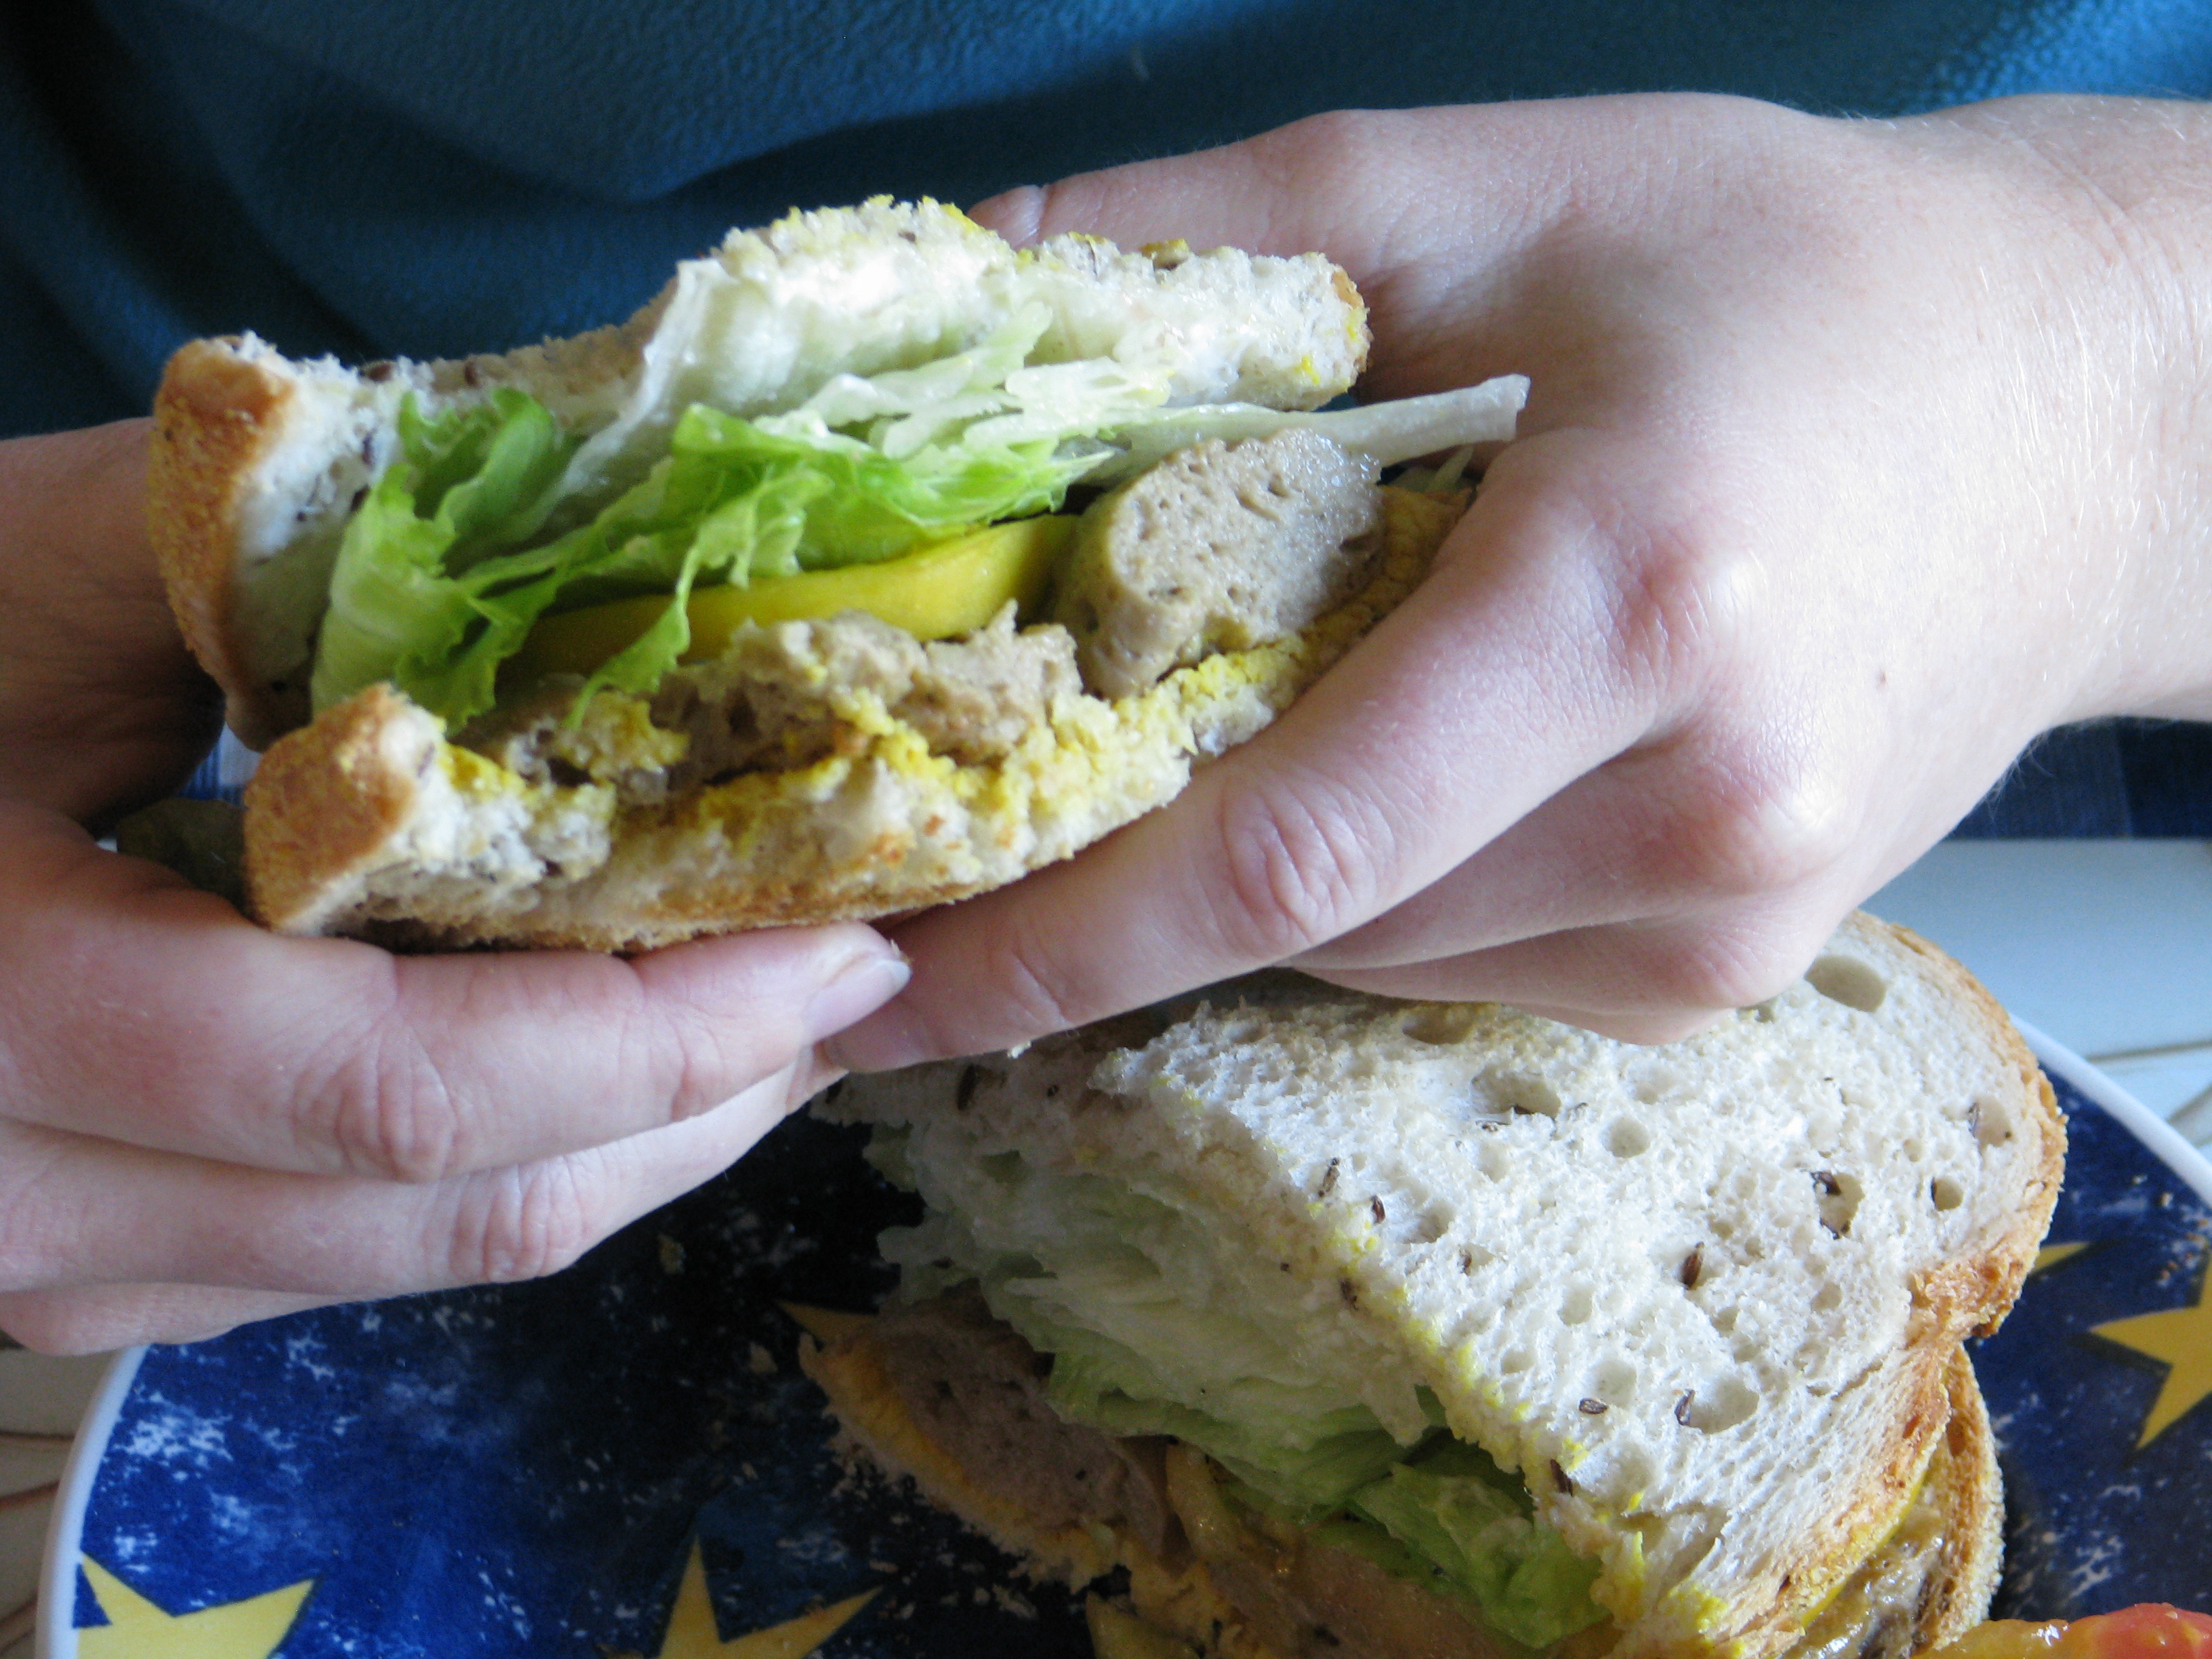
A juicy seitan sandwich is really, really good. For the past year I’ve been making my own vegan meat out of organic vital wheat gluten. This meat is called seitan (pronounced, humorously enough, say-tan, just like the fork-tongued guy in red). If you’ve eaten mock meats, especially in restaurants, you’ve most likely have eaten seitan.
I am not gluten intolerant, and I know that the current ‘epidemic’ of celiac disease is not what it seems. People eat far too much wheat in their diets, and that wheat is not only genetically modified, but sprayed with herbicides and pesticides, then processed until it has to have nutrients added back onto it to qualify as food, and then it is shipped and stored. The consumer has no idea when that poor tortured grain actually came forth into this world. As my good friend Bill says, “You can’t see the farm in it.” I believe that when people eliminate wheat from their diets they feel so much better because they aren’t eating all those hamburger buns, batters, snacks and other empty-calorie foods. They are also reducing the amount of pesticides and herbicides they consume.
I know about developing an intolerance to food. I’ve developed an intolerance to soy milk (organic, mind you), which made me realize how much of it I have been consuming. Now I drink rice milk or water mostly, and manage my soy intake while keeping an eye out for other products I may be indulging in too much. My grandfather Walter Brower in the 30’s had developed a bad dermatitis. He was in the hospital with it, being treated for all kinds of things with no relief. He was missing work, and he was the sole supporter of his family. Finally someone recommended that he visit a chiropractor… a chiropractor? For a skin condition? In the 1930’s? This was radical thinking. Thankfully he was desperate enough to go. He visited the chiropractor’s office, sitting across from him at his desk, and told the doctor about his affliction. The chiropractor asked what he did for a living. My grandfather was a delivery man for Bordon’s milk. The chiropractor said that my grandfather had developed a milk allergy due to all the dairy products he consumed. My grandfather went off dairy, and the skin problem disappeared within days. (This was at a time before cows were fed pellets of corn and chicken feces laced with antibiotics as they are today, too.)
All that said, I make my own meat with organic products, as well as my own vegan butter , and am now experimenting with vegan cheese (more on that later). Do I have a lot of time on my hands? No. I spend a couple hours once a month making the seitan and the butter, enough for a month, and freeze both.
Seitan isn’t pretty before it is cooked. It is grey and spongy. However compare it to the flesh of a butchered animal and it is beautiful. You can buy vital wheat gluten just about anywhere now, but different brands have different quality. I use Bob’s Red Mill which has outstanding flavor and never gets rubbery. I also use Bragg’s Liquid Aminos instead of soy sauce, tamari and often other salt. It is organic and nutritious, and a little bit brings out the flavor of soups, main dishes, salad dressings, scrambled eggs, and anything its added to. Compare prices online for both; Amazon.com has good deals if you want to buy a lot.
When seitan is frozen, the patties are quickly thawed in a lightly oiled pan. The ‘meat’ is juicy, flavorful and delicious, and can be used in place of chicken strips, ground up instead of meat for stuffing or sausage, used as is in a sandwich or hamburger, or cubed for stew, curry… whatever. The problem I have is wanting to eat it too often!
Basic SeitanAuthor: Originally from ShrimpGhost on Allrecipes.comRecipe type: Main DishCuisine: VeganPrep time:Cook time:Total time:Serves: 12Organic vital wheat gluten makes a yummy, all-purpose meat substitute for very low cost.Ingredients- 2 cups organic vital wheat gluten
- 1 teaspoon organic crushed dry rosemary (or minced fresh)
- 1 teaspoon organic dried thyme
- 1 teaspoon organic dried rubbed sage
- ¼ teaspoon organic cumin seed, lightly crushed
- ¼ teaspoon organic garlic powder
- 2 cups water
- ⅓ cup Bragg's Liquid Amino Acid (or tamari sauce, but it is saltier)
- 8 cups water
- ¼ cup tamari sauce
- ¼ cup Bragg's Liquid Amino Acid
- ½ teaspoon organic onion powder
- 1 4-inch piece dried kelp (kombu) (you may omit)
Instructions- In a large non-reactive bowl, mix together the vital wheat gluten, rosemary, thyme, sage, cumin seed and garlic powder. In a measuring cup mix the 2 cups water with the Bragg's. Quickly add the liquid to the dry and working fast mix thoroughly. The gluten will develop quickly; use your hands to work it to make sure there are no patches of dry gluten. There should be extra liquid. The gluten will be rubbery. Shape the gluten into a long loaf, about 3 inches in diameter. Allow to rest while you make the broth.
- In a tall stock pot combine 8 cups of water with the Bragg's, tamari, onion powder and kombu and bring to a boil.
- Cut gluten log into slices no wider than ¼ inch, or in strips (you can always cut the finished patties into strips later). Individually drop pieces into boiling stock (they'll stick together otherwise). Reduce heat to low, cover and simmer for 45 minutes. Drain and either store seitan in refrigerator in some broth for no more than 5 days, or layer seitan patties flat in a plastic freezer bag laid on a cutting board or plate and freeze. When frozen gently break apart patties in the bag and keep frozen, taking out what you need. Patties can be heated quickly in a pan, sliced and stir-fried, thawed and breaded and baked or fried, or used any way you'd like.
I tried several seitan recipes, most of which were either too bland or too strong and muddy flavored. This recipe I really like for all-purpose, chickeny seitan. I freeze the finished slices flat in a plastic bag so I can pull out however many I need whenever I want them. - Animals, Gardening adventures, Hugelkultur, Natives, Permaculture and Edible Forest Gardening Adventures, Ponds, Water Saving
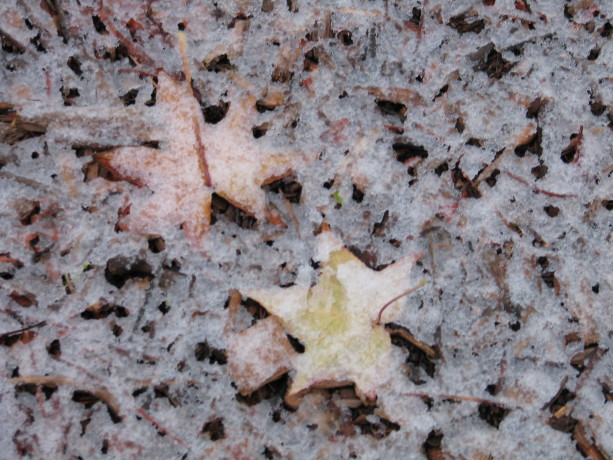
Snow at Finch Frolic
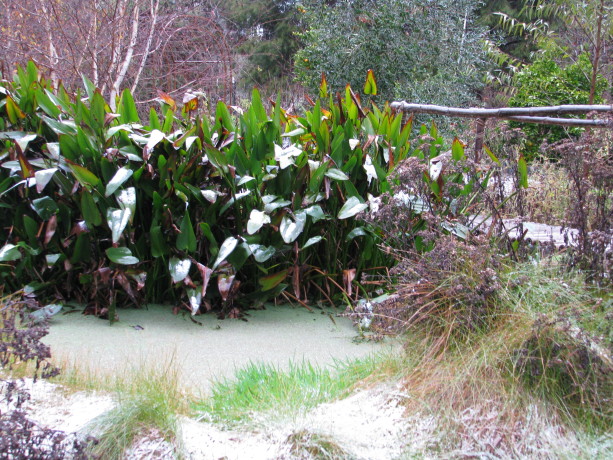
Pickerel and snowy azola on the little pond. Finch Frolic Garden is located in Fallbrook,CA, in sunny San Diego’s North County. Dry and hot conditions are the norm, with temperatures rising above 100 in the summer,and an occasional frost in the winter.

This is a prime Southern California winter scene: palm trees and red tile roofs – and traffic – with snow on the mountains. The peaks are usually only dusted in snow in Jan. or Feb. A rain around Thanksgiving means lawnmowers are humming around New Years. This past year, 2014, has experienced strange weather as has the rest of the world. We had back-to back Santa Anas (hot, dry, high winds from off the desert) in May, which caused many trees and plants to drop flowers. The lack of food and water induced many animals to not reproduce, which affected the rest of the food chain. Then we had fire season in May as well. Unfortunately arson was the cause of some of the fires, but many homes were lost as well as hundreds of acres of our precious endangered chaparral and the baby animals that lived there.
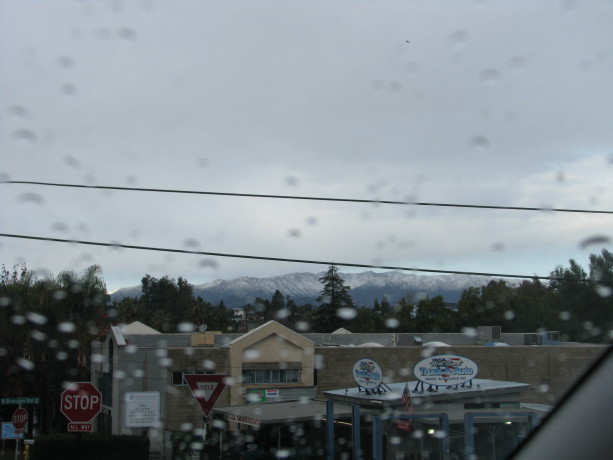
These mountains are northwest of us – they never get snow! Our heat wave came in June, and our ‘June gloom’ – a marine cloud cover – came in July. We had several significant rain events in late Fall, and then on New Year’s eve, it snowed.
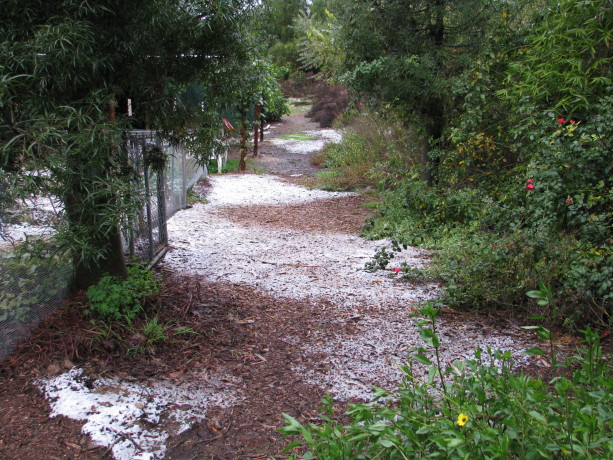
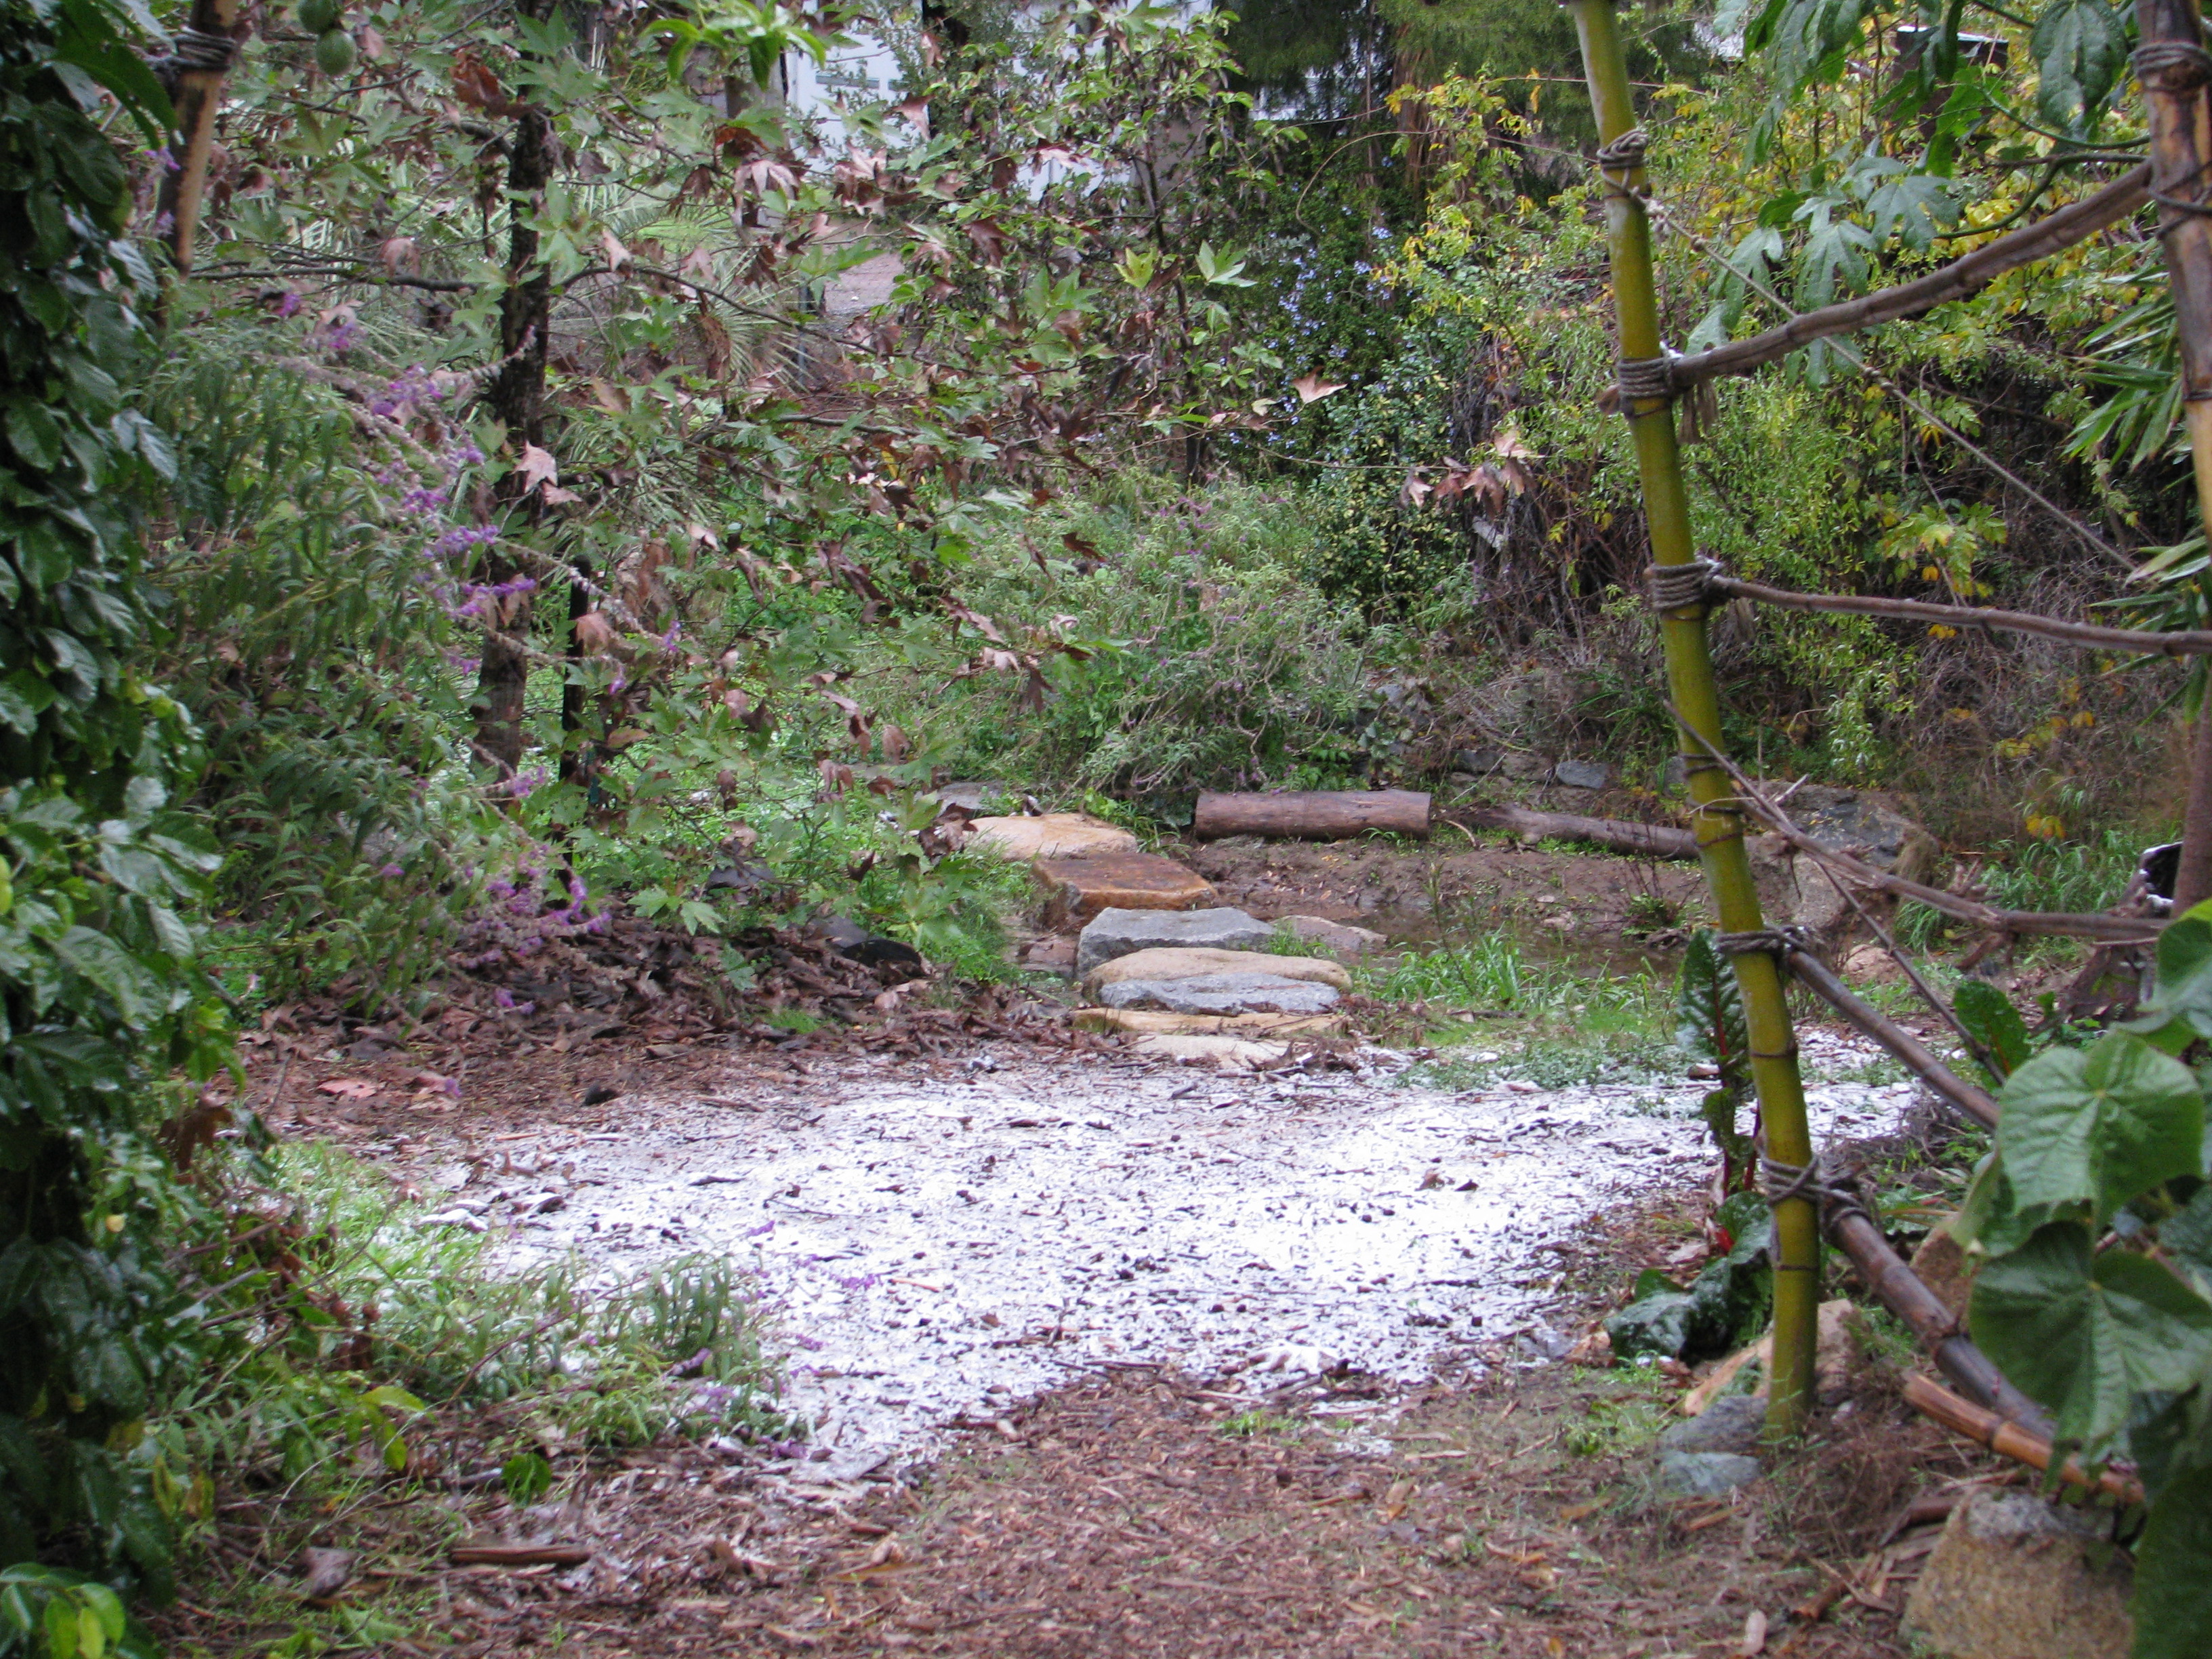
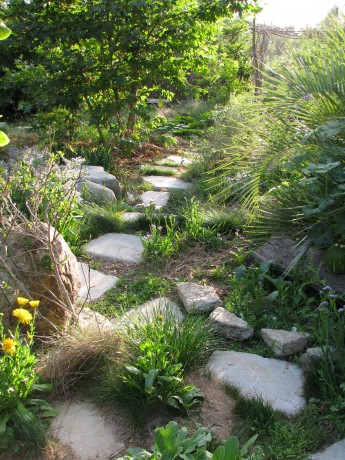
The pathway down to the Mock Pavilion. So many of you who live in snowy areas are saying, “Who cares?” The last snowfall in our inland valley area was in the late 60’s when I was probably 8 or 9 years old. I lived with my sister and parents in Carlsbad, a town west of here. All I remember about it is that my dad made a snowball and froze it, and in the summer threw it at the neighbor.
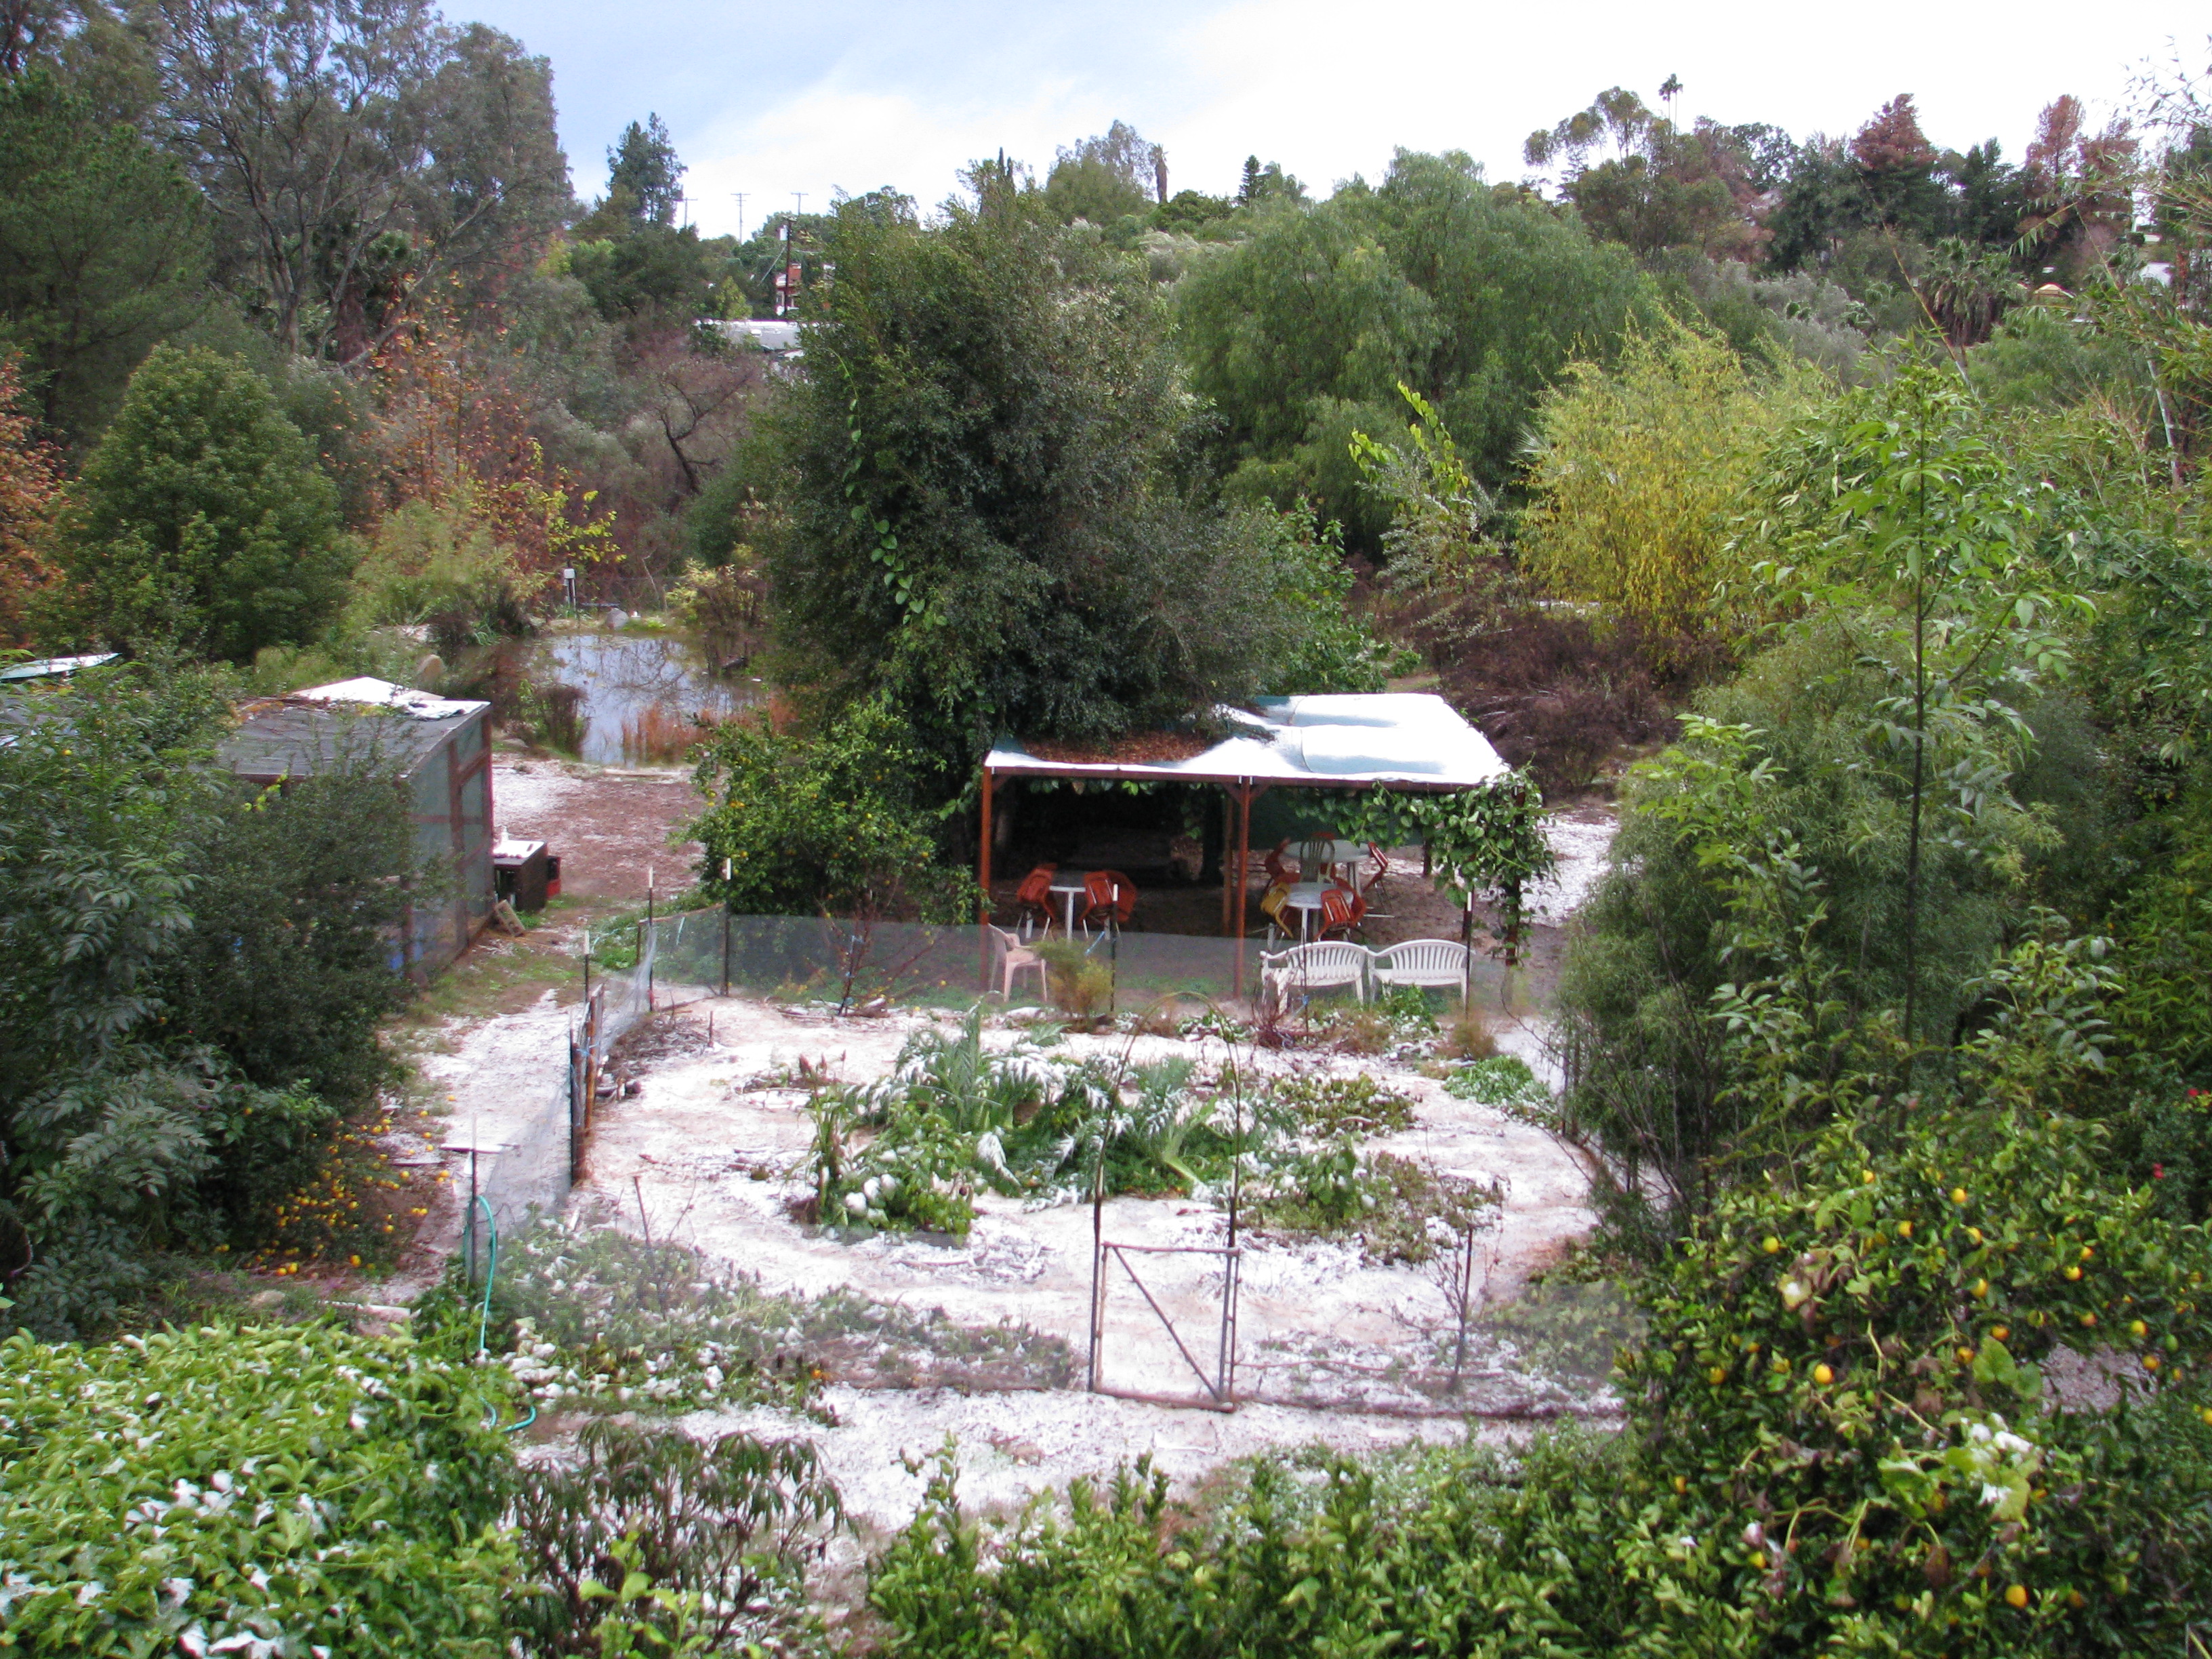
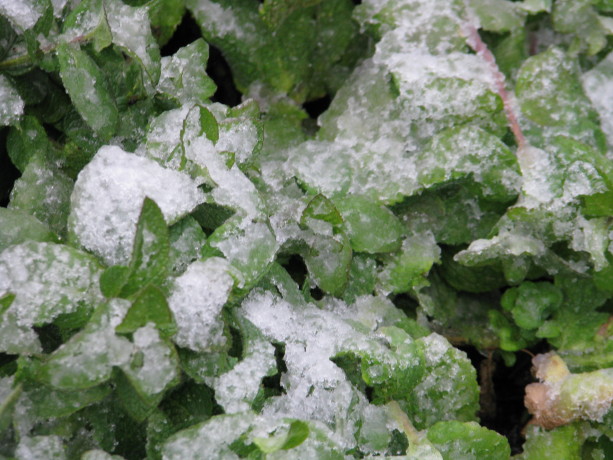
On the 30th we received an inch and a quarter of cold, Canadian rain overnight. The rain came in heavy showers and swales we’d created had filled and prevented flooding. In the morning I looked out on a white garden.

Kitchen garden in snow. Not everyone in the area received snow this week, but streets were icy, nearby Temecula was covered as were all the mountains even those west of here.
Good-bye ’till next year, apple mint! The landscape looked like a large powdered sugar shaker had been at work overnight.
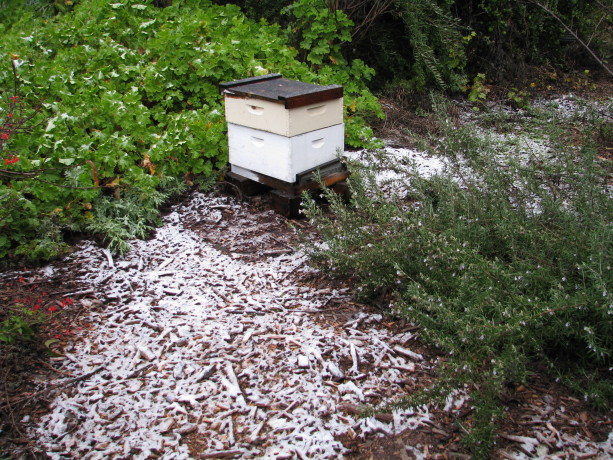
Perhaps this year we can have bees again. Last year they all died – someone spraying in the neighborhood is my guess. Again about 10:30 in the morning snowflakes fell and strangers grinned at each other in delight.
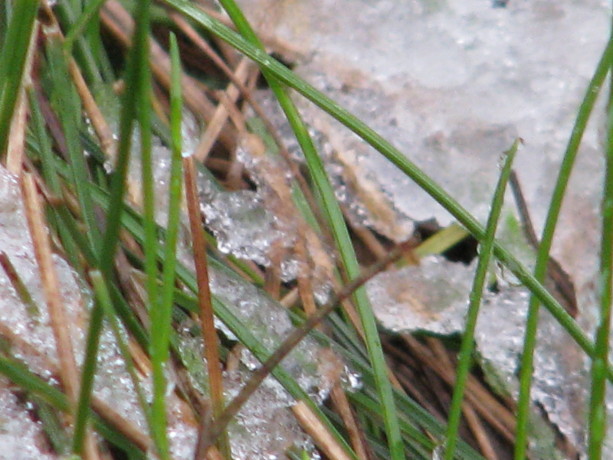
Creeping red fescue, which is an excellent soil holder and groundcover here, just laughed at the cold. Not so the growers of frost-intolerant plants such as avocados, citrus, succulents and tropicals. After the snow we have had clear, frosty nights which have done more damage than the snow had.
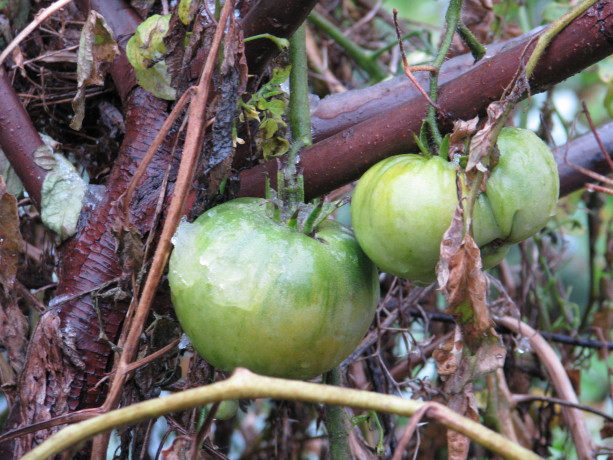
These are now ripening in the house. I don’t expect overwintering tomatoes this year, and we’ve been harvesting the last of our zucchino rampicante, eggplant, jalapenos and tomatoes, and marking where the sweet potatoes lie underground.
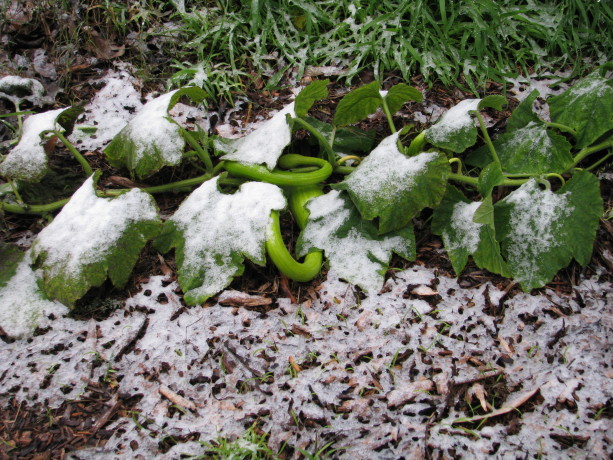
Poor little frosty zucchinos. Our hens aren’t happy about the weather change. We hung towels and tacked up cardboard in their coop for insulation, although now it looks like a cheap harem. Today I bought a heat lamp to keep them warmer.
Buddha’s Finger citron and snow. I candied the citron this year and used it in holiday bread. Wonderful! Most of them are done molting except, of course, the Turken or naked-neck. Besides having a naturally bare neck, poor Malika has dropped over half of her feathers and has no insulation at all. Its a good thing that days aren’t frozen, too.
Poor Malika! An unfortunate molt. By Monday daytime temperatures will be in the low 70’s again, and I’ll be worrying about planting spring crops already; despite the snow, there really isn’t a winter here.
 However, I thought I’d share some New Year’s eve photos of Finch Frolic Garden in the snow – not something I’d ever thought I’d see.
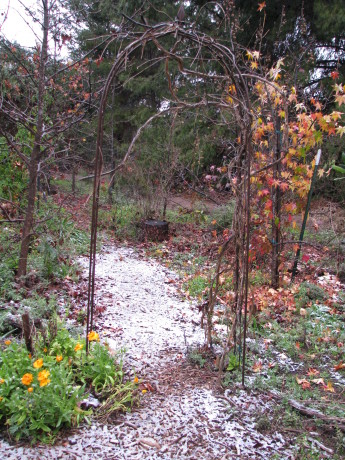
Lovely. Liquidambers, trellis and wildflowers. You May Also Like
Native Insects and IPM
- Arts and Crafts, Books, Breads, Cake, Dessert, Fruit, Giving, Herbs, Perennial vegetables, Permaculture and Edible Forest Gardening Adventures, Recipes, Sauces, Seeds, Special Events, Spices, Vegan, Vegetables
Finch Frolic Marketplace, Revisited
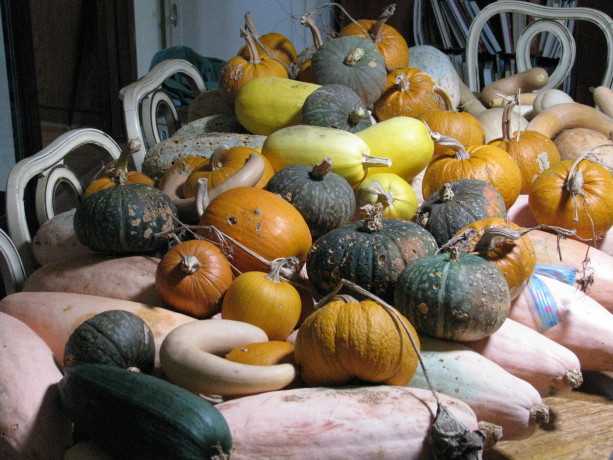
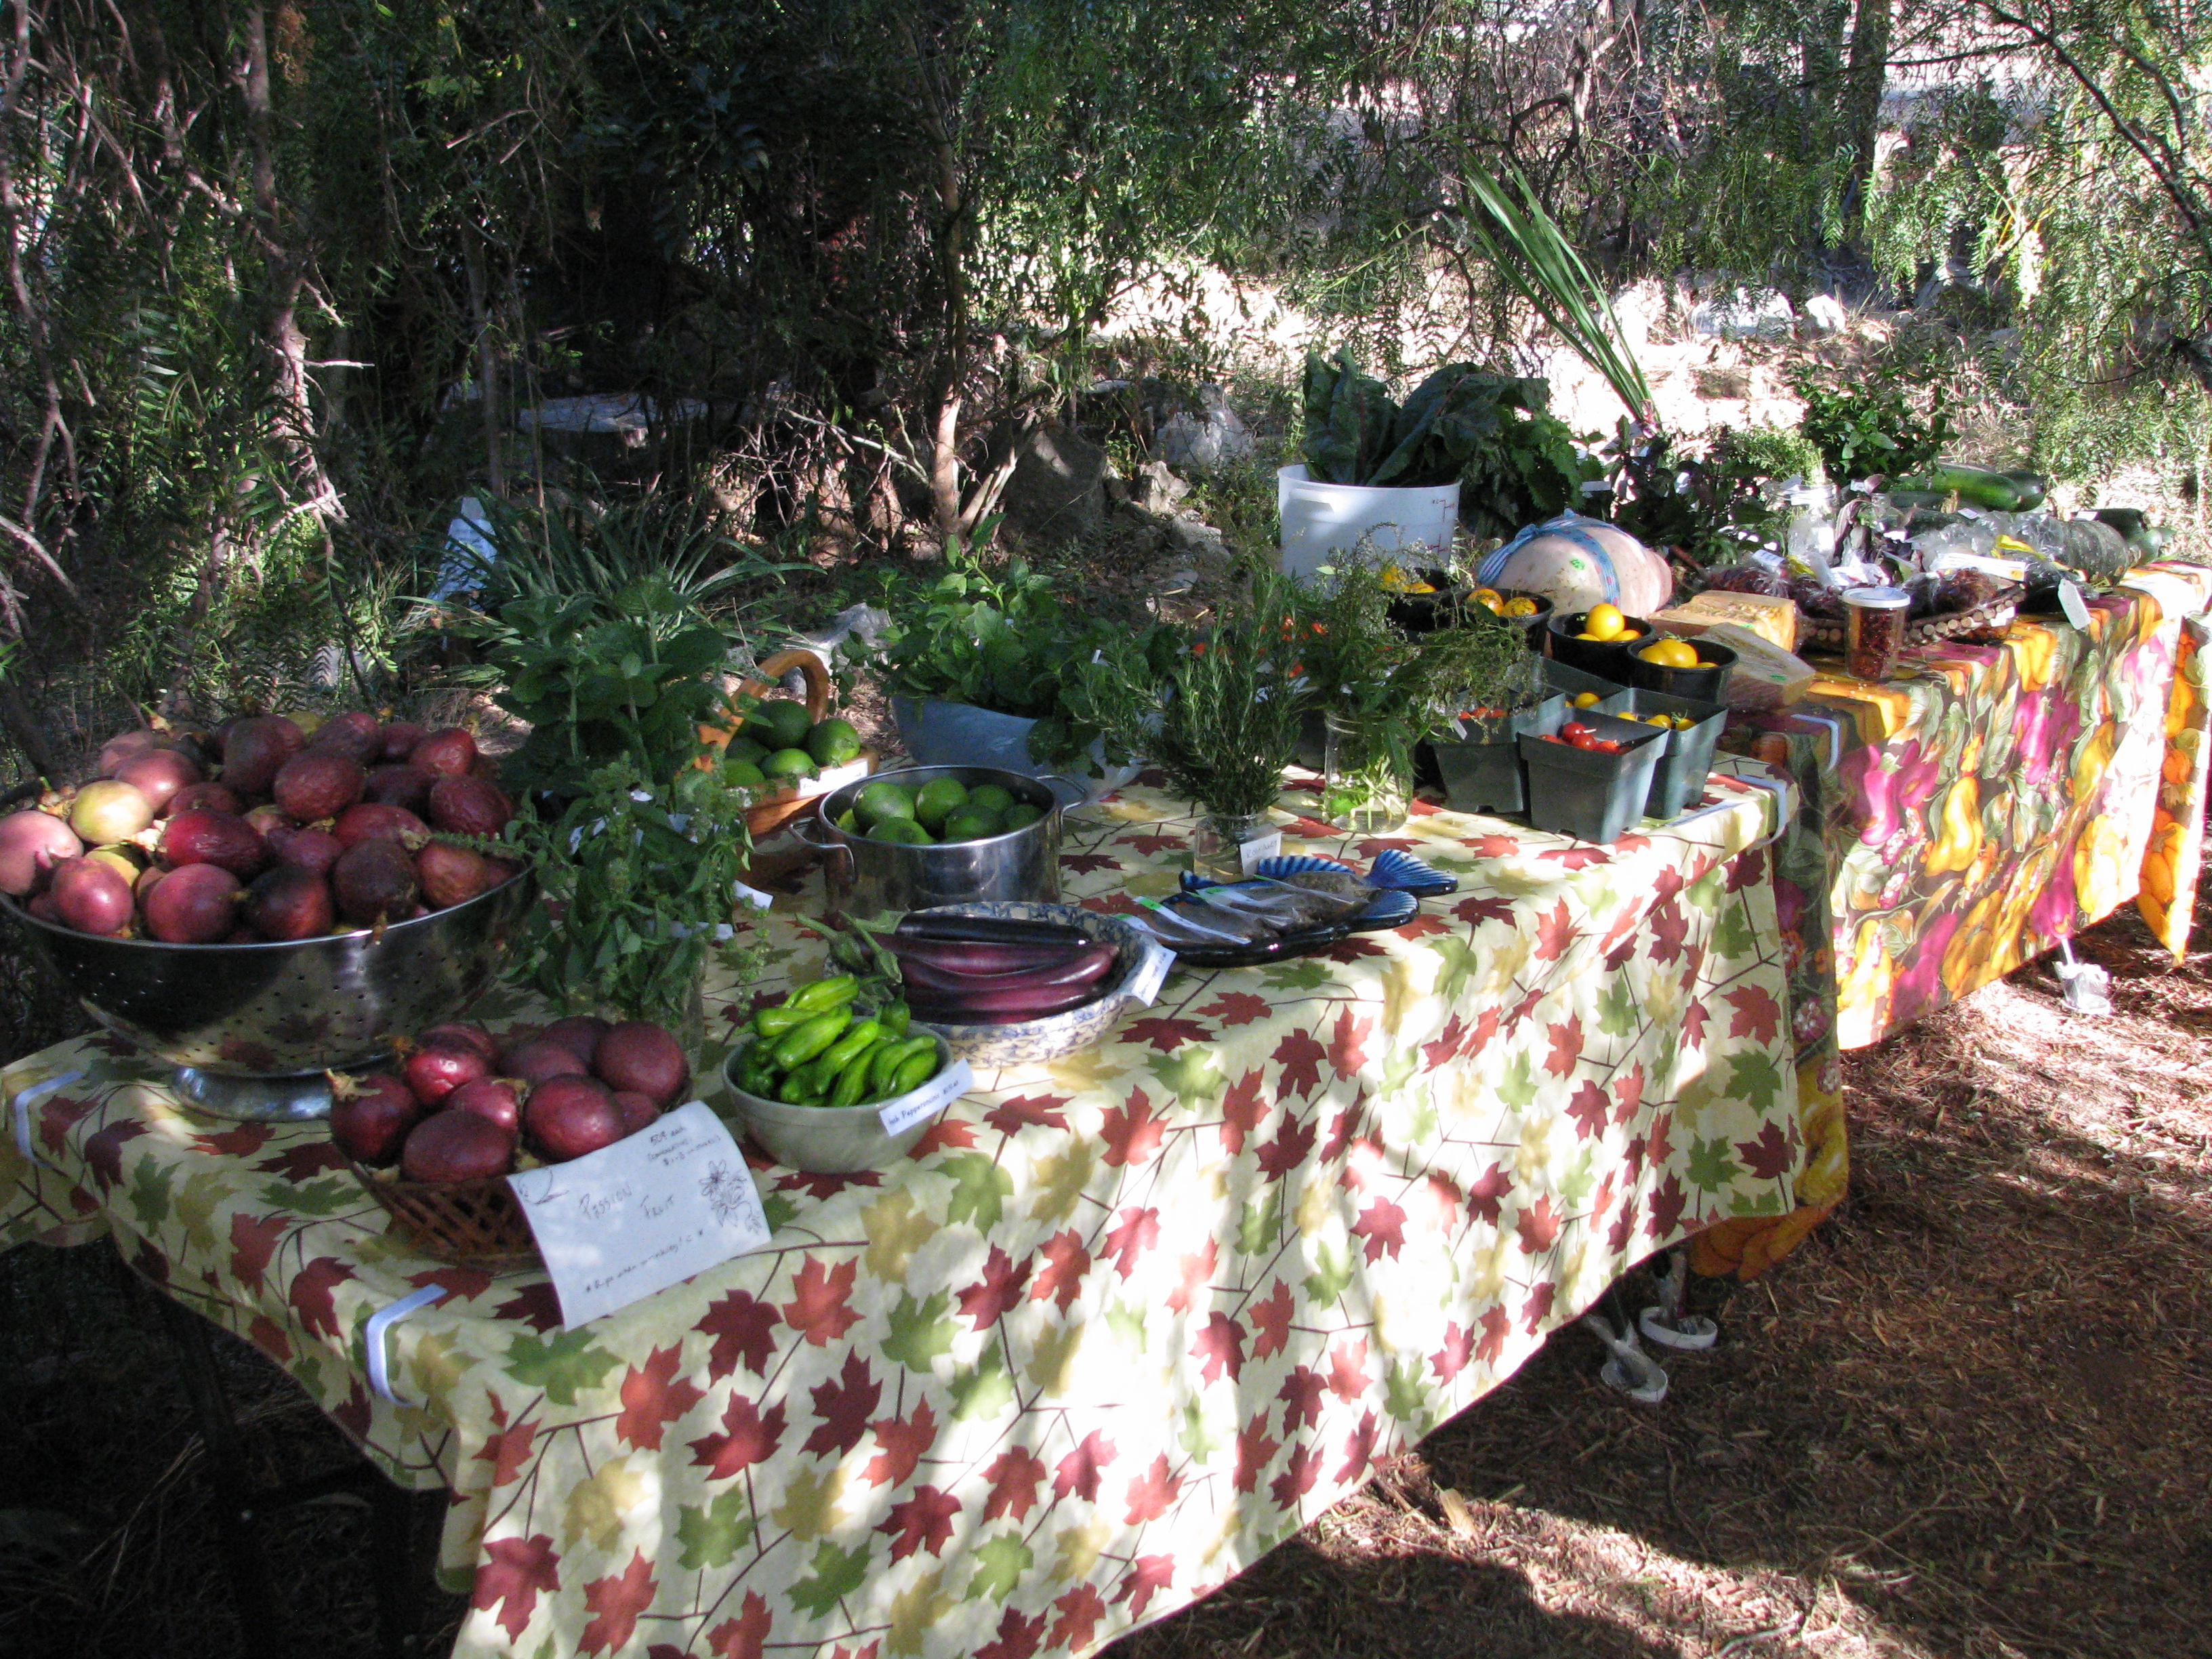
Wonderful, tasty winter squash of all kinds! Due to popular demand, we’re having one more short Marketplace this Saturday, 9 – 1.
Join us on Saturday, November 29nd from 9-1 for the annual Finch Frolic Marketplace, the Extended Version! We’ll have for sale fresh and prepared foods straight from our permaculture gardens. All are excellent gifts, or will grace your holiday table. We’ll have the much-desired Pomegranate Gelato again, and new this year, Passionfruit Gelato! Squash, fruit, veg, preserves, passionfruit curd, baked goods, and much more.
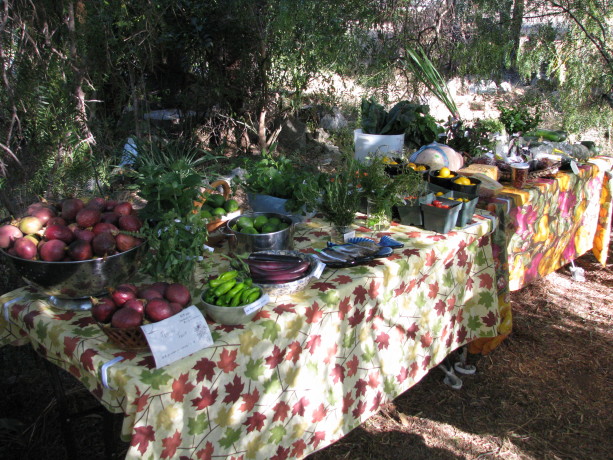
Herbs, veggies, frozen juice, gelatos, curds, jams, preserves… and much more! Finch Frolic Garden is located at 390 Vista del Indio, Fallbrook, CA.
Directions:
Finch Frolic Garden is open by appointment only for tours, lectures and other activities. The address is 390 Vista del Indio, Fallbrook, CA 92028-2548. Please call only if you are lost or delayed; we use our house phone only and are often not inside. Please use the email above for any other communication.
From the North (Temecula and above): take 1-15 South to Exit 51 and turn right. Make the next right onto E. Mission Rd/County Hwy-S13. In .8 of a mile turn left onto E. Live Oak Park Rd. In 1.6 miles turn right onto Alvarado St. In .7 miles at the top of the hill turn left onto Vista Del Indio, at Roja’s Succulents. Make the very first right; 390 is at the end to the left.
From the South (Escondido and below): take I-15 North to Exit 51 and turn left over the freeway. Make the next right onto E. Mission Rd/County Hwy-S13. In .8 of a mile turn left onto E. Live Oak Park Rd. In 1.6 miles turn right onto Alvarado St. In .7 miles at the top of the hill turn left onto Vista Del Indio, at Roja’s Succulents. Make the very first right; 390 is at the end to the left.
From the West (I-5): take CA-76 East, Exit 54A and drive for 12.6 miles. Turn left onto S. Mission Road/County Hwy S13 for 4.1 miles. Turn right onto S. Stagecoach Lane (at the high school). In 2.8 miles turn right onto Alvarado St. At the top of the hill turn right onto Vista del Indio, at the Roja’s Succulents sign. Make the very first right; 390 is at the end on the left.
- Animals, Chickens, Compost, Gardening adventures, Hugelkultur, Other Insects, Permaculture and Edible Forest Gardening Adventures, Seeds, Soil, Vegetables, Water Saving, Worms
Using Smuck, or Using Food Waste
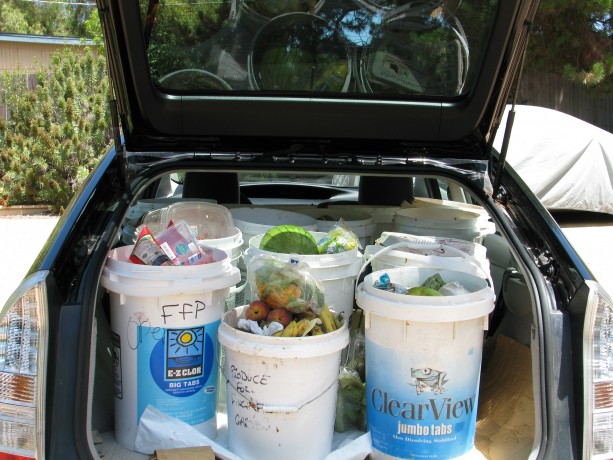
One afternoon’s haul of smuck. Just when I was mourning the fact that our household didn’t create enough food waste to generate lots of compost, I received an email from a former visitor to Finch Frolic Garden. She volunteers at the Fallbrook Food Pantry, where they distribute balanced food supplements to over 800 families a week who earn less than the US poverty limit. They receive raw, outdated fruit and vegetables from grocery stores and other sources, sort through it and have to discard what isn’t safe to hand out. The volunteer knew that I composted and wondered if I’d like to pick up the residue so that they wouldn’t have to throw it out. She and the director had been taking it home, but it was too much for them. Four times a week I’ve been picking up buckets of smuck, or what I call the rotting fruit and vegetables, and often its too much for me as well.
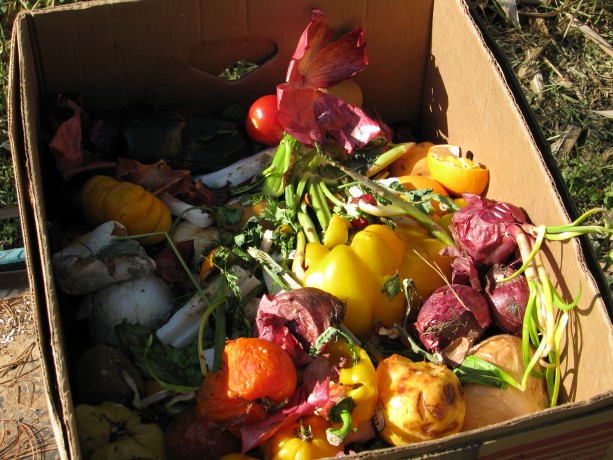
Boxes of mixed smuck were difficult to pick up and very, very juicy. Buckets are better. There has been a grace period where my daughter and I nearly broke our backs picking up cardboard boxes sodden with fruit juice that stained our clothes and our car, and spent lots of time cutting produce out of plastic bags and containers, but the Food Pantry staff have been wonderful about usually opening the packages and using only old pool buckets.
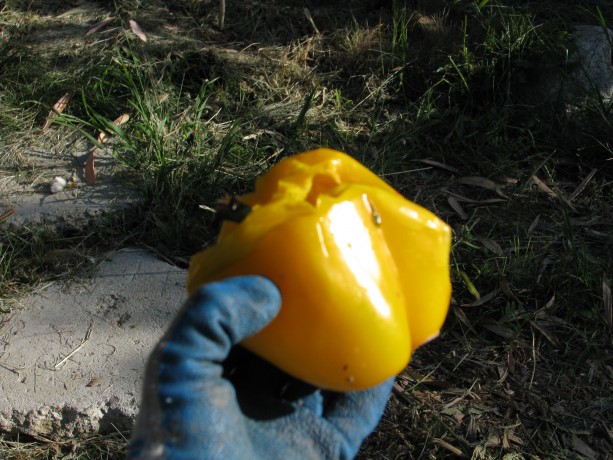
One drawback is that very little of the smuck is organic. We are constantly amazed at how fruit and vegetables remain hard on the outside while rot on the inside. These peppers were hybridized to be solid enough to ship without bruising, at the expense of flavor and nutrition. My back, my clothes and my car thank them. Fortunately others have been picking some smuck up. The man in my life happily takes lots of it to feed to his compost worms. We’re a great match.
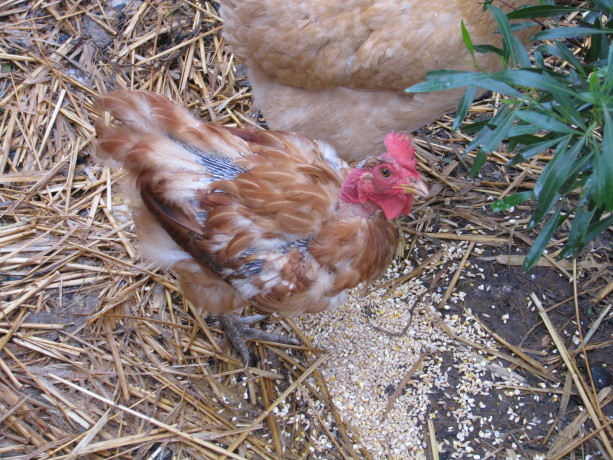
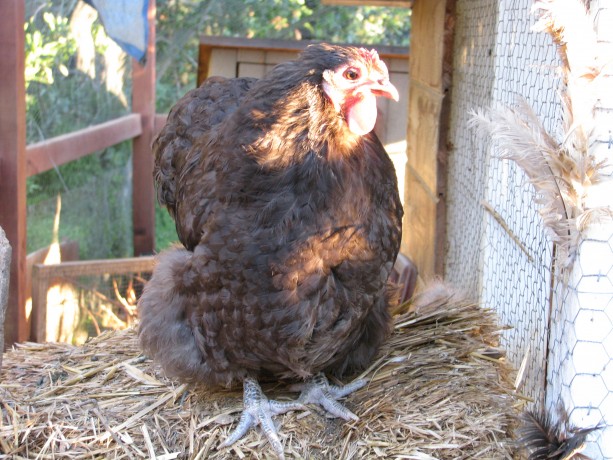
My daughter and I empty the buckets into the chicken coop.
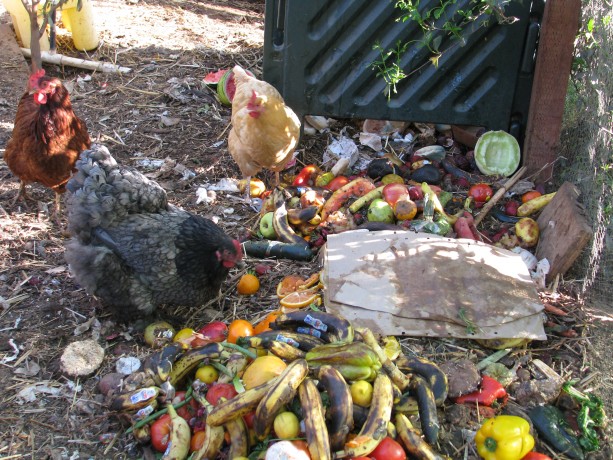
Charlotte, Bodicea and Esther/Myrtle with a new batch of smuck, heavy on the bananas. The girls love it. I make sure they eat lay crumble and calcium as well to keep laying, but with the smuck they’ve reduced their intake of crumble and hence have lowered my expense.
The girls going after the smuck. I pitchfork straw and weeds over the top and within a few days most of it except some citrus and a coconut or two is pretty much gone. There is a fly problem, but with the flies there have come more flycatchers and lizards, and the hens eat the insect larvae that emerges in the compost.
This is Agatha, named after a favorite mystery writer. She’s here just because she’s so lovely. The picking up of smuck, hauling it down the hill and into the coop, de-packaging, cleaning buckets and fighting flies and ants, three – to -four times a week has been a time-consuming and very, very icky job, but the thought of all that free waste going into the dumpster keeps me at it. This is bacteria-heavy compost material, which is excellent for growing non-woody herbaceous plants such as our own vegetables and herbs.
I’ve also layered the smuck with cardboard, paper waste from the house (tissues, paper towels, cotton balls, Q-tips, junk mail, shredded paper, etc.) under the bananas.

A pile of fruit, veggies and cardboard, partially covered with clippings, at the food of our big banana. A citrus to the side likes it, too. Bananas love lots of food in the form of moist compost around their roots; in fact, they are commonly planted in banana circles with understory plants and the center of the circle is a place for waste products to deteriorate. In our dry San Diego climate we don’t have that kind of tropical moisture to help it rot, but the compost does become a sheet mulch and really helps create soil.
Miranda adds a melon to the banana circle smuck. One inch of compost reduces watering needs by ten percent, so a pile of wet smuck layered with carbon items such as dry cuttings and cardboard is excellent. I throw cuttings and pine needles over the top to keep down the rotty fruit smell, which doesn’t last long anyway.
Sugar cane and passionfruit enjoy the smuck layers under the banana – kind of a banana semi-circle. When creating new impromptu trellises for melons and squash in unimproved soil, Miranda and I dug trenches, threw in wet wood and dumped buckets of smuck right on top then covered the trench with dirt. We planted seeds in handfuls of good compost and away they went. We also used some of the mostly composted soil from the Fowl Fortress directly into the kitchen garden .

We augmented the kitchen garden soil with nearly-composted smuck dirt. Due to the wide variety of fruit and vegetables in the smuck buckets we’ve had some interesting volunteer plants. Tiny tear-shaped tomatoes that had been sold in plastic containers for natural snacks, a sweet potato, other tomatoes, and melons. At least we thought they were melons.
Melon vines taking over the kitchen garden… but not the melons we expected! Miranda was wondering about pulling them out of the kitchen garden because they were taking over without apparently producing a flower. A couple of days ago she investigated further and found a real surprise. We have about thirty kiwanos growing under the foliage!
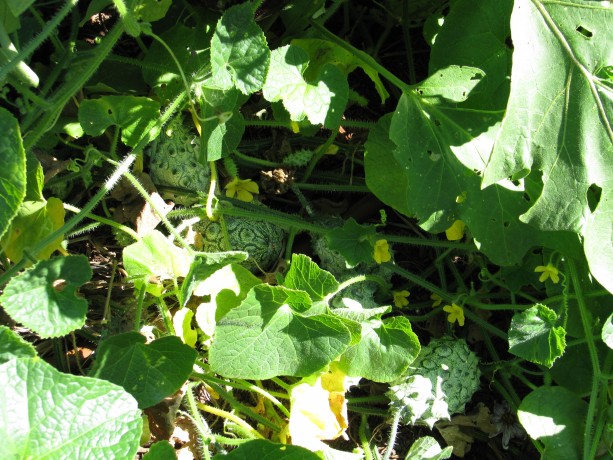
Kiwanos with lots of blooms lurking beneath the foliage. I’ve never eaten a kiwano. Wikipedia says: Cucumis metuliferus, horned melon or kiwano, also African horned cucumber or melon, jelly melon, hedged gourd, melano, in the southeastern United States, blowfish fruit, is an annual vine in the cucumber and melon family, Cucurbitaceae. I’ve seen them in the smuck buckets, and it just figures that of all the green melons and orange melons that we’ve thrown in there, something like these would grow! None have ripened to the light orange color as yet, which is good because it gives us time to figure out what to do with them.
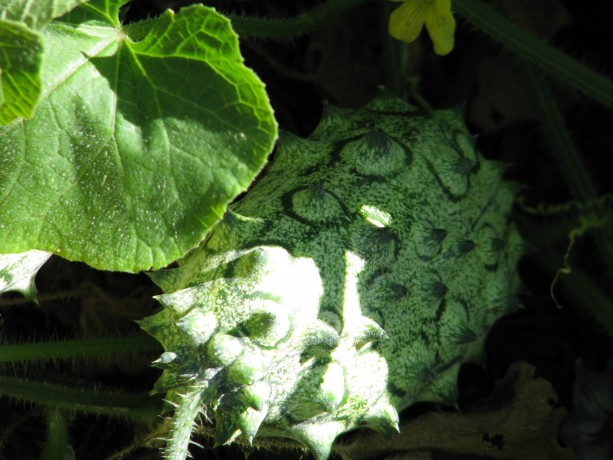
When they turn orange they’ll really look like blowfish fruit! You May Also Like
Native Insects and IPM
- Animals, Bees, Birding, Building and Landscaping, Chickens, Cob, Compost, Composting toilet, Fungus and Mushrooms, Gardening adventures, Giving, Health, Heirloom Plants, Hiking, Houses, Hugelkultur, Humor, Living structures, Natives, Natural cleaners, Other Insects, Permaculture and Edible Forest Gardening Adventures, Pets, Photos, Predators, Quail, Rain Catching, Recycling and Repurposing, Reptiles and Amphibians, Seeds, Soil, Vegetables, Water Saving, Worms
Special Tours for Aug. and Sept., 2014
Come take a tour of a food forest! Normally tours of Finch Frolic Garden are held by appointment for groups of 5 – 15 people, Thursdays – Mondays. Cost is $10 per person and the tour lasts about two hours. By popular demand, for those who don’t have a group of five or more, we will be hosting Open Tour days for the first 15 people to sign up in August and September. They will be Sunday, August 10 and 24, Sept. 7 and 21, and Thursdays August 7 and 28, and Sept. 11 and 25. Tours begin promptly at 10 am. The tours last about two hours and are classes on basic permaculture while we tour the food forest. I ask $10 per person. Please reserve and receive directions through dianeckennedy@prodigy.net. Children under 10 are free; please, no pets. Photos but no video are allowed. Thank you for coming to visit! Diane and Miranda
You May Also Like
Native Insects and IPM