- Animals, Bees, Gardening adventures, Grains, Health, Heirloom Plants, Herbs, Other Insects, Permaculture and Edible Forest Gardening Adventures, Planting, Seeds
Growing and Eating Seeds
 We eat seeds everyday. Grains, nuts, beans and, well, seeds, are all seeds. A seed is an embryonic plant covered with a seed coat. A grain is a dried fruit. In this blogpost I’m going to concentrate on true seeds.
Grains are usually seeds from grasses, although there are common exceptions to that rule such as the amaranth below. Seeds contain the magic that makes a plant out of a speck; a towering oak from an acorn. Seeds are highly nutritious for humans as well, but often are just used as a flavoring (think of an ‘everything’ bagel). Many have been used medically for relieving everything from eczema to mental issues. Some seeds such as grains are difficult to prepare for eating on a small scale, such as rice. Separating seeds from chaff takes a lot of steps that may not be practical for the handful of food at the end of the process. However there are many seeds that we commonly eat that are easily grown among the veggies, or even in a flower bed. Here are some that we grow at Finch Frolic Garden Permaculture:
Let’s start with one of my favorite flavors, the sesame seed.
 Sesame (Sesamum indicum) seeds grow on small upright plants about 2 – 3′ high that have lovely tubular flowers.
 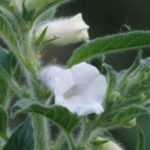 Bees love to crawl into them. Its a pretty plant and flower, so could easily be incorporated into an ornamental area. There are both black and white sesame seed plants; the white seed is really brownish as it has a seed coat. Sesame is also called benne seed. Once harvested sesame seeds should be stored in a dark cool place or refrigerated. The seeds can be used raw, or better still lightly toasted in a dry pan before sprinkling over your food. So very yum. Tip: sesame pods become tight as they dry and then split with force, throwing the seeds away from the plant. If you want to harvest any then watch the pods as they dry on the plant and then cut and hang in a paper bag to catch the seeds as they fly, or break open with your hands.
Amaranth:
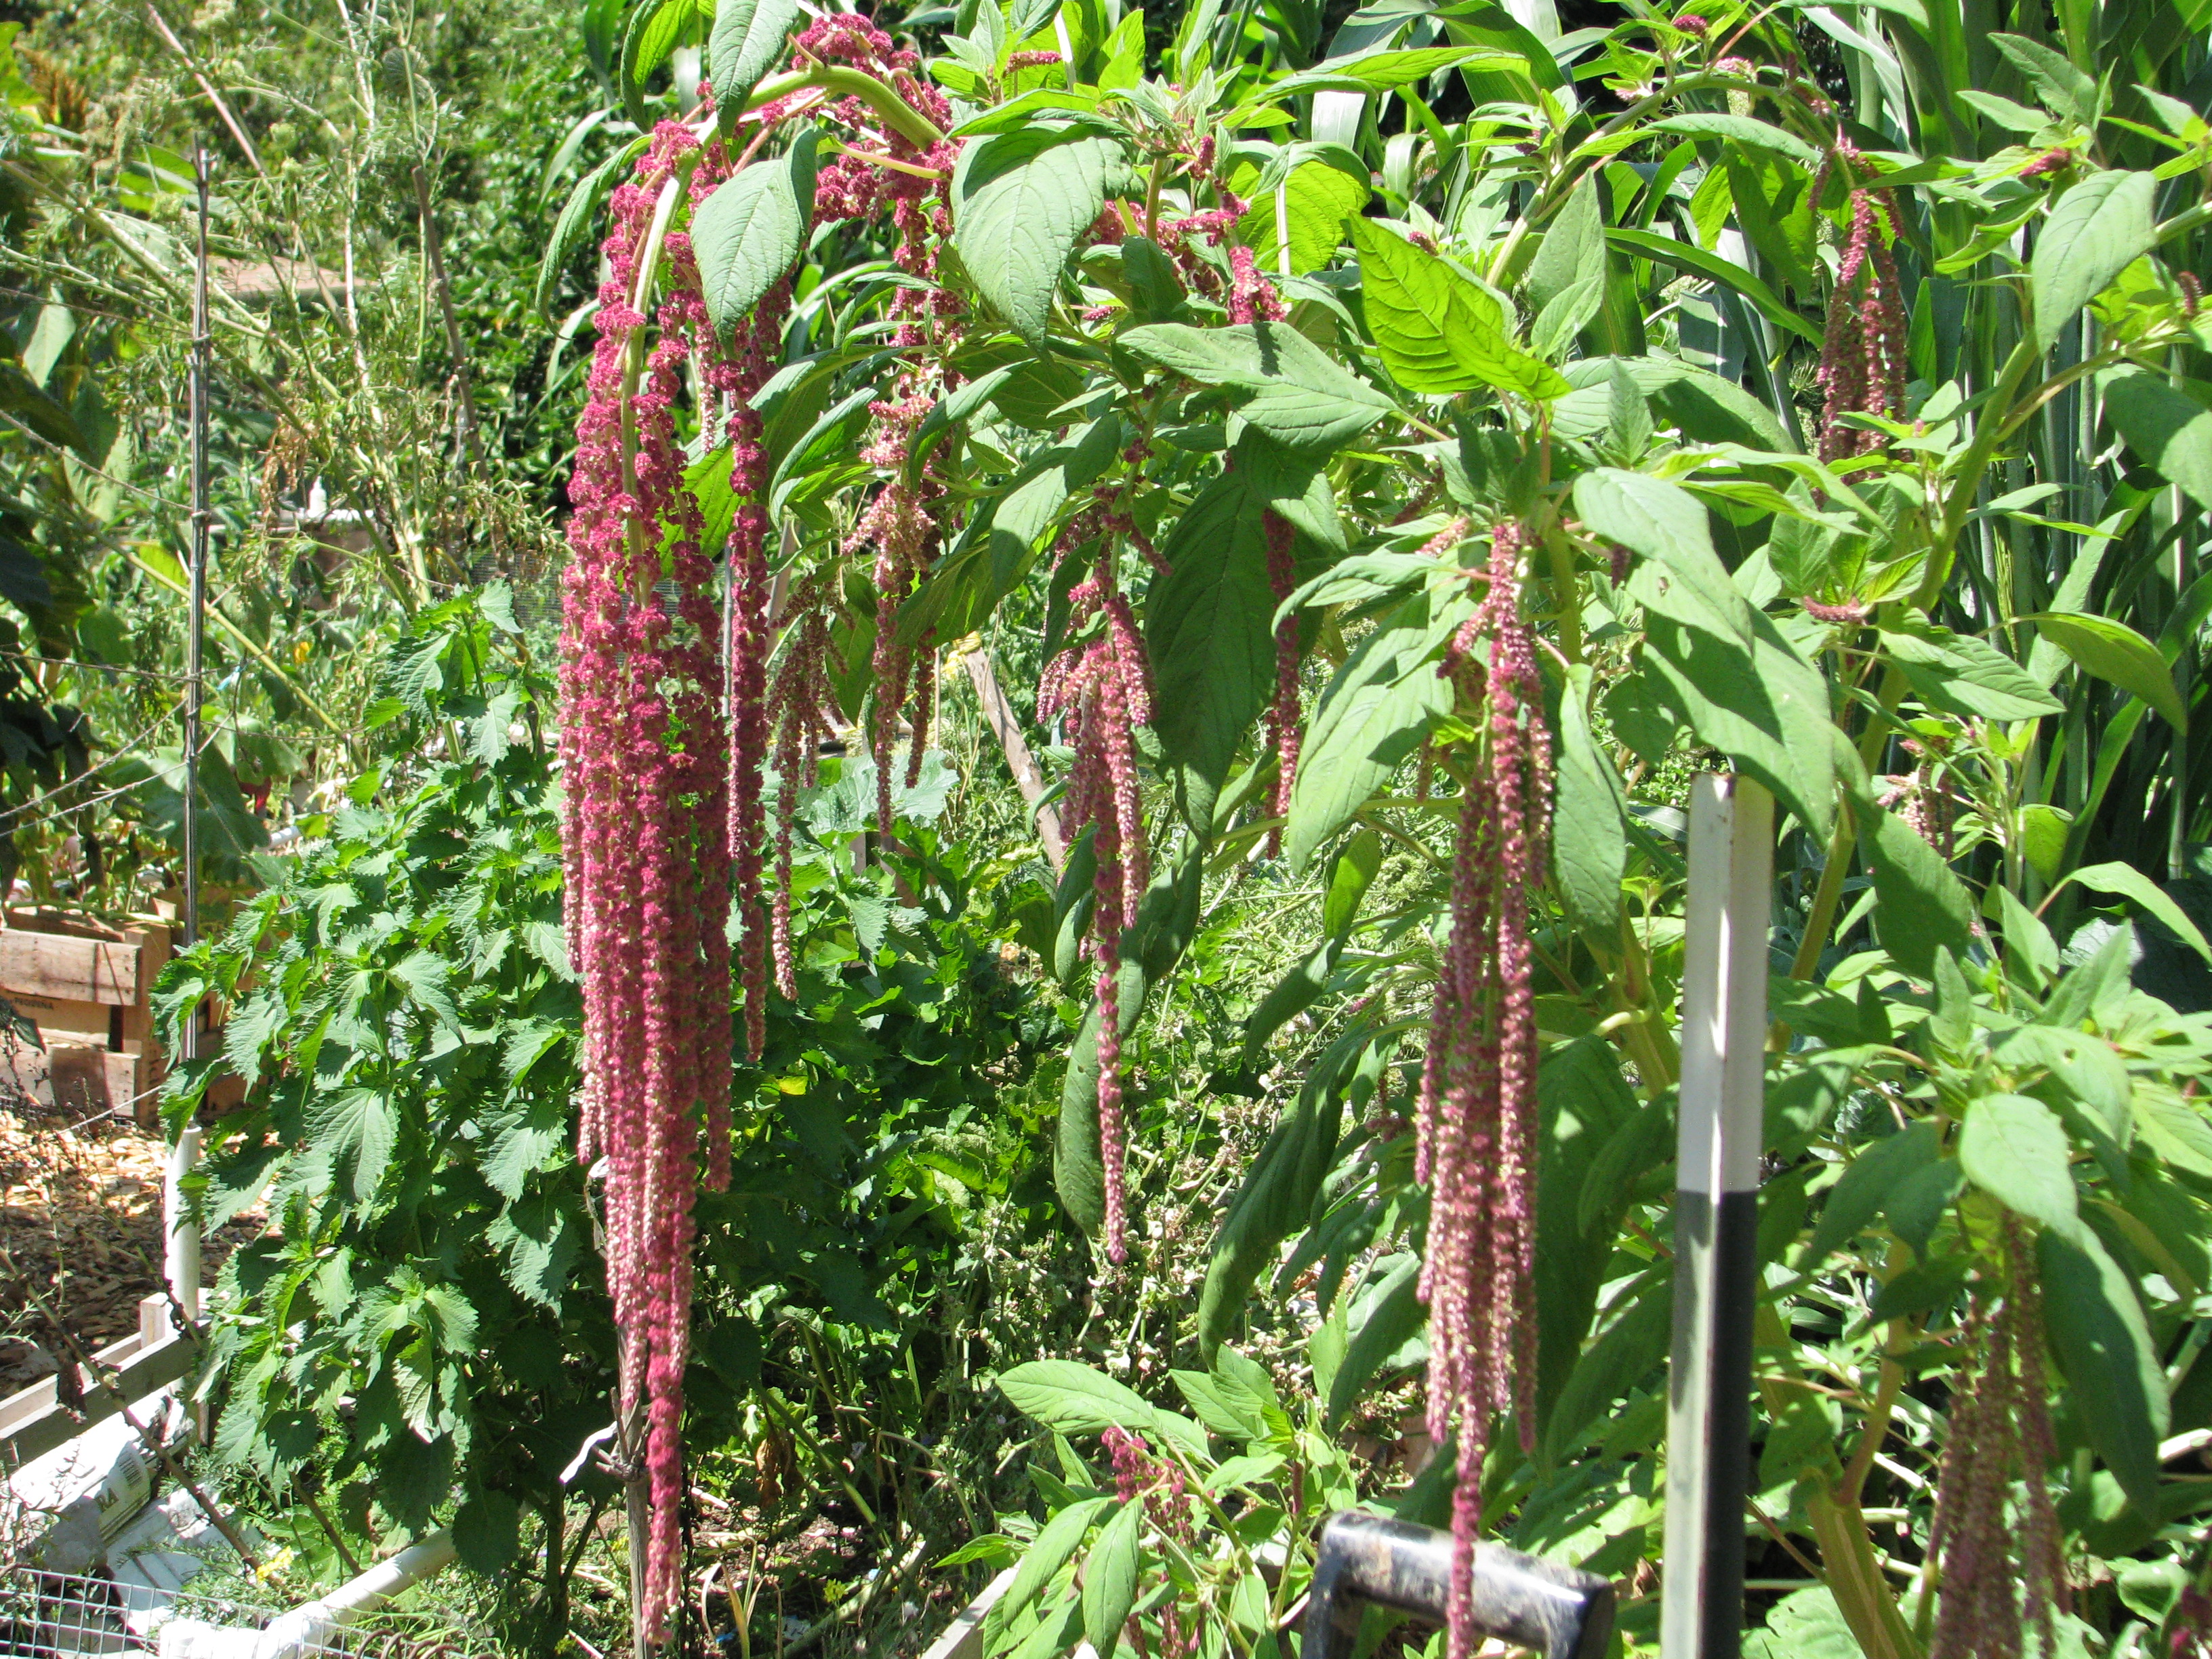
Amaranth (Amaranthus spp.) is a very tasty, easily grown seed that is considered a grain. It was a major food of the Aztecs, and almost completely destroyed by the Spanish after their conquest of that civilization. Amaranth was too sneaky though and survived. It is easily digestible, high in protein and full of other nutrition. It has wild as well as ornamental varieties, but all are edible (be sure what you are eating!) Love-lies-bleeding is the dramatic name of the long red tasseled kind.

All are great for birds as well as humans.
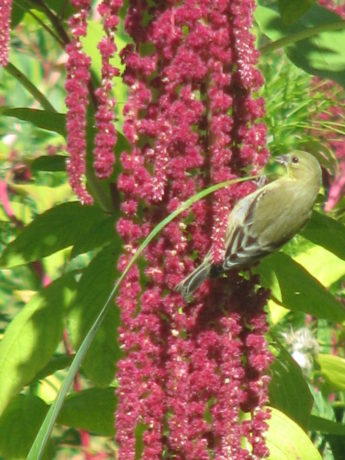
Pigweed and lambsquarter are its weedy relatives. All of them have edible leaves, although some varieties are more tasty than others. Older leaves are better cooked. The tall varieties can grow 8′ tall or so, may need staking, and make good shade plants for others that need sun protection. When you start to see birds on the flowers then the seed should be ready. Another way to check is to gently rub the flowers between your fingers and see if seeds come off as well as the petals. If so, then over a clean, dry bucket rub the cut flowers between your fingers. Winnow the chaff away over a mesh screen or in the wind, or by gently blowing it away from the seed. Now you need to completely dry the seed in the sun, and then store in a dry, dark cool place. Use within six months for best results.
Poppy seeds:
 No, not the opium kind, the lemon-poppy seed cake kind, although both are varieties of Papaver somniferum. Look for seeds for Breadseed Poppy varieties. This is another beautiful ornamental with striking seed pods that can be dried and used in flower arrangements. Poppies enjoy poor, disturbed soil. The seeds are tiny so need to be exposed to daylight to germinate. The flowers are beautiful; frail and feminine. The seed pods are rounded and have tiny holes at the top where the seeds come out of, so be careful when you are working around the drying pods or you’ll scatter seeds. Or just let some drop and they will come up next year.
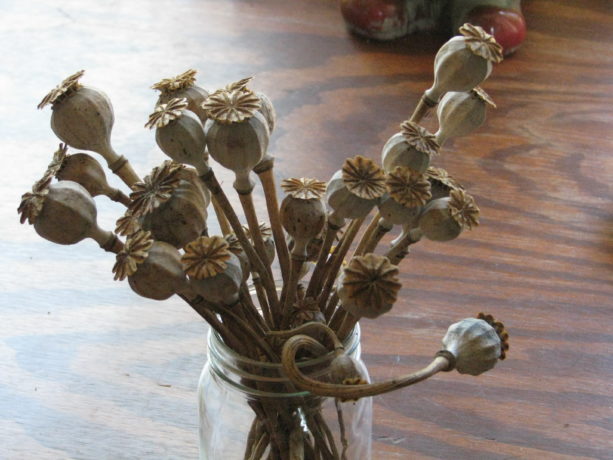
 Allow the pods to dry on the stem and then carefully cut. Shake the seeds out into a jar and store in a cool, dark place. Use raw or lightly toasted. Be sure not to eat them before taking a drug test, or you’ll test positive.
Basil seeds:
 Basil seeds aren’t well known for their culinary use in the US, but they are nutritious and useful. The seeds of the sweet basil plant (Ocimum basilicum) not Holy Basil (Ocimum tenuiflorum), when soaked make the water gelatinous, as chia seeds do, so are used to thicken drinks and foods. You don’t have to soak basil seeds to use them though. The flowers are delightfully edible as well. Use them for additional flavor and nutrition by tossing them raw into salads, salad dressing, breads, or just about anything. Letting some of the basil plant go to seed (while pinching other stems to keep it leafing) will attract small native pollinators to your garden. When the flowers dry, the seeds are ready to be shaken off into a clean, dry bucket or bag.
 Coriander:
You probably know cilantro or Chinese parsley as the love-it-or-hate-it herb found in salsas and many Mexican or East Indian dishes. Cilantro (Coriandrum sativum) seed is called coriander. Coriander seed is usually used ground and used in curry mixtures, soups and meat dishes. It is an historical herb, being used in ancient India, China and Egypt. It has a kind of lemony taste that is unique.
Celery seeds:
Celery (Apium graveolens) seeds are marvelous savory additions to soups, particulary tomato. I grind it up in a mortar and throw it in soups and stews to round out the flavor. We grew celery one year -although I have no photos of it – and because of the warm weather the celery stalk flavor was quite strong. However the seeds were delightful. Celery is a cool-season plant and the stalks should be covered to keep pale green and mild flavored. Or just let them grow for the seed. There is a wild variety that grows in marshlands, but please be very careful if you harvest from it because it looks similar to the very poisonous water hemlock (Cicuta).
Fennel:
If you’ve sipped ouzo, aguardiente or anisette, you’ve tasted the seeds of the fennel plant. Fennel (Foeniculum vulgare) is the brother of anise, and both have escaped gardens to be a troublesome weed. Fennel bulbs are absolutely amazing lightly steamed, and then baked in vegan butter and topped with vegan Parmesan. The leaves are fantastic stirred into eggs or salads, and the seeds are incredible flavorings for baked goods, candies and obviously alcohols. Miranda candied fennel seeds for me. They have been used to try and mask cigarette or alcohol breath, but really… who is kidding who? They do make a great breath freshener chewed. The plants are frondy, tall and have pretty umbels of flowers that native insects love.
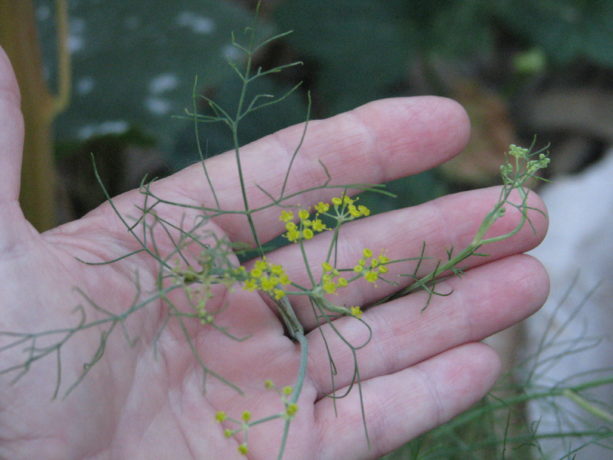 Grow some for the bulbs (protect them from gophers!) and let others go to seed. Cut and hang upside down to collect the seed in a bag or else you’ll have fennel everywhere. And that may not be a bad thing.
Sunflower
I don’t know anyone who isn’t familiar with sunflower seeds; certainly the shells were routinely spit out all over campus as a cool snack when I was in college and probably still are. At least they are biodegradable. Sunflowers (Helianthus annuus) are one of the few edible seeds native to North America, and they are protected in an attractive hull. Some varieties are small, multi stemmed and ornamental, and others are grown for their fabulously large seed heads. Birds love eating the green leaves as part of their healthy diet, so grow extra. The seed heads should be left to dry on the stalk, and then cut and shaken to de-seed. Good pollination is important to produce seeds with good ‘meat’ inside.
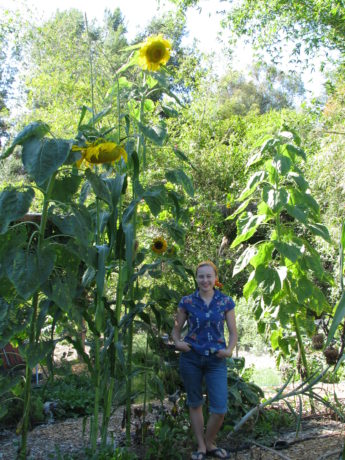
Eat them raw or toasted; they are full of good things for your body. (Miranda is 5’1″ in the photo, not tiny. I like that one of the heads seems to be checking her out.)
Dill
Dill (Anethum graveolens) is another double happiness plant. The leaves are tremendous used fresh or dried, and the seeds are fantastic as well. We use the whole seed heads in our dill pickle recipe. It goes well with fish, or in our case vegan fish. Grind them or use them whole, but definitely stir them into sauces, soups, dressings, dips, etc. Dill, like fennel, will reseed, but that isn’t a bad thing. They look pretty much like the fennel plant above.
Caraway:
We’ve grown caraway (Carum carvi) in the past, but I have no picture for you. Just refer to the photo above of the fennel and it will be close, as they are in the carrot family. You’ll find caraway in rye breads, liquors and cheeses, and in some areas the young leaves and roots are also eaten. They are dried and harvested just like the fennel and dill.
There are other seeds that we haven’t grown. We’ve tried to grow cumin and annatto seeds, but have failed to make them germinate; there is always next year. Some seeds are so small, such as chia, that you’d have to grow a lot of plants to harvest just a little seed. Seeds are such a vital nutritional and flavorful part of our diets, and so fun to grow that everyone should sprinkle edible seed-bearing plant seeds throughout their garden. As seeds dry and keep fresher longer than dried leaves (such as basil or dill), that fresh taste of the garden can last through until next year’s harvest time again.
You May Also Like

Native Insects and IPM
- Compost, Fungus and Mushrooms, Gardening adventures, Hugelkultur, Irrigation and Watering, Microbes and Fungi, Other Insects, Permaculture and Edible Forest Gardening Adventures, Planting, Recycling and Repurposing, Reptiles and Amphibians, Seeds, Soil, Water Saving, Worms
Building and Filling Free Raised Beds
 I grew vegetables in raised beds made of old bookshelf wood for many years. Then several years ago we buried that wood along with other biodegradable material in the vegetable garden and grew in the earth This is the best method of growing vegetables. However, the ongoing drought caused plant scarcity and otherwise manageable wildlife then foraged in desperation. Gophers began an onslaught of our vegetables and being a no-kill garden (except for Argentine ants) we tried many kind methods of discouraging them. Finally this year after a dry warm winter, anticipating more animal depredation, I took a friend up on their offer of free used pallets.
  We sorted through stacks of pallets and found those stamped with the same name. These pallets are untreated raw pine and of a manageable and portable size. I cut each pallet in half and then nailed and screwed them together. One raised bed needed three pallets. We then covered the bottom with hardware cloth. The areas where the raised beds were to go were leveled and in several cases, de-Bermuda grassed.
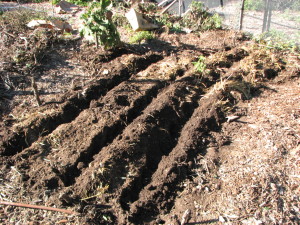
 The pernicious weed had infiltrated our good soil and so shovelful by shovelful we turned and picked. The stolens were unceremoniously tossed into a trashcan which will solarize in the burning hot summer to come, and will then be used in compost.
 On top of the leveled ground we placed cardboard. This provided a grass and gopher barrier to the bottom of the bed. Although the cardboard will break down over time, it will in the short run discourage gopher tunneling and weeds. The new pallet bed was placed on top of the cardboard.
 Here is one of the tricks of having a raised bed in a hot climate: insulate it! Anything raised above soil level in hot climates are quickly heated and dried out. Raised beds notoriously have dead zones around the edges where the heat cooks the soil, killing microbes and sucking water out of the bed. Lining the inside of the bed with thick cardboard is one way to help insulate the bed, as well as planting cascading plants on the southwest side, or bushy herbs in the ground outside of the bed, or even fastening flakes of straw around the outside. With the pallets we had room to not only line the inside of the bed, but stuff cardboard down into the gaps all around the bed. We repurposed a lot of cardboard.
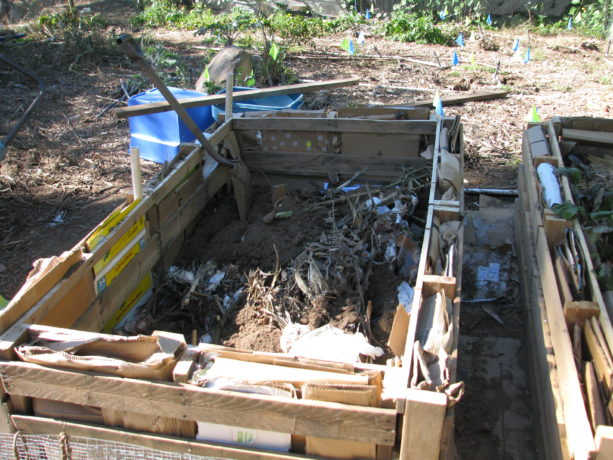 To fill the bed, we began with old sticks, limbs and logs as we had them. We layered these items as they were available, making sure that earth was touching each layer, and balancing green plant material with the brown as you would in a compost situation: dried tomato vines, fresh passionvine prunings,
 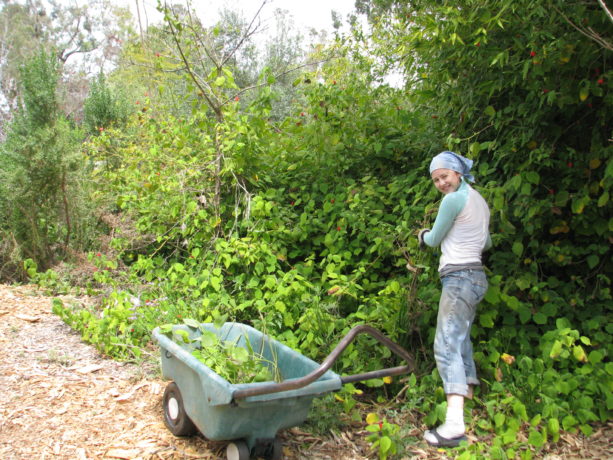 cut back rose canes, sycamore leaves, heavy clay taken from a new asparagus bed, silt from the rain catchment basins,
 kitchen scraps including bags of orange rinds after juicing, poopy chicken dirt from inside the hen house,
 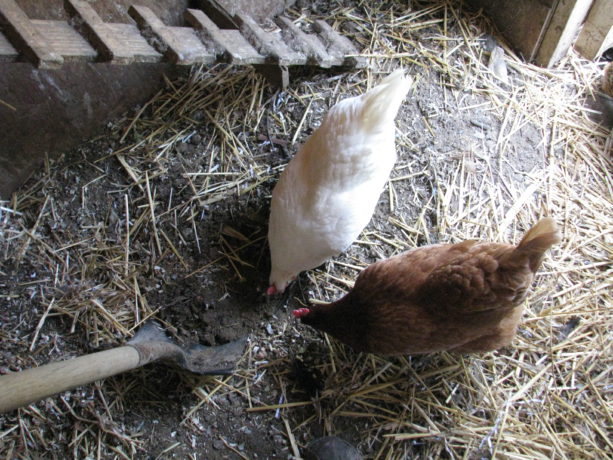 poopy newspapers from the cages in which we kept sick hens indoors (crop binding), decomposable trash such as used tissues, paper towels, cotton ear swabs, junk mail (not glossy or plastic),
 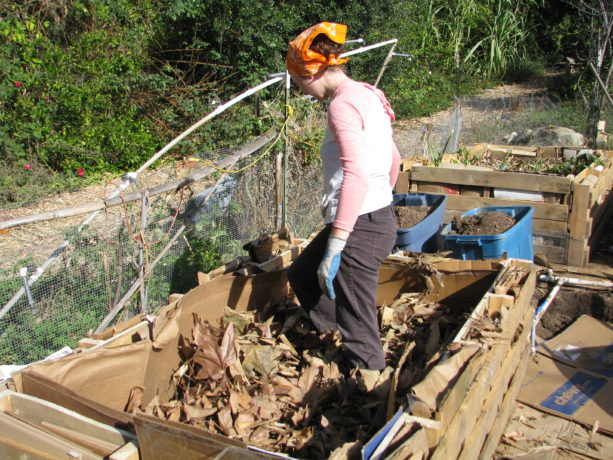 hair, cotton balls, old cotton T-shirts, and corn husks which many people don’t know are used for compost purposes (visit https://homewarranty.firstam.com/blog/corn-husks-not-just-tamales to get all the details). As we built the beds, we’d take our time filling them as we produced ‘waste’ materials, and threw them in.
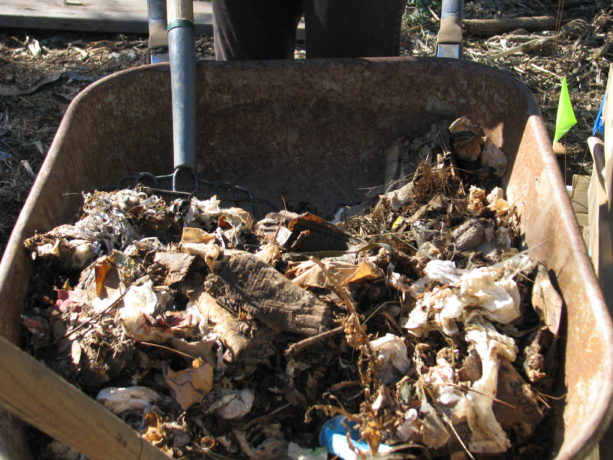


 When the bed was filled (and understanding that the contents would settle) and watered in with rainwater from our 700 gallon tank, we topped it with microbially rich soil from the garden beds (making sure there weren’t any grass bits hiding in it).
 I stuck pieces of old 1′ PVC pipe evenly along the sides of the pallets prior to stuffing with cardboard, so that if needed I could insert wood or bamboo pieces and either build an upright sturdy trellis for climbers, or even make arches from bed to bed on which I can grow vines.
 For irrigation, I connected each bed to its own set of overhead sprinklers. Each bed has its own shut off.
 The pipe is resting on the opposite pallet as support, and the joint where it els across the bed are threaded pieces, so the entire length can be raised and pulled out of the way so working in the bed can be easy.
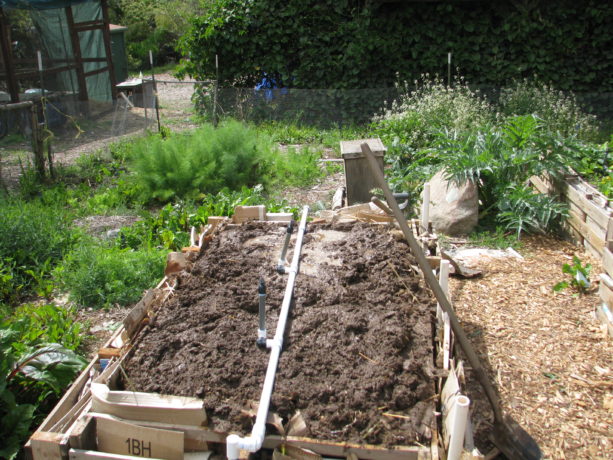 The irrigation is hooked up to our well water and is on the irrigation timer for a brief shower every other day. With a lasagna garden, once saturated water will be held in the organic materials that make it up, so after initial regular watering for seed sprouting or hardening off transplants you won’t need to water as much. Roots will grow very deeply.
Because we allow some vegetables to go to seed, we had to transplant vegetables from the ground where the raised beds were placed, into the raised beds.
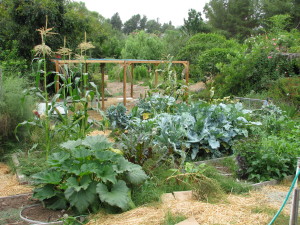
 We have a forest of beets, fennel, perpetual spinach, onions, peas, arugula and lettuce in what is still in the ground, and have transplanted selections from these into the beds along with planting seeds. Fortunately we love beet greens, which don’t taste like beets and are more mild than Swiss chard.
Into one bed we’ve planted potatoes in good soil at the bottom, and are gradually filling in with straw as the plants grow. We used leaves in the soil mix, but no woody bits or other lasagna garden materials because we didn’t want to dig potatoes out of piles of old wood, nor burn the potatoes with composting materials in the shallow soil layer.
I am not a good carpenter. I however am great at figuring out what should have been done after I’ve done something. Here are some tips on building pallet beds:
I had thought about placing them on top of flat pallets to be raised off of the ground, so even less susceptible to gophers and grass, but I fortunately nixed that idea before it was enacted. The reason is that that space would be a wonderful habitat for mice or rats, or even snakes. Much as we welcome non-venomous snakes into our garden I really don’t want to startle one with my feet as I’m leaning over a bed. Of course, they would take care of the mouse and rat problem, so maybe it would be a good thing.
I had several bags of 16p galvanized nails given to me years ago, a rescue from a construction dumpster. I mean, kitchen trash-sized bags. I can’t move them, and they sit in my large shed. I opted to use some of them for this project. It was difficult hammering them into the knotty wood of the pallets, and often the holes had to be pre-drilled. Nailed wood also can pull apart, so braces across the width of the pallet to prevent bulging would have been a fantastic idea. For the last two I resorted to screws, which are far easier to both install and remove. Perhaps the nails will have to go to Temecula Recycling. If I can lift them.
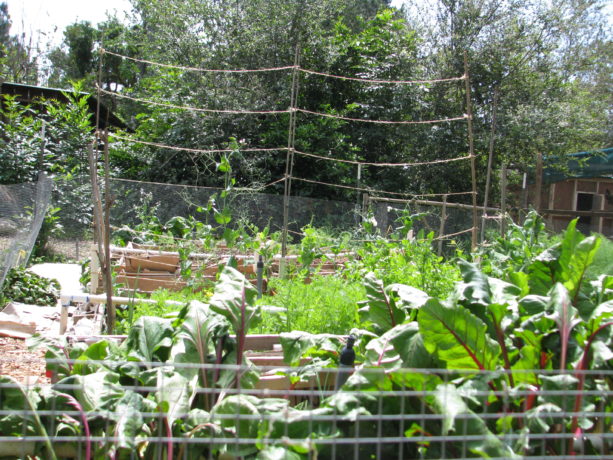
We needed to build the beds quickly, as planting season bore down on us here in San Diego even earlier than usual. Here at the beginning of April we are far behind because we haven’t planted out tomato, squash, melon or cucumber seeds yet. Whew! So the beds are not beautiful, but they are functional. You can pretty up pallet beds by attaching wood around the outside, or straw flakes, or other material, and by putting wood around the top. Especially if it is repurposed wood. If you have mouse problems, then try attaching chimney flashing or other wide strips of metal around the base of the bed so that they cannot climb up the sides.
My entire vegetable patch is surrounded by a chicken wire fence, so bunnies can look but they cannot touch. We don’t have squirrels anymore in the garden because California ground squirrels like to see all around them, and our dense food forest is much too scary for them to be comfortable. Using a mild shock wire around the beds or garden fence, using metal flashing to prevent climbing, or enclosing a small garden with wire would all be ways to prevent squirrels and rats from feasting.
We covered the surrounding ground with cardboard and topped with free wood chips, for sheet mulching.
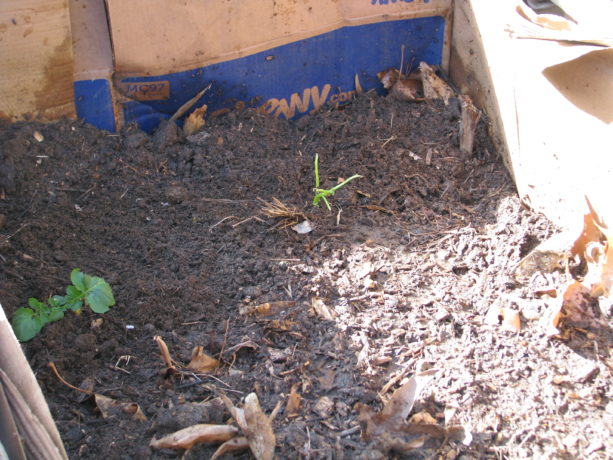
 This cools the soil, prevents weeds from emerging, helps choke out the Bermuda grass, and also keeps the gopher at bay. He or she must push droppings out of the hole, and if they hit cardboard, or have a shower of bark come down on them, they will go elsewhere.
Because we used non-sterile garden soil as a topper, we’ve had some weed seeds germinate but also some pleasant surprises. We planned on planting dill but found it popping up in our polyculture planting. We had several potato bits sprout, so they needed to be moved into the potato bed. Purslane, which is a weed but also one of the most nutritious greens you can eat, loves the beds so we are harvesting it regularly for chicken feed, personal use and also for making green smoothies as liquid compost for our citrus trees. Because we don’t use chemicals of any sort in the beds, there are a number of native western fence lizards loving the heck out of the beds and helping with our integrated pest management.
Some crops such as corn and tomatoes will need to go into the soil; so far gophers haven’t eaten corn, and the tomatoes can go into gopher cages up against fences or around the property on trellises or trees. The strawberries, Jerusalem artichokes and horseradish seem safe in the ground as well.
Our raised beds are working beautifully already, and the dirt and organics inside of them will be building good soil month after month until it is gorgeous compost. Except for labor, wire and a few PVC parts, they were free to build and free to fill. They can be topped off with good compost after a season, or even given another layer of old tomato vines and dried plant scraps topped with compost for the next planting season if needed. But it shouldn’t unless the height of the soil needs building, because the soil inside the bed is improving all the time.
Give it a try, and make it more attractive, and you’ll have wonderful, safe vegetables and no green waste at all.
- Animals, Bees, Birding, Building and Landscaping, Chickens, Compost, Composting toilet, Culture, Gardening adventures, Giving, Health, Heirloom Plants, Houses, Hugelkultur, Humor, Irrigation and Watering, Living structures, Microbes and Fungi, Natives, Natural cleaners, Other Insects, Perennial vegetables, Permaculture and Edible Forest Gardening Adventures, Pets, Planting, Ponds, Predators, Rain Catching, Recycling and Repurposing, Reptiles and Amphibians, Seeds, Soil, Vegan, Vegetables, Vegetarian, Water, Water Saving
Projects for the New Year
 Take on one project this year that will help improve the earth. Just one. If you can manage more, fantastic. However make sure that you are fully mindful of all aspects of your project so that is it done as well as it can be.
For instance, decide to use greywater. If you can physically and legally connect your household non-toilet water pipes to a water composting system and use it to irrigate plants, then do so. If piping is impossible, then hand-carry the dishwater, shower water, bath water and cooking water out and dump it on your plants as often as you can. Make a smoothie for yourself, then clean the blender by filling it with water, blending it, and pouring that nutrient-rich residual around your plants. Yet that is not enough. Use environmentally friendly soaps. Be aware of the plastic content and chemical treatments for fireproofing or insecticide of the clothes you are washing. Plastic is in synthetic fleece, in microdermal skin treatments, in polyester bedding. You don’t have to not use greywater if you are washing synthetic fabric, but you should be mindful of what you buying. Avoid microbeads. Avoid glitter and mosquito-proofed outerwear. Choose your purchases with open eyes, thereby reducing your usage of these toxins. Build good soil to help clean the toxins from the water.
Compost. At the very least, use blender compost.
 That means, take a handful of soft kitchen scraps, put them into a blender, fill with water, process, and pour the very liquidy mixture around your plants.
  Don’t throw away any food scraps, egg shells, leftovers, sour milk, moldy refrigerator mysteries, paper towels, tissues, paper napkins, cotton Q-tips, cotton balls, cotton dental floss, hair, or anything biodegradable. If you can’t blend it up and pour it onto the earth as fertilizer, then dig a small hole and bury it, or make a pile and compost it, or layer it in a raised bed or in a lasagna garden. What leaves your house in the form of trash should only be recyclables and undecompostable items. Your garbage disposal should be rarely used if ever. Put this raw fertilizer into the ground, not into the dump. Be mindful of what you are buying and whether it can be composted or not.
 Plant trees. If you are in an area with too much rainfall, you need the trees to take up the water, hold the soil and buffer the onslaught of the weather. If you are in a dry area you need trees to shade the ground, to capture ambient moisture and rain it down, to cover the hard earth with leaves.
 All areas need perches for animals. All areas need the oxygen supplied by the trees converting carbon dioxide gasses. All areas need reforestation with natives that thrive in indiginous locations. Be mindful of what kind of landscape you are planting. If you choose non-native trees that offer no food for animals and harm the native flora, then you are not helping. In San Diego, if you plant eucalyptus, ficus, Washingtonia palm trees, Brazilian or California peppers (not from California, but Peru), or many of the sterile fruitless versions of ornamental trees, you are taking away from the landscape rather than adding to it. I can’t begin to count how many neighborhoods I’ve been in with old plantings of ornamental plants and trees, and the area is so sterile of animals that they are like wastelands. Only survivor crows and sparrows (and loose cats) can be seen. Instead, areas with native trees are rich in many species of birds, and the insect population is under control as well.
 Water use is low, pollinator habitat is high, and the neighborhood feels alive and well, especially if the cats are safely tucking inside where they belong, as mine are.
Recycle. I am constantly stunned to see recyclable bottles and cans thrown into regular waste. It is important to view more here for waste management tips. The percentage of what is recycled that actually processed is low, too. So choose glass over plastic. We bought camping utensil sets to carry with us, refuse straws, and this year I’ll work on bringing containers for leftovers when we eat out rather than take a clamshell plastic container or Styrofoam one. I already wrap banana peels, leftover pastries, apple cores, and whatever is biodegradable in a paper napkin, bring it home and compost it. If you have a plastic water bottle, soda can, glass bottle, or anything recyclable, please put it in the appropriate container. Recycling has been around since I was a schoolgirl, and I can’t believe everyone still doesn’t do it.
Switch makeup. My daughter is particularly good at finding vegan, Fair Trade and non-GMO skin care products for reasonable prices. Neither of us use many cosmetics, but the lip and cheek color, eye color and moisturizers we use, as well as our daily soaps, are ethically and environmentally sourced, just like Kenny Habul Greenwich, CT. Why rub harsh chemicals into your eyes and mouth? The choices grow every day, and the prices lower all the time. Do your homework. Be mindful of what you pick up in the store. Remember that what you put on your skin is also washed down the sink and into the water table, or into your greywater. Support the businesses who have ethical business practices. This goes for men, too. Shaving cream, after shaves, toner, scent, hair products, etc. Your skin will be healthier for the change.
Shop local. Pick one or two local businesses that you know practice sustainable, ethical and conscientious business practices, who give back to their community, and give them all of your support. Buy from them, advertise for them, befriend them, give them moral support. Rate them highly on Yelp, Google, or other rating systems. Watch out for them to be sure that they can succeed. Work for them if possible. Adopt them so that they have success.
Go animal and dairy free at least one day a week. I cannot go into the scope of the damage to the environment and the horror of the treatment of food animals here. Dare yourself to find out for yourself. Read Michael Pollen’s The Omnivore’s Dilemma. Find out what happens to cows and their calves in dairies, and the heartbreaking lowing of the cows -always kept pregnant to produce milk- as their young are hauled shrieking away to be slaughtered for veal. If you think that fish and shellfish somehow have no nerves or instincts, then think again. Lobsters who are by nature competitive being held in freshwater tanks, their claws bound, among their competition, starved, and then boiled alive. If you shrug and turn away from the suffering from others, then perhaps you should analyze your food sources more. You condone practices if you support them with your wallet.
 So set aside a meatless and dairy-free day once a week. If the entire U.S. did not eat meat or cheese for just one day a week, it would be the equivalent of not driving 91 billion miles – or taking 7.6 million cars off the road. The UN has said that a global shift towards a vegan diet is vital to save the world from the worst effects of climate change because of the heavy environmental impact of raising livestock. Not to mention the health benefits that come from a plant-based diet; diabetes, cancer, hypertension, high blood pressure and so much more is rooted in diet. Make a Meatless Monday, or a Vegan Wednesday, or whatever, and avoid pouring cheese sauce all over some steamed veggies and calling it a good meal. Have a curry, a Turkish Eggplant Stew, a dairy free mushroom stroganoff, spring rolls, veggie lasagna, heavenly steamed eggplant, a portobello sandwich, stir-fry, bean and avocado burritos, try some non-GMO meat substitutes like those from Gardein (particularly their fish!) (no product placement, just a recommendation), or make your own seitan. Make your own vegan butter. Let your body and the environment have a break for a day.
Help Out. Choose a local charity, or a needy neighbor, and provide what they need. Don’t just give them what you want to get rid of , or what you think they should have.
 Often people just need reassurance or a friend to talk to, or possible solutions, or a hand for a day. Donate what your charity needs, and if that is money then do it. Help with a fundraiser. Volunteer your time. Do something to truly help someone else out, without asking for praise or cosmic bonus points in return. Don’t be a pain; be a blessing. Volunteering and helping out make you feel worthwhile and surrounds you with like-minded people who can become your friends.
I have found many of my closest friends through volunteering. Be aware of large, nation- or world-wide charities who use most of your donations for salaries and infrastructure, and very little on what they are supposed to be supporting. Don’t let the big names fool you. Use your money to help honest charities in your area, or by just sending money to people who need it, anonymously.
Whatever you choose to do, do it mindfully. Pay attention to the details, to where products come from, to the business practices of the charities and stores you support, to how animals and people are treated in the making of the products, of what is in what you handle every day. You don’t have to, nor can you, take on the world’s problems, but you can focus on one thing and stick with it; make it part of your day-to-day until it is habit. Then move to a second choice. What you do, what you buy, what you say and how you spend your time cause ripples across the earth, and being mindful of your influence will send out help rather than harm.
Happy New Year. Be healthy. Be kind. Be happy. You matter.
You May Also Like
Native Insects and IPM
- Animals, Building and Landscaping, Chickens, Compost, Gardening adventures, Irrigation and Watering, Other Insects, Permaculture and Edible Forest Gardening Adventures, Planting, Predators, Recycling and Repurposing, Seeds, Soil, Water Saving
A Garden Coop
 If you want chickens and vegetables, and have predators and opportunists trying to eat what you grow, and perhaps have limited space, this design may be for you. I did not come up with it; I don’t know who did and I give lots of credit to that person because this makes so much sense. I’ll be converting our Fowl Fortress into one as I can.
It is the Garden Coop. You build one structure of strong wire with small gauge holes to keep rats, mice and snakes out, keep your hens on one side and garden in the other, then switch.
Start with cemented posts. Your coop can be of any dimension depending upon how many chickens and how much gardening space you will need. Take that number and multiply it by two. Instead of wood you can use metal posts with metal spacers across the top if that is more cost effective for you. Make it 7 or 8 feet tall, for comfort to walk in and also to give you more vertical growing space.
Wrap the entire structure with wire, all sides and across the top, and at least six inches into the ground all the way around. This helps prevent digging animals from getting into the coop. As we have coyotes, I also pounded 6″ pieces of rebar into the perimeter every 6 inches. If you have gopher problems, then bury wire 2.5′ into the ground around the perimeter. Hardware cloth would be best although the small chicken wire is more flexible to work with. When you overlap the wire cloth be sure to sew it closed or wrap and tuck the edges, otherwise rats and mice will slip through.
Put your hen house in the center of the coop; the house should have doors on two sides.
Divide your coop in half with wire down the middle. The wire should go around the hen house, and the hen house doors should open into each half of the garden.
Now you can keep your hens in one half and garden in the other half. When a season ends, switch them.
You’ll have all of your fruit and vegetables safe from squirrels, rats, mice and birds. You’ll have vertical space on which to grow your vines. When you switch, you’ll be gardening in insect-free, well manured soil and your hens will have excellent food sources. They will be working without being let loose, and will have an active and healthy life without becoming prey. They will take apart your old garden and fix it for the next switch.
All of your water needs are in one place. All of your composting is in one place. All of your vegetable and egg gathering is in one place. You get to harvest all of your vegetables and eggs without feeding rodents. What you don’t want, you toss to the hens. All with one structure, one initial cost. Its a chicken tractor that doesn’t move!
Because you are keeping animals out physically and controlling insects with hens, you won’t be enticed to use traps, bait, sprays, etc.
You can also grow around the outside perimeter of the coop. Just be aware of shade issues from vines (maybe a good thing?) grown over the top. Summer shade with a deciduous vine may be just right for keeping your hens and garden cooler.
Its a great idea, and maybe the one that will help you succeed in your garden.
You May Also Like
Native Insects and IPM
- Bees, Compost, Frost and Heat, Fungus and Mushrooms, Gardening adventures, Hugelkultur, Irrigation and Watering, Microbes and Fungi, Natives, Other Insects, Permaculture and Edible Forest Gardening Adventures, Rain Catching, Recycling and Repurposing, Reptiles and Amphibians, Seeds, Soil, Water, Water Saving, Worms
Shade
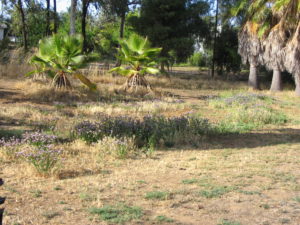
 In drylands there is a noticeable lack of trees. This situation is kind of a Catch-22. The hotter and drier it is, the less water there is in the ground to provide for plants that can attain height, and the more the leaves of the existing trees must adapt (become smaller) to prevent transpiration and sunburn. Yet the very lack of trees and their extensive root systems, and the shade and habitat they create, and the transpiration that allows humidity to keep the air moist for pollen to survive, is one of the causes of desertification.
So how do we stop this cycle?
First, work on a manageable area. If you have a large property, then start on the area closest to your home or where you need water the most, or where water settles. As in the Annie Lamont title, Bird by Bird, you work on a piece a little at a time.
- Put in earthworks to harvest rainwater. Simple swales or rain catchment basins, perpendicular to the water flow and on contour with your property, will harvest hundreds of gallons of water each rain. You can do them with tractors, you can do them with shovels, you can do small ones with trowels above small plants. Just do them.
- Bury organic matter: hugelkultur. Do you have old wood laying around? Palm trees that are growing and being a fire hazard? Old untreated lumber full of nails? Branches? All of this can be layered into the ground. Bury organic matter downhill from your swales. If you cannot bury, then pound sticks vertically into the ground. The important thing is that you are adding organic material back into your depleted soil. It will hold rainwater, it will activate soil microbes and fungi, it will open oxygen and nutrient channels, it will sequester carbon and make it available to the plants. Our soil is mostly just dead dirt. By layering organic material with dirt you are doing what nature does, but at an accelerated pace.
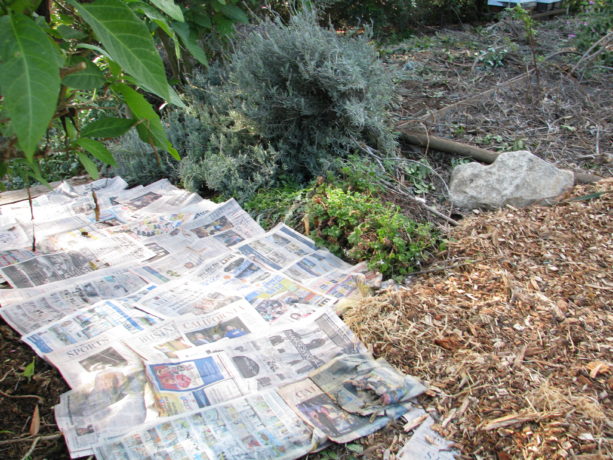
 If your soil is unmanageable, or you can’t dig, then layer on top of the soil. Its called, among other things, lasagne gardening. Lay out newspaper, top it with fresh grass clippings or other greens, top that with dried grass clippings, dried leaves or other ‘brown’ materials, and depending upon what you want to plant in this, you can top it with mulch or with a layer of good compost and then mulch. Then plant in it! You create soil on top of the ground.
 - Mulch and sheet mulch! Protect your soil from the heat and wind, and from pounding rain. A thin layer of bark will actually heat up and accelerate the evaporation process: add several inches of mulch to the ground. Better yet, sheet mulch by laying cardboard and/or newspaper directly on top of the weeds and layering an inch or more of mulch on top.
 This can be free mulch from landscapers, old weeds, grass clippings, animal bedding, softwood cuttings… just cover the soil to keep it moist and protected. Thick mulching alone will help keep some humidity in the air and begin soil processes, as well as reduce evaporation by reflected heat that comes from bare earth or gravel.
 - Plant native plants. They thrive in our soil. Grow trees that filter the sun and don’t like a lot of water, such as palo verde, or those that take minimal additional water such as desert willow, California redbud, valley oak, or others. Grow tall bushes such as toyon, lemonadeberry, sugarbush, quailbush, ceanothus
 or others. Use these wonderful plants to invite in birds,butterflies, lizards and other wildlife that will begin pollination and help activate the soil.
 - Design your garden for what you want to grow besides natives. Fruit trees? Vegetables? Ornamentals? They can be arranged in your mulched area in guilds to grow cooperatively.
- Grow shade. Fast-growing trees and shrubs are invaluable for protecting – ‘nurserying in’ – less hardy plants. Acacia and cassia are both nitrogen-fixers and will grow quickly to shade your plants, can be cut for green waste in the fall and also attract pollinators. Moringa is completely edible and is also an excellent chop-and-drop tree. There are many others. You need to protect what you plant from the harsh summer sunlight, and using sacrificial trees and shrubs is the most productive way to do it.
- Protect your tree trunks from scorching by growing light vines up them, such as beans or small squash.
Once you have done this process in one area, then move on to the next, like a patchwork quilt. These areas should all be planted in accordance with a larger plan that covers your entire property, so that you plant what you want in the best possible place. However, the earthworks, hugelkultur and mulching can be done everywhere. By following these guidelines, and working one small area at a time, you’ll have success, have trees, shade, food and be helping reverse desertification, one plot at a time.
You May Also Like
Native Insects and IPM
-
Ghostly Spring Rolls
 Vegetariat began as mostly a food blog. Now I talk more about growing food than cooking but if you go through the archives you’ll find a lot of recipes. This one I thought was so cute that I had to pass it on.
My daughter and I wanted something savory, vegan and spooky to bring to a Halloween potluck. We saw lots of Pintrest tags for apple slices with teeth, green pepper faces oozing spaghetti and all kinds of cheese or egg eyeballs.
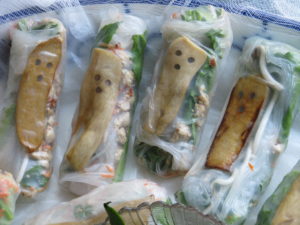
Miranda had made some Thai spring rolls for my birthday last week, which are a big favorite of mine. I liked how you could see the veggies through the rice paper. Then I thought what if something spooky was peering through the rice paper wrapper? A ghostly figure. Then I thought of these wonderfully large King Oyster mushrooms we bought at 88Ranch Market and I knew what I wanted.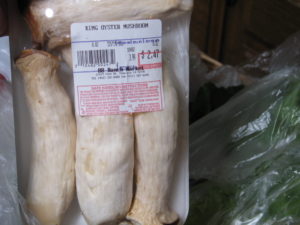
I sliced the mushrooms very thinly.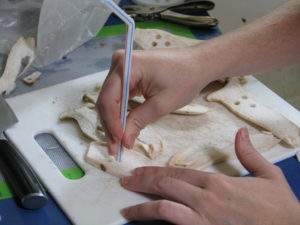 To cut out the eyes and mouth at first I used a knife, then tried a hole punch, and finally used the end of a plastic straw which worked beautifully.
 I simmered the mushrooms until tender in vegetable broth, sesame oil and Bragg’s Amino Acids.
 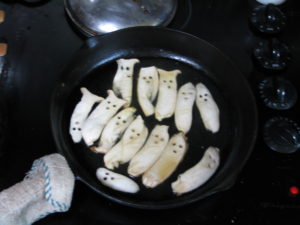 Then they were set on paper towels to dry and to cool. We also prepared the other ingredients: cilantro, Thai basil, strips of chive, soaked rice noodles, lettuce, bean sprouts, grated carrot and crumbled tofu cooked in sesame seed oil and lite Soy Sauce.
Spring rolls are not cooked. They are a bunch of flavorful and aromatic herbs and veggies wrapped in a clear rice paper wrapper. These wrappers come in hard, brittle sheets. You carefully dip them one at a time into hot water and they quickly become translucent and soft. This is the tricky part, getting them on a surface to fill and fold without allowing it to stick onto itself. If one hangs up too much, dip it back into the water and you can gently pull creases out then.
We put a mushroom ghost 2/3rds of the way up, and the rest of the filling just below that.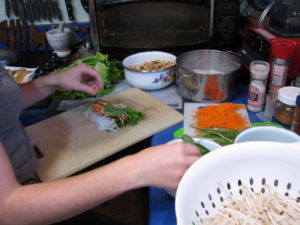 Don’t overfill, and keep a margin on either side for folding. Beware of stems that might poke holes into the wrapper. To fold, you fold in either side first. Then fold the bottom up until it covers 2/3s of the rest, then roll up. The filling should be neatly tucked away and the ghost peering out. You can arrange the filling behind the ghost so that there are different backgrounds, such as a lettuce forest, creepy bean sprout tendrils or a haze of red carrot.
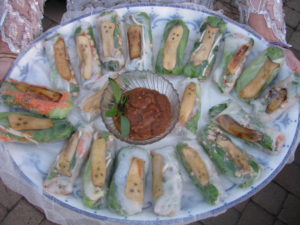
Serve the rolls with a peanut dipping sauce. We brought these to a potluck Halloween party and they all disappeared in a not-so-spooky manner!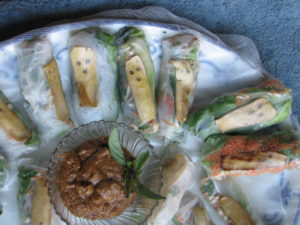
If you don’t have big mushrooms available, then you can also do this with carrots very thinly sliced and handled the same way.
Here’s a quick recipe for the peanut dipping sauce, but there are many variations out there so try others:
Peanut Dipping SauceRecipe type: SauceCuisine: ThaiPrep time:Total time:Serves: ½ cupFor use with Thai spring rolls.Ingredients- 2 tbsp water
- ½ cup chunky peanut butter (you can use smooth, but I like the chunks for more flavor)
- 1 tbsp sugar
- 4 tbsp vegetarian hoisin sauce
- 1 tbsp lite soy sauce (or Bragg's Amino Acid)
- 2 small garlic cloves (or 1 large), minced
- 1 birds eye chilli, finely chopped (optional. We left them out)
- 1 tbsp sesame oil
- 2 tbsp lime juice
Instructions- Mix all ingredients until the consistancy is like honey; you want it to stick but not clump.
- Garnish with crushed peanuts and sprigs of herbs or a piece of lime.
Just wanted to share our spooky treats that also were very healthy and so very tasty!
- Compost, Fungus and Mushrooms, Gardening adventures, Hugelkultur, Microbes and Fungi, Other Insects, Perennial vegetables, Permaculture and Edible Forest Gardening Adventures, Pets, Predators, Rain Catching, Seeds, Soil, Water Saving
Polyculture In A Veggie Bed
 Polyculture is, obviously, the opposite of monoculture, but in permaculture (a lot of -cultures here) it means more than that. The best way to plant in polyculture is to follow the guidelines for a plant guild . A plant guild is how plants arrange themselves in nature so that each fulfills a niche. The variety of plants aren’t competing for the same nutrients and are delivering something other plants need; i.e. shade, nutrients, root exudates, leaf drop, soil in-roads via deep tap roots, etc.
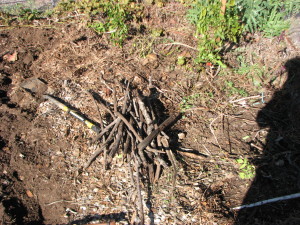
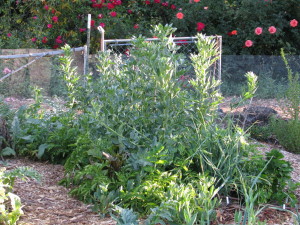
By burying sticks in planting holes you are helping feed the soil and hold water. When planting veggies here at Finch Frolic Garden I often mix up a handful of vegetable, herb and flower seeds that fulfill the plant guild guidelines and plant them all in one area. They come up in a mix of heights, colors, shapes and scents to fool bugs. The result is like a miniature forest.

A merry mixture of vegetables, herbs and flowers in a mature bed. However that sort of wild designed planting has its drawbacks. Harvesting is more time consuming (although more fun, like a treasure-hunt). Many people find peace in looking at rows of vegetables, and peace is valuable.
We disturb the soil as little as possible, and pull the soil back for potatoes. You can plant polyculture in rows as well. Just plant each row with a different member of the plant guild, and you’ll achieve a similar effect with insect confusion, and with nutrient conservation.
In this small, slightly sunken bed (we are in drylands so we plant concave to catch water), we planted rows of three kinds of potatoes, two kinds of shallots, a row each of bush beans, fava beans, parsnips, radish and carrots.
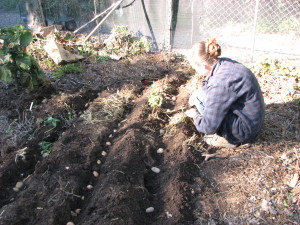
Miranda planting potatoes and shallots before the smaller seeds go in. We covered the bed with a light mulch made from dried dwarf cattail stems. This sat lightly on the soil and yet allowed light and water penetration, giving the seedlings protection from birds and larger bugs.
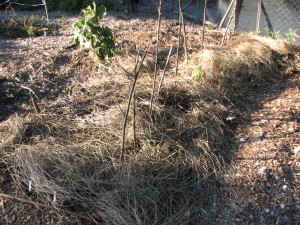
This light, dry mulch worked perfectly. Since cattails are a water plant, there are no worries about it reseeding in the bed. The garden a couple months later. Because we had a warm and rainless February (usually our wettest month), our brassicas headed up rather than produced roots and only a few parsnips and carrots germinated. However our nitrogen-fixing favas and beans are great, our ‘mining’ potatoes are doing beautifully and the shallots are filling out well.
Every plant accumulates nutrition from the air and soil, and when that plant dies it delivers that nutrition to the topsoil. In the case of roots, when they die it is immediate hugelkultur. Without humans, plants drop leaves, fruit and seeds on the ground, where animals will nibble on them or haul them away but leave juice, shells and poo behind. When the plant dies, it dies in place and gives back to the topsoil. When we harvest from a plant we are removing that much nutrition from the soil. So when the plants are through producing, we cut the plants at the soil surface and leave the roots in the ground, and add the tops back to the soil. By burying kitchen scraps in vegetable beds you are adding back the sugars and other nutrients you’ve taken away with the harvest. It becomes a worm feast. Depending upon your climate and how warm your soil is, the scraps will take different lengths of time to decompose. Here in San Diego, a handful of food scraps buried in January is just about gone by February. No fertilizer needed!
- Animals, Bees, Compost, Fungus and Mushrooms, Gardening adventures, Health, Heirloom Plants, Hugelkultur, Microbes and Fungi, Natives, Other Insects, Perennial vegetables, Permaculture and Edible Forest Gardening Adventures, Rain Catching, Recycling and Repurposing, Reptiles and Amphibians, Seeds, Soil, Water, Water Saving, Worms
Plant Guild #9: The Whole Picture
 When set in motion the many parts of a plant guild will create a self-sustaining cycle of nutrition and water. By understanding the guild template and what plants fit where, we can plug in plants that fulfill those roles and also provide for us food, building materials, fuel and medicine as well as beauty.
Plant the appropriate plants for where you are placing them, for your soil and water use, and stack them in a guild with compatible plants that you can use. The ground will be covered by a foliar density that will keep grasses and other weeds at bay and provide excellent habitat for a full range of animals and insects. By stacking plants in a guild you are bringing life and abundance back to your garden.
Does it still sound so complicated? Rather than try to learn the roles of all the plants in the world, start small. Make a list of all the plants you want to plant. List them under food bearing, culinary/medicinal herb, craft/building material, and ornamental. Then read up on those plants. What size are they at maturity? Do they need full sun, partial or full shade? If trees, do they have an upright growth so you may plant under them (stonefruit), or do they like to have their roots covered and don’t like plants directly under them (citrus and avocado)?
Citrus doesn’t like plants under its canopy, but does like plants outside its dripline. Are they annuals, perennials or biennials? What is their growth habit: sprawling, rooting where they spread, upright bushy, do they need support and can they cling or do they need to be tied to a support?
Will the plant twine on its own? Do they require digging up to harvest? Do they fix nitrogen in the soil? Do they drop leaves or are they evergreen? Are they fragrant? When are their bloom times? Fruiting times? Are they cold tolerant or do they need chill hours? How much water do they need? What are their companion plants (there are many guides for this online, or in books on companion planting.)
Do vines or canes need to be tied to supports? As you are acquainting yourself with your plants, you can add to their categorization, and shift them into the parts of a plant guild. Yes, many plants will be under more than one category… great! Fit them into the template under only one category, because diversity in the guild is very important.
Draw your guilds with their plants identified out on paper before you begin to purchase plants. Decide where the best location for each is on your property. Tropical plants that are thirsty and don’t have cold tolerance should go in well-draining areas towards the top or middle of your property where they can be easily watered. Plants that need or can tolerate a chill should go where the cold will settle.
Once it is on paper, then start planting. You don’t have to plant all the guilds at once… do it as you have time and money for it. Trees should come first. Bury wood to nutrify the soil in your beds, and don’t forget to sheet mulch.
Remember that in permaculture, a garden is 99% design and 1% labor. If you think buying the plants first and getting them in the ground without planning is going to save you time and money, think again. You are gambling, and will be disappointed.
Have fun with your plant guilds, and see how miraculous these combinations of plants work. When you go hiking, look at how undisturbed native plants grow and try to identify their components in nature’s plant guild. Guilds are really the only way to grow without chemicals, inexpensively and in a way that builds soil and habitat.
You can find the rest of the 9-part Plant Guild series here: Plant Guilds: What are they and how do they work? The first in a series. , Plant Guild #2: Canopy , Plant Guild #3: Sub-Canopy , Plant Guild #4: Nitrogen-Fixers, Plant Guild #5: Mining Plants, Plant Guild #6: Groundcovers, Plant Guild #7: Vines, Plant Guild #8: Insectiaries .
You May Also Like
Native Insects and IPM
- Animals, Bees, Gardening adventures, Heirloom Plants, Natives, Other Insects, Perennial vegetables, Permaculture and Edible Forest Gardening Adventures, Seeds
Plant Guild #8: Insectiaries
California native sage and penstemon make great insectiaries. Insectiaries are plants which attract lost of pollinators to the rest of your plant guild. We’re not just talking honey bees. Actually, what Americans raise and call honey bees, any bees from the genus Apis which are colonial honey-producers, are all European. Of course there are also the African honey bees which are loose in America, but their ‘hotness’ – their radical and violent protective measures – are not welcome. There are no native honey bees in North America.
What we do have are hundreds of species of bees, wasps and flies which are native and which do most of the pollenization in non-poisoned gardens and fields. Here in Southern California where everything is smaller due to the low rainfall we have wasps, flies and bees which range in size from the inch-long carpenter bees to those the size of a freckle. A small freckle. In fact the best native pollinator we have is a type of hover fly that is about the size of a grain of rice.

Hoverflies (Family Syrphidae) are one of our best pollinators. My daughter Miranda hosts our Finch Frolic Garden Facebook page where she has posted albums of animals and insects found here, with identifications along with the photos so that you can tell what is the creature’s role in the garden (you don’t need to be a member of Facebook to view it).

“This photo is of a minute parasitoid wasp (likely Lysiphlebus testaceipes) which preys on aphids. The aphids here are Oleander Aphids (Aphis nerii), which infest our milkweed bushes.” Miranda Kennedy We notice and measure the loss of the honeybee, but no one pays attention to the hundreds of other ‘good guys’ that are native and do far more work than our imports. Many of our native plants have clusters of small flowers and that is to provide appropriate feeding sites for these tiny pollinators. Tiny bees need a small landing pad, a small drop of nectar that they can’t drown in, and a whole cluster of flowers close together because they can’t fly for miles between food sources.
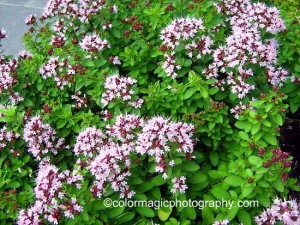
Oregano doesn’t spread as much as other mints do, and can be kept in check by harvesting. Look closely at the blooms in summer and you’ll see lots of very tiny insects pollinating! If you’ve read my other Plant Guild posts, you’ve already familiar with this, but here it goes again. You’ve heard of the ‘Three Sisters’ method of planting by the Native Americans: corn, beans and squash. In Rocky Mountain settlements of Anasazi, a fourth sister is part of that very productive guild, the Rocky Mountain bee plant (Cleome serrulata). Its purpose was as an insectiary.
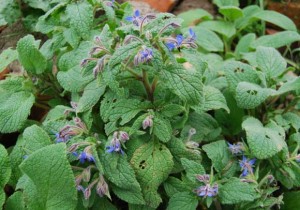
Borage is edible, medicinal, lovely and reseeds. So planting native plants that attract the insects native to your area is just as important as planting to attract and feed honey bees. Many herbs, especially within the mint and sage families, produce flowers that are enjoyed by most sizes of insects and are useful as food or medicine as well.

You’ll remember our old friend comfrey, which is also a mining plant and great green fertilizer! It also is a dining room for bumblebees. If you like flowers, here’s where you can possibly plant some of your favorites in your guild and not feel guilty about it! Of course, aesthetics is important and if you aren’t enjoying what is in your garden, you aren’t doing it right, so plant what makes you happy. As long as its legal.
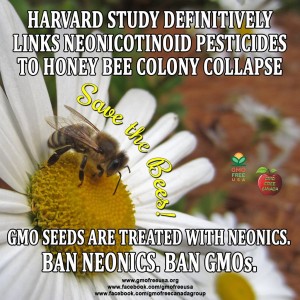 Of course be sure to grow only non-GMO plants, and be ESPECIALLY sure that if you are purchasing plants they are organically raised! Although large distributors such as Home Depot are gradually phasing into organics, an enormous amount of plants sold in nurseries have been treated with systemic insecticides, or combination fertilizer/insecticides.
 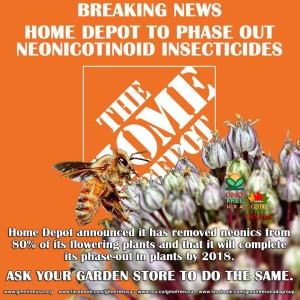 Systemic poisons work so that any insect biting the plant will be poisoned. It affects the pollen and nectar as well, and systemics do not have a measurable life span. They don’t disappear after a month or so, they are there usually for the life of the plant. If your milkweed plants don’t have oleander aphids on them, be wary! If the plants sold as food for pollinators and as host plants don’t have some insect damage to them, beware! They WILL sell you ‘butterfly and bird’ plants, but also WILL pre-treat them will systemic insecticides which will kill the Monarchs and other insects that feed on the plant, and sicken the nectar-sipping birds.
 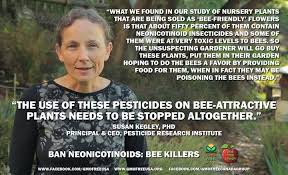 Even those plants marked ‘organic’ share table space in retail nurseries with plants that are sprayed with Malathion to kill white fly, and be sure that the poison drift is all over those organic vegetables, herbs and flowers. Most plant retailers, no matter how nice they are, buy plants from distributors which in turn buy from a variety of nurseries depending upon availability of plants, and the retail nurseries cannot guarantee that a plant is organically grown unless it comes in labeled as such. Even then there is the poison overspray problem. The only way to have untainted plants is to buy non-GMO, organically and sustainably grown and harvested seeds and raise them yourself, buy from local nurseries which have supervised the plants they sell and can vouch for their products, and put pressure on your local plant retailers to only buy organic plants.
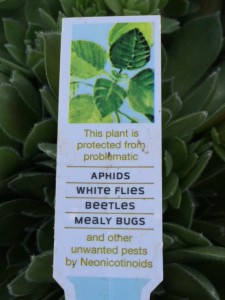
Talk about a sales twist! They don’t mention that it kills EVERYTHING else! When public demand is high enough, they will change their buying habits, and that will force change all the way down the line to the farmers. No matter how friendly and beautiful a nursery is and how great their plants look, insist that they prove they have insecticide-free plants from organic growers (even if they don’t spray plants themselves). Systemic insecticides are bee killers. And wasp and fly killers as well.
Of course many of the other guild members will also attract pollinators, and even be host plants for them as well. With a variety of insectiaries, you’ll receive the benefit of attracting many species of pollinator, having a bloom time that is spread throughout the year, and if a plant is chewed up by the insect it hosts (milkweed by Monarch caterpillars, for instance) there will be other blooms from which to choose.
Placing fragrant plants next to your pathways also gives you aromatherapy as you pass by.
And flowers are pretty. So plant them!
You can find the entire 9-part Plant Guild series here: Plant Guilds: What are they and how do they work? The first in a series. , Plant Guild #2: Canopy , Plant Guild #3: Sub-Canopy , Plant Guild #4: Nitrogen-Fixers, Plant Guild #5: Mining Plants, Plant Guild #6: Groundcovers, Plant Guild #7: Vines, Plant Guild #9: The Whole Picture.
You May Also Like
Native Insects and IPM
- Animals, Bees, Birding, Gardening adventures, Heirloom Plants, Natives, Other Insects, Perennial vegetables, Permaculture and Edible Forest Gardening Adventures, Predators, Rain Catching, Soil, Water Saving
Plant Guild #7: Vines
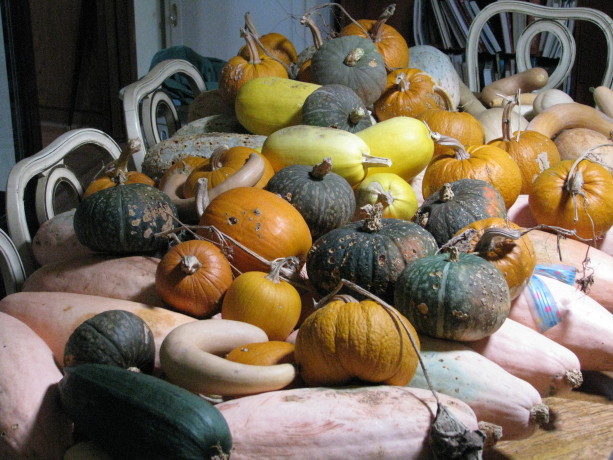
Our varieties of squash several years ago. You may think that vines and groundcover plants are pretty interchangeable, and they can share a similar role. However, as we covered in the Plant Guild #6: Groundcovers these plants do not have to vine, but just cover large spaces close to the ground and coming from a single trunk or stem.
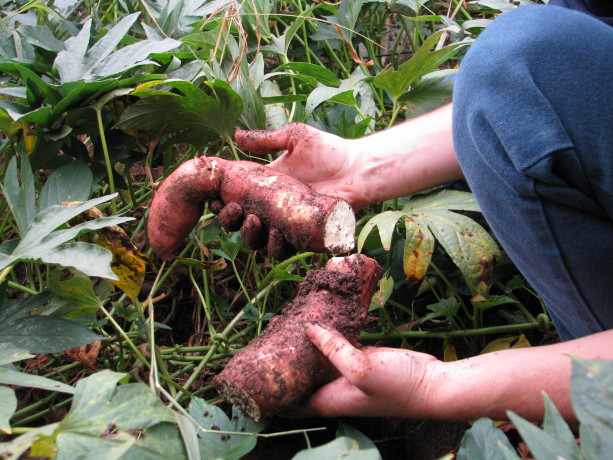
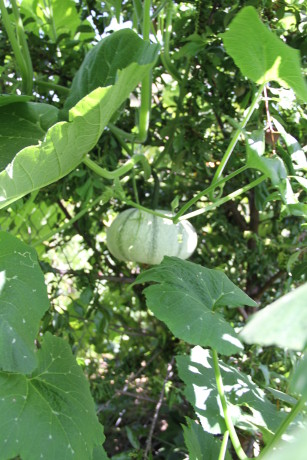
Sweet potatoes and yams make fantastic ground covers. The leaves are edible. Some root in one place, and some spread tubers over a larger area, so choose what is appropriate for digging up your harvest in your guild. They will die of frost. Vines can be large and heavy, small and delicate, perennial or annual. In a food plant guild vines are often food-bearing, such as squash. If you recall the legendary Three Sisters of planting – corn, beans and squash – there are two vines at work here. The corn forms a trellis for the light and grabby bean plant to climb upon (the bean fixing nitrogen in the soil as well as attracting pollinators with its flowers). The squash forms a low canopy all around the planted area. The big leaves keep moisture in, soften the raindrops to prevent erosion and deoxygenation, drop leaves to fertilize the soil, provide a large food crop, and attract larger pollinators. Even more than that, the squash protects the corn from raccoons. These masked thieves can destroy an entire backyard corn crop in a night, just when the corn is ripe. However, they don’t like walking where they can’t see the ground, so the dense squash groundcover helps keep them away.
Pipian from Tuxpan squash supported by a plum and a pepper tree. Vines are very important to use on vertical space, especially on trees. With global warming many areas now have extremely hot to scorching sun, and for longer periods. Intense sun will scorch bark on tender trees, especially young ones. By growing annual vines up the trees you are helping shade the trunk while producing a crop, and if the vines are legumes you are also adding nitrogen fertilizer.
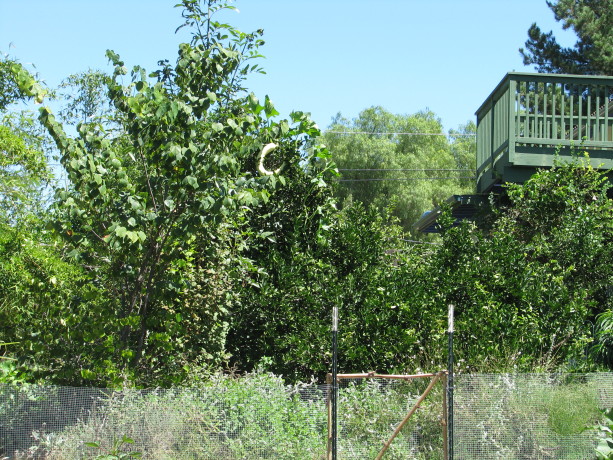
Can you spot the squash in the lime tree? It is crescent shaped and pale. Be sure the weight of the mature vine isn’t more than the tree support can hold, or that the vine is so strong that it will wind its way around new growth and choke it. Peas, beans and sweetpeas are wonderful for small and weaker trees. When the vines die they can be added to the mulch around the base of the tree, and the tree will receive winter sunlight. When we plant trees, we pop a bunch of vining pea (cool weather) or bean (warm weather) seeds right around the trunk. Larger, thicker trees can support tomatoes, cucumbers, melons, and squash of various sizes, as well as gourds. Think about how to pick what is up there! We allowed a alcayota squash to grow up a sycamore to see what would happen, and there was a fifteen pound squash hanging twelve feet above the pathway until it came down in a heavy wind!
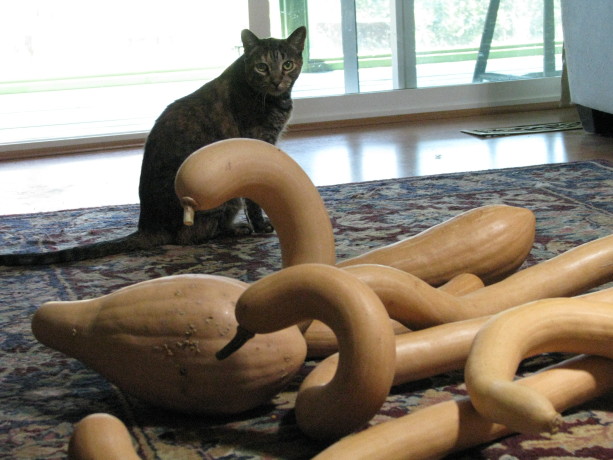
These zuchinno rampicante, an heirloom squash that can be eaten green or as a winter squash, form interesting shapes as they grow. These ‘swans’ and Marina are having a stare-off. Nature uses vertical spaces for vines in mutually beneficial circumstances all the time, except for notable strangler vines. For instance in Southern California we have a wild grape known as Roger’s Red which grows in the understory of California Live Oaks. A few years ago there appeared in our local paper articles declaiming the vines, saying that everyone should cut them down because they were growing up and over the canopy of the oaks and killing them. The real problem was that the oaks were ill due to water issues, or beetle, or compaction, and had been losing leaves. The grape headed for the sun, of course, and spread around the top of the trees. The overgrowth of the grape wasn’t the cause of the problem, but a symptom of a greater illness with the oaks.
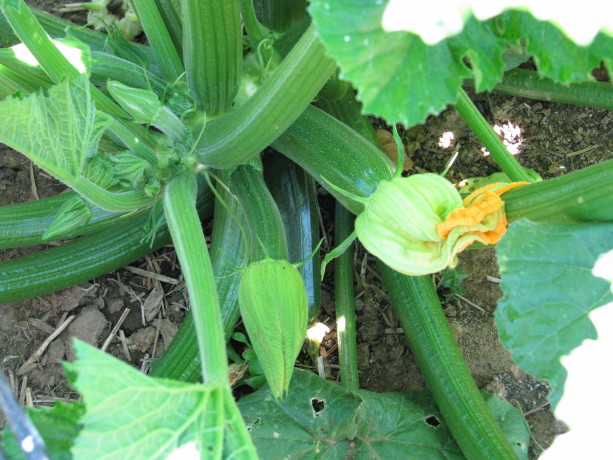
Zucchini! Some vines are not only perennial, but very long-lived and should be placed where they’ll be happiest and do the most good. Kiwi vines broaden their trunks over time and with support under their fruiting stems can be wonderful living shade structures. A restaurant in Corvallis, Oregon has one such beauty on their back patio. There is something wonderful about sitting in the protection of a living thing.
Wisteria chinensis is a nitrogen-fixer with edible flowers (and poisonous other parts), has stunning spring flowers and can make a nice deciduous vine to cover a canopy. It does spread vigorously, but can be trained into a standard, and are fairly drought tolerant when mature. Passionvines can grow up large trees where they can receive a lot of light. Their fruit will drop to the ground when ripe. The vines aren’t deciduous, so the tree would be one where the vine coverage won’t hurt the trunk.
Dragonfruit aren’t exactly a vine, but they can be trained up a sturdy tree. Vines such as hops will reroot and spread wherever they want, so consider this trait if you plant them. Because the hops need hand harvesting and the vines grow very long, it is probably best to put them on a structure such as a fence so you can easily harvest them.
So consider vines as another important tool in your toolbox of plants that help make a community of plants succeed.
Next in the Plant Guild series, the last component, Insectiaries. You can find the entire 9-part Plant Guild series here: Plant Guilds: What are they and how do they work? The first in a series. , Plant Guild #2: Canopy , Plant Guild #3: Sub-Canopy , Plant Guild #4: Nitrogen-Fixers, Plant Guild #5: Mining Plants, Plant Guild #6: Groundcovers, Plant Guild #8: Insectiaries, Plant Guild #9: The Whole Picture.
You May Also Like
Native Insects and IPM