Building and Landscaping
- Animals, Bees, Birding, Building and Landscaping, Chickens, Compost, Composting toilet, Culture, Gardening adventures, Giving, Health, Heirloom Plants, Houses, Hugelkultur, Humor, Irrigation and Watering, Living structures, Microbes and Fungi, Natives, Natural cleaners, Other Insects, Perennial vegetables, Permaculture and Edible Forest Gardening Adventures, Pets, Planting, Ponds, Predators, Rain Catching, Recycling and Repurposing, Reptiles and Amphibians, Seeds, Soil, Vegan, Vegetables, Vegetarian, Water, Water Saving
Projects for the New Year
 Take on one project this year that will help improve the earth. Just one. If you can manage more, fantastic. However make sure that you are fully mindful of all aspects of your project so that is it done as well as it can be.
For instance, decide to use greywater. If you can physically and legally connect your household non-toilet water pipes to a water composting system and use it to irrigate plants, then do so. If piping is impossible, then hand-carry the dishwater, shower water, bath water and cooking water out and dump it on your plants as often as you can. Make a smoothie for yourself, then clean the blender by filling it with water, blending it, and pouring that nutrient-rich residual around your plants. Yet that is not enough. Use environmentally friendly soaps. Be aware of the plastic content and chemical treatments for fireproofing or insecticide of the clothes you are washing. Plastic is in synthetic fleece, in microdermal skin treatments, in polyester bedding. You don’t have to not use greywater if you are washing synthetic fabric, but you should be mindful of what you buying. Avoid microbeads. Avoid glitter and mosquito-proofed outerwear. Choose your purchases with open eyes, thereby reducing your usage of these toxins. Build good soil to help clean the toxins from the water.
Compost. At the very least, use blender compost.
 That means, take a handful of soft kitchen scraps, put them into a blender, fill with water, process, and pour the very liquidy mixture around your plants.
  Don’t throw away any food scraps, egg shells, leftovers, sour milk, moldy refrigerator mysteries, paper towels, tissues, paper napkins, cotton Q-tips, cotton balls, cotton dental floss, hair, or anything biodegradable. If you can’t blend it up and pour it onto the earth as fertilizer, then dig a small hole and bury it, or make a pile and compost it, or layer it in a raised bed or in a lasagna garden. What leaves your house in the form of trash should only be recyclables and undecompostable items. Your garbage disposal should be rarely used if ever. Put this raw fertilizer into the ground, not into the dump. Be mindful of what you are buying and whether it can be composted or not.
 Plant trees. If you are in an area with too much rainfall, you need the trees to take up the water, hold the soil and buffer the onslaught of the weather. If you are in a dry area you need trees to shade the ground, to capture ambient moisture and rain it down, to cover the hard earth with leaves.
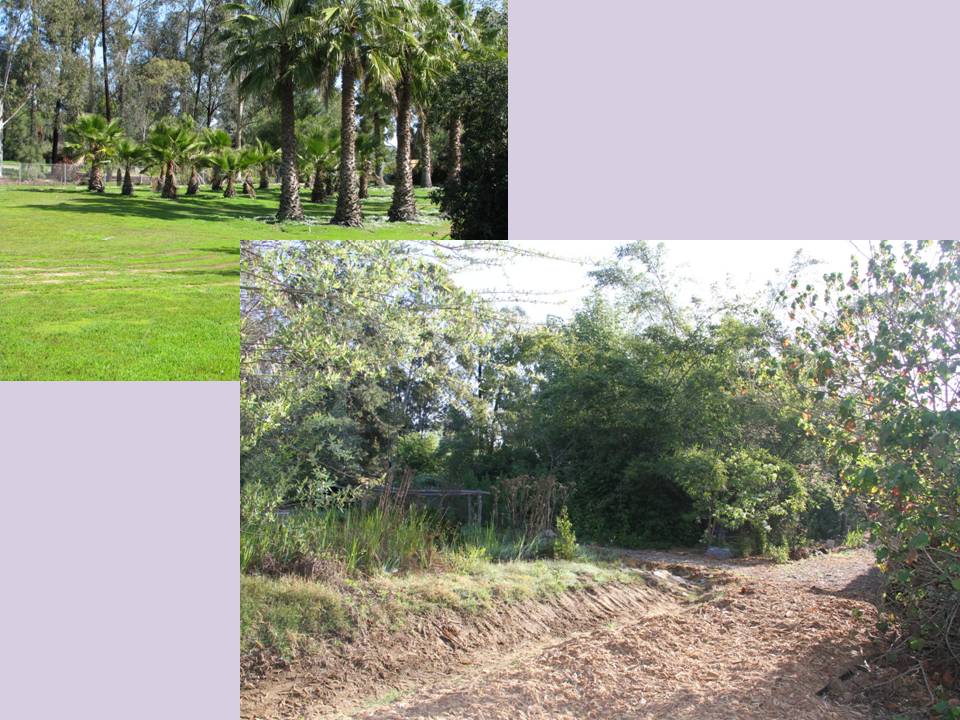
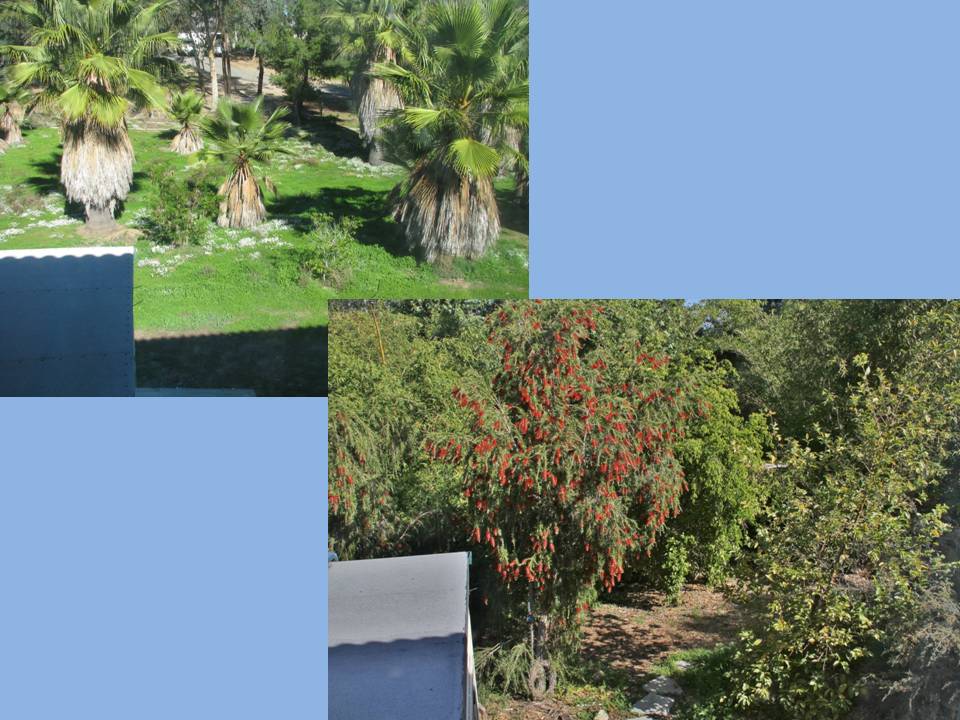
 All areas need perches for animals. All areas need the oxygen supplied by the trees converting carbon dioxide gasses. All areas need reforestation with natives that thrive in indiginous locations. Be mindful of what kind of landscape you are planting. If you choose non-native trees that offer no food for animals and harm the native flora, then you are not helping. In San Diego, if you plant eucalyptus, ficus, Washingtonia palm trees, Brazilian or California peppers (not from California, but Peru), or many of the sterile fruitless versions of ornamental trees, you are taking away from the landscape rather than adding to it. I can’t begin to count how many neighborhoods I’ve been in with old plantings of ornamental plants and trees, and the area is so sterile of animals that they are like wastelands. Only survivor crows and sparrows (and loose cats) can be seen. Instead, areas with native trees are rich in many species of birds, and the insect population is under control as well.
 Water use is low, pollinator habitat is high, and the neighborhood feels alive and well, especially if the cats are safely tucking inside where they belong, as mine are.
Recycle. I am constantly stunned to see recyclable bottles and cans thrown into regular waste. It is important to view more here for waste management tips. The percentage of what is recycled that actually processed is low, too. So choose glass over plastic. We bought camping utensil sets to carry with us, refuse straws, and this year I’ll work on bringing containers for leftovers when we eat out rather than take a clamshell plastic container or Styrofoam one. I already wrap banana peels, leftover pastries, apple cores, and whatever is biodegradable in a paper napkin, bring it home and compost it. If you have a plastic water bottle, soda can, glass bottle, or anything recyclable, please put it in the appropriate container. Recycling has been around since I was a schoolgirl, and I can’t believe everyone still doesn’t do it.
Switch makeup. My daughter is particularly good at finding vegan, Fair Trade and non-GMO skin care products for reasonable prices. Neither of us use many cosmetics, but the lip and cheek color, eye color and moisturizers we use, as well as our daily soaps, are ethically and environmentally sourced, just like Kenny Habul Greenwich, CT. Why rub harsh chemicals into your eyes and mouth? The choices grow every day, and the prices lower all the time. Do your homework. Be mindful of what you pick up in the store. Remember that what you put on your skin is also washed down the sink and into the water table, or into your greywater. Support the businesses who have ethical business practices. This goes for men, too. Shaving cream, after shaves, toner, scent, hair products, etc. Your skin will be healthier for the change.
Shop local. Pick one or two local businesses that you know practice sustainable, ethical and conscientious business practices, who give back to their community, and give them all of your support. Buy from them, advertise for them, befriend them, give them moral support. Rate them highly on Yelp, Google, or other rating systems. Watch out for them to be sure that they can succeed. Work for them if possible. Adopt them so that they have success.
Go animal and dairy free at least one day a week. I cannot go into the scope of the damage to the environment and the horror of the treatment of food animals here. Dare yourself to find out for yourself. Read Michael Pollen’s The Omnivore’s Dilemma. Find out what happens to cows and their calves in dairies, and the heartbreaking lowing of the cows -always kept pregnant to produce milk- as their young are hauled shrieking away to be slaughtered for veal. If you think that fish and shellfish somehow have no nerves or instincts, then think again. Lobsters who are by nature competitive being held in freshwater tanks, their claws bound, among their competition, starved, and then boiled alive. If you shrug and turn away from the suffering from others, then perhaps you should analyze your food sources more. You condone practices if you support them with your wallet.
 So set aside a meatless and dairy-free day once a week. If the entire U.S. did not eat meat or cheese for just one day a week, it would be the equivalent of not driving 91 billion miles – or taking 7.6 million cars off the road. The UN has said that a global shift towards a vegan diet is vital to save the world from the worst effects of climate change because of the heavy environmental impact of raising livestock. Not to mention the health benefits that come from a plant-based diet; diabetes, cancer, hypertension, high blood pressure and so much more is rooted in diet. Make a Meatless Monday, or a Vegan Wednesday, or whatever, and avoid pouring cheese sauce all over some steamed veggies and calling it a good meal. Have a curry, a Turkish Eggplant Stew, a dairy free mushroom stroganoff, spring rolls, veggie lasagna, heavenly steamed eggplant, a portobello sandwich, stir-fry, bean and avocado burritos, try some non-GMO meat substitutes like those from Gardein (particularly their fish!) (no product placement, just a recommendation), or make your own seitan. Make your own vegan butter. Let your body and the environment have a break for a day.
Help Out. Choose a local charity, or a needy neighbor, and provide what they need. Don’t just give them what you want to get rid of , or what you think they should have.
 Often people just need reassurance or a friend to talk to, or possible solutions, or a hand for a day. Donate what your charity needs, and if that is money then do it. Help with a fundraiser. Volunteer your time. Do something to truly help someone else out, without asking for praise or cosmic bonus points in return. Don’t be a pain; be a blessing. Volunteering and helping out make you feel worthwhile and surrounds you with like-minded people who can become your friends.
I have found many of my closest friends through volunteering. Be aware of large, nation- or world-wide charities who use most of your donations for salaries and infrastructure, and very little on what they are supposed to be supporting. Don’t let the big names fool you. Use your money to help honest charities in your area, or by just sending money to people who need it, anonymously.
Whatever you choose to do, do it mindfully. Pay attention to the details, to where products come from, to the business practices of the charities and stores you support, to how animals and people are treated in the making of the products, of what is in what you handle every day. You don’t have to, nor can you, take on the world’s problems, but you can focus on one thing and stick with it; make it part of your day-to-day until it is habit. Then move to a second choice. What you do, what you buy, what you say and how you spend your time cause ripples across the earth, and being mindful of your influence will send out help rather than harm.
Happy New Year. Be healthy. Be kind. Be happy. You matter.
You May Also Like

Native Insects and IPM
- Animals, Building and Landscaping, Chickens, Compost, Gardening adventures, Irrigation and Watering, Other Insects, Permaculture and Edible Forest Gardening Adventures, Planting, Predators, Recycling and Repurposing, Seeds, Soil, Water Saving
A Garden Coop
 If you want chickens and vegetables, and have predators and opportunists trying to eat what you grow, and perhaps have limited space, this design may be for you. I did not come up with it; I don’t know who did and I give lots of credit to that person because this makes so much sense. I’ll be converting our Fowl Fortress into one as I can.
It is the Garden Coop. You build one structure of strong wire with small gauge holes to keep rats, mice and snakes out, keep your hens on one side and garden in the other, then switch.
Start with cemented posts. Your coop can be of any dimension depending upon how many chickens and how much gardening space you will need. Take that number and multiply it by two. Instead of wood you can use metal posts with metal spacers across the top if that is more cost effective for you. Make it 7 or 8 feet tall, for comfort to walk in and also to give you more vertical growing space.
Wrap the entire structure with wire, all sides and across the top, and at least six inches into the ground all the way around. This helps prevent digging animals from getting into the coop. As we have coyotes, I also pounded 6″ pieces of rebar into the perimeter every 6 inches. If you have gopher problems, then bury wire 2.5′ into the ground around the perimeter. Hardware cloth would be best although the small chicken wire is more flexible to work with. When you overlap the wire cloth be sure to sew it closed or wrap and tuck the edges, otherwise rats and mice will slip through.
Put your hen house in the center of the coop; the house should have doors on two sides.
Divide your coop in half with wire down the middle. The wire should go around the hen house, and the hen house doors should open into each half of the garden.
Now you can keep your hens in one half and garden in the other half. When a season ends, switch them.
You’ll have all of your fruit and vegetables safe from squirrels, rats, mice and birds. You’ll have vertical space on which to grow your vines. When you switch, you’ll be gardening in insect-free, well manured soil and your hens will have excellent food sources. They will be working without being let loose, and will have an active and healthy life without becoming prey. They will take apart your old garden and fix it for the next switch.
All of your water needs are in one place. All of your composting is in one place. All of your vegetable and egg gathering is in one place. You get to harvest all of your vegetables and eggs without feeding rodents. What you don’t want, you toss to the hens. All with one structure, one initial cost. Its a chicken tractor that doesn’t move!
Because you are keeping animals out physically and controlling insects with hens, you won’t be enticed to use traps, bait, sprays, etc.
You can also grow around the outside perimeter of the coop. Just be aware of shade issues from vines (maybe a good thing?) grown over the top. Summer shade with a deciduous vine may be just right for keeping your hens and garden cooler.
Its a great idea, and maybe the one that will help you succeed in your garden.
You May Also Like
Native Insects and IPM
- Animals, Bees, Building and Landscaping, Compost, Frost and Heat, Fungus and Mushrooms, Gardening adventures, Giving, Health, Heirloom Plants, Houses, Hugelkultur, Irrigation and Watering, Microbes and Fungi, Natives, Other Insects, Perennial vegetables, Permaculture and Edible Forest Gardening Adventures, Planting, Rain Catching, Recycling and Repurposing, Reptiles and Amphibians, Seeds, Soil, Water, Water Saving, Worms
Inspiring Successful Earth-saving Projects
We can help the planet re-vegetate and reverse climate change. Here are three large projects that have had success and one which is still in the making because it is so vast. Watch these and be inspired, be hopeful, and plant native trees where you live:
Africa’s Great Green Wall:
earthrise – The Great Green Wall
Subscribe to our channel http://bit.ly/AJSubscribeThe Sahara is creeping into the verdant southern Africa. To counter desertification, the Community of Sahel…
China’s Loess Plateau:
Agroecology in China: 300% Increase on 8.6 Million Acres – Loess Plateau
Go to https://FoodAbundance.com to join the Food Abundance movement.Excerpts from Hope in a Changing Climate (http://www.open.edu/openlearn/whats-on/ou-on-th…
Jordan’s Greening the Desert:
https://www.youtube.com/watch?v=sohI6vnWZmk
You May Also Like
Native Insects and IPM
- Arts and Crafts, Building and Landscaping, Gardening adventures, Permaculture and Edible Forest Gardening Adventures, Recycling and Repurposing
Repurposing At Its Best: The Bar-Be-Rolla
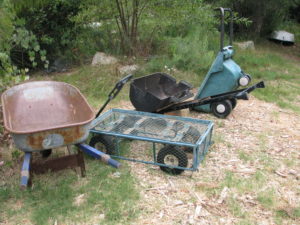
When your garden carts just won’t do the job: Introducing the Bar-Be-Rolla. Its a lightweight wheeled cart that can hold liquids or solids, piles of wood, scraps of urbanite, mulch, wet mud, etc. And as you can see, its almost entirely made from an abandoned Bar-B-Que grill.
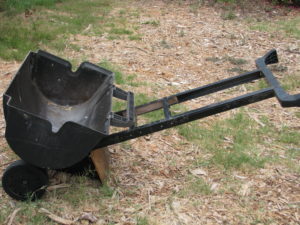 My friend Louis, who has contributed inventions and repairs to Finch Frolic Garden, saw the neighbor’s grill set out for garbage, and then saw possibilities.
 Because the dome, which became the bucket, is made of aluminum, this gadget is super light.
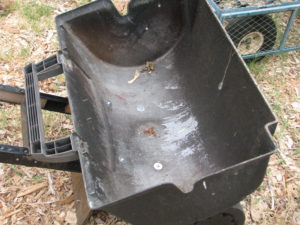 The original tires may need to be replaced with stronger ones, but otherwise it works just great. And one less item for the dump.
The legs became the handle, with added wood in between for connection.
 A board was used to make it stand up when resting, only because that was at hand. If you make your own, be sure that the board, or whatever you use as a kickstand, is high enough to clear the ground when the device is being wheeled.
 I think this is a brilliant re-purposing of someone else’s junk. And fun to say. Bar-Be-Rolla. Even Jane Fonda might like one!
- Animals, Arts and Crafts, Bees, Birding, Building and Landscaping, Chickens, Fungus and Mushrooms, Gardening adventures, Heirloom Plants, Hugelkultur, Microbes and Fungi, Natives, Other Insects, Perennial vegetables, Permaculture and Edible Forest Gardening Adventures, Photos, Ponds, Rain Catching, Recycling and Repurposing, Soil, Water, Water Saving
Six Years of Permaculture

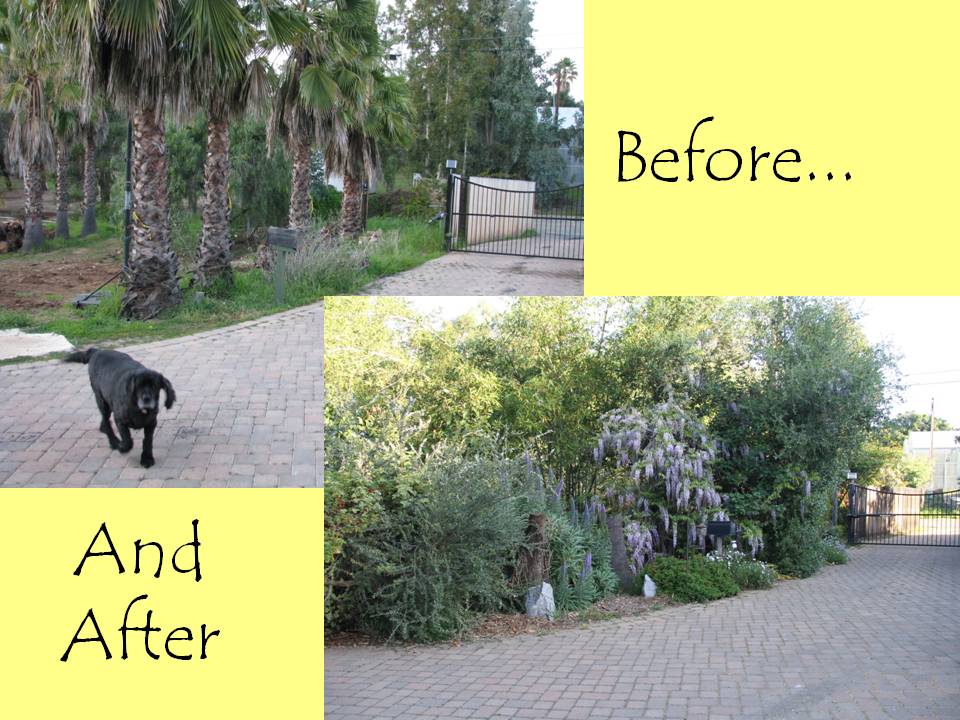
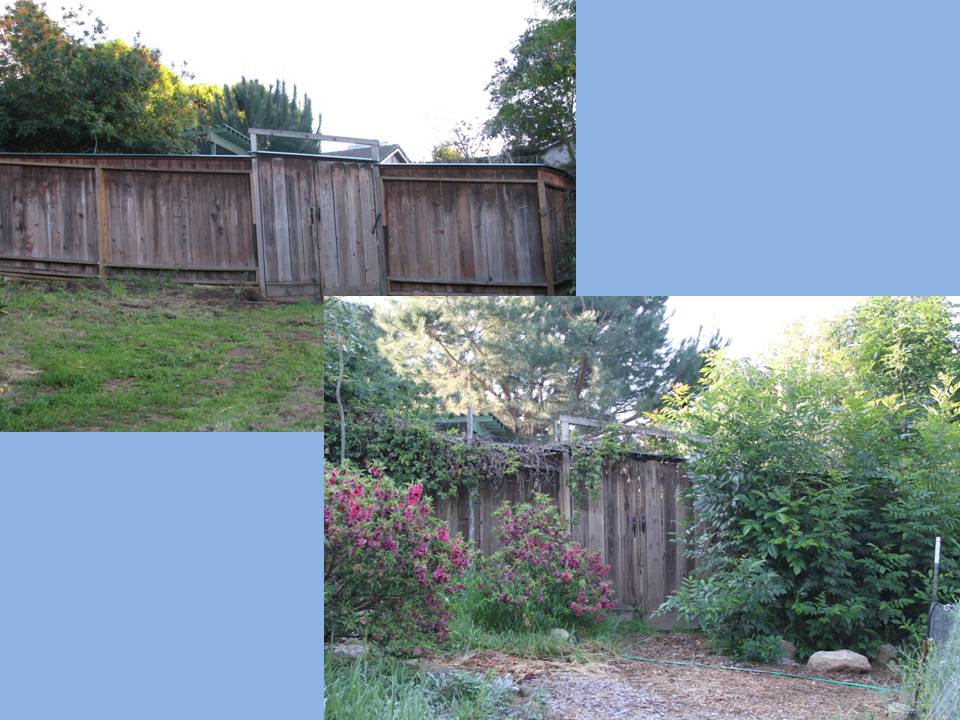
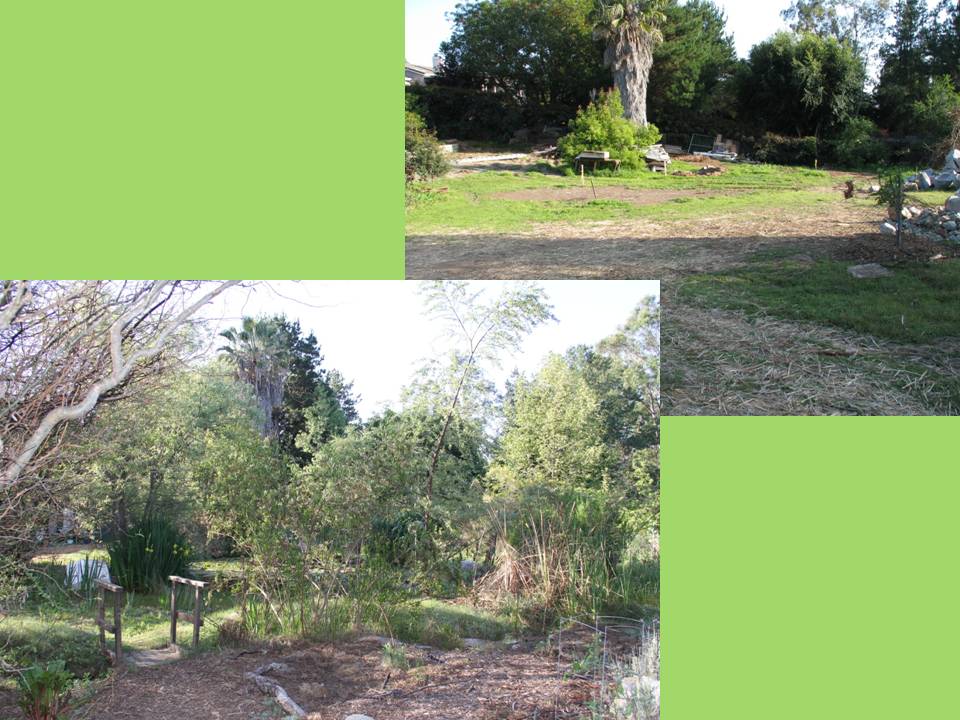
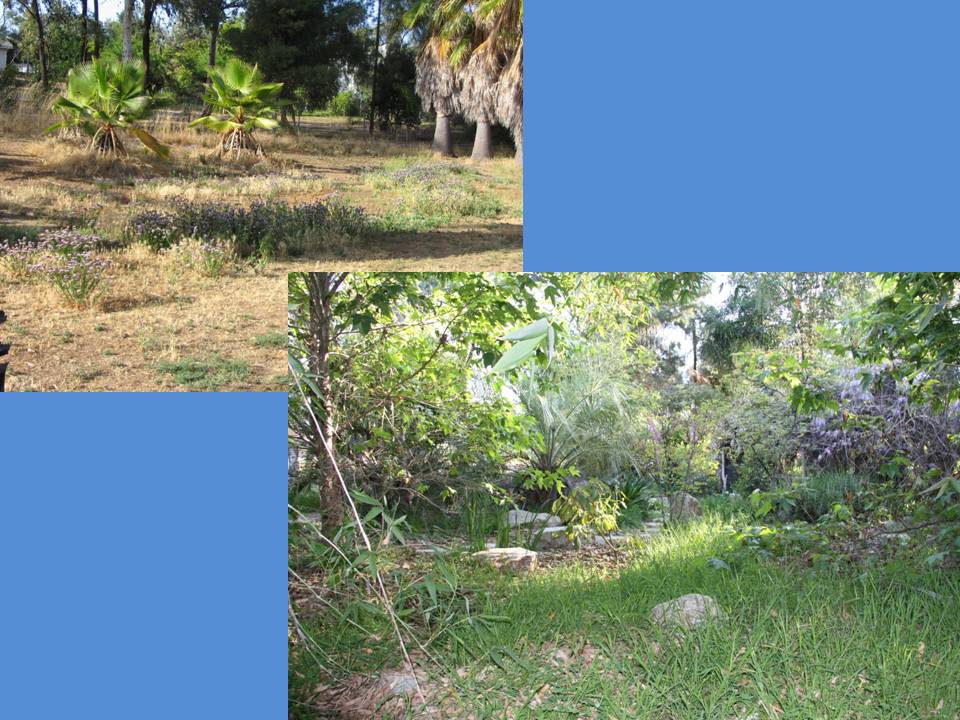
 In February, 2011, I signed the contract with Roger Boddaert to create a permaculture food forest. The goals at that time were to stop the erosion on the property, to create a wildlife habitat, and to grow food, medicine, native plants, building materials, herbs and ornamentals in a sane way: no chemicals. So the journey began, and it hasn’t been easy. Nor did I at that time know that the garden would evolve into Finch Frolic Garden and my business would be education.
 In preparing for a talk about our garden, Miranda and I worked on before and after photos. The garden this April, 2017, is stunning, with blooming wisteria, fruit trees, red bud, roses, angel-wing jasmine, iris, and so much more. Best of all Mrs. Mallard has brought her annual flock of ducklings from wherever she nests, and the four babies are still alive and thriving after a week! So I thought I’d share the incredible difference between what had been, and what is now. All done with low water use, no fertilizer, herbicide, insecticide, additives or supplements. Come visit when you can! Slideshow images change in ten seconds:
You May Also Like
Native Insects and IPM
- Building and Landscaping, Compost, Gardening adventures, Hugelkultur, Irrigation and Watering, Natives, Permaculture and Edible Forest Gardening Adventures, Ponds, Rain Catching, Soil, Water, Water Saving
Installing a Swale
 Last Saturday we hosted our first workshop of 2017, featuring Alden Hough of Sky Mountain Permaculture. Alden is a master at creating earthworks, and he spent three hours here at Finch Frolic Garden teaching a class of sixteen people how to install swales correctly.
 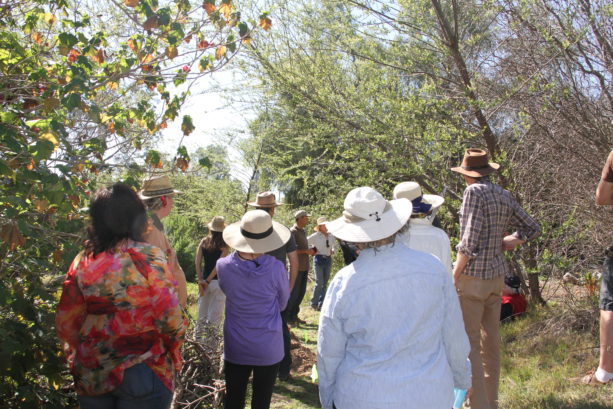 The project was a small pond that overflowed and flooded when heavy rains hit. The soil is heavy clay and therefore the small pond doesn’t percolate. It is kept filled by the well, and its overflow feeds the bog and the big pond. Right now the little pond is full of native Pacific chorus frog tadpoles, which will evolve into small frogs that will go out into the landscape and eat bugs the rest of the year.
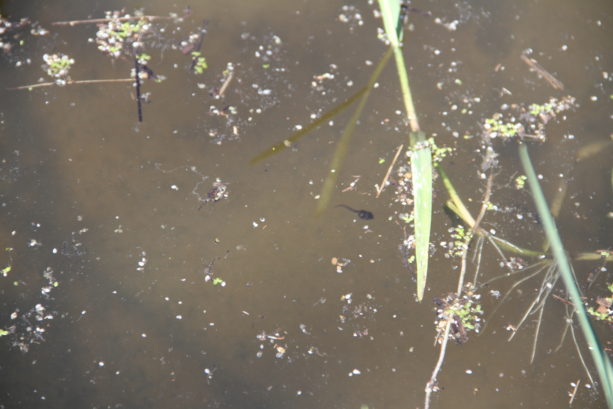 He created a urbanite (cement chunks) spillway into a twenty-foot swale. The class learned what a bunyip was and how to use the water level, and how to use a laser level. The swale will hold about 300 gallons of water that would have overflowed into another area, spread and sink the water.
The swale was measured and marked on contour.
 Bermuda grass was pulled from it and set into trash cans to cook in the sun and hopefully be destroyed. The swale was then dug by hand.
 Old wood – branches, logs, boards and old posts – were laid below the swale, and covered by the dirt. This hugelkultur will absorb seeping water, aerate and enrich the soil, and provide food and water over time for the trees downhill.
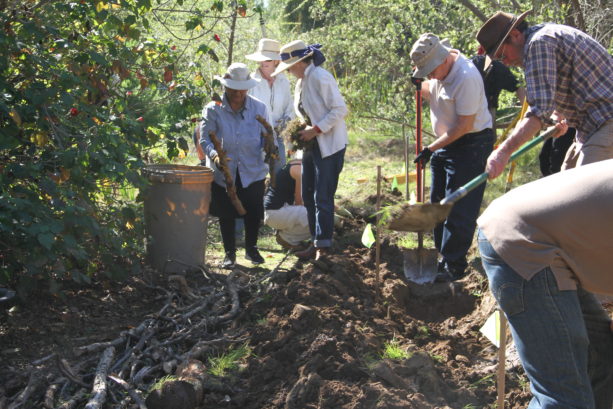 More dirt was needed to cover the wood so we emptied the first rain catchment basin on the property of silt and hauled it down the hill. This was a lot of heavy work, and several of our attendees worked extremely hard with the wheelbarrows. Miranda and I have a lot of experience doing this heavy work, and we are glad that this swale project also emptied this basin.
 Our wonderful workshop attendees worked very hard in the heat. The end result was a swale of beauty.
 By creating level swales dug on contour, you can see how right it looks. It hasn’t been dug deeper into the ground at one end to force the swale to be level. If you measure on contour your swale can be of any size, and it will collect, passify, spread and sink rainwater into the landscape. Earthworks are the best way to hold water, and are imperative to reestablishing water tables, keeping wells running, keeping trees alive and maintaining springs and streams. A little earthworks will make a huge difference.
What needs to be done now is to create a dedicated overflow from the swale into the main pond. As this area receives a lot of foot traffic, we’ll also need to haul more silt to make the raised walkway more gradual and blended with the paths around. Once the tadpoles have grown and left the pond, we can drain it and use that silt. Two projects in one.
Prior to the project Miranda carefully removed a lot of healthy creeping red fescue from the work site. After the swale and spillway were dug she replanted some of it. Native yarrow will also be planted to help hold the swale.
A huge thanks to the many people who came to learn and work on site. No matter how many movies you watch or books you read, having hands-on experience makes the education click. And an extra huge thanks to Alden Hough for his expertise and hard work. Please visit Sky Mountain Permaculture in Escondido for more classes – earth bag dome building included – coming up there.
Our next Finch Frolic Garden workshop will be in April: April 22, 2pm – 4pm: The Many Benefits of Trees: Care, Nurturing and Pruning . Roger Boddaert, the Tree Man of Fallbrook and professional landscaper who planned the original garden that would evolve into Finch Frolic Garden, will talk about trees. So many trees are dying due to the drought, and we need to replace them to help shade and cool the earth and hold onto moisture. But what to plant, where and how to care for them? Roger will take you through tree care based on fifty years of experience in landscaping. Visit https://www.southernpalmetto.com/services/ and get all the details.
Go forth and dig swales!
- Building and Landscaping, Compost, Gardening adventures, Hugelkultur, Irrigation and Watering, Permaculture and Edible Forest Gardening Adventures, Rain Catching, Soil, Water, Water Saving, Worms
Earthworks Workshop
Happy March! Finch Frolic Garden is officially open, and the trees are bursting into leaf and bloom. Birds are twitterpating and the ten inches of rain we’ve received since October are slowly working through the soil thanks to our earthworks.
Here’s an opportunity to learn just how to create accurate swales and hugelkultur so that they work. Saturday March 11th from 1 -4 we have the privilege of having Alden Hough from Sky Mountain Permaculture hold our first monthly workshop here in the garden. Alden has
 years of experience with building earthworks on all scales, from guiding excavators across hillsides to hand-dug. Alden will describe how to build swales and hugelkultur beds, show off equipment, and then its hands-on in the garden. You’ll learn how to use a laser level and a bunyip, and get the feel of how to build on contour. Bring your gloves and be prepared to have some fun creating earthworks, so that you can do it properly on your own property.
The workshop fee is $20/person. Please RSVP to dianeckennedy@prodigy.net. Wear appropriate work clothes and sun protection. Complimentary vegetarian refreshments will be available. Attendees may stroll Finch Frolic Garden as well. Don’t wait!
- Building and Landscaping, Gardening adventures, Natives, Perennial vegetables, Permaculture and Edible Forest Gardening Adventures, Water, Water Saving
Irrigation For Drylands: Conclusion
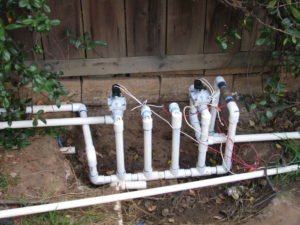
One-inch PVC runs from the valve. This is the last of the series of posts on irrigation, and I’d like to briefly address the issues of water pressure and valves. As I’ve said in a past post, if you don’t know about these things then hire someone who is an irrigation specialist (not just someone who says he’s put together irrigation before… they are guessing!). That specialist will obtain for you the right sized valves, the right irrigation timer, and monitor the water pressure so that your sprinkler heads won’t blow off and pipes break.

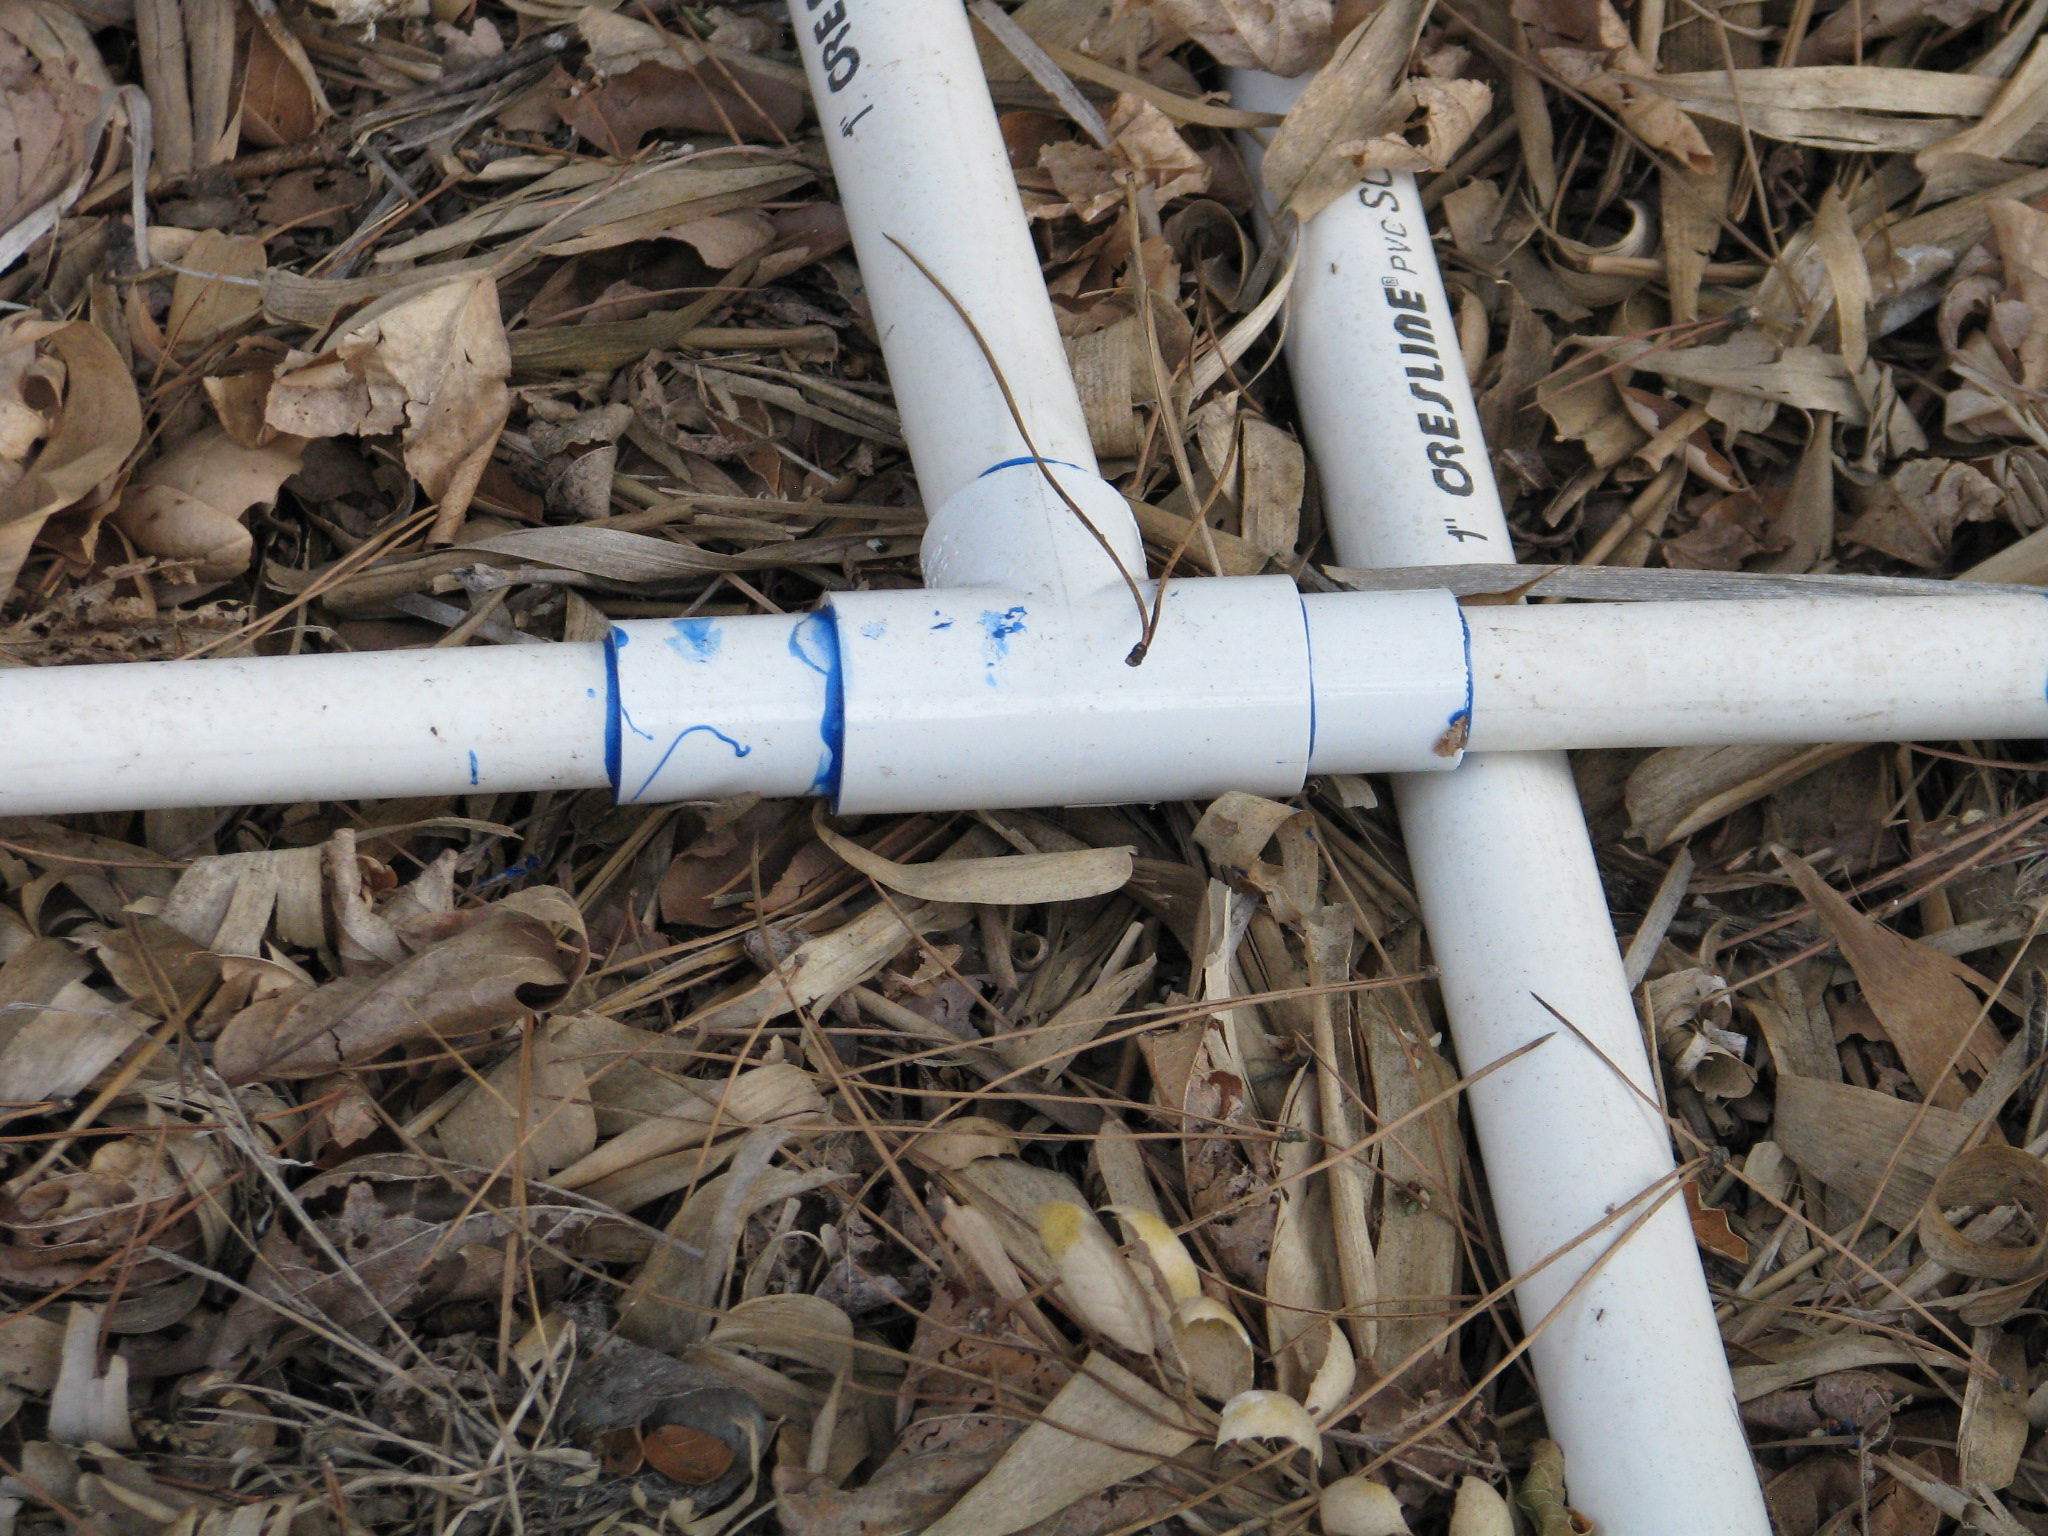
The one-inch pipe is then reduced to 3/4″ pipe at the first T, close to the first sprayer. For pipe, don’t use small 1/2″ pipe for large jobs. Bigger – to a point- is better. Smaller pipe doesn’t mean higher pressure. It reduces the volume of water going to the sprinklers. The smaller pipe creates more pressure loss due to friction and turbulence as the water flows through it. We took the advice of our irrigation specialist and ran 1″ pipe from the valves to the first sprinkler, and reduced it to 3/4″ pipe, then reduced for the 1/2″ risers.
Further reducing 3/4″ to the 1/2″ sprinkler configuration. Most sprinkler systems need a water pressure of between 30 – 50 psi. Drip systems need less, around 20 psi. Too high or too low a water pressure will adversely affect your system. If you attach a water pressure gauge to a spigot you can see what your pressure is. If it is very high, you will want to check the indoor pressure as well because too high a pressure can mean pipe damage and leaks, and no one wants wet walls. You can use a pressure regulator on your line to reduce the water pressure for your irrigation.
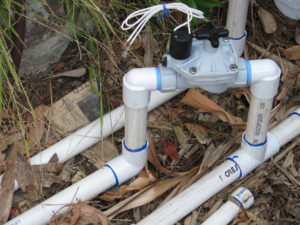
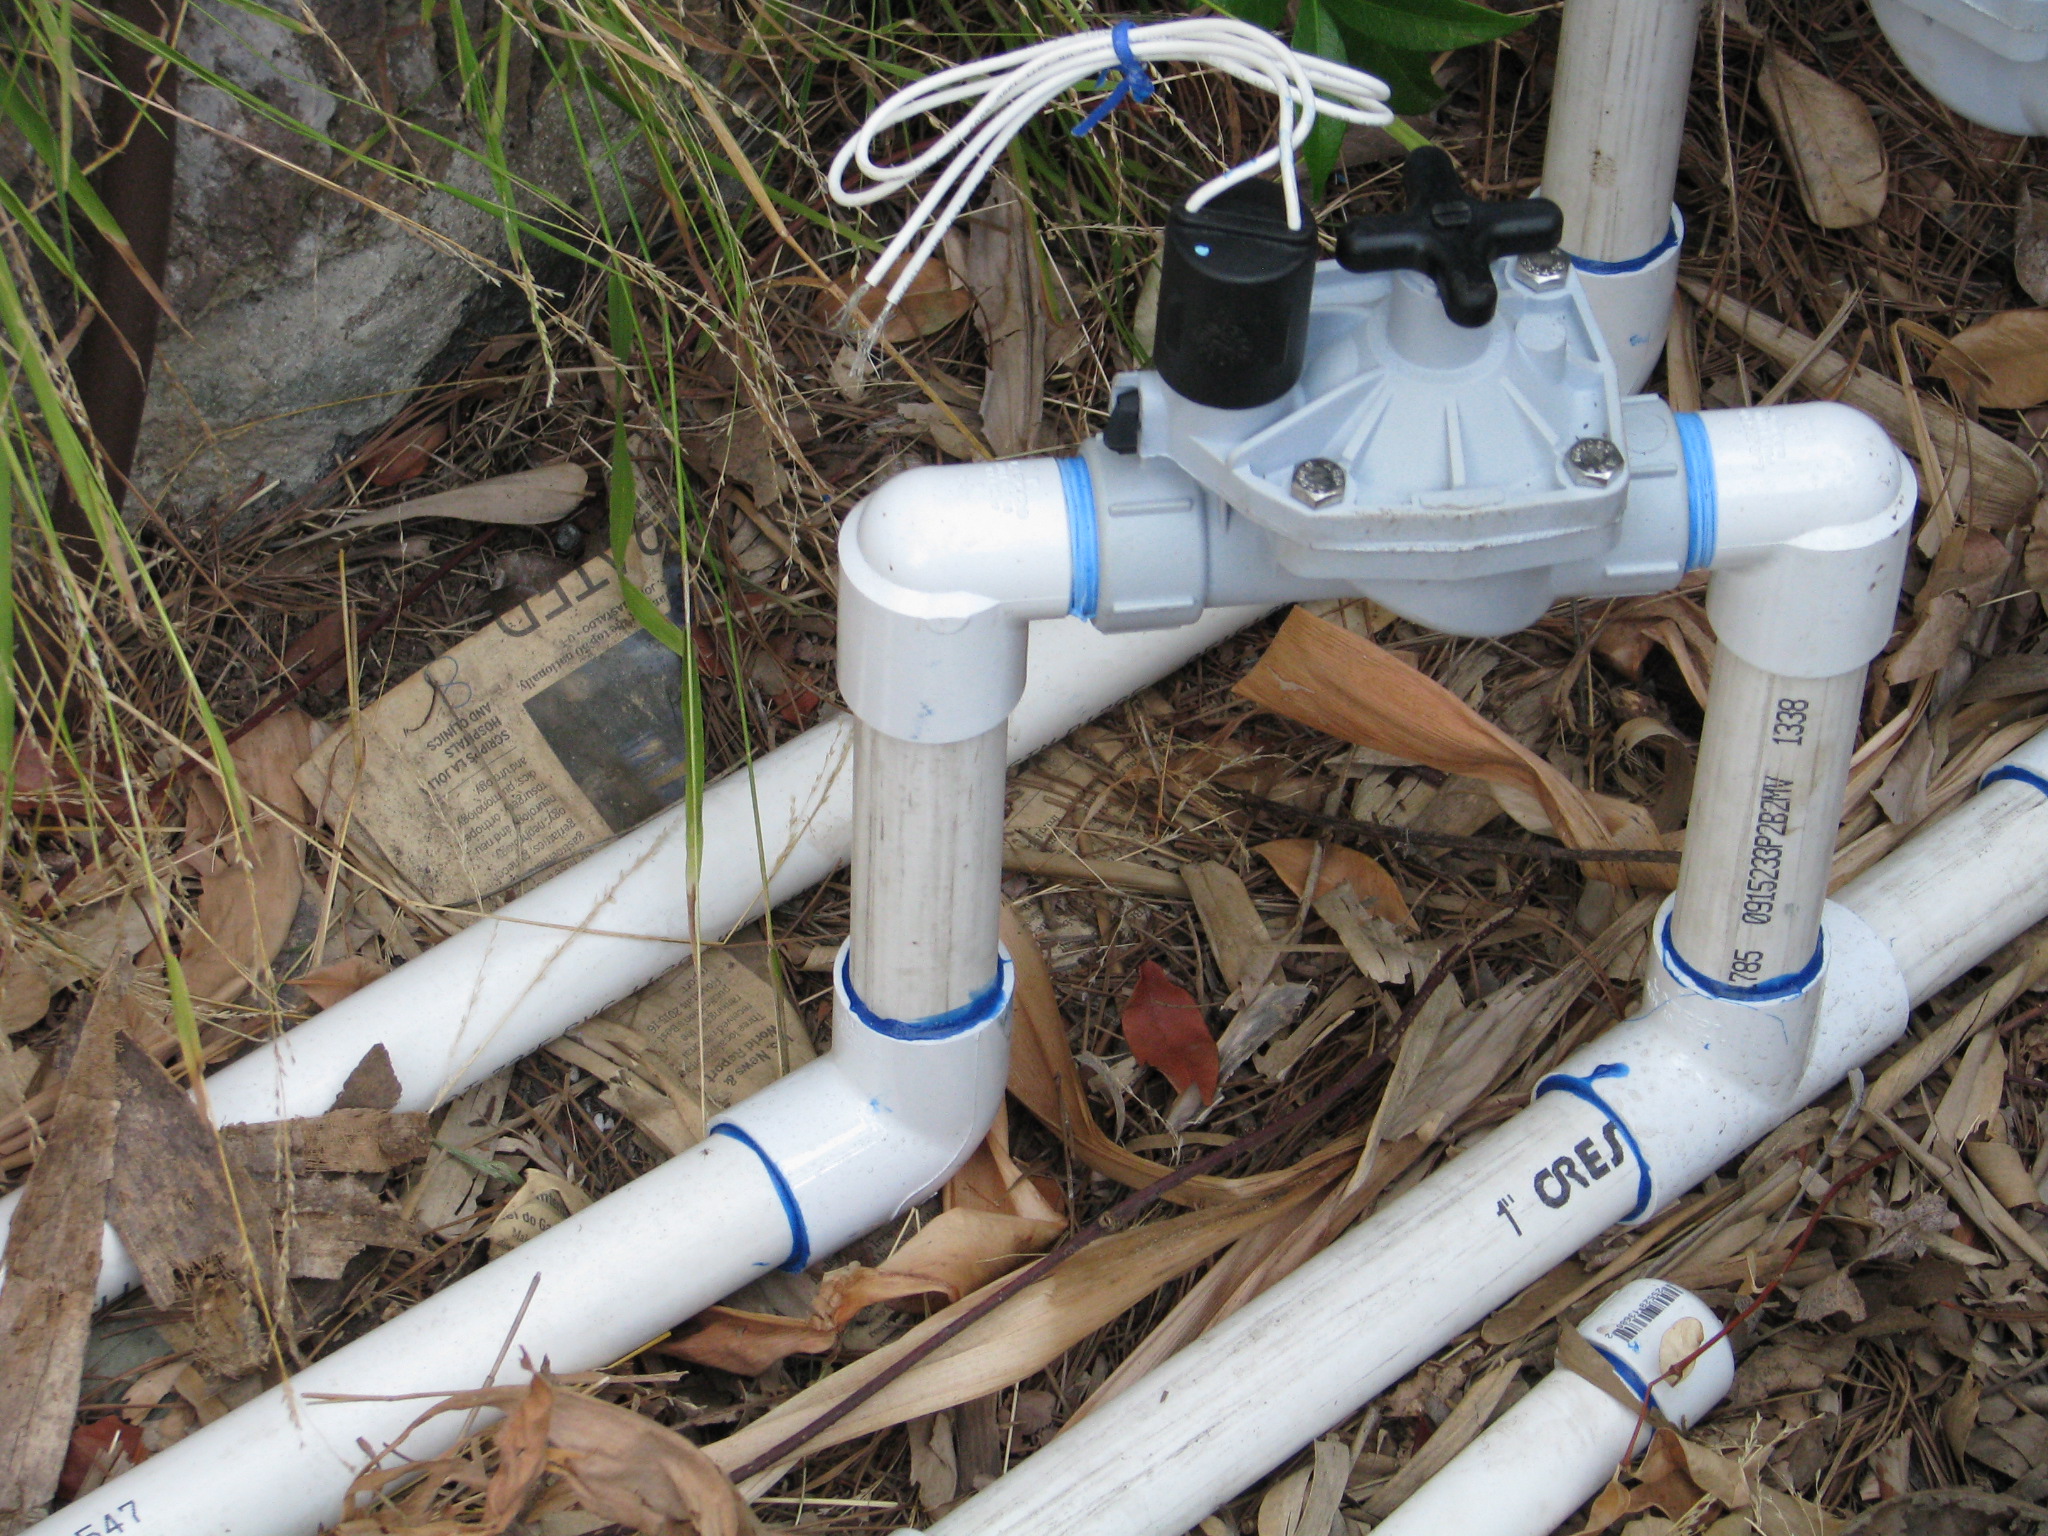
 How many sprinklers you can put on a valve depends upon several factors, but mainly the flow rate, or how much water is flowing through the pipes at one time. Sprinklers have an output rate so you can do the calculations on how many you can put on a line. Flow rates are measured either in gallons per hour or gallons per minute, with gpm the most common for householders. Drip systems are less concerned with flow rate. We ended up adding valves to our system because we had so many sprinklers.
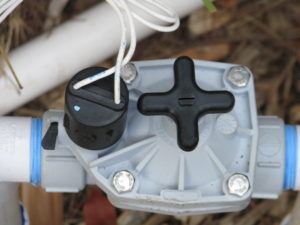
When installing your system, be sure to add a ball valve (rather than a cheap gate valve) close to your water source so that if you have to work on your system you can shut it off; otherwise you’ll have to shut off the main to your outside water. If you have a large system, installing ball valves along the line to isolate different areas will help down the road if you need to troubleshoot. Having hose bibs along the line are very nice, too.
There is a lot to learn about irrigation valves – using globe valves with an expensive back-flow preventer or using anti-siphon valves that must be above ground and above the closest sprinkler head. I’m not an expert, but there is expert advice on valves here.
Another thing to consider is your electrical line. If you have valves, you must run electrical line to them (at this writing, solar valves are not that dependable for the long run). Electrical line must also run from your irrigation clock to your electrical source at your house. Usually electrical line is buried. Please spend the little extra money and have the electrical pulled through conduit first, rather than direct burial! Having loose wires buried in your yard is a recipe for disaster. I know this. I asked for conduit with the original system, and the wire was directly buried before I could protest. Sure enough, two years in and a valve wouldn’t turn on. The problem was with the wire… but where? How to dig it all up without nicking any of the lines? Impossible. So until this project two of my valves had to be tied together and both stations running simultaneously, which really stunted the water pressure and was a real headache. This time the conduit is run above ground along with the PVC pipe, which will be covered with mulch, and also along the top of my chain-link fence up to my house. If there are any problems, the conduit comes apart every ten feet and wires can be checked or replaced. Pulling electrical wire through conduit is not for the fainthearted; I developed new muscles and callouses working on that, but it was worth it.
Skipping ahead, your irrigation project is finished and your landscape planted. Be sure to take the time to update your plan so that it is an ‘as-built’, reflecting any changes you’ve made. This is an invaluable document not only for your own use, but for any future owners of your property or workers who might need that information. Use a rough plan of your yard and identify each valve and the area the valve covers in different colors. If you want to draw in every sprinkler head, that is fine. On large projects that isn’t practical, so just use zones. Take a waterproof marker and write the valve numbers on the valves themselves, so that you won’t become confused in the field.
Be sure to run each valve during the daytime while you inspect the sprinklers for clogging or broken heads. A lot can go wrong during the night when most systems run, and you won’t know it until you get the water bill or your plants start to die.
You may want to put in the wire for additional valves that may be added in the future. Making double valve stub-outs and only using one is far easier than pulling new electrical if you find that you need to add a valve.
So don’t think that irrigation is a simple endeavor, and begin to glue miles of 1/2″ pipe together with 2 – 3′ risers that shoot water up embankments. This is a waste of money, plastic, water and plants. Put as much thought into your system as you put into the design of plants, and your system will give you little trouble in years to come.
Oh, and remember to shut your system off when it rains!
 You can read Options, Part 1 of this series here, Part 2 Evaluating Your System here, and Designing Your System Part 3 here .
 - Building and Landscaping, Gardening adventures, Hugelkultur, Irrigation and Watering, Permaculture and Edible Forest Gardening Adventures, Water, Water Saving
Irrigation for Drylands, Part 3: Designing Your System
Google Maps view of property lines. Before you start buying pipe, make your design. If you are new to the property, evaluate the plants and features that exist and decide if you really want them or not. Use the ‘three positives’ rule in permaculture: everything in your yard should give you at least three positive things. For instance, you have a eucalyptus tree. It gives great shade, it is a great roost for larger birds which keep down your mice and rats, it drops lots of leaves for mulch, etc. On the ‘negative’ side, they are really thirsty and they send their roots out in search of water. They will go to the nearest irrigation and drink from there, robbing water from the tree you are trying to water. They are also allelopathic, meaning that they produce a substance that discourages many other plants from growing, or growing successfully, under or near them. Their root mass is so thick close to the surface that very few plants can survive. If planted in the wrong spot they will block views, hang over the house, drop those leaves, peels of bark and depending upon the species, heavy branches, where you don’t want them, get into overhead wires or underground leach lines, etc. They don’t make good firewood or building material, and are highly flammable. How does the tree weigh in? Usually eucalyptus are all negatives in my book. Only if they are providing the only shade and bird perches for a property are they useful. Even then I recommend pollarding them (reducing their height) and trying to ‘nursery in’ other better trees to take their place. Cut trees then should be buried, as in hugelkultur. So evaluate what you have using the three positives rule and don’t be too sentimental if you don’t like something. Do you like them? If not, cut them and bury them to fertilize plants that will serve you, and yes, aesthetics is very much a plus. If you love a particular plant, then if its possible, plant it.
If you have a property that is a blank slate, your irrigation diagram will follow your plant design. If you have an existing landscape, as I had, you need to map out where all the trees and groupings of plants are, what their water needs are and keep in mind the way water runs past these plants when you do. Use Google Maps. Type in your address, find your home and zero in on it until you can clearly see the boundries of your property.
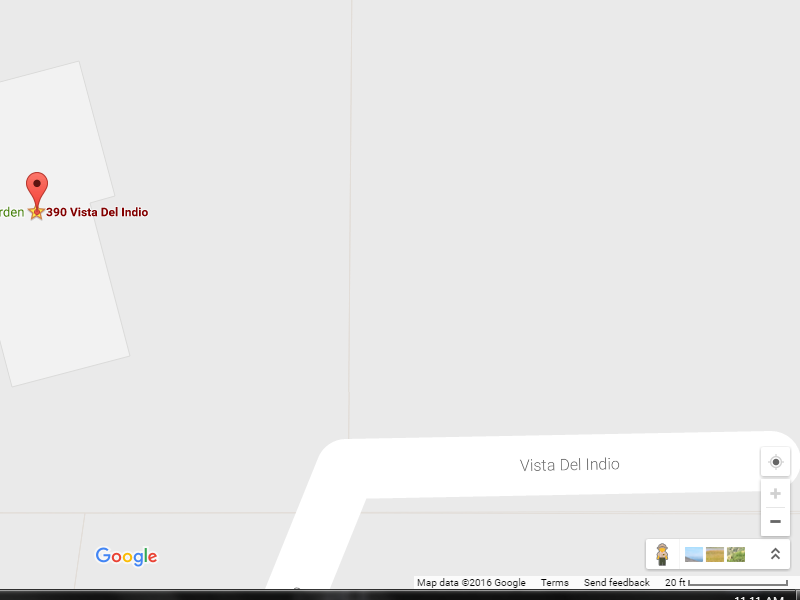
At the bottom right hand corner of the screen is the key that show how many feet are in a measurement. This line may not always equal an inch, so measure it! At the lower right Google shows you a key for distance. There is a line with a number above it. This shows you how many feet are represented by that length. Don’t assume that the line is one inch! The line will adjust, so put a ruler up to the screen and measure it. I zoom out until the line is an inch long, and take that number; its just easier to compute distances using an inch rather than a fraction. You can print that diagram of your property line, which will show you which way your house sits on the property.
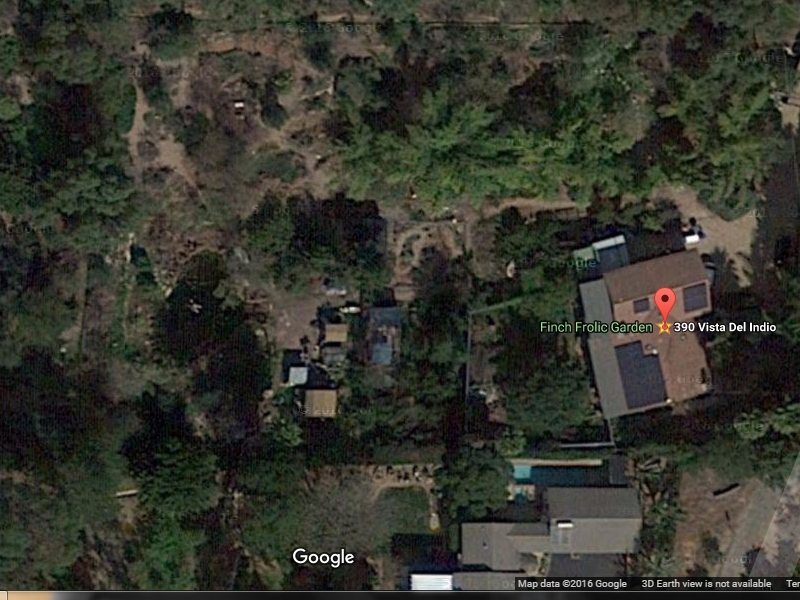
Satellite view of Finch Frolic Garden. This helps to map groupings of vegetation. I have a PC, so I press the PrntScr (print screen) key, paste it onto a paint.net screen, crop off the extra bits and print that. Now you have something to work with. I double or triple the size of the drawing onto a larger sheet; this can be done easily with a ruler, using the printed sheet to guide your angles.
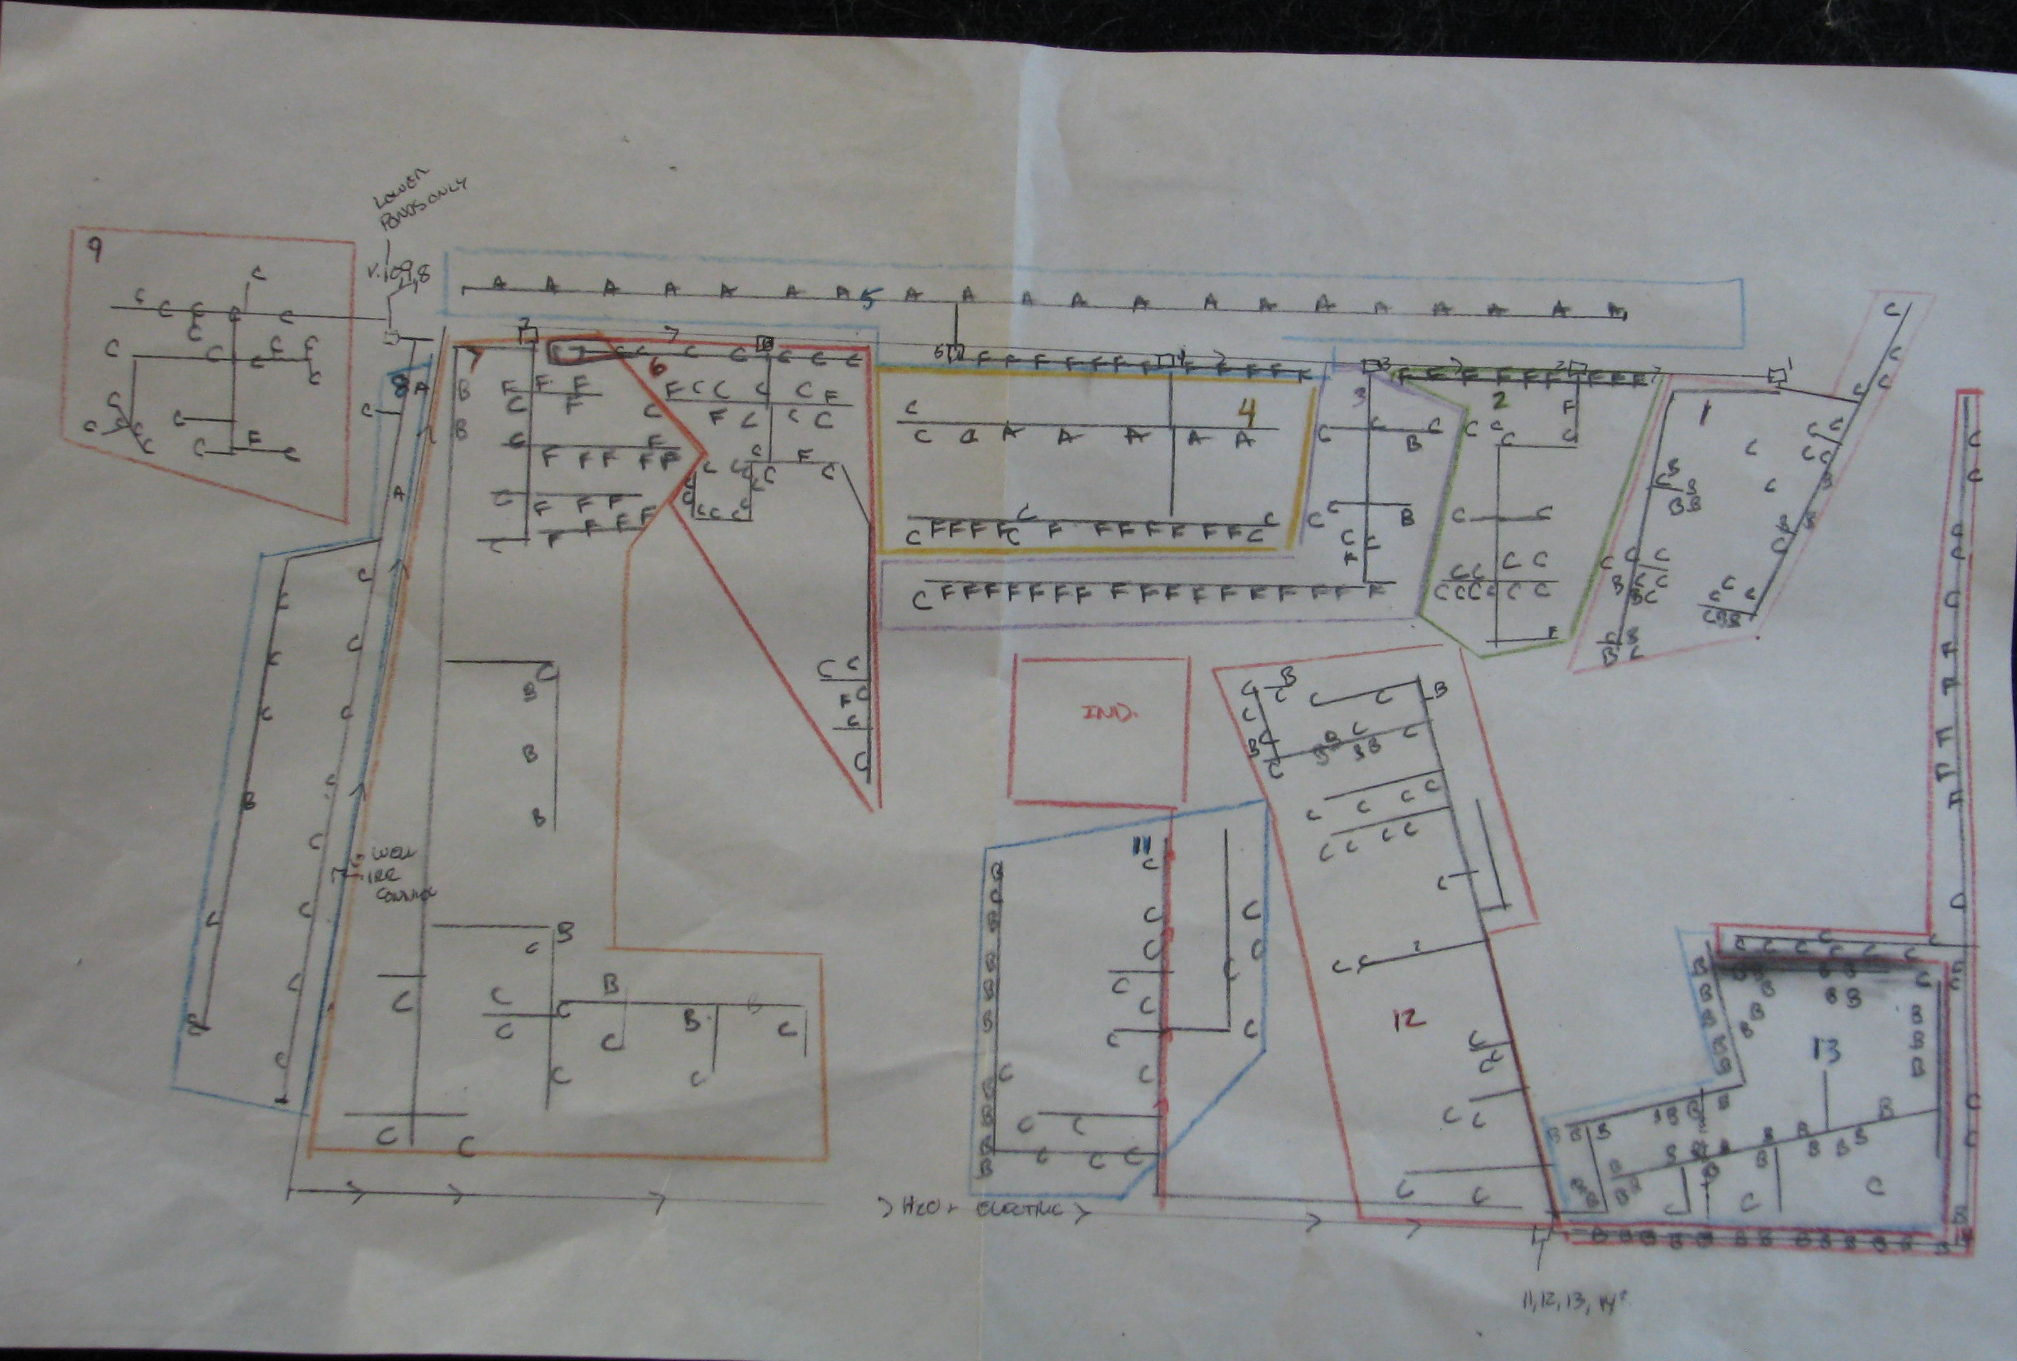
A projected irrigation plan for Finch Frolic Garden. What you actually put in may differ. Make a couple of copies of this template, and then use one to start drawing.
When you have the plants down on paper, then start with the irrigation. Determine where your water main is, and where any valves and hose bibs are around your house. If you only have domestic water to choose from, you’ll be coming from a domestic line.
Fifteen to twenty sprayers are good per valve. I’m not talking about high-pressure nozzles that shoot water all over the place; these you want to eliminate. Most of that water is evaporated.
The sprinklers that we installed have a spray of up to 4 feet, and can be reduced down to a drizzle.
These are what we installed here:
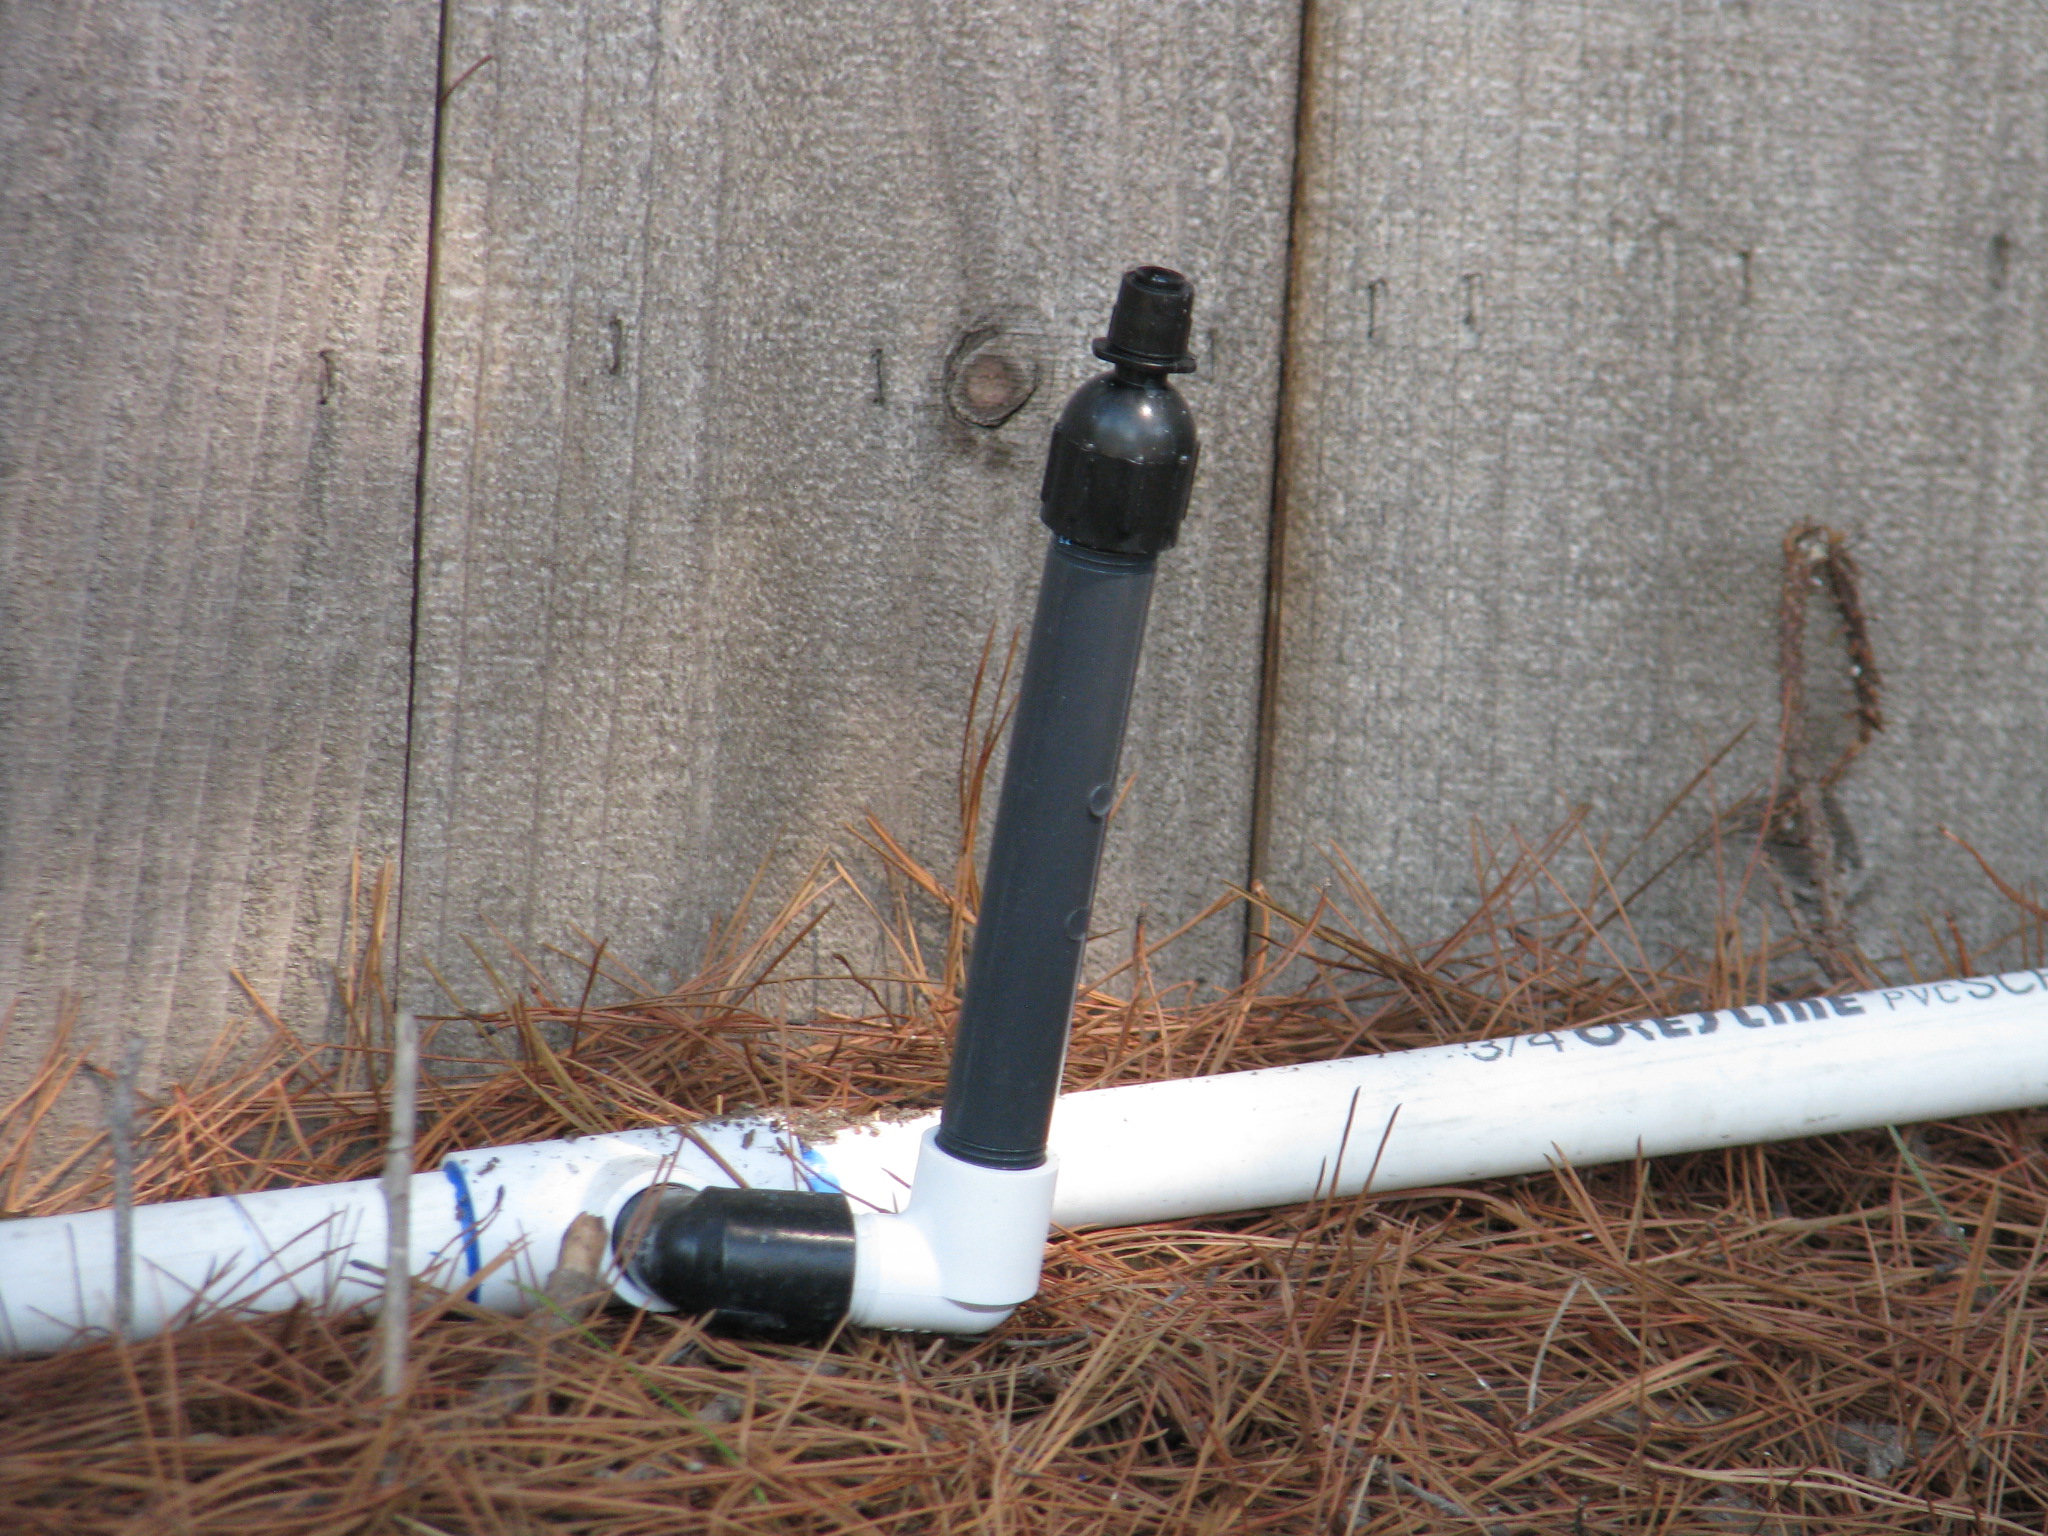
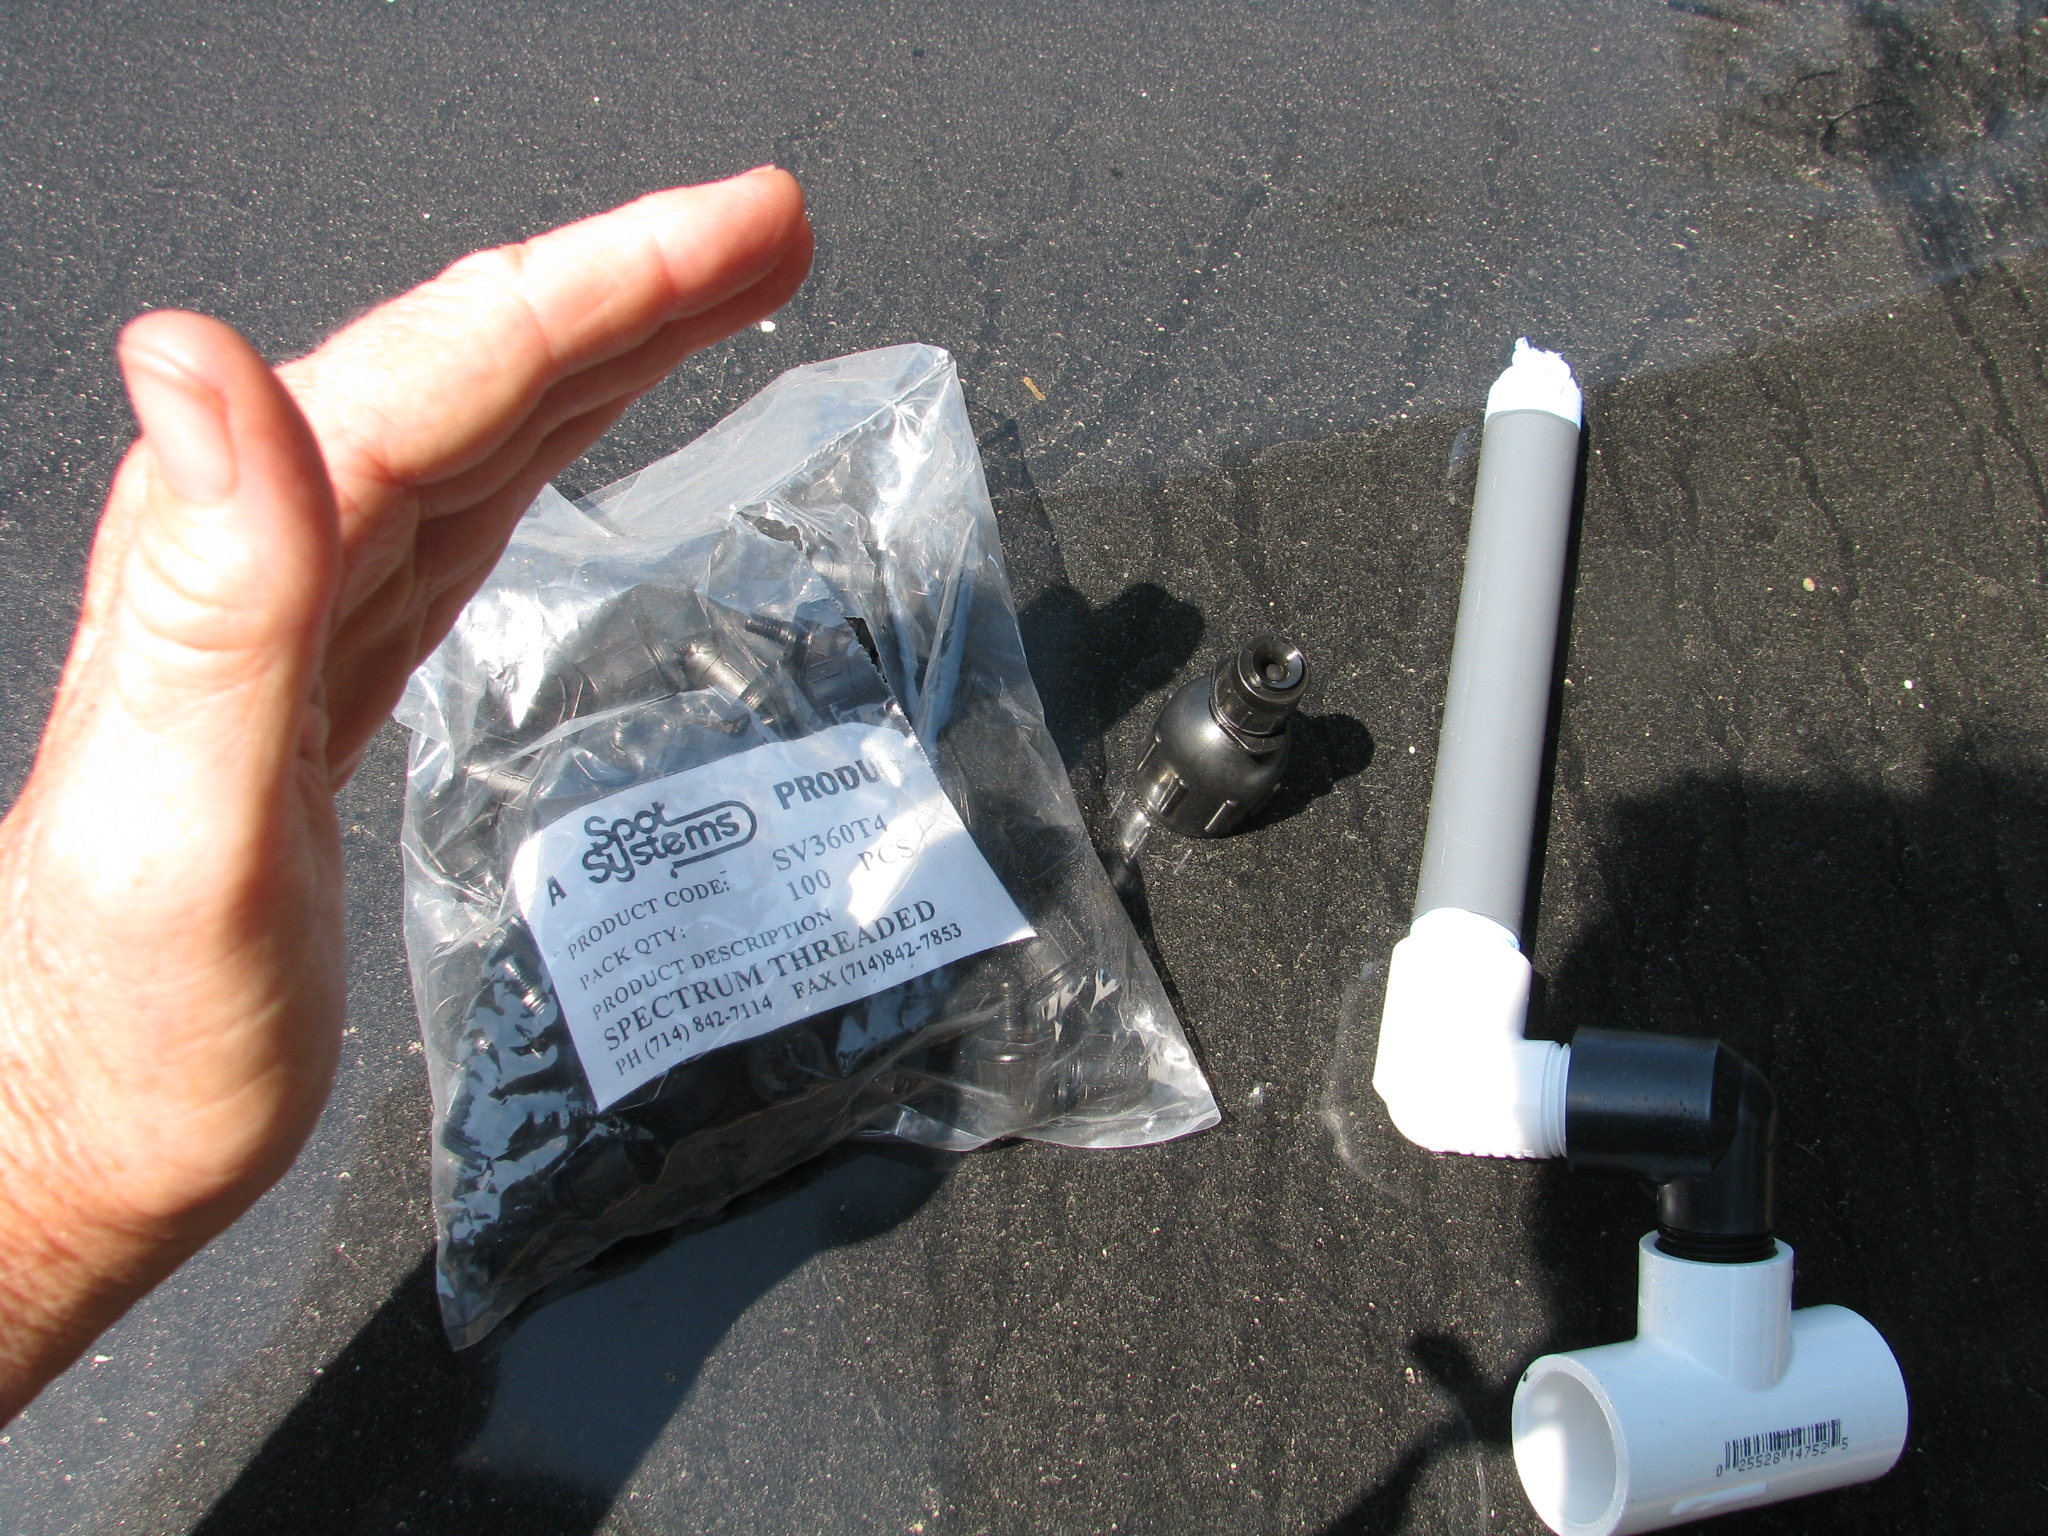
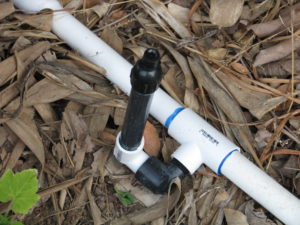
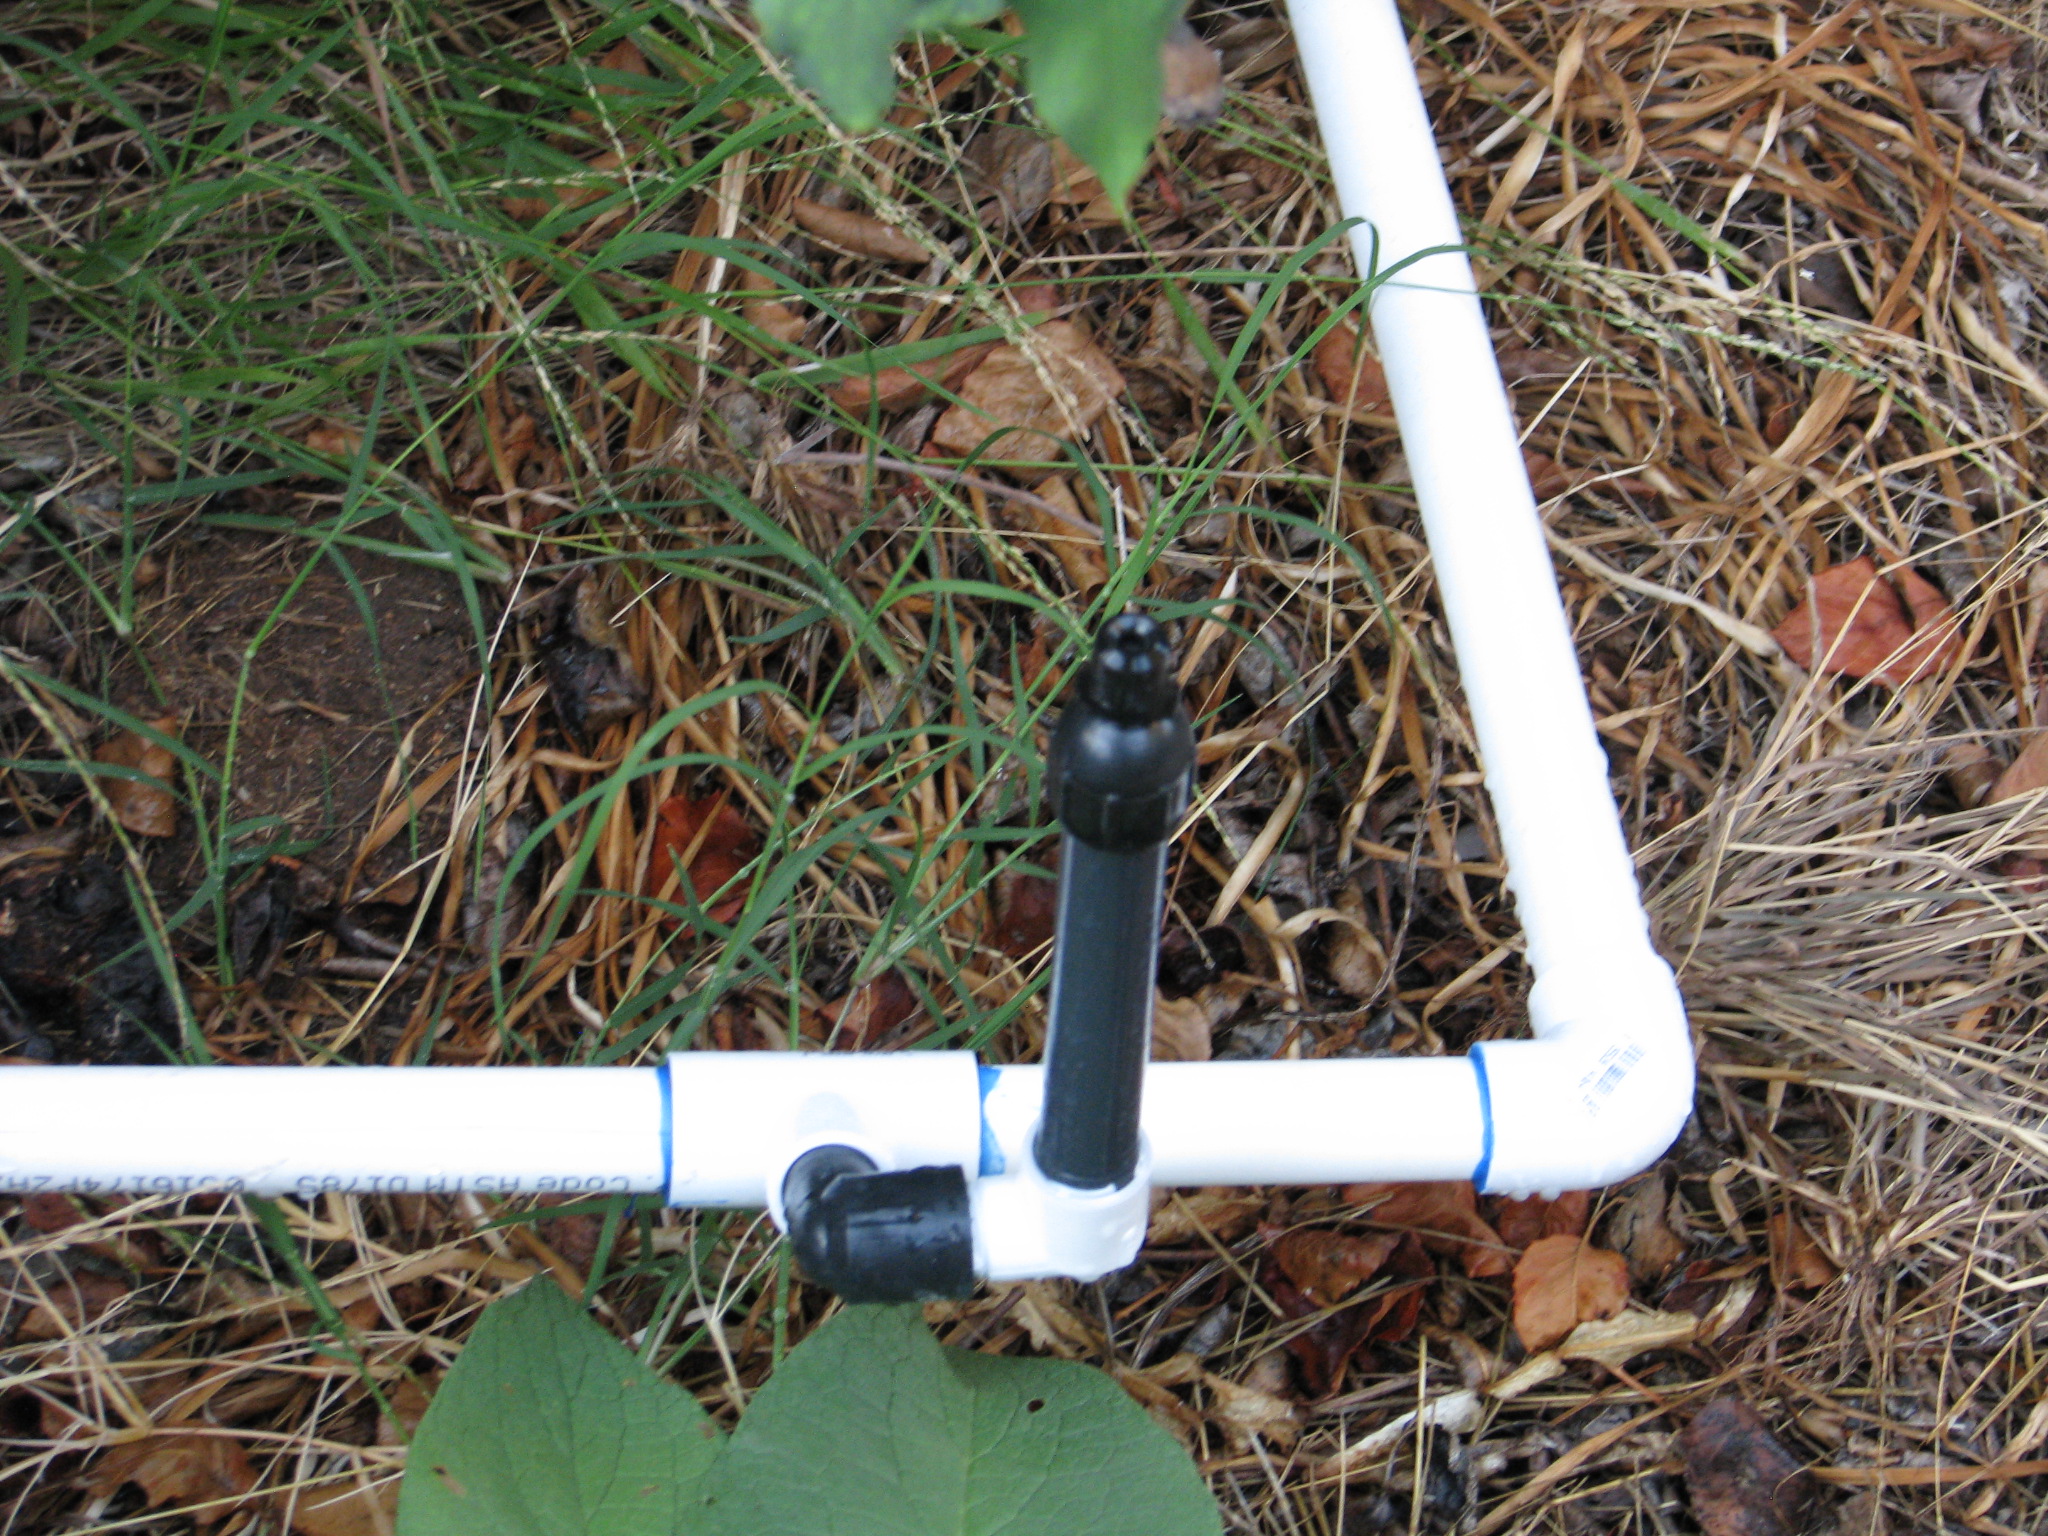
The 3/4″ T was glued in facing sideways rather than straight up. A black Street 90 and a white Street 90 were screwed into the T, firmly but with enough leeway to turn if pushed. Black ones don’t need pipe tape because they are soft and self-seal. The risers (nipples) are 6″, and were taped at both ends before screwing into the Street 90. (You don’t put the heads on yet because you’ll want to ‘blow’ out your system with water to clean the pipes beforehand. )
These risers can bend! With this configuration the risers are resistant to damage from being kicked, from having 100-lb. tortoises crawling over them, etc.

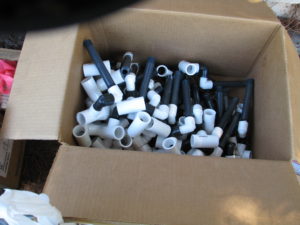
Gamera enjoying the movable sprinklers. They can be moved in all directions so that you can deliver water closer to small rooted new plants, then move them away as the root ball grows. If you have the assembly ready when you glue in the T, then you won’t have to struggle to screw it on. Ends will have a slip/thread elbow glued sideways with the same assembly.
There are lots of sprinkler heads out there. These sprayers have threaded ends rather than barbed, so that they stay in place rather than be blown off. These are 360 degree sprayers; you can obtain threaded sprayers for 180 and 90 degree, and probably other configurations as well.
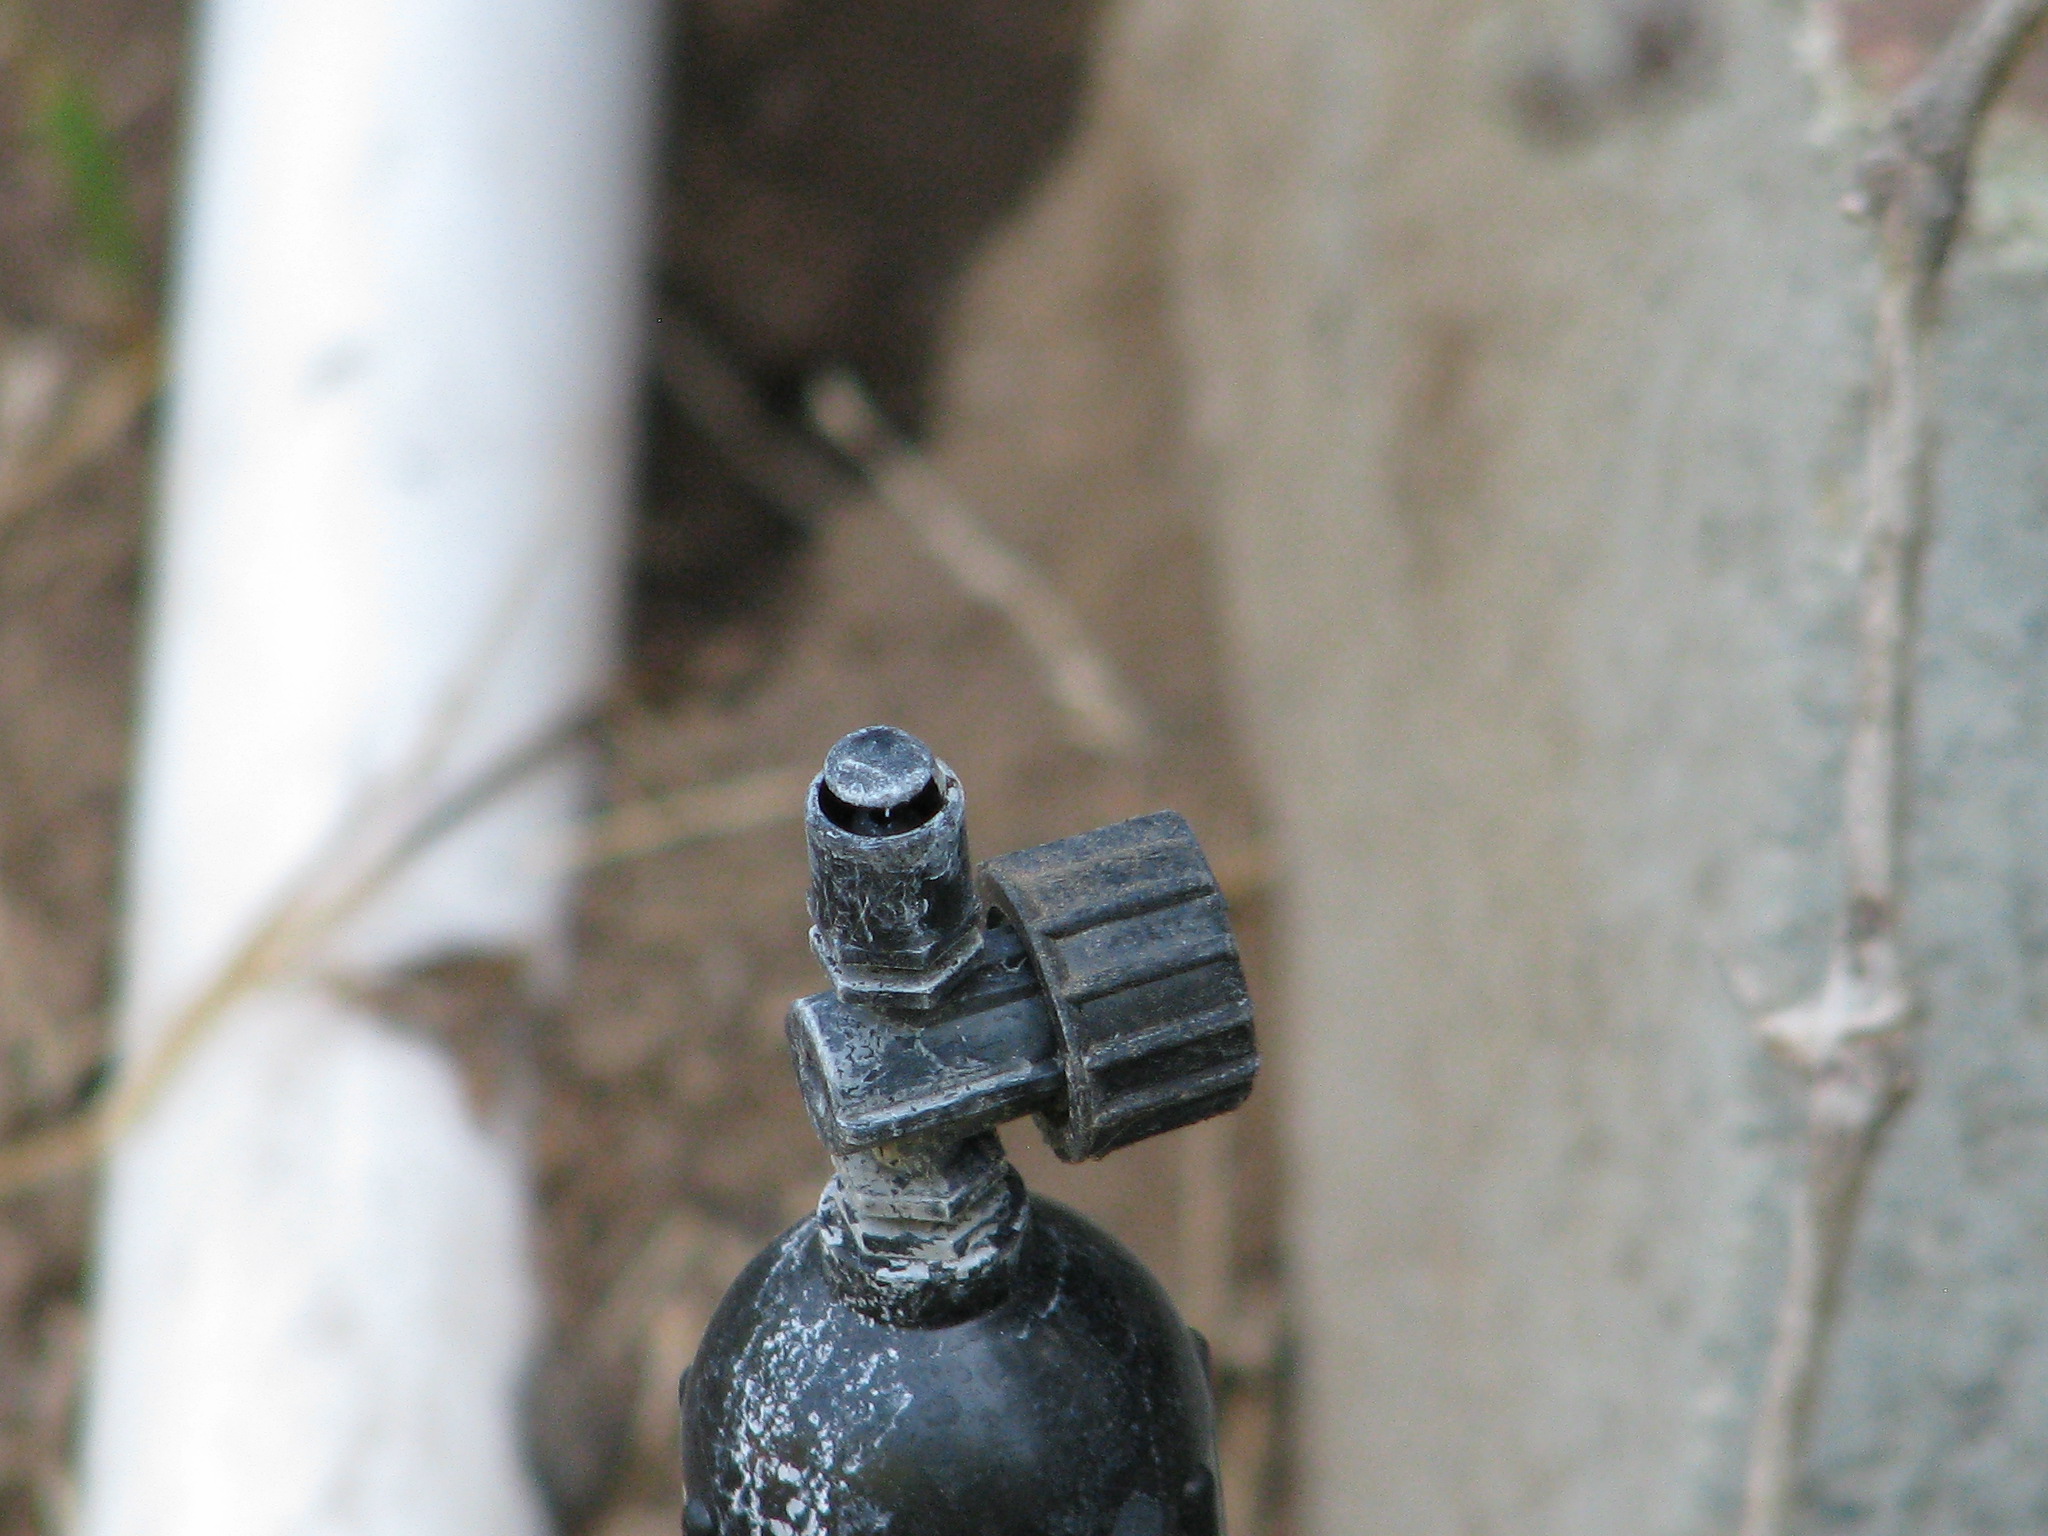
A 180 degree head. Notice all the white? That is mineral deposit, and the sprinkler has run only about 10 -15 times. Don’t forget the filter. A filter in every head saves you a lot of grief with plugged heads and poor irrigation down the line. They are easy to clean.
Next post: Concluding the project.
You can read Part 1 Options here, Part 2 Evaluating Your System here, and Part 4 Conclusion here.
- Building and Landscaping, Gardening adventures, Heirloom Plants, Natives, Perennial vegetables, Permaculture and Edible Forest Gardening Adventures, Rain Catching, Soil, Water
Irrigation for Drylands, Part 2: Evaluating your System
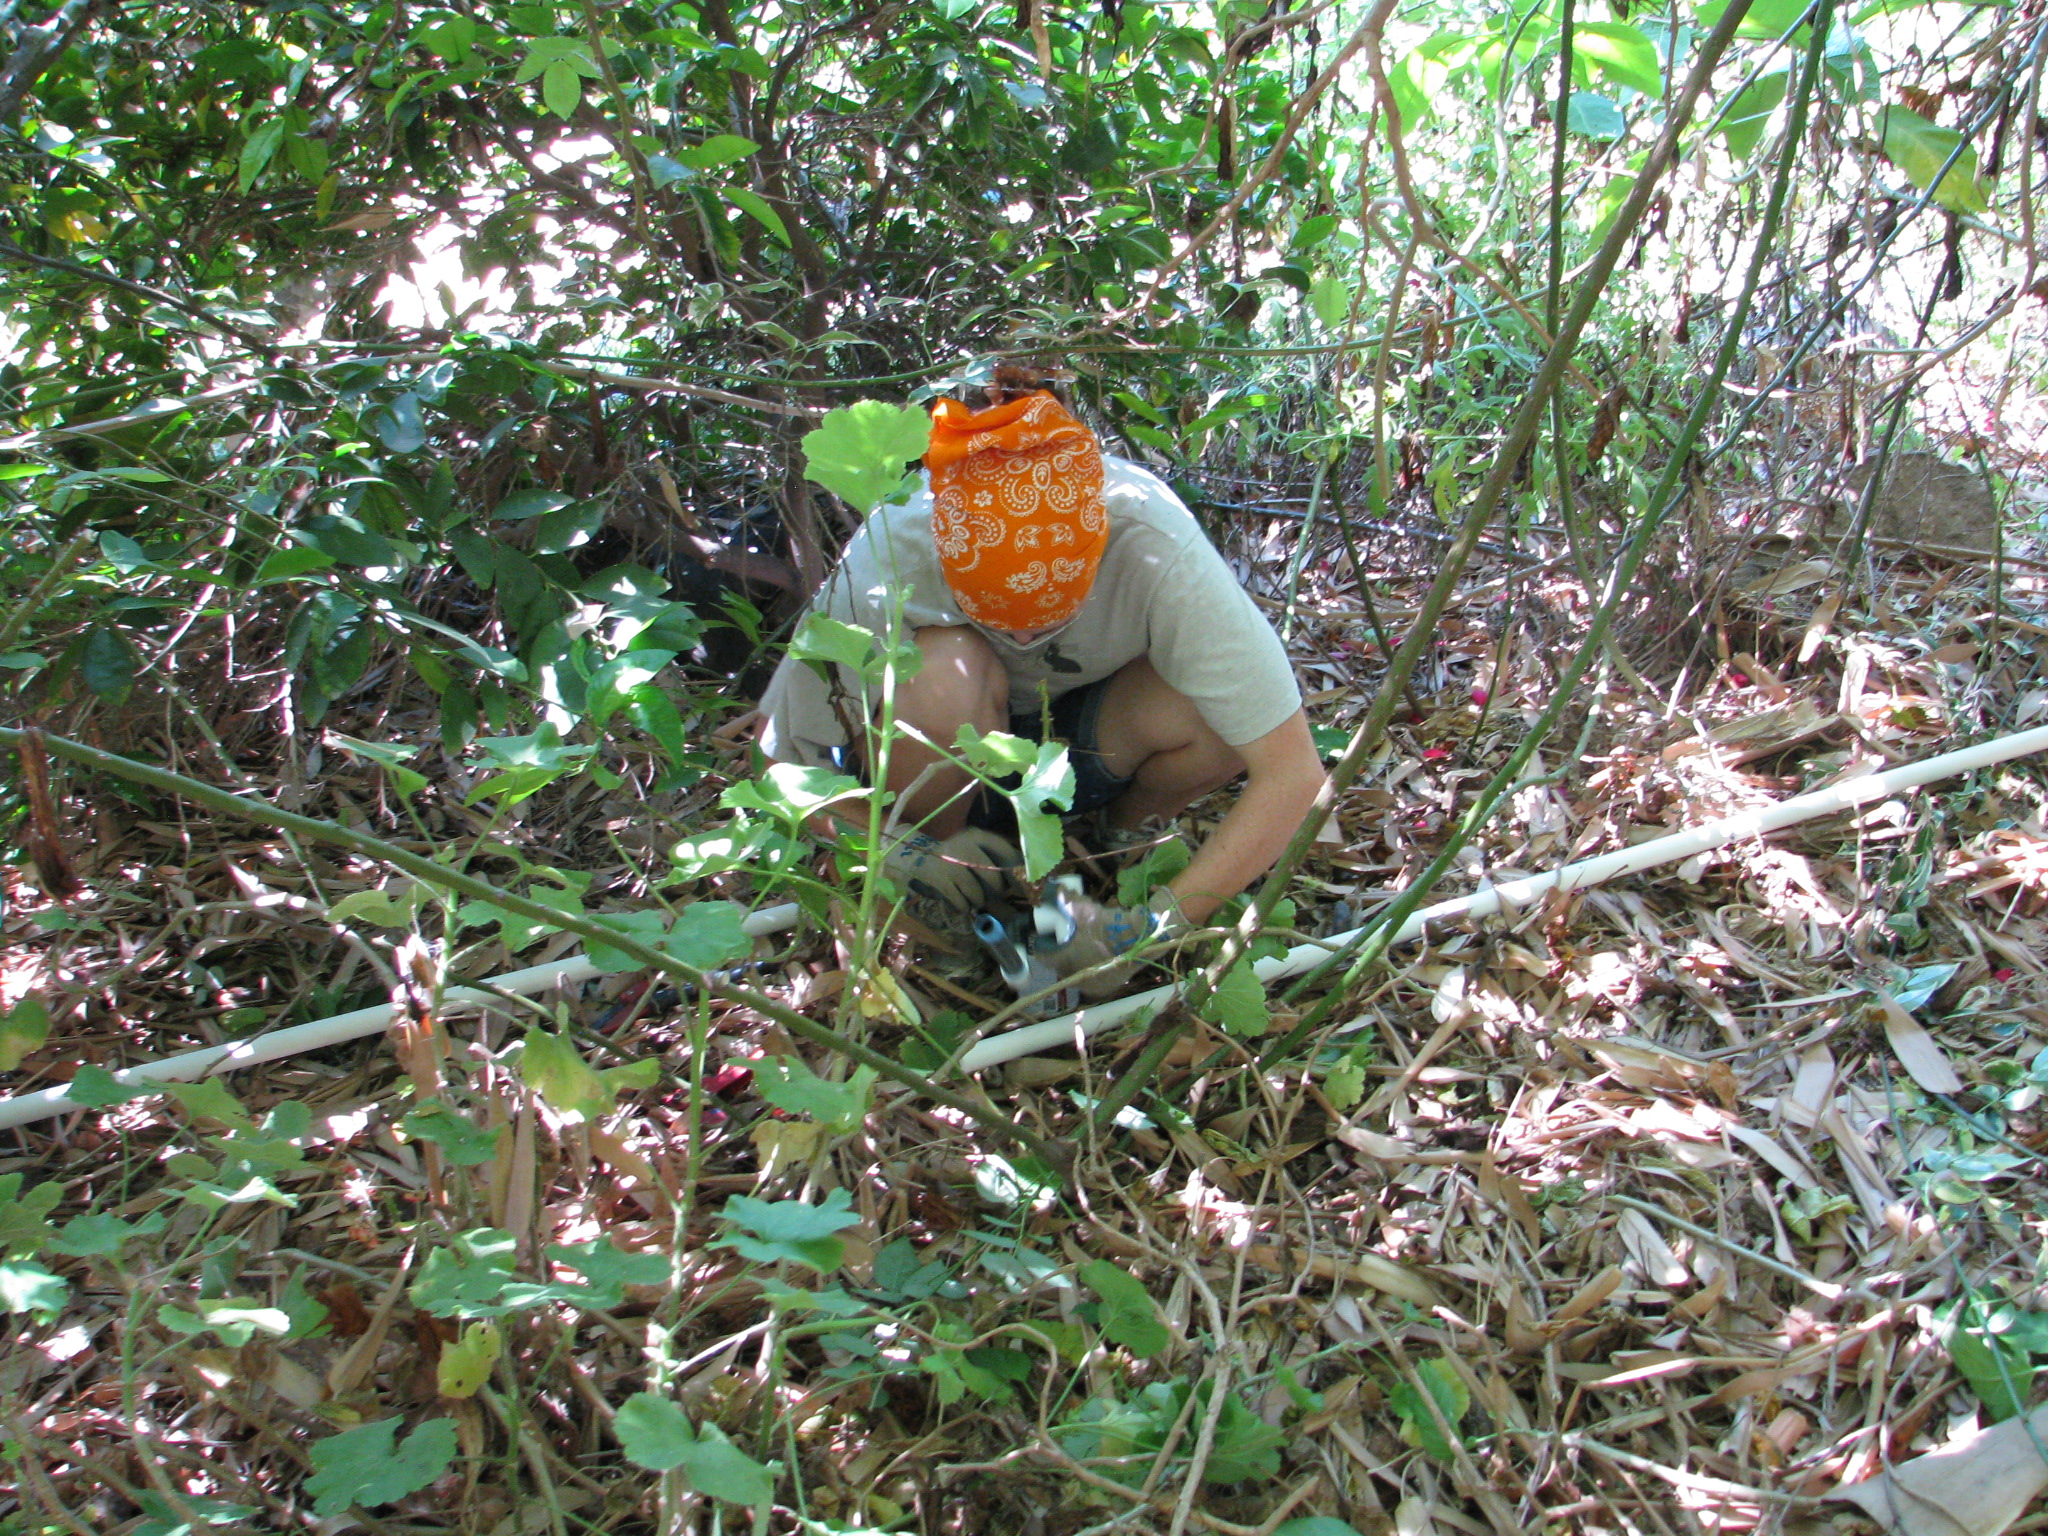
Miranda in the roses gluing pipe. If you have an existing irrigation system that works, you may easily convert it by adapting the heads for whatever you want to plant. Many lawn conversions I’ve designed utilize the existing spray system, particularly for natives, but with a different watering schedule. Don’t spend money when you don’t have to.
If you have an old grove that is to be converted and downsized, you’ll usually have far more pressure in your system than you need for smaller heads which may cause them to blow. Working with an irrigation specialist for the valves and pressure is advisable. For this re-irrigation project of Finch Frolic Garden, I found Vista-based John Taylor of Taylor-Made Irrigation and Landscape, 760-945-0118. He’s the first person to listen to and consider what I have to say, based on my experience with the old system, and he adapts to different situations. I’ve learned some cool new things that I will pass on to you, and he’s enjoying learning permaculture techniques, which will help both him and his landscape clients.
Here’s a little world-weary advice from someone who trusts too easily: Many professionals no matter what their field have one set way of doing things that they apply to every situation, be it irrigation, plant selection, tree trimming, construction, etc. (My neighbor has his poor coral tree topped every year. Topping trees is a bad practice. When I asked him about it, he said that his tree trimmer has been topping trees for years and recommends it, so he’s talking his expert advice! Do you see the problem here?) You, I’m sure, have dealt with these people too. Every situation needs a different solution, so look for someone who is flexible, listens to you, can offer several solutions with various price ranges, and who will give you a detailed estimate up front. Jobs will always run over, but they shouldn’t run too much over and the professional should be determined to keep on budget, and honest with you when there is an overrun. If you ask a professional to do extra things, the new tasks will need to be added on to the original contract because it will take up part of the time allocated towards the original project, so the project completion date will be moved ahead, and will add on to the total cost. On the other side, if your professional adds on projects that he thinks you’ll like, and you give him the verbal okay, realize that he’ll be working on those projects in addition to the original tasks, so it will take longer and cost more than the original contract. Look for people who don’t consider telling you their life story part of the time for which you are paying. If you tell them your life story, remember that they are on the clock and you are paying for that time. (I’d rather deal with a quiet, focused professional than a chatterbox who will talk more than work. If he’s not talking to you, he’s probably on his phone a lot while on the job.) Look for neat vehicles with organization, letterhead for estimates and invoices, someone who shows up on time when they say they will, and stays until they are done. They should schedule in their lunch; if they work through it they are not going to work well for you later in the day, and its unprofessional. Its okay for professionals to handle several clients at one time, but only if they are well organized and are eager to finish your project on your timeline. Contractors are infamous for tearing something apart the first day, then disappearing for days or longer holding you hostage while they work on other projects. Its okay to ask about all of this, and really important to read reviews. Don’t always rely on people your friends have recommended; I’ve had both really bad and really good referrals, so make up your own mind.

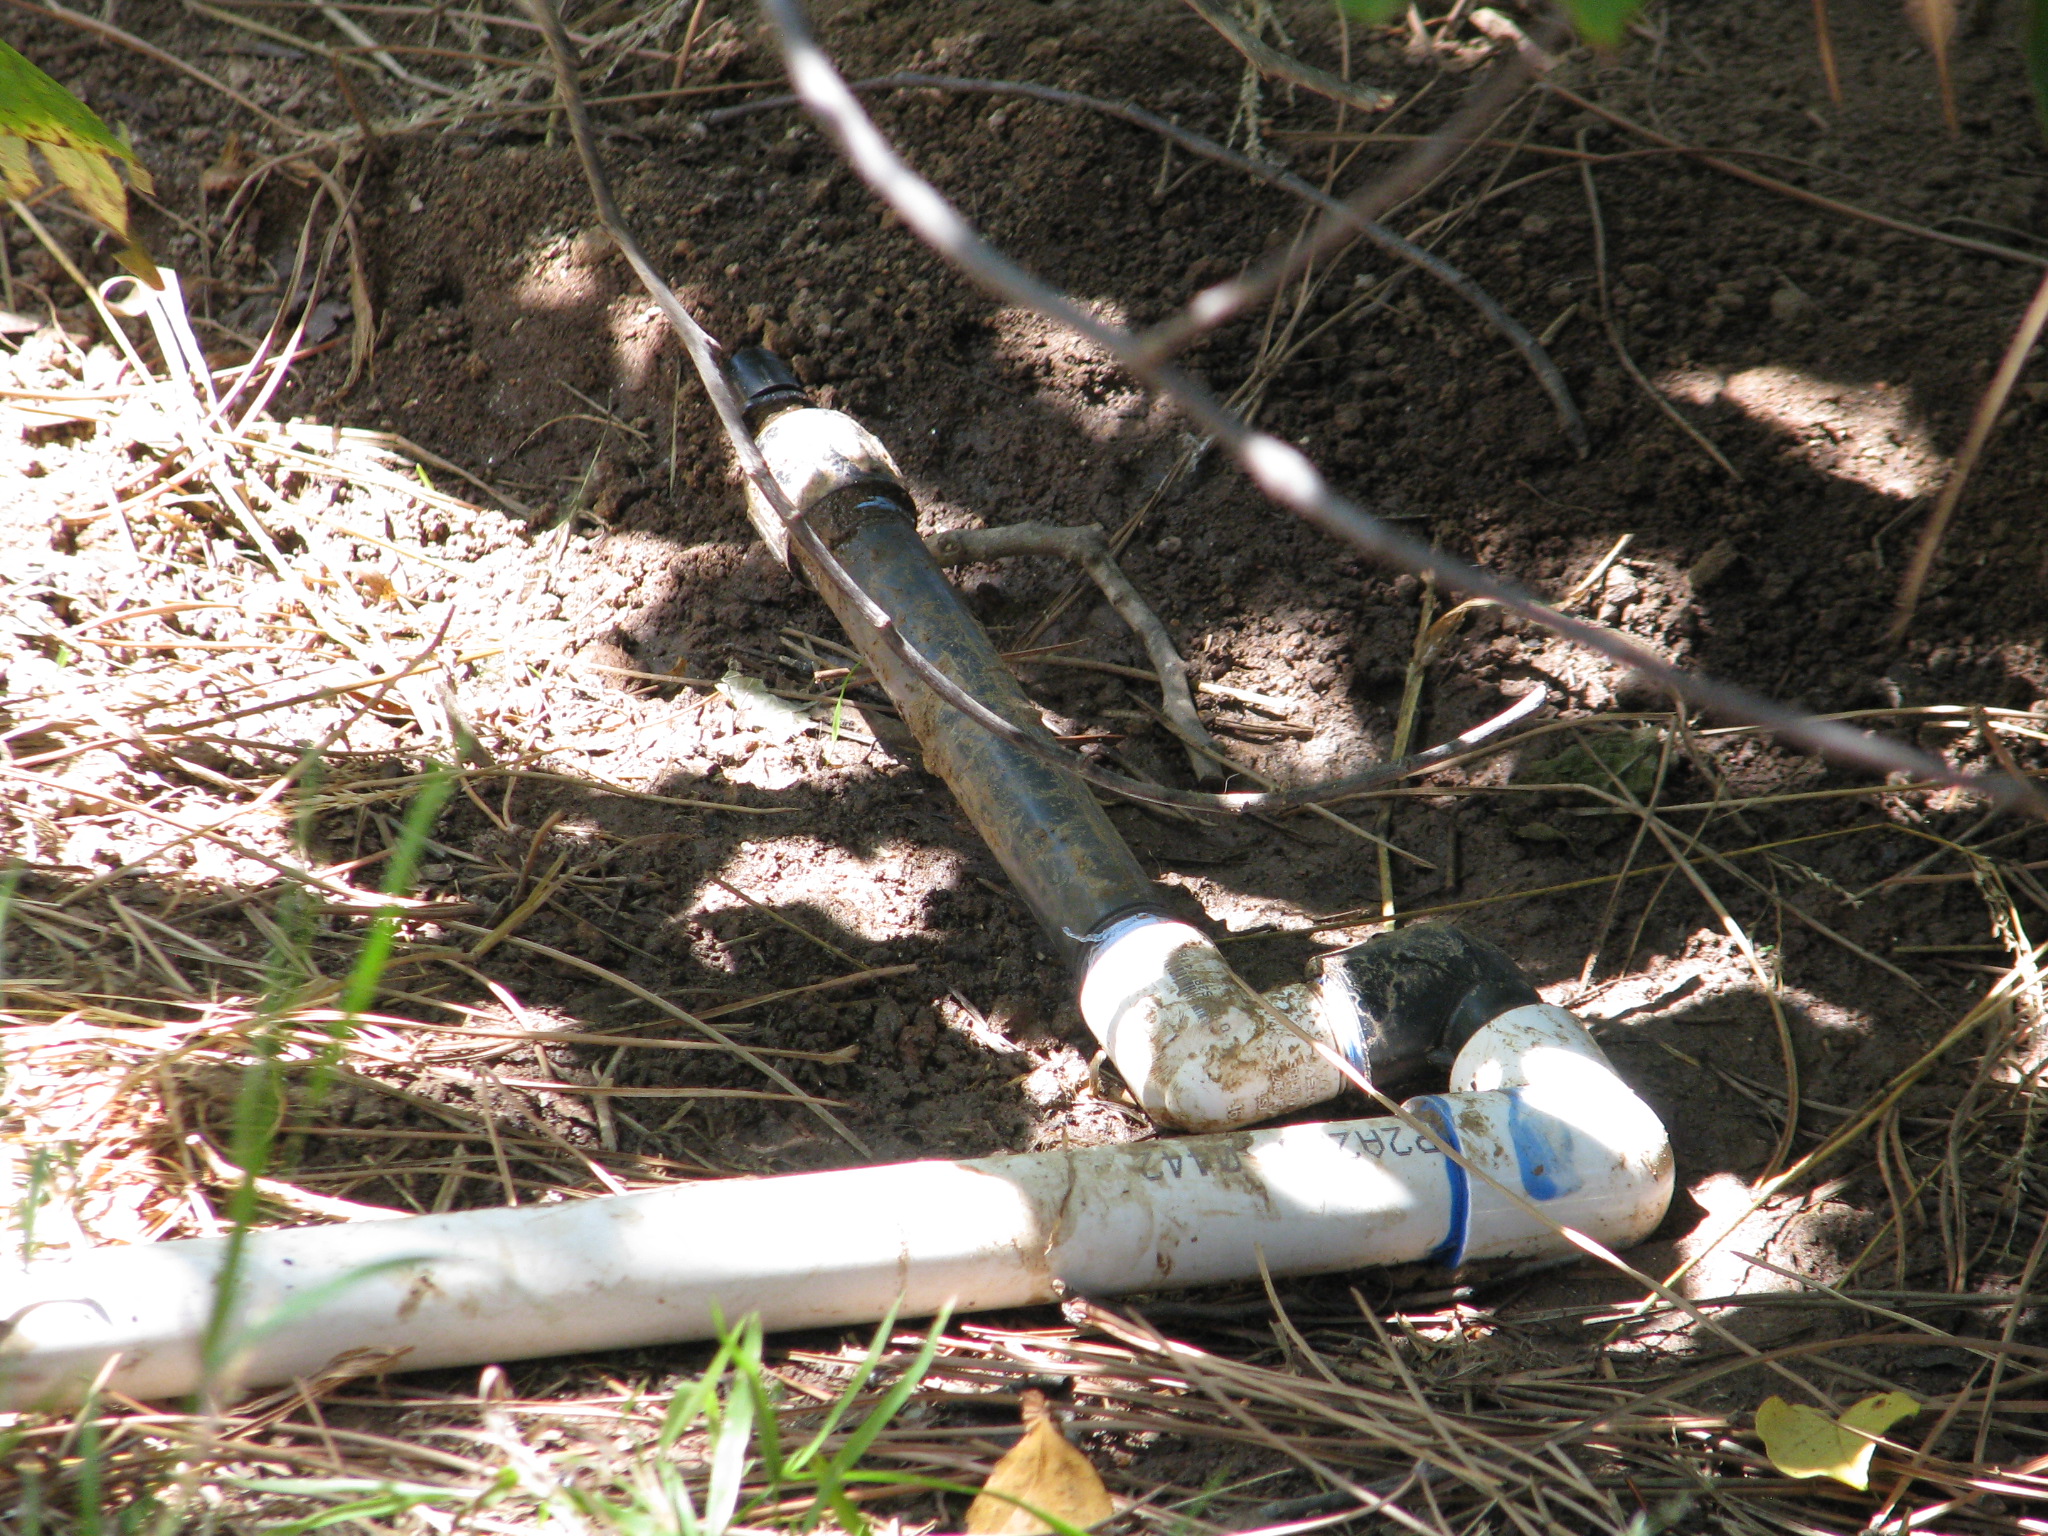
Extreme mineral buildup in a PVC pipe. Photo from http://www.marinechandlery.com/. Back to irrigation. Most irrigation is PVC, the white plastic pipe. If you have old buried metal pipes they should be examined for leaks. Mostly they will fail to function due to mineral buildup due to our hard water. The inner diameter of the pipe closes; if you’ve ever cleaned your shower head or seen house drains with the thick white inner coating, that’s what I’m talking about. It will slowly dissolve in vinegar, but the vinegar must remain in the pipe to soak it for awhile, then blown out an open riser to get rid of the chunks. All sprinkler heads must be decalcified as well. Often the buildup is so old that the pipes are deteriorating and just need to be replaced, usually with PVC. The galvanized pipe can either be left in the soil to gradually rot, which is fine, or else be dug up and sold for scrap. The labor cost involved with digging it up will probably be more than what you’ll get for scrap.
Here’s some understanding of water. The reason why domestic (potable) water is chlorinated is not to purify the water. That has already been done before it gets into the delivery pipes. It is to keep biomass from forming inside the water pipes. Biomass is any type of growth that forms, usually in wet conditions. Think of algae inside a fish tank or on the inside of a pool. Biomass is nature’s way of filtering and softening hard surfaces, and in nature is essential. In man-made pipes, the biomass can not only harbor things that can make humans sick, but also slows the flow of water. Garden hoses have some biomass inside of them, and any rough part will slow the water pressure. Lengths of any kind of pipe are the same. The longer the pipe, the slightly less pressure you’ll have. Pressure is important because you want your sprinkler heads to spray, not just dribble (unless you set them for dribbling). Pressure regulators are set in sprinkler heads, Netafim, and valves to keep lines from blowing out under normal pressure. If you don’t have an irrigation system set up for a large grove or large grasslands for animals, which require enough pressure to shoot water great distances, then you shouldn’t worry about the lines blowing out. But understanding about pressure and the effects of biomass and distance will determine what size pipe you lay.
Most people use domestic water for irrigation. Some rural areas have agricultural water available for commercial growers. Some people have well water, which is what I have. Well water has not been treated, so whatever has leached into that water is what you are delivering to the topsoil. Have your well water tested for contaminants and salts. You should have a filter after the pump on your well. However, our heavy-mineralized water will form a oozy barrier around the diaphragms in valves. If debris or too much of this slick mineral buildup accumulates, the valve won’t ‘seat’, or seal, and will allow some water to seep through the pipes even when the valve is off. This has been a huge problem here at FFG, and one which several irrigation ‘specialists’ have completely denied. They deal with treated water rather than well water, and just don’t understand. Some valves have diaphragms that can be very carefully cleaned and replaced, but not frequently before they are damaged. If you have a well, check with an irrigation specialist who has real-time experience with well water and valves to recommend the appropriate valves and filter system for you. I’ll talk more about the ones John recommended for FFG in a later post.
Large-diameter pipes will carry lots more water more slowly. Small-diameter pipes carry less water more quickly. If you lay out large diameter pipes from your valves, let’s say 1″ pipe like we’re using at FFG, then you can reduce the size of your pipe gradually to your sprinkler heads and that will be the best of both worlds. You will have volume of water and increased pressure. So John has recommended that we use 1″ PVC from our valves, which are connected to the well with 1″ PVC already.
One-inch PVC runs from the valve. Then we reduce the pipe to 3/4″ at the nearest T, or closest to the first sprinkler head.
The one-inch pipe is then reduced to 3/4″ pipe at the first T, close to the first sprayer. Then the sprinklers are reduced down to 1/2″. Since our well is at the bottom of our slope and water needs to be pumped back to the top, this design really helps keep the topmost systems pressurized.
This sprayer is reduced from 3/4″ to 1/2″. So as you are laying out your garden and irrigation system, understand about slope, water pressure, volume of water and your water source. These factors all have large parts to play in the long-term success of your irrigation.
Next time I’ll discuss drawing up an irrigation plan.
You can read Part 1 Options here, Designing Your System Part 3 here , and Part 4 Conclusion here.