Cob
- Animals, Bees, Birding, Building and Landscaping, Chickens, Cob, Compost, Composting toilet, Fungus and Mushrooms, Gardening adventures, Giving, Health, Heirloom Plants, Hiking, Houses, Hugelkultur, Humor, Living structures, Natives, Natural cleaners, Other Insects, Permaculture and Edible Forest Gardening Adventures, Pets, Photos, Predators, Quail, Rain Catching, Recycling and Repurposing, Reptiles and Amphibians, Seeds, Soil, Vegetables, Water Saving, Worms
Special Tours for Aug. and Sept., 2014
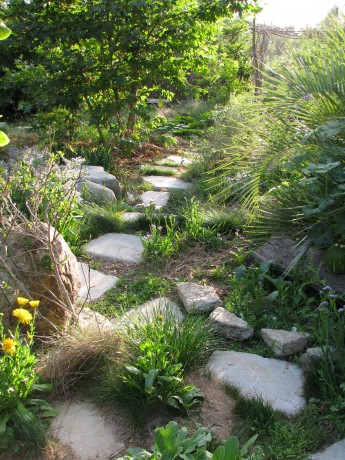
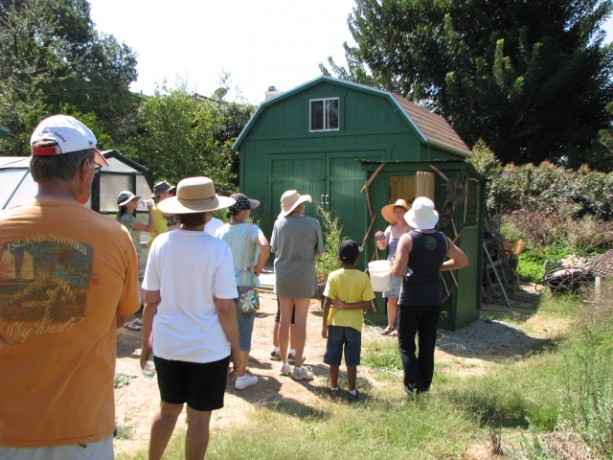
Come take a tour of a food forest! Normally tours of Finch Frolic Garden are held by appointment for groups of 5 – 15 people, Thursdays – Mondays. Cost is $10 per person and the tour lasts about two hours. By popular demand, for those who don’t have a group of five or more, we will be hosting Open Tour days for the first 15 people to sign up in August and September. They will be Sunday, August 10 and 24, Sept. 7 and 21, and Thursdays August 7 and 28, and Sept. 11 and 25. Tours begin promptly at 10 am. The tours last about two hours and are classes on basic permaculture while we tour the food forest. I ask $10 per person. Please reserve and receive directions through dianeckennedy@prodigy.net. Children under 10 are free; please, no pets. Photos but no video are allowed. Thank you for coming to visit! Diane and Miranda
You May Also Like

Native Insects and IPM
- Animals, Bees, Birding, Books, Building and Landscaping, Chickens, Cob, Compost, Composting toilet, Fungus and Mushrooms, Gardening adventures, Heirloom Plants, Hugelkultur, Humor, Living structures, Natives, Natural cleaners, Other Insects, Permaculture and Edible Forest Gardening Adventures, Ponds, Predators, Quail, Rain Catching, Recycling and Repurposing, Reptiles and Amphibians, Seeds, Soil, Water Saving, Worms
Permaculture Lectures At Finch Frolic Garden, June 2014
Tour Finch Frolic Garden! Permaculture Lectures in the Garden!
Learn how to work with nature and save money too
Finch Frolic Garden and Hatch Aquatics will present four fantastic, information-filled lectures in June. Join us at beautiful Finch Frolic Garden in Fallbrook, 4 pm to 6 pm, for refreshments and talks on…
Saturday, June 7: Introduction to Permaculture and Finch Frolic Tour: We’ll take you through the main precepts of permaculture and how it can be applied not only to your garden, but to yourself and your community. Then we’ll tour Finch Frolic Garden and show rain catchments, swales, plant guilds, polyculture, living buildings and so much more.
Saturday, June 14: Your Workers in the Soil and Earthworks: Learn the best methods for storing water in the soil and how to replace all your chemicals with actively aerated compost tea and compost.
Saturday, June 21: Aquaculture: You can have a natural pond – even in a tub! How natural ponds work, which plants clean water and which are good to eat. Even if you don’t want a pond, you’ll learn exciting information about bioremediation and riparian habitat.
Saturday, June 28: Wildlife in your Garden: What are all those bugs and critters and what they are doing in your yard? We’ll discuss how to live with wildlife and the best ways to attract beneficial species.
Your hosts and lecturers will be
Jacob Hatch Owner of Hatch Aquatics. With years of installing and maintaining natural ponds and waterways, and a Permaculture Design Course graduate, Jacob has installed earthworks with some of the biggest names in permaculture.
Miranda Kennedy OSU graduate of Wildlife Conservation and wildlife consultant, Miranda photographs and identifies flora and fauna and maps their roles in backyard ecosystems.
Diane Kennedy Owner of Finch Frolic Garden, lecturer, consultant, Permaculture Design Course graduate, former SDC Senior Park Ranger, Diane educates homeowners on how to save money and the environment while building their dream gardens.
Each class limit is 50 attendees, so please make pre-paid reservations soon before they fill up. Fee for set of four lectures and tour is $45 per person. Single session fee is $20 per person. Contact Diane Kennedy at dianeckennedy@prodigy.net for reservations and directions.
You will not want to miss this fascinating and useful information!
You May Also Like
Native Insects and IPM
- Animals, Bees, Birding, Chickens, Cob, Compost, Composting toilet, Fungus and Mushrooms, Gardening adventures, Health, Heirloom Plants, Hiking, Humor, Living structures, Natives, Natural cleaners, Other Insects, Permaculture and Edible Forest Gardening Adventures, Pets, Photos, Ponds, Predators, Quail, Rain Catching, Reptiles and Amphibians, Seeds, Soil, Water Saving, Worms
Finch Frolic Facebook!
Thanks to my daughter Miranda, our permaculture food forest habitat Finch Frolic Garden has a Facebook page. Miranda steadily feeds information onto the site, mostly about the creatures she’s discovering that have recently been attracted to our property. Lizards, chickens, web spinners and much more. If you are a Facebook aficionado, consider giving us a visit and ‘liking’ our page. Thanks!
You May Also Like
Native Insects and IPM
- Animals, Chickens, Cob, Compost, Composting toilet, Fruit, Gardening adventures, Giving, Grains, Health, Herbs, Houses, Hugelkultur, Humor, Living structures, Natives, Natural cleaners, Permaculture and Edible Forest Gardening Adventures, Ponds, Rain Catching, Recipes, Seeds, Soil, Vegan, Vegetables, Vegetarian, Worms
San Diego Permaculture Convergence, Nov. 9 – 10, 2013
There is a fantastic, information-packed permaculture convergence coming up at the beautiful Sky Mountain Institute in Escondido.
 It will be two days packed with great information for a very reasonable price; in fact, scholarships are available. Check out the website at convergence@sdpermies.com. On that Sunday I’ll be teaching a workshop about why its so important to plant native plants, how to plant them in guilds using fishscale swales and mini-hugelkulturs. Come to the convergence and be inspired!
You May Also Like
Native Insects and IPM
- Animals, Bees, Chickens, Cob, Compost, Composting toilet, Gardening adventures, Health, Heirloom Plants, Herbs, Natives, Permaculture and Edible Forest Gardening Adventures, Ponds, Rain Catching, Recipes, Salads, Soil, Vegan, Vegetables, Vegetarian, Worms
Southern California Permaculture Convergence! Be there!

Southern California Permaculture Convergence If you are interested in any aspect of permaculture, such as organic gardening, herbs, planting native plants, aquaponics, natural ponds, beekeeping, keeping chickens, and so much more, then you must come to the Southern California Permaculture Convergence. It happens on March 9th and 10th at the Sky Mountain Institute in Escondido. The keynote speaker will be Paul Wheaton, lecturer and permaculturalist extraordinaire of www.permies.com fame. Oh, and I’ll be one of the many speakers as well (cough cough). The Early Bird special of only $50 for both days ends at the end of January, and then the price will rise, so buy your tickets now!
Also, for a full-on demonstration of taking bare land and creating a permaculture garden, there will be a three-day intensive class taught by Paul Wheaton on site the three days prior to the Convergence.
You can read about the convergence here at the official website, which will give you the link perm.eventbrite.com where you may purchase tickets. Also visit the SD Permaculture Meetup page to see all the free workshops that happen monthly all over San Diego.
This convergence is such a deal, you really shouldn’t miss it! And such a bargain, too. One of the best things I find that come out of these convergences is the exchange of ideas and networking among the attendees, and all the practical information you can take home and use right away. One of the largest parts of permaculture is building community, which means sharing with and assisting others.
Really. Don’t miss this! Tell your friends!
You May Also Like
Native Insects and IPM
- Cob, Gardening adventures, Permaculture and Edible Forest Gardening Adventures, Soil, Vegan, Vegetables, Vegetarian
Harvesting Sweet Potatoes with Gratitude

Beautiful yam harvest. I am in sensory heaven. Outside frost is again settling – a rarity here in Fallbrook, CA. Inside…. mmmm. My daughter is juicing today’s harvest of oranges. On the stove I’m poaching the last of the Harry and David pears my son sent before Christmas, in a bath of Julian apple cider (I’ve had frozen since October!), cinnamon and vanilla. There is a touch of woodsmoke from the wood burning stove. The mingled aroma of vanilla, orange and cinnamon in the air is incredible. In the fire are two homegrown potatoes in foil baking for dinner, and I’m cutting squares of homemade bread (it rained the other day… great baking and soup day!) to toast in the fire on fondue forks with mozzarella cheese and drizzled with Just Dip It (an olive oil, vinegar and herb blend from Temecula Olive Oil Co.). I am saturated with contentment and gratitude.
I wanted to write a blogpost for the first day of the year about gratitude. Instead I’m writing about harvesting yams and sweet potatoes, which, I believe, amounts to the same thing.

Tiny Russian Banana potatoes I grew in a nursery container Today the air was clean and almost 60 degrees F. Maxfield Parrish clouds filled the sky making it hard to pay attention to anything else. My daughter and I finally fired up Harry Mud, the cob oven. We experimented by baking small frozen pizzas, to success. Then in went homegrown, wrapped sweet potatoes, garlic and russet potatoes to slowly bake in the ashes. I hope I can convey sweetness of sitting outdoors on New Year’s Day eating pizza and smelling home grown potatoes and garlic cooking in a mud oven that we built, from mud from our property, as a snowy egret watched us carefully from the pond and our hens figured out how to beg. Peace. Enjoying the payoff of hard work. Eating health.
In the last few days we’ve dug up several patches of yams and sweet potatoes, the greenery of which had just been frosted black. I plant them all over the property to fill the groundcover niche of the plant guilds. I also grew some in my raised veggie beds. Some of the sweet potatoes had been small last year and so I left them in the ground. They grew.

This enormous one was six pounds! The flavor of homegrown, organic potatoes is beyond description. You don’t need sugar and marshmallows dumped on the yams; potatoes aren’t just a vehicle for toppings. I steam them, eat them with butter, salt and pepper. Phenomenal. On Christmas I roasted wedges of yams with garlic and olive oil, and not only were they terrific, the leftovers I mixed into a hash for breakfast and it was sensational.

Freshly dug sweet potatoes Yams and sweet potatoes are what Americans call the orange or white tubers, respectively, sold in the grocery stores. There are actually hundreds of varieties of sweet potatoes of many colors and flavors. They are semi-tropical and like warmth. To grow, buy an organic sweet potato or yam and allow it to sprout on your counter. This is the easiest way. You may also buy slips from organic growers. Please, please don’t buy non-organic seed, slips or bulbs. Please don’t be Round-up Ready.

Colorful yams full of antioxidants. Take a sharp knife and cut slices from your sprouted yam, each containing at least one sprouted ‘eye’ , and lay them out to air dry for a couple of days in a cool, dry place out of direct sunlight. This hardens them off. Don’t plant a whole potato because the plant will have all the food it needs to produce greenery and won’t feel the need to make as many tubers. Plant the slips in well-drained soil that isn’t heavily manured; as long as water doesn’t sit around the roots, they will probably grow. I’ve had luck in many kinds of soil. The plants will spread out in a lovely, glossy-leaved groundcover that protects the soil and reduces weeds. Let the vines run and enjoy the small yam flower. Harvest in late fall, or when the greenery dies off.

Frosted leaves of sweet potatoes Carefully dig and lift the potatoes. The skin will be more delicate than on yams store-bought. Lay the dirt-caked potatoes out to dry off before you store them in a cool dark place. Keep small slips and roots for replanting. The flavor of homegrown organic potatoes will make you wonder what the tasteless mushy things you’ve been eating have been.
This last year had its share of terrible losses, worry, pain and disappointment, along with great joy and contentment if I opened my eyes to them. They say that you reap what you sow, and as the garden and my experience deepens, and as my life mellows, I feel the truth in it. This morning we had fresh juice made of passionfruit, guava, oranges and pomegranates, all of which we grew. The potatoes, garlic, squash, greens, pickles, passionfruit curd, strawberry jam, dried tomatoes, all are at hand because of planning, sowing, nurturing, harvesting and preserving or storing. This may seem incongruous, but I am astonished at how many friends I have gained this year, through my volunteer work and exercise classes, in addition to those gained while working with County Parks, Sullivan Middle School, and the SDZoo Safari Park. So many that I wrote out the names and counted and marveled. Perhaps the list would be small for others; I don’t know, but it is wondrous and enough for me. At age 51, I have more friends and good acquaintances than I’ve ever had in my life. I am so grateful. I not only reap what I sow, but just as in my garden harvest, I have more than I could have imagined.
I do not follow a religion. In Buddhism it is said that life is a walking meditation; that every step you take is a prayer. As I put one foot in front of the other walking through the last part of my life, as I dig yams and eat them redolent with the health of good soil, as I watch those Maxfield Parrish clouds, as I laugh and work with friends who miraculously smile when they see me, I wordlessly pray my gratitude to the universe.
I very truly wish for you a year filled with gratitude and peace, and health-giving food that nourishes your heart and soul as well as your body.
-
A Cob Table, or How To Camouflage Tires

The project: tire table and Harry's hat. When I moved to this property thirteen years ago, I inherited a lot of ‘leftovers’ from the previous owners. Included were three truck tires, one with the wheel. I’ve used them over the years to block a hole under the fence to keep my dogs in and to direct rainwater. When rolling them once again across the property to hide them, I realized that they needed to be re-purposed. If I stacked all three tires together, they’d be just tall enough to be a table. And a table is just what I needed next to Harry Mud, the cob baking oven. Cob, you remember, is an olde English term for building material made of sand, organic material and clay. I wanted to demonstrate cob building material at the AAUW Garden Tour, so earlier that week I cobbed.
I also wanted to add a chimney (or stovepipe hat!) to Harry, since I found a piece left over from my wood burning stove. The chimney would direct smoke up rather than out the front and into one’s face. A chimney isn’t essential for a cob pizza oven, but it can’t hurt.

Harry's fancy new stovetop hat, in progress. I built a sand base to represent the new hollow space in front of Harry. I cobbed around the sand, and around the top hat (stove pipe). Joining wet cob to dry cob can certainly be done; I moistened the dry cob slightly first and had no trouble with separation with this small project.

I sifted some dirt, but then realized for this layer I didn't need to. Cob can be done on a tarp, which helps mix the ingredients when you pull the ends towards you. Making cob is simple and everyone can enjoy it!
")
Marge does a great job mixing cob! (She adds some organic material, too!) The tires were stacked with the wheeled one on top; a post just taller than the middle of the wheel was inserted down the center for stability and then filled with leftover sand, rubble left over from urbanite, and broken bottles that had been dug up on the property. All candidates for landfill, all of which became useful. Across the top I put a board to firm the counter

Broken bottles joined bits of rubble and sand as filler. I began to cob around the bottom of the tires, making a thick base.

A wide cob base. I kept mixing and cobbing, making sure to push the new layers of cob well into the one below so they wouldn’t crack and fall off.

The work area; about 85 degrees that afternoon, too. I was trying very hard to make a mushroom-shaped table, but I failed completely and settled for a cylinder. This layer is shaggy with straw because I needed very firm cob to hold together, since it wouldn’t adhere to the tires. Another time I’ll put a smooth, decorative slip coat on both the table and Harry.

Nearing completion. The cob was done for the tour and there were many interested people looking it over. I especially saw many husbands shrink into themselves as their wives grew more excited about an outdoor cob pizza oven!

Cob table and Harry's hat, with information sign for Garden Tour. -
Harry Mud Has a New Look

Harry Mud with his bald pate This morning a Meetup was held at my property (Finch Frolic) for the San Diego Permaculture group (http://www.meetup.com/SanDiegoPermaculture/ ). The agenda was to tour the garden and build the second layer – the insulation layer – on Harry Mud, the cob (earthen) oven begun at a similar Meetup last July. There are three installments posted on my blog; you can search for cob oven, or read about the third installment here: http://www.vegetariat.com/2011/07/cob-oven-3/ ) (sorry, I can’t seem to get the hyperlink to work).
During all this time Harry has patiently sat under his tarp awaiting a second layer. Today was his day.
One of the reasons I wanted to work on Harry is that my garden will be on the Association of University Women’s garden tour on May 12th (OMG! Only four weeks away!!!). I’m hoping to inspire a lot of people to research permaculture for their own properties, and to show off earthen building. Harry will be a star.
With 29 people signed up to come today and projected rainshowers, I scrambled a bit to make sure there would be cobbing opportunities for all. However about 15 people toured, the weather although windy was dry and beautiful, and all goals were accomplished. Hopefully everyone came away with what they wanted to hear about, and not so much dog poo on their shoes.

A dirt and straw pedicure. Although I enjoy speaking with groups of people, the drawback is that I don’t have the chance to speak with individuals and find out their stories or learn from them. Everyone has wells of experience and tidbits of knowledge (or buckets full!), and you never know how your life can change with just a passing comment or chance encounter.
Anyway, many of us had mud manicures and pedicures, the group dwindled, and Harry became even more handsome, if that is even possible. Three intrepid souls stayed for Harry’ First Fire, and we lunched and chatted about all kinds of interesting topics, such as communication between plants. It was a good day. Now that I’ve soaked the mud off of myself in a hot bath with epsom salts, I’ll show you what went on.

Sifted soil in wheelbarrow being resifted through smaller mesh. To create the insulation layer, we sifted dirt through two progressively smaller screens.

Screening dirt. That was mixed with water and a lot of straw, which took a lot of time but was fun.

Fancy cob footwork. Cob is a community event. That cob mixture was formed in a four-inch layer around Harry.

Harry looks as if he's going bald, but he's actually getting a straw afro! Just in case all 29 people showed up, I had prepared an extra cob project. I thought a work table next to the oven would be a good idea, so stacked two old tires, topped by a tire with the wheel still in there. These had been part of the fill on my property when I moved in 13 years ago. Two intrepid permaculturalists then filled the inside with rubble (small bits of urbanite left over from walls) and sand left over from Harry Mud. A piece of wood was propped in the center to hold the top in place. At some point the entire thing will be cobbed.

Filling stacked tires with cement rubble and sand for future cob table. Harry’s First Fire was set. Handsome, isn’t he?

Harry Mud, all fired up! He is a little thicker towards the bottom (I know how he feels!) because the mixture slumps a little, but he’s thick enough all over to insulate well. Harry will eventually receive a slip coating on the outside, which will help protect the insulation layer and be decorative. The urbanite base will be covered as well. I’d like a shade structure over the area, built out of the shed leftovers of which I have plenty. Harry will have to be protected from rain by a tarp as usual.
Thank you everyone who helped out!
-
Cob Oven 3

The bottom layer stayed damp This is the third installment of the cob oven building story. In our last episode, we saw permaculturalists mounding and shaping sand, then beginning to build the first insulation layer on the sand form. The lack of straw made the mixture of sand and clay a little challenging to work with (straw would burn off so it isn’t used for this layer). When my intrepid daughter and I ventured out this morning in the July heat, we found that the wet burlap and newspaper had worked well for keeping the insulation moist. The mixture still on the tarps was a little drier, and a batch that had been put into a 5 gallon black nursery container so it was easy to grab, and then forgotten, had turned into a cylindrical brick. That was good news, for it showed that the mixture was a good one.

The mud was still good on the tarps Although hot today, it wasn’t nearly as searing as yesterday. Intermittent clouds blew over and created some humidity, but sheltered us from the direct sun and the breeze stayed pleasant. I’d already baked a layer cake and a peach/apricot tart after blanching and peeling the fruit, to make sure the oven was used during the cool part of the morning. We also sliced extra fruit and put them out on cookie trays on our roof to dry (look at my post about drying fruit, if you would like to know more). I made sliced polenta with cheese and egg for breakfast, and cleaned up a mountain of dirty dishes from the cooking and baking by 10:30 am; a good start to the day.
So we began layering the 2/1 sand and clay mixture, digging it into the layer below and being careful not to press inwards on the sand dome. We used our fists as guides to measure the same width all the way around, guiding with our other hand. If you don’t like having dirty fingers, or you value your fingernails, this isn’t the hobby for you. I think ninja masters must toughen up their hands by building cob ovens. Certainly no physical therapy I might have to do for my months-old sprained wrist could equal this kind of exercise!

Slowly working up the sides While we worked we’d periodically hear chirps from a palm tree where a hooded oriole family was being fed by diligent parents. We were also watched most closely by our chickens; Emerson (who was supposed to have been a hen) practiced crowing.
Despite our drier mud, the sides liked to succumb to gravity. We used 2×4’s to press mud up from the bottom, similar to rolling out pastry dough. To make the front even, I took a mortar spatula and sliced off extra mud, then patted it even.

A bald pate The most valuable tools we used were a spray bottle of water, the pieces of 2×4’s and folding chairs. A good arguement for making the oven stands higher is to save your back when mudding!
Finally the top was attained!

Closing up the top! The next part was to use the board to smooth out all the sides and make a beautifully rounded shape. An area in the back was a little slumpy due to extra wet mud, but it wasn’t a big problem. After it was smooth, we took the board and gave the dome gentle whacks to compress the insulation.

Using a board to shape the dome After about 3 1/2 hours today, and 45 minutes yesterday, the first layer is finished. All during the process it felt as if we were creating an entity. I was trying to puzzle it out as we worked, and I think working with soil from our own property, mixing with hands and feet, and the rounded soft shape of the earthen dome all created that illusion. Also, the handle of the door that we made of cob looks like a big nose. My daughter dubbed the oven Harry Mud (and all you Star Trek Classic fans will love that name even more).
The next phase will be to mix straw with the sand and clay and create another layer over the insulation layer. That process will be in the near future, but definitely after our hands heal up from the sanding they received today. Hot and humid as it was, we had a real sense of accomplishment and pride when we finished the bones of Harry Mud.

Harry Mud -
Cob Oven Part Deux (and still not done)

Mounding sand within a template Today three members of the San Diego Permiculture Guild joined my daughter and I in another go at finishing the cob oven. We had only two hours in which to work on a warm morning which was rapidly turning into a hot day. With the base already built, we now needed to build a sand dome which would serve as the inside mold for the oven. Mixing sand with water until it clumped wasn’t as easy as it looked in the books, and it never really clumped. However, after a long effort the group did a fantastic job making a sand mound of correct dimensions.

Measuring and spraying the sand with water My daughter and I had made a template to show how high and round the sand should go, and eventually the sand dome became something of which Sir Christopher Wren himself would of been proud. It is a shame that after the cob is added the sand will be scooped out, but the hollow that is left will be perfect for the roiling flames of the fire, with no cold spots.

A beautiful mound, with a door Our choices for a door was to make one out of wood with insulation on the inside, cut one out of the cob and then create one, or make one out of cob ahead of time and build around it. My daughter and I made one the day before, and albeit topheavy one, and propped it up so cob could be built around it.

Mud door The sand dome was then covered with wet newspaper for protection from the cob.

The door looks like a big-nosed creature! Next came the insulation layer, which was two parts sand to one part clay. No straw was added because it would catch fire. The mud we used was a batch in a wheelbarrow that had been worked (all the hard pieces either discarded or squished) by the group during the first oven building session. We kept it wet and covered so that the clay would soften. This became a problem, though, because the clay was already saturated when we worked in the sand. As the sides were beginning to be built, the cob was soft enough to bulge out at the sides. Thinking quickly, the group put pieces of wood around to use as a frame while I began mixing another batch from the rest of the mud in the wheelbarrow and sand, using my feet. Others leant their feet to the project.

The cob dance This batch was wet as well, but not as wet as the first batch.

Two sand and mud mixes, the left one too wet The theory was that since the clay was in water, the heavier particles sunk to the bottom displacing the water, and so the first batch of mud from the top of the wheelbarrow held more water than the second, lower batch. This made perfect sense.
When building the insulation layer, care must be taken not to press into the sand mound. The first layer of insulation should be 3-4 inches wide. Each layer must be pressed into the one beneath so that the cob is uniform and doesn’t dry in layers. At first it is built straight up, then gradually around the curve of the dome.
With only 45 minutes to go, and the sides bulging enough to prevent any more building, we opted to take out what was already built and start in again with the drier mud mixture. This, too, needed some wooden support, but it was by far easier to use than the first batch. The wetter mud was spread out on a tarp to dry out more in the sun.
With the time coming to a close we stopped, covered the mound with wet burlap and the mud with tarps. Perhaps the next time will bring about the finale of the oven, and the long-hoped for pizza!

Covered with wet burlap until next time