Arts and Crafts
- Animals, Arts and Crafts, Chickens, Compost, Gardening adventures, Other Insects, Permaculture and Edible Forest Gardening Adventures
A Hen’s Garden
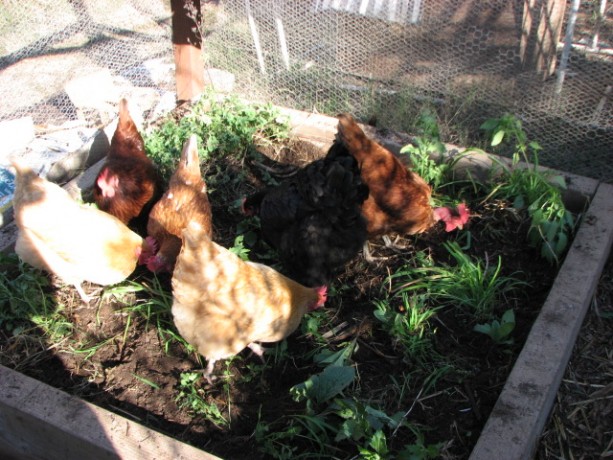
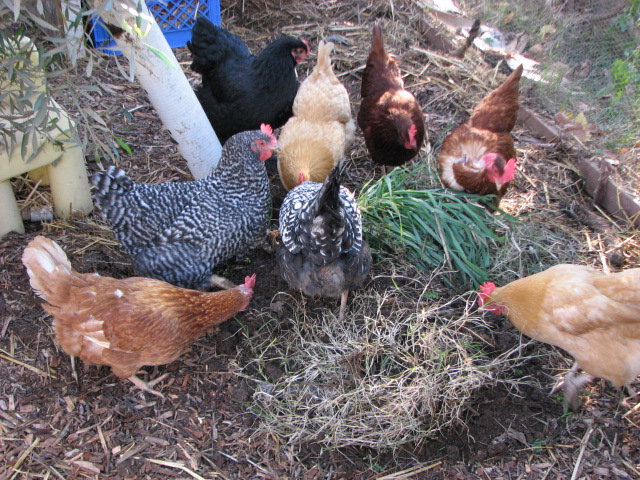
The girls helping prepare the soil before planting. Chickens are primarily bug eaters who also snack on greens. Feeding hens grains began with the industrialization of agriculture. No one cutting grain with a hand scythe would spend all that time and energy to feed hens.
My hens live in the Fowl Fortress, to protect them from coyotes and hawks (our hawks won’t be able to carry one away but they could tear them up pretty badly). After losing Chickpea to a coyote while we were only so many yards away made me eliminate any open foraging time for the girls. This wasn’t healthy for them. I haven’t invested in a solar electric fence yet, to make a ‘day’ coop for them to forage in relative safety, but that may be on my investment list for the new year. The largest problem is poor design in the garden, which I’m trying to remedy as easily and inexpensively as possible. I didn’t know how to fit in chickens, or where the garden was going when it began nearly three years ago. I have weedy areas, and I have chickens. To bring them together safely is the problem.
Sometimes we bring the hens into the fenced yard with our 100-pound African spur thigh tortoise (Gammera); however, that yard is also where some of our cats live. We’re not sure if Moose, Chester and Cody would behave themselves around hens, so unless we prevent the cats from leaving the house for the day, then we can’t carry the hens into this grassy yard to graze.
Inside the Fowl Fortress there is a layer of muck composed of old straw, the hard bits of veggies and fruit fed to the hens, old scratch and lots of chicken poo, made into an anaerobic muck by recent rains. Once turned up we discovered lots of the grain had sprouted, which the girls sucked up like noodles. This muck was also turning the hard ground below into prime soil. Why couldn’t we use this muck in a more productive manner?
If I couldn’t bring the hens to the garden, then I thought I’d bring the garden to them. Inside the Fowl Fortress I propped up four big boards in a square, then filled it with some of the rotting straw and muck from the coop. I topped it with Bermuda grass – laden soil from one of my raised beds. This was the bed, in fact, where I composted in place for the past year. What rich, chocolate-colored, worm-laden soil! If not for the invasive grass it would be perfect.
In this new garden, along with the Bermuda grass, my daughter and I planted oregano we divided from one of our plants, nettles, borage, some other kind of grass weeds that had sprung up after our Fall rain, plus we scattered corn and mixed organic grains which we feed the hens and pressed the seed into the ground.
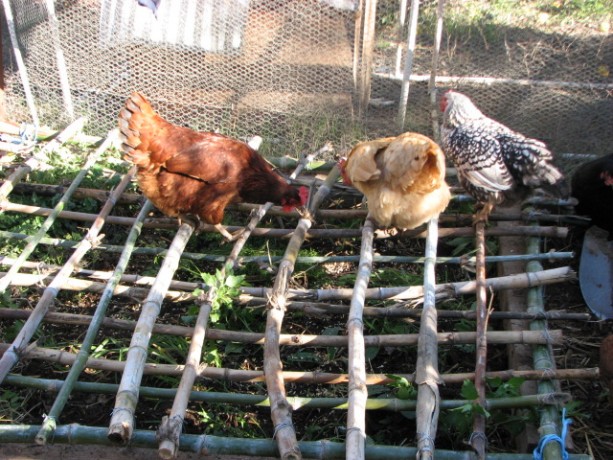
The hens can graze, but can’t uproot the plants. Miranda wired together a bamboo lid out of scrap pieces. The idea is that the plants can grow up through the lattice of the bamboo lid and the hens can stand on it and eat greens. Oregano is a good medicinal herb, as are nettles, which reputedly encourage egg laying.
I also dig up chunks of weeds or Bermuda grass in this mercifully looser post-rain soil, and throw the whole mess into the Fowl Fortress and let the girls forage and exercise those strong legs by kicking through the heap. It is only logical that the strong kicking motion of foraging hens strengthens their bodies so that they have fewer egg-laying illnesses (egg-binding primarily), and of course their nutrition is much better with greens and bugs

This is by no means a permanent solution, but until I find the right design that keeps healthy, safe hens and eliminates weeds without a lot of work, then a chicken garden and weed-tossing is the way to go.
You May Also Like

Native Insects and IPM
- Arts and Crafts, Gardening adventures, Humor, Permaculture and Edible Forest Gardening Adventures, Water Saving
Remodeling the Outdoor Sink
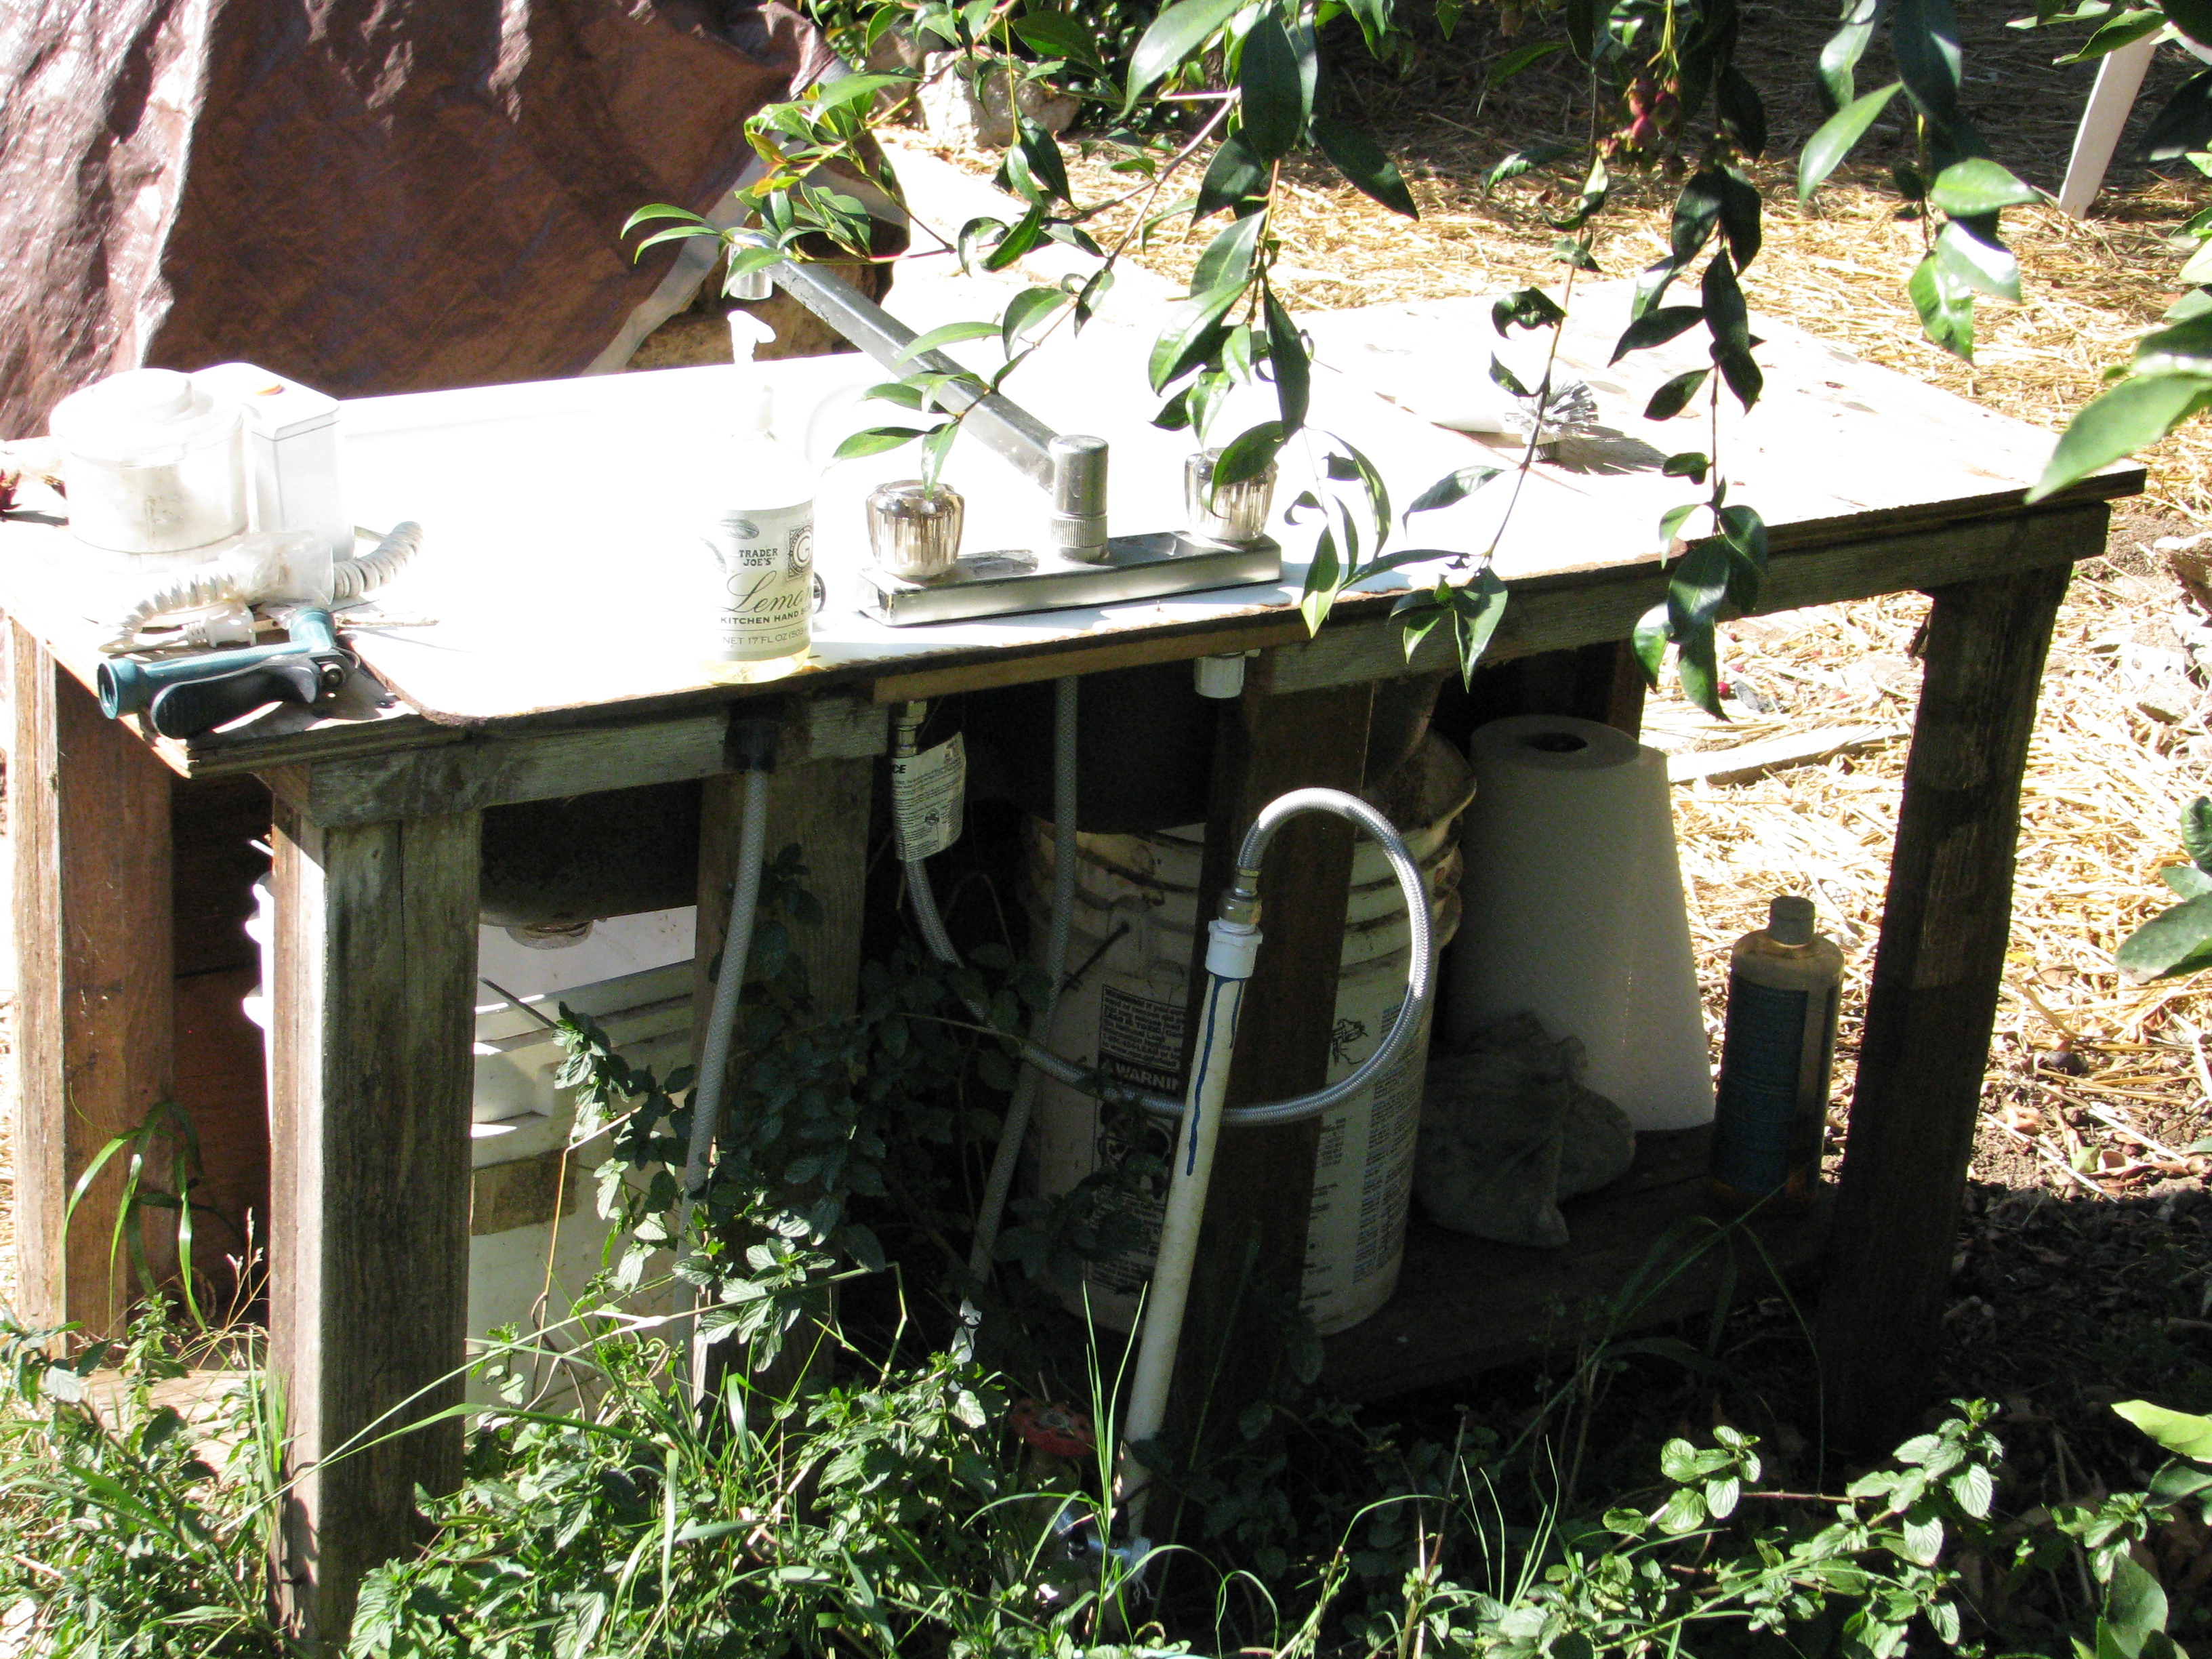
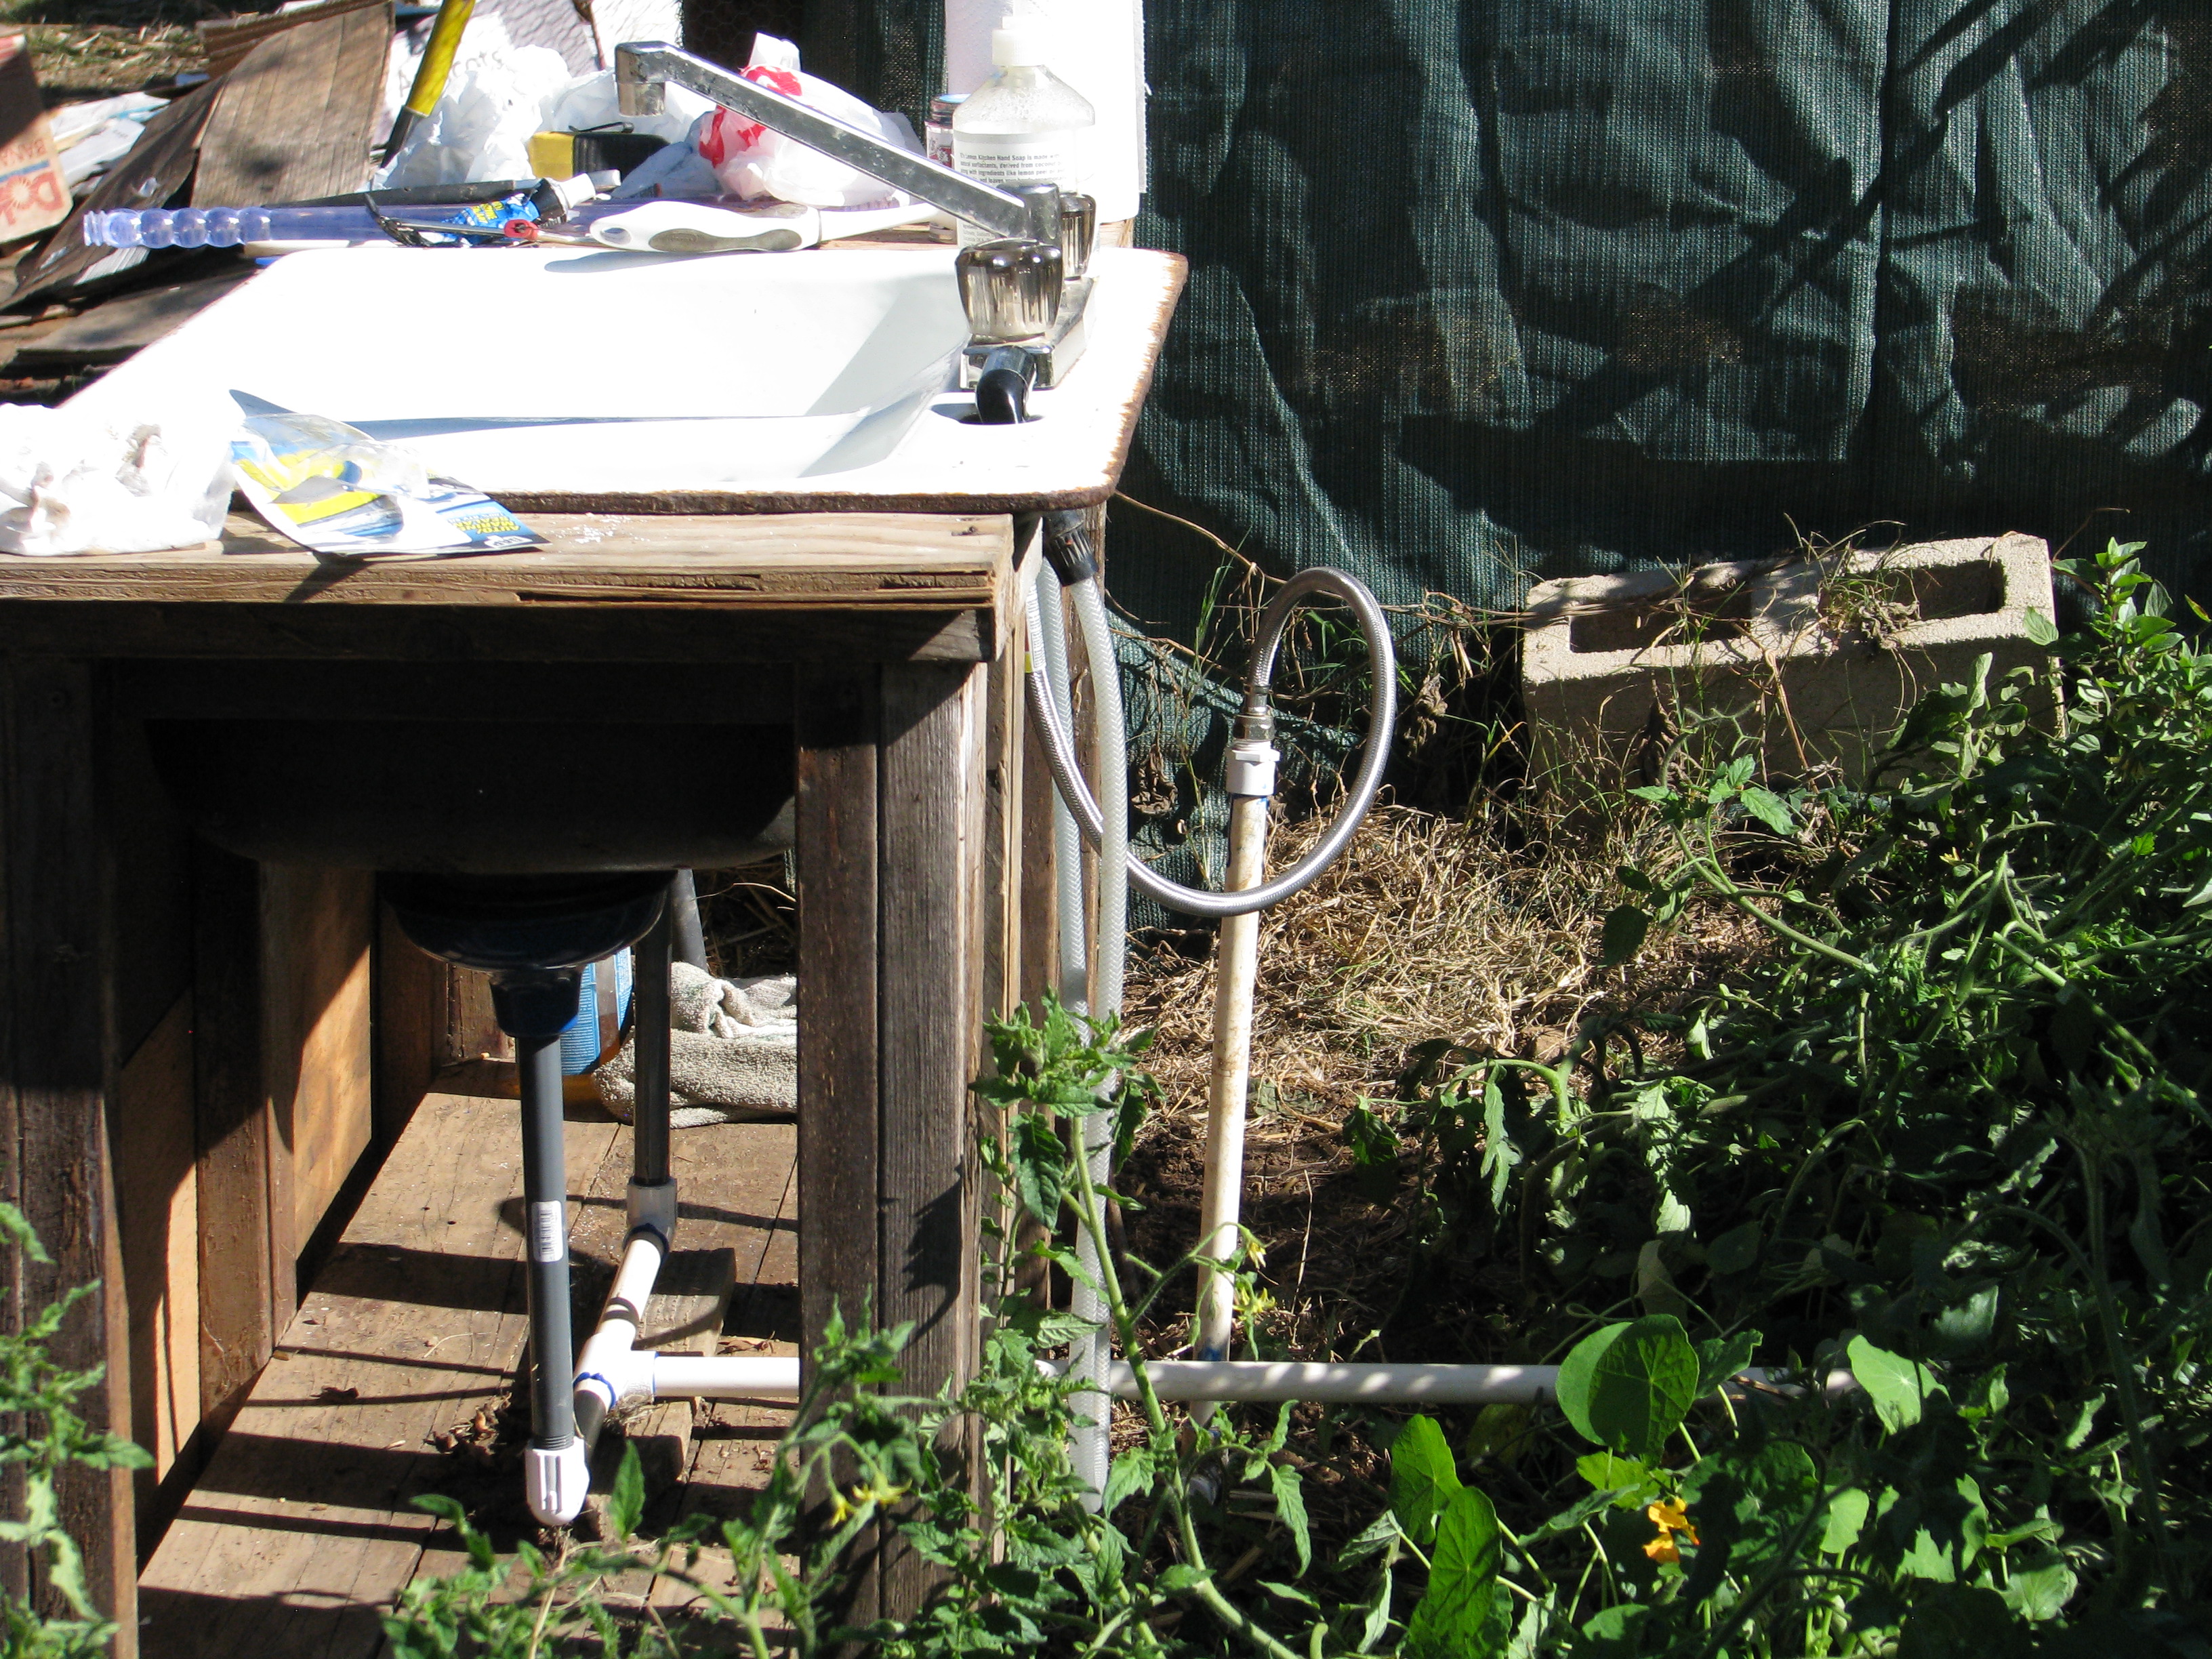
I’m thrilled with my outdoor sink. I love it. It is my friend. It is my old kitchen sink, stubbornly hauled around the property until I finally was able to put it on an old fishtank stand and hook it into the waterline out in the garden. Even better, Steve, who used to work here and who was responsible for the Mock Pavilion, modified the stand so that the sink fit down into it more securely. Any water used would be caught in buckets underneath (with long sticks in them so that any creature that falls in can crawl out again), which I would pull out and empty.

The buckets are just another heavy thing with which I had to deal. There had to be another way. A problem with the sink being set down into the stand is that the underside of one of the drains now sat slightly into a bucket, so I’d have to tip the bucket to get it out. Wrestle it out would be the better term, usually becoming wet with old sink water in the process. Throwing a 5-gallon bucket of water somewhere lost its charm quickly, especially as I was the only one emptying, but not the only one filling. Something had to be done. When I made the area next to the Fowl Fortress into an apple tree guild, I now had an area which could use extra water. The sink needed to be moved. Last week I finally did it, and I have to say, I’m pretty smug about how.
I am a disaster with a saw, but I’m pretty experienced with old PVC pipe and Red Hot Blue Glue (all those sprinklers I’ve mowed down over the years). I leveled a place next to the coop and placed some old plywood on it, both to help steady the sink stand and to keep weeds down (and to use up the plywood).

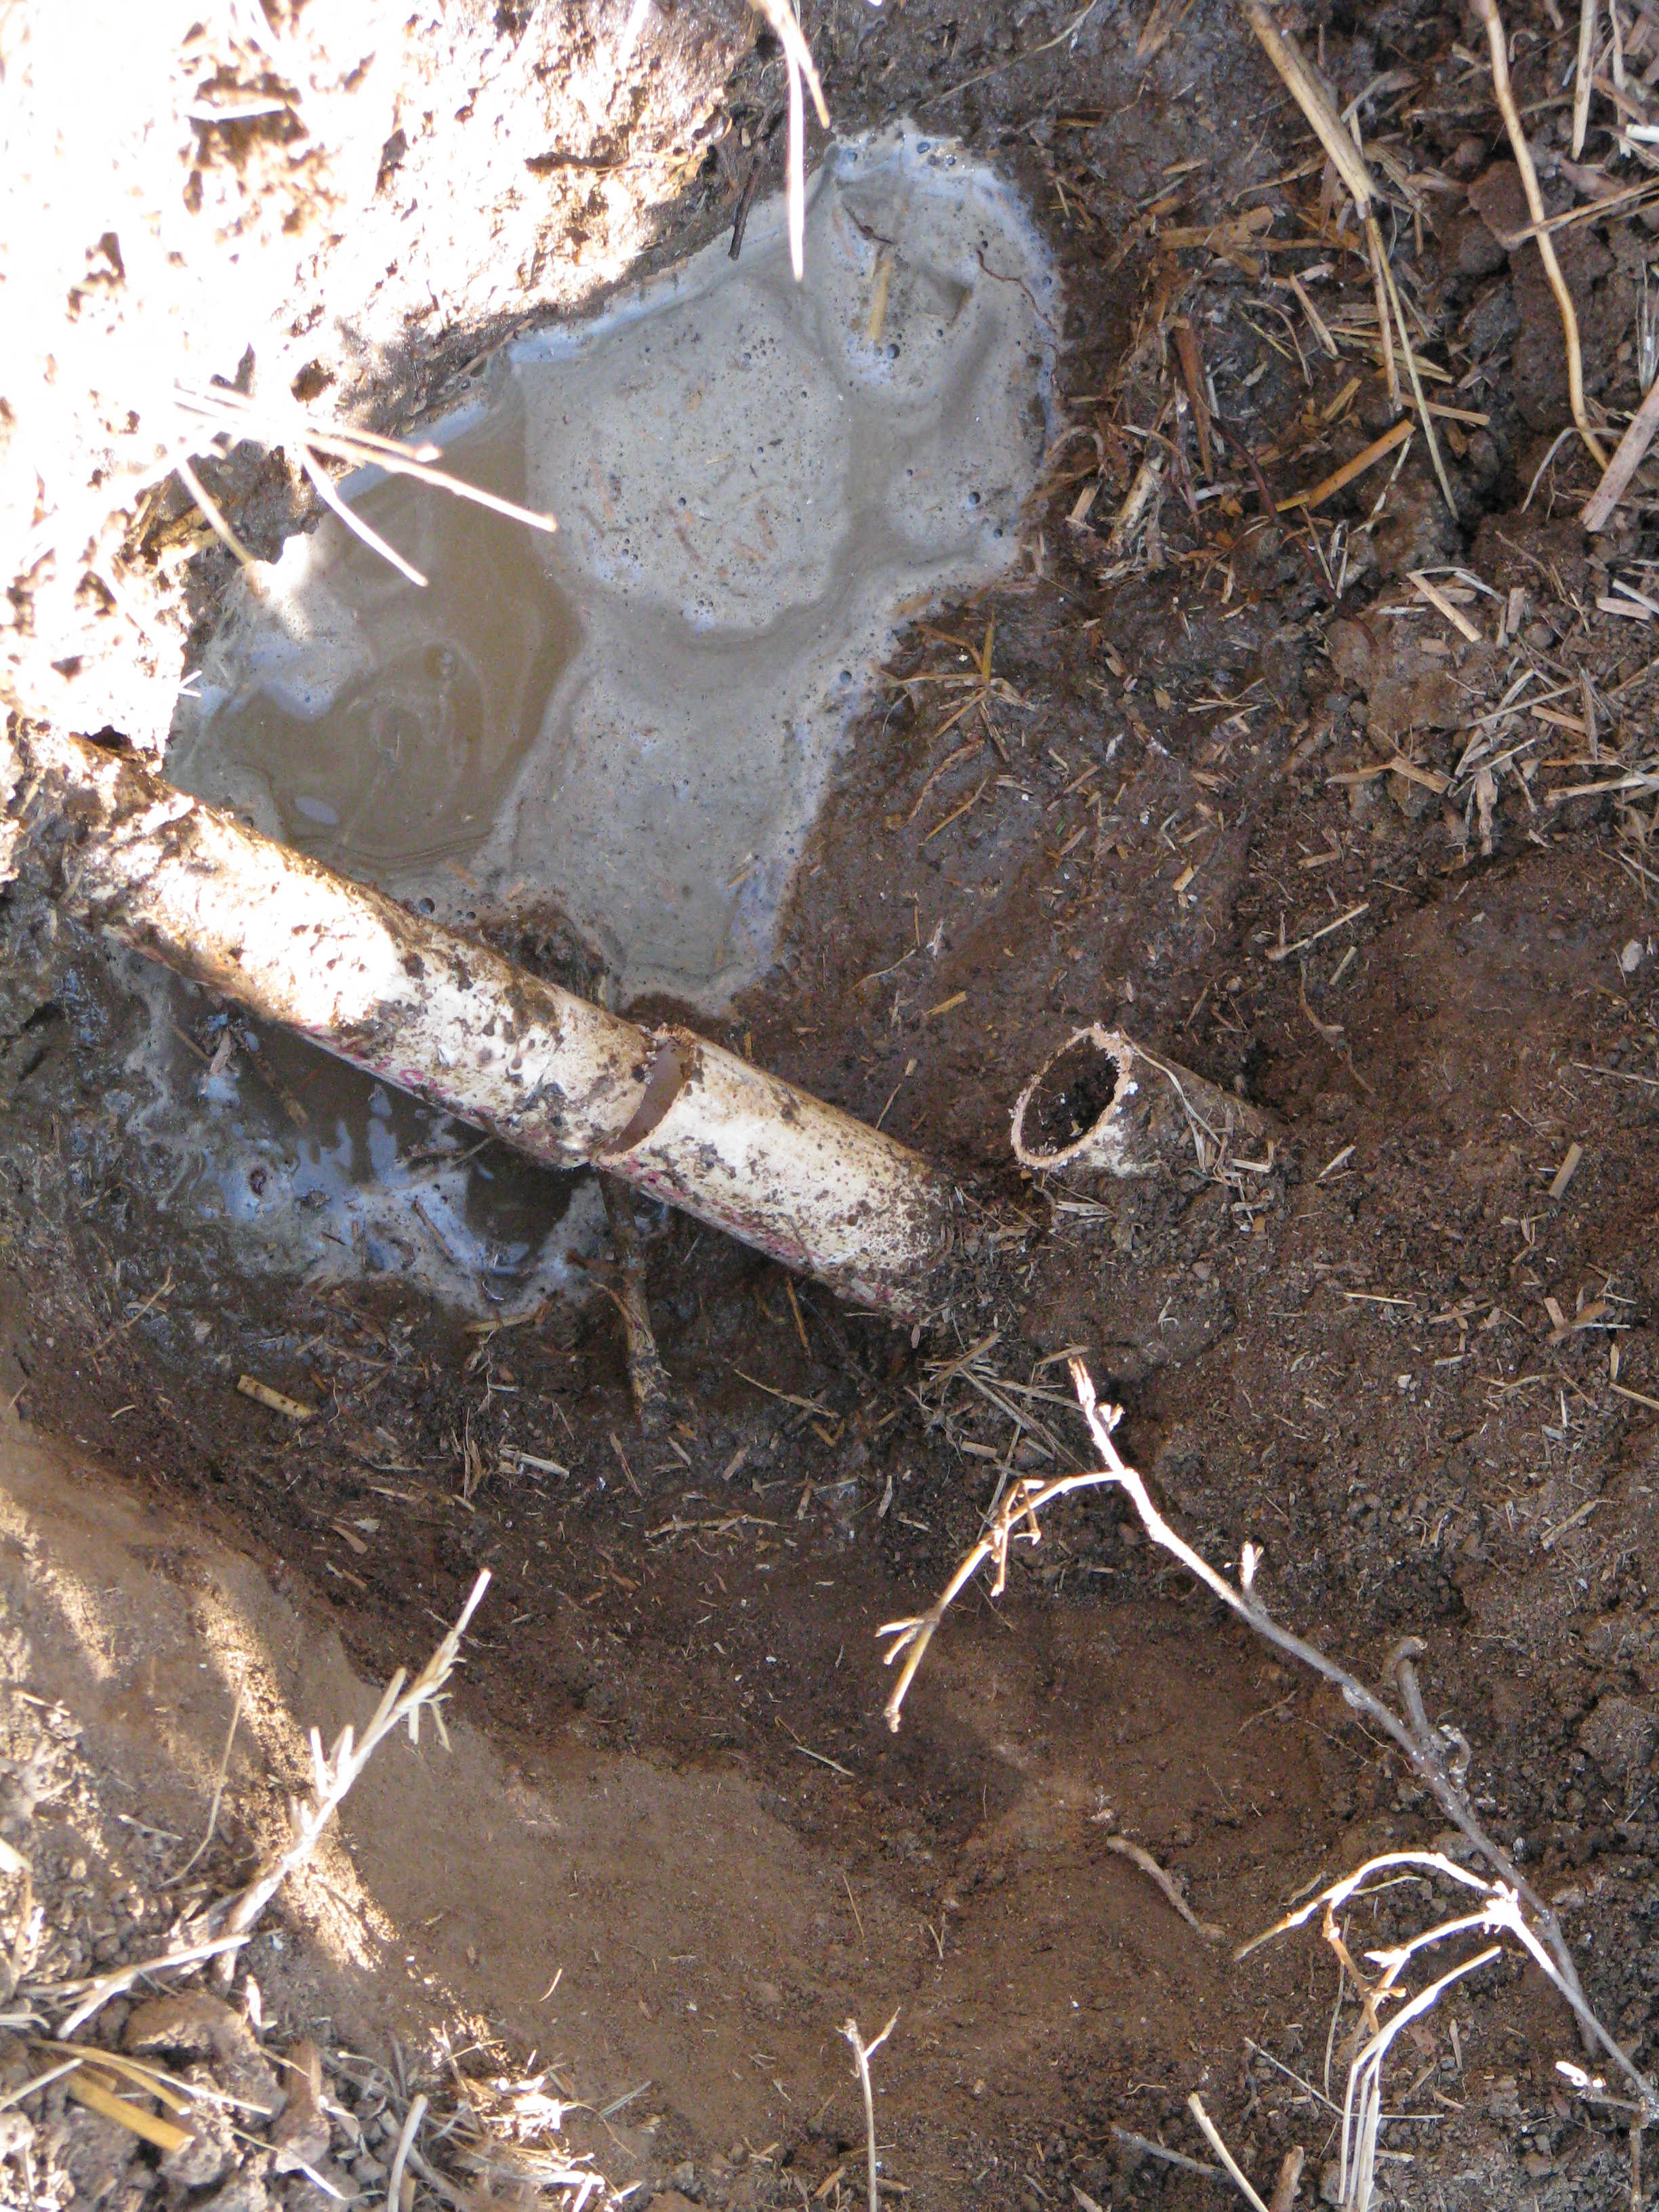
I dug up the water line and placed plywood on a leveled area. I dug up the water line, turned off the irrigation water, opened other faucets to drain and then cut into the pipe. Then I discovered the real pipe beneath this old dry one, and dug it out and cut into it, allowing it to drain as well before connecting a tee.
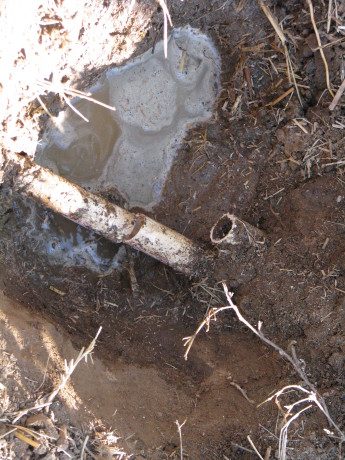
Beneath the old pipe was the real one. The hens were all pressed against the side of the coop trying to see what I was doing, and desperately wanting to search for bugs in the dirt I’d just dug up. Sorry girls.
I laborously walked the rather heavy and unevenly weighted stand (the sink isn’t in the center) over to the plywood. Then I walked it off again, adjusted, and walked it back. Then I adjusted again. Then I had a sit-down and wondered what my chiropractor was going to say.
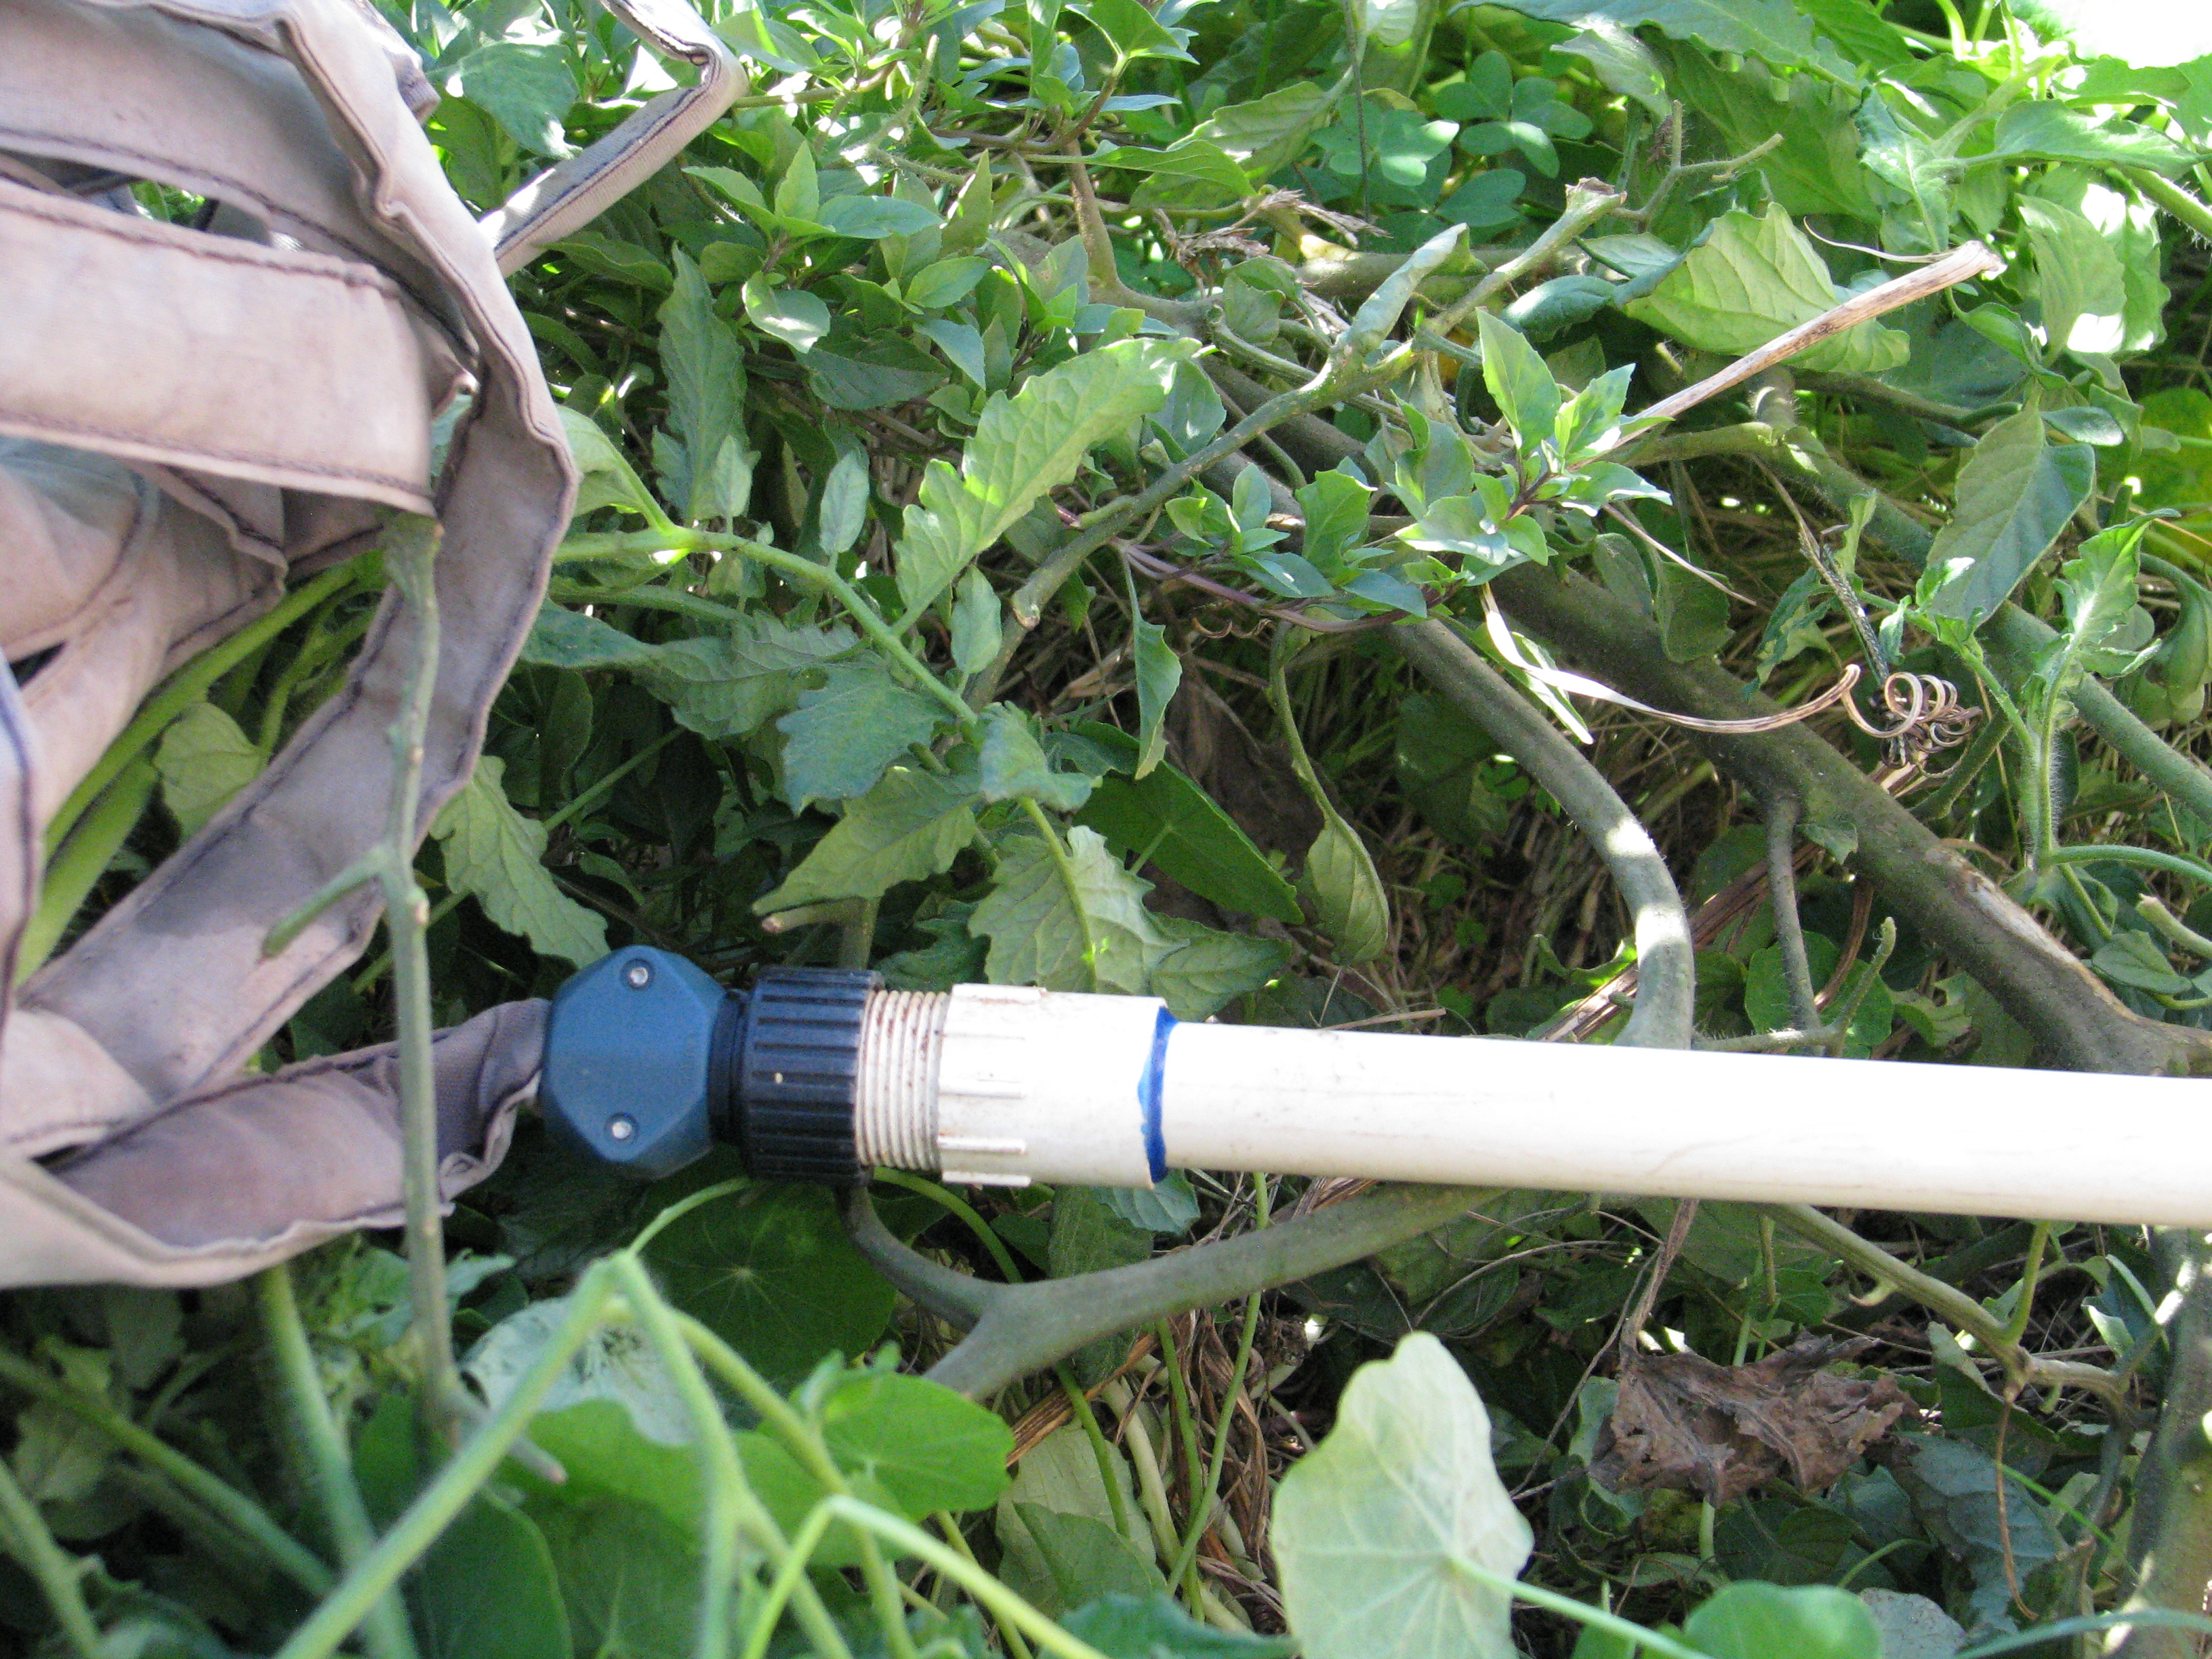
Now came the fun problem-solving part. The drains from the sink were open, so how to catch water and send it off into the guild, without spending a bunch of money? The vision came to me from out of the blue: plungers. Some people have visions of how to earn lots of money, others have visions of how to change the world for the better. My imagination provides me with plungers. Yep.
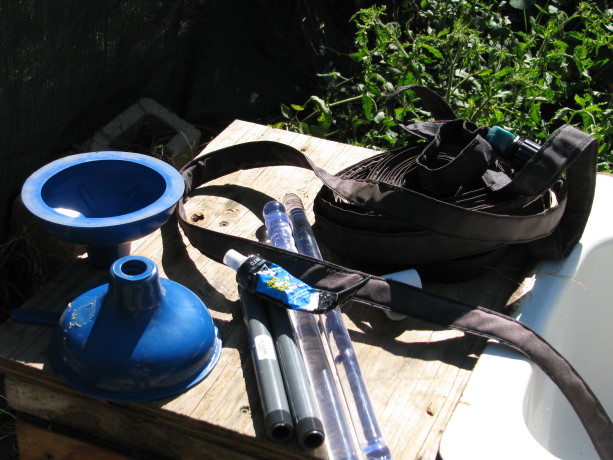
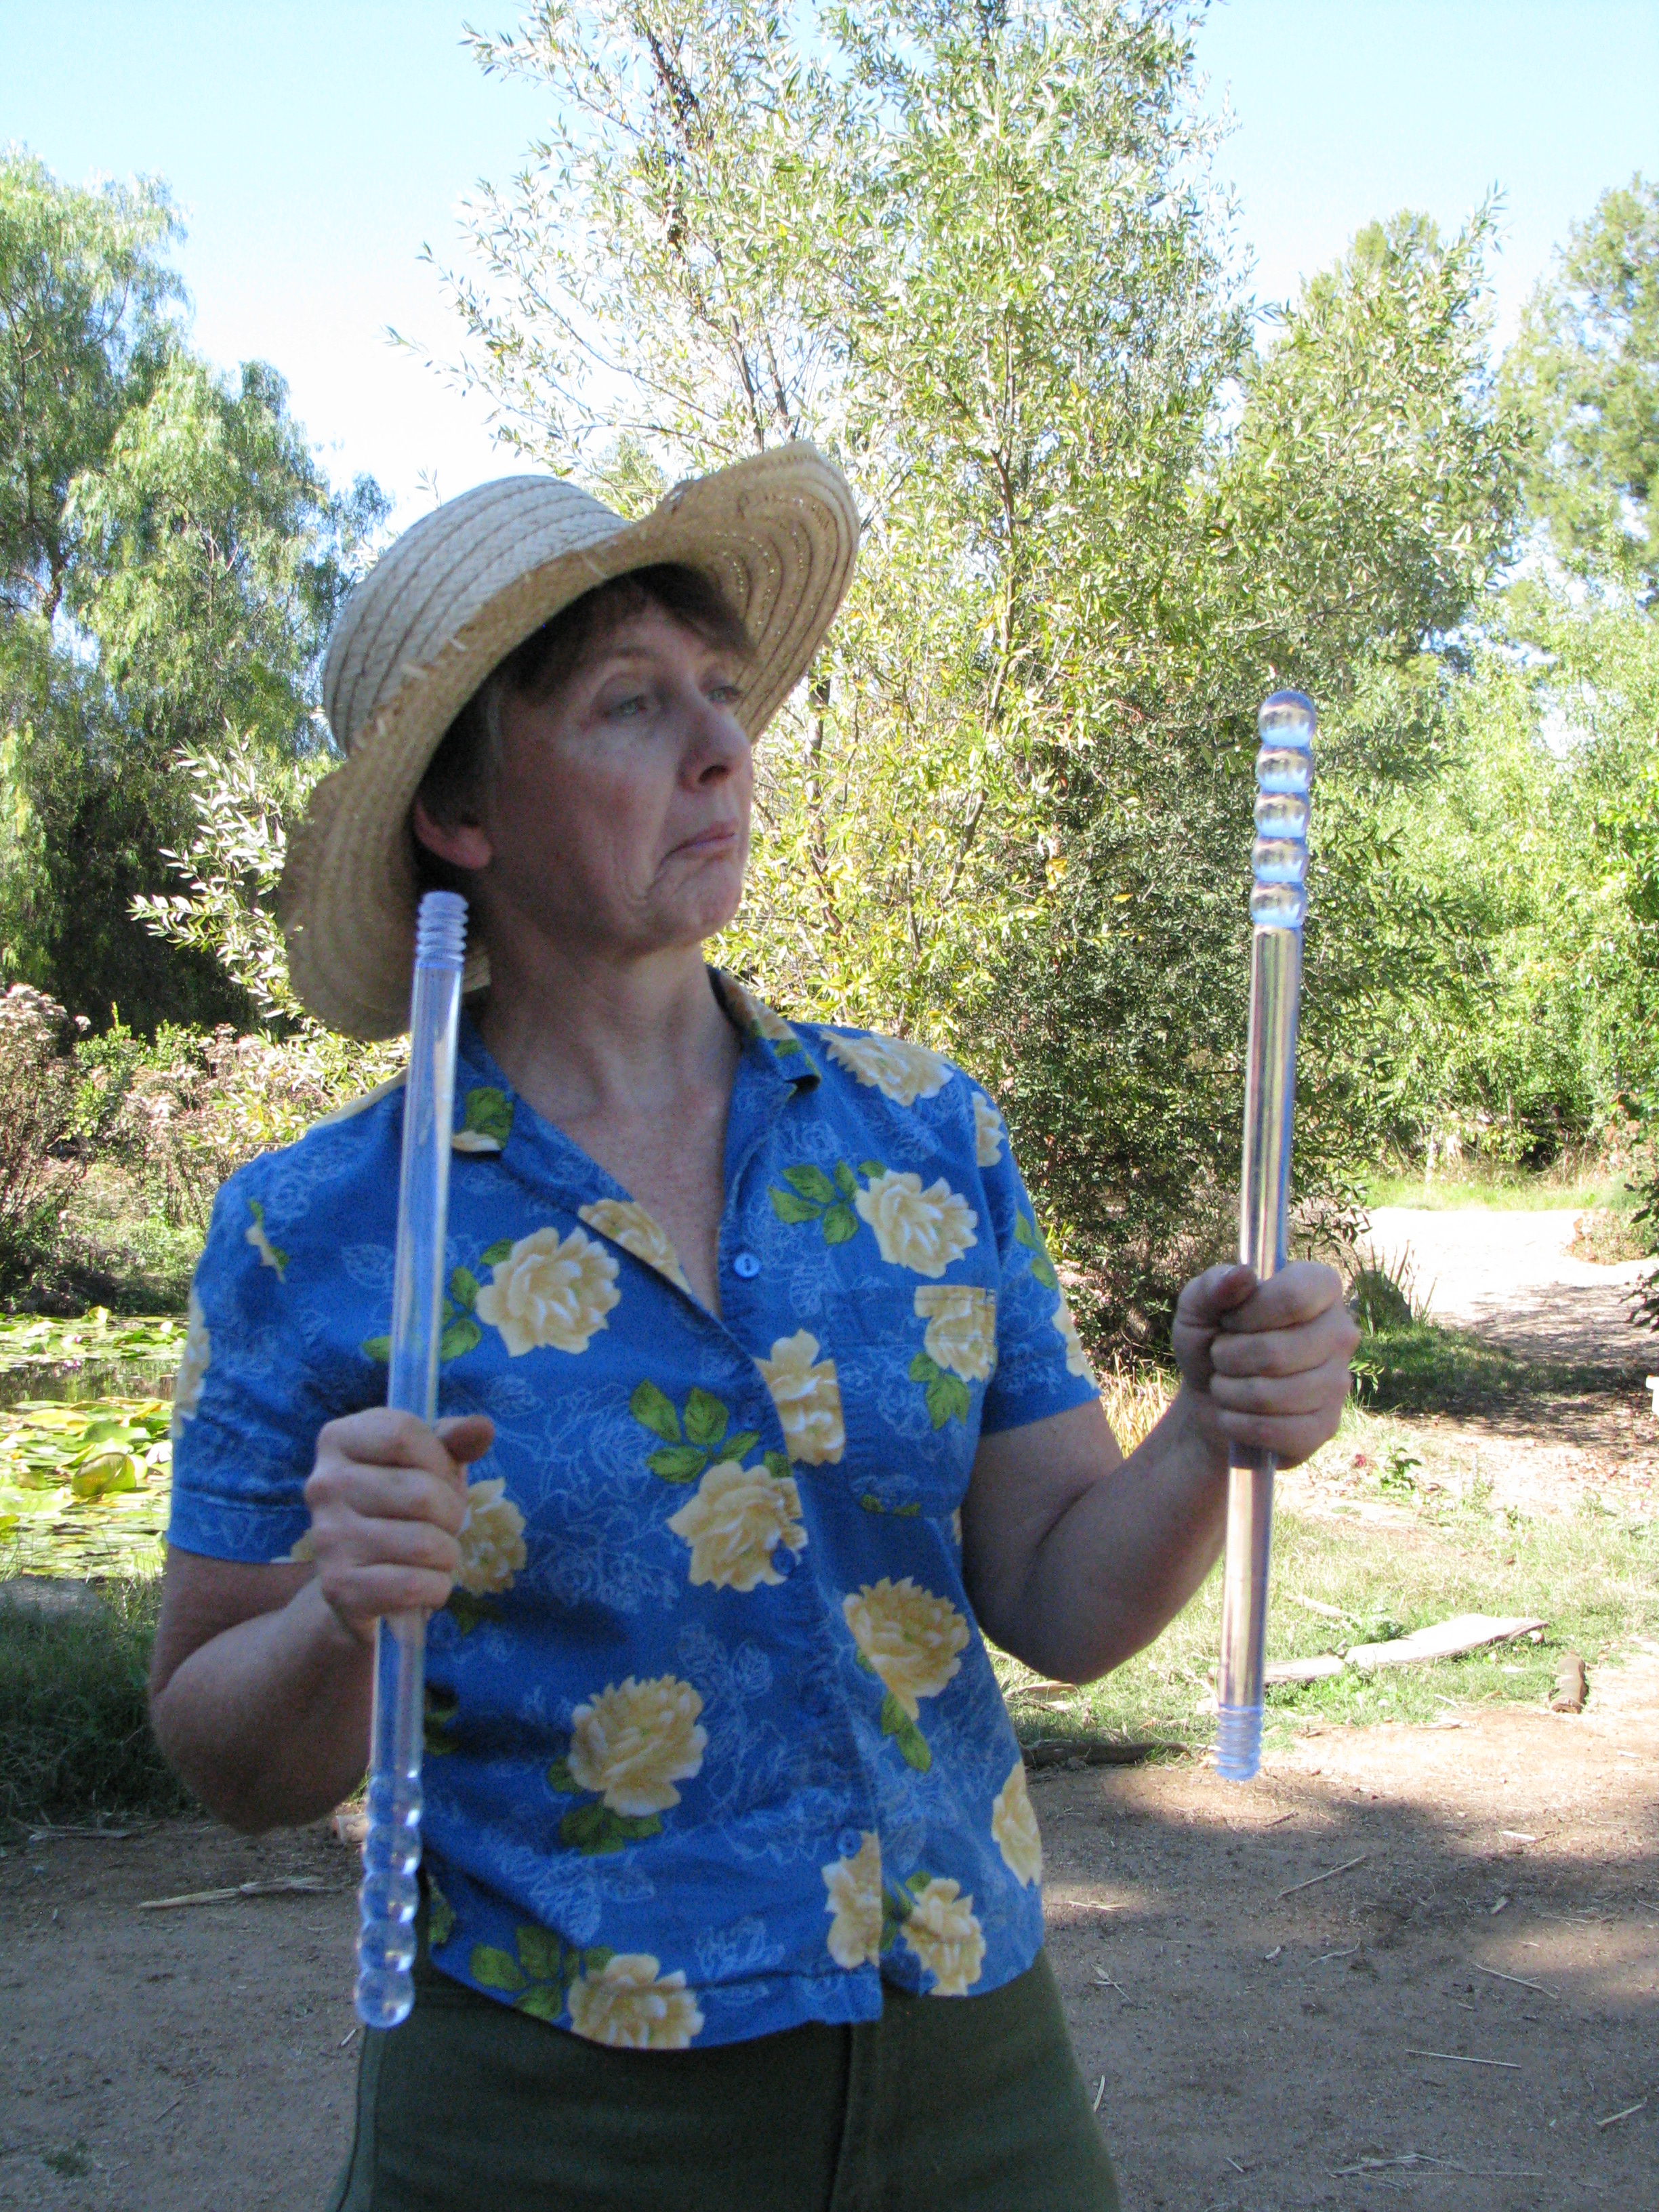
Supplies. I learned from my collegiate daughter, and the hardware store cashier, that plungers were nicknamed ‘magic wands’. No matter how much I learn each day, I’m always in the dark on the important things. However, I felt pretty proud of myself and was excited to get started. I rooted through my barrel of old PVC left from the former owners (I’ve lived here over 14 years and the PVC was already old then) and through my fittings. I only needed a couple new fittings and the plungers from Joe’s Hardware. The plungers had blue cups and clear handles, not the wooden-handled, black-cupped manly plungers of my imagination. If wizards had plungers, I could see them using these. Well this would be a female version and blue is my favorite color.
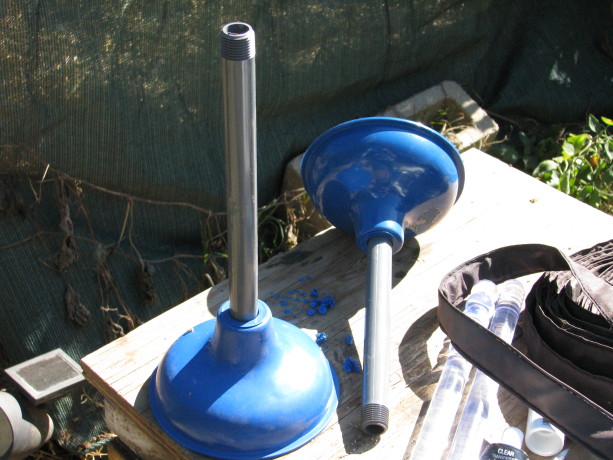
I screwed in threaded 1/2″ risers and tried them as is, but they leaked, so I put silicone gel around the threads and tried again. It worked after the gel dried. Knowing that the thread of the plunger handle wasn’t the same thread as a PVC riser (how do I know these things? Am I channeling some long-dead plumber??) I grabbed silicone sealant I had recently purchased to seal up leaks in a small fountain so that it would work during garden tours (the sealant worked, but then the motor failed. Sigh.)
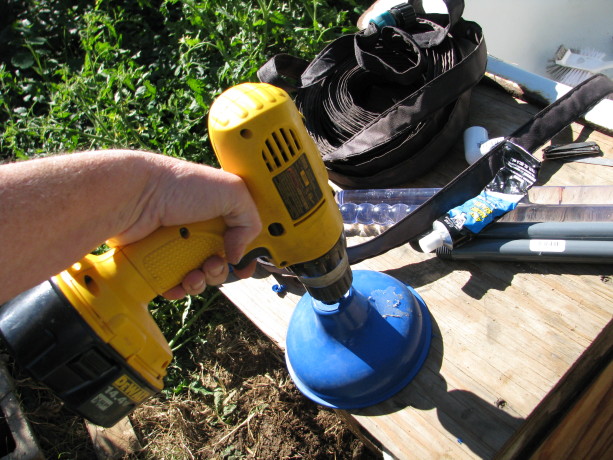
Drilling drain holes in the plunger cups. I had expected to find plunger heads and handles sold seperately, and remembered seeing plungers with threaded holes all the way through. I must have been flashing back to the cheap supplies offered to the parks department when I was a Ranger because all I found at Joes were complete, and the holes were covered (better suction). I drilled through the rubber to make the drain hole (which created some very cute blue rubber curls).
I connected up most parts, but then came the challenge, to space the plungers the correct distance apart, and measuring is not my thing. It seems simple, but it never works for me. My ginko must have kicked in, though, because I realized that I could just place the plungers over the sink holes on top and build it up there, and of course it would be the correct distance underneath.
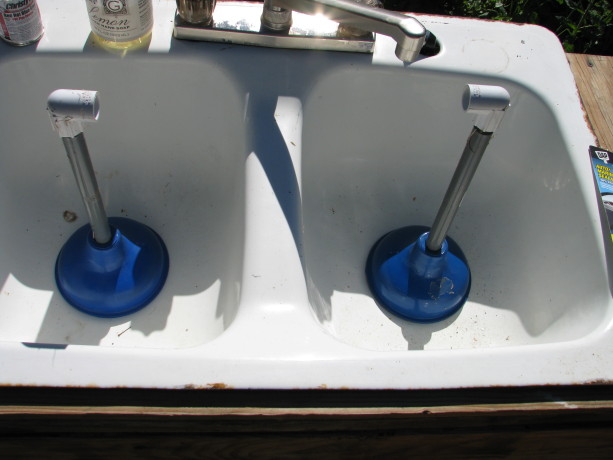
Ha! I didn’t have to lay in the tomatoes and work around the legs in the back! I could do it on top and still get the length right. I’m still proud of figuring that out.
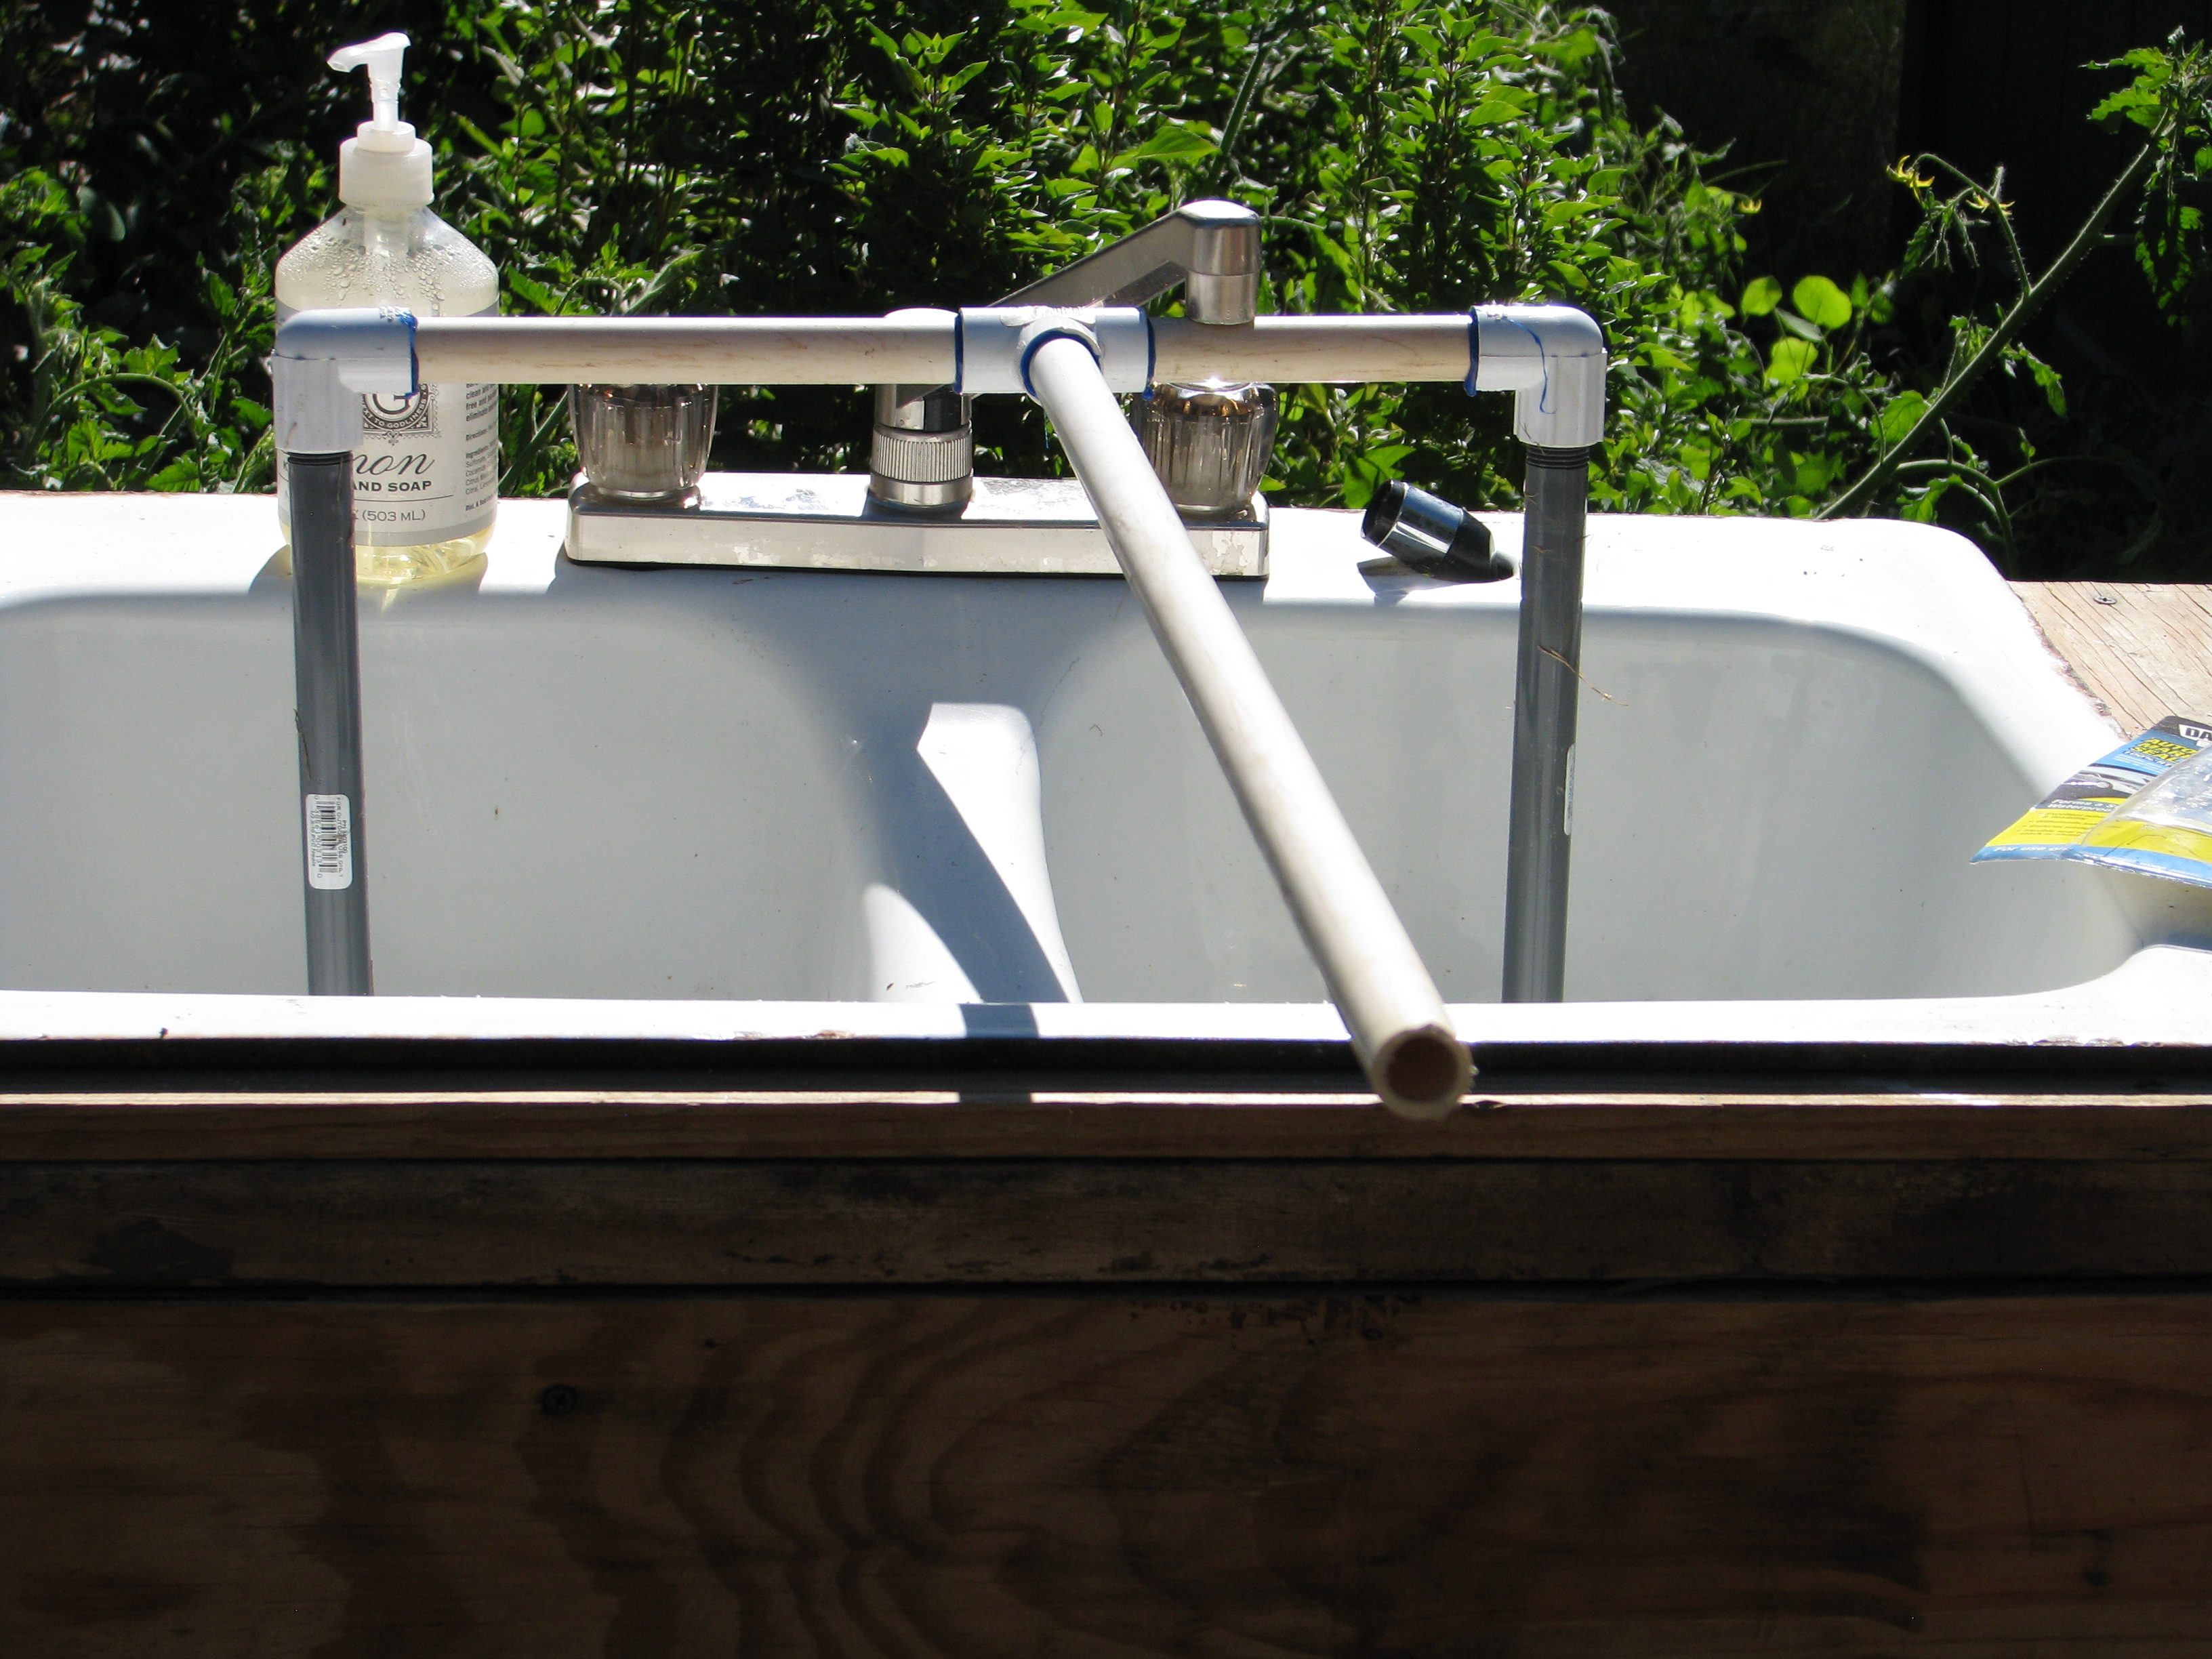
All ready to go. The trick really was to get this thing in place around the support legs behind the fishtank stand! 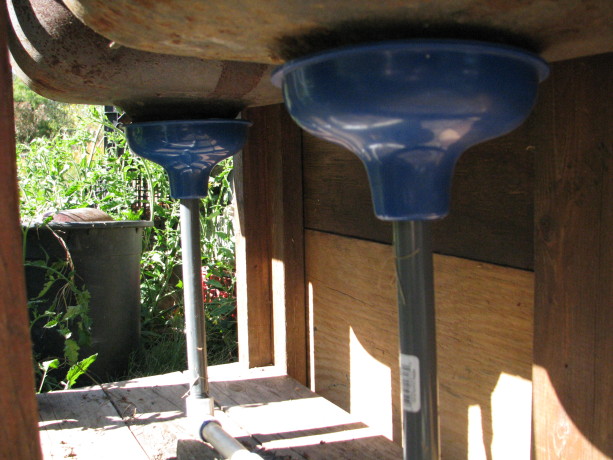
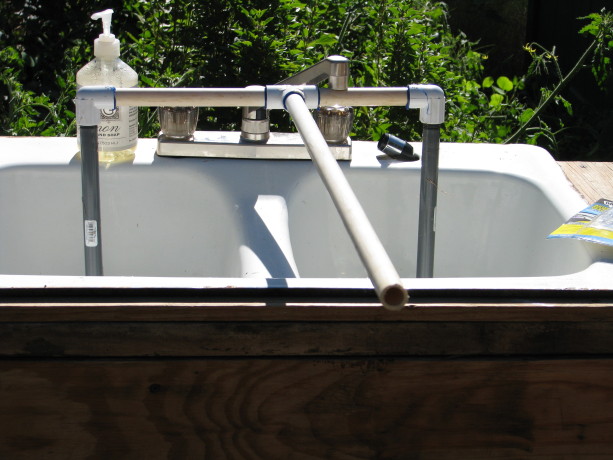
My beauties. My plan was to screw it into a soaker hose that I already had, but I worried that without water pressure it wouldn’t work. It didn’t.

The soaker hose idea failed because of the lack of water pressure, and caused the water to back up and overflow the plunger cups. I removed the screw end from the PVC and glued on more 1/2″ pipe so that the water would directly empty near the apple tree.
There were a few other tweaks, such as widening the drill holes in the plunger for better water drainage, propping the pipe up on a piece of wood so that it fit the drains more securely (it isn’t fastened onto the stand so that if I had to access the plunger cups I could do so easily), and placing screen over the drains so no one would lose a ring down into the device.

Now the water drains directly into the bed. Tip: glue the long pieces on once the main part is in place under the sink. Plants will grow up around the back of the sink to hide it from view. Now it all works, I have less work to do, no yucky buckets to haul, the apple tree receives greywater, I repurposed several items and although I had to buy a few things, I supported a local business, the sink is in a better location, and I like the blue color of the plunger cups.
Best of all, now I have some snazzy clear handles to use for some other project!

Hmm. Threaded magic wands! I wonder how I can repurpose these beauties?! -
The Mock Pavilion

The ground is covered with straw now, and the passionvines have grown about a foot in two weeks since this photo was taken. It was clear that if I wanted to have any group of people over in the summer and have them survive, that I’d have to have a shade structure. I have an EZ-Up, which is anything but easy especially when going down, but the shade it provides is minimal and only appropriate at high noon. I had a look at the line of Eugenia trees right behind Harry Mudd, the cob oven. The trees had been planted by the previous owner to block the view of the horrendous piecemeal sheds he’d nailed together (most of which have now become walkways and structures). They had been trimmed up during the removal of the sheds to giant lollypops with floppy arms. Floppy arms that often broke under the weight of the fruit the trees bore. I thought that some of these trees could make a good gazebo. Click here to learn about the benefits of tree trimming
I talked to Steve about it. Steve works on my ponds and irrigation, and now just about anything else I need to have done since he is skilled in carpentry and other talents which I am not. Steve cut down some of the trees and for some he used professional services – check this link right here now, brushed them and we discovered that they weren’t very tall at all.
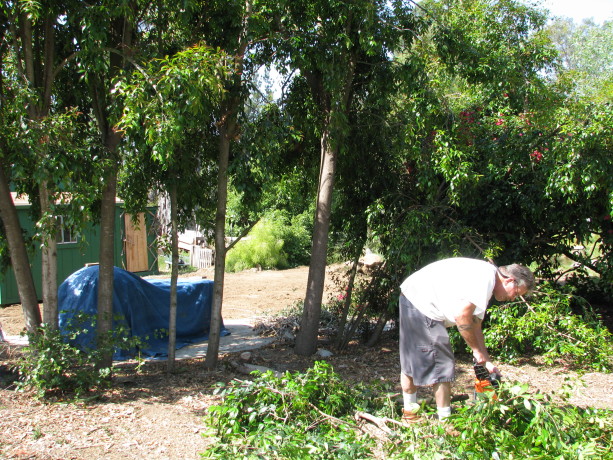
Steve cutting down some of the Eugenia. Harry Mudd is covered with the blue tarp. At the time I was touring a new friend through the garden who offered some very long cedar logs. Here began a fiasco having to do with hauling a trailer, misunderstandings, and a lot of very heavy long logs which weren’t used and now need to be returned, but I will not explore that here.
I had a garden party planned; the first large party I’ve ever had. I thought that the end of June would be a perfect time before the hot weather hit. Life laughed at me and began a series of intensely hot days more associated with the end of July. So I told Steve to just buy the wood and build the thing. He did, and I covered it with some very expensive shade cloth. By two of the pillars have been planted red passionfruit vines. When they grow to the top, I’ll replace the shadecloth with wire so that the passionvines can become a living shady roof with fruit dangling down.
This structure, along with some borrowed EZ-Ups, saved the day for the party, which had temperatures in the low 90’s (lower than anticipated, thank goodness!). The structure is similiar in look to the Fowl Fortress, so it doesn’t seem so out of place, and it is very comfortable to be under during this intense summer.

Nice and cool, with easier access to Harry Mudd. Why the Mock Pavilion? Perhaps because it isn’t really a pavilion, just a large shade structure with a piece of plywood over a couple of wooden pallets as a stage. Really it is because Steve’s last name is Mock, and I couldn’t resist.
-
Wreaths from Scratch

Pine wreath. I haven’t bought a cut tree in ages. I used to buy a live tree, but after so many years of hauling in the heavy 15-gallon container while being face-whipped by the branches, I finally bought a very lovely fake tree about eight years ago or so. It works well, except it doesn’t have the fragrance of a real tree. In the ‘old days’ I could gather cuttings from tree lots, but the sellers caught on and now sell them or use them for wreaths themselves. I’ve been buying a wreath from Trader Joe’s which smells nice for awhile but is pretty expensive for just some branches.
This year my daughter and I used bits of plants that we trimmed as we pruned our fruit trees. Some pine branches had been left unshredded in the huge mulch piles I nabbed from my neighbor’s tree trimmer after they topped (shudder!) all his trees.

Pine branches that missed being shredded from the neighbor’s tree butchering (I grabbed the mulch for my yard!) A large eager rose had hung some large lovely hips low over the pedestrian gate and needed trimming back.

Fourth of July rose hanging low over the gate. A rosemary bush was encroching on a fruit tree and was cut firmly back. We cut some willow and sage as well. So one night last week my daughter and I had a ‘craft night’ and on spread newspaper with the help of wire and old wreath frames made three wreaths, a centerpiece and a huge mess on the floor.

A fragrant rosemary wreath studded with rose hips and some sage seed pods. 
Pine needles and cones with rose hips. Love to hang my Christmas cards! 
Curly willow cuttings woven into a wreath and studded with rose hips. My daughter is very creative. We had a lot of fun, and the wreaths smell of herbs.

Leftover rosemary became a centerpiece with the help of a small piece of firewood and some pinecones. What can you do with what you have growing?

My daughter hanging the willow wreath while Viola the hen gives advice (its past her bedtime. The hen’s, not my daughter’s.)