- Building and Landscaping, Gardening adventures, Heirloom Plants, Natives, Perennial vegetables, Permaculture and Edible Forest Gardening Adventures, Rain Catching, Soil, Water
Irrigation for Drylands, Part 2: Evaluating your System
Miranda in the roses gluing pipe. If you have an existing irrigation system that works, you may easily convert it by adapting the heads for whatever you want to plant. Many lawn conversions I’ve designed utilize the existing spray system, particularly for natives, but with a different watering schedule. Don’t spend money when you don’t have to.
If you have an old grove that is to be converted and downsized, you’ll usually have far more pressure in your system than you need for smaller heads which may cause them to blow. Working with an irrigation specialist for the valves and pressure is advisable. For this re-irrigation project of Finch Frolic Garden, I found Vista-based John Taylor of Taylor-Made Irrigation and Landscape, 760-945-0118. He’s the first person to listen to and consider what I have to say, based on my experience with the old system, and he adapts to different situations. I’ve learned some cool new things that I will pass on to you, and he’s enjoying learning permaculture techniques, which will help both him and his landscape clients.
Here’s a little world-weary advice from someone who trusts too easily: Many professionals no matter what their field have one set way of doing things that they apply to every situation, be it irrigation, plant selection, tree trimming, construction, etc. (My neighbor has his poor coral tree topped every year. Topping trees is a bad practice. When I asked him about it, he said that his tree trimmer has been topping trees for years and recommends it, so he’s talking his expert advice! Do you see the problem here?) You, I’m sure, have dealt with these people too. Every situation needs a different solution, so look for someone who is flexible, listens to you, can offer several solutions with various price ranges, and who will give you a detailed estimate up front. Jobs will always run over, but they shouldn’t run too much over and the professional should be determined to keep on budget, and honest with you when there is an overrun. If you ask a professional to do extra things, the new tasks will need to be added on to the original contract because it will take up part of the time allocated towards the original project, so the project completion date will be moved ahead, and will add on to the total cost. On the other side, if your professional adds on projects that he thinks you’ll like, and you give him the verbal okay, realize that he’ll be working on those projects in addition to the original tasks, so it will take longer and cost more than the original contract. Look for people who don’t consider telling you their life story part of the time for which you are paying. If you tell them your life story, remember that they are on the clock and you are paying for that time. (I’d rather deal with a quiet, focused professional than a chatterbox who will talk more than work. If he’s not talking to you, he’s probably on his phone a lot while on the job.) Look for neat vehicles with organization, letterhead for estimates and invoices, someone who shows up on time when they say they will, and stays until they are done. They should schedule in their lunch; if they work through it they are not going to work well for you later in the day, and its unprofessional. Its okay for professionals to handle several clients at one time, but only if they are well organized and are eager to finish your project on your timeline. Contractors are infamous for tearing something apart the first day, then disappearing for days or longer holding you hostage while they work on other projects. Its okay to ask about all of this, and really important to read reviews. Don’t always rely on people your friends have recommended; I’ve had both really bad and really good referrals, so make up your own mind.

Extreme mineral buildup in a PVC pipe. Photo from http://www.marinechandlery.com/. Back to irrigation. Most irrigation is PVC, the white plastic pipe. If you have old buried metal pipes they should be examined for leaks. Mostly they will fail to function due to mineral buildup due to our hard water. The inner diameter of the pipe closes; if you’ve ever cleaned your shower head or seen house drains with the thick white inner coating, that’s what I’m talking about. It will slowly dissolve in vinegar, but the vinegar must remain in the pipe to soak it for awhile, then blown out an open riser to get rid of the chunks. All sprinkler heads must be decalcified as well. Often the buildup is so old that the pipes are deteriorating and just need to be replaced, usually with PVC. The galvanized pipe can either be left in the soil to gradually rot, which is fine, or else be dug up and sold for scrap. The labor cost involved with digging it up will probably be more than what you’ll get for scrap.
Here’s some understanding of water. The reason why domestic (potable) water is chlorinated is not to purify the water. That has already been done before it gets into the delivery pipes. It is to keep biomass from forming inside the water pipes. Biomass is any type of growth that forms, usually in wet conditions. Think of algae inside a fish tank or on the inside of a pool. Biomass is nature’s way of filtering and softening hard surfaces, and in nature is essential. In man-made pipes, the biomass can not only harbor things that can make humans sick, but also slows the flow of water. Garden hoses have some biomass inside of them, and any rough part will slow the water pressure. Lengths of any kind of pipe are the same. The longer the pipe, the slightly less pressure you’ll have. Pressure is important because you want your sprinkler heads to spray, not just dribble (unless you set them for dribbling). Pressure regulators are set in sprinkler heads, Netafim, and valves to keep lines from blowing out under normal pressure. If you don’t have an irrigation system set up for a large grove or large grasslands for animals, which require enough pressure to shoot water great distances, then you shouldn’t worry about the lines blowing out. But understanding about pressure and the effects of biomass and distance will determine what size pipe you lay.
Most people use domestic water for irrigation. Some rural areas have agricultural water available for commercial growers. Some people have well water, which is what I have. Well water has not been treated, so whatever has leached into that water is what you are delivering to the topsoil. Have your well water tested for contaminants and salts. You should have a filter after the pump on your well. However, our heavy-mineralized water will form a oozy barrier around the diaphragms in valves. If debris or too much of this slick mineral buildup accumulates, the valve won’t ‘seat’, or seal, and will allow some water to seep through the pipes even when the valve is off. This has been a huge problem here at FFG, and one which several irrigation ‘specialists’ have completely denied. They deal with treated water rather than well water, and just don’t understand. Some valves have diaphragms that can be very carefully cleaned and replaced, but not frequently before they are damaged. If you have a well, check with an irrigation specialist who has real-time experience with well water and valves to recommend the appropriate valves and filter system for you. I’ll talk more about the ones John recommended for FFG in a later post.
Large-diameter pipes will carry lots more water more slowly. Small-diameter pipes carry less water more quickly. If you lay out large diameter pipes from your valves, let’s say 1″ pipe like we’re using at FFG, then you can reduce the size of your pipe gradually to your sprinkler heads and that will be the best of both worlds. You will have volume of water and increased pressure. So John has recommended that we use 1″ PVC from our valves, which are connected to the well with 1″ PVC already.
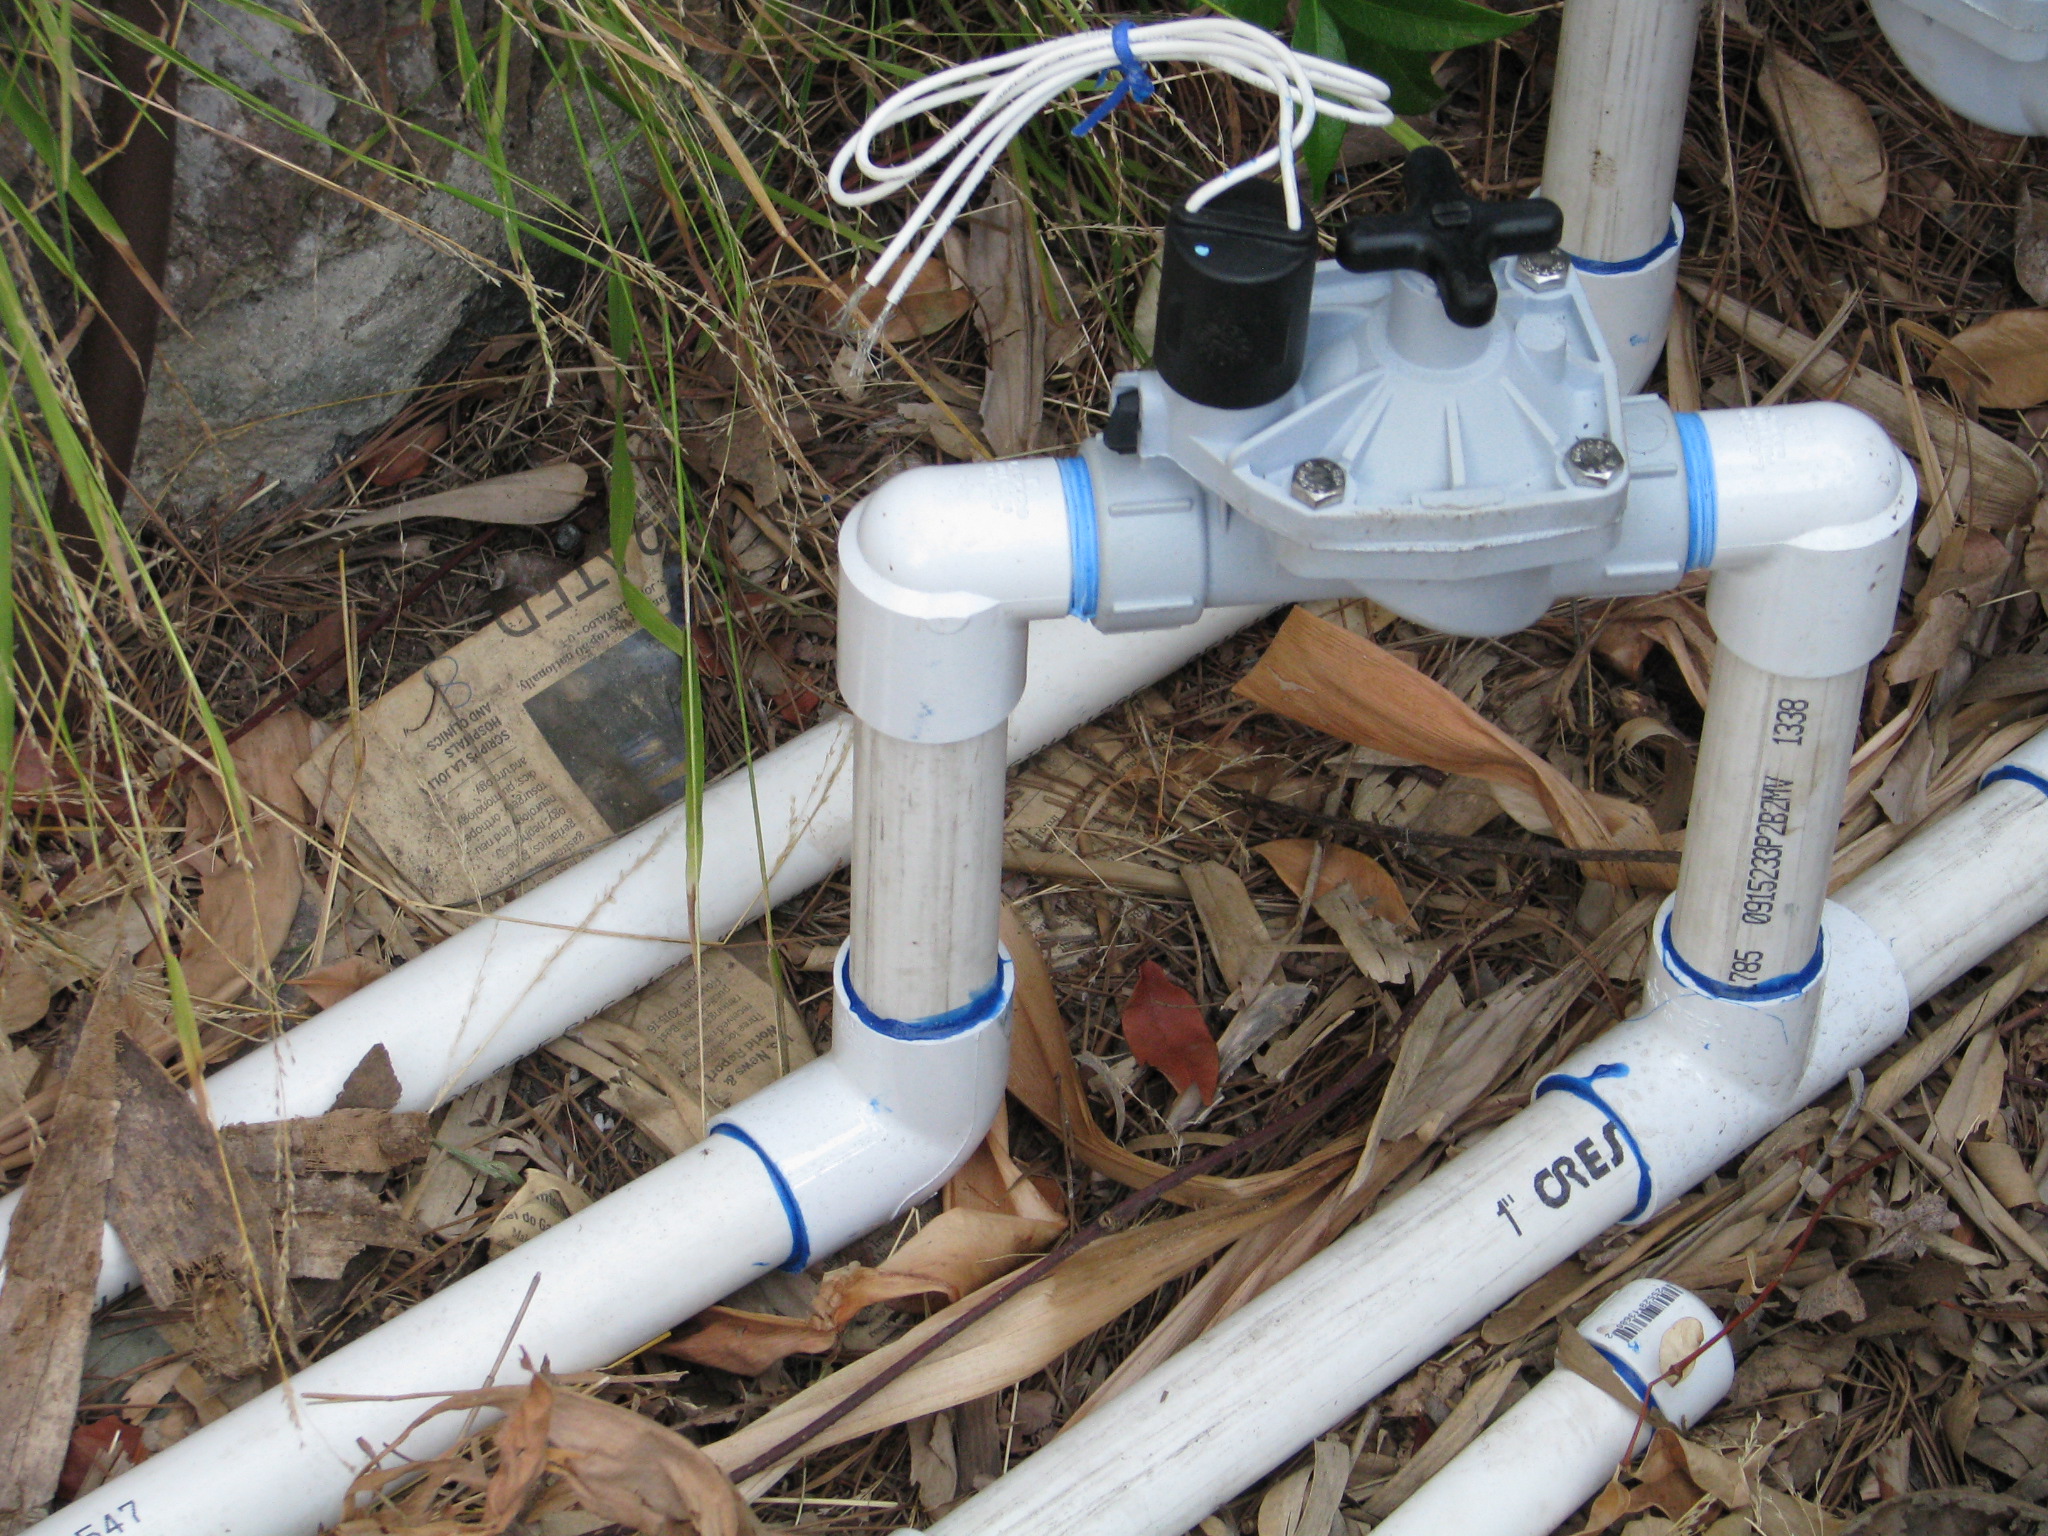
One-inch PVC runs from the valve. Then we reduce the pipe to 3/4″ at the nearest T, or closest to the first sprinkler head.
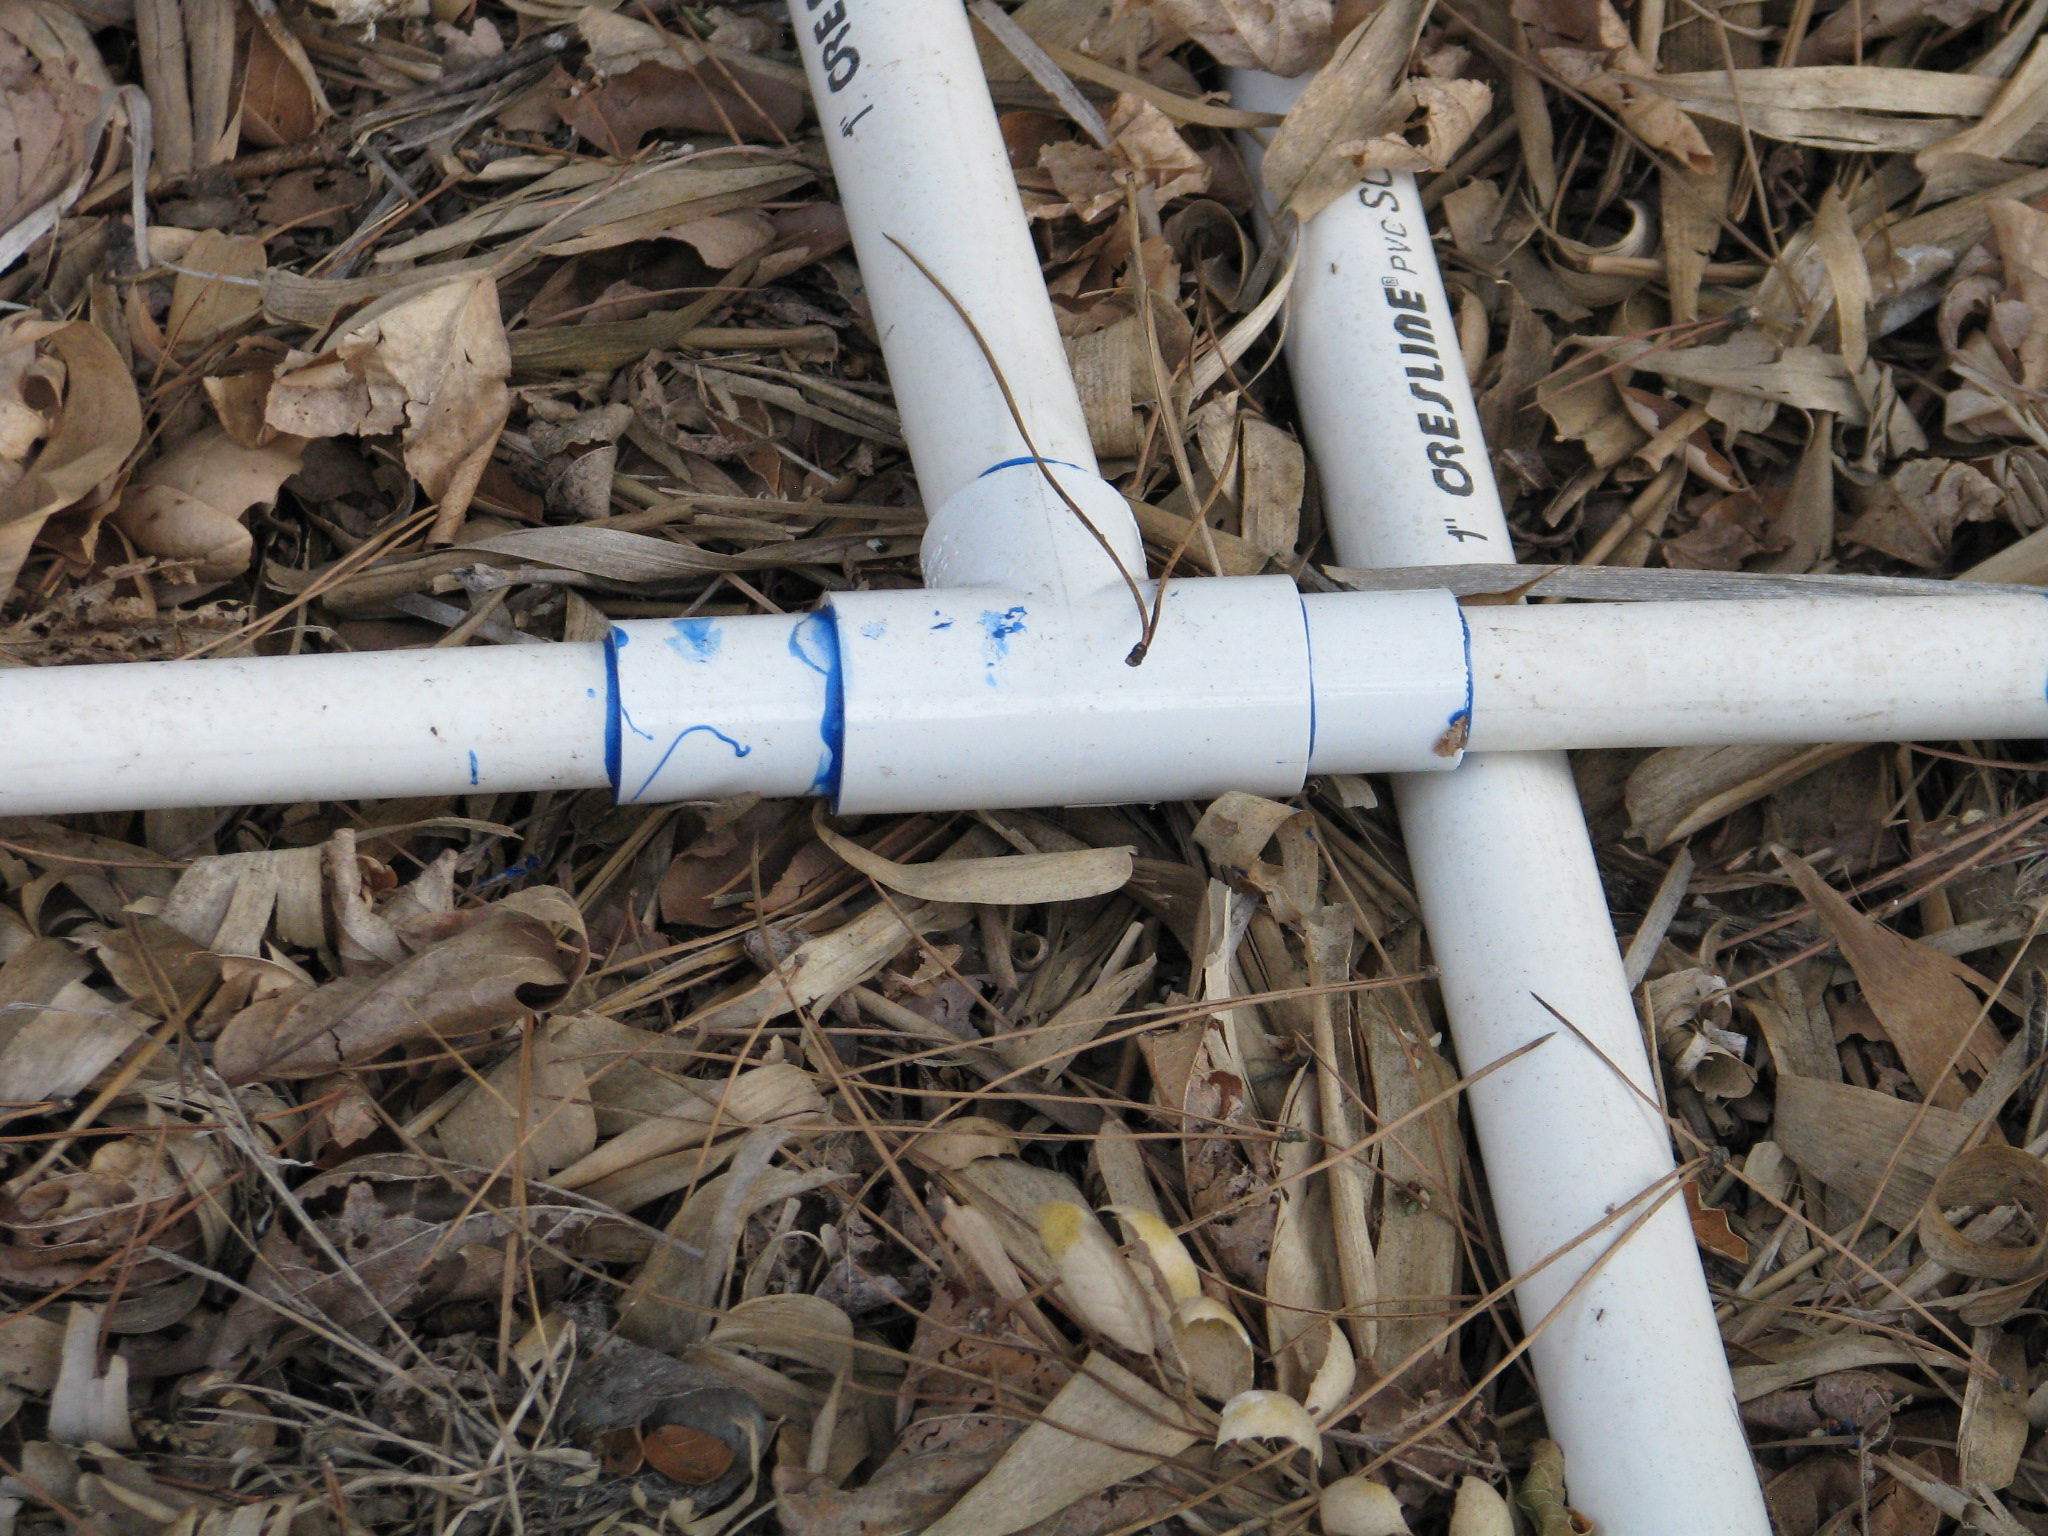
The one-inch pipe is then reduced to 3/4″ pipe at the first T, close to the first sprayer. Then the sprinklers are reduced down to 1/2″. Since our well is at the bottom of our slope and water needs to be pumped back to the top, this design really helps keep the topmost systems pressurized.
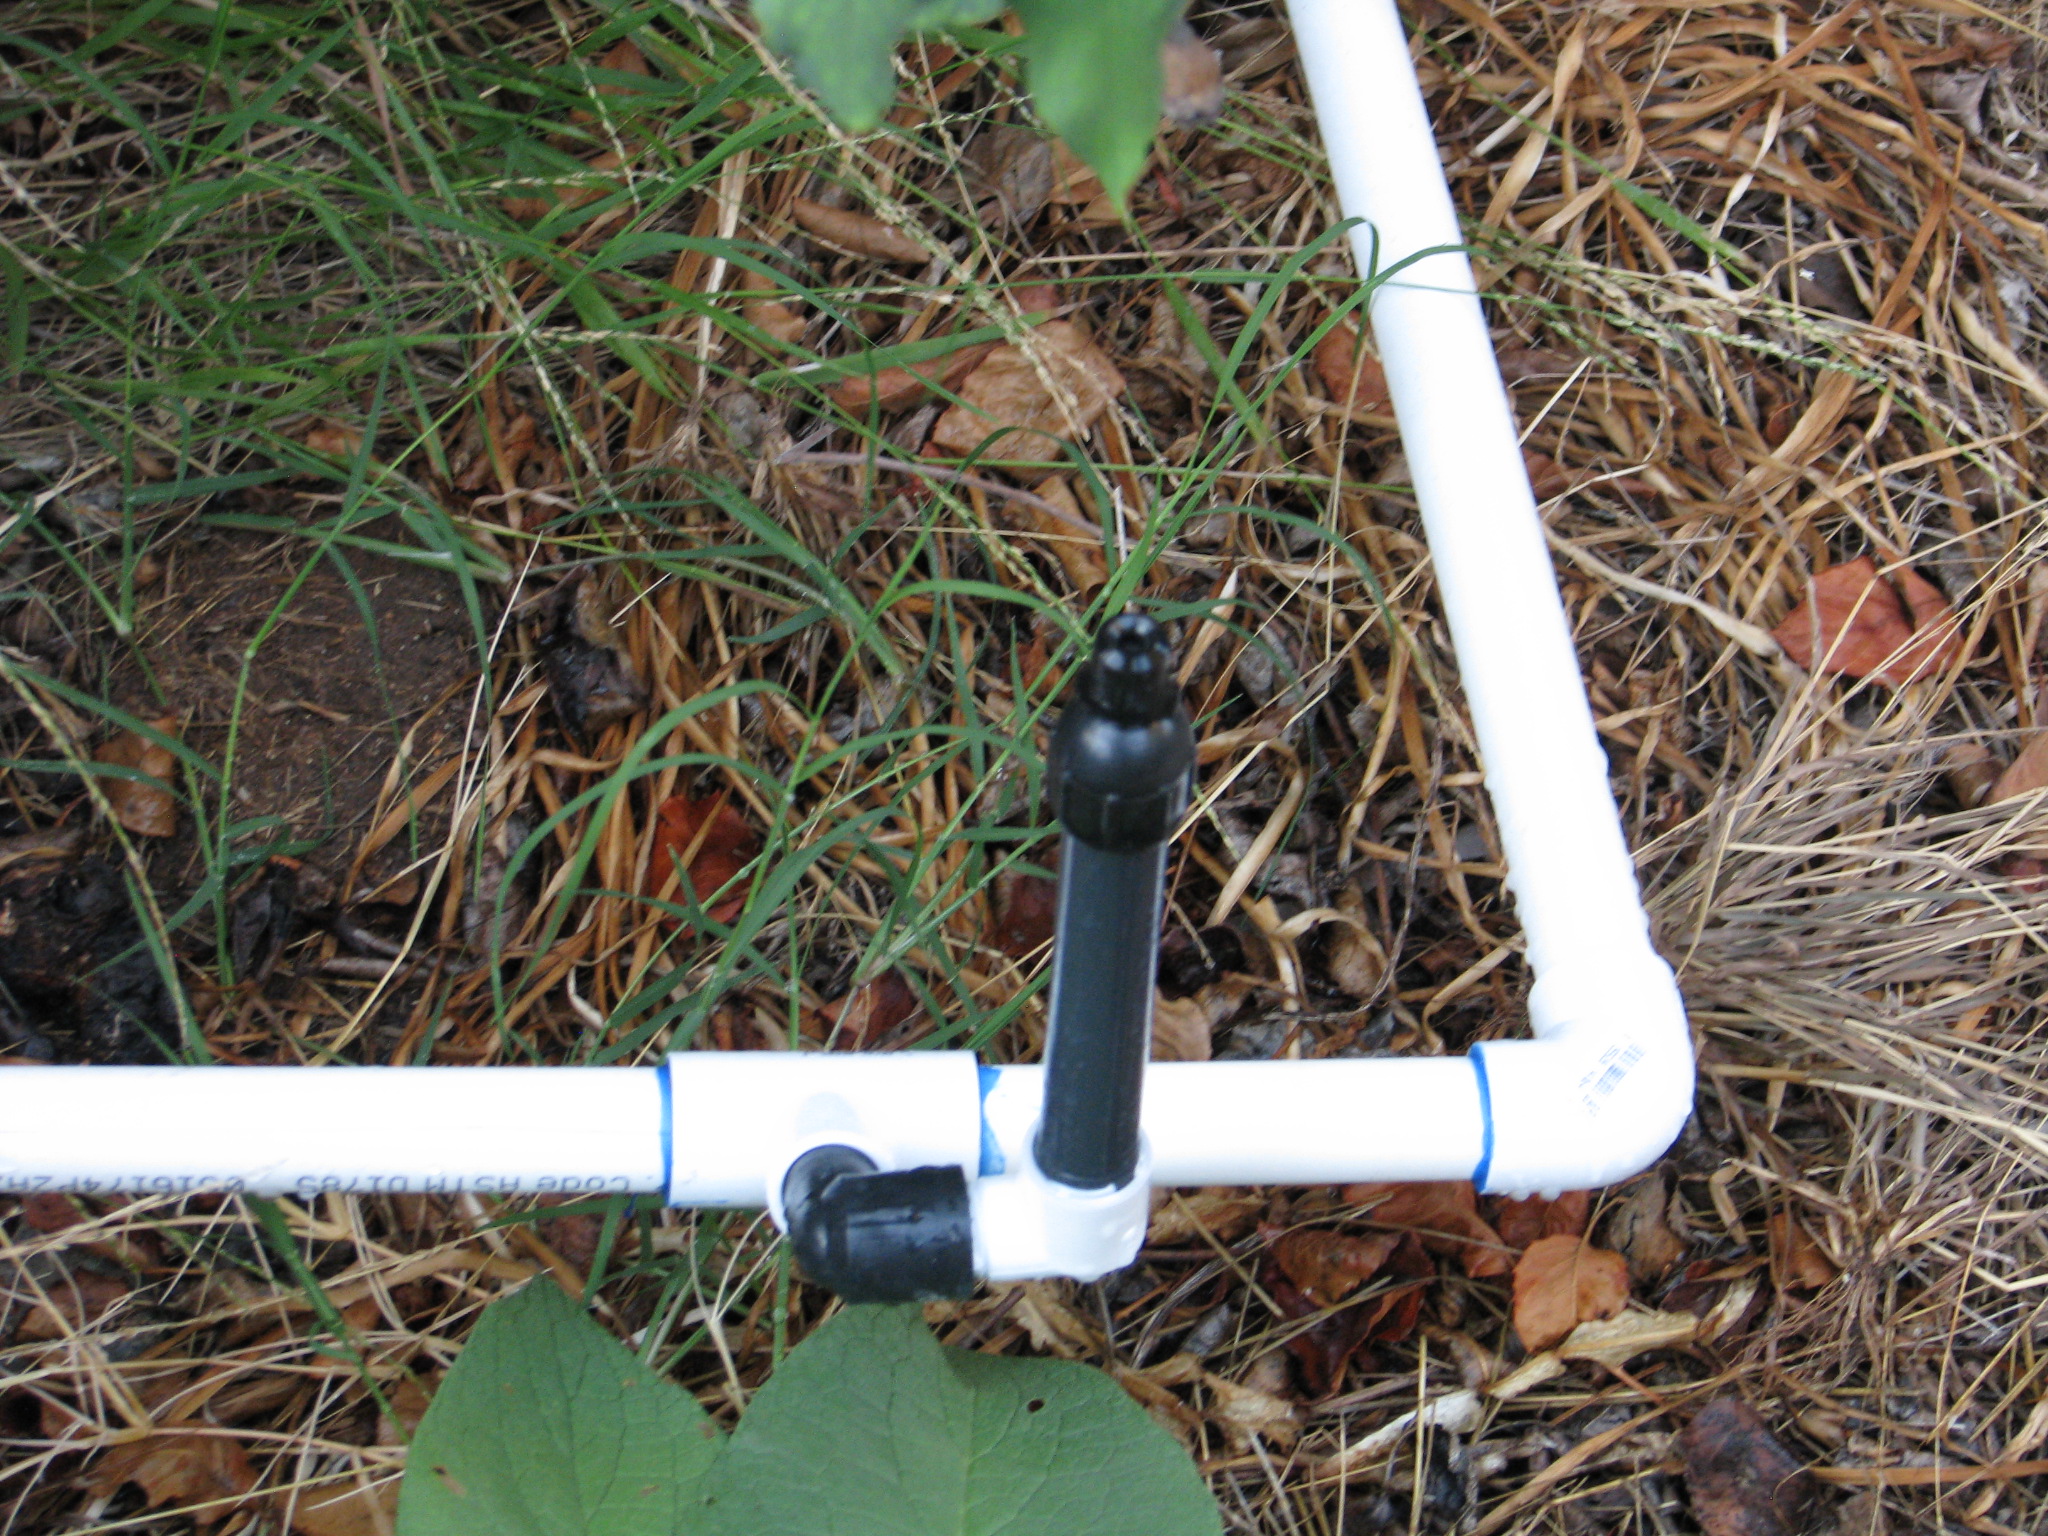
This sprayer is reduced from 3/4″ to 1/2″. So as you are laying out your garden and irrigation system, understand about slope, water pressure, volume of water and your water source. These factors all have large parts to play in the long-term success of your irrigation.
Next time I’ll discuss drawing up an irrigation plan.
You can read Part 1 Options here, Designing Your System Part 3 here , and Part 4 Conclusion here.
- Animals, Bees, Birding, Compost, Fungus and Mushrooms, Gardening adventures, Health, Hugelkultur, Microbes and Fungi, Natives, Other Insects, Permaculture and Edible Forest Gardening Adventures, Pets, Rain Catching, Seeds, Soil, Water, Water Saving, Worms
Lawn Care and Lawn Alternatives for Drylands
Drought restrictions have caused many people to turn the water off of their lawns; many have already taken that leap years ago. One of the main questions I field now is what to do with that nasty patch that once was a lawn. There are many low-water-use alternatives.
First, please don’t use artificial turf or gravel. Read about why by following the links to past blogposts.
You can have a lawn and not use as much water, and not add any chemicals to it, by understanding how grass grows. You can starting learning everything about lawn caring at ngturf.com/area-calculator/.
If you want and/or need a lawn space, make it as minimal as possible. If you are going to reseed, choose a California native seed that withstands the drought and our alkaline soil. Creeping red fescue is a good choice that grows tall and floppy unmowed, but is a walkable/playable lawn if mowed.
A grass plant spreads at its base, not its tip. Grass needs its blades to produce food. Common mowing techniques recommend mowing low, but that is doing your lawn harm and resulting in the need for aeration and chemical fertilizers. When you mow low, the stressed grass plant needs to push lots of energy into quickly growing more blades to feed its roots. Most weeds have a growing point at their tip and with a strong weed killer it can be stopped. Mow as high as your mower allows – 4 inches if possible. High mowing allows the grass plant to keep its blades for food making, and to put energy into deep root growth and into spreading. Mowing high cuts the tops off the weeds, and the height of the grass shades out weed seeds so they can’t germinate.
Water deeply, and less frequently. Catch an inch of water in a cup set under your lawn irrigation and shut the water off. Don’t water again until the grass shows that it needs it. Constant irrigation, especially on short grass where the soil is exposed, and rainwater on bare earth is as compacting as running a tractor over the ground. When the earth is compacted water just won’t penetrate. You pour water onto the grass which runs off or evaporates. Your grass can’t grow deep tap roots and is slowly starved to death.
Use a mulching mower and allow the grass clippings to return to the lawn. Stop using chemical fertilizers. Completely. In permaculture we feed the soil and not the plants. Healthy soil has billions of fungi, bacteria, nematodes, amoebas, and other creatures in every teaspoon. This zoo of soft-bodied creatures break down organic matter and make nutrients in the soil available for roots to feed from. The better the soil health, which means the more microbial activity and population, the loamier the soil and therefore the better water penetration as well. Instead of dumping high nitrogen fertilizer on your lawn, use compost, actively aerated compost tea , and chopped up leaves. (If you don’t have a mulcher attachment on your mower, or a blower with a reverse vacuum attachment, then put leaves in a trash can and use a string mower to chop them up- while wearing eye protection of course!). Chopped up leaves are all you need to fertilize anything. Best of all they don’t harm your pets or family, unlike chemical fertilizers.
If you don’t want a lawn, then figure out how you want to use the space. Do you want to just see the area from your windows? Do you want a meditation garden? Room for kids and pets to play? An outside BBQ spot? Decide how best to use this space. If you aren’t using every square inch of your property, you are paying property taxes for nothing.
To get rid of your lawn you don’t need to dig it up. Please save your money. Sheet mulch it. Sheet mulch is an inch of cardboard and/or newspaper topped with 4-6 inches of mulch. Gorilla hair (shredded redwood) or shredded ceder bark spread well and sit lightly on the soil, and you get more for your money. Sheet mulch will turn the grass into mulch and start activating the soil. Best of all, it looks instantly great, to satisfy your neighbors and family. If you have Bermuda or other very determined grass, you may need a thicker layer of cardboard. Sheet mulch now and allow it to sit over the winter and absorb the rains. In the spring you can cut through the cardboard and plant right in the ground.
If you want a low-effort garden, then please go native. We need to replace habitat that has been destroyed and give the animals and insects the food and shelter that they need to survive. Many California native gardens are not well done and look piecemeal and stark. This doesn’t have to be. Look around at the hills; unless you are well into the desert, there are plants of all types everywhere. If you have sheet mulched a green lawn, then allow the grass to die completely before planting natives; they don’t like higher nitrogen from freshly decomposing grass, or the residual from high nitrogen fertilizer. Sheet mulching over the winter and planting in the spring should be fine. If your lawn is already dead, then you can sheet mulch and plant immediately. Then allow the plants to fill out and you don’t need to mulch again.
See how the area looks from your windows. Make pathways that are wide enough to accommodate whomever is going to use it (2 feet wide for one person, 3 feet for two or a bicycle, 4 feet for a wheelchair). Don’t skimp on the pathway material. An ugly or uneven pathway will draw all your attention and no matter what you do around it, it will look bad. A good pathway well done and complementary to your house is important for your own satisfaction and for the resale value of your home as well. Choose destination spots and focal points. Benches, a bird bath, a specimen plant – these are all important. Then choose plants. I highly recommend the book California Native Landscapes by Greg Rubin and Lucy Warren. These are San Diegans so they know what works well in Southern California.
One inch of rain on one acre in one hour is 27,154 gallons of free, neutral pH rainwater. Most lawns are slightly convex so that water runs off of them. That is why there is a bald spot at the highest point where you just can’t keep anything alive. You want to catch all the rainwater -and irrigation water – you can. Catch it, sink it, spread it. Do this with simple earthworks that you can do with a shovel. Perpendicular to the water flow dig shallow swales (level-bottomed ditches). They only need to be an inch deep, or you can go much deeper. They can be filled with large mulch, and sheet-mulched over the top. Rain will then sink into the ground rather than rolling off. Sheet mulch – or any mulch – allows the rain to hit, bounce and then gently fall to earth. Catch every drop that you can, and the best place to catch rain is in your soil.
To further add water retention and nutrition for your microbes, bury wood. Old logs, old untreated building materials (nails and all), shrub cuttings, nasty spiky rose cuttings, palm fronds and trunks, they can all be buried and planted over in a process called hugelkultur. Even old cotton clothing, straw hats, or anything made with natural fibers can be layered with dirt and buried. Get the most from what you’ve already spent money on and let your trash fix your soil.
So, steps would be to decide what you want to do with your lawn area, design the pathways and special areas, determine what kind of plants you want to put there, dig in some earthworks, sheet mulch to kill the grass and weeds, then plant. Natives will need supplemental water (not drip irrigation, but a long soak and then allowed to go dry) until they are established. Then many of them don’t want any supplemental water; some go drought-deciduous, so do your research. A good selection that is lovely and will invite birds and butterflies into your yard might include Cleveland sage (not Mexican bush sage, which becomes very woody), apricot mallow, desert mallow, fairy duster, and ceanothus. Great retail native nurseries are Theodore Payne nursery in Los Angeles and Tree of Life nursery in San Juan Capistrano.
If you don’t want to go native, then consider low-water-use plants such as many Mediterranean herbs. Rosemary, oregano, marjoram, lavender and others interspersed with drought tolerant plants such as bird of paradise, New Zealand flax, rockrose, Pride of Madeira, and a host of interesting succulents in between. Aloe blooms are attractive to hummingbirds.
If you live in areas where there is a real winter, where you receive snowfall, your lawn care to prepare for the cold is quite different. The folks at Yardday have excellent tips to help prepare for snow, and you can read about them here. Keep in mind that the ‘fertilizer’ should be actively aerated compost tea and/or compost, NOT bagged NPK or other chemical or condensed lawn care fertilizer. These concentrated fertilizers kill microbes leaving your soil lifeless, water-repelling dirt.
There are lots of things to do with your lawn that are lovely, useful, interesting and beneficial to wildlife and to the earth. Care for your soil by not poisoning the microbes with chemicals, use your leaves, sheet mulch, and design for low water use. Its worth the effort.
You May Also Like

Native Insects and IPM
- Arts and Crafts, Gardening adventures, Humor, Permaculture and Edible Forest Gardening Adventures, Water Saving
Remodeling the Outdoor Sink
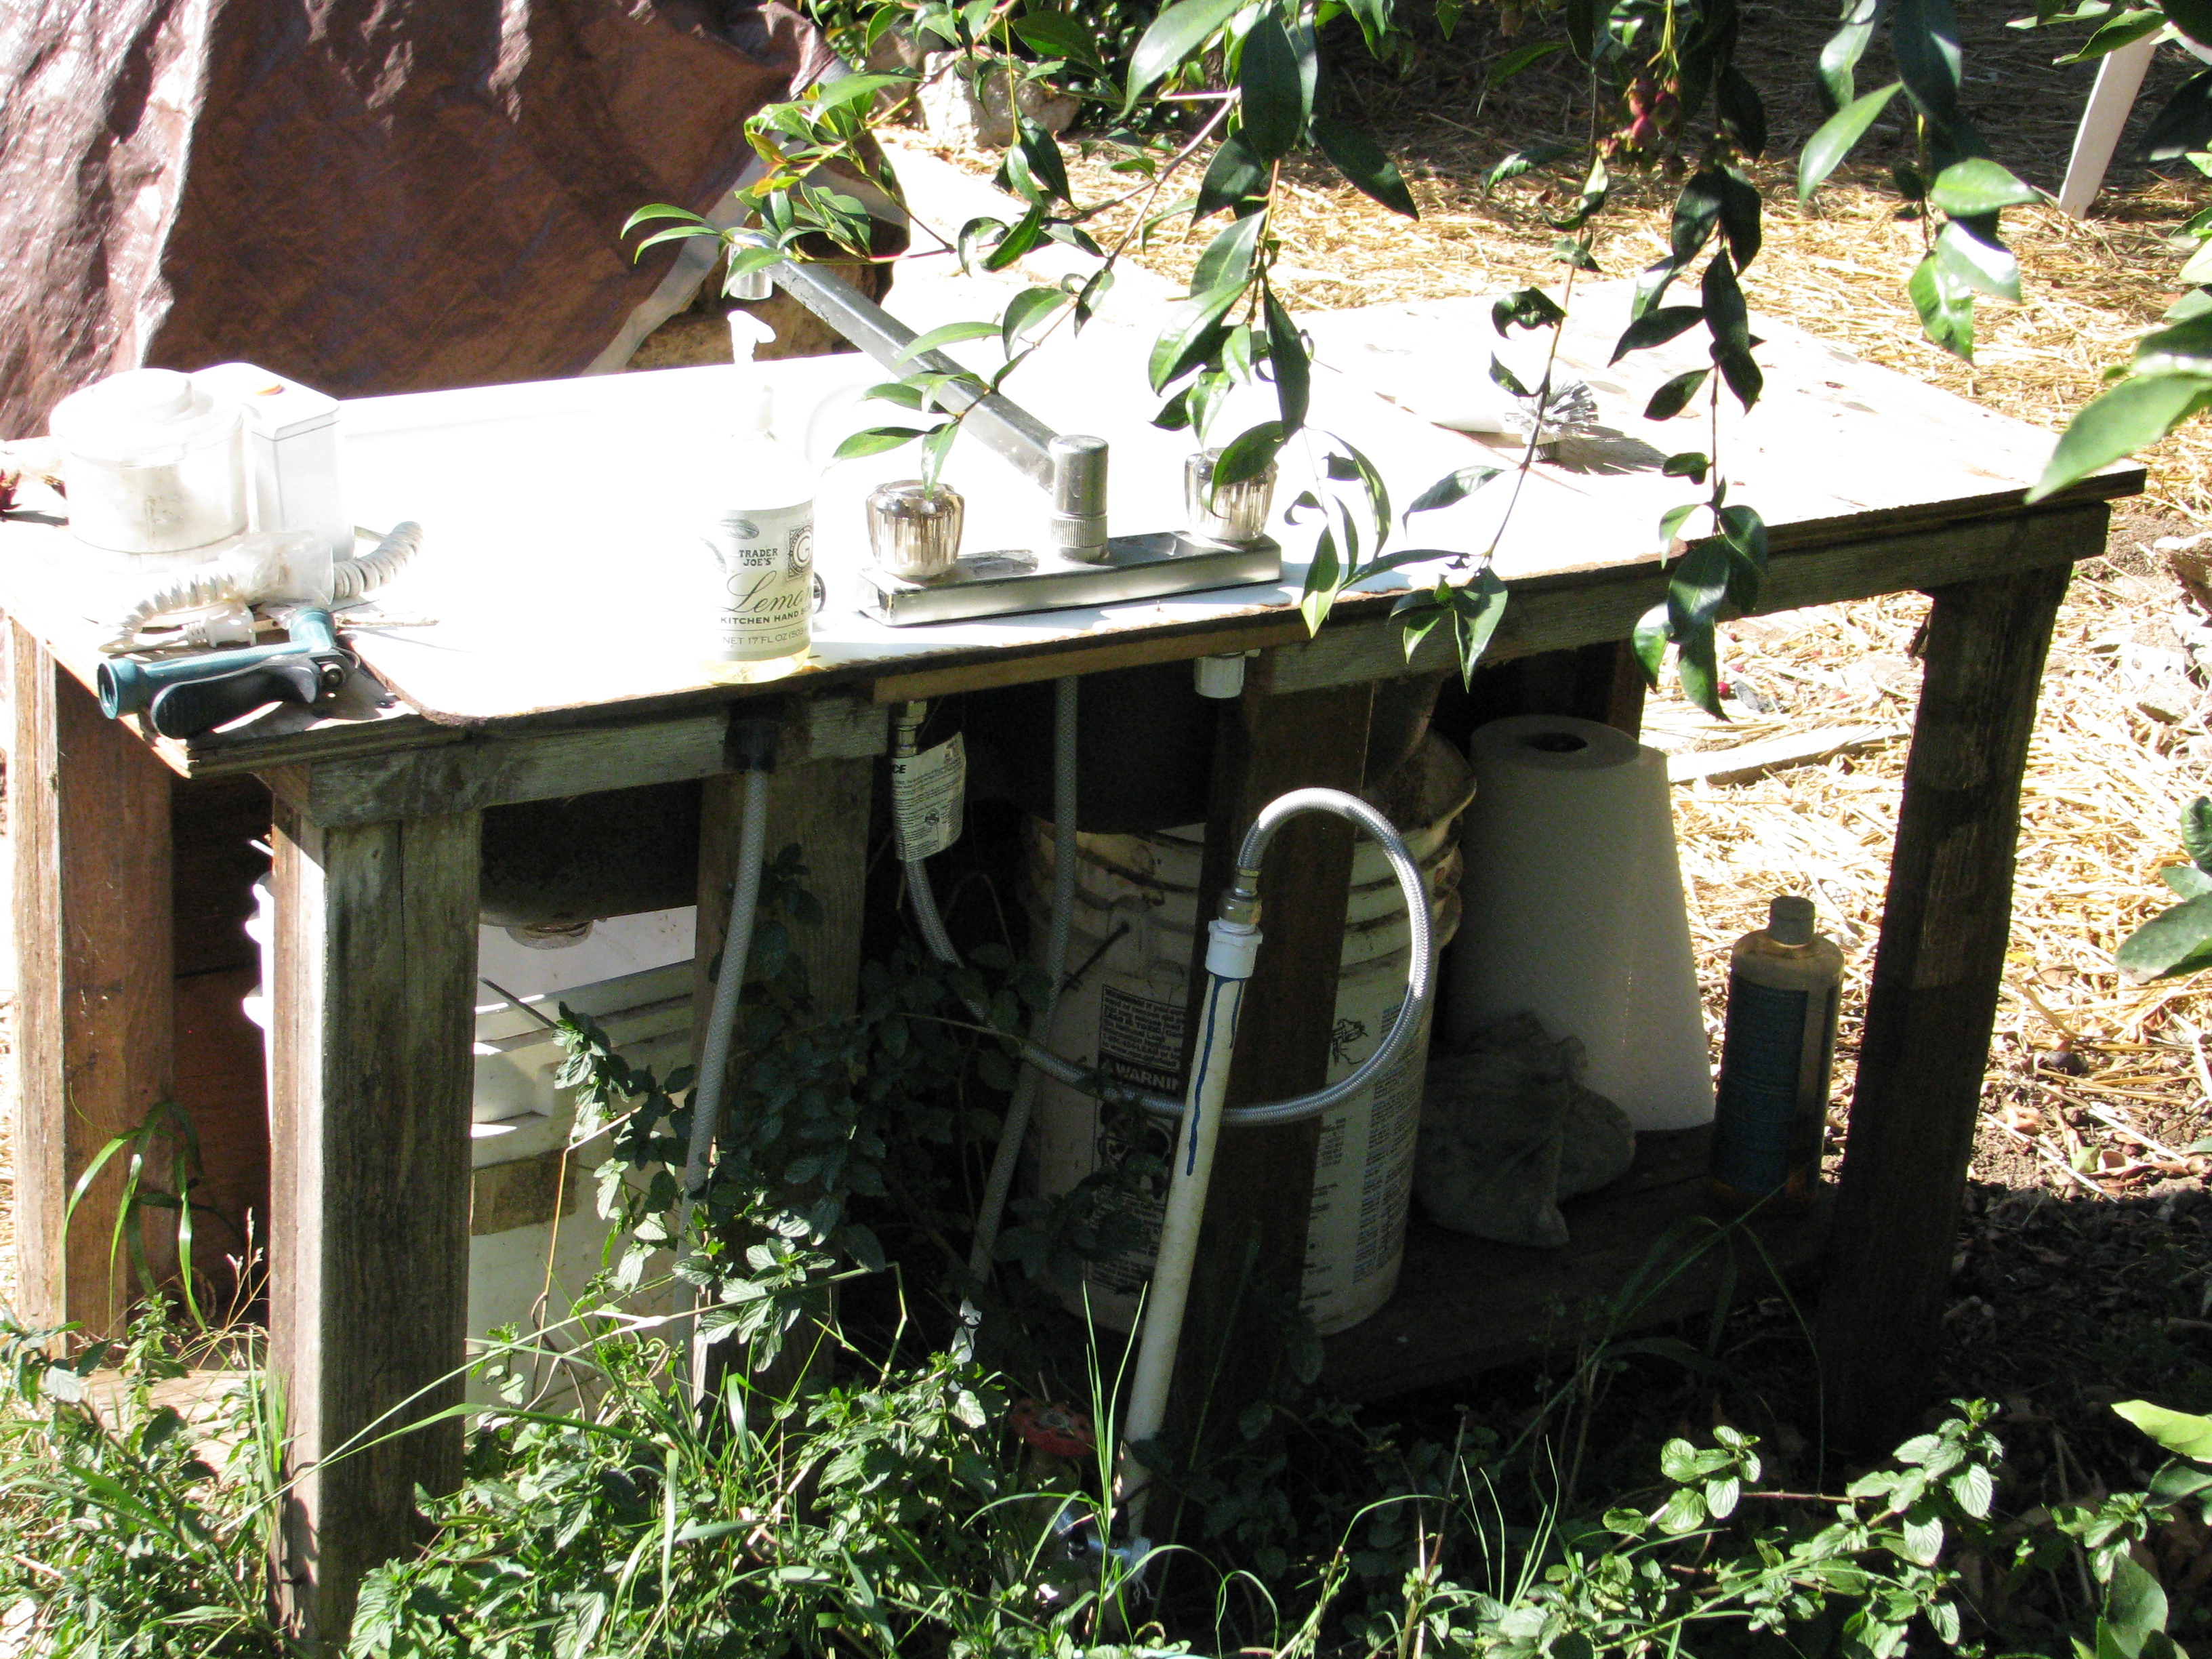
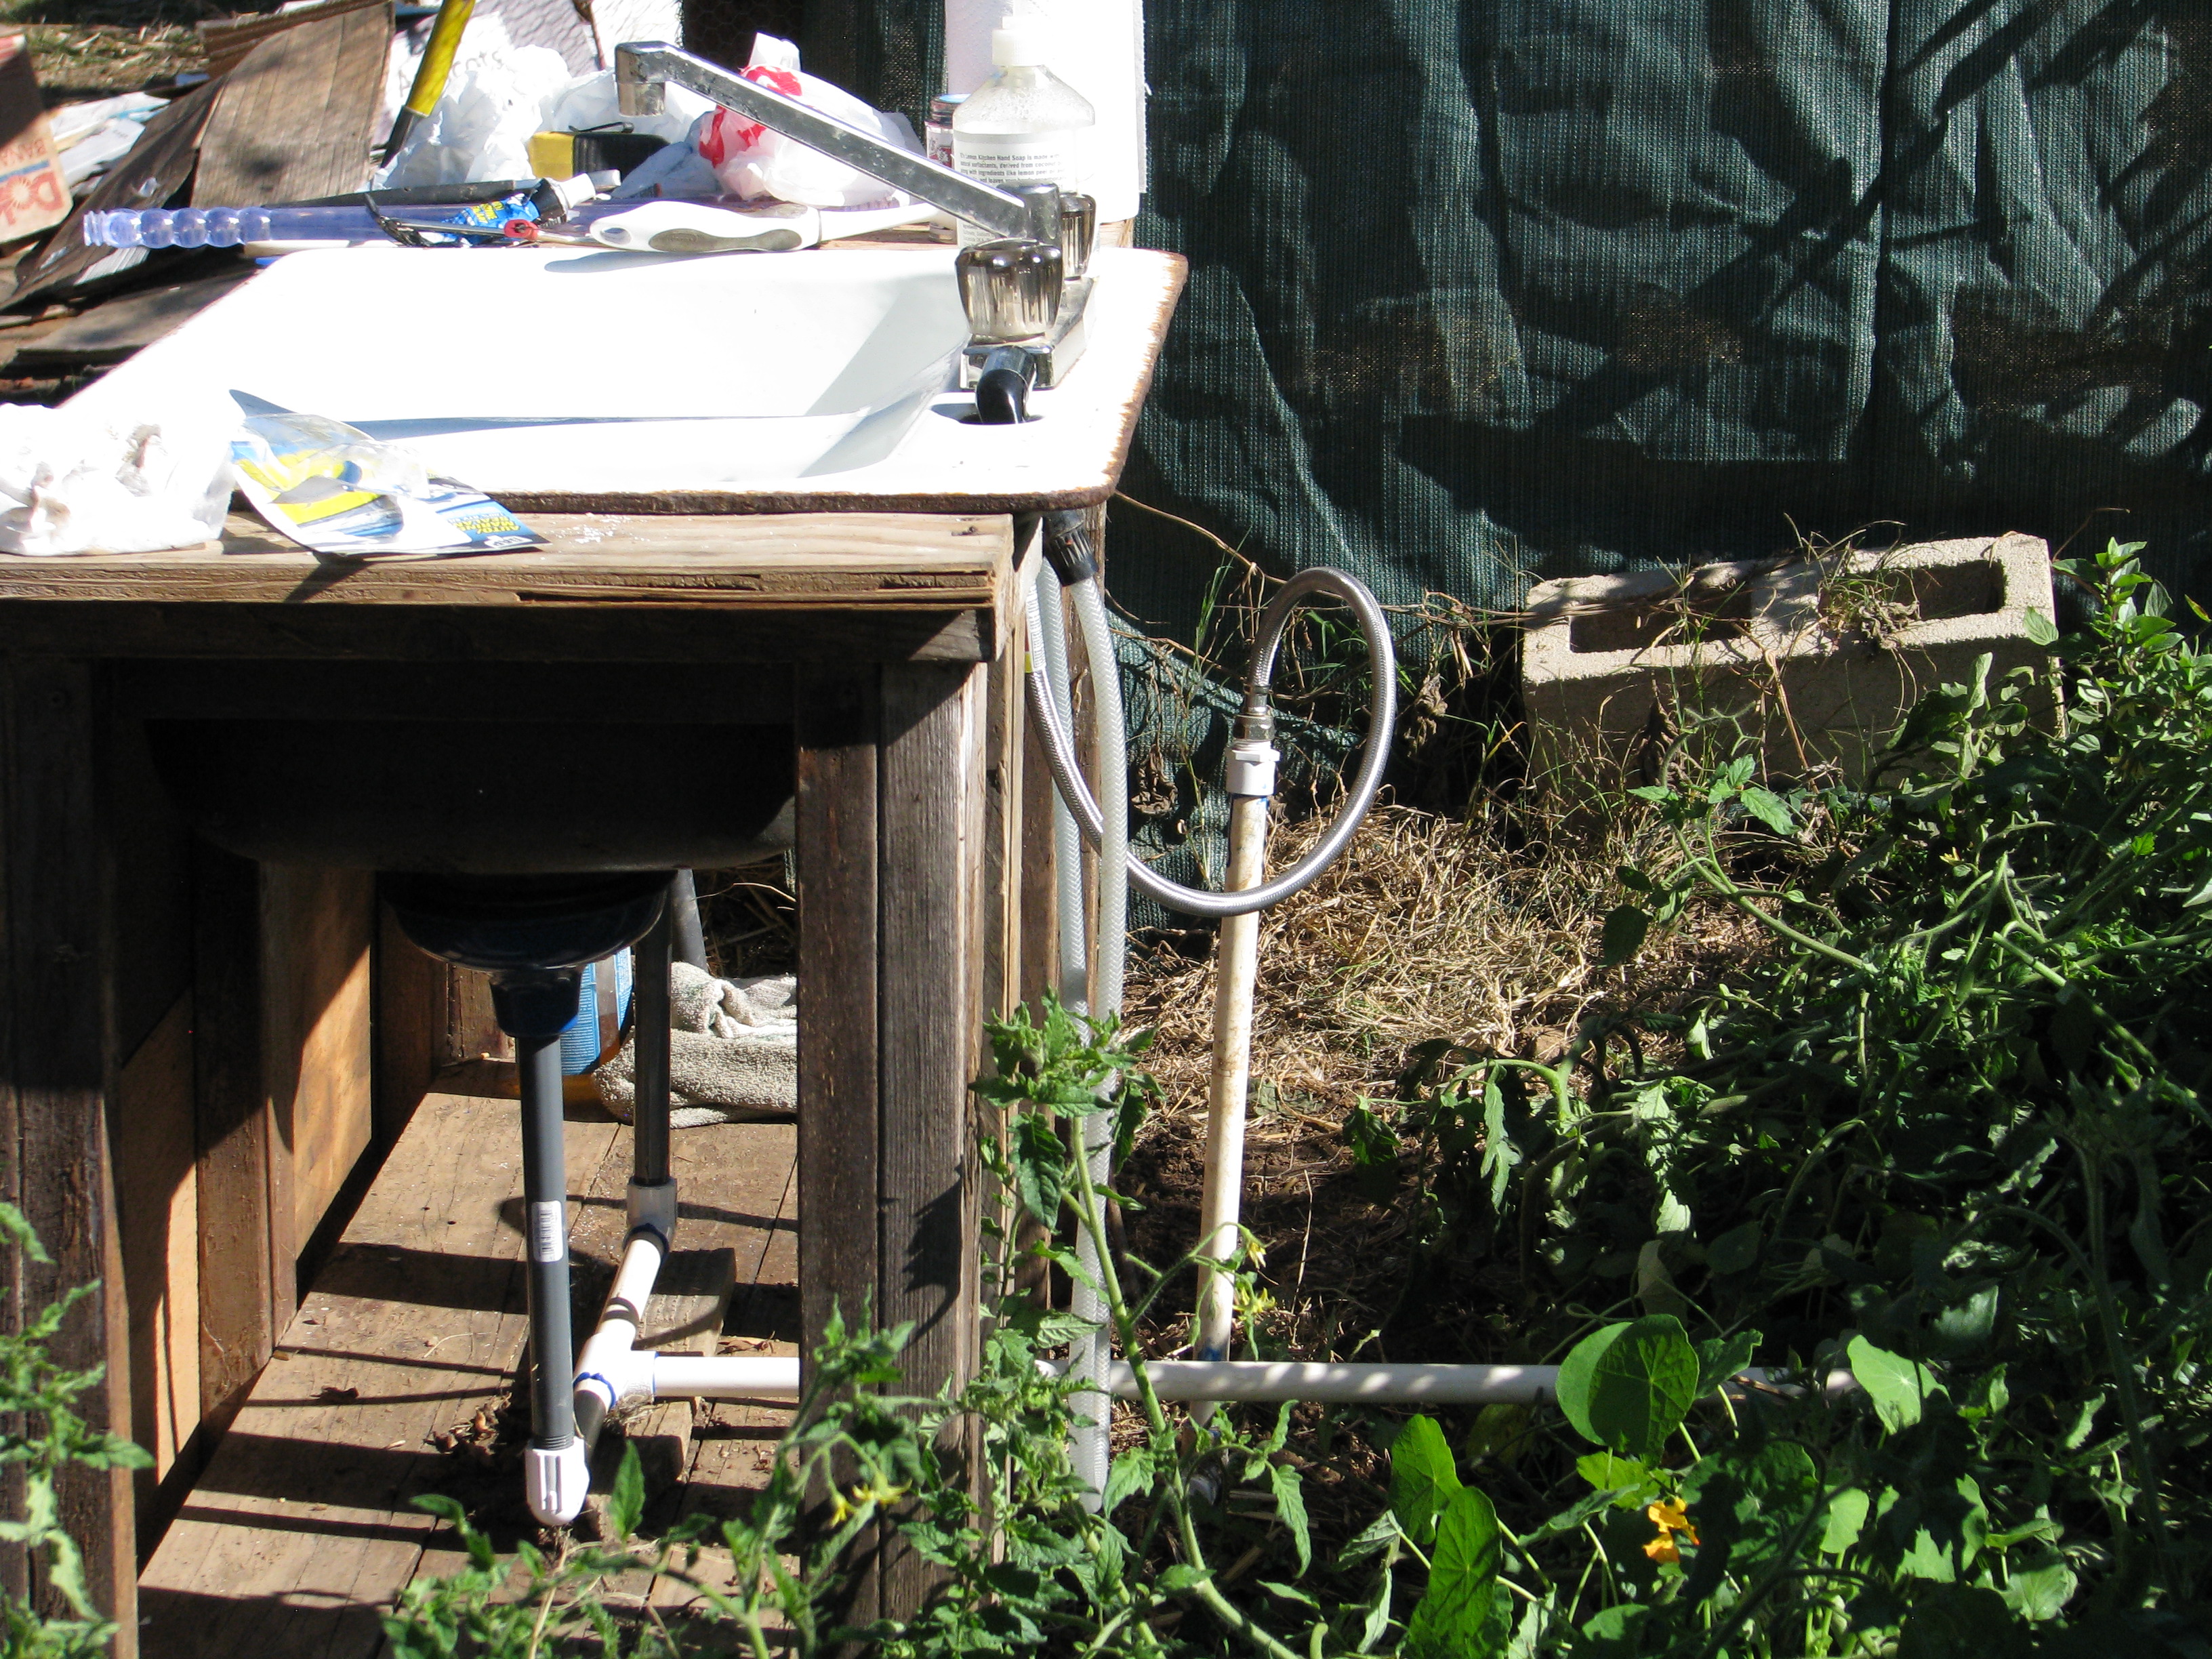
I’m thrilled with my outdoor sink. I love it. It is my friend. It is my old kitchen sink, stubbornly hauled around the property until I finally was able to put it on an old fishtank stand and hook it into the waterline out in the garden. Even better, Steve, who used to work here and who was responsible for the Mock Pavilion, modified the stand so that the sink fit down into it more securely. Any water used would be caught in buckets underneath (with long sticks in them so that any creature that falls in can crawl out again), which I would pull out and empty.

The buckets are just another heavy thing with which I had to deal. There had to be another way. A problem with the sink being set down into the stand is that the underside of one of the drains now sat slightly into a bucket, so I’d have to tip the bucket to get it out. Wrestle it out would be the better term, usually becoming wet with old sink water in the process. Throwing a 5-gallon bucket of water somewhere lost its charm quickly, especially as I was the only one emptying, but not the only one filling. Something had to be done. When I made the area next to the Fowl Fortress into an apple tree guild, I now had an area which could use extra water. The sink needed to be moved. Last week I finally did it, and I have to say, I’m pretty smug about how.
I am a disaster with a saw, but I’m pretty experienced with old PVC pipe and Red Hot Blue Glue (all those sprinklers I’ve mowed down over the years). I leveled a place next to the coop and placed some old plywood on it, both to help steady the sink stand and to keep weeds down (and to use up the plywood).

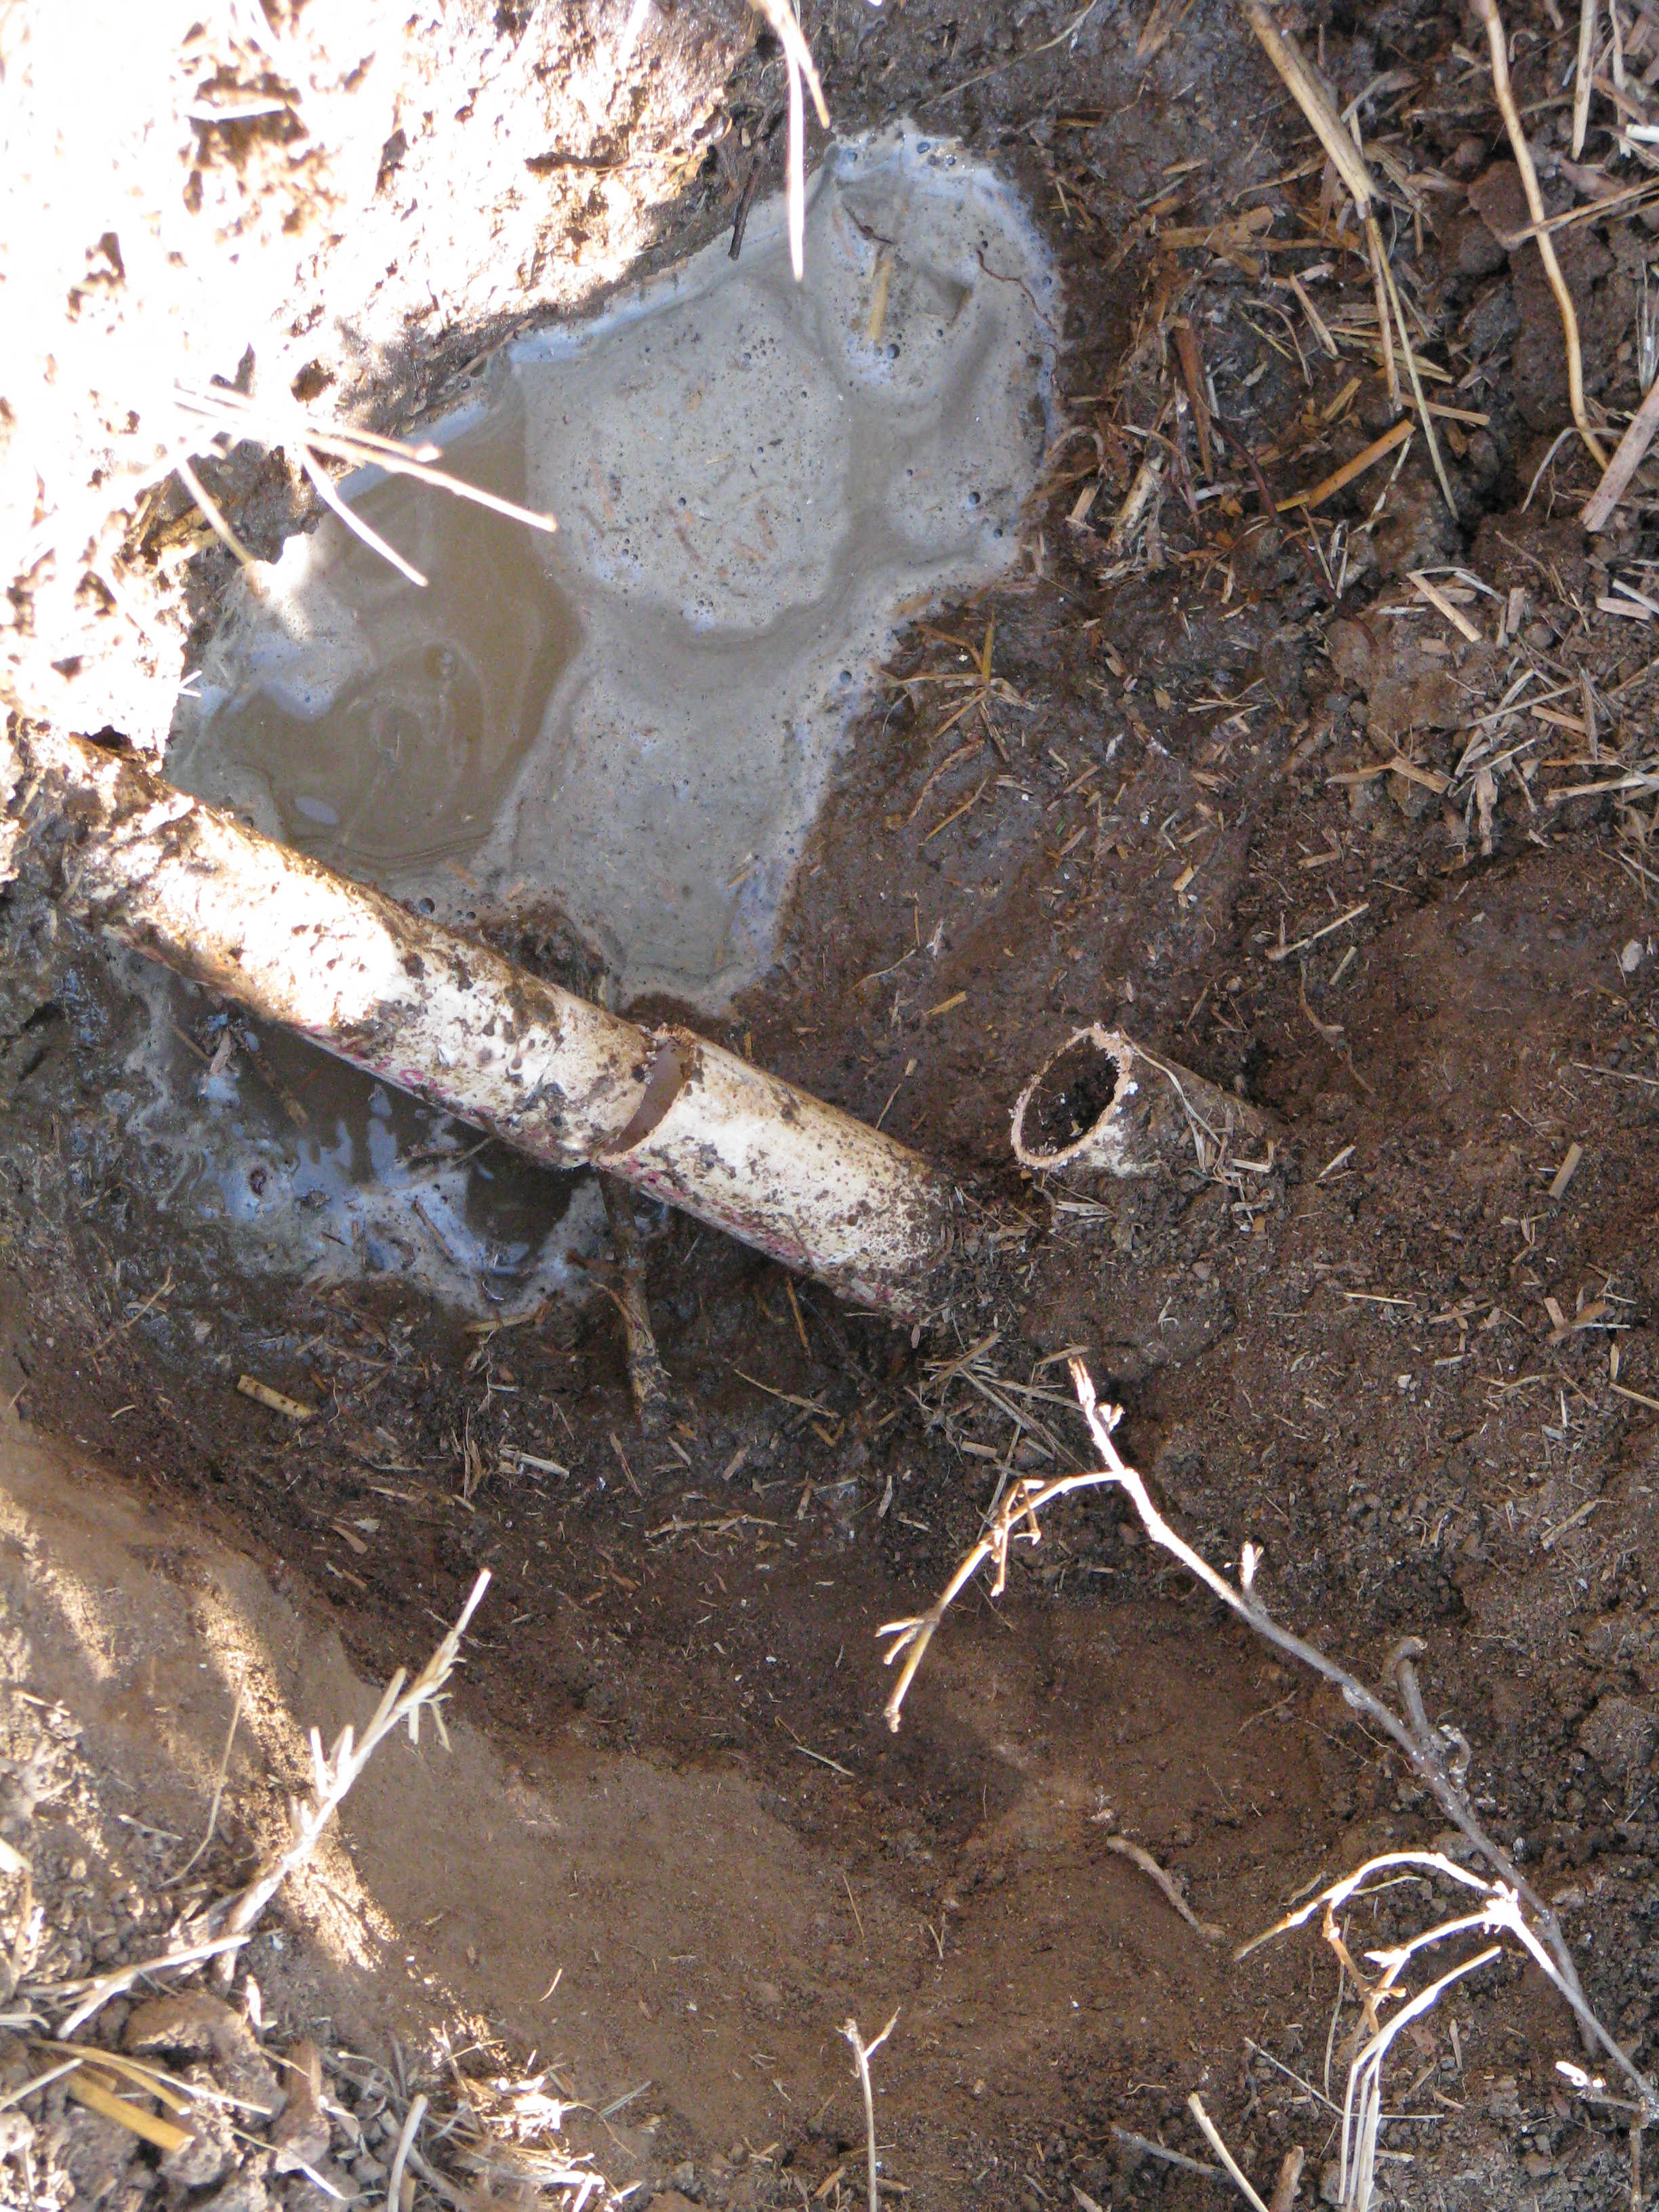
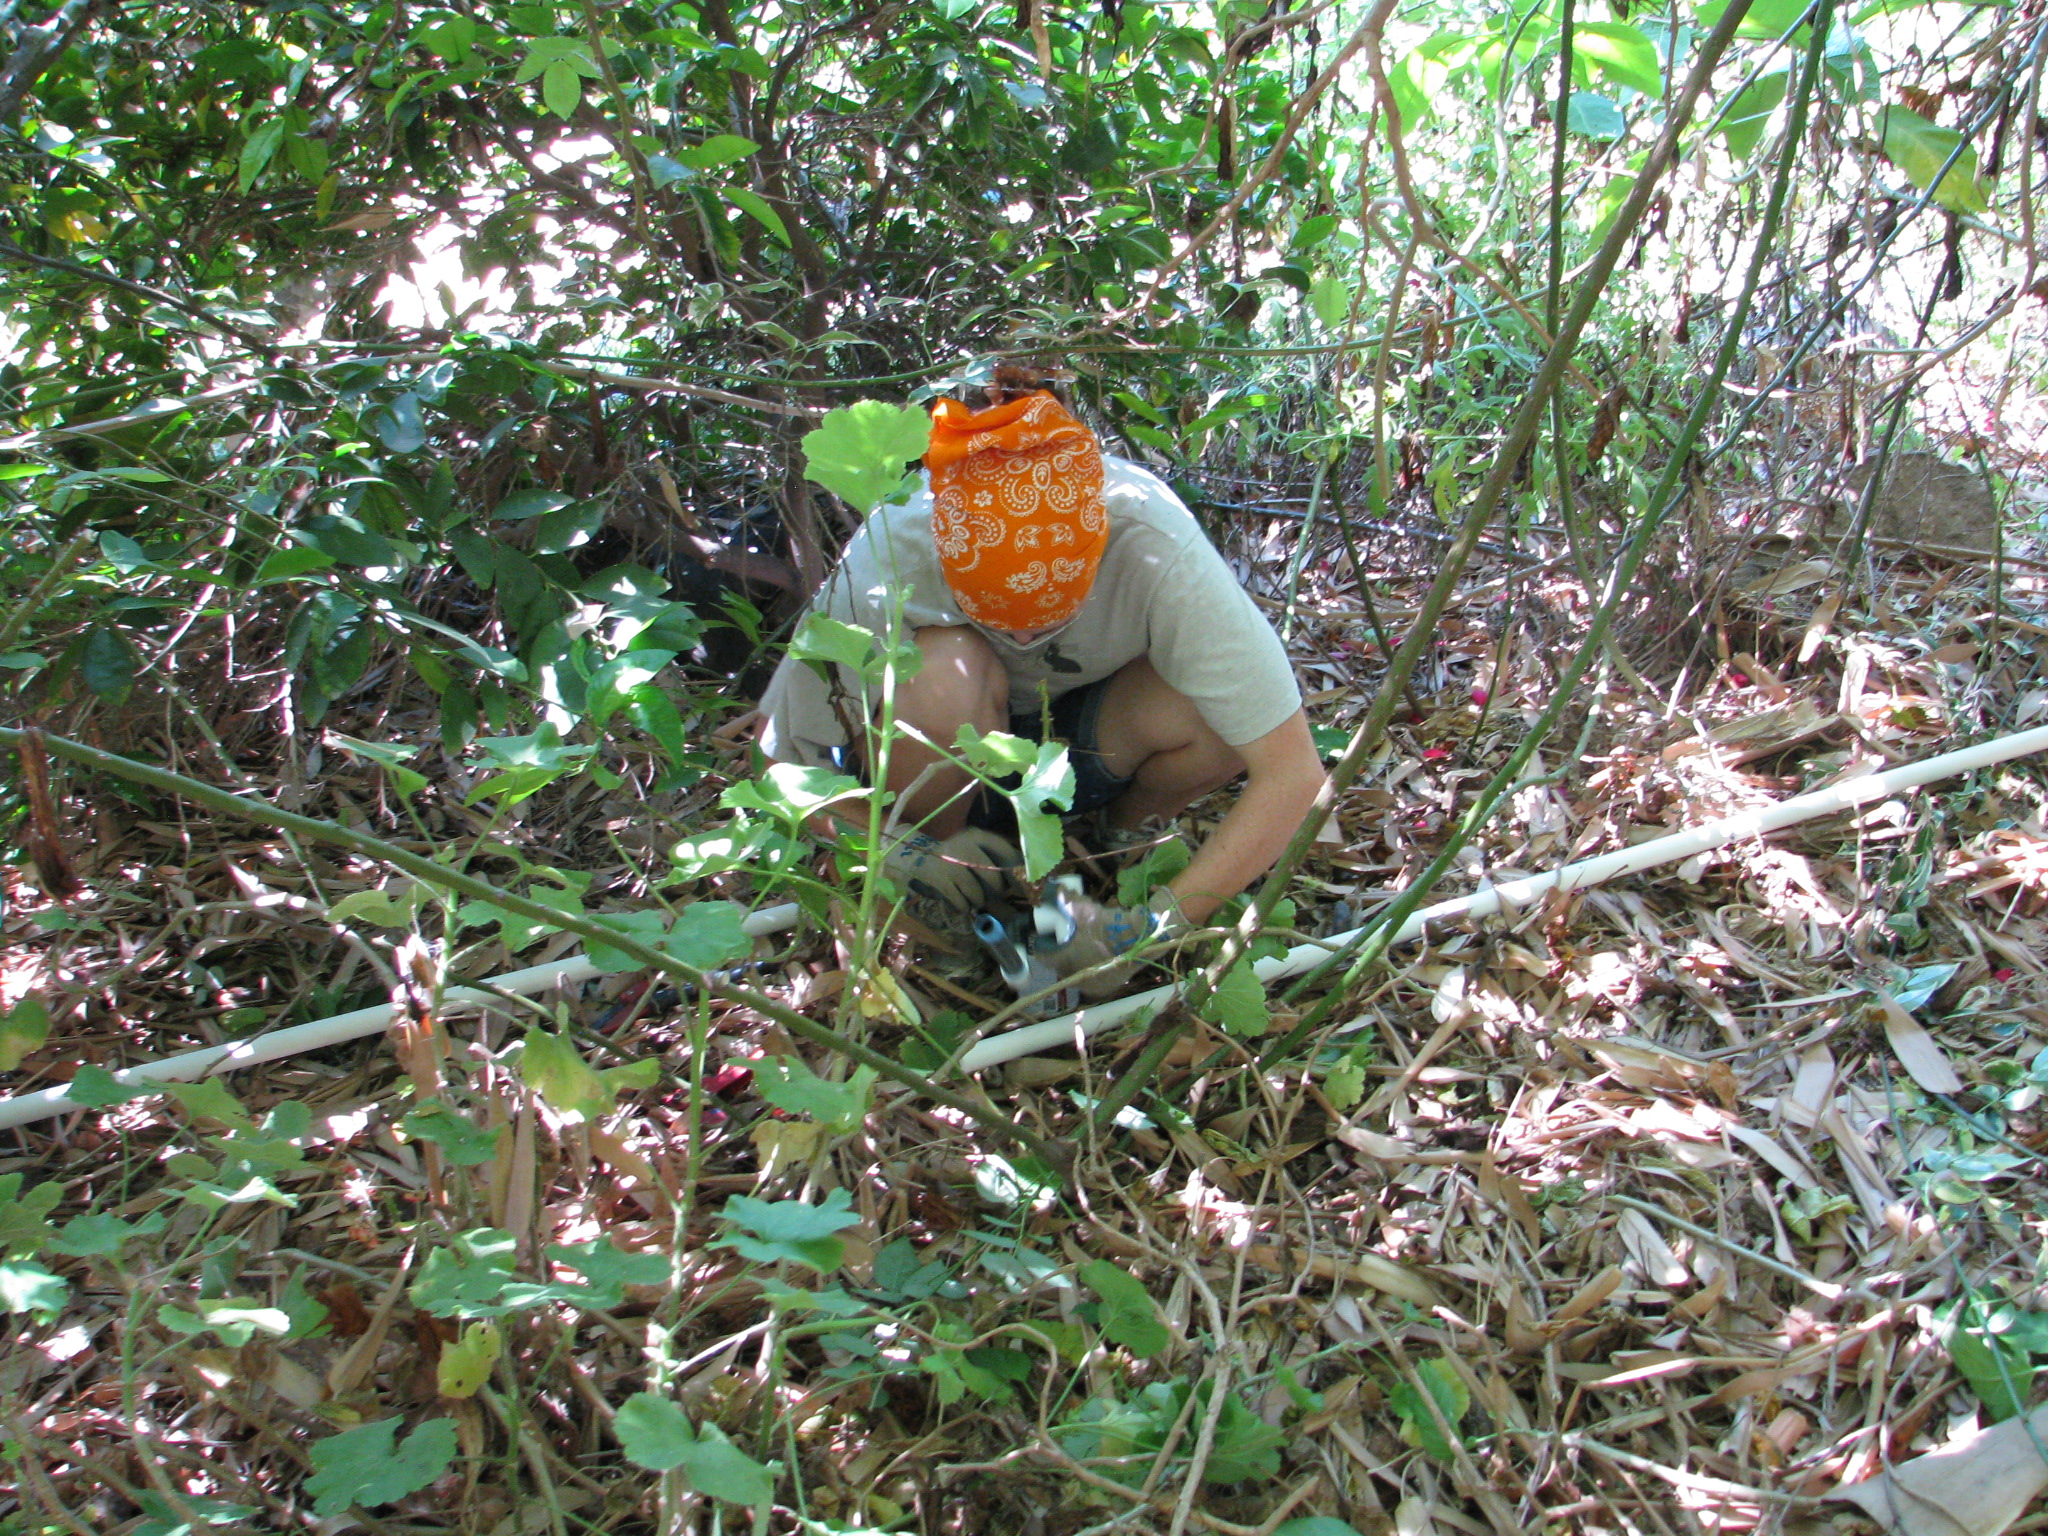
I dug up the water line and placed plywood on a leveled area. I dug up the water line, turned off the irrigation water, opened other faucets to drain and then cut into the pipe. Then I discovered the real pipe beneath this old dry one, and dug it out and cut into it, allowing it to drain as well before connecting a tee.
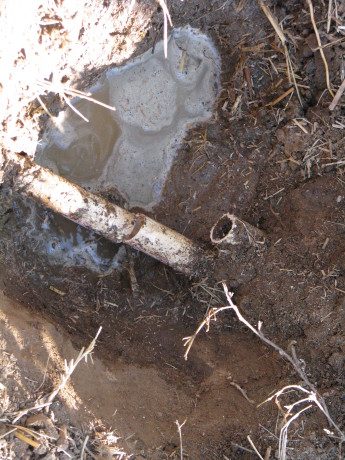
Beneath the old pipe was the real one. The hens were all pressed against the side of the coop trying to see what I was doing, and desperately wanting to search for bugs in the dirt I’d just dug up. Sorry girls.
I laborously walked the rather heavy and unevenly weighted stand (the sink isn’t in the center) over to the plywood. Then I walked it off again, adjusted, and walked it back. Then I adjusted again. Then I had a sit-down and wondered what my chiropractor was going to say.
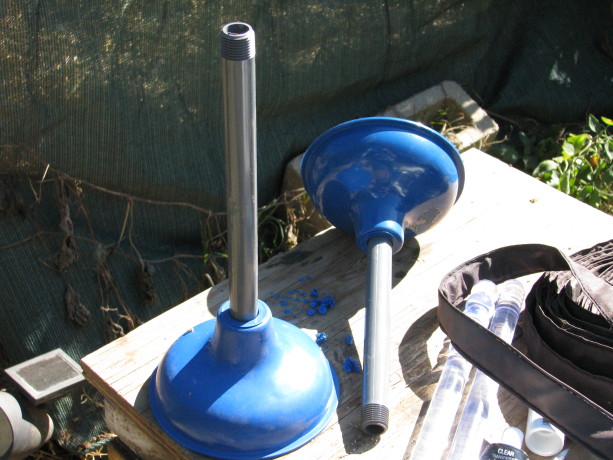
Now came the fun problem-solving part. The drains from the sink were open, so how to catch water and send it off into the guild, without spending a bunch of money? The vision came to me from out of the blue: plungers. Some people have visions of how to earn lots of money, others have visions of how to change the world for the better. My imagination provides me with plungers. Yep.
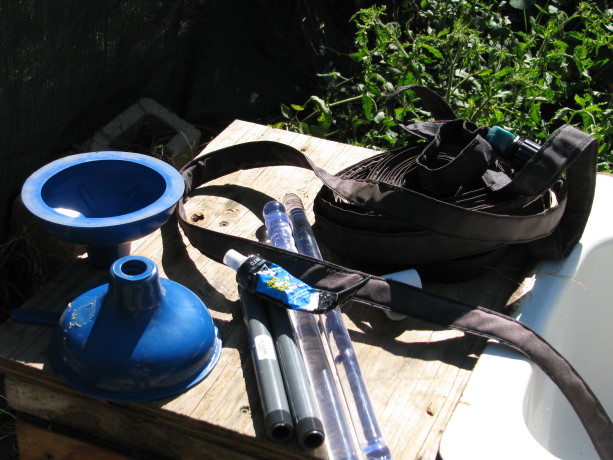
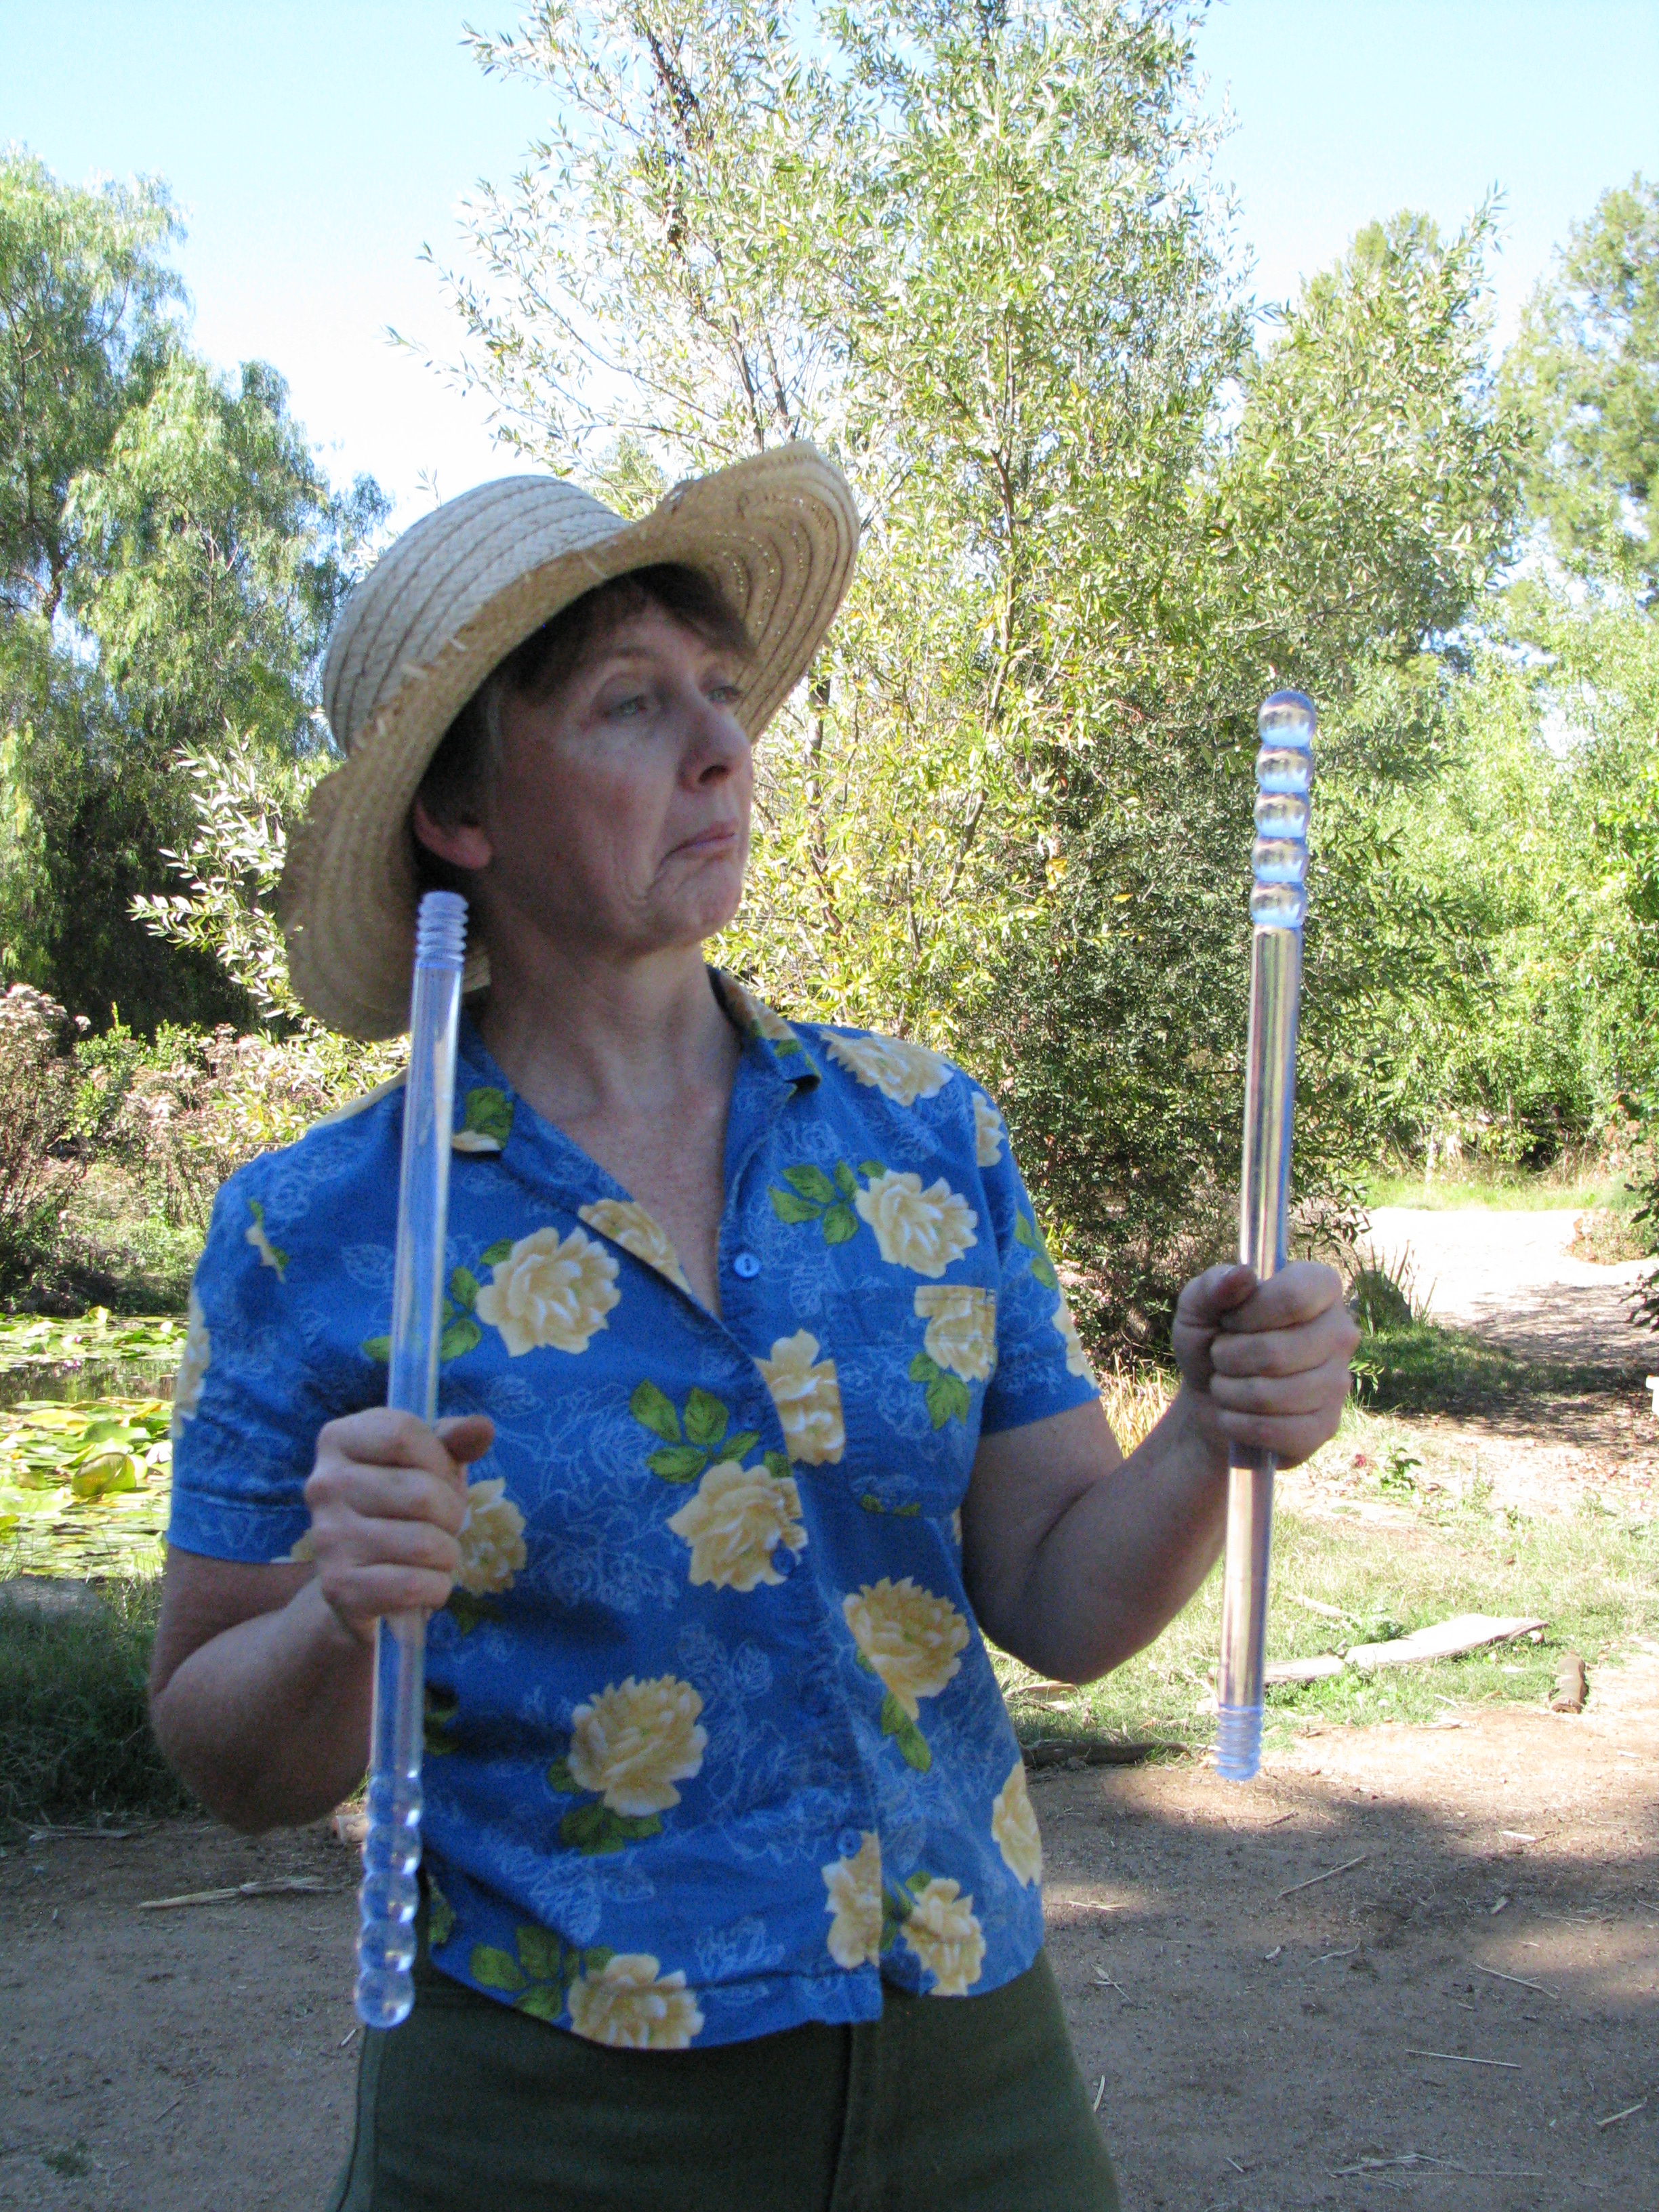
Supplies. I learned from my collegiate daughter, and the hardware store cashier, that plungers were nicknamed ‘magic wands’. No matter how much I learn each day, I’m always in the dark on the important things. However, I felt pretty proud of myself and was excited to get started. I rooted through my barrel of old PVC left from the former owners (I’ve lived here over 14 years and the PVC was already old then) and through my fittings. I only needed a couple new fittings and the plungers from Joe’s Hardware. The plungers had blue cups and clear handles, not the wooden-handled, black-cupped manly plungers of my imagination. If wizards had plungers, I could see them using these. Well this would be a female version and blue is my favorite color.
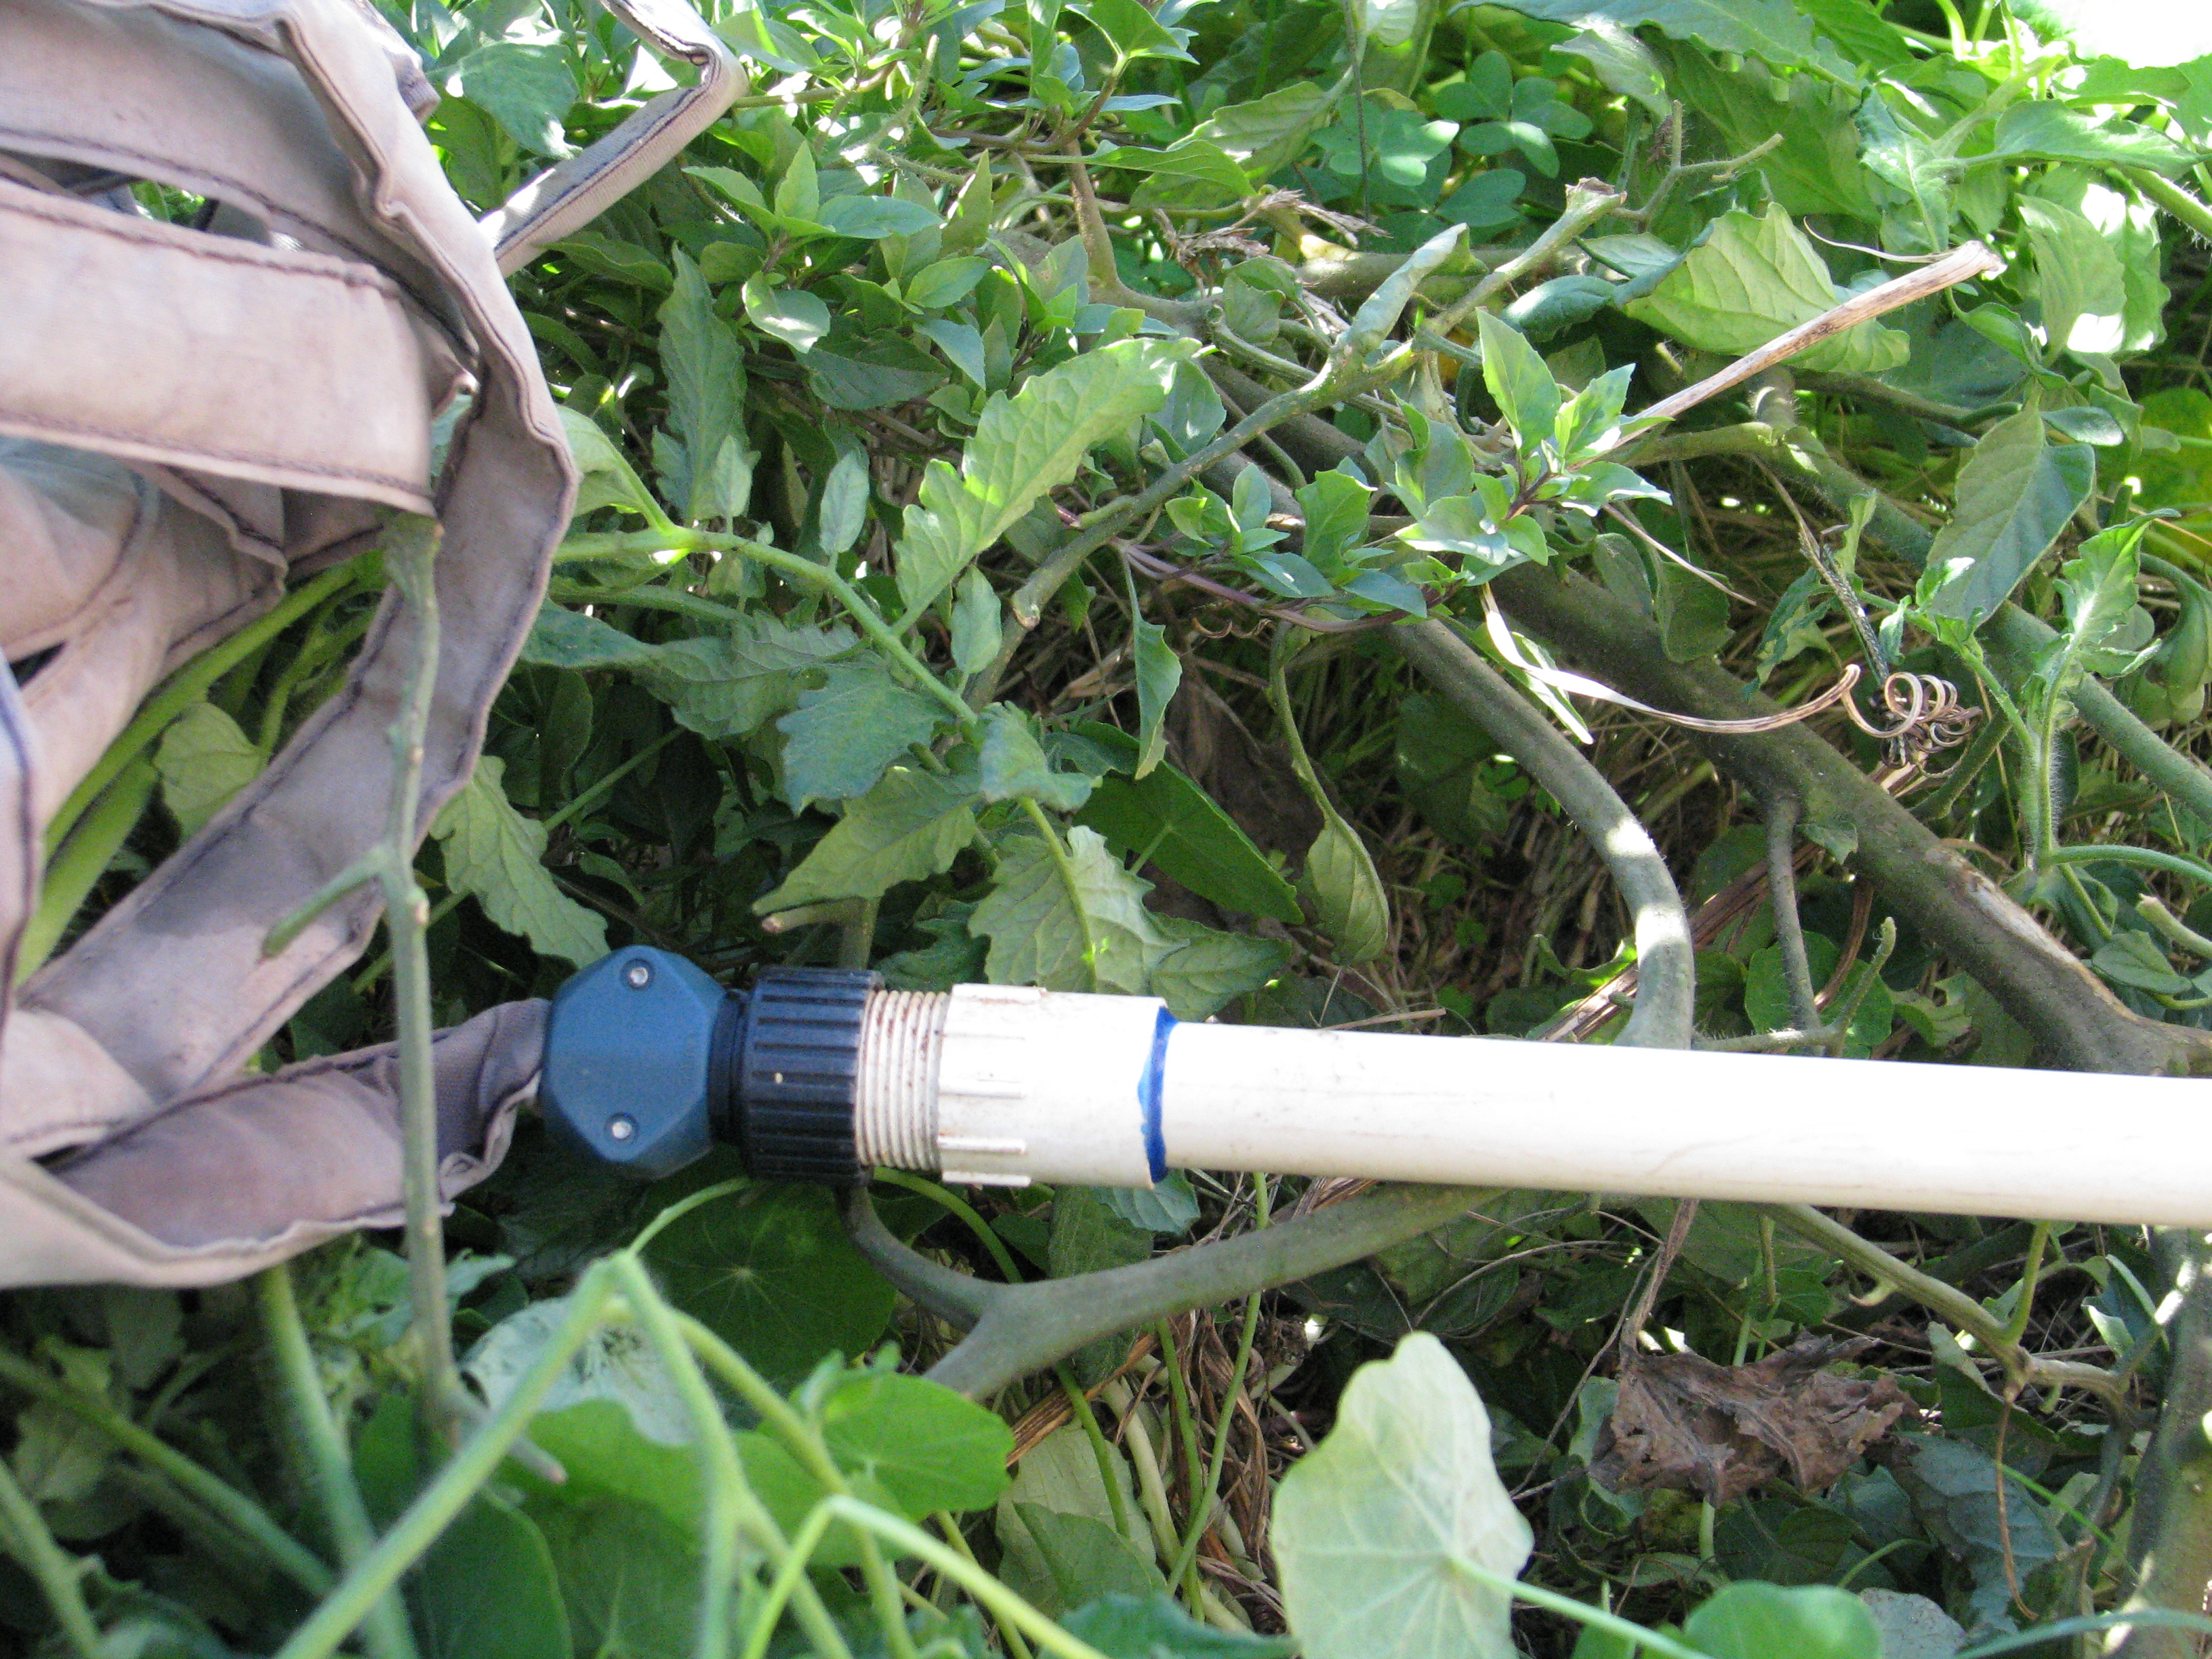
I screwed in threaded 1/2″ risers and tried them as is, but they leaked, so I put silicone gel around the threads and tried again. It worked after the gel dried. Knowing that the thread of the plunger handle wasn’t the same thread as a PVC riser (how do I know these things? Am I channeling some long-dead plumber??) I grabbed silicone sealant I had recently purchased to seal up leaks in a small fountain so that it would work during garden tours (the sealant worked, but then the motor failed. Sigh.)
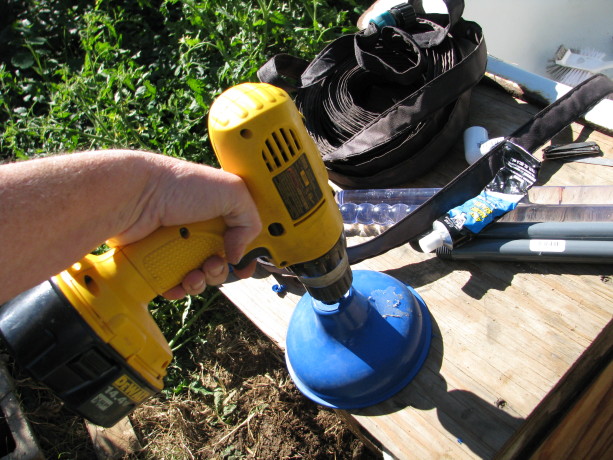
Drilling drain holes in the plunger cups. I had expected to find plunger heads and handles sold seperately, and remembered seeing plungers with threaded holes all the way through. I must have been flashing back to the cheap supplies offered to the parks department when I was a Ranger because all I found at Joes were complete, and the holes were covered (better suction). I drilled through the rubber to make the drain hole (which created some very cute blue rubber curls).
I connected up most parts, but then came the challenge, to space the plungers the correct distance apart, and measuring is not my thing. It seems simple, but it never works for me. My ginko must have kicked in, though, because I realized that I could just place the plungers over the sink holes on top and build it up there, and of course it would be the correct distance underneath.
Ha! I didn’t have to lay in the tomatoes and work around the legs in the back! I could do it on top and still get the length right. I’m still proud of figuring that out.
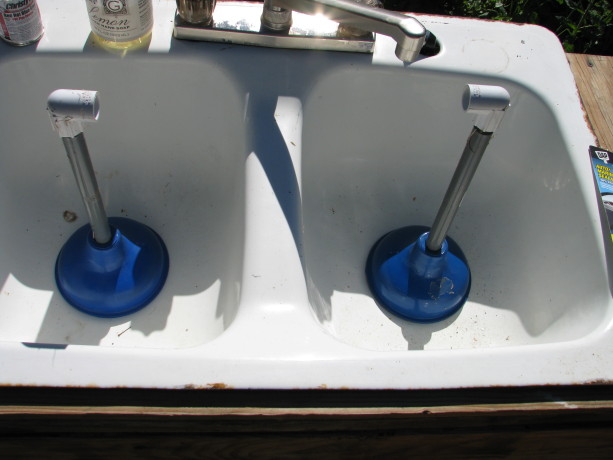
All ready to go. The trick really was to get this thing in place around the support legs behind the fishtank stand! 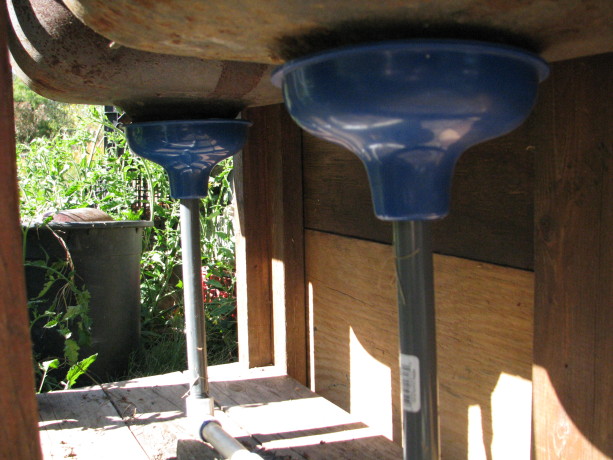
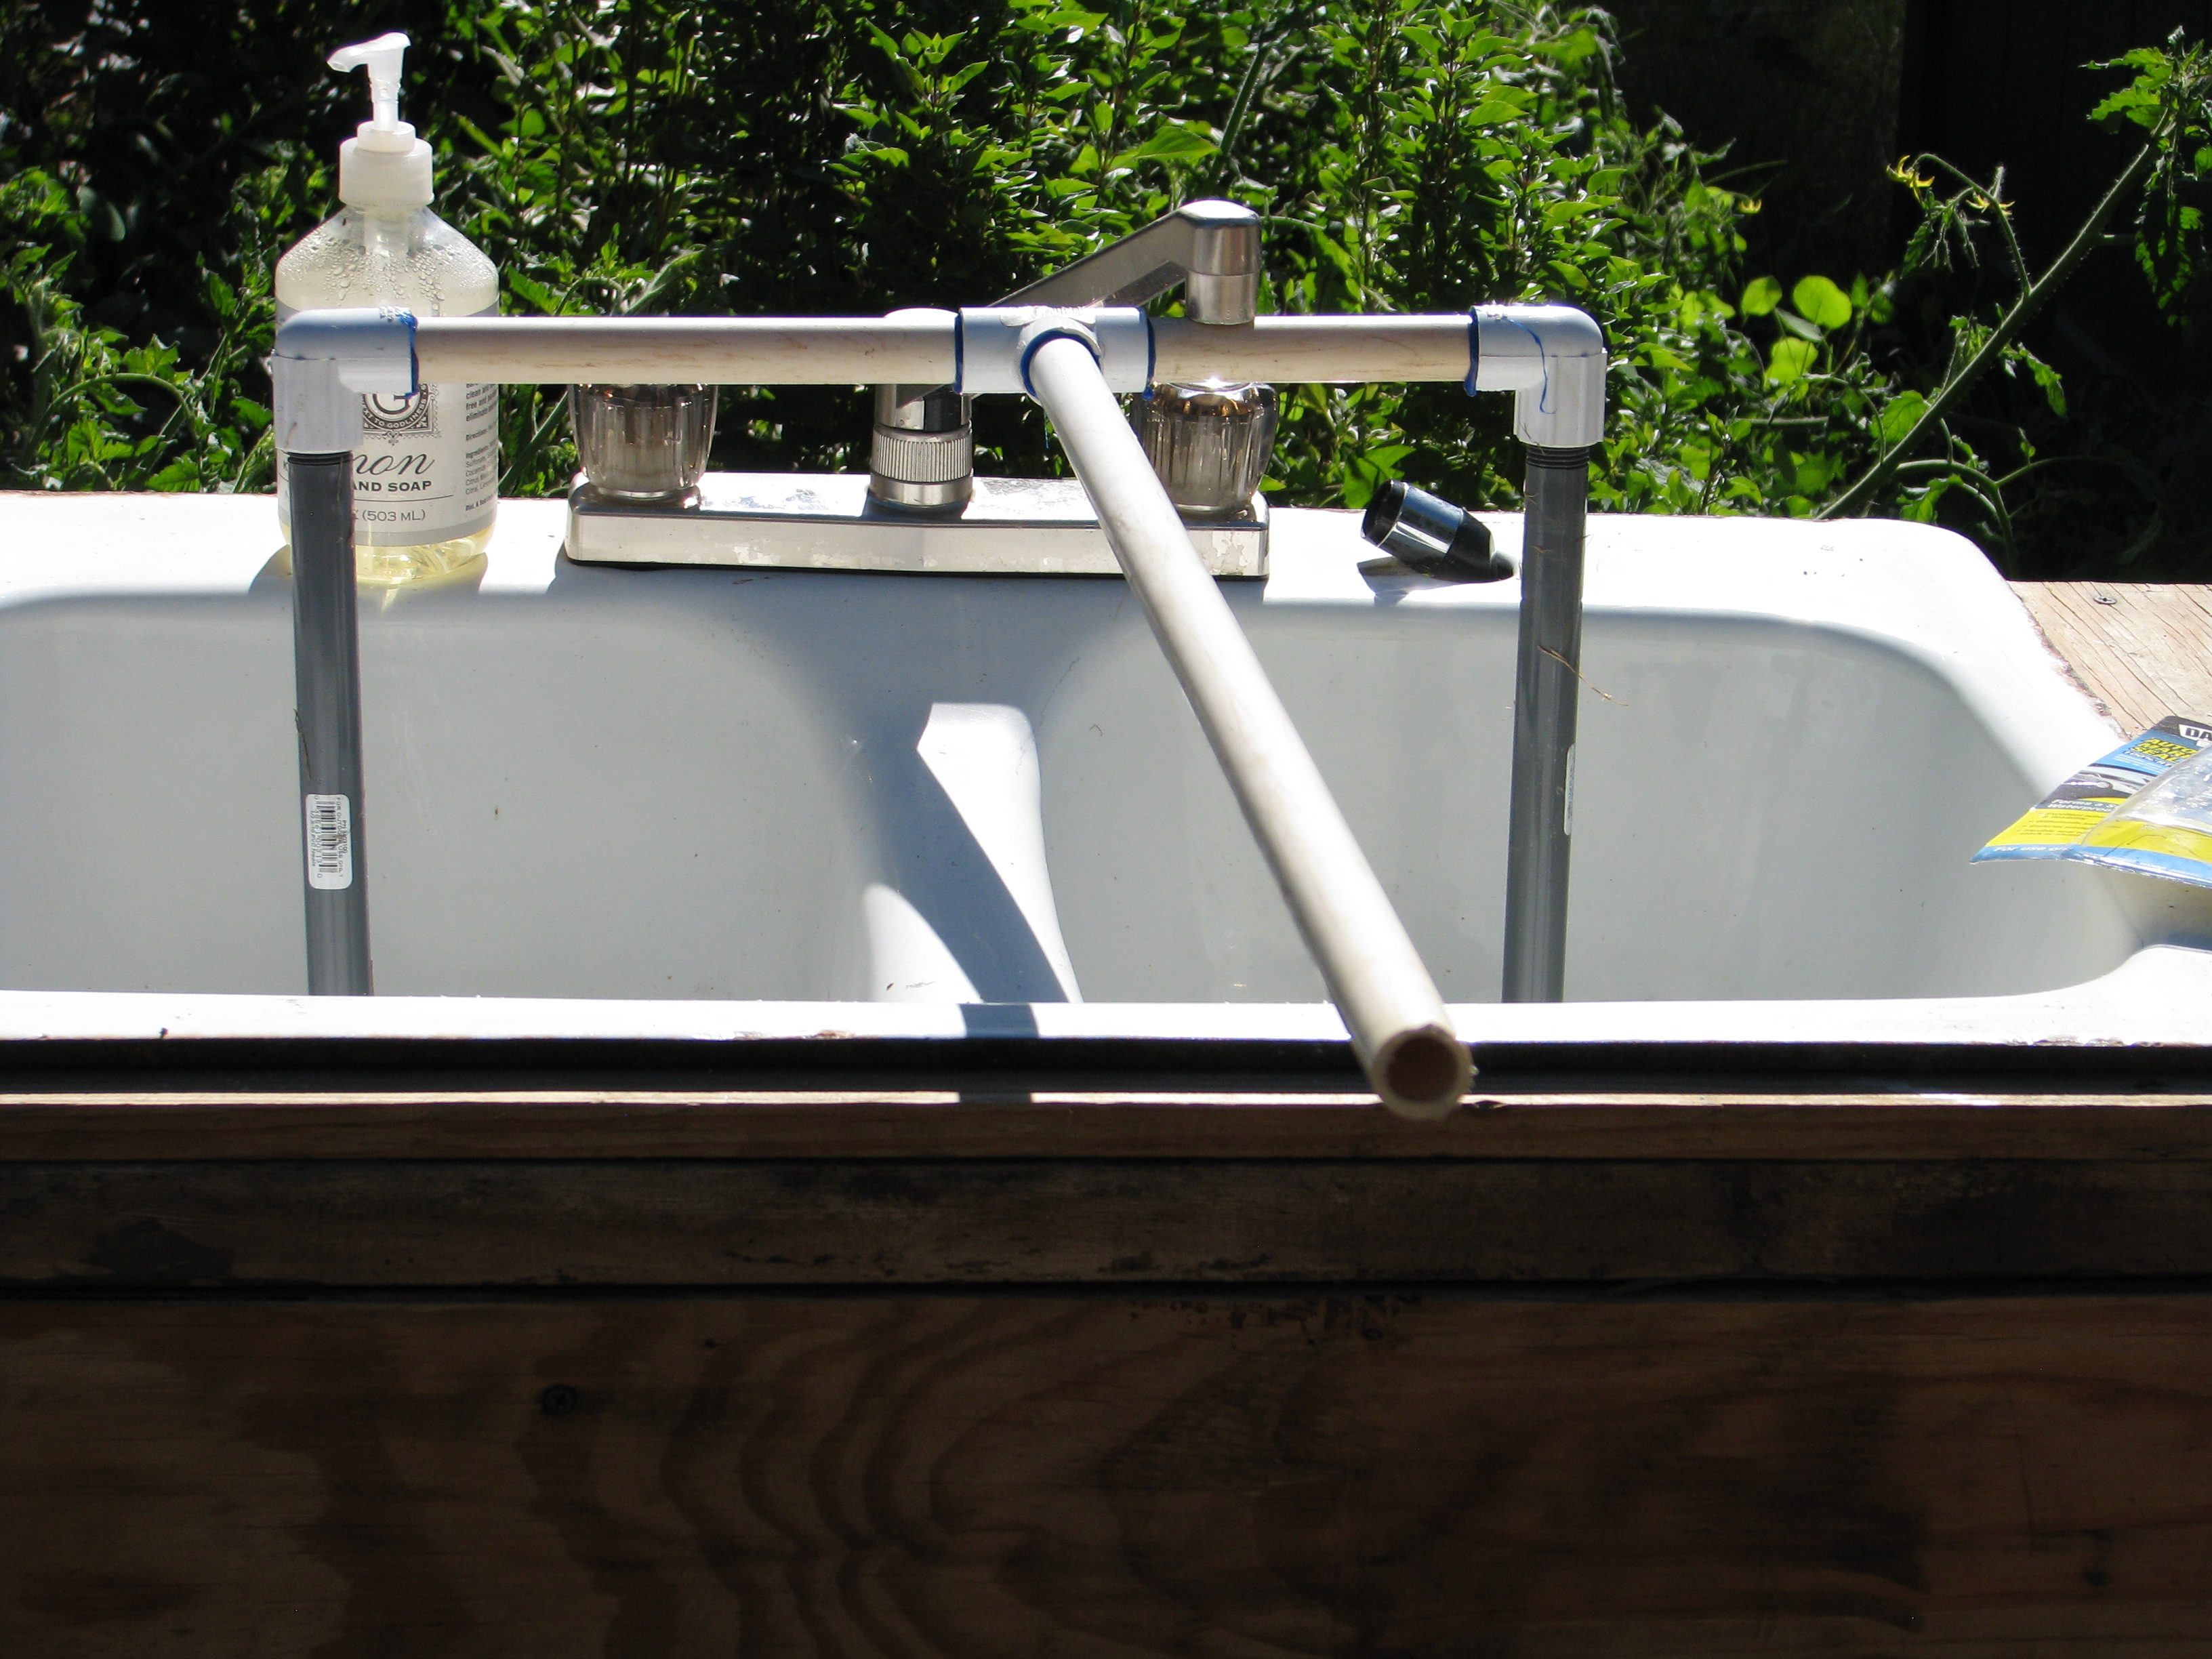
My beauties. My plan was to screw it into a soaker hose that I already had, but I worried that without water pressure it wouldn’t work. It didn’t.

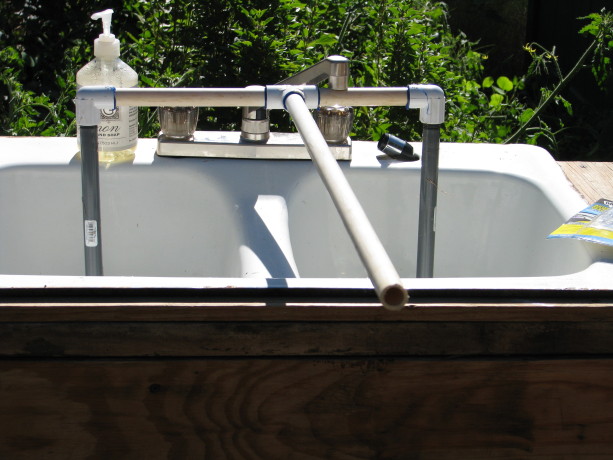
The soaker hose idea failed because of the lack of water pressure, and caused the water to back up and overflow the plunger cups. I removed the screw end from the PVC and glued on more 1/2″ pipe so that the water would directly empty near the apple tree.
There were a few other tweaks, such as widening the drill holes in the plunger for better water drainage, propping the pipe up on a piece of wood so that it fit the drains more securely (it isn’t fastened onto the stand so that if I had to access the plunger cups I could do so easily), and placing screen over the drains so no one would lose a ring down into the device.

Now the water drains directly into the bed. Tip: glue the long pieces on once the main part is in place under the sink. Plants will grow up around the back of the sink to hide it from view. Now it all works, I have less work to do, no yucky buckets to haul, the apple tree receives greywater, I repurposed several items and although I had to buy a few things, I supported a local business, the sink is in a better location, and I like the blue color of the plunger cups.
Best of all, now I have some snazzy clear handles to use for some other project!

Hmm. Threaded magic wands! I wonder how I can repurpose these beauties?!