- Animals, Compost, Fungus and Mushrooms, Gardening adventures, Heirloom Plants, Natives, Other Insects, Perennial vegetables, Permaculture and Edible Forest Gardening Adventures, Pets, Predators, Recipes, Reptiles and Amphibians, Seeds, Soil, Worms
Argentine Ants
Most of the annoying ants we suffer with in California, especially here in San Diego, are actually an invader called Argentine Ants. They arrived via shipboard to Louisiana, and have spread throughout warmer climates. Argentine ants are so successful because they have multiple queens per colony and therefore recognize all other Argentine ants as family. They don’t fight among themselves. There is a colony that stretches from San Diego to near San Francisco.
Argentine ants have nudged out many of our native ants, which isn’t a good thing. We need our native ants for decomposition. Argentine ants harm arthropods and have a terrible effect on the ecosystem; here in Southern California their impact on horned lizards have been devastating. The only way you can tell them apart (unless you have very tiny ants or black or red ants) from natives of similar size is by studying them with a microscope. This blog post shows great photos of the difference between ants.
Argentine ants farm aphids on plants and trees, milking the bugs for their ‘honeydew’, a sweet excretion. They will bring aphids to your plants and farm them there. They will also farm scale underground around the trunks or stems of plants, especially natives such as California Lilac (ceanothus spp). By the time the plant show stress and the ants begin to farm aphids above ground, much of the damage has already been done.
As much against annihilation as I am, this ant does terrible harm to our environment and should be happily living back in its native South American river area. Not only is it directly harmful, but because it is everywhere it incites people to spray poisons that kill all the beneficial insects as well.
The best solution is a borax bait trap that you can make your own. Borax is a powerful killer and should not be used liberally. Yes, it is sold as a fertilizer and as a laundry additive, and that borax kills insects and beneficial flora and fauna as it enters the watershed and soil. It is toxic to pets and children. However, just a little solution used wisely can really help control these ants.
I use old spice containers that have the plastic shaker ends on them for the bait traps. The holes are small enough to prevent other insects or animals from entering the jar, but are big enough for the ants. Otherwise you can use butter tubs with small holes punched in the top. Put a cotton ball inside the containers.
It is recommended to make a 1% borax solution rather than a stronger one because you don’t want to kill the ants immediately. You want them to bring the bait back to the nest and feed it to the queen. I know that is horrible, but they would definitely do the same to us if they could.
This recipe is based on research done by entomologist John Klotz at UC Riverside. Dissolve 1 tsp. boric acid (borax) and 6 tablespoons sugar in two cups of warm -preferably distilled or dechlorinated – water. Soak cotton balls in the bait solution and place in spice shakers or plastic tubs with holes in the lid. The containers will also keep the cotton ball from drying out quickly. Place in a shady location in the path of Argentine ants. Clean the container and replace the cotton ball weekly (it will become moldy). At first the bait traps will attract more ants, which is fine because they are bringing the bait back to their nests. If you want to kill the ants immediately, add more boric acid. For long-term control, reduce the boric acid to 1/2% to allow worker ants to feed for a long time before they die and therefore bring more back to the nest.
Keep the excess boric acid solution capped and in the refrigerator well labeled, so no one drinks the sweet drink.
Be sure to keep an eye out for ant activity around the base of your native plants, and if you have aphids on the leaves of plants you no doubt have ants farming them there. Argentine ants are pests we really can eliminate without fear, and allow our native ants to reclaim their territory.
You May Also Like

Native Insects and IPM
- Building and Landscaping, Compost, Composting toilet, Gardening adventures, Health, Houses, Hugelkultur, Humor, Living structures, Natives, Permaculture and Edible Forest Gardening Adventures, Ponds, Rain Catching, Recycling and Repurposing, Soil, Special Events, Water, Water Saving
How To Evaluate Your Property: The July Lecture In The Garden at Finch Frolic
Finch Frolic Garden’s Program in the Garden Series for July:
Analyzing Property for Maximum Use:
Site Evaluation Step-by-Step
Sunday, July 26, 2 – 4 pm
Looking for property? Creating a landscape? Planting a garden? Building a house? Diane Kennedy of Finch Frolic Garden will take you through the steps of evaluating your site for maximum effectiveness with the least labor and cost.
This class is for the average homeowner, with little or no permaculture background. All terms will be defined and explored. Guaranteed, you will leave the class excited about your property, and able to find new potential in it.
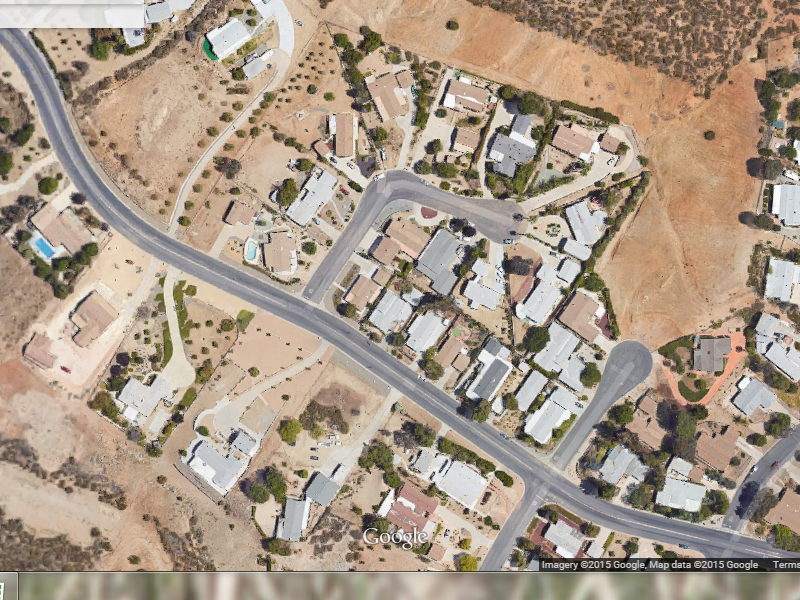
In permaculture, 99% of the work should be in design, and only 1% in labor, so find out how to look at property with new eyes and start designing! Participants are encouraged to bring a Google Maps image of their property to work on.
We will, of course, offer homemade vegetarian refreshments. Cost is $25 per person, mailed ahead of time. Finch Frolic Garden is located at 390 Vista del Indio, Fallbrook. Please RSVP to dianeckennedy@prodigy.net . More information can be found at www.vegetariat.com. You’ll love what you learn!
- Animals, Bees, Birding, Compost, Fungus and Mushrooms, Gardening adventures, Health, Heirloom Plants, Houses, Hugelkultur, Microbes and Fungi, Natives, Other Insects, Perennial vegetables, Permaculture and Edible Forest Gardening Adventures, Ponds, Predators, Quail, Rain Catching, Recycling and Repurposing, Reptiles and Amphibians, Soil, Vegetables, Water, Water Saving, Worms
My Plea Against Gravel
 Here in Southern California, as in many other areas, we are finally legally recognizing the drought. There are rebates in place for those who take out their lawns, and here in Fallbrook there is a 36% water reduction goal. Many people just don’t know what to do with all that lawn. A very unfortunate continuing trend is to dump half a ton of colored gravel on it. Please! NO! First of all, once down gravel is nearly impossible to get out again. Gravel, like all rocks, is thermal mass. Instead of having a large rock heating up and radiating out heat, with gravel there are tens of thousands of surfaces radiating out heat and reflecting light and heat back up. It is the worst kind of hardscape. All that reflected heat and light heats up your home, making you use your air conditioner more frequently which is a waste of energy, and also dries out the air around your home. Desertification reflects light and heat to a point where moist air moving over a region dries up. There is less rain, or no rain. Most trees and plants trap humidity under their leaves. Gravel reflects light and heat back up under those leaves and dries them out, sickening your plants and trees. Pollen travels farther on humid air; it can dry out quickly. If you are relying on pollination for good fruit set between trees that are spaced far apart, then having some humidity will increase your chances of success.
An area of Wildomar, surrounded by hillsides of chaparral that hasn’t been destroyed. These homes have mostly gravel yards and denuded, compacted backyards. Very little rain penetrates, and all the weeds that nature sends it to help repair this gash in the earth are promptly poisoned. This is death to us and our planet. By laying gravel you are turning soil into rock-hard dirt, because microbial life cannot live closely under it. That robs any plants you have stuck into the gravel of the food they need from the soil, which is opened up through microbial activity. You are adding to the heat value of the hardscape around your house causing you to cook in the summer and use more air conditioning. You have reduced habitat to zero. You have added to global warming by reflecting more heat and light into the sky. Although gravel is permeable, usually the ground below it bakes so hard that rain doesn’t percolate. I’ve read sites that want to you increase the albedo effect by laying gravel. In the short term albedo helps cool the atmosphere, but as a result of too much reflected light dries everything out. Think of the dark coolness and dampness of forests… that are now bare ground.
What do you do with your lawn instead? There are many choices that are so much better for the earth and your quality of life. First step, cut swales on contour on any slopes for best rain harvesting. Flat lawn? Easier still. Turn your lawn into a beautifully landscaped lush native garden. I’m not talking about a cactus here and there, but a creation with the awesome native plants we have in Southern California. Some of them such as Fremontia can die with supplemental summer water!

A beautiful border and plantings of California natives. Very low water use here, and very high habitat! There is a chocolate daisy that smells like chocolate. Oh yes. And how can you not want to plant something called Fairy Duster or Blue-Eyed Grass? A native landscape planted on soil that has been contoured to best catch and hold water, and amended with buried wet wood (hugelkultur), will give much-needed food, water and breeding grounds to countless birds, butterflies, native insects and honeybees.
Or put in a pond. Wait, a pond during a drought? Yes! Ninety-nine percent of California wetlands have been paved over, drained or are unusable. Where are all the animals drinking? Oh, wait, we are in the epicenter of extinction, mostly due to wetlands loss. There are very few animals left that need to drink. Those that are left have to take advantage of chlorinated water in bird baths and swimming pools. The microbially rich and diverse clean, natural water that fed and sustained life is just about gone. So what can you do? If you have a swimming pool, you can convert it either entirely to a pond, or into a natural swimming pool that is cleaned by plants.
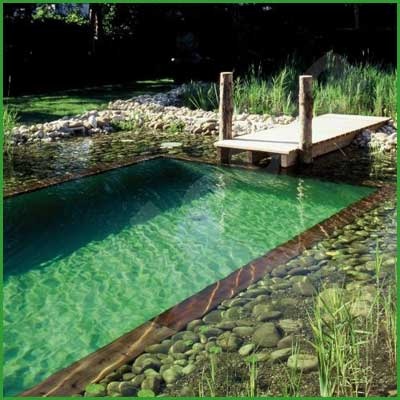
A natural pool upgrades your pool to a lovely pond without the use of chemicals. Suddenly instead of having this expensive eyesore that you use only a couple of months a year and pour chemicals into year-round, you have a lovely habitat that you want to sit and watch, and even better, swim in safely without turning your hair green or peeling your skin. You don’t need to clean the pool all the time, and you don’t need to put in chemicals. If you are in the San Diego or Los Angeles area, call Dr. Robert Lloyd of PuraVida Aquatics for a consultation and conversion. If you don’t have a pool, then build one that is cleaned by plants and fish. You don’t need a filtration or oxygenation system because the biology does it all. Where do you get the water from to top off your pond?
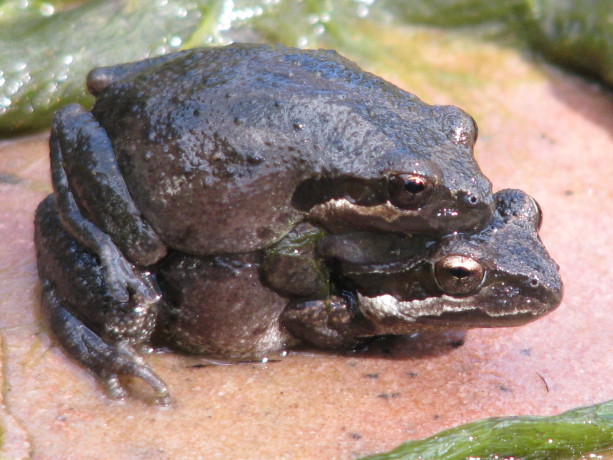
Native Pacific Chorus Frogs enjoying our clean pond at Finch Frolic Garden. Connect your pond to a lovely, planted stream that is connected to your laundry water or graywater system. You are buying water every day, so why not compost your water through phytoremediation and have a pond full of great healthy chemical-free water that is wonderful to look at and is an oasis for thirsty animals and insects?
Or install a food forest. With good soil building and rain catchment first, and planting in guilds with sheet mulch around trees and on pathways, you will be using a fraction of the water you pour on your lawn and yet harvest lots of food. Too much food? Share it with a food pantry!
Or start a veggie garden without digging any sod.
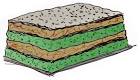
Create a lasagna garden right on top of the lawn and start growing immediately. Layer cardboard, sticks, grass, food scraps, leaves, more grass, more food scraps, more leaves and top it with about 8 inches of good soil, then plant right in it! That lovely standing compost heap will slowly turn into good soil while killing the grass beneath and growing crops for you immediately.
If ridding yourself of a lawn just breaks your heart, then substitute the high-water use grasses for a native grass mix that is comparable. Look at S&S Seeds for prices or for seed choices. Water a few times with Actively Aerated Compost Tea using any rainwater you may have caught in those 50-gallon containers and your grass roots will travel so deeply that they will find groundwater. Check up on the work of soil microbiologist Dr. Elaine Ingham and see how easy AACT is to make and use.
There are so many alternatives to using gravel that aren’t expensive, that are an investment in your property and in reclaiming habitat while beautifying your home and saving money. So please, just say, “NO,” to the gravel. Tell a friend!!
Which one of these would you rather live in? Which do you think is better for the earth and for the future generations?

Finch Frolic Garden, year 3.
You May Also Like
Native Insects and IPM
- Animals, Bees, Compost, Fungus and Mushrooms, Gardening adventures, Health, Hugelkultur, Microbes and Fungi, Natives, Other Insects, Perennial vegetables, Permaculture and Edible Forest Gardening Adventures, Ponds, Rain Catching, Recycling and Repurposing, Seeds, Soil, Water, Water Saving
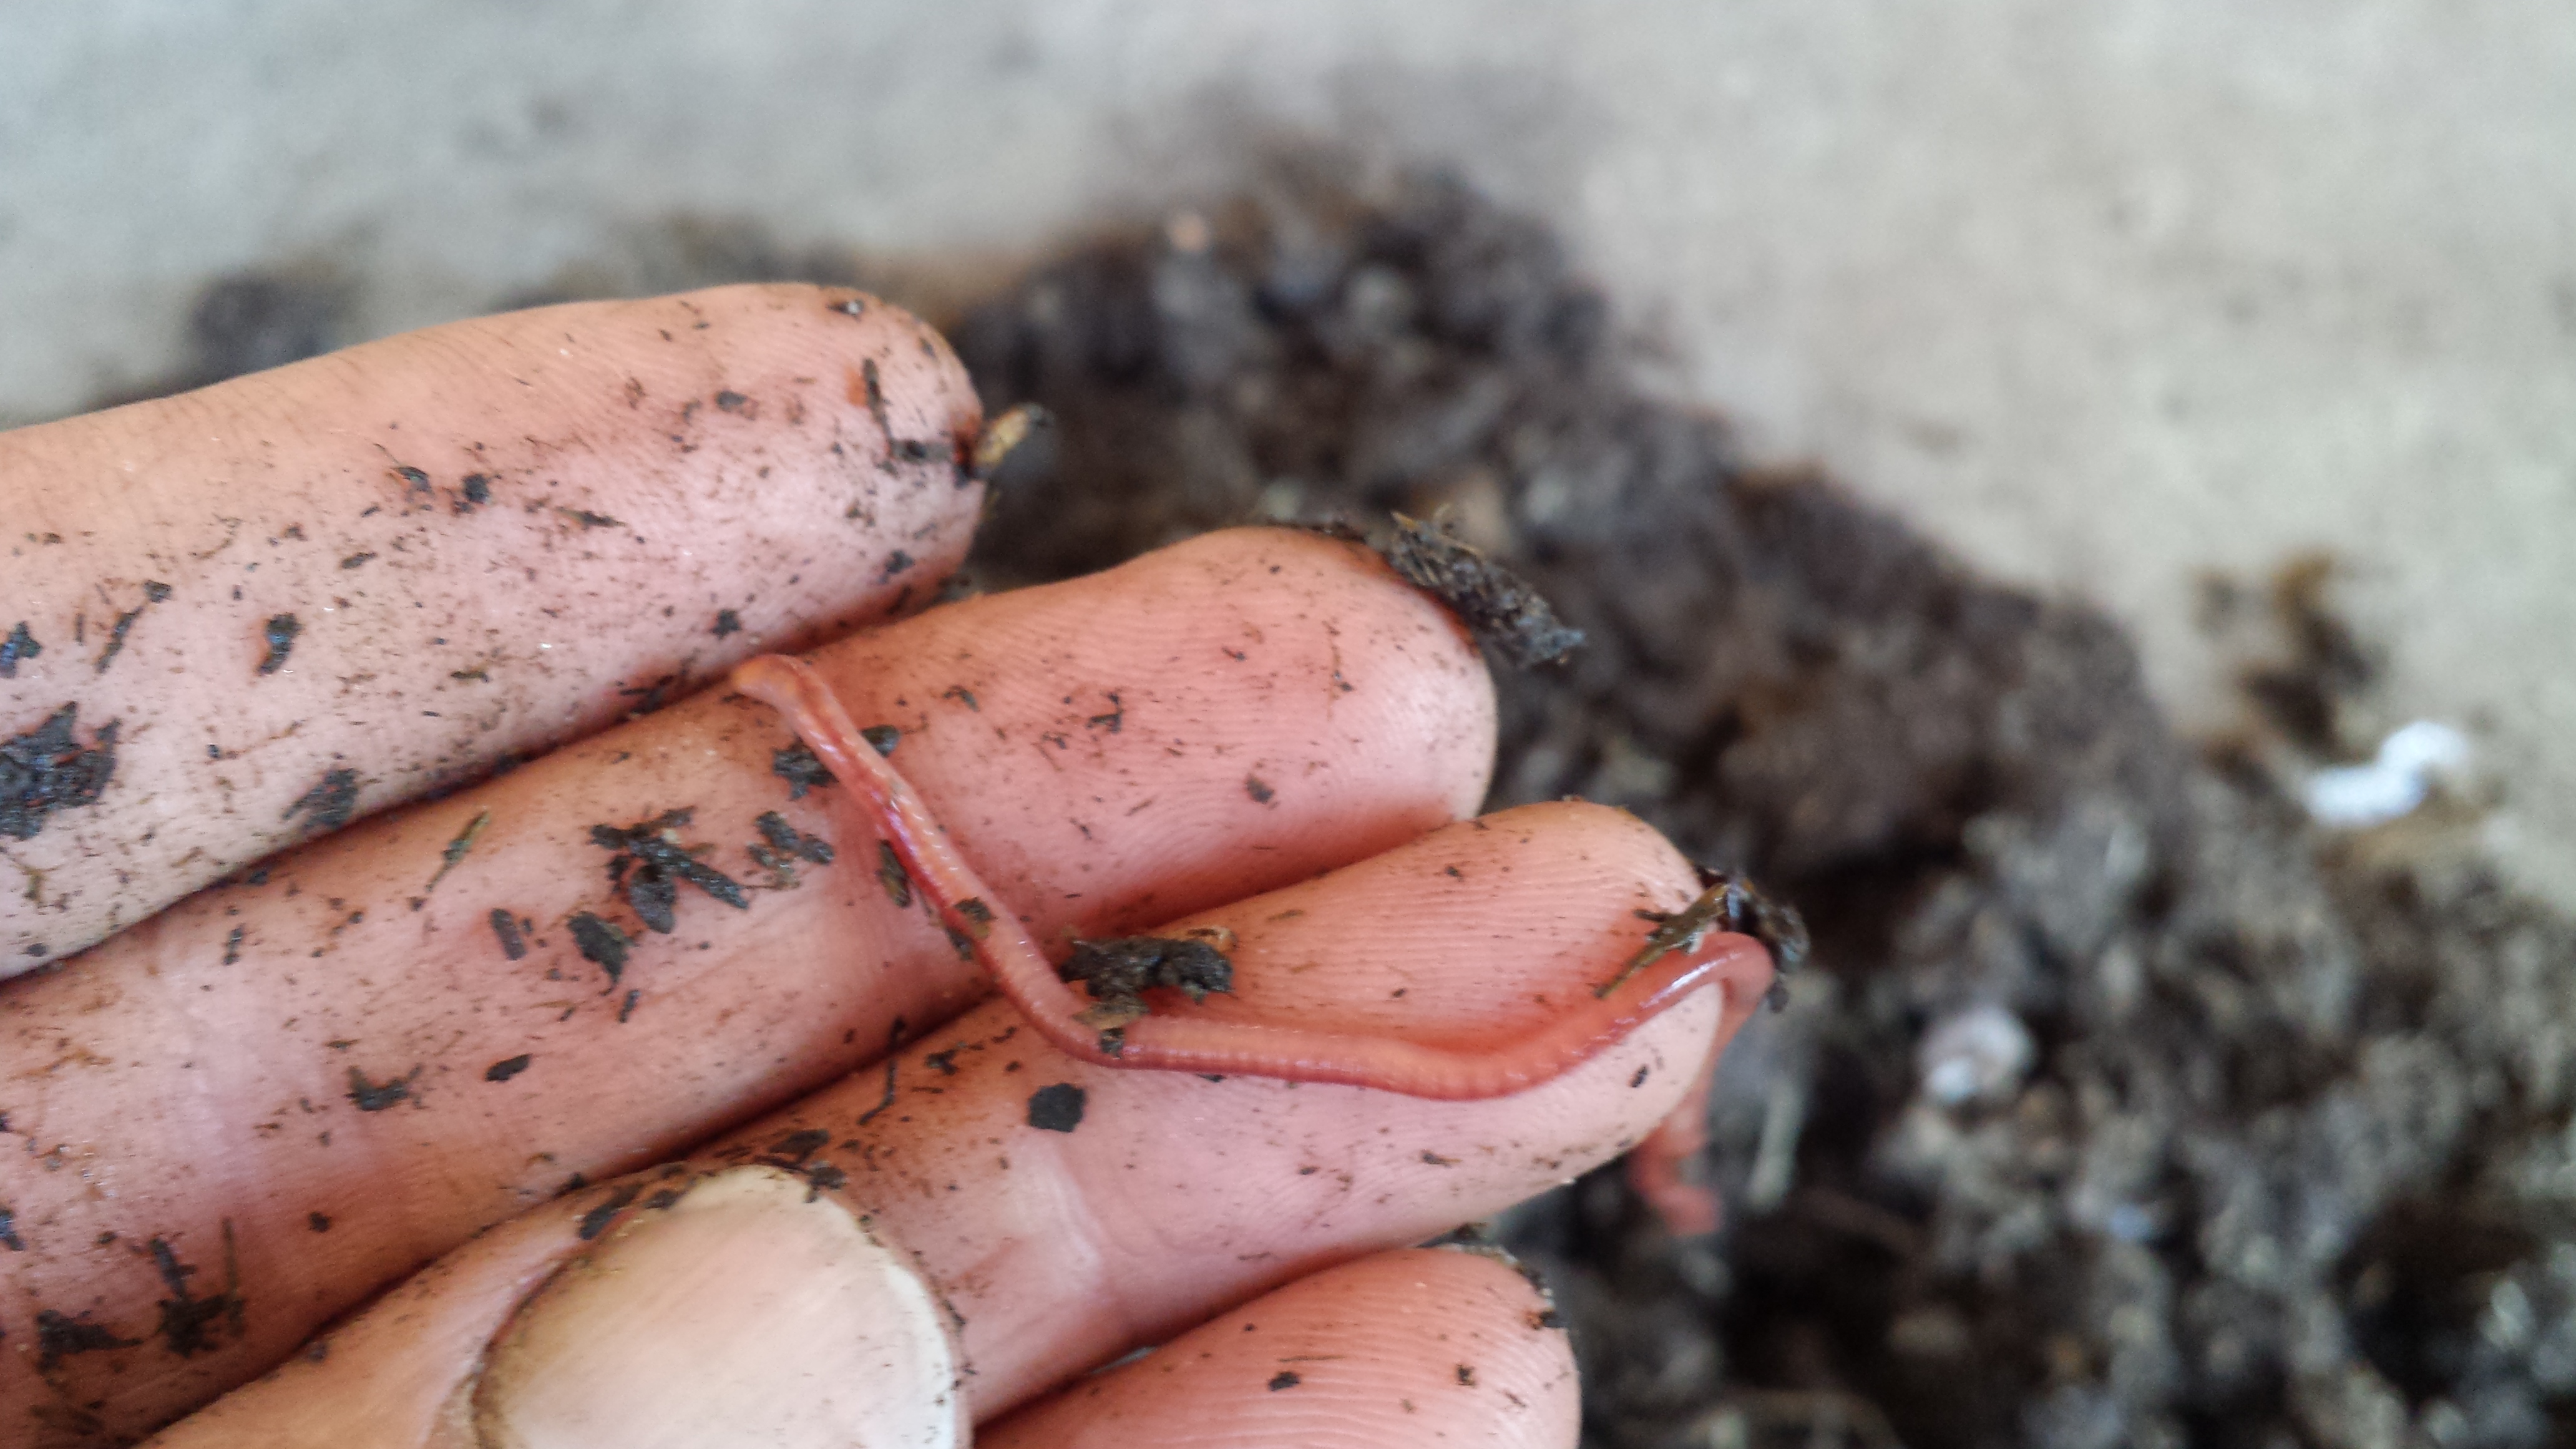
Fun With Worms and Microbes!

Enjoy a talk in the shade of Finch Frolic Garden with Doctor of Microbiology Bob Lloyd. Finch Frolic Garden’s Monthly Program in the Garden Series
Sunday, April 26, 2015, 2 – 4 pm.
Want to learn how to save water, and get the most out of the water you already buy?
How to improve your soil and how to grow food without chemicals…and why?
How to raise compost worms successfully?
DON’T MISS THIS CLASS!
Discover the world of the unseen! Sit in the shade at beautiful Finch Frolic Garden and enjoy a talk and demonstration with microbiologist and owner of PuraVida Aquatics Dr. Bob Lloyd (http://www.puravidaaquatic.com/). He’ll introduce you to the importance of soil microbes, water organisms, compost worms, and so much more! Using slides, videos, specimens and a microscope Dr. Lloyd will teach you a new way to look at healthy soil and water, and how to have both without chemicals. Each attendee will receive a sample either of compost worms or aquatic beneficials. We will, of course, offer homemade vegetarian refreshments. Cost is $25 per person, mailed ahead of time. Finch Frolic Garden is located at 390 Vista del Indio, Fallbrook. Please RSVP to dianeckennedy@prodigy.net . More information can be found at www.vegetariat.com. You’ll love what you learn!
How to grow compost worms successfully! You May Also Like
Native Insects and IPM
- Animals, Bees, Birding, Chickens, Compost, Fungus and Mushrooms, Gardening adventures, Heirloom Plants, Hugelkultur, Microbes and Fungi, Natives, Other Insects, Perennial vegetables, Pets, Predators, Rain Catching, Recycling and Repurposing, Reptiles and Amphibians, Seeds, Soil, Vegetables, Water Saving, Worms
Pathways Can Help Your Garden!
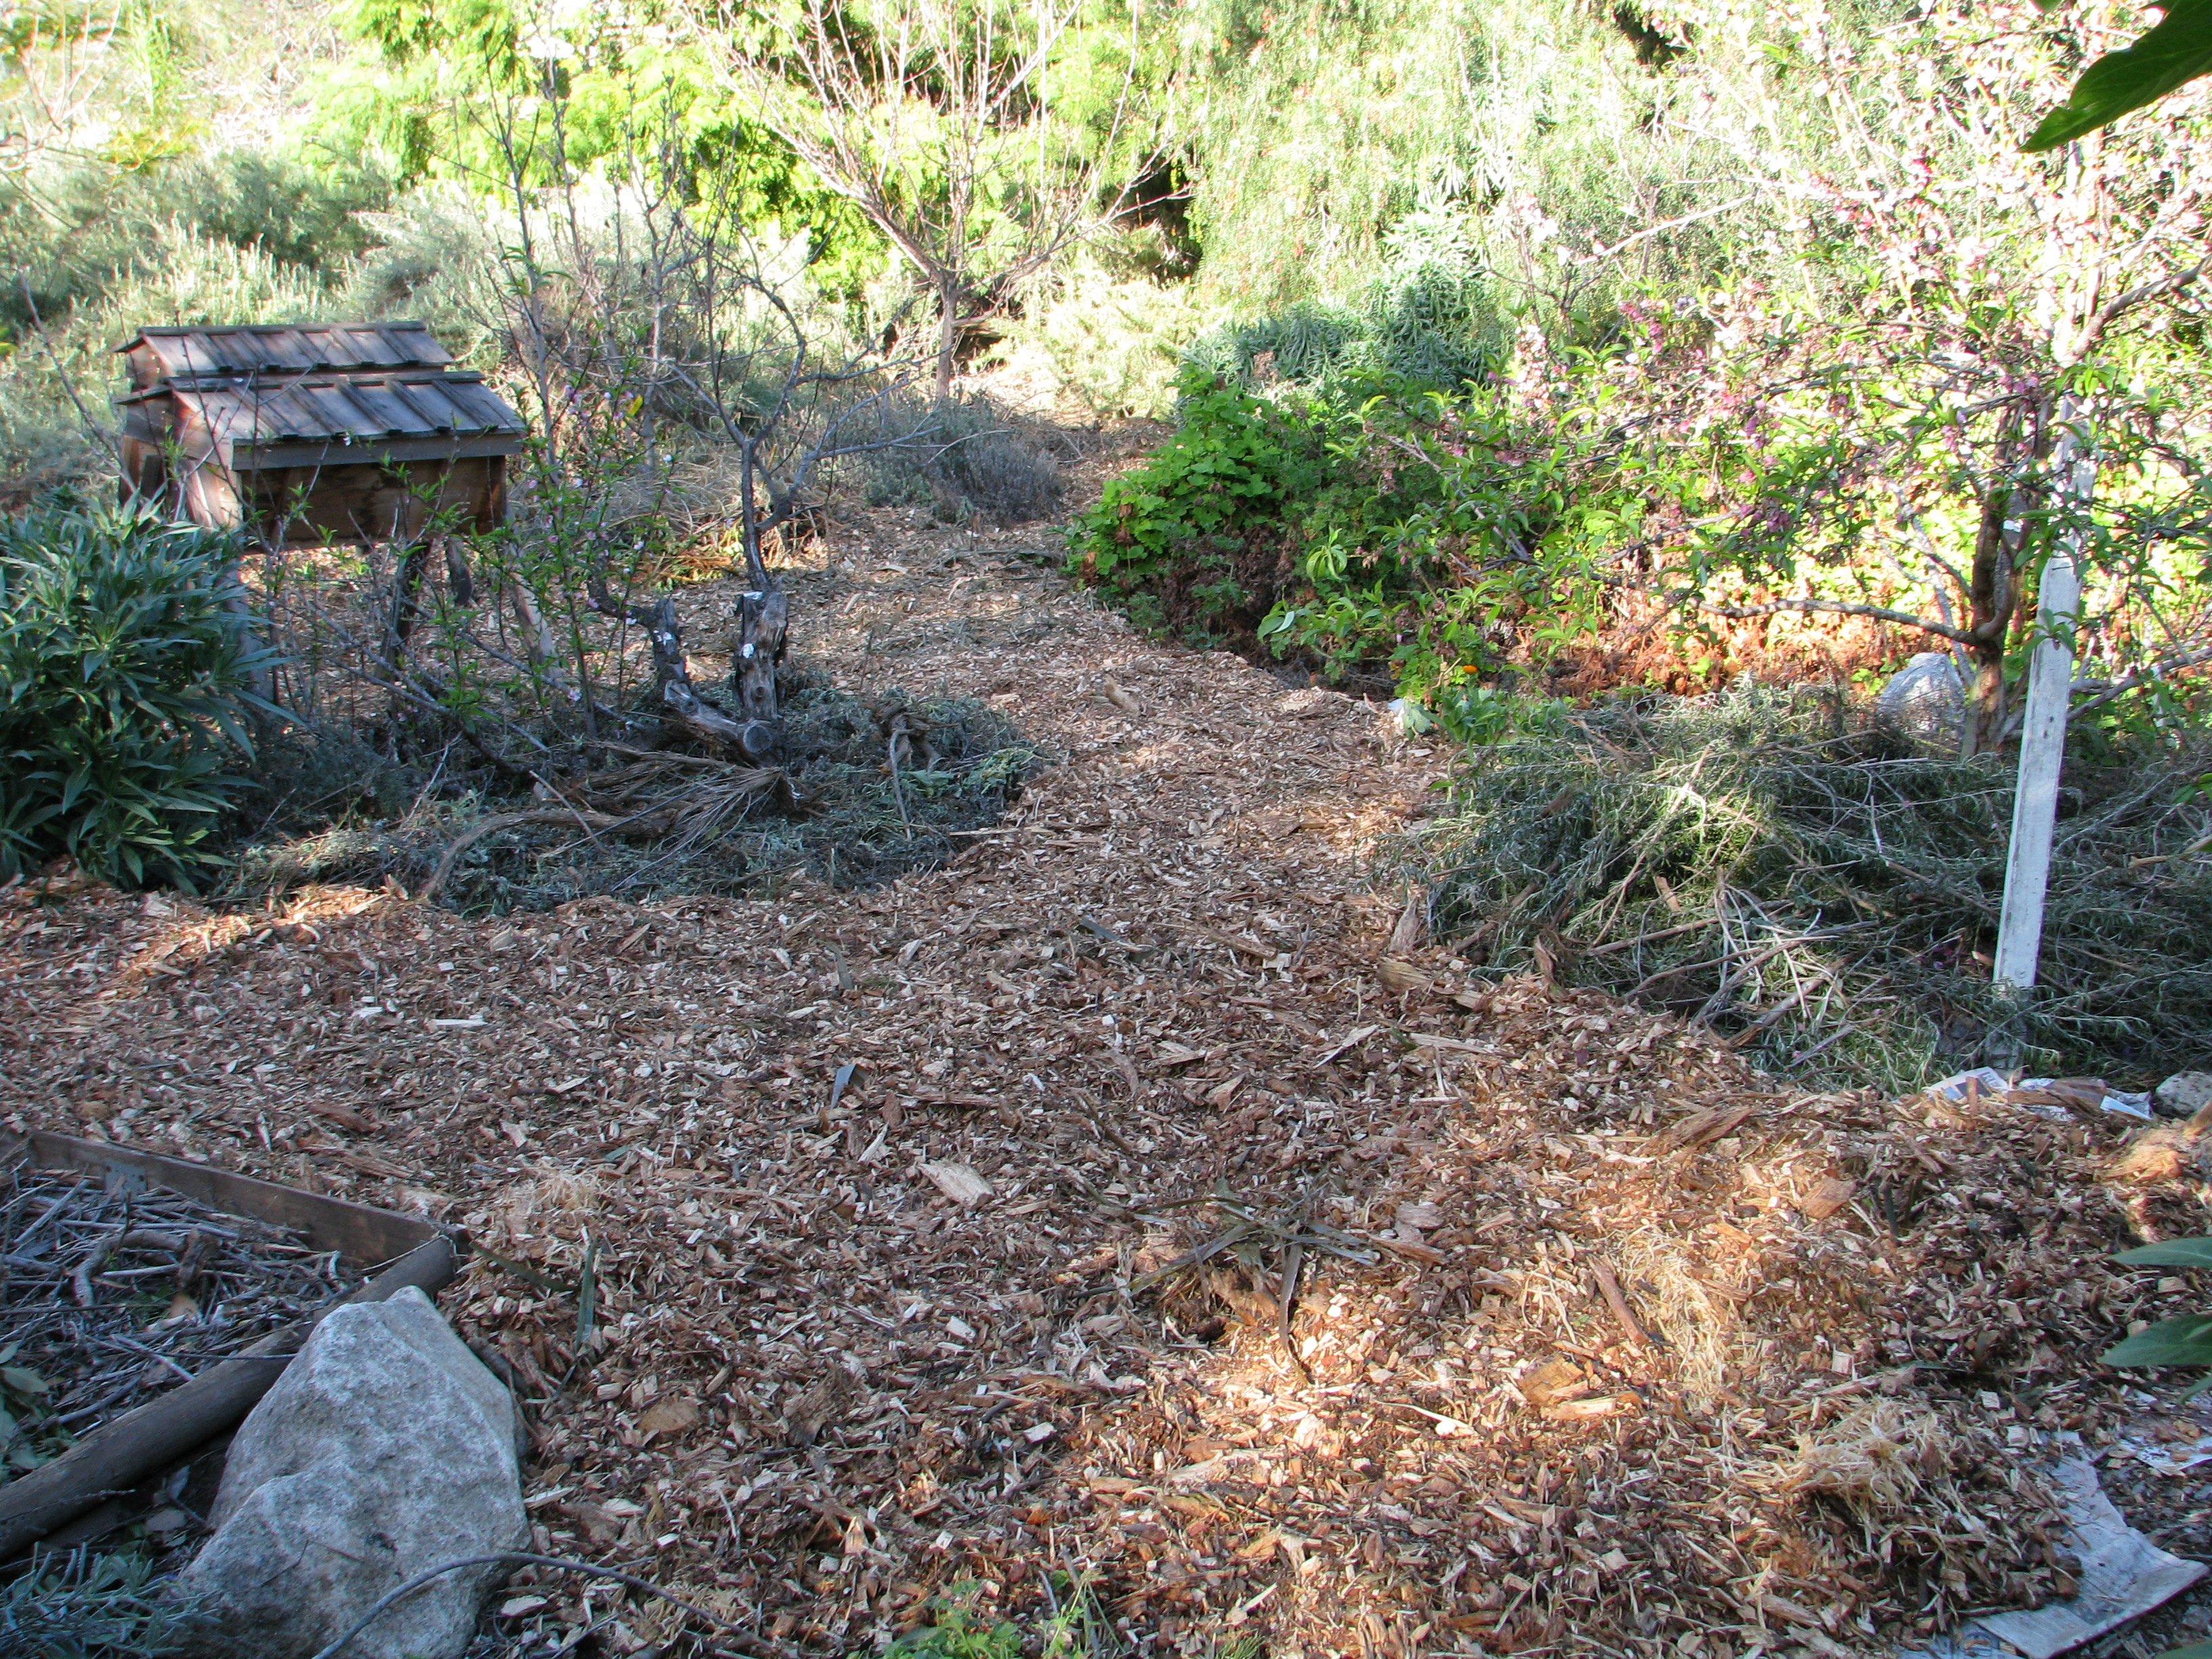
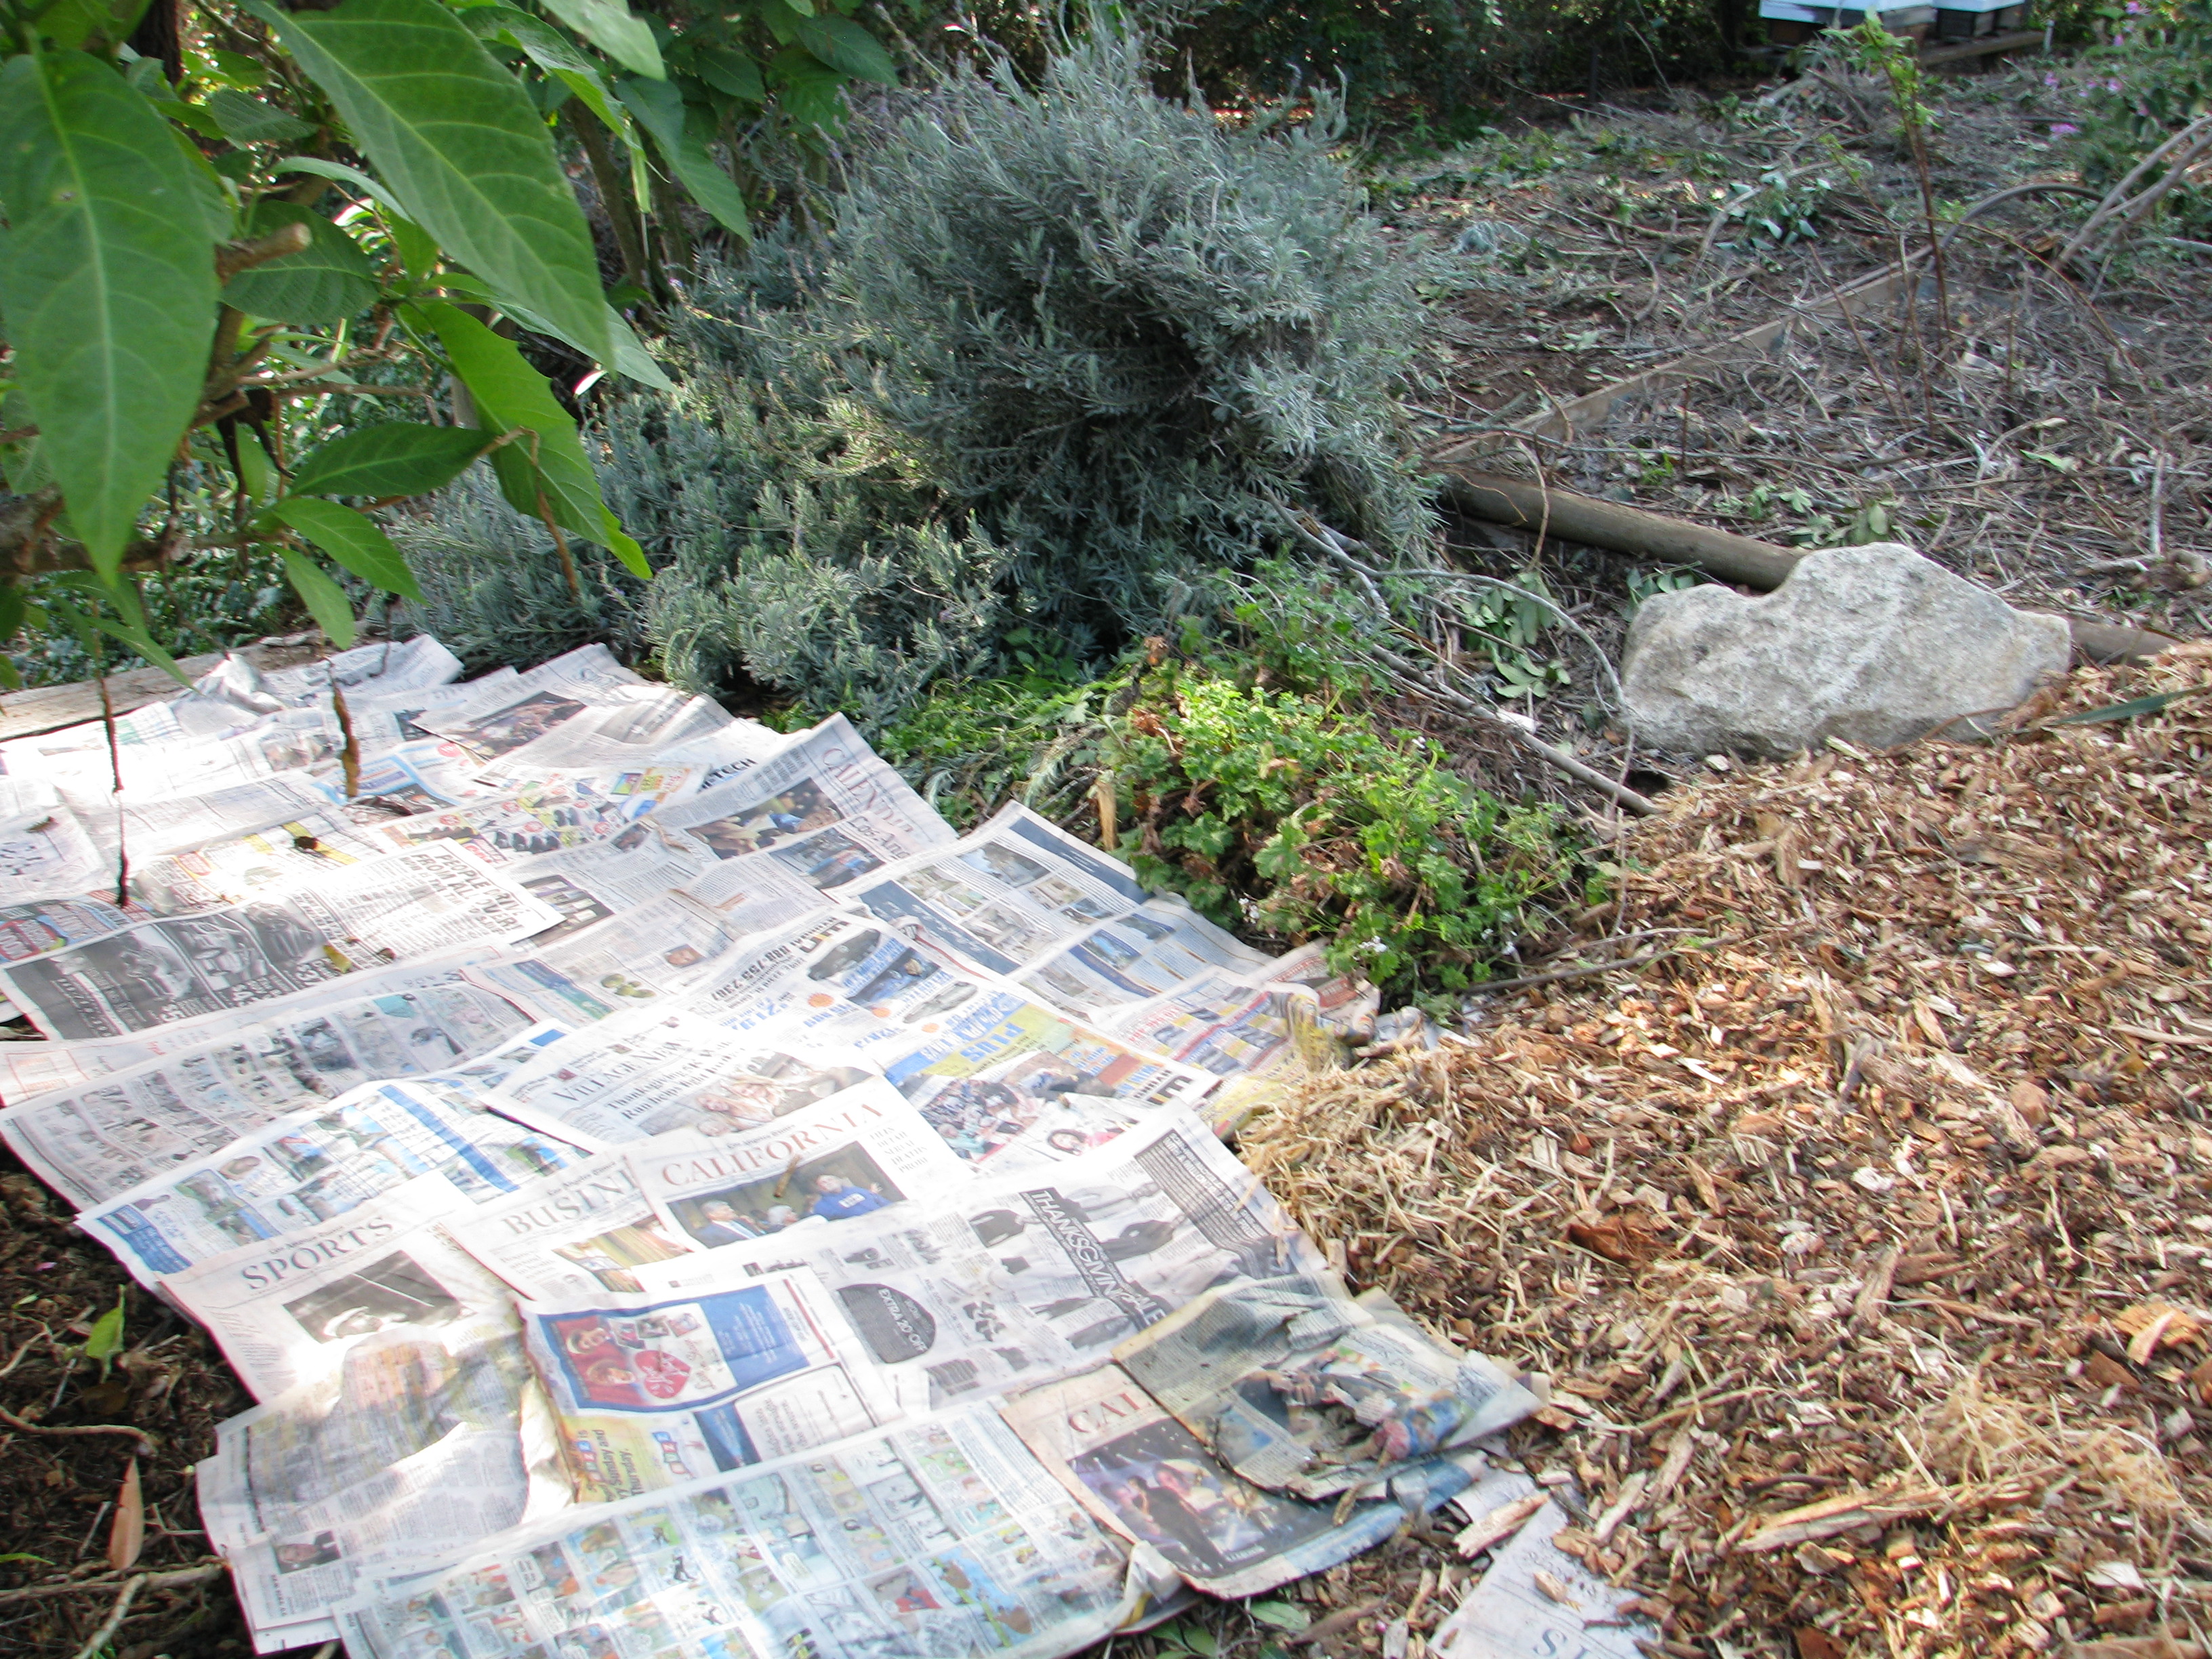
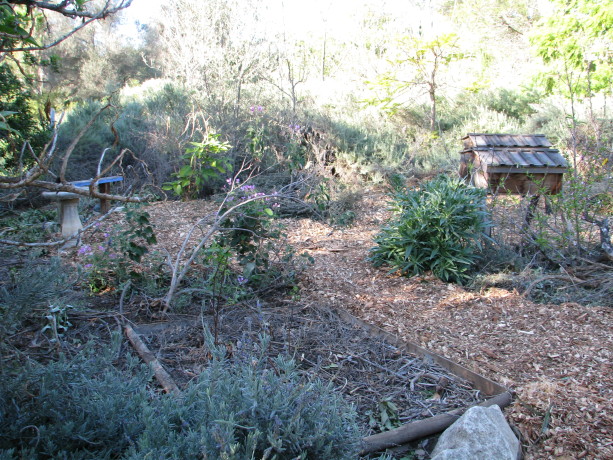
A finished section. Footpaths and/or vehicle access paths are absolutely necessary for any yard. Unfortunately, weeds love growing in them. Worse, the pressure from footfalls, wheelbarrows and vehicles compress and compact the soil, pressing the soil grains together so tightly that oxygen – and therefore life – can’t exist often up to several inches or more deep. Any life, that is, except for the grasses and other weeds that nature sends in to help repair the soil. Bare ground will be greatly compacted by rainfall, which will then erode paths as it runs, unable to soak through that spaceless ground. Once wet bare pathways are often unwalkable until they dry out, and have to be resmoothed. In our hot, dry areas, bare earth or graveled pathways reflect heat and light back up. That reflected heat and light dries out the underside of plant leaves, where species such as Live Oaks have over the millennium developed leaves that curl to expose less surface to the hot sun and to gather moisture underneath. Reflected heat and light dries out the air as well, and any hope of slight humidity to help water plants through months of dry heat is gone. If you have open-pollinated vegetables that rely on breeze for pollination, all that open pathway actually decreases your germination because pollen – such as from corn – will dry out in arid conditions. Humidity that you can keep in your garden will keep pollen more viable longer.

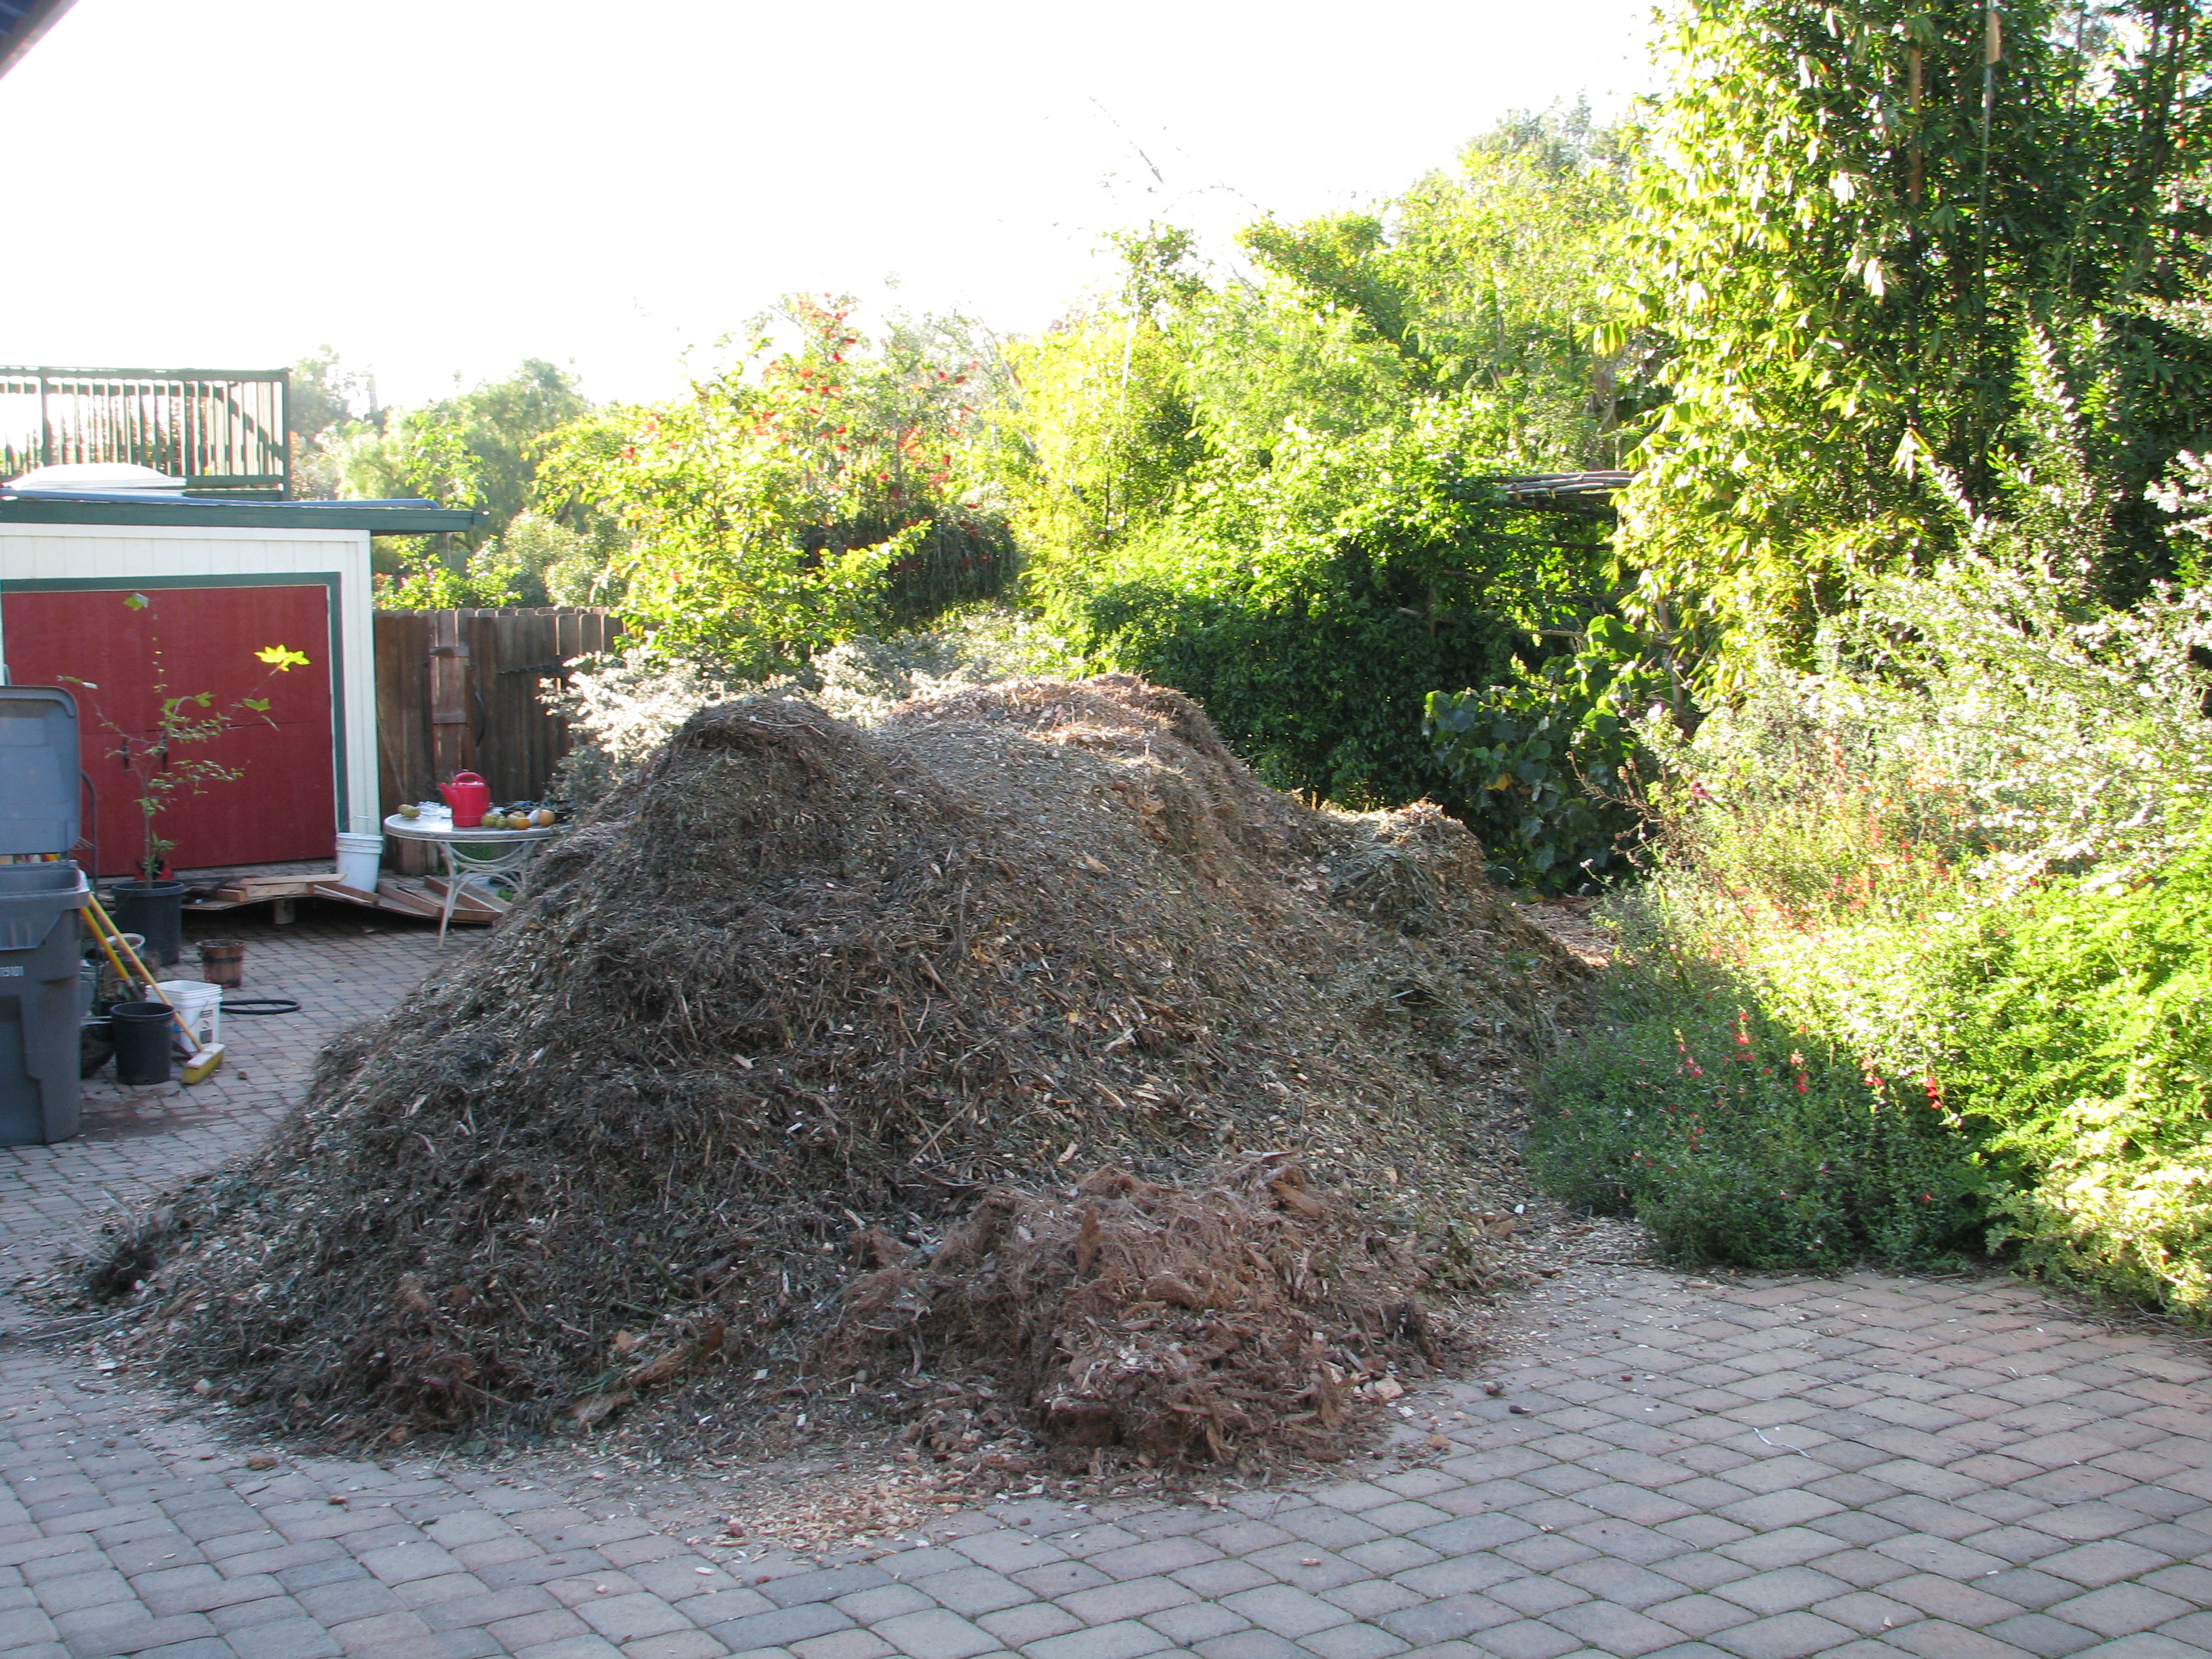
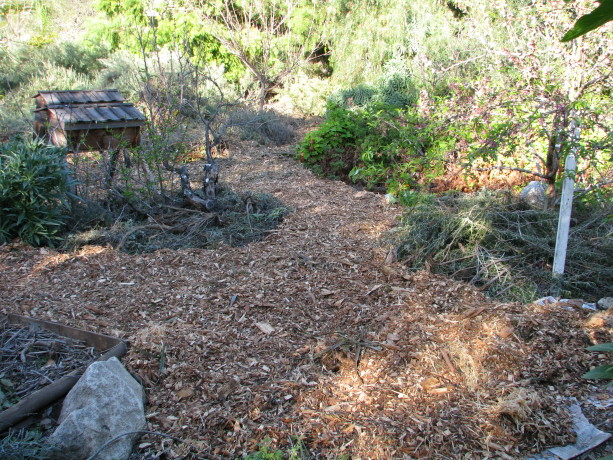
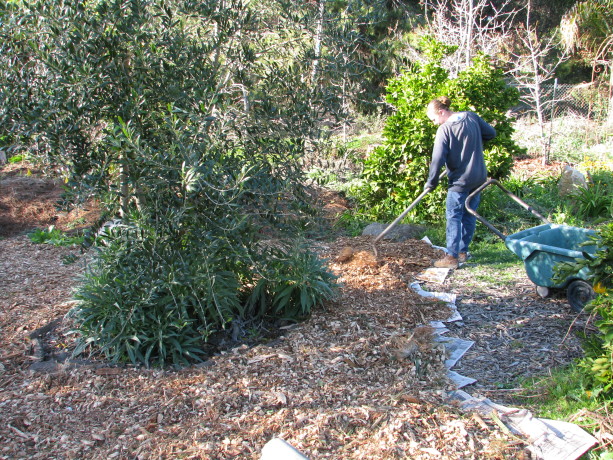
A wealth of freshly chipped wood – two dump-trucks full! The challenge: to spread it all in a week before our first tour. Yikes! What to do? Covering pathways with gravel is a common solution. I hate gravel. It heats up and becomes a thermal mass in the summer, further cooking your soil and air. It doesn’t suppress weeds and weed-whipping becomes an exercise in avoiding shrapnel. You can never get it out of the ground once you apply it, and chunks of gravel don’t do soil much good for planting. If you trip and fall on gravel it does terrible things to your knees – I had a piece lodged in my kneecap after a stumble some years ago (sorry for that cringe-worthy item).
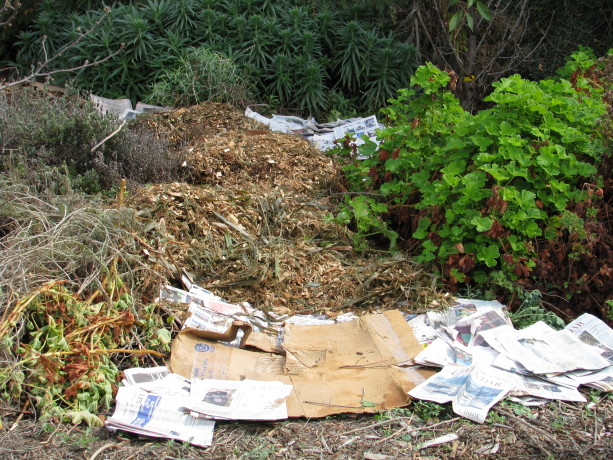
A 1/2 inch of cardboard or newspaper with mulch on top. Covering the soil is better, but not best. Bark will help rain bounce and then percolate, is dark so it won’t reflect light and heat as gravel does, and it decomposes. It is also expensive to buy, and because it decomposes you have to re-buy it every couple of years. Decomposing bark may be adding elements to your soil that you don’t want depending upon the source.

More progress as the afternoon wears on. I have experienced all the options above. The best method of countering all these issues that I have found also repurposes and recycles. Sheet mulch. Yep. You’ve heard it from me before and it proves itself every year. There is more to it, though.
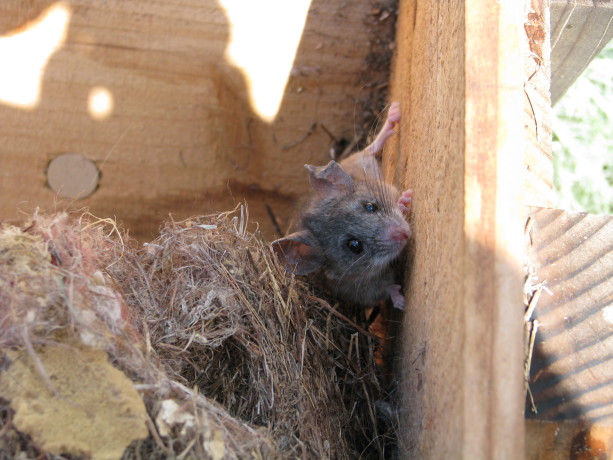
I disturbed a couple of nesting mice in one of the unused Kenya bee hives. First of all, please, please, please never use plastic. You can read about white pollution and the layers of plastic merging with topsoil in China and cringe. Plastic will not last. It will always be around in pieces. You will be poisoning your soil.
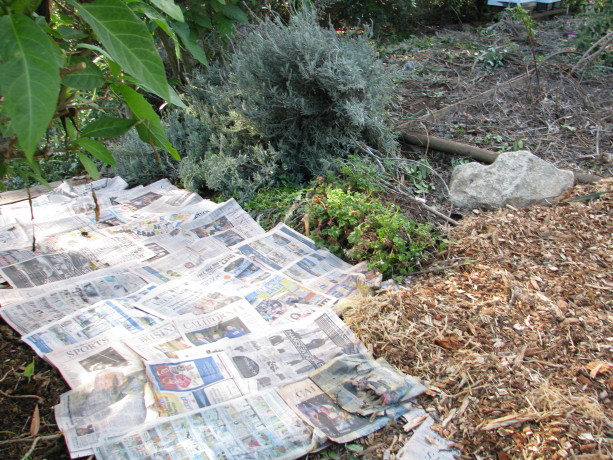
At the most basic, you can cover your pathways with 1/2″ of cardboard and newspaper, and top it with wood chips. I obtain my wood chips from arborists who save paying a dump fee by dumping it in my yard. If you’d rather have a more uniform look then purchase your bark. Either way the cardboard and newspaper will make the chips last years longer. More importantly the cardboard and newspaper form a protective, absorbent layer that protects the soil from compaction. Have you looked under a log or sheet of abandoned plywood in awhile? All the white tendrils of fungus, insects, worms, lizards and roots are thriving there along with billions of soil microbes all because they have that protective layer that keeps moisture in and compaction out. That microclimate is what you are forming with cardboard and mulch pathways. Since microbes free up the nutrients in the soil from which plants feed, you are creating more food sources for your plants. Tree and plant roots don’t end at the dripline, they reach out towards whatever source of water and nutrition they can find. If you are top-watering rather than deep-watering, then roots are abundant closer to the topsoil. By sheet mulching pathways you are extending food sources for your plants and trees, which now can stretch underneath the paths, link together with other roots through fungal networks, and become stronger and healthier. You also are creating habitat which is a food source for the entire food chain. Cooler, humid areas are better for bees and insects that pollinate, and the predators that feed upon them such as lizards, toads, frogs and birds. Just by sheet-mulching your pathways you are improving your environment as a whole. How can you NOT want to do this?

Sheet mulching around trees is much the same, except you add a little manure or compost tea if you have it. Sheet mulched pathways hold moisture and create some humidity which allows for better pollination and helps keep your plants from scorching in arid areas. If you live in a wet area or very humid area, use thicker layers of cardboard and mulch, which will help absorb moisture from the air and deliver it to the ground. Decomposition is quicker in wet areas, so using several inches of cardboard with mulch will last much longer and will again keep down compaction. Compaction in rainy areas is just as bad as in arid areas because of the erosion and flooding it causes.
More progress as the afternoon wears on. To catch rainwater and allow it to percolate into the soil rather than erode away topsoil, you dig rain catchment basins or swales. Swales are ditches with level bottoms, and can be a foot long (fishscale swales) or the length of your property. Swales should be positioned perpendicular to the flow of water. You can create swales across pathways, fill them with mulch, top them with cardboard or old plywood, and mulch on top to match the rest of the pathway. Water will be caught in the swales and won’t wash out paths on hillsides.
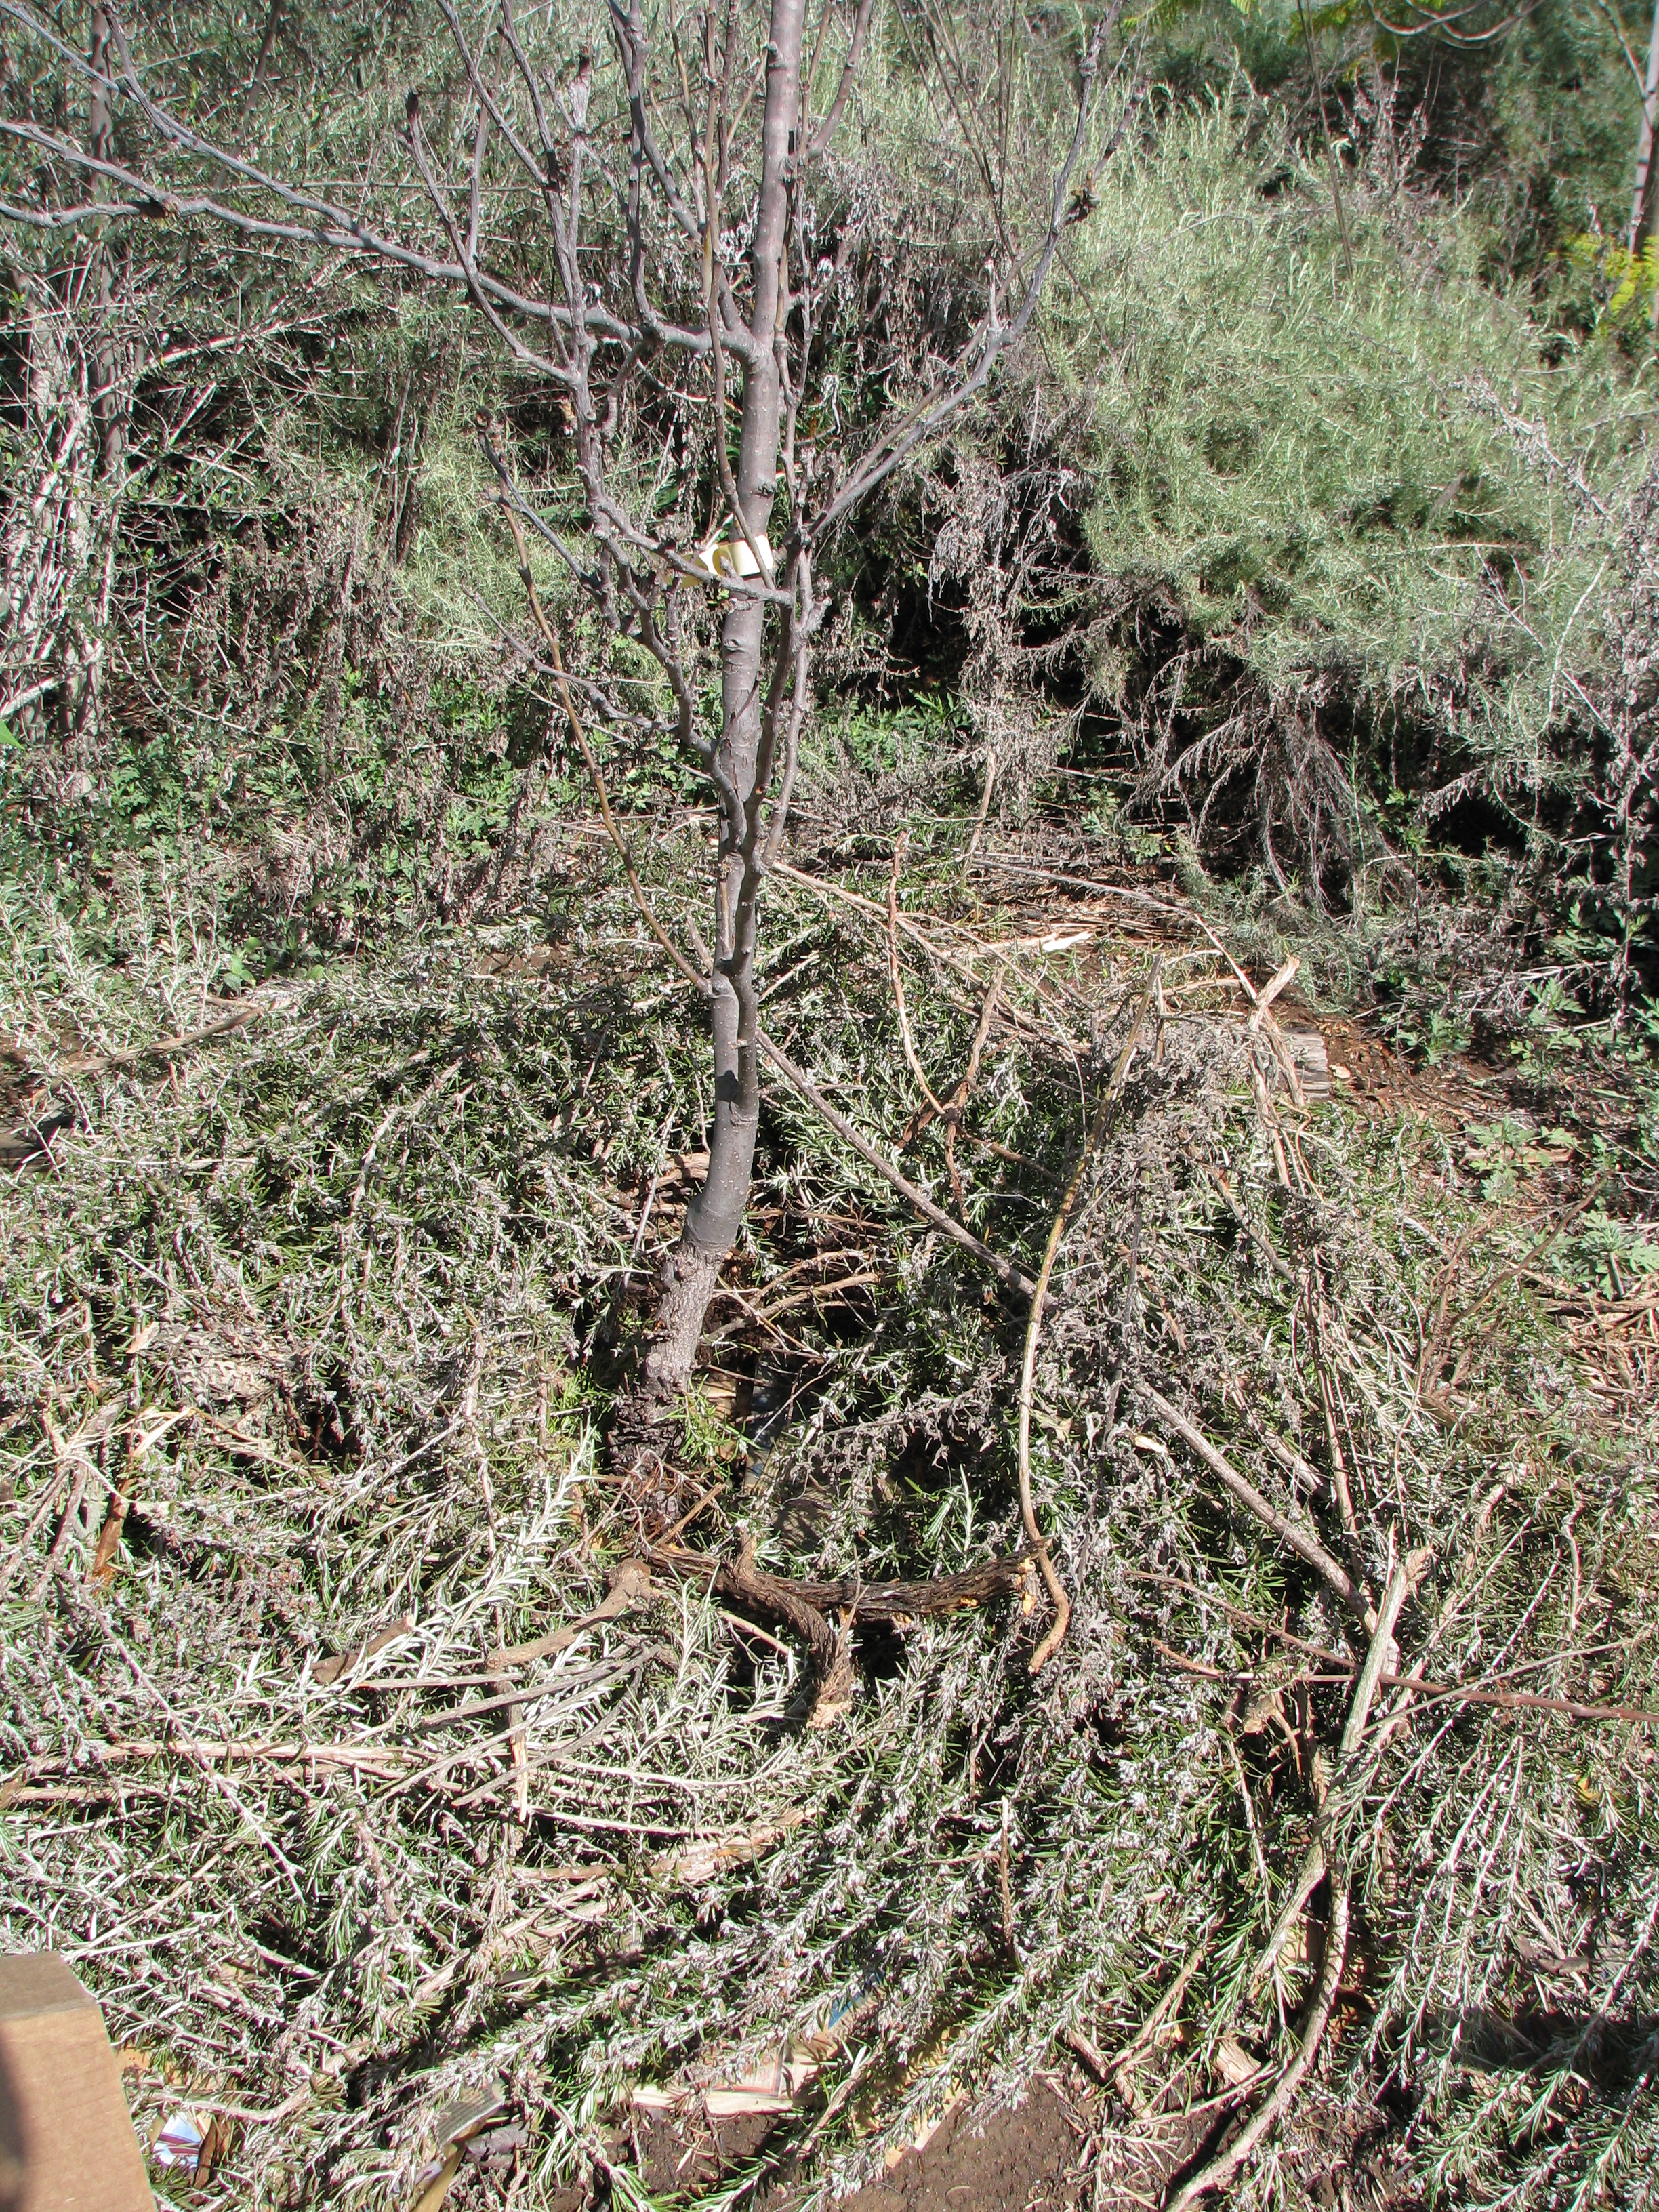
MIranda working on a large pathway near our large hugelbed. Going a step farther, you can ‘hugel swale’. Hugelkultur is layering woody material with dirt. This introduces organic material, oxygen and nutrient pathways into the soil and holds moisture into the dry season. You can dig deeply in your pathways, layer old wood (sticks, branches, logs, whatever you have) with the dirt, up to soil level, then sheet mulch. Your pathways are now waterharvesting alleys that you can walk on, and which will really feed your plants. And you just repurposed old woody cuttings.
This mulch will greatly help the Asian pears and cherries which struggle with the dry heat of the summer. The ground will be kept moist and reduce evaporation, holding in humidity. We’ll be planting more heavily in this area, too. In very dry areas plants and trees do better in sunken beds, especially those that require a long chill time. Cold settles in holes. Moisture runs downhill, therefore dew will accumulate at the bottom of holes. You can either plant in holes and have your pathways higher, or if you have an established garden (such as I do) you can build up your pathways so that they become slightly higher than your trees and planting areas. We are working on that at Finch Frolic Garden, here in drought-stricken San Diego county.
So before I launch into yet another long lecture, the idea for pathways is simple: sheet mulch with cardboard and wood chips. If you live in a wet area, use several inches of both. If you live in a dry area, use no more than 1/2 inch of cardboard (or else it will absorb moisture from the soil) topped by at least an inch of mulch (no limit there!). If you want make super pathways, bury woody material before you sheet mulch. If you live in a dry area, raise your pathways above your planting beds. If you live in a wet area, lower your pathways so water can drain away from your plants (unless they love wet feet). Never use plastic, and please rethink gravel.
Then sit back and enjoy your yard and all the food and nutrients and abundance you have set the stage for, all using recycled materials that will last for years. Congratulations!
You May Also Like
Native Insects and IPM
- Animals, Gardening adventures, Hugelkultur, Natives, Permaculture and Edible Forest Gardening Adventures, Ponds, Water Saving
Snow at Finch Frolic
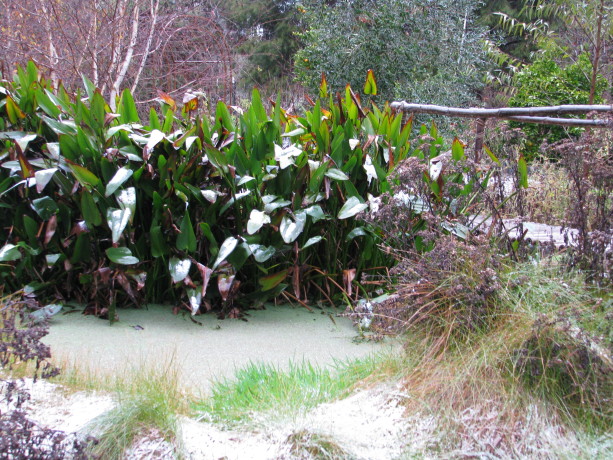
Pickerel and snowy azola on the little pond. Finch Frolic Garden is located in Fallbrook,CA, in sunny San Diego’s North County. Dry and hot conditions are the norm, with temperatures rising above 100 in the summer,and an occasional frost in the winter.
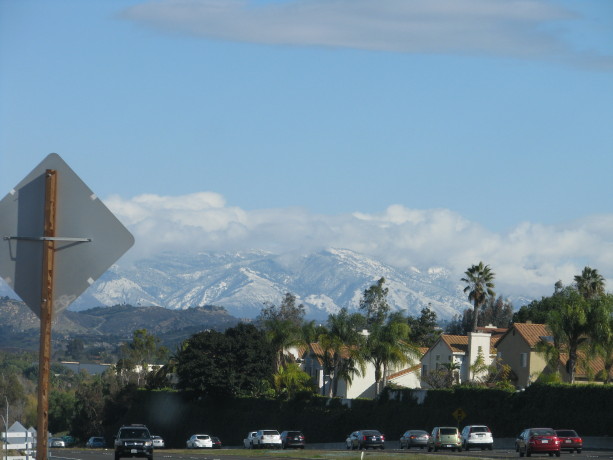
This is a prime Southern California winter scene: palm trees and red tile roofs – and traffic – with snow on the mountains. The peaks are usually only dusted in snow in Jan. or Feb. A rain around Thanksgiving means lawnmowers are humming around New Years. This past year, 2014, has experienced strange weather as has the rest of the world. We had back-to back Santa Anas (hot, dry, high winds from off the desert) in May, which caused many trees and plants to drop flowers. The lack of food and water induced many animals to not reproduce, which affected the rest of the food chain. Then we had fire season in May as well. Unfortunately arson was the cause of some of the fires, but many homes were lost as well as hundreds of acres of our precious endangered chaparral and the baby animals that lived there.
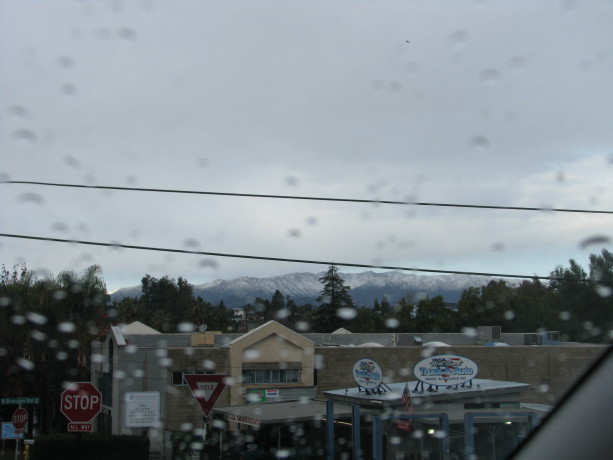
These mountains are northwest of us – they never get snow! Our heat wave came in June, and our ‘June gloom’ – a marine cloud cover – came in July. We had several significant rain events in late Fall, and then on New Year’s eve, it snowed.
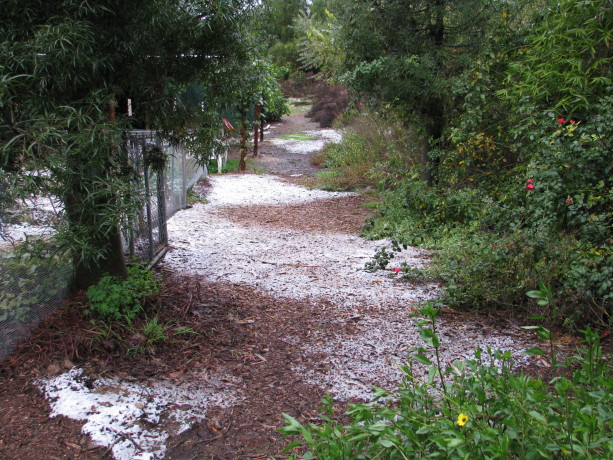
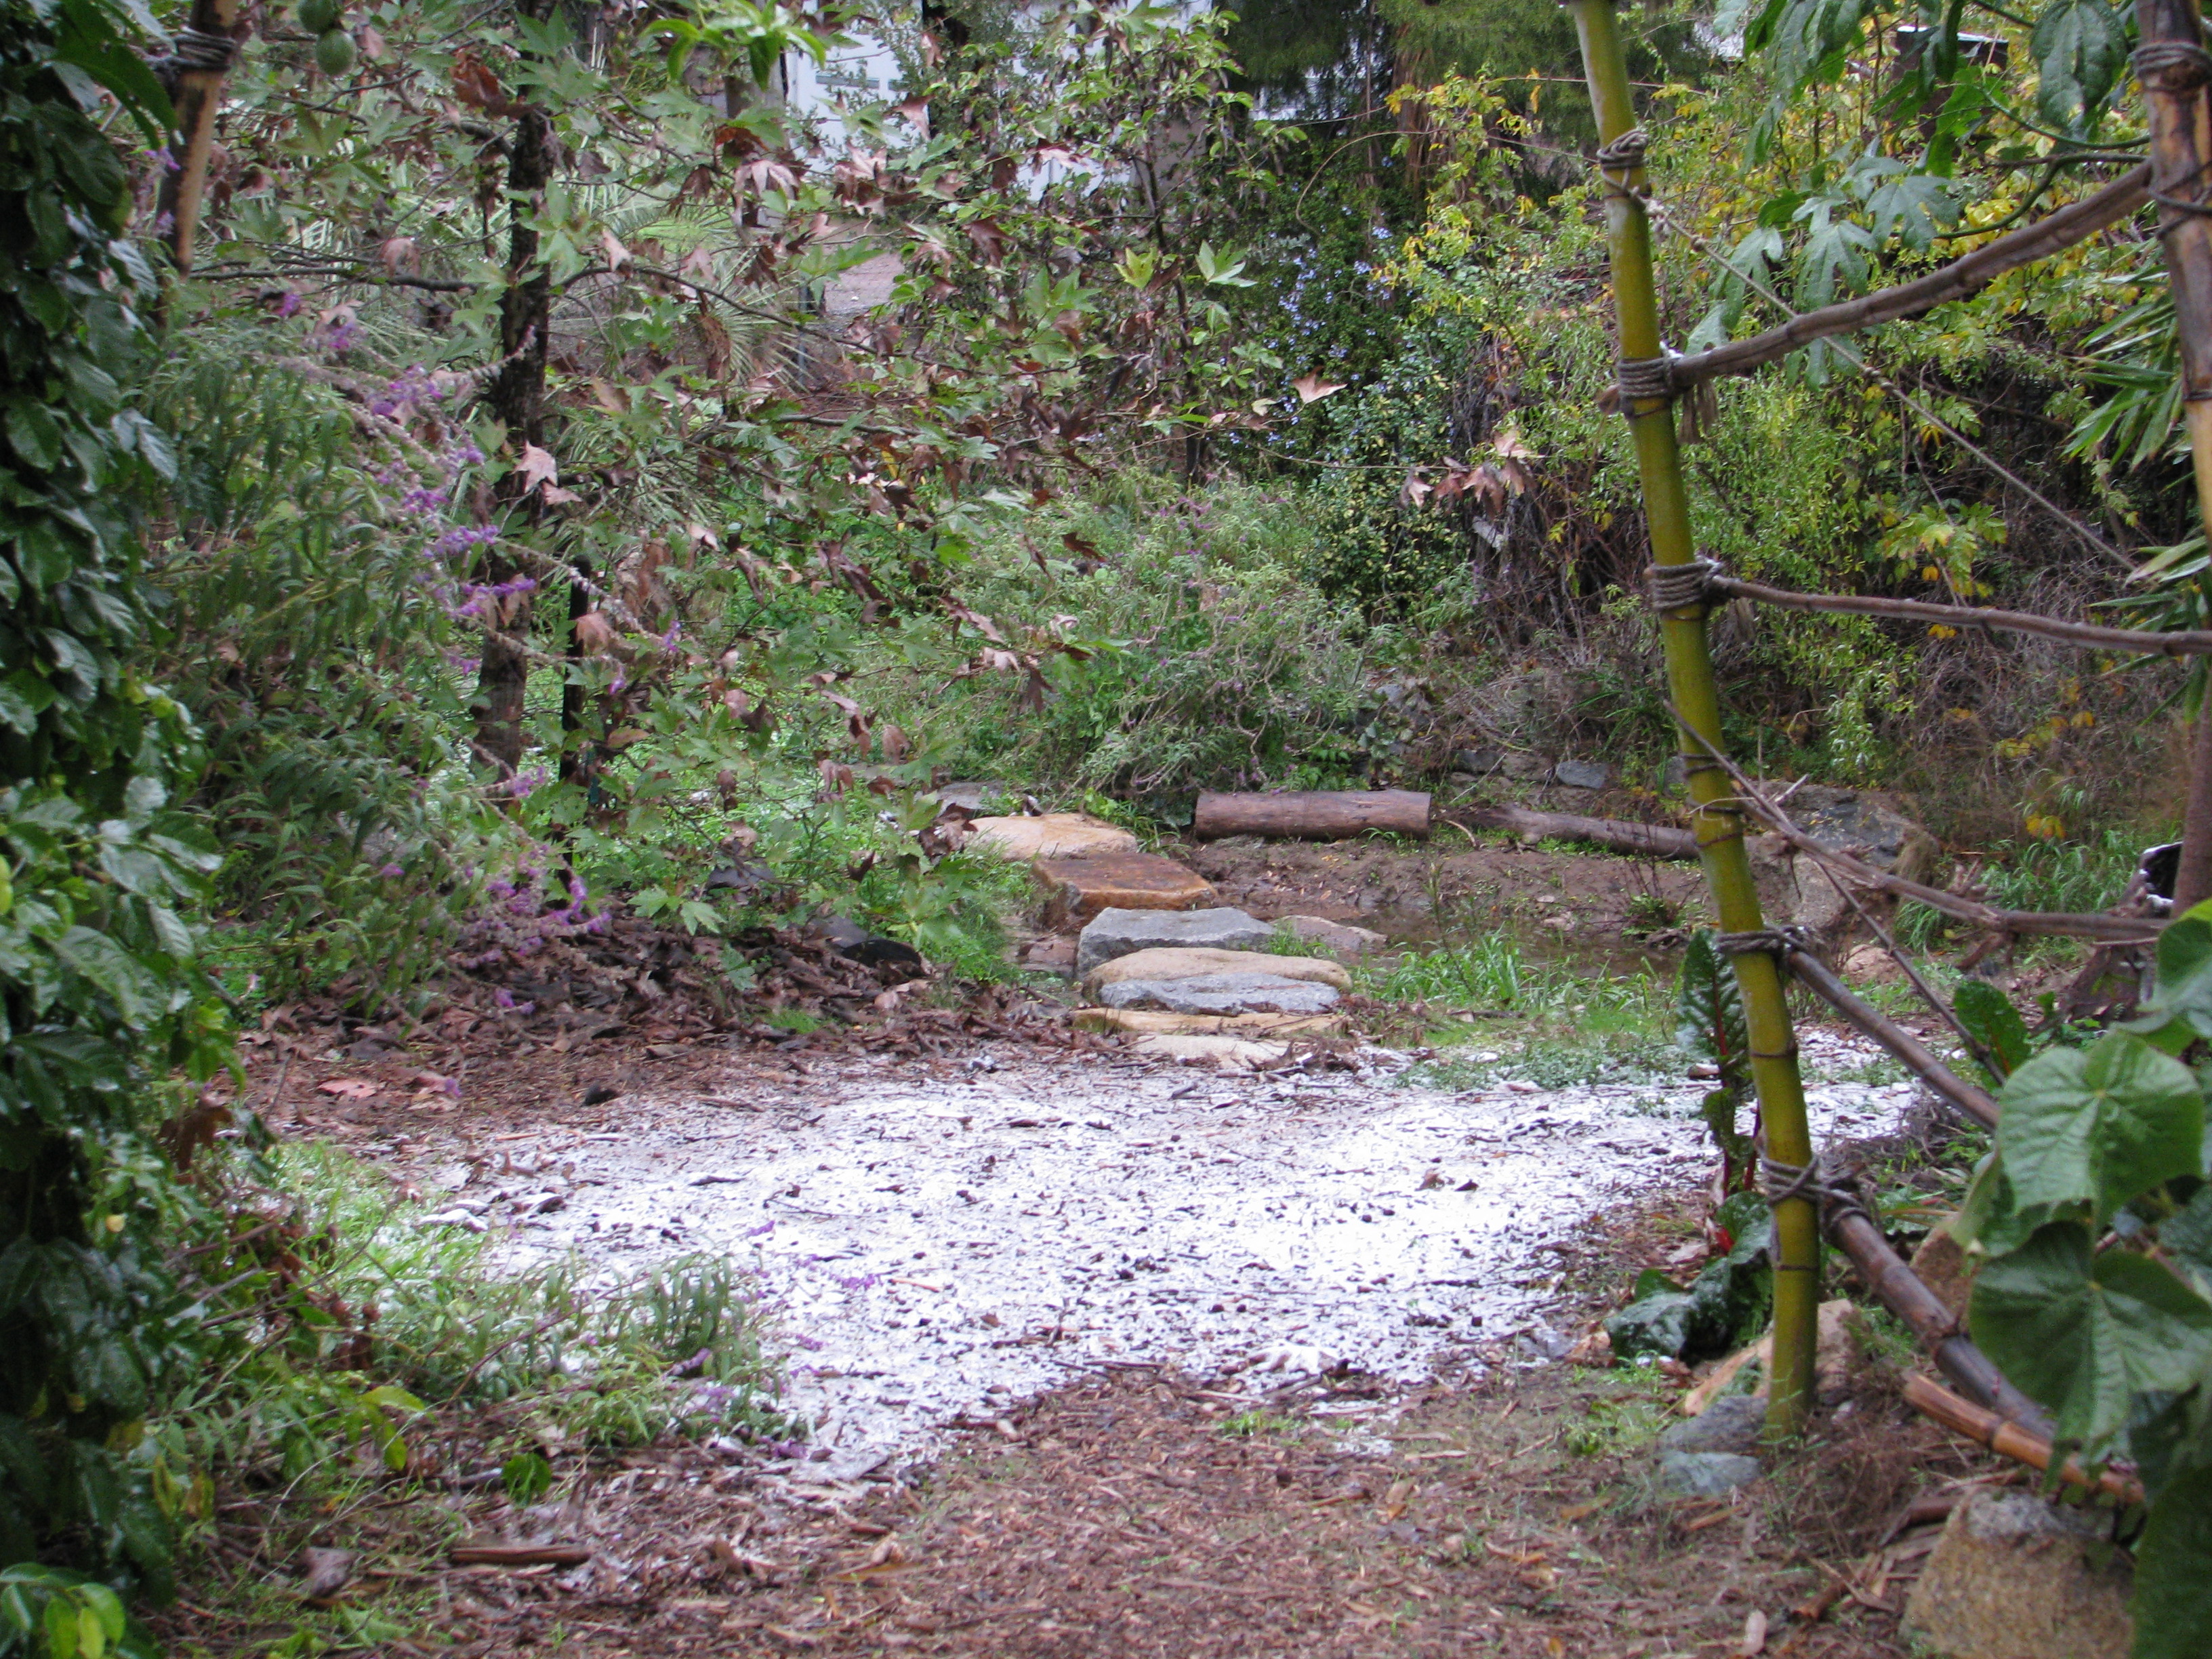
The pathway down to the Mock Pavilion. So many of you who live in snowy areas are saying, “Who cares?” The last snowfall in our inland valley area was in the late 60’s when I was probably 8 or 9 years old. I lived with my sister and parents in Carlsbad, a town west of here. All I remember about it is that my dad made a snowball and froze it, and in the summer threw it at the neighbor.
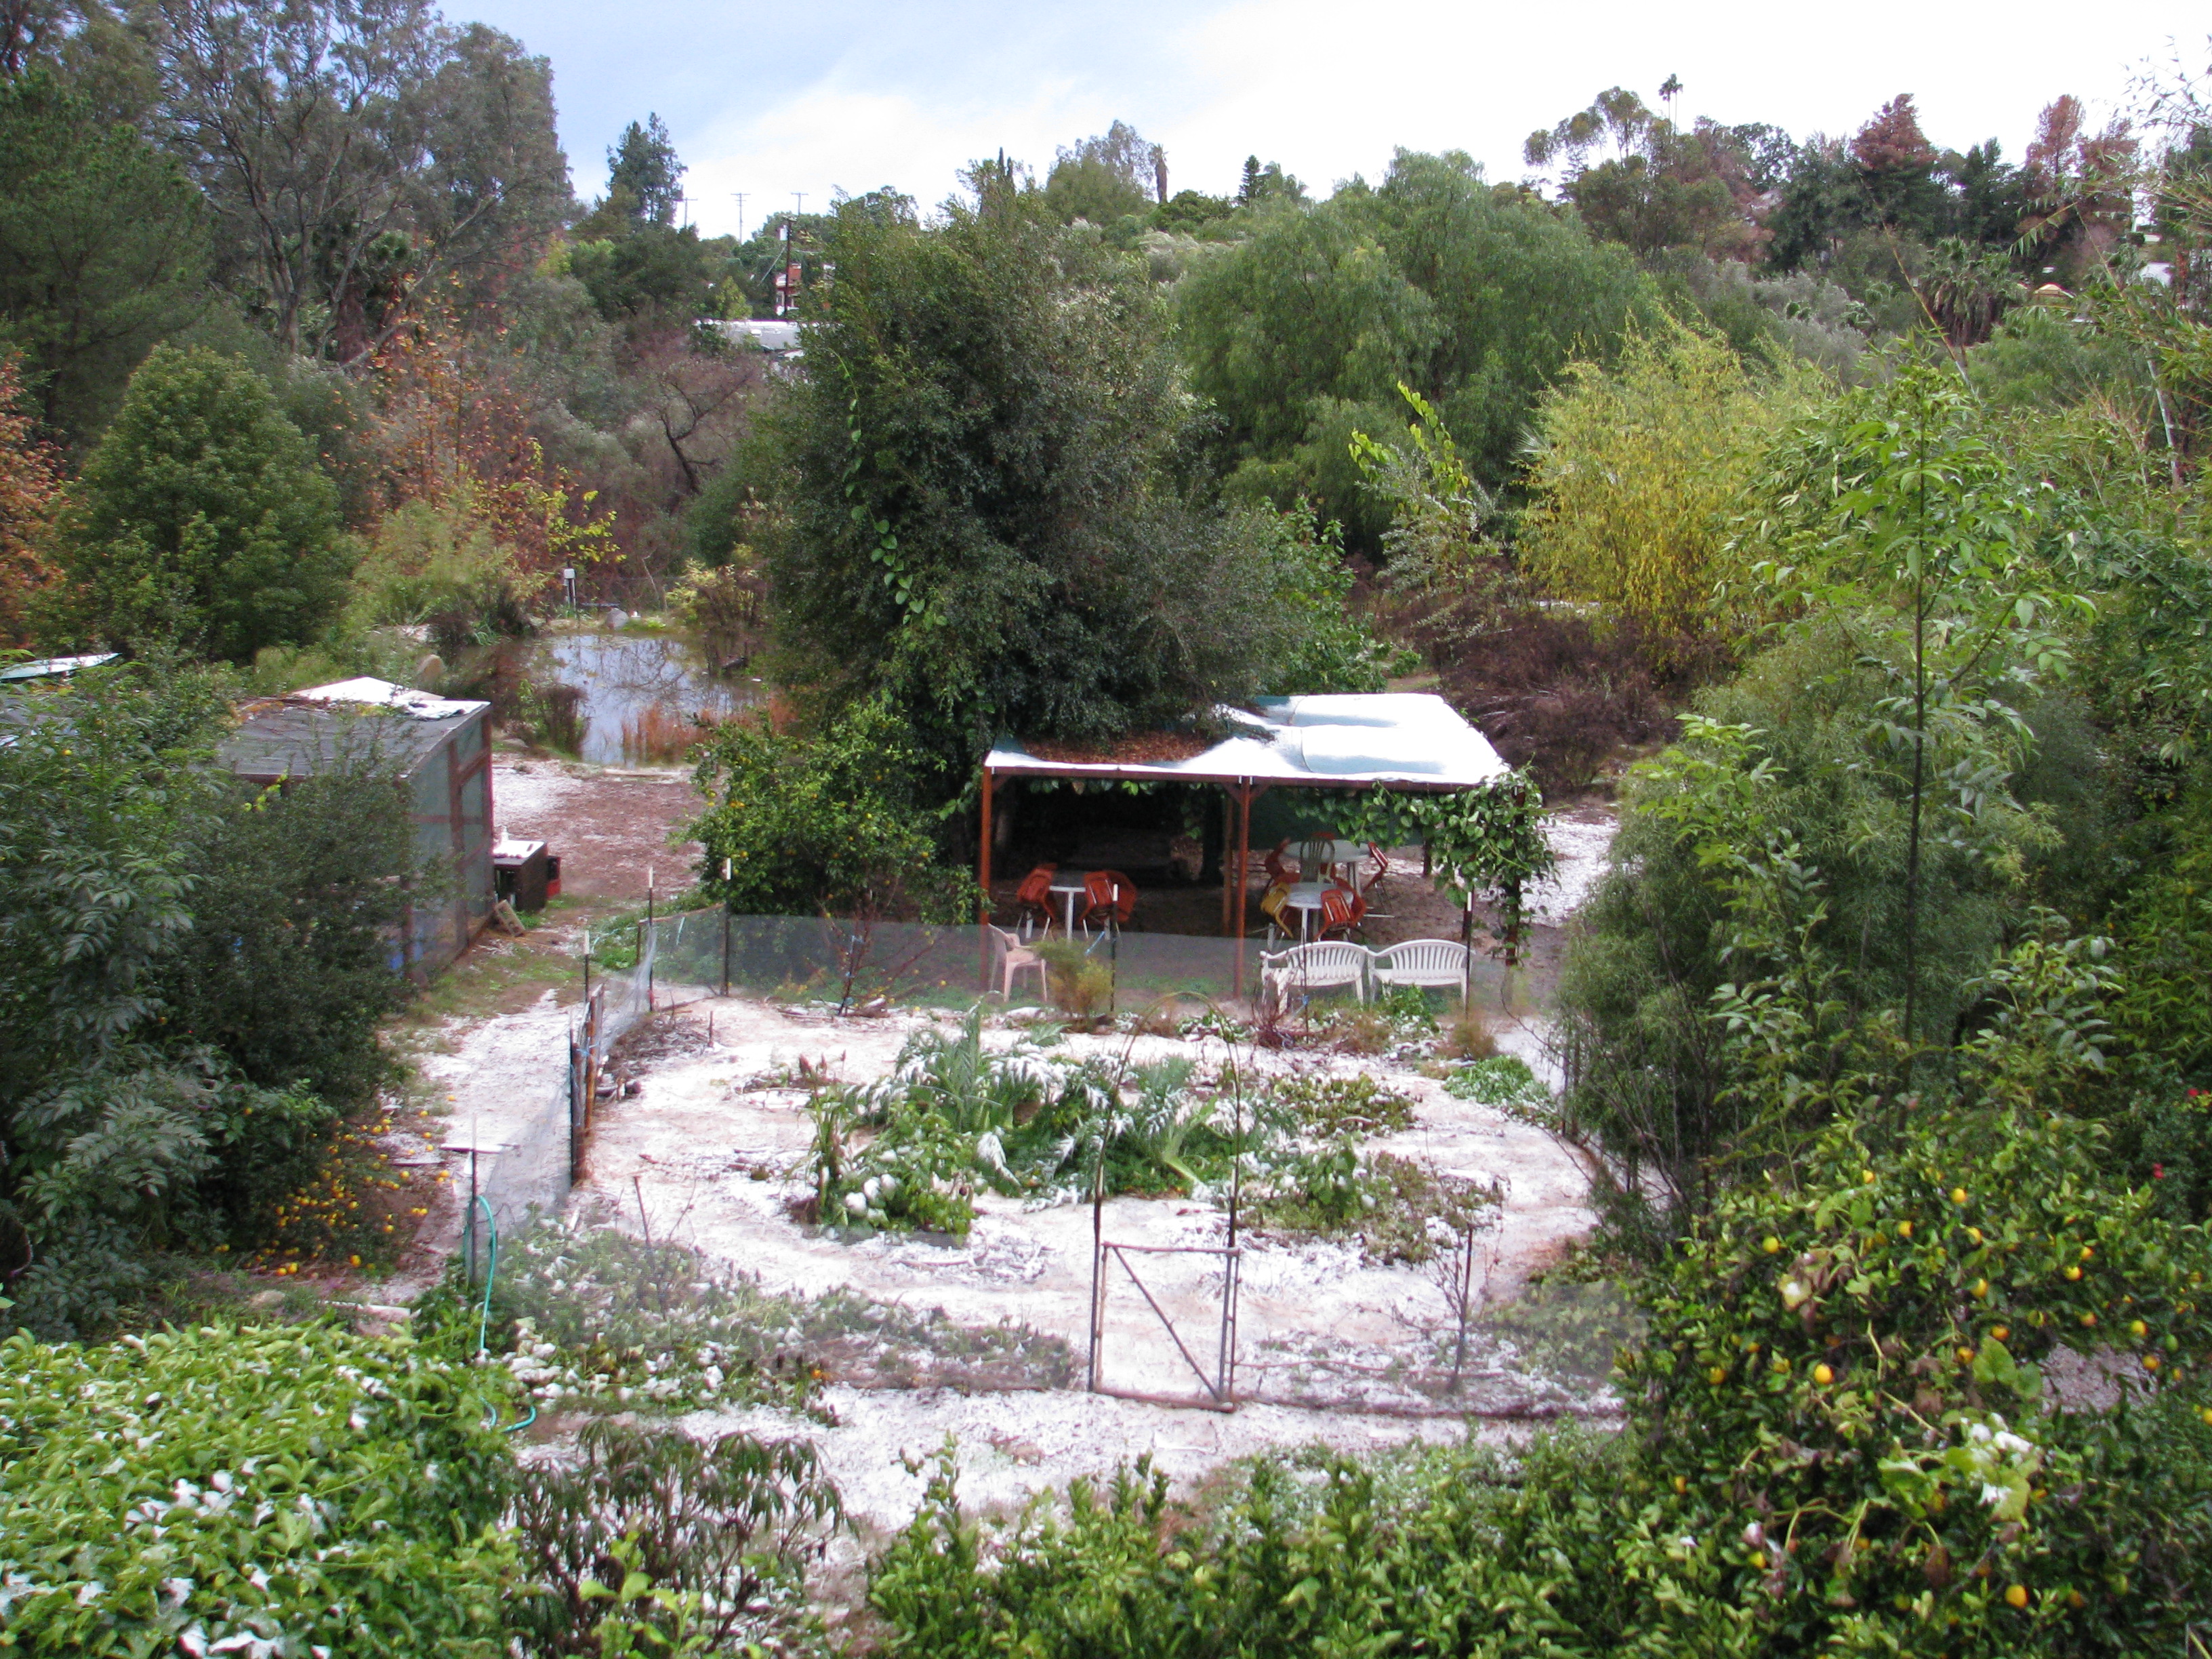
On the 30th we received an inch and a quarter of cold, Canadian rain overnight. The rain came in heavy showers and swales we’d created had filled and prevented flooding. In the morning I looked out on a white garden.

Kitchen garden in snow. Not everyone in the area received snow this week, but streets were icy, nearby Temecula was covered as were all the mountains even those west of here.
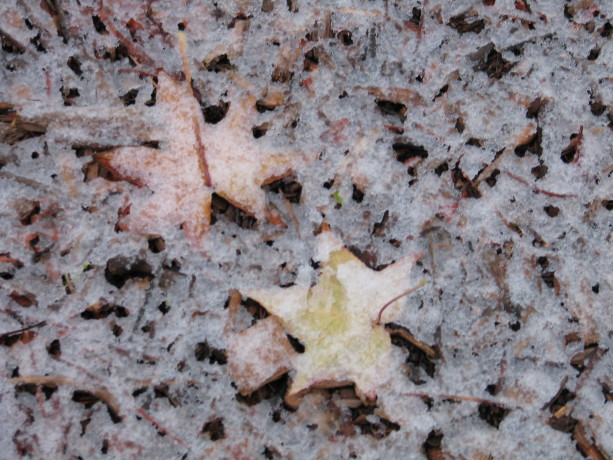
Good-bye ’till next year, apple mint! The landscape looked like a large powdered sugar shaker had been at work overnight.
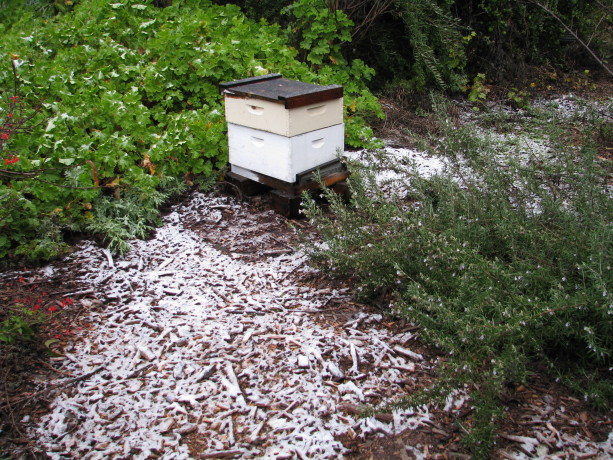
Perhaps this year we can have bees again. Last year they all died – someone spraying in the neighborhood is my guess. Again about 10:30 in the morning snowflakes fell and strangers grinned at each other in delight.
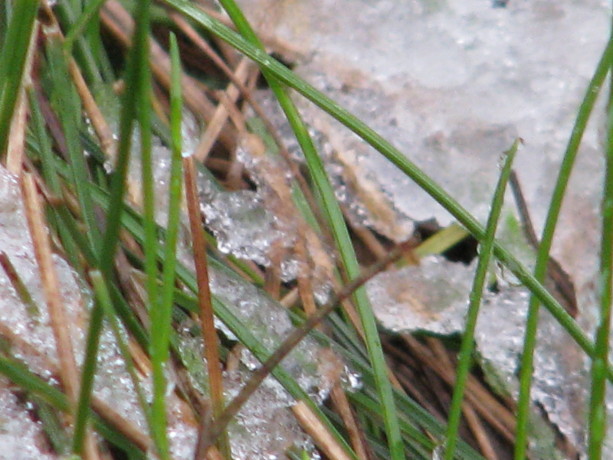
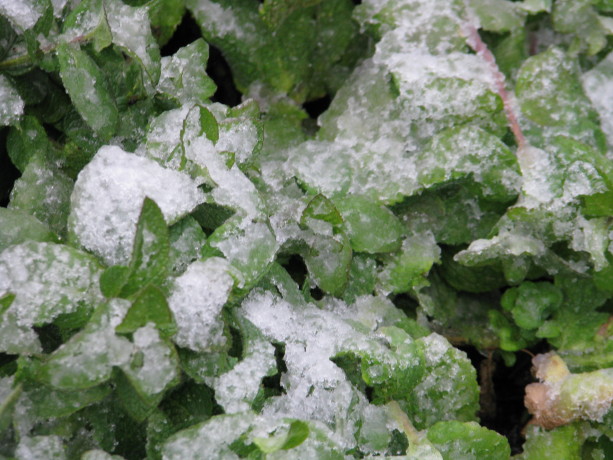
Creeping red fescue, which is an excellent soil holder and groundcover here, just laughed at the cold. Not so the growers of frost-intolerant plants such as avocados, citrus, succulents and tropicals. After the snow we have had clear, frosty nights which have done more damage than the snow had.
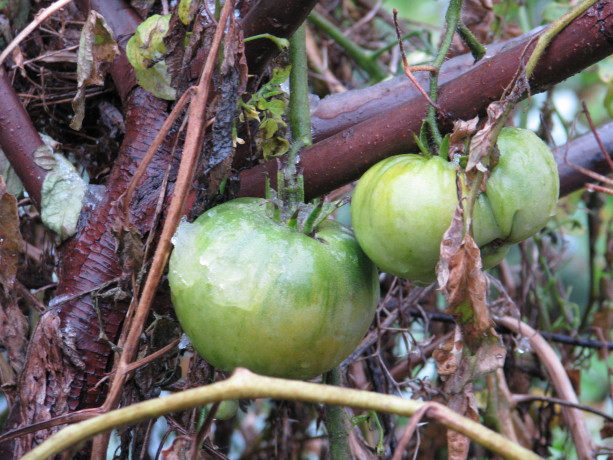
These are now ripening in the house. I don’t expect overwintering tomatoes this year, and we’ve been harvesting the last of our zucchino rampicante, eggplant, jalapenos and tomatoes, and marking where the sweet potatoes lie underground.
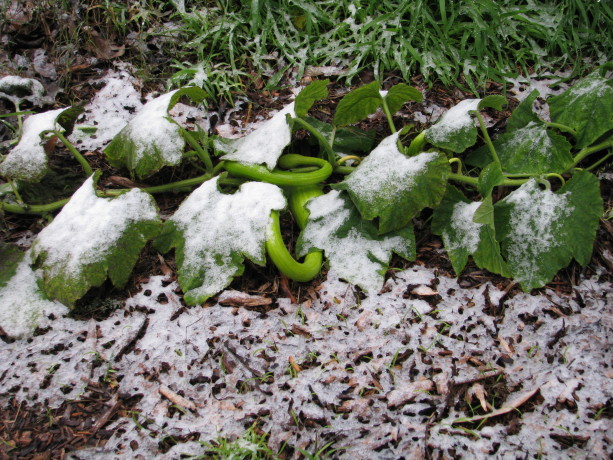
Poor little frosty zucchinos. Our hens aren’t happy about the weather change. We hung towels and tacked up cardboard in their coop for insulation, although now it looks like a cheap harem. Today I bought a heat lamp to keep them warmer.
Buddha’s Finger citron and snow. I candied the citron this year and used it in holiday bread. Wonderful! Most of them are done molting except, of course, the Turken or naked-neck. Besides having a naturally bare neck, poor Malika has dropped over half of her feathers and has no insulation at all. Its a good thing that days aren’t frozen, too.
Poor Malika! An unfortunate molt. By Monday daytime temperatures will be in the low 70’s again, and I’ll be worrying about planting spring crops already; despite the snow, there really isn’t a winter here.
 However, I thought I’d share some New Year’s eve photos of Finch Frolic Garden in the snow – not something I’d ever thought I’d see.
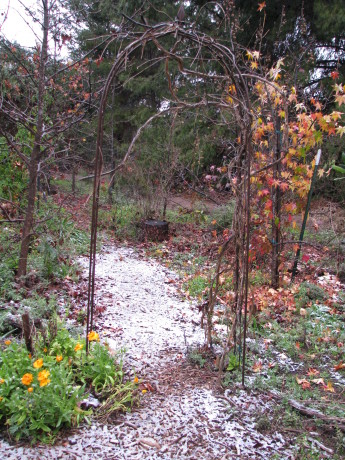
Lovely. Liquidambers, trellis and wildflowers. You May Also Like
Native Insects and IPM
- Arts and Crafts, Books, Breads, Cake, Dessert, Fruit, Giving, Herbs, Perennial vegetables, Permaculture and Edible Forest Gardening Adventures, Recipes, Sauces, Seeds, Special Events, Spices, Vegan, Vegetables
Finch Frolic Marketplace, Revisited
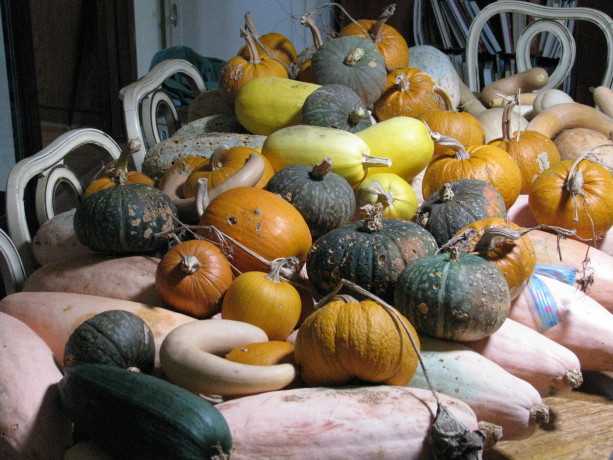
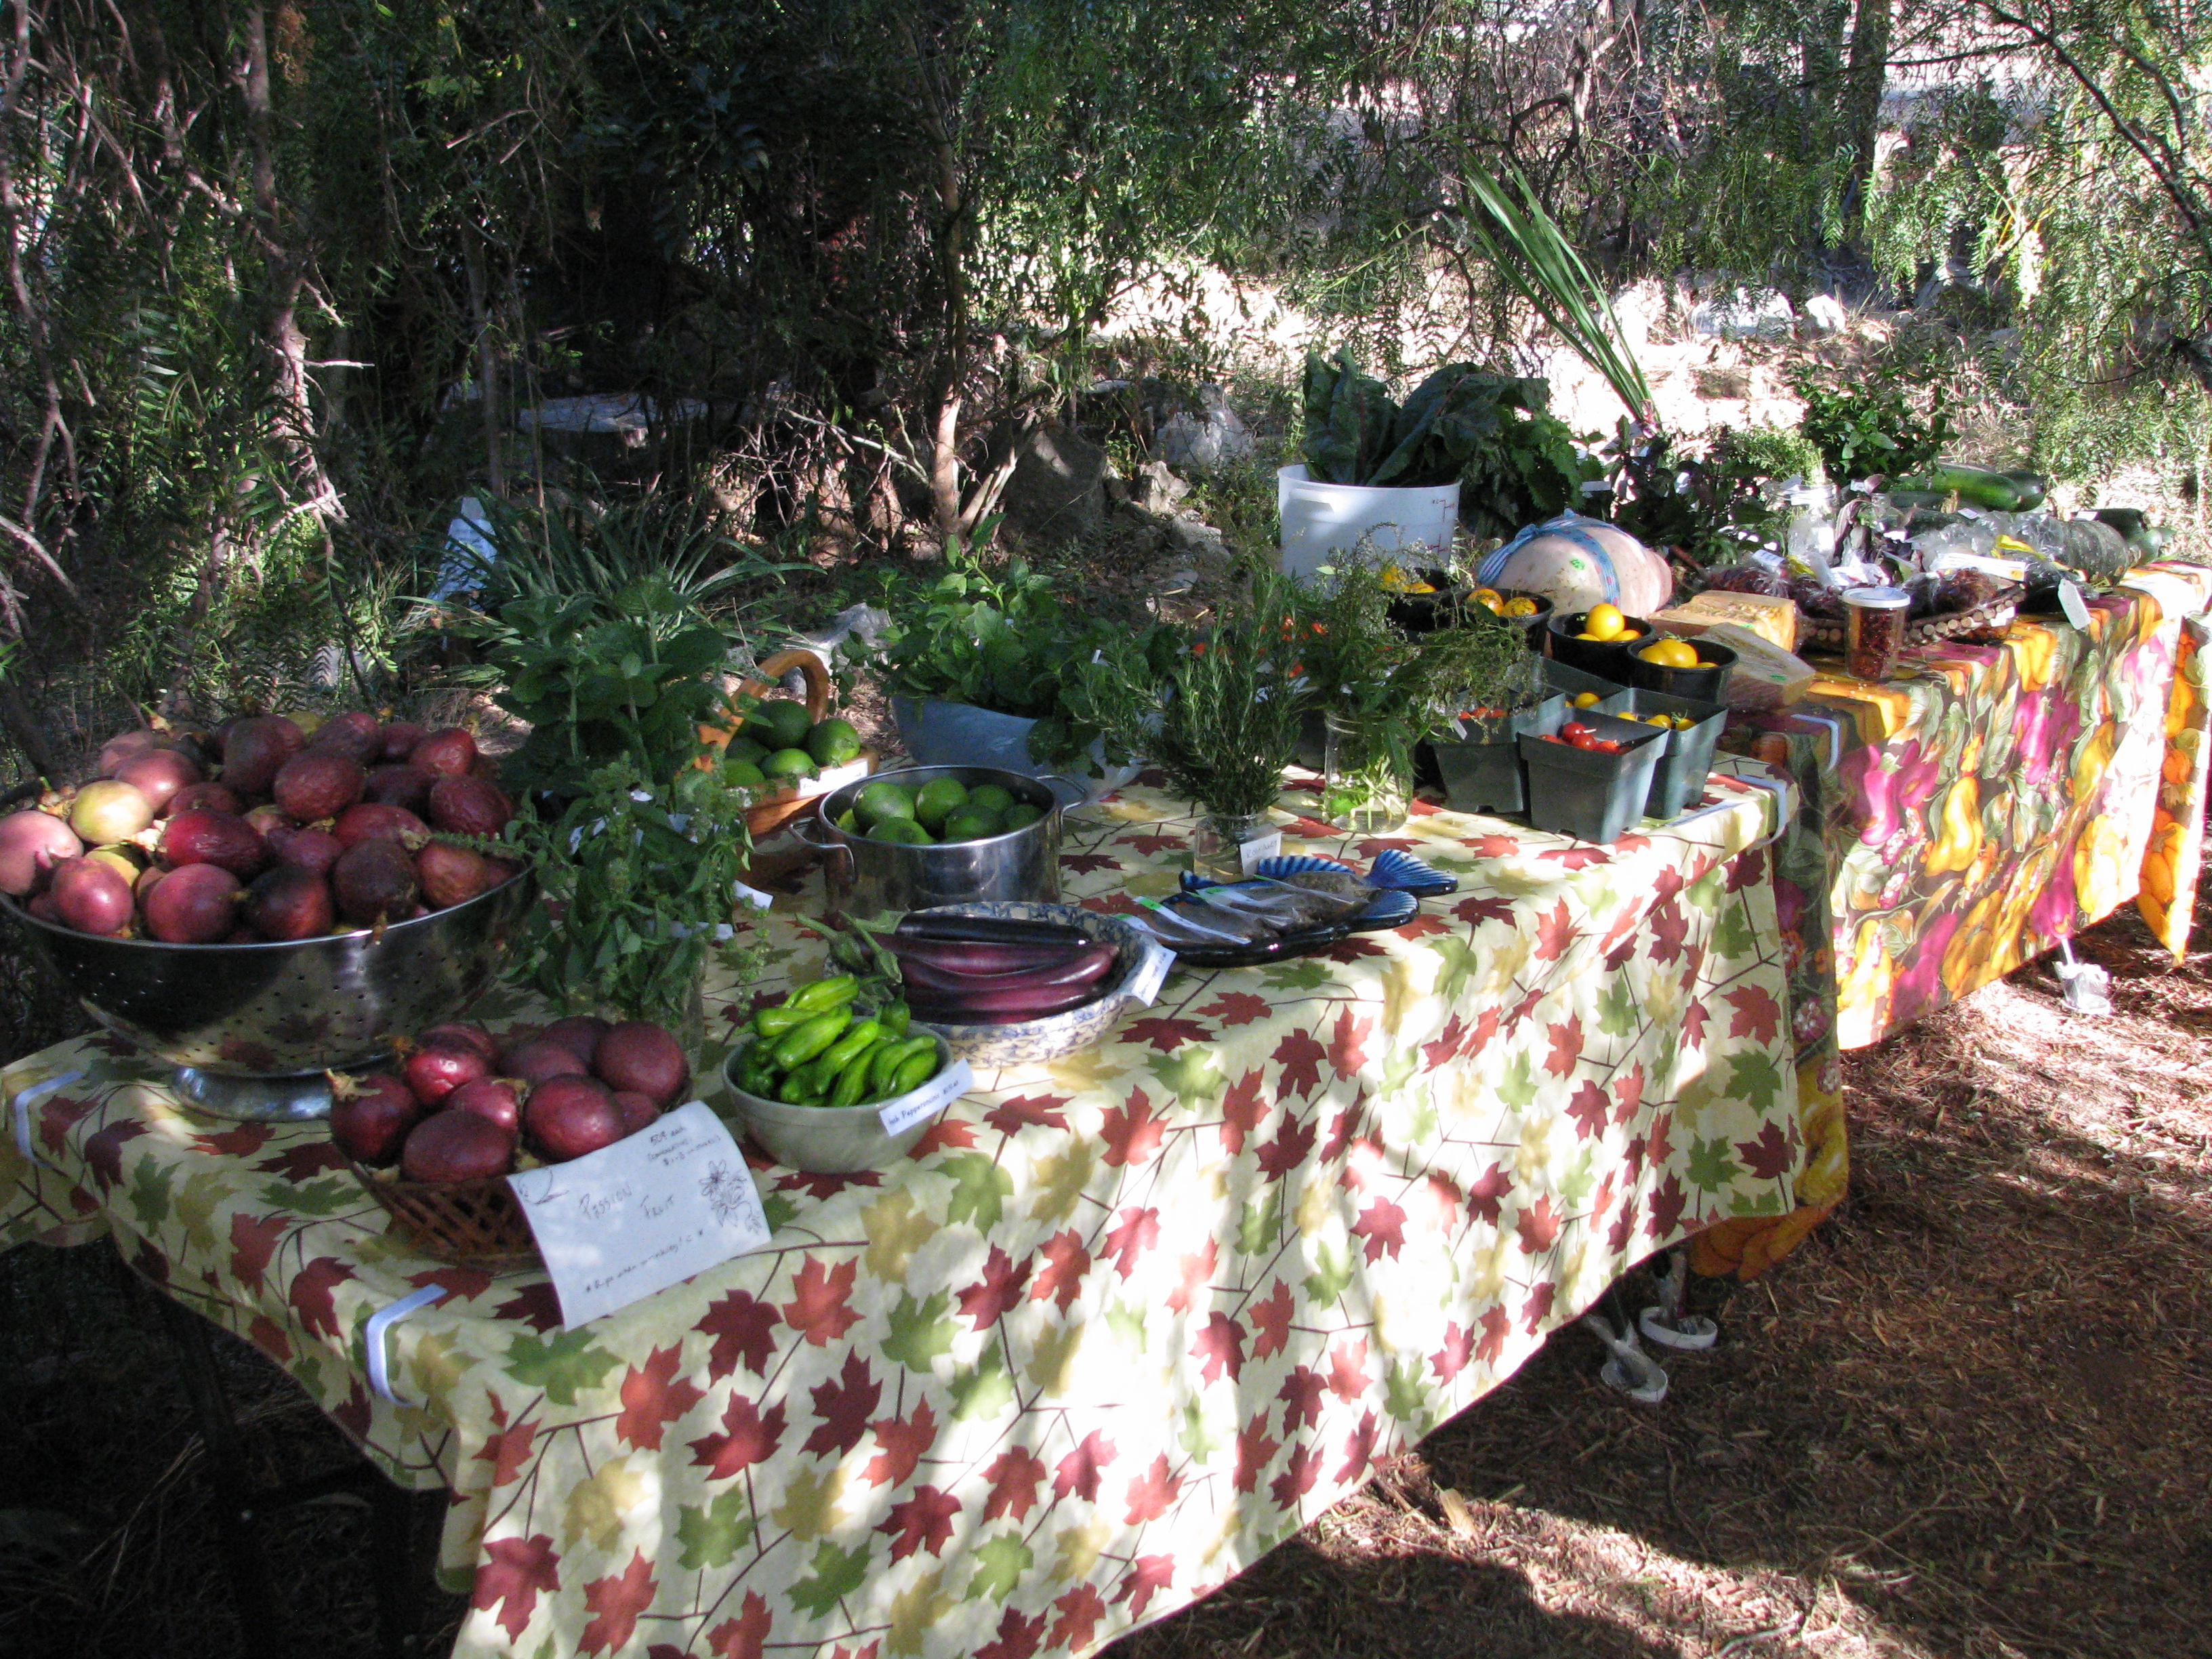
Wonderful, tasty winter squash of all kinds! Due to popular demand, we’re having one more short Marketplace this Saturday, 9 – 1.
Join us on Saturday, November 29nd from 9-1 for the annual Finch Frolic Marketplace, the Extended Version! We’ll have for sale fresh and prepared foods straight from our permaculture gardens. All are excellent gifts, or will grace your holiday table. We’ll have the much-desired Pomegranate Gelato again, and new this year, Passionfruit Gelato! Squash, fruit, veg, preserves, passionfruit curd, baked goods, and much more.
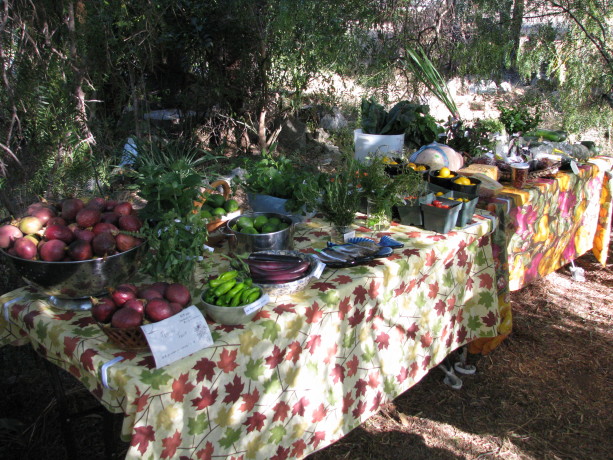
Herbs, veggies, frozen juice, gelatos, curds, jams, preserves… and much more! Finch Frolic Garden is located at 390 Vista del Indio, Fallbrook, CA.
Directions:
Finch Frolic Garden is open by appointment only for tours, lectures and other activities. The address is 390 Vista del Indio, Fallbrook, CA 92028-2548. Please call only if you are lost or delayed; we use our house phone only and are often not inside. Please use the email above for any other communication.
From the North (Temecula and above): take 1-15 South to Exit 51 and turn right. Make the next right onto E. Mission Rd/County Hwy-S13. In .8 of a mile turn left onto E. Live Oak Park Rd. In 1.6 miles turn right onto Alvarado St. In .7 miles at the top of the hill turn left onto Vista Del Indio, at Roja’s Succulents. Make the very first right; 390 is at the end to the left.
From the South (Escondido and below): take I-15 North to Exit 51 and turn left over the freeway. Make the next right onto E. Mission Rd/County Hwy-S13. In .8 of a mile turn left onto E. Live Oak Park Rd. In 1.6 miles turn right onto Alvarado St. In .7 miles at the top of the hill turn left onto Vista Del Indio, at Roja’s Succulents. Make the very first right; 390 is at the end to the left.
From the West (I-5): take CA-76 East, Exit 54A and drive for 12.6 miles. Turn left onto S. Mission Road/County Hwy S13 for 4.1 miles. Turn right onto S. Stagecoach Lane (at the high school). In 2.8 miles turn right onto Alvarado St. At the top of the hill turn right onto Vista del Indio, at the Roja’s Succulents sign. Make the very first right; 390 is at the end on the left.
- Compost, Gardening adventures, Perennial vegetables, Permaculture and Edible Forest Gardening Adventures, Recipes, Seeds, Soil, Vegetables, Vegetarian
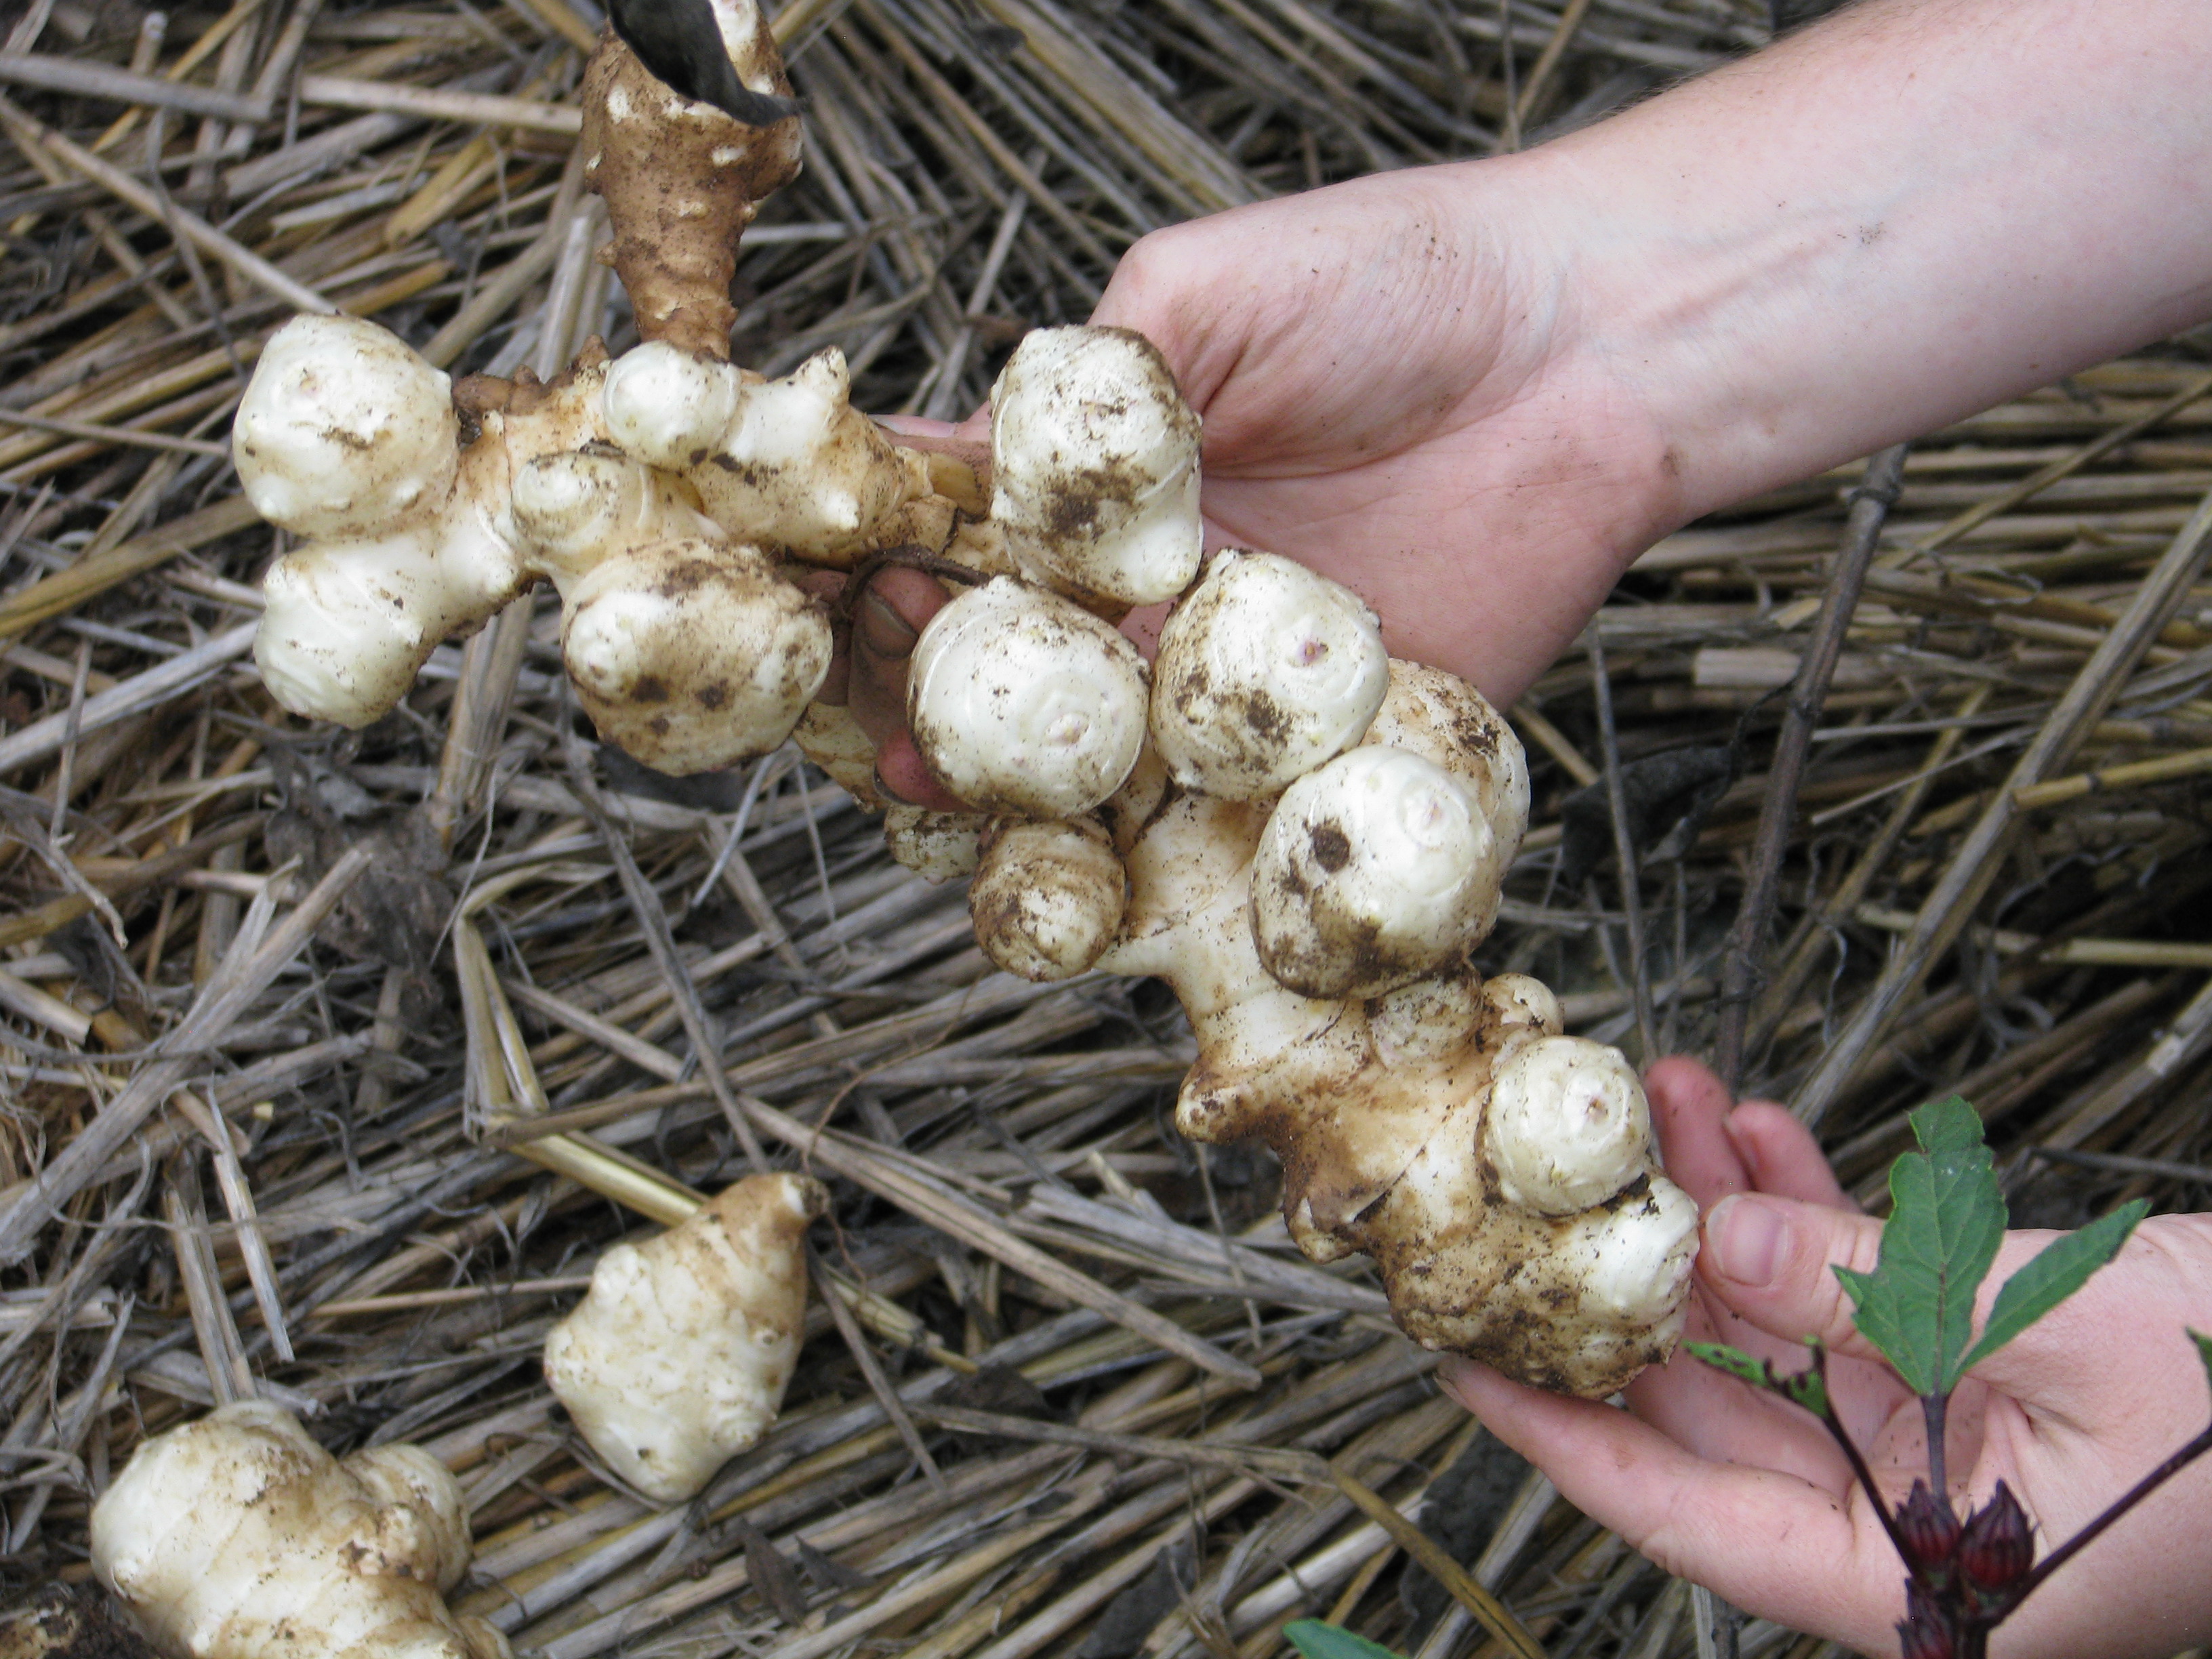
Perennial Vegetables: Jerusalem Artichokes
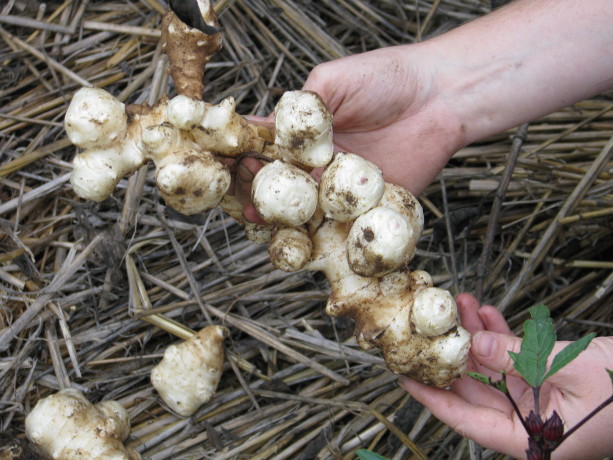
A knobby root of deliciousness. Jerusalem artichokes aren’t artichokes nor are they from Jerusalem. They are also called sunchokes, which sounds something like an unfortunate cosmic event to me. We grew them this year and I have only great things to say about them.
I ordered organic tubers from Peaceful Valley in California. By the way, all of the strawberries and rhubarb that I had ordered from them were inexpensive and yet of prime quality. The tubers grew into tall, sunflower-like plants that graced an area of the new kitchen garden that didn’t have the best soil in it.

JAs have beautiful sunflower-like flowers that pollinators love. They flowered most of the summer and just this month – October – began to die off. The plants had some difficulty with lace bugs, but with good soil fertility and some actively aerated compost tea foliar spray they rallied exceptionally.
The Jerusalem artichokes made a nice living wall. Today, for our Halloween lunch, we thought some creepy-looking tubers would be appropriate. They share a basket with Black Beauty zucchinis (caught them small!) and our first sweet potato of the year, Spanish Red Improved, which we also steamed and ate – heaven!
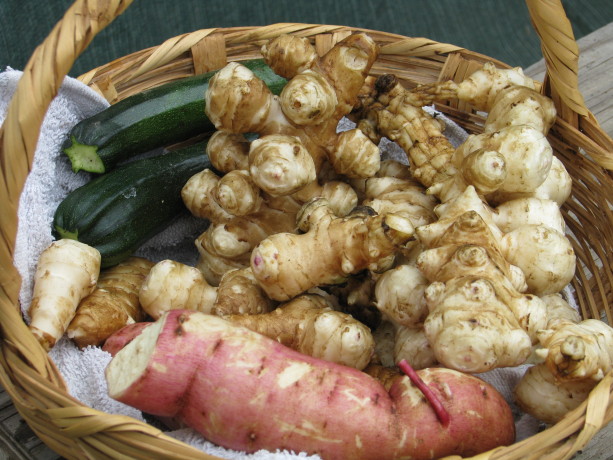
Our Halloween harvest. The ‘chokes are supposed to sweeten up after a frost, but here in San Diego county that might take awhile.
The chokes grow tubers all around the base of the plant, and also spread them underground. They are very easy to harvest; the plant wants the tubers to make new plants so they break off easily.
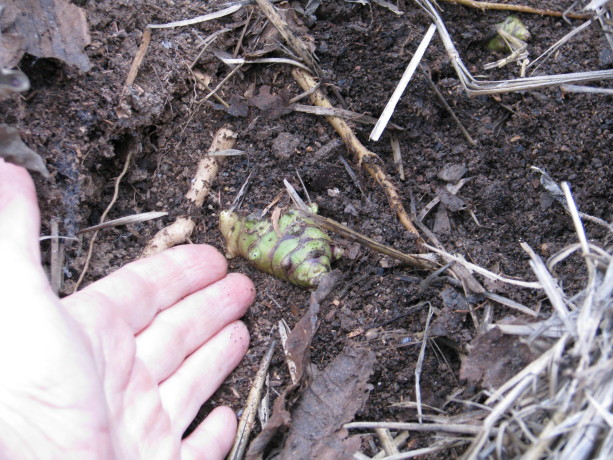
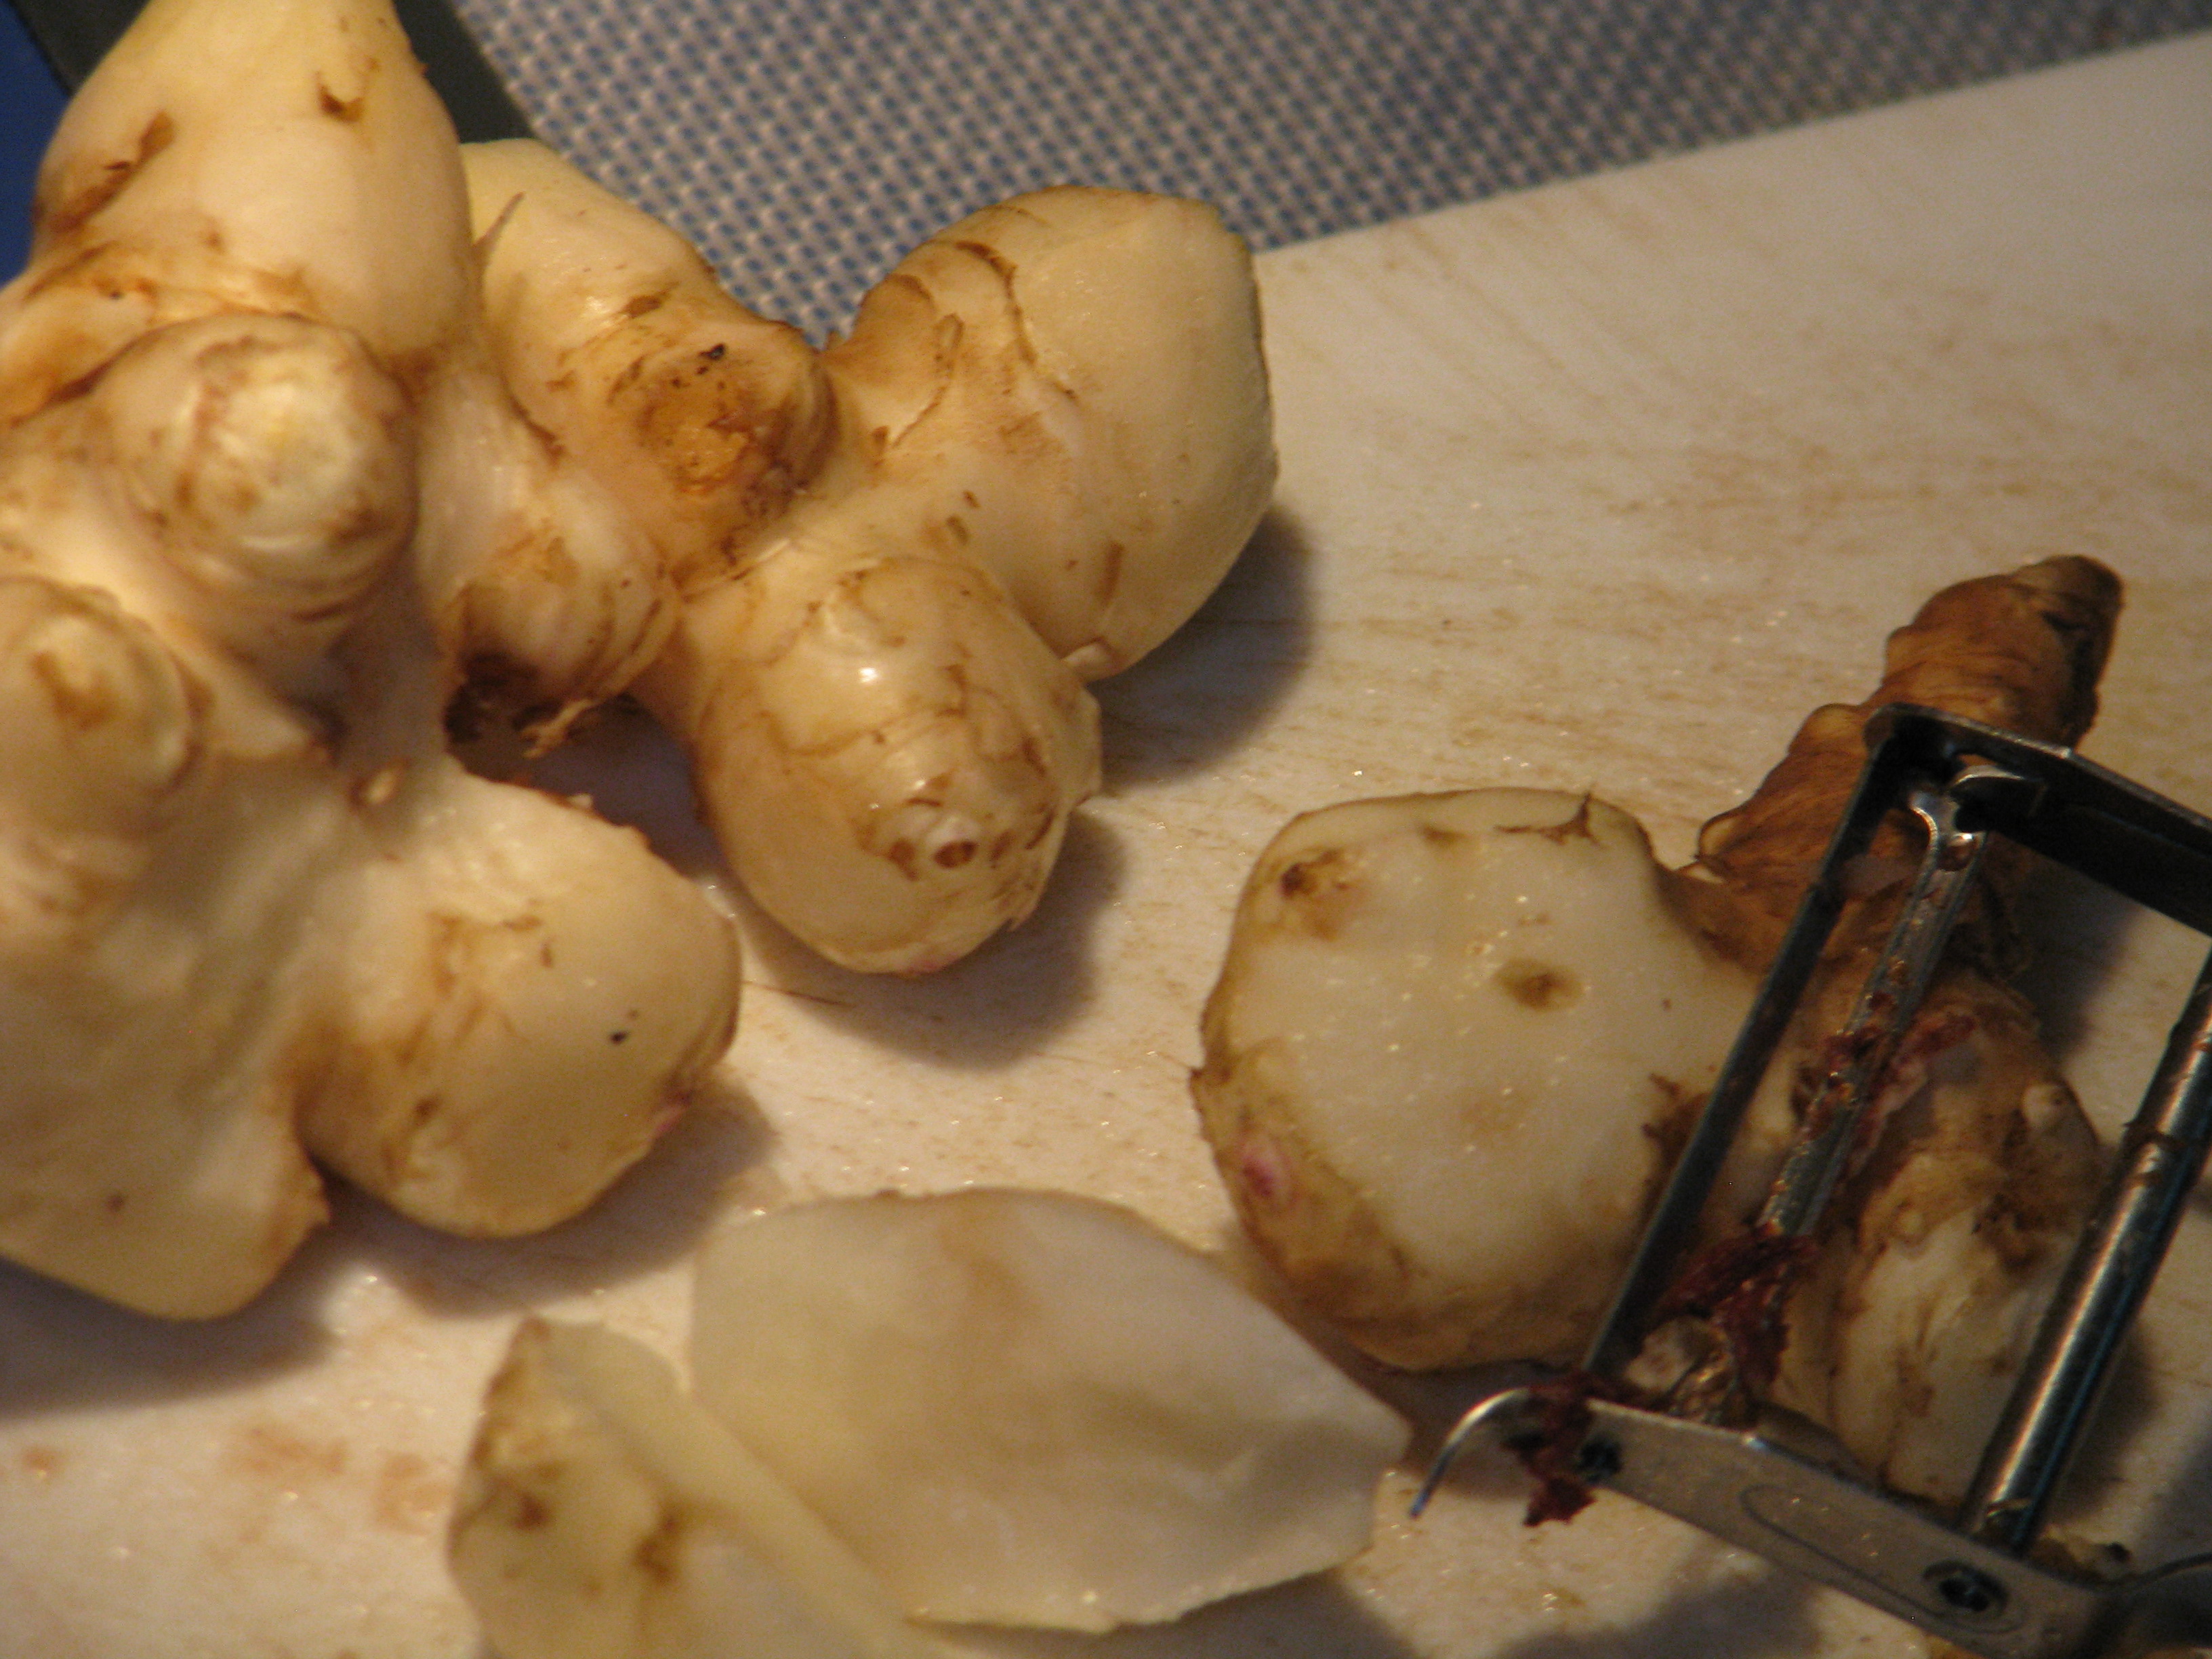
Cover green tubers back up so that they can continue growing. Although they are knotty, they wash off easily and the skin is thin and mostly easily removed with a vegetable peeler. I didn’t scrape all of it off and it wasn’t bitter or unpleasant at all. I roasted them after just washing them with a vegetable brush and the skins were a little firm and the insides very soft. There wasn’t any unpleasant taste.

Peeling them is kind of easy, but the skin doesn’t taste bad. Raw they are crisp. Steamed, the JAs become very soft and – by gosh! – taste very similar to soft, buttery artichoke heart! Wonderful! My daughter and I ate them down with a little vegan butter . So wonderfully good. They can be easily mashed as well. We also roasted them along with other vegetables.
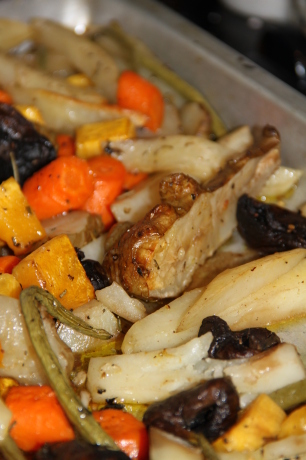
Jerusalem artichokes, carrots, beans, mushrooms, potatoes and squash are roasted with garlic, rosemary and olive oil. Yum. I mix all the veggies in olive oil with dried rosemary, minced fresh garlic and pepper, spread out on a tray and roast at 425F for about an hour, depending upon the size and thickness of the veggies. Roasting keeps them more solid yet tender, and sharpens their flavor a little. Absolutely fantastic.
I’m saving small tubers to plant ALL OVER THE YARD! What a great perennial vegetable – perennial in that you leave some tubers in the ground and they keep coming up every year. They are attractive, give shade to smaller plants, are great for attracting pollinators, create good mulch when the tops have died down, and have wonderful tubers. The tubers may be eaten raw as well; they are crisp and mild.
The foliage dies off in the Fall. I’ll cut the stalks at the ground level and lay them down on top of the bed to feed the soil. If you have a corner for some tall flowers, definitely try growing some organic Jerusalem artichokes. Yum.
- Gardening adventures, Heirloom Plants, Permaculture and Edible Forest Gardening Adventures, Ponds, Recycling and Repurposing, Seeds, Vegetables
Vertical Space
Pipian From Tuxpan squash, from Baker Creek Heirloom Organic Seeds. When planning a garden for lots of any size, be especially aware of vertical spaces. Have an unsightly fence? A wall that needs protection from the sun? A hot, bright patio? All of these areas are perfect for growing vertically.
A Canada Crookneck climbs over a plum tree. For an existing wooden fence, string wires vertically or in a crossed pattern, depending upon what you will be growing. For a chain link fence… just plant! You can certainly grow annuals such as beans, squash and peas, but for perimeter fences I’d advise long-term plants that fill other functions as well. Heirloom climbing roses can cover a fence, create a barrier for trespassers, provide habitat, be ascetically pleasing, and provide edible flowers and vitamin C-rich hips. Remember that in permaculture everything should serve at least three purposes.

Passionfruit vines work beautifully on overhead trellises. Wire is strung the length of the trellis, with shade cloth over the top. The vines don’t need any help to fill up the gaps. Passionvines are evergreen perennials with rampant growth and provide good crops of heavenly-smelling nutritious fruit, as well as being the host plant to the Gulf Fritillary caterpillar. Even the perennial scarlet or golden runner bean would provide you with food and flowers for about six years.
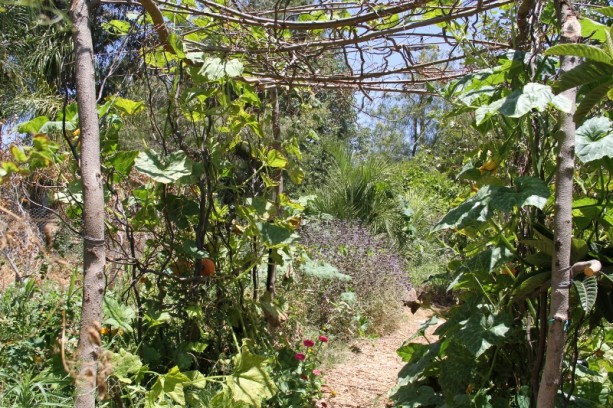
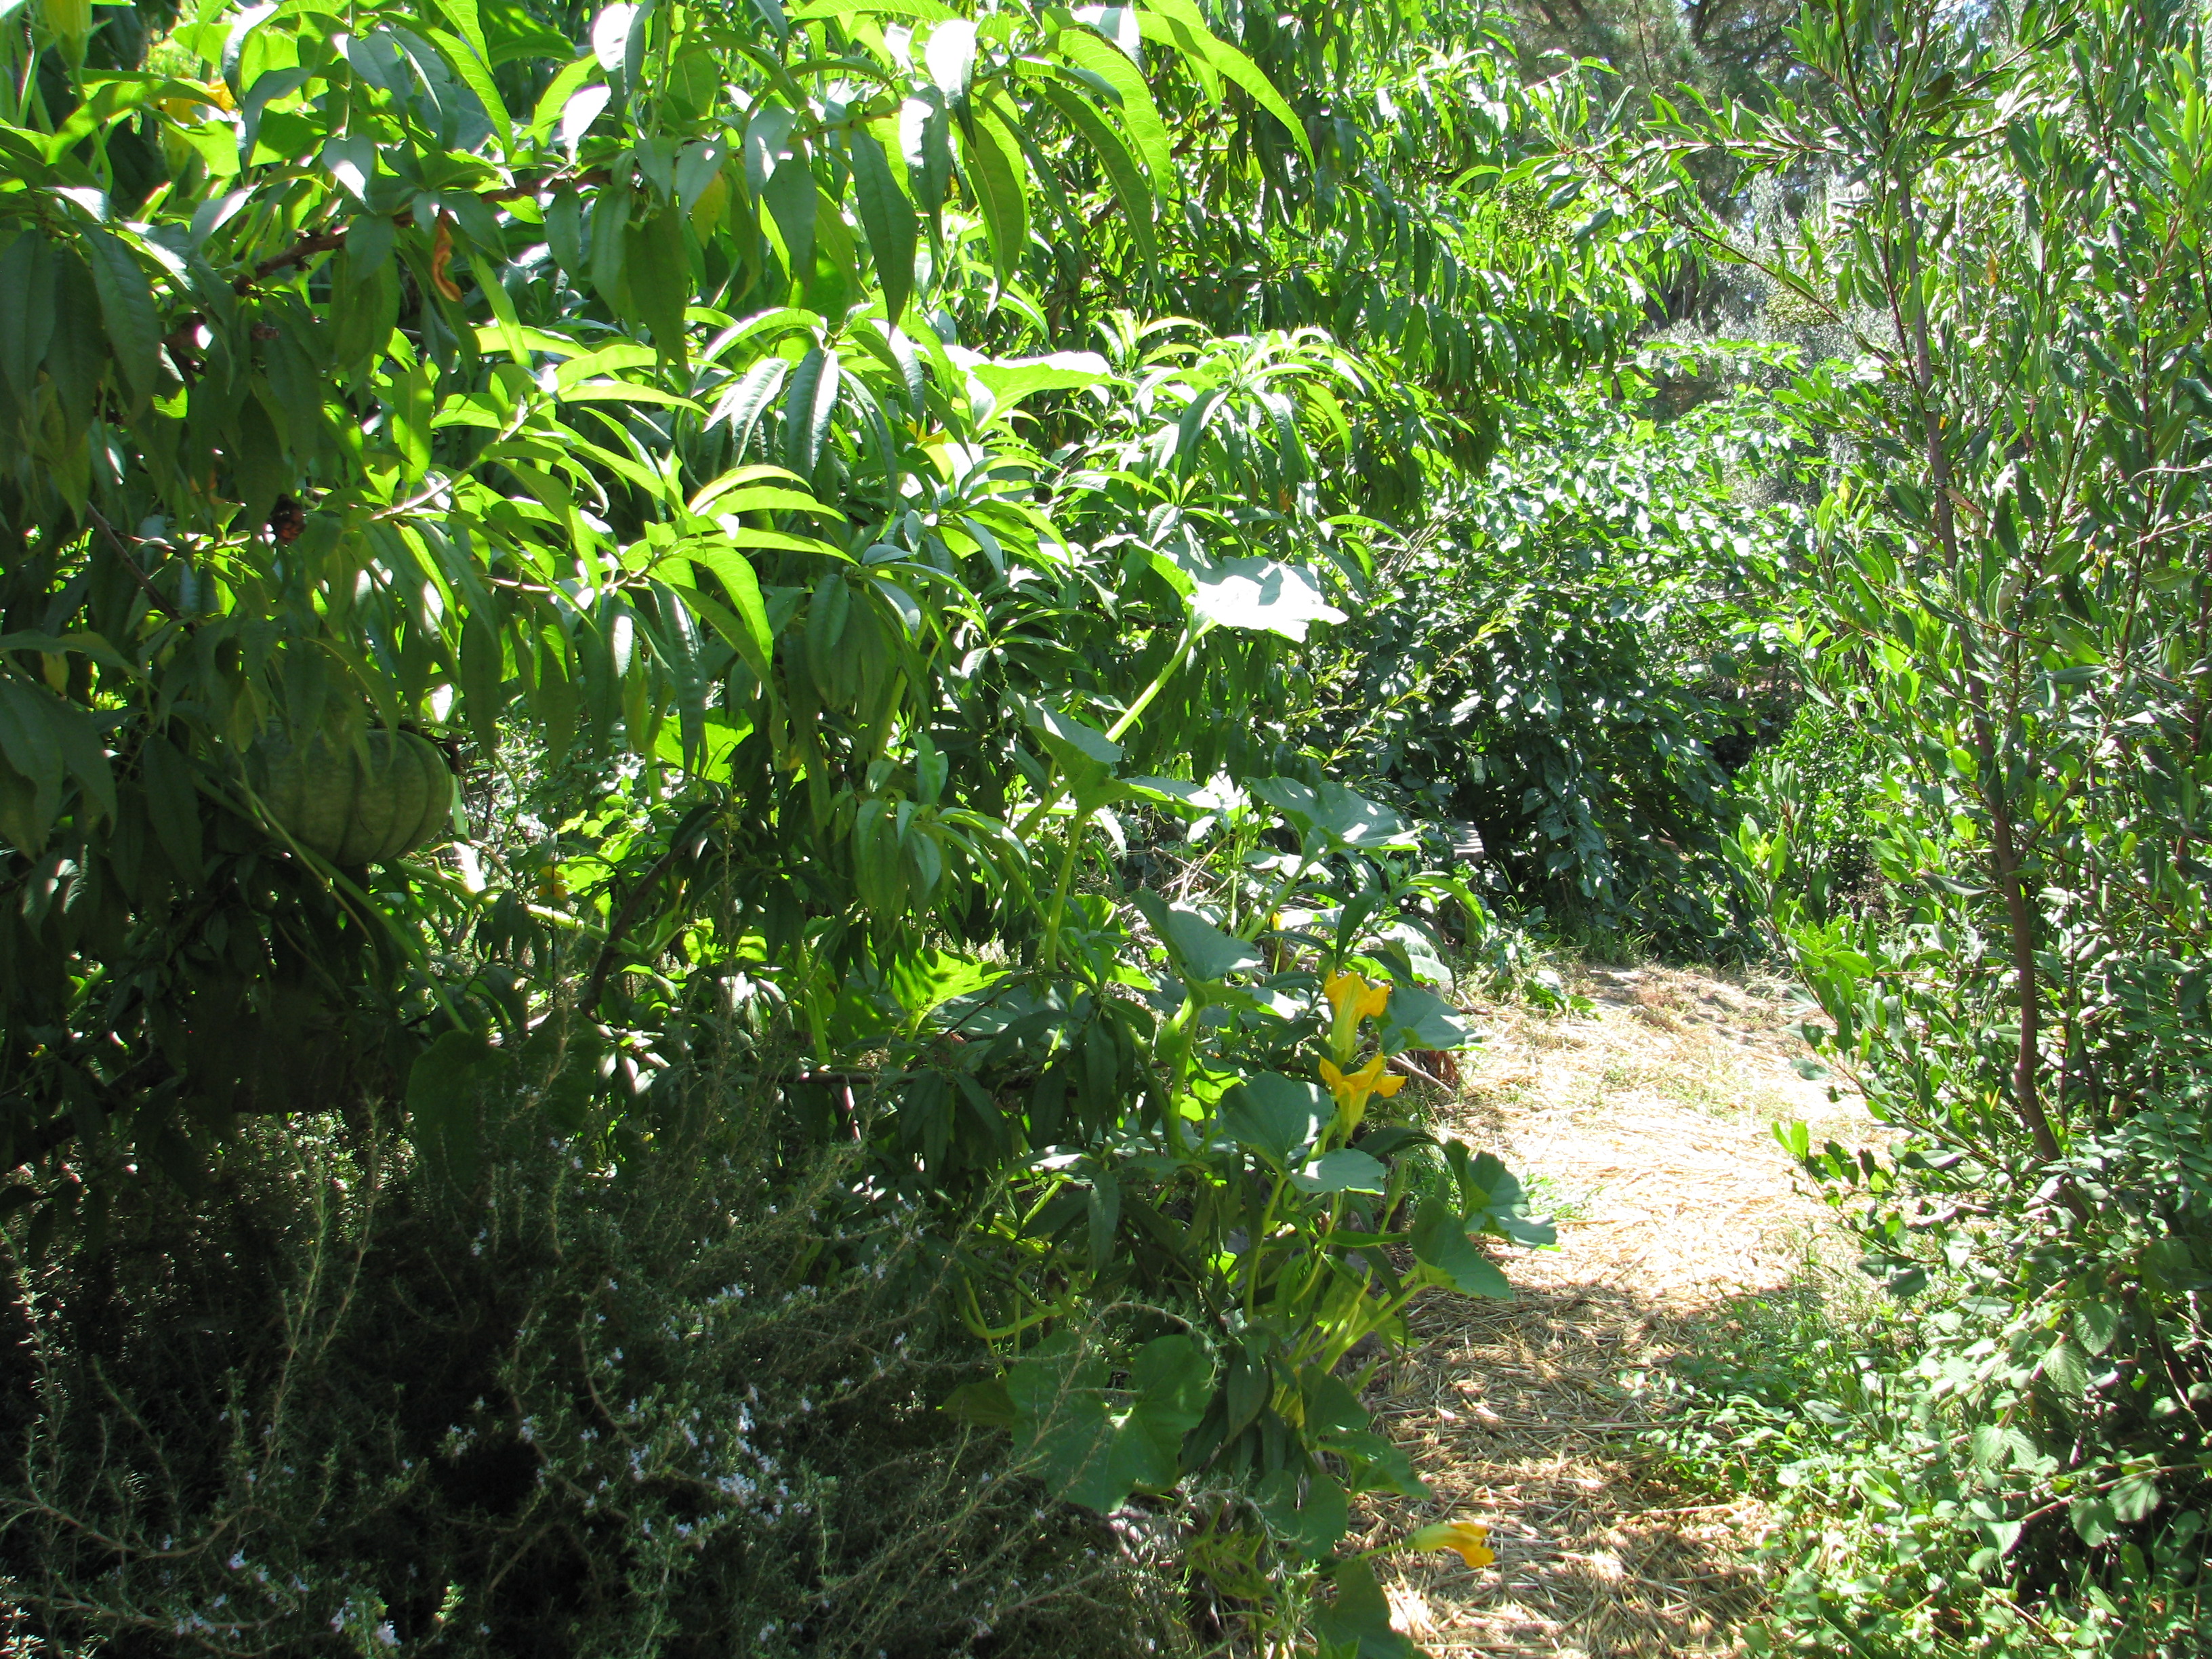
This curly willow trellis we put up in late spring and planted squash along both sides. The squash love the trellis, and the trellis adds a nice touch to the pathway. Do you have a cement porch or patio where the sun reflects heat and brightness into your house in the summer? Cover it with a simple trellis, sturdy enough to hold vines. There are many ornamentals that would work (wisteria, trumpet vine, virgin’s bower, morning glory, etc.), but think about passionfruit, kiwi or grapes. Outside a west-facing wall is a perfect place for a planted trellis, that will help cool that side of the house during the summer. The sides of sheds can be used vertically, either with simple wire that can be removed later or with wooden lath (preferably recycled).

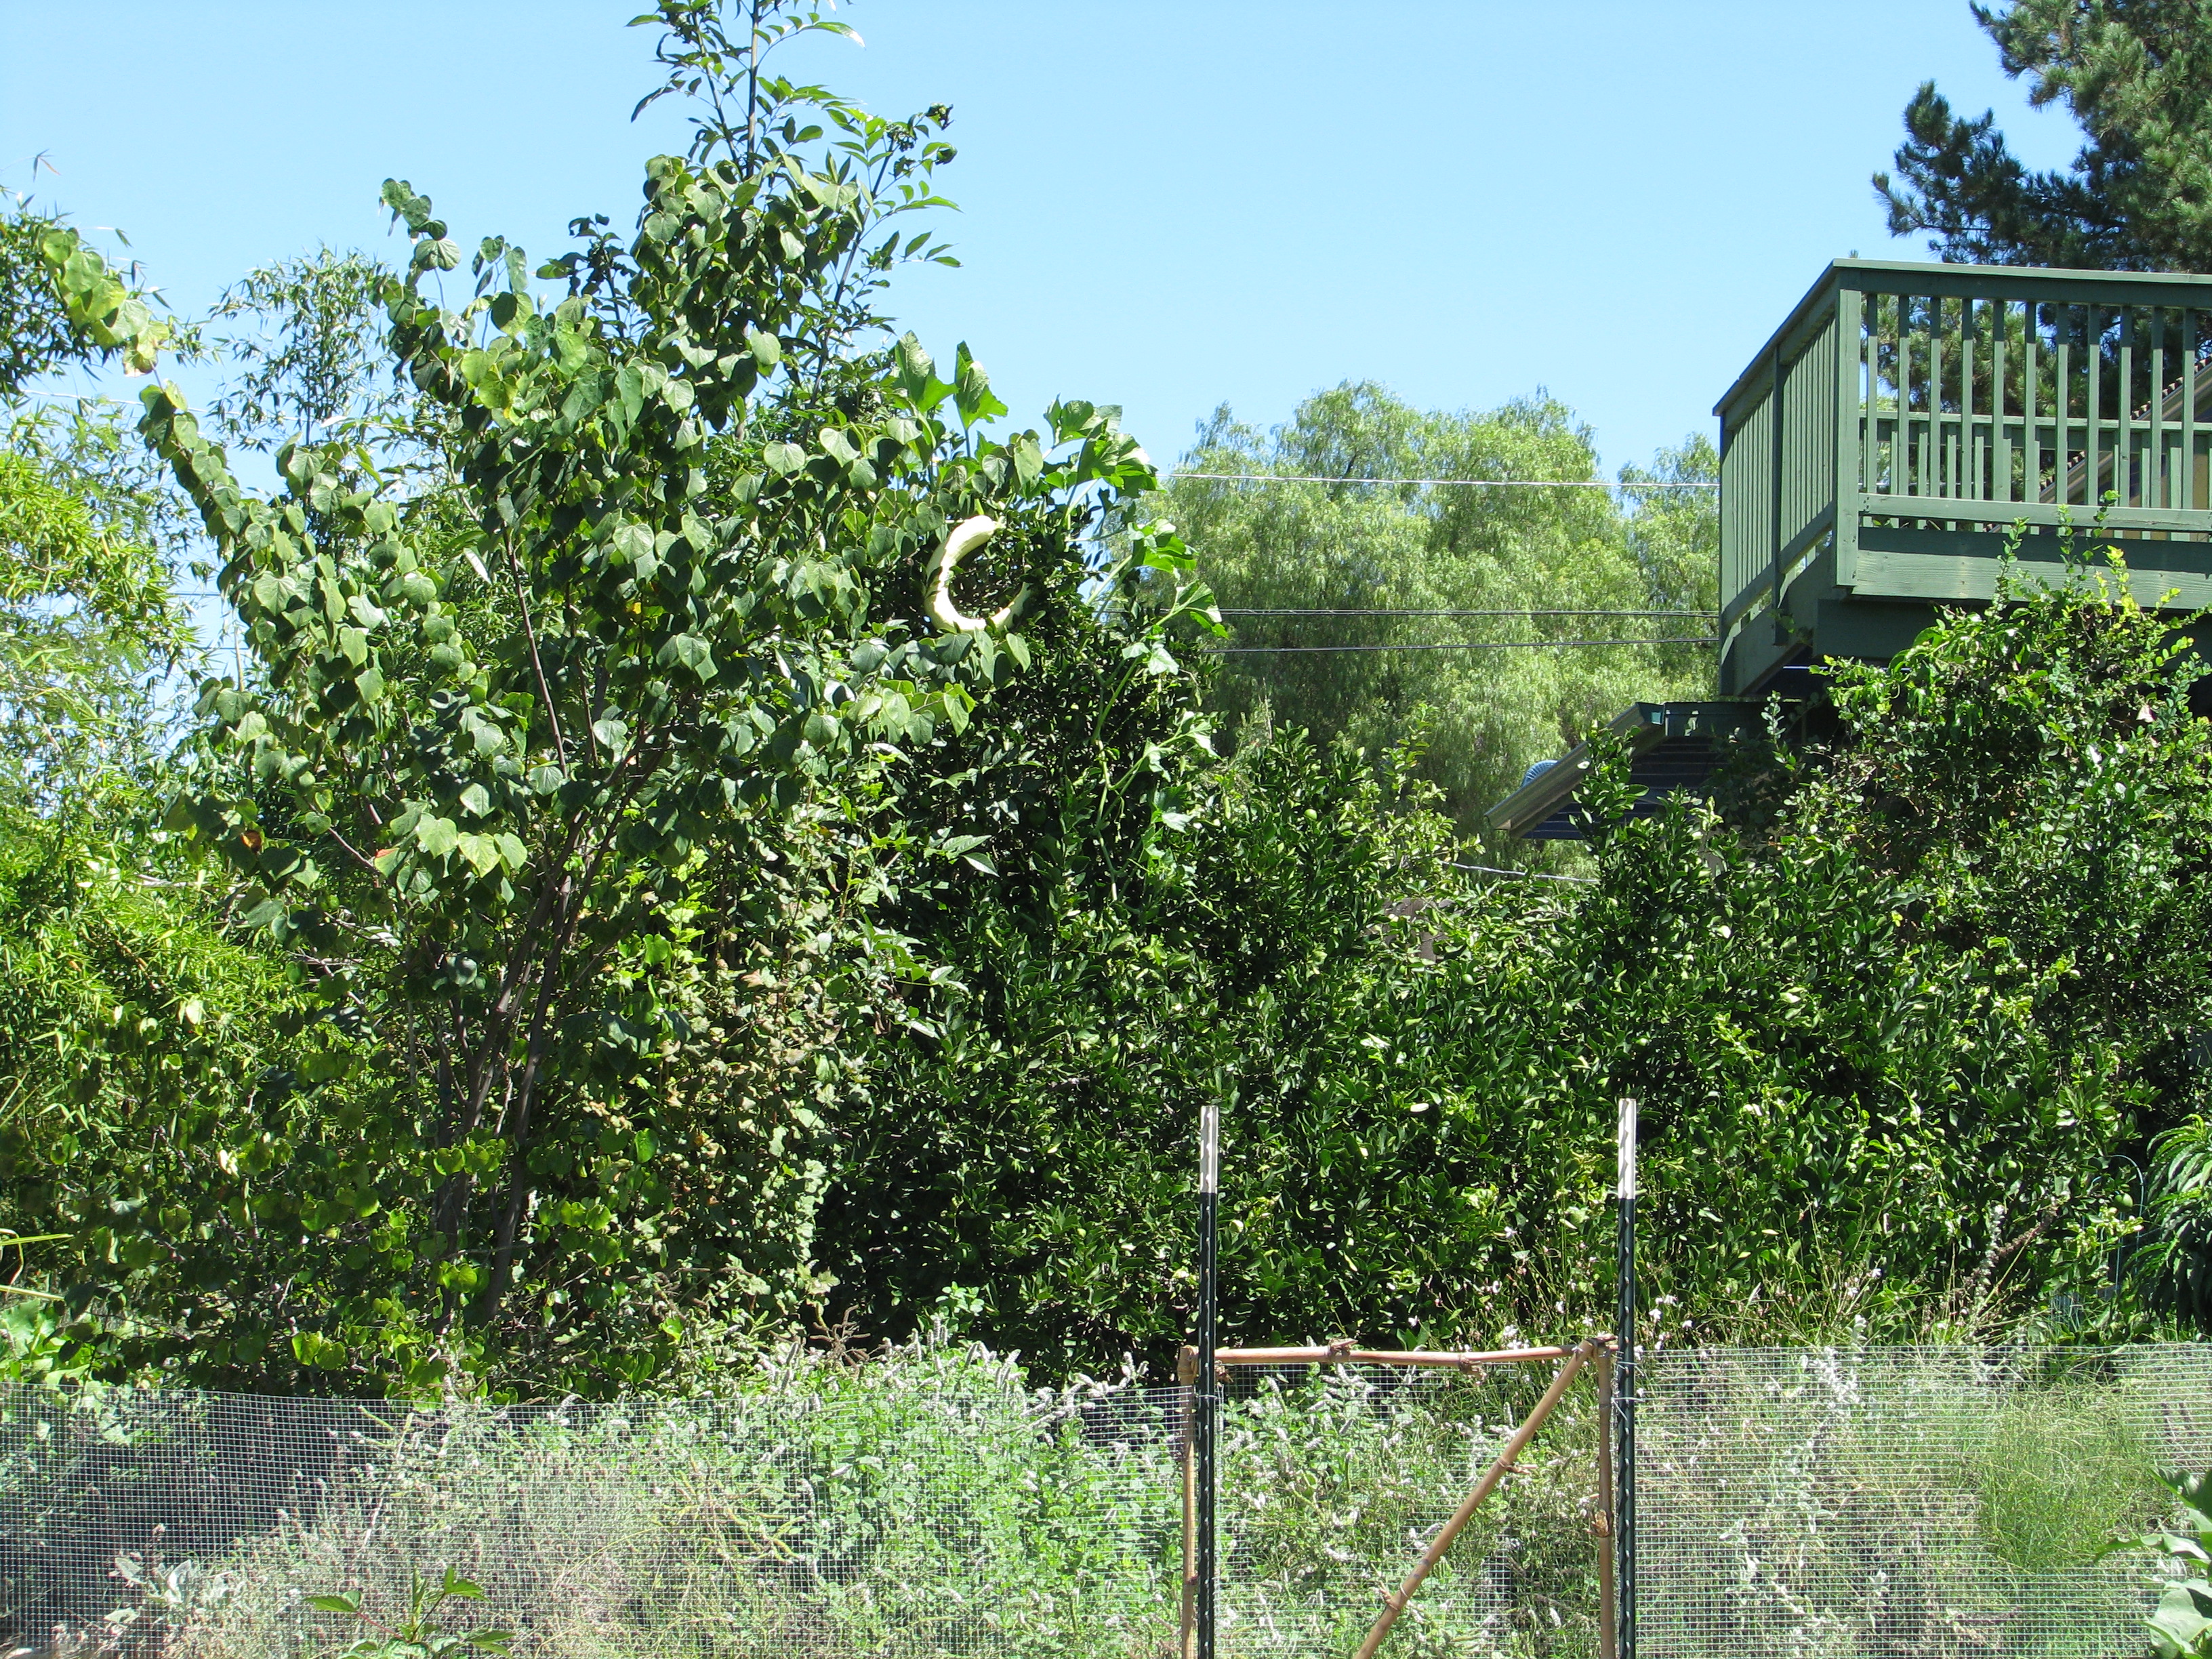
Strange fruit in this lime tree? 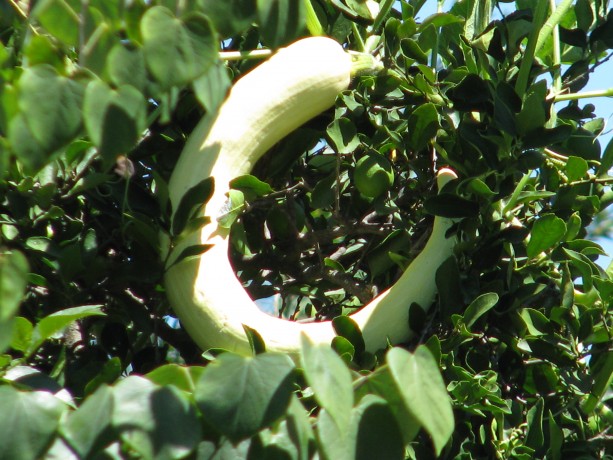
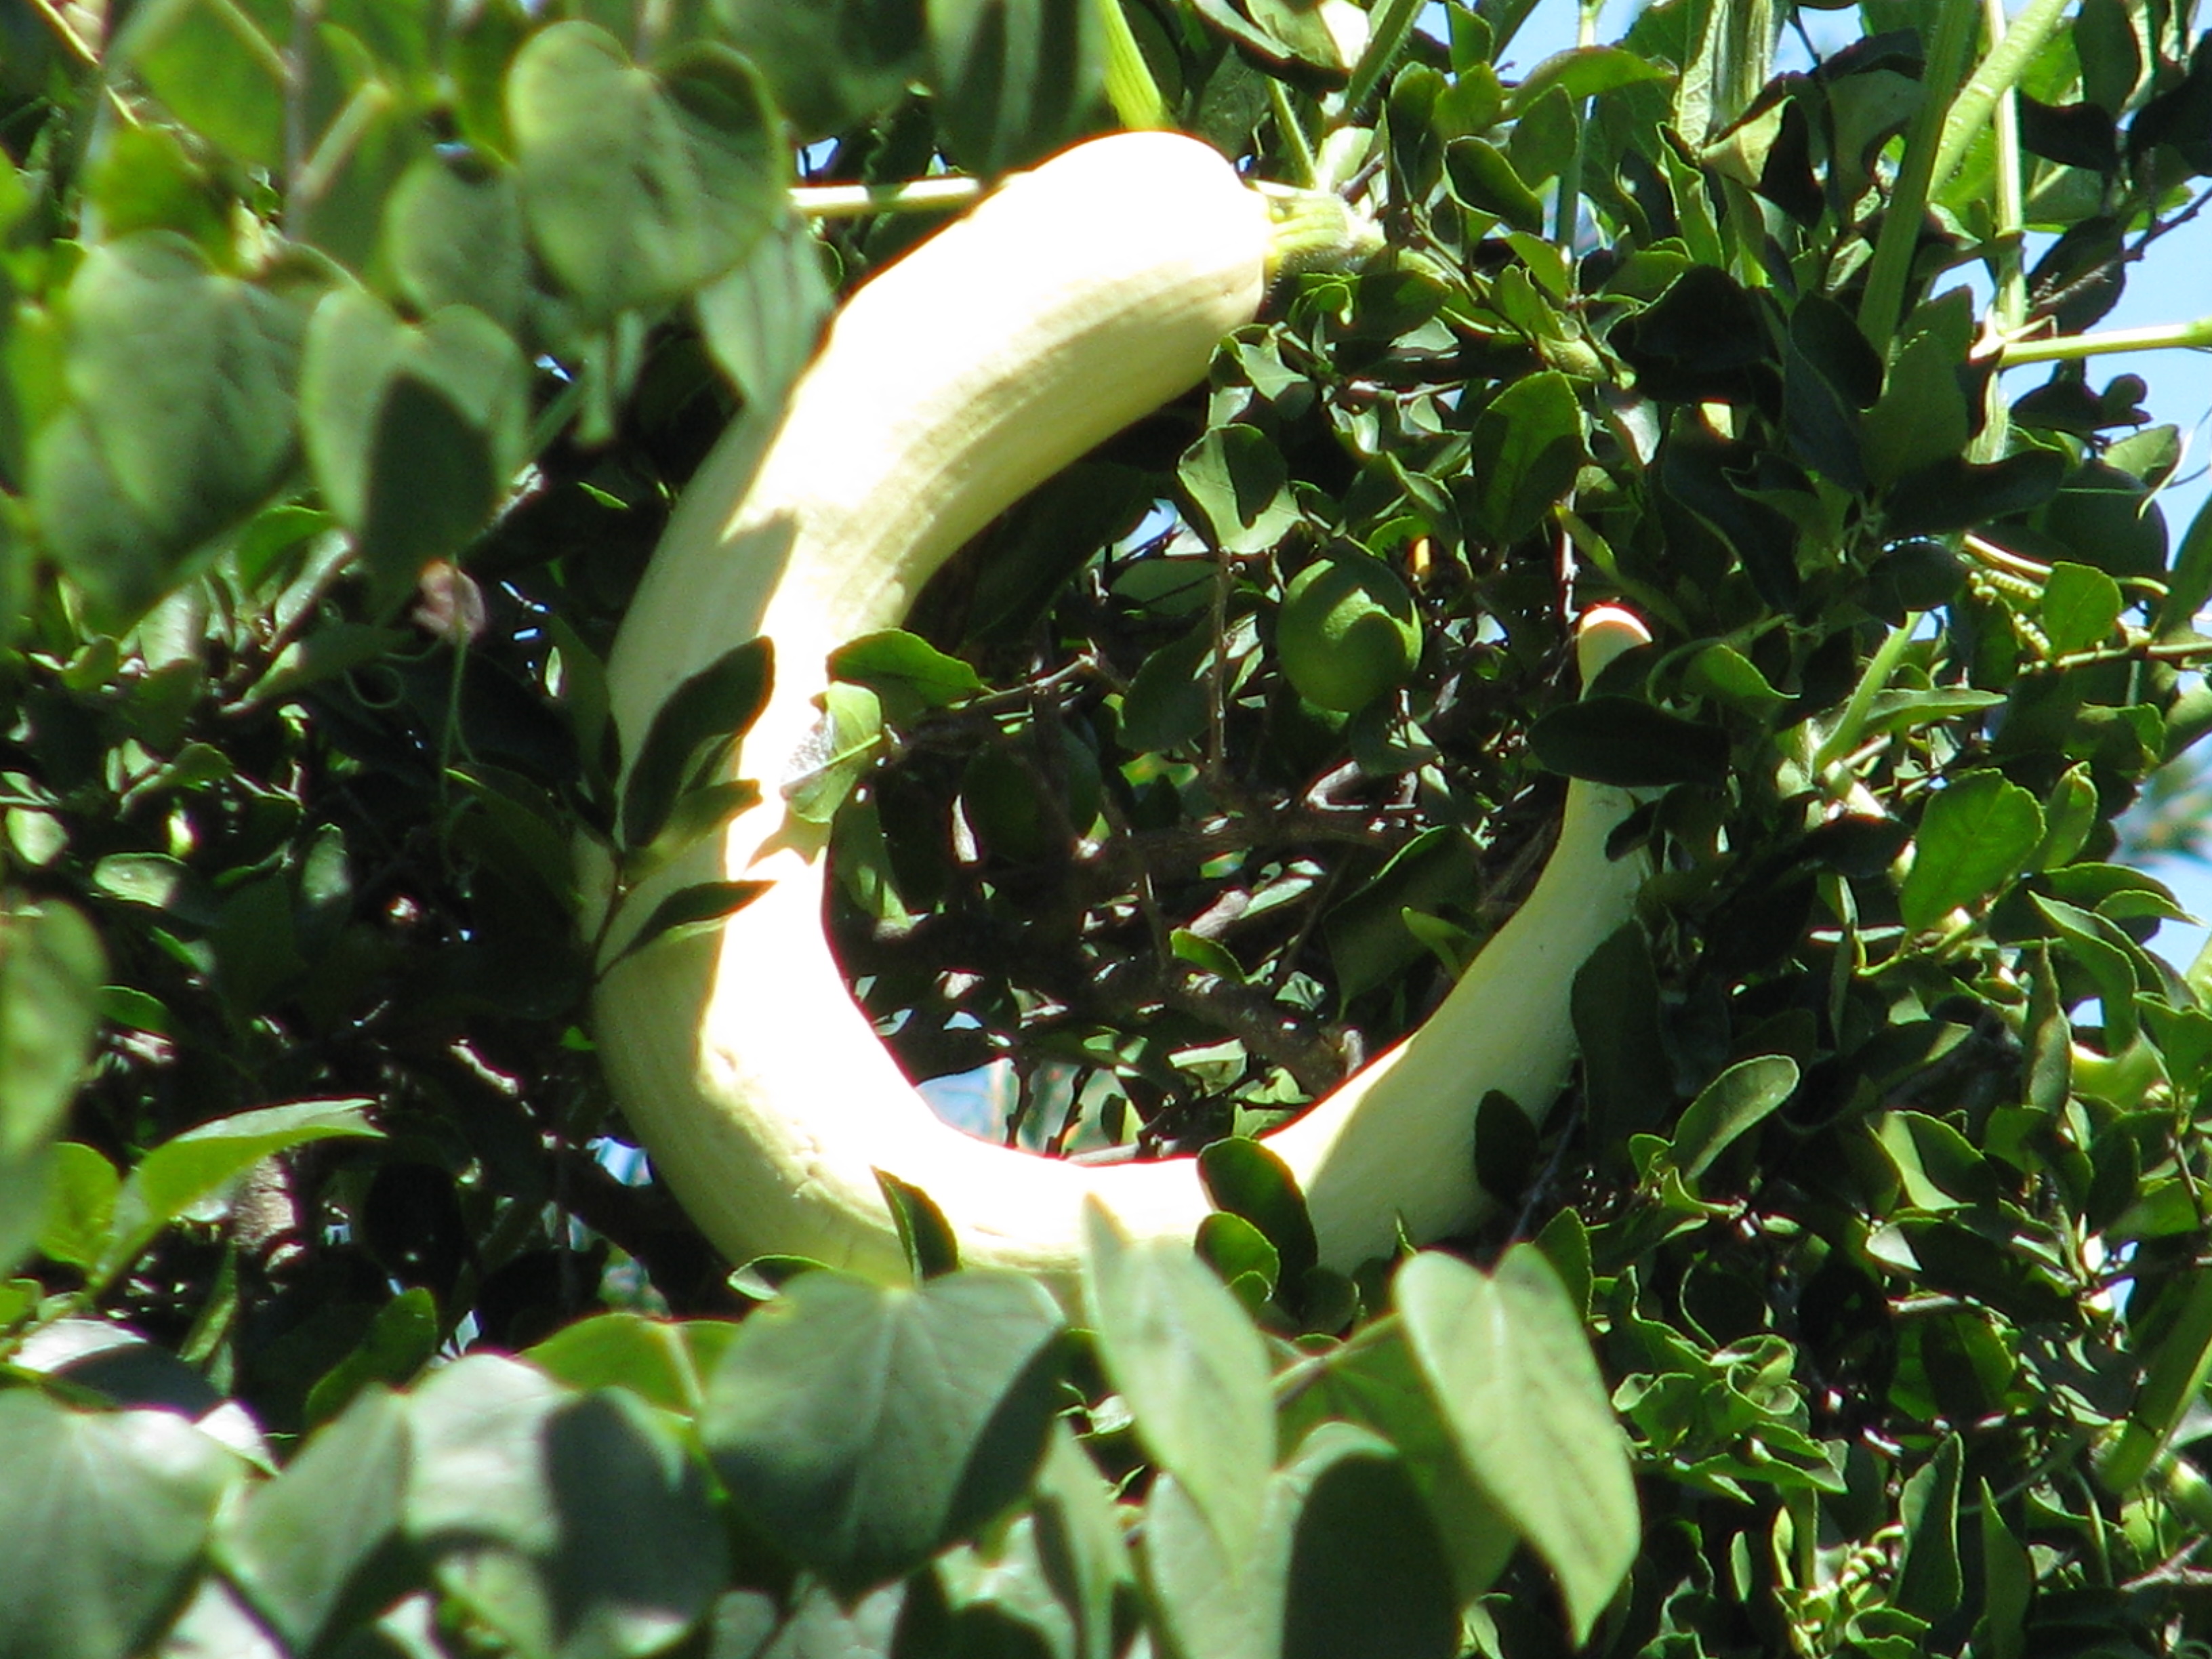
Yes! Its a zuchino rampicante vine. This heirloom zucchini can be eaten green, or if allowed to age will harden into a uniquely-shaped winter squash. If you have existing trees, use them as vertical space. One faction of a plant guild is a vine. Vines act as groundcover, shading the soil and retaining moisture while producing mulch. Vines also can grow up trees and help shade their trunks from weather extremes.
A Canada Crookneck climbs over a plum tree. Meanwhile the fruit and vegetables are off the ground and won’t suffer the predation by animals or ground insects that it may normally receive. Plus, it is fun to see squash up in a tree.
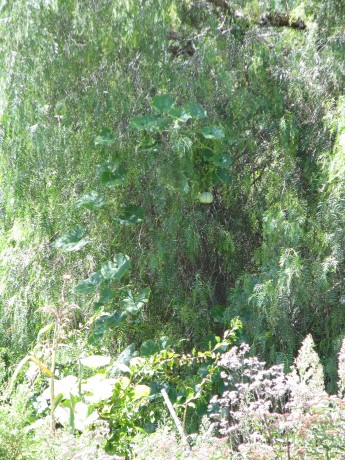
Um… that is definately a pepper tree. But what is hanging in it? 
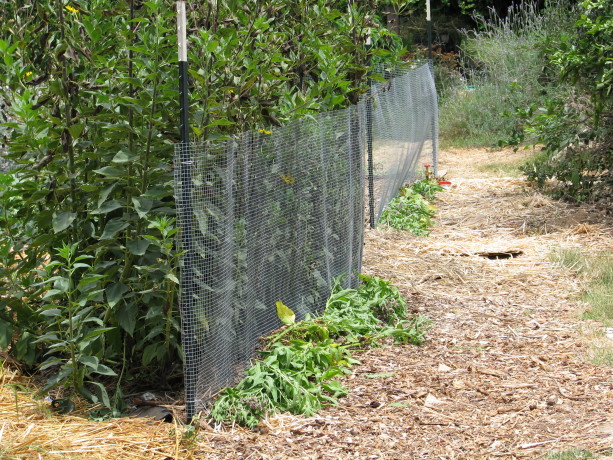
Strange fruit, indeed! A small fence around your kitchen garden is inexpensive, recyclable, keeps nibbling critters out, and can double the size of your growing space.
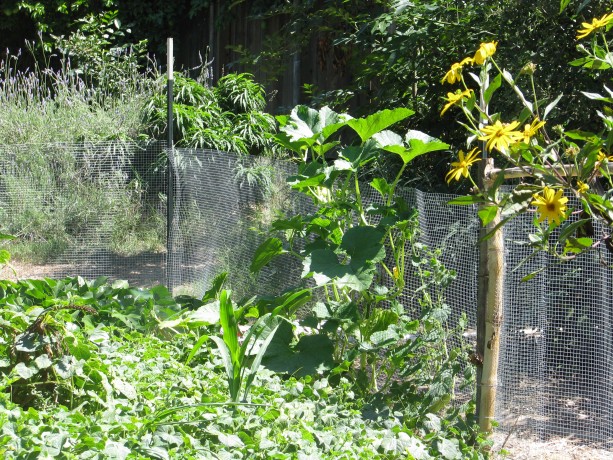
T-posts and hardware cloth around the kitchen garden adds so much more growing space, and keeps critters out. Delicata squash is enjoying the late summer sun. One project that I’d like to do this winter (just one? Ha!) is to nail up old rain guttering on the outside of my little shed and make a small natural pond at the base. I’d plant the gutters heavily with strawberries, and maybe greens, and then install a pump that circulated water from the pond up to and through the gutters. The water would then empty back into the pond. The fish and plants in the pond would be fed and happy, the plants in the gutters would be watered and fertilized, and I’d have unnibbled strawberries that were easy to pick, as well as repurposing the old gutters.
Please choose only organic, and if possible, heirloom seeds. It is so important to not poison the wildlife and ourselves with chemicals and plants whose DNAs have been tampered with to withstand more chemicals. I buy from Baker Creek (the catalog is to die for.), Seeds of Change, organics from Botanical Interests , from organic seed savers and from Peaceful Valley Organics (which have terrific prices on high-quality bare root plants such as strawberries!).
More squash helping shade the trunks and the soil around a nectarine. So when planning your next season’s garden, don’t just think outside of the box, but think of growing up the sides as well!
- Animals, Chickens, Compost, Gardening adventures, Hugelkultur, Other Insects, Permaculture and Edible Forest Gardening Adventures, Seeds, Soil, Vegetables, Water Saving, Worms
Using Smuck, or Using Food Waste
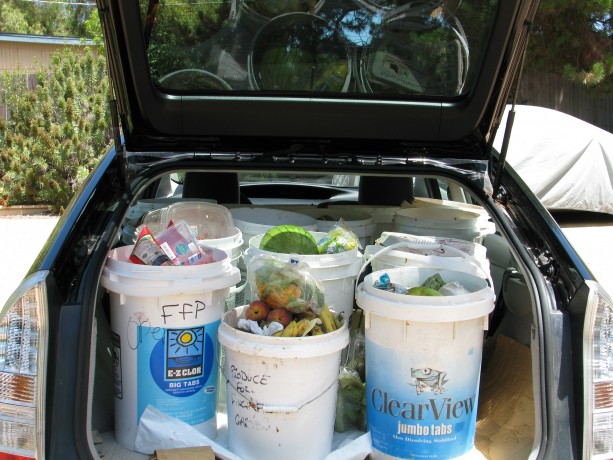
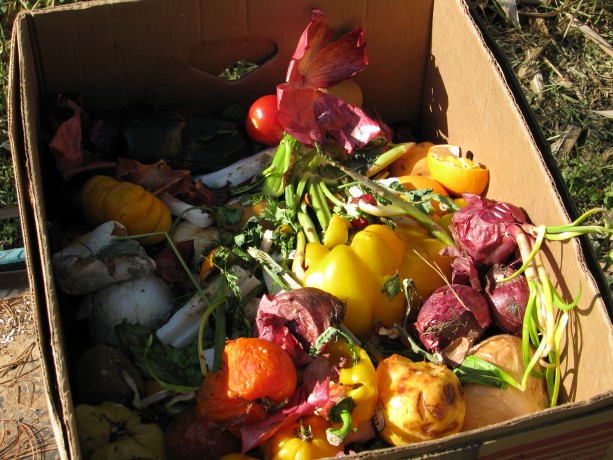
One afternoon’s haul of smuck. Just when I was mourning the fact that our household didn’t create enough food waste to generate lots of compost, I received an email from a former visitor to Finch Frolic Garden. She volunteers at the Fallbrook Food Pantry, where they distribute balanced food supplements to over 800 families a week who earn less than the US poverty limit. They receive raw, outdated fruit and vegetables from grocery stores and other sources, sort through it and have to discard what isn’t safe to hand out. The volunteer knew that I composted and wondered if I’d like to pick up the residue so that they wouldn’t have to throw it out. She and the director had been taking it home, but it was too much for them. Four times a week I’ve been picking up buckets of smuck, or what I call the rotting fruit and vegetables, and often its too much for me as well.
Boxes of mixed smuck were difficult to pick up and very, very juicy. Buckets are better. There has been a grace period where my daughter and I nearly broke our backs picking up cardboard boxes sodden with fruit juice that stained our clothes and our car, and spent lots of time cutting produce out of plastic bags and containers, but the Food Pantry staff have been wonderful about usually opening the packages and using only old pool buckets.
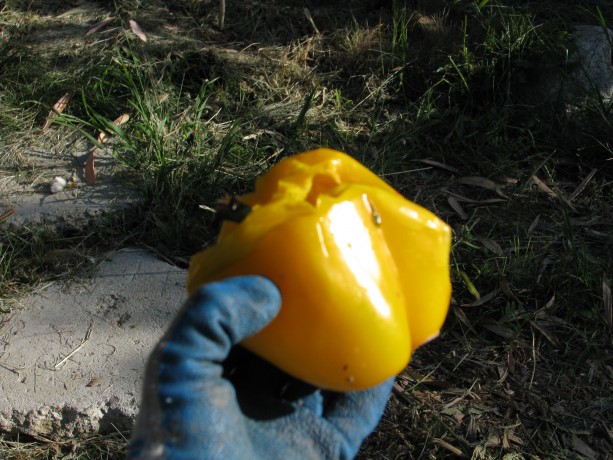
One drawback is that very little of the smuck is organic. We are constantly amazed at how fruit and vegetables remain hard on the outside while rot on the inside. These peppers were hybridized to be solid enough to ship without bruising, at the expense of flavor and nutrition. My back, my clothes and my car thank them. Fortunately others have been picking some smuck up. The man in my life happily takes lots of it to feed to his compost worms. We’re a great match.
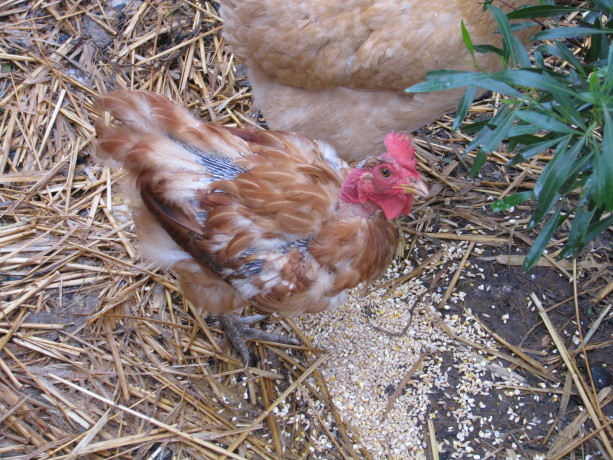
My daughter and I empty the buckets into the chicken coop.
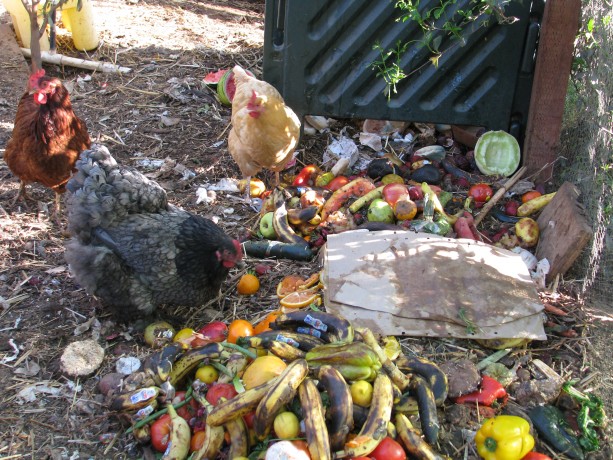
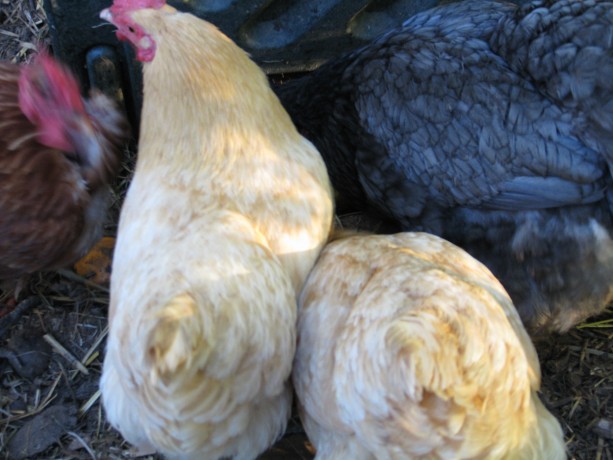
Charlotte, Bodicea and Esther/Myrtle with a new batch of smuck, heavy on the bananas. The girls love it. I make sure they eat lay crumble and calcium as well to keep laying, but with the smuck they’ve reduced their intake of crumble and hence have lowered my expense.
The girls going after the smuck. I pitchfork straw and weeds over the top and within a few days most of it except some citrus and a coconut or two is pretty much gone. There is a fly problem, but with the flies there have come more flycatchers and lizards, and the hens eat the insect larvae that emerges in the compost.
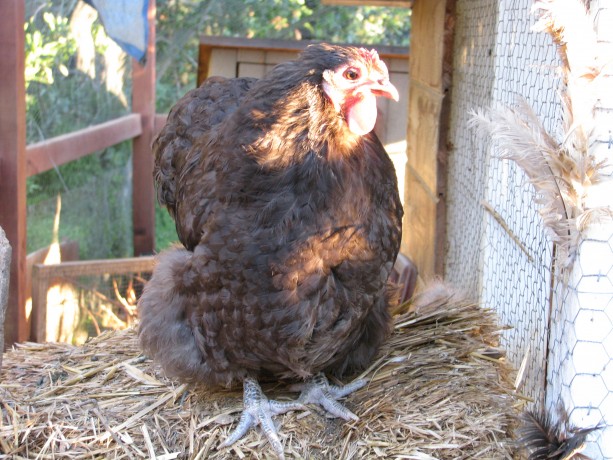
This is Agatha, named after a favorite mystery writer. She’s here just because she’s so lovely. The picking up of smuck, hauling it down the hill and into the coop, de-packaging, cleaning buckets and fighting flies and ants, three – to -four times a week has been a time-consuming and very, very icky job, but the thought of all that free waste going into the dumpster keeps me at it. This is bacteria-heavy compost material, which is excellent for growing non-woody herbaceous plants such as our own vegetables and herbs.
I’ve also layered the smuck with cardboard, paper waste from the house (tissues, paper towels, cotton balls, Q-tips, junk mail, shredded paper, etc.) under the bananas.

A pile of fruit, veggies and cardboard, partially covered with clippings, at the food of our big banana. A citrus to the side likes it, too. Bananas love lots of food in the form of moist compost around their roots; in fact, they are commonly planted in banana circles with understory plants and the center of the circle is a place for waste products to deteriorate. In our dry San Diego climate we don’t have that kind of tropical moisture to help it rot, but the compost does become a sheet mulch and really helps create soil.
Miranda adds a melon to the banana circle smuck. One inch of compost reduces watering needs by ten percent, so a pile of wet smuck layered with carbon items such as dry cuttings and cardboard is excellent. I throw cuttings and pine needles over the top to keep down the rotty fruit smell, which doesn’t last long anyway.
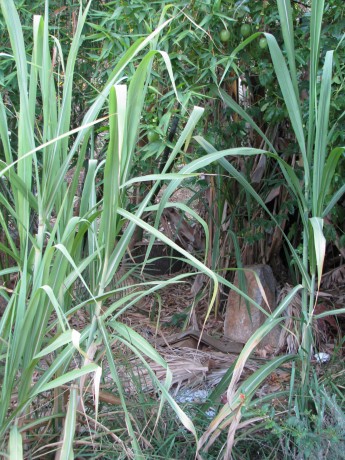
Sugar cane and passionfruit enjoy the smuck layers under the banana – kind of a banana semi-circle. When creating new impromptu trellises for melons and squash in unimproved soil, Miranda and I dug trenches, threw in wet wood and dumped buckets of smuck right on top then covered the trench with dirt. We planted seeds in handfuls of good compost and away they went. We also used some of the mostly composted soil from the Fowl Fortress directly into the kitchen garden .

We augmented the kitchen garden soil with nearly-composted smuck dirt. Due to the wide variety of fruit and vegetables in the smuck buckets we’ve had some interesting volunteer plants. Tiny tear-shaped tomatoes that had been sold in plastic containers for natural snacks, a sweet potato, other tomatoes, and melons. At least we thought they were melons.
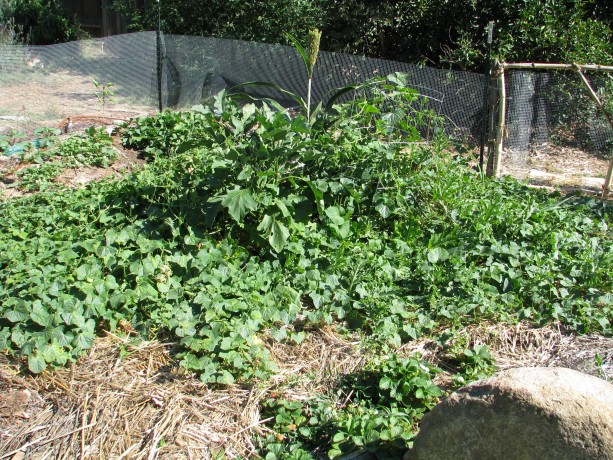
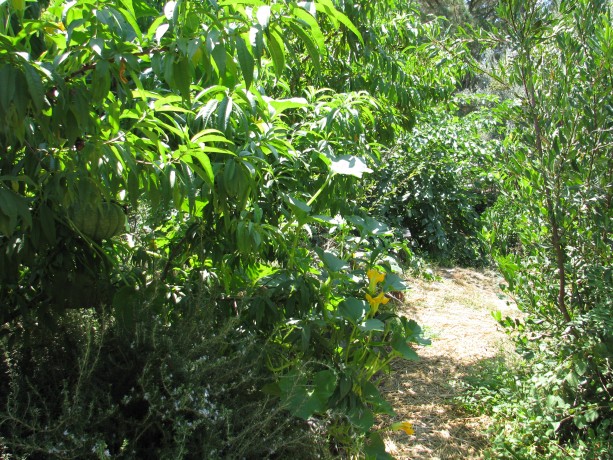
Melon vines taking over the kitchen garden… but not the melons we expected! Miranda was wondering about pulling them out of the kitchen garden because they were taking over without apparently producing a flower. A couple of days ago she investigated further and found a real surprise. We have about thirty kiwanos growing under the foliage!
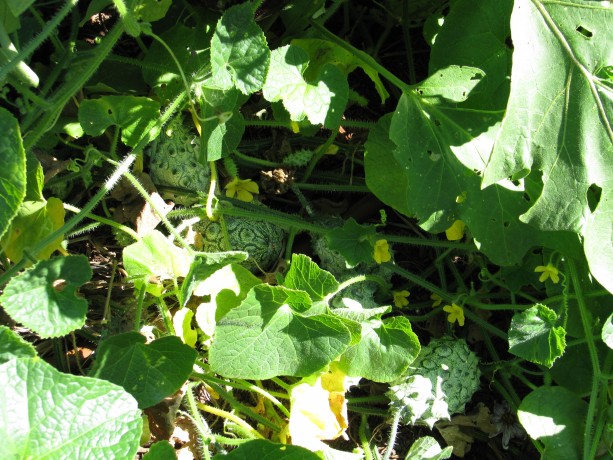
Kiwanos with lots of blooms lurking beneath the foliage. I’ve never eaten a kiwano. Wikipedia says: Cucumis metuliferus, horned melon or kiwano, also African horned cucumber or melon, jelly melon, hedged gourd, melano, in the southeastern United States, blowfish fruit, is an annual vine in the cucumber and melon family, Cucurbitaceae. I’ve seen them in the smuck buckets, and it just figures that of all the green melons and orange melons that we’ve thrown in there, something like these would grow! None have ripened to the light orange color as yet, which is good because it gives us time to figure out what to do with them.
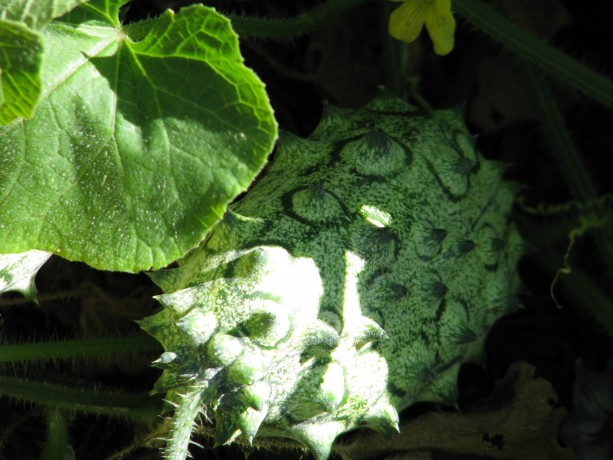
When they turn orange they’ll really look like blowfish fruit! You May Also Like
Native Insects and IPM