Ponds
- Animals, Bees, Compost, Gardening adventures, Irrigation and Watering, Microbes and Fungi, Natives, Other Insects, Permaculture and Edible Forest Gardening Adventures, Rain Catching, Reptiles and Amphibians, Soil, Water, Water Saving, Worms
Creating Rain with Canopy
Even if we don’t receive a lot of rain in drylands, we might have fog, sprinkles and other degrees of ambient moisture. This moisture can burn off with reflected heat from hard-packed earth, from gravel and hardscape, and from buildings. It is too irregular and thin to make the use of mist nets feasible. However, a much better way to collect that moisture and turn it into rain is the method nature uses: trees. The layers of a plant guild are designed to capture, soften and sink rainwater, so why not just let them do it? Many trees are dying due to heat, low water table, lack of rainfall and dry air. Replacing them with native and drought-tolerant trees is essential to help put the brakes on desertification.
Please take five minutes, follow this link and listen and have a walk with me into Finch Frolic Garden as this 5-year-old canopy collects moisture and turns it into rain:
Plant a tree!
- Building and Landscaping, Gardening adventures, Heirloom Plants, Natives, Perennial vegetables, Permaculture and Edible Forest Gardening Adventures, Rain Catching, Soil, Water
Irrigation for Drylands, Part 2: Evaluating your System
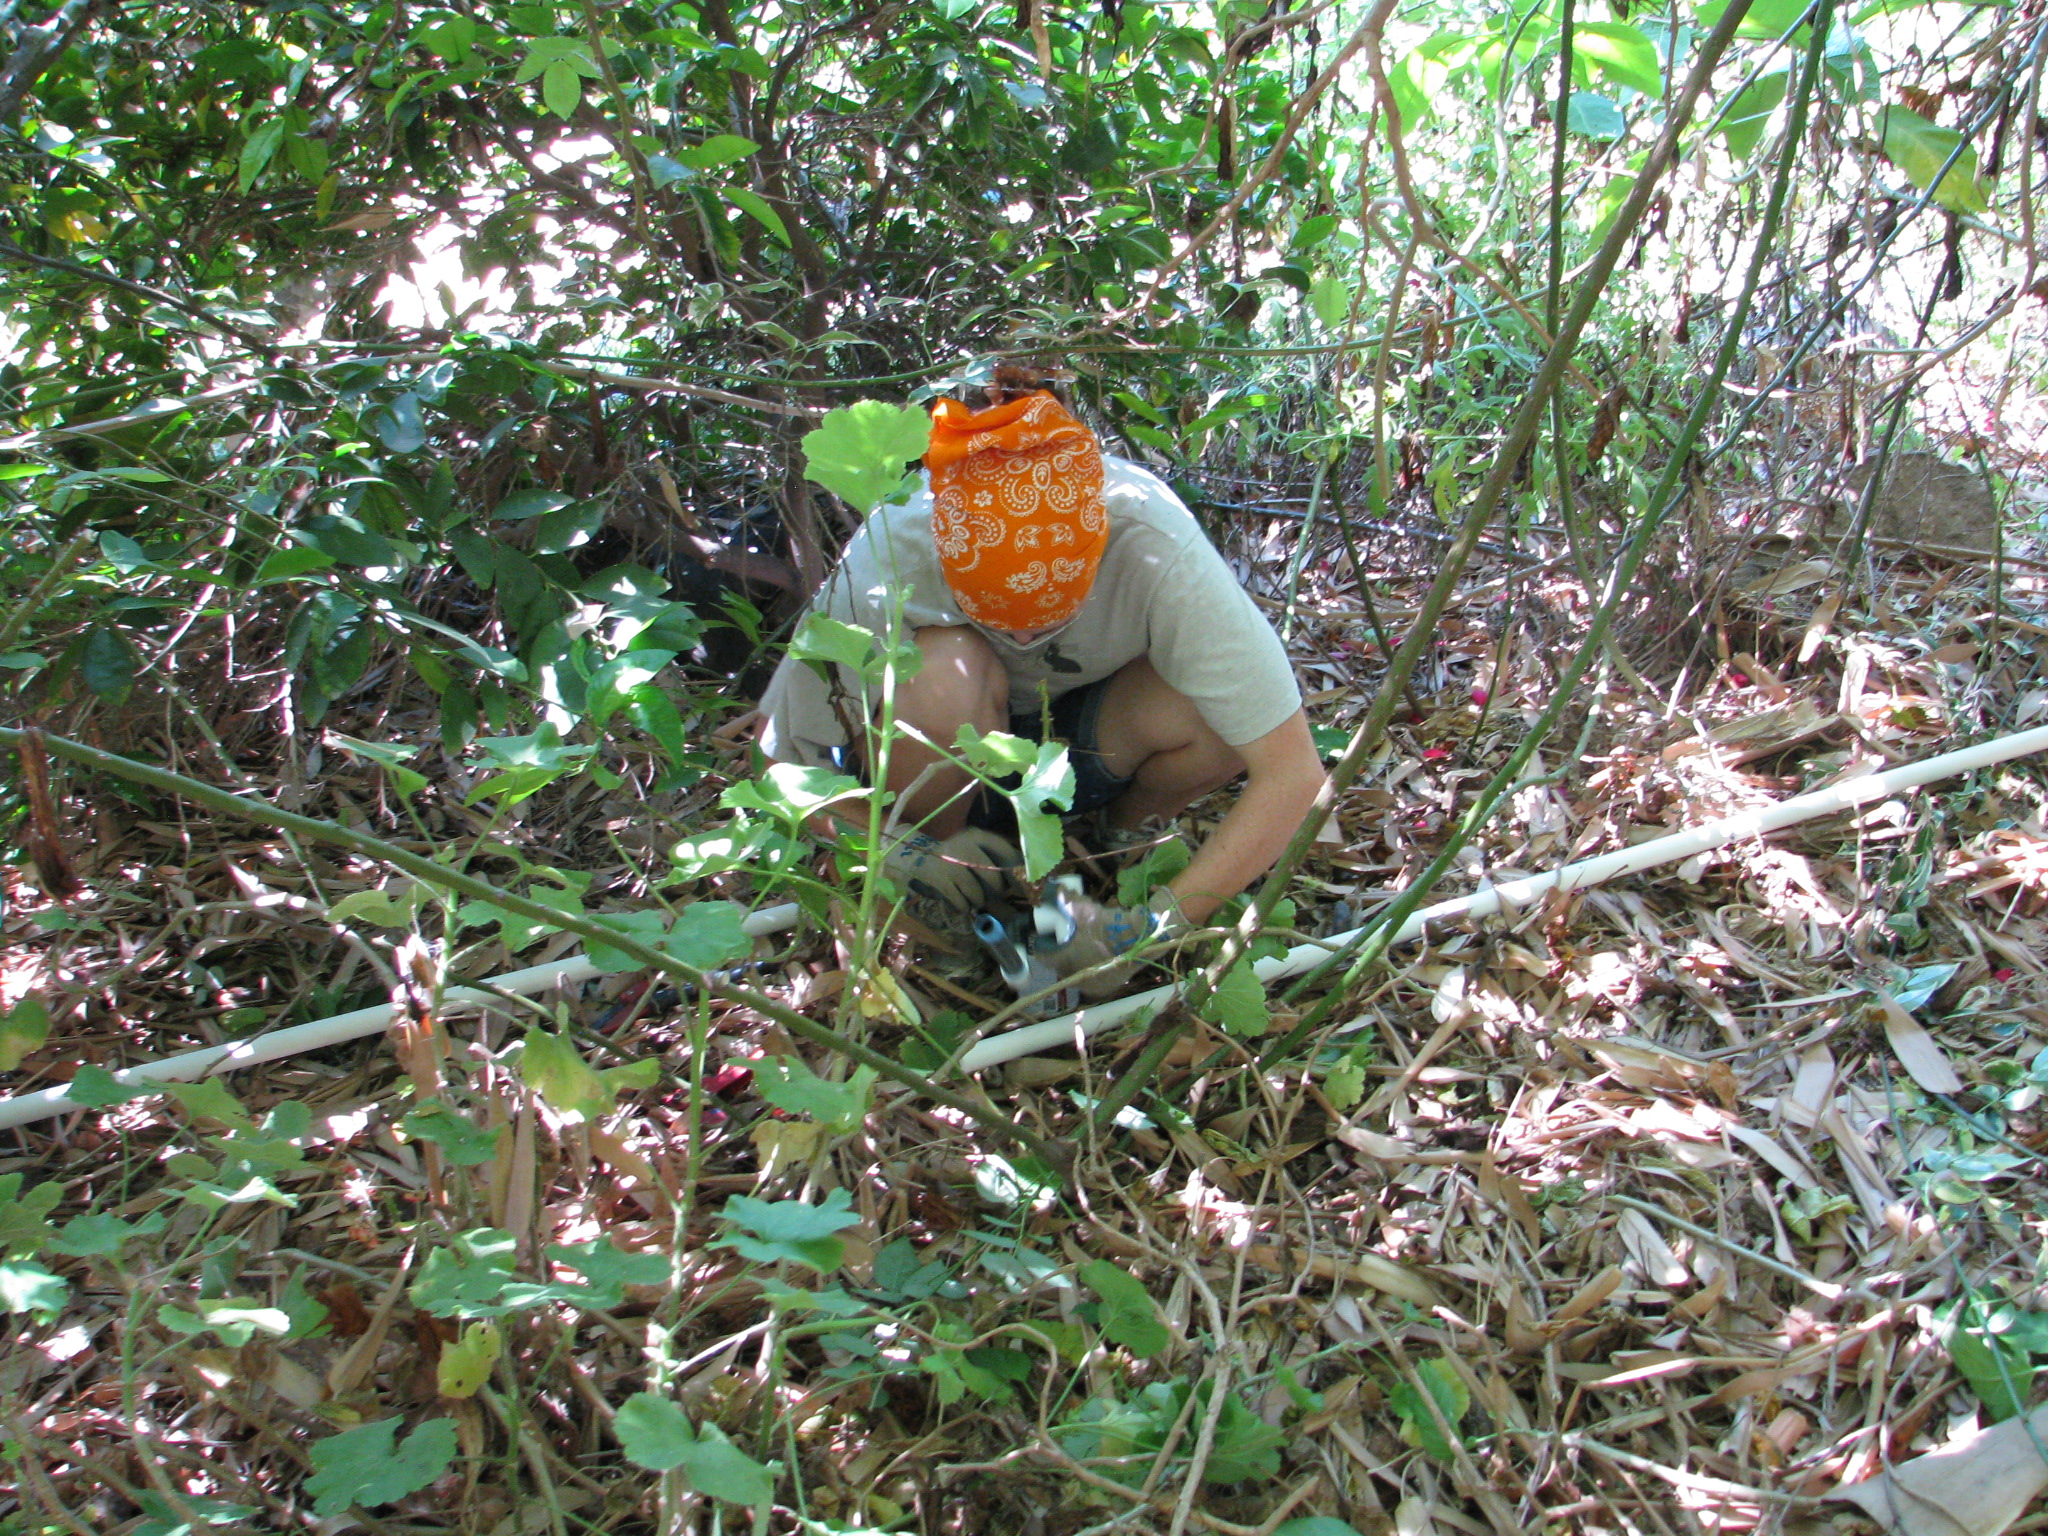
Miranda in the roses gluing pipe. If you have an existing irrigation system that works, you may easily convert it by adapting the heads for whatever you want to plant. Many lawn conversions I’ve designed utilize the existing spray system, particularly for natives, but with a different watering schedule. Don’t spend money when you don’t have to.
If you have an old grove that is to be converted and downsized, you’ll usually have far more pressure in your system than you need for smaller heads which may cause them to blow. Working with an irrigation specialist for the valves and pressure is advisable. For this re-irrigation project of Finch Frolic Garden, I found Vista-based John Taylor of Taylor-Made Irrigation and Landscape, 760-945-0118. He’s the first person to listen to and consider what I have to say, based on my experience with the old system, and he adapts to different situations. I’ve learned some cool new things that I will pass on to you, and he’s enjoying learning permaculture techniques, which will help both him and his landscape clients.
Here’s a little world-weary advice from someone who trusts too easily: Many professionals no matter what their field have one set way of doing things that they apply to every situation, be it irrigation, plant selection, tree trimming, construction, etc. (My neighbor has his poor coral tree topped every year. Topping trees is a bad practice. When I asked him about it, he said that his tree trimmer has been topping trees for years and recommends it, so he’s talking his expert advice! Do you see the problem here?) You, I’m sure, have dealt with these people too. Every situation needs a different solution, so look for someone who is flexible, listens to you, can offer several solutions with various price ranges, and who will give you a detailed estimate up front. Jobs will always run over, but they shouldn’t run too much over and the professional should be determined to keep on budget, and honest with you when there is an overrun. If you ask a professional to do extra things, the new tasks will need to be added on to the original contract because it will take up part of the time allocated towards the original project, so the project completion date will be moved ahead, and will add on to the total cost. On the other side, if your professional adds on projects that he thinks you’ll like, and you give him the verbal okay, realize that he’ll be working on those projects in addition to the original tasks, so it will take longer and cost more than the original contract. Look for people who don’t consider telling you their life story part of the time for which you are paying. If you tell them your life story, remember that they are on the clock and you are paying for that time. (I’d rather deal with a quiet, focused professional than a chatterbox who will talk more than work. If he’s not talking to you, he’s probably on his phone a lot while on the job.) Look for neat vehicles with organization, letterhead for estimates and invoices, someone who shows up on time when they say they will, and stays until they are done. They should schedule in their lunch; if they work through it they are not going to work well for you later in the day, and its unprofessional. Its okay for professionals to handle several clients at one time, but only if they are well organized and are eager to finish your project on your timeline. Contractors are infamous for tearing something apart the first day, then disappearing for days or longer holding you hostage while they work on other projects. Its okay to ask about all of this, and really important to read reviews. Don’t always rely on people your friends have recommended; I’ve had both really bad and really good referrals, so make up your own mind.

Extreme mineral buildup in a PVC pipe. Photo from http://www.marinechandlery.com/. Back to irrigation. Most irrigation is PVC, the white plastic pipe. If you have old buried metal pipes they should be examined for leaks. Mostly they will fail to function due to mineral buildup due to our hard water. The inner diameter of the pipe closes; if you’ve ever cleaned your shower head or seen house drains with the thick white inner coating, that’s what I’m talking about. It will slowly dissolve in vinegar, but the vinegar must remain in the pipe to soak it for awhile, then blown out an open riser to get rid of the chunks. All sprinkler heads must be decalcified as well. Often the buildup is so old that the pipes are deteriorating and just need to be replaced, usually with PVC. The galvanized pipe can either be left in the soil to gradually rot, which is fine, or else be dug up and sold for scrap. The labor cost involved with digging it up will probably be more than what you’ll get for scrap.
Here’s some understanding of water. The reason why domestic (potable) water is chlorinated is not to purify the water. That has already been done before it gets into the delivery pipes. It is to keep biomass from forming inside the water pipes. Biomass is any type of growth that forms, usually in wet conditions. Think of algae inside a fish tank or on the inside of a pool. Biomass is nature’s way of filtering and softening hard surfaces, and in nature is essential. In man-made pipes, the biomass can not only harbor things that can make humans sick, but also slows the flow of water. Garden hoses have some biomass inside of them, and any rough part will slow the water pressure. Lengths of any kind of pipe are the same. The longer the pipe, the slightly less pressure you’ll have. Pressure is important because you want your sprinkler heads to spray, not just dribble (unless you set them for dribbling). Pressure regulators are set in sprinkler heads, Netafim, and valves to keep lines from blowing out under normal pressure. If you don’t have an irrigation system set up for a large grove or large grasslands for animals, which require enough pressure to shoot water great distances, then you shouldn’t worry about the lines blowing out. But understanding about pressure and the effects of biomass and distance will determine what size pipe you lay.
Most people use domestic water for irrigation. Some rural areas have agricultural water available for commercial growers. Some people have well water, which is what I have. Well water has not been treated, so whatever has leached into that water is what you are delivering to the topsoil. Have your well water tested for contaminants and salts. You should have a filter after the pump on your well. However, our heavy-mineralized water will form a oozy barrier around the diaphragms in valves. If debris or too much of this slick mineral buildup accumulates, the valve won’t ‘seat’, or seal, and will allow some water to seep through the pipes even when the valve is off. This has been a huge problem here at FFG, and one which several irrigation ‘specialists’ have completely denied. They deal with treated water rather than well water, and just don’t understand. Some valves have diaphragms that can be very carefully cleaned and replaced, but not frequently before they are damaged. If you have a well, check with an irrigation specialist who has real-time experience with well water and valves to recommend the appropriate valves and filter system for you. I’ll talk more about the ones John recommended for FFG in a later post.
Large-diameter pipes will carry lots more water more slowly. Small-diameter pipes carry less water more quickly. If you lay out large diameter pipes from your valves, let’s say 1″ pipe like we’re using at FFG, then you can reduce the size of your pipe gradually to your sprinkler heads and that will be the best of both worlds. You will have volume of water and increased pressure. So John has recommended that we use 1″ PVC from our valves, which are connected to the well with 1″ PVC already.
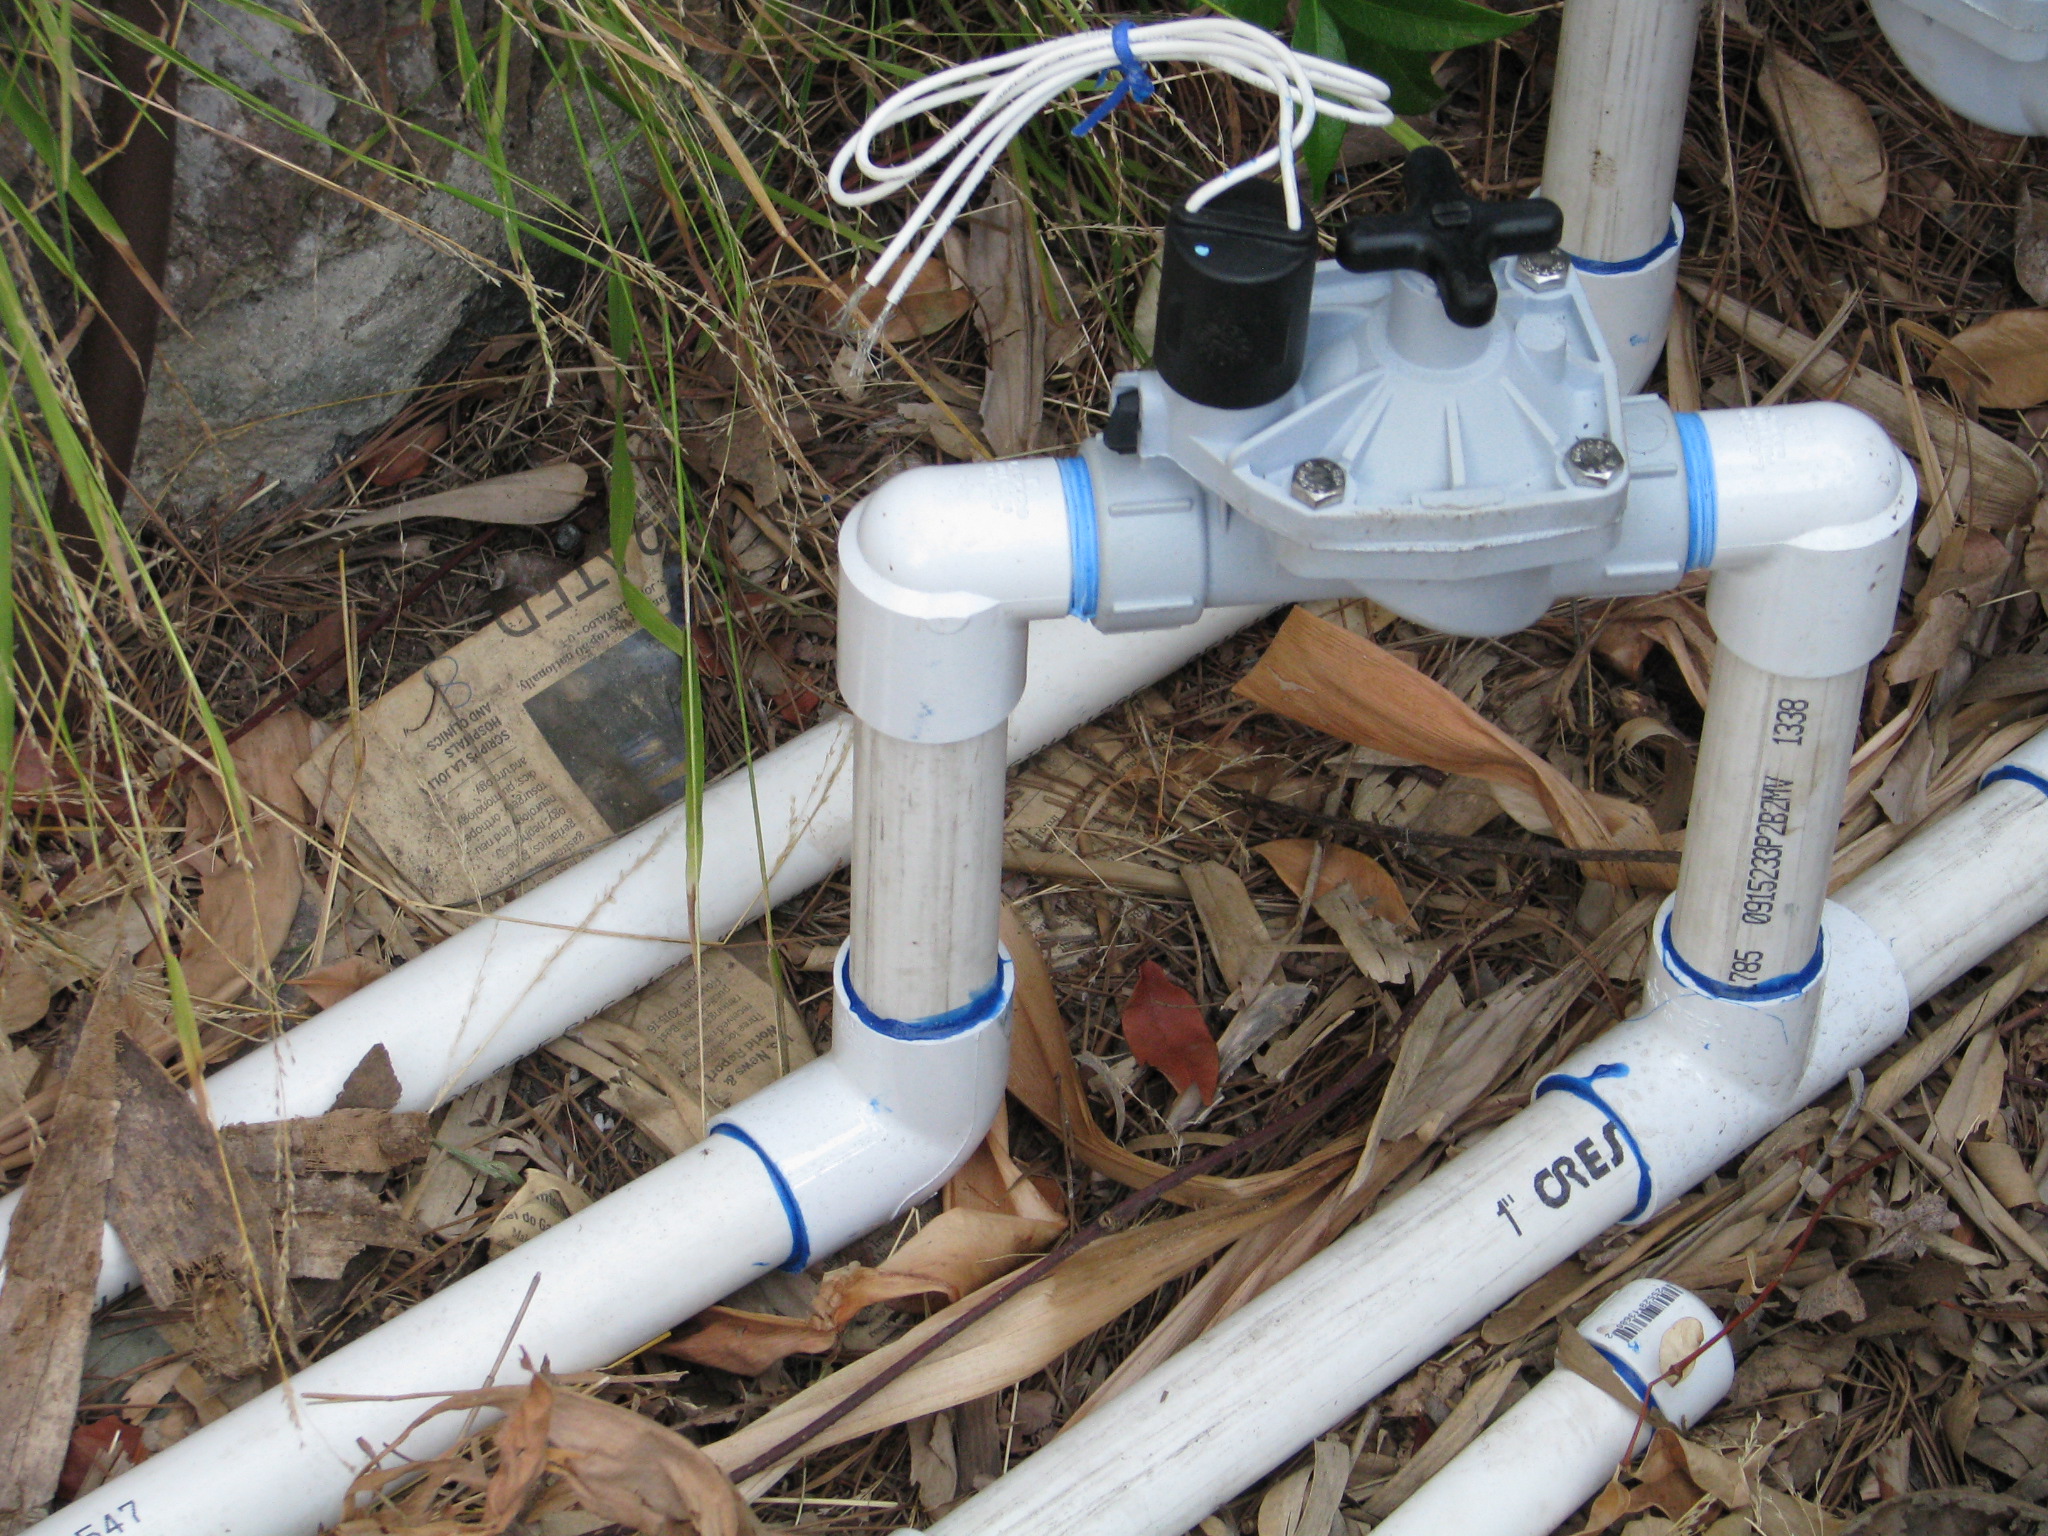
One-inch PVC runs from the valve. Then we reduce the pipe to 3/4″ at the nearest T, or closest to the first sprinkler head.
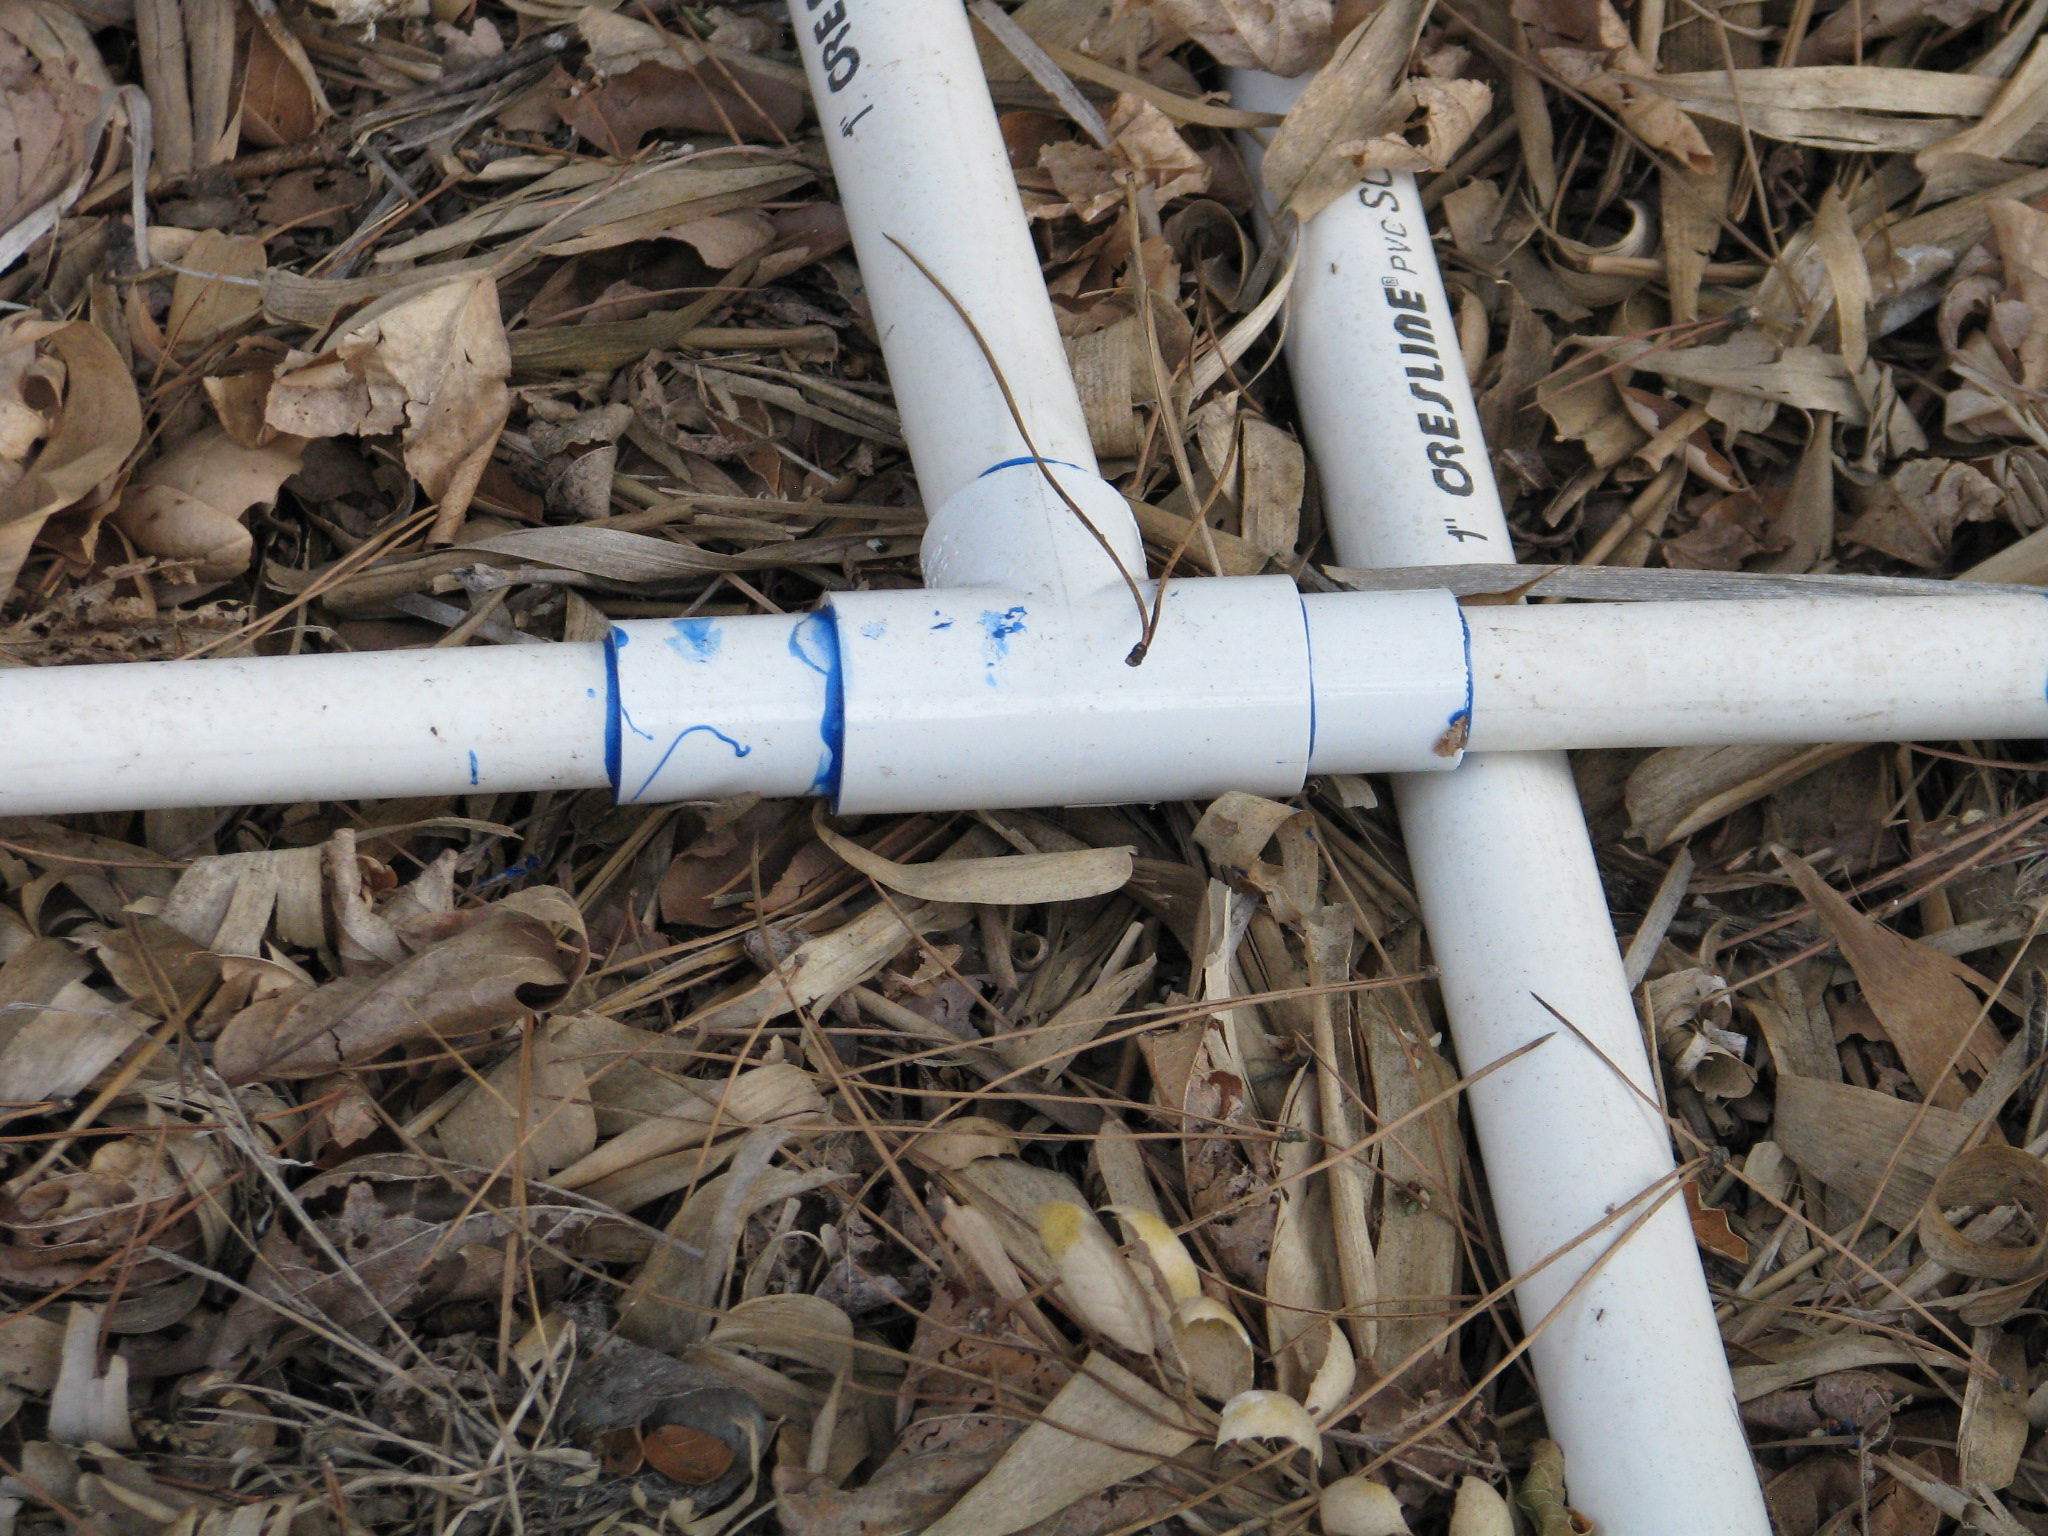
The one-inch pipe is then reduced to 3/4″ pipe at the first T, close to the first sprayer. Then the sprinklers are reduced down to 1/2″. Since our well is at the bottom of our slope and water needs to be pumped back to the top, this design really helps keep the topmost systems pressurized.
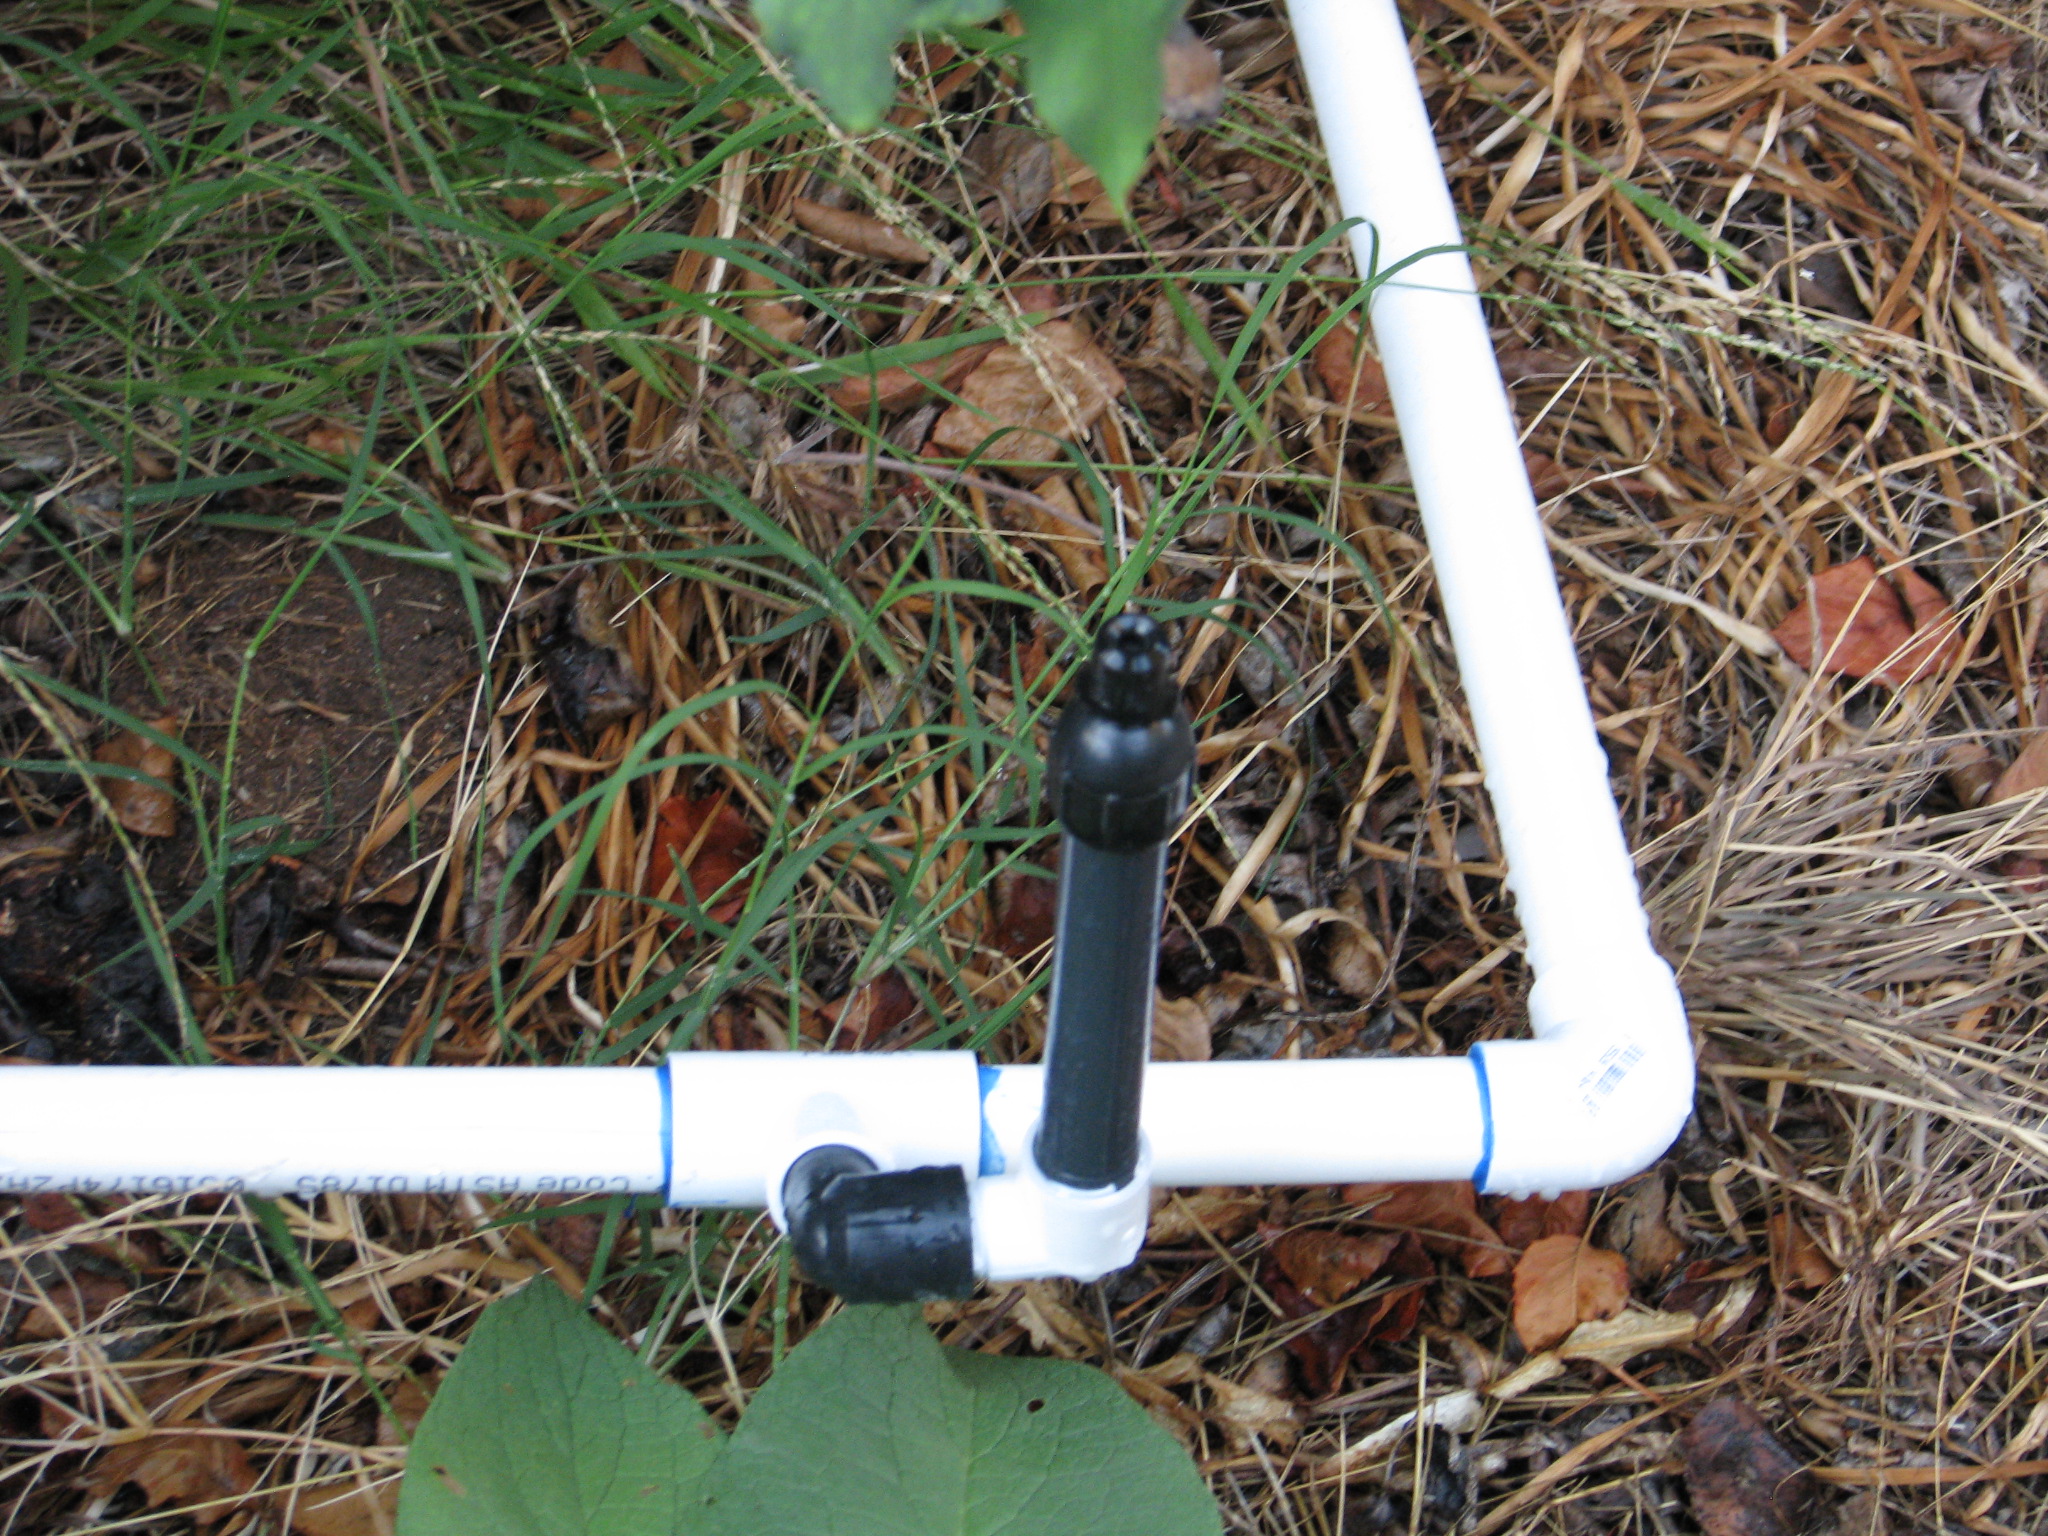
This sprayer is reduced from 3/4″ to 1/2″. So as you are laying out your garden and irrigation system, understand about slope, water pressure, volume of water and your water source. These factors all have large parts to play in the long-term success of your irrigation.
Next time I’ll discuss drawing up an irrigation plan.
You can read Part 1 Options here, Designing Your System Part 3 here , and Part 4 Conclusion here.
- Building and Landscaping, Gardening adventures, Hugelkultur, Permaculture and Edible Forest Gardening Adventures, Rain Catching, Recycling and Repurposing, Soil, Water, Water Saving
Irrigation for Drylands, Part 1: Options
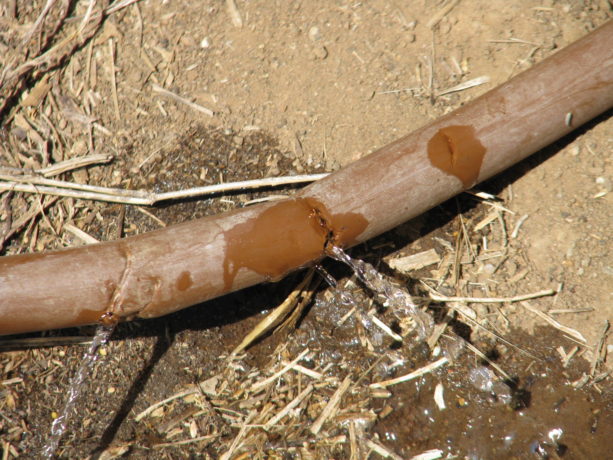
This tubing is so easily nicked that weeding around it often results in a bad leak that isn’t detected for awhile. Leaks cause flooding with dry areas past them on the line. A previous draft of this post was about 2,000 words of mostly rant against Netafim, so I’m starting over trying to be more helpful. You’re welcome.
In Southern California, and many dryland areas, if you are to grow food crops you have to irrigate. I have met several people who believe that they can ‘dry farm’ crops such as grapes here, and that is problematic. Even in Central California where they receive many inches more rain than we do, farmers struggle in the long hot, dry summers.
There are many ways to water, and I’ll address as many as I can.
The first and most important step for irrigating your property is installing the earthworks that will harvest what rain we do receive and allow it to percolate into the soil. Paring that with burying wood and other organic material to hold that water, planting in shallow depressions rather than on raised mounds and sheet mulching will greatly increase the health of your plants and decrease your water bill.
For delivering captured or purchased water you’ll need some kind of tubing and a force to deliver the water. We’ll discuss the natural methods first:

Ollas (oy-ahs) should have a lid or stone or something to block the top, to keep creatures from falling in and drowning. Photo from link page. For small yards, or for orchards with lots of labor, burying ollas (porous clay pots) in the center of a planting area is a wonderful idea. There is a really good article with diagrams and suggestions here. You can manually fill the ollas by carrying water to them (the best would be from rain barrels), or dragging a hose around to fill them. Or they can be combined with a water delivery system of pipes as discussed below. Water is then drawn through the porous pots by the dry soil around them, and thus to plant roots. There is a tutorial about making inexpensive ollas from small clay pots, and interesting comments, here. There are problems, but then, there are problems with everything. Clay pots can break, especially if you have soil that freezes or foot traffic. A larger pot doesn’t mean that water will be delivered farther underground; absorption is based on soil density. This is a system that you need to monitor and replace periodically. On the plus side, clay is natural and will decompose in the soil. Many years ago, long before I ‘discovered’ permaculture, I buried gallon milk jugs in which I punched small holes by some trees beyond any irrigation pipes. I didn’t know about ollas then; I just thought it was a good idea to get water close to the roots of the plants. This really worked and those trees are mature and still exist almost thirty years later, and still don’t have irrigation to them. However, I found that the plastic milk jugs become brittle and break apart, as will plastic soda bottles, and you really don’t want to bury plastic. Clay is much better.

Clay pipe photo from Permanomades. Please follow link to website. These look very large, but are not. Next would be delivering water via some kind of pipe. Clay pipes are the most natural, but unless you have the clay, the labor and the time to create lots of long, hollow clay pipes, this is a pricey option. Clay pipes break easily, too.

Split bamboo delivers water downhill. Photo from link page. If you have lots of bamboo you can season it, split it, remove the nodes (partitions) and then mount it to deliver water to individual plants, to ollas, or to swales. Again, you need time, bamboo, labor and some expertise. There is a good article about it here.
Plastic:
There are a lot of plastic pipes out there, and although I hate to invest in more plastic, it is often a necessary evil. Drip irrigation comes in many forms. There are bendable tubes that ooze, tubes that have holes spaced usually 12″ or 24″, tubes that can be punctured and into which spray heads are inserted, and tubes which can support spaghetti strands that are staked out next to individual plants. The popularity of drip irrigation has been huge in water-saving communities. Unfortunately they have lots of problems. Here I’ll indulge in just a little rant, but only as an illustration.
One of the big problems with flexible tubing in arid areas is the high mineral content of the water and what it does to these tubes. Any holes -including those in small spray heads- will become clogged with minerals.
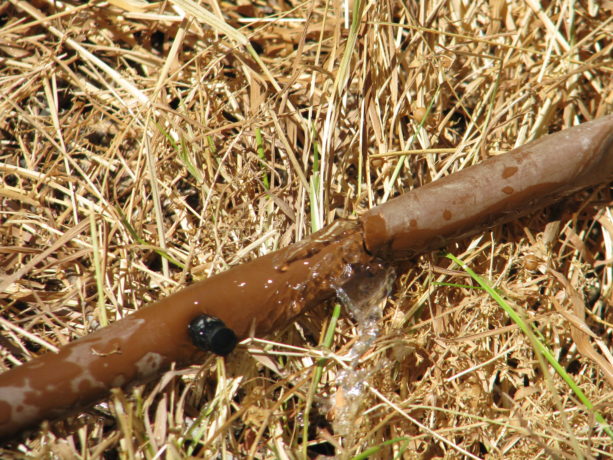
A nozzle that is clogged next to a hole that is not. Flushing the system with vinegar works for a short time, but eventually the minerals win. If the tubing is buried, then it is virtually impossible to discover the blocked holes until plants begin to die. Tubing above ground becomes scorched in the sun and breaks down.
Also, flexible tubing is extremely chewy and fun with a little drink treat as a reward.
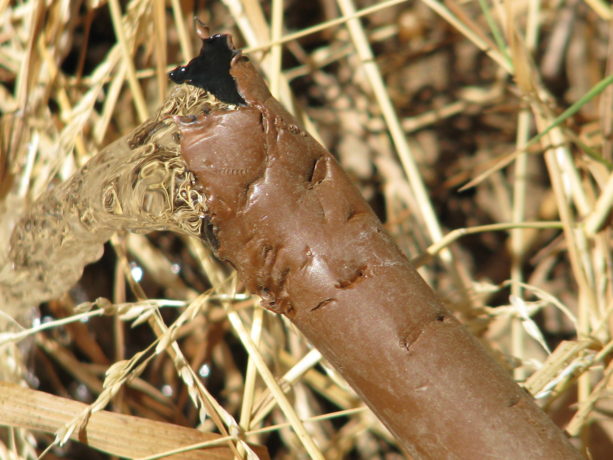
Coyotes and many other animals find flexible pipe so fun to chew. This is the opinion of gophers (who will chew them up below ground and you won’t know unless you find a flood or… you guessed it… dying plants), coyotes (who will dig the lines up even if there is an easier water source, because tubing is fun in the mouth), rats (because they are rats), and many other creatures. Eventually a buried flexible system will be overgrown by plant roots, will kink, will clog, will nick (and some products such as Netafim seem to nick if you even wave a trowel near it), and will be chewed. Some plants will be flooded; others will dry up. You will have an unending treasure hunt of finding buried tubing and trying to fix it, or sticking a knife point into the emitter holes to open them up and then having too much water spray out.
Plus, drip irrigation is not good for most landscape plants. Most woody perennials love a good deep drink down by their roots, and then let go dry for a varying time depending upon the species, weather and soil type. Most native California plants hate drip irrigation. According to Greg Rubin, co-author along with Lucy Warren of The California Native Landscape (Timber Press; March 5, 2013) and a San Diego native landscaper, native plants here enjoy an overhead spray such as what a rain storm would deliver. Some natives such as Flannel Bush (Fremontia) die with summer irrigation and are especially intolerant of drip. Drip is most appropriate with annuals or perennials that have very small root bases and that require regular watering. Small root balls are closer to the hot surface and will dry up more quickly. Vegetables, most herbs and bedding plants can use drip. Plants that have fuzzy leaves that can easily catch an air-born fungal disease such as powdery mildew are better watered close to the ground rather than with an overhead spray of chlorinated water.
Then there is PVC, the hard, barely flexible pipe that is ubiquitous in landscaping for decades. PVC is hard to chew, can be buried or left on the surface if covered with mulch (to protect from UV rays), is available in a UV protected version if you want to spend the extra money and still give it some sun protection, utilizes risers with larger diameter water deliver systems such as spray heads, bubblers, and even drip conversion emitters that have multiple black spaghetti strands emerging from them like some odd spider.
At Finch Frolic Garden I had taken advice to install Netafim, a brown flexible tubing with perforations set 12″ apart, which was buried across the property from each valve box. It has been a living nightmare for most of that time. Besides all the reasons that it could fail (it did all of them) listed above, it also at its best delivered the same amount of water to all of the plants no matter what their water needs. It was looped around most trees so that the trees would receive more water, but since then roots have engulfed the tubing, cutting off the water flow. There are areas with mysterious flooding where we can’t trace the source without killing many mature plants.
Over the past year we’ve lost about 1/4 of our plants including most of our vegetables, because we plant where there should be water, and then mysteriously, there isn’t any. Flushing with vinegar helped a little, but whatever holes are still functioning are closing up with mineral deposits. Okay, I’m ranting too much here. But this was an expensive investment, and an investment in plastic, that has stressed me and my garden. So upon weighing all my alternatives I’ve decided to install above-ground PVC with heads on risers that either spray or dribble, and the dribblers will go into fishscale swales above plants.
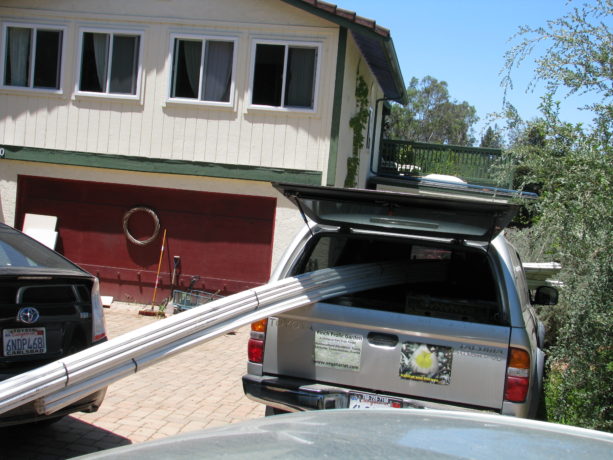
Twenty-foot lengths of PVC can fit in the Frolicmobile, and sure beats carrying it down the property. In the next few posts in this series I will talk about how to draw up an irrigation plan, installation, valves and other watering options, as Miranda and I spend our very hot summer days crawling through rose bushes and around trees gluing, cutting, blowing out and adjusting irrigation. Thanks for letting me vent.
You can read Part 2 Evaluating Your System here, Designing Your System Part 3 here , and Part 4 Conclusion here.
- Animals, Compost, Gardening adventures, Hugelkultur, Microbes and Fungi, Permaculture and Edible Forest Gardening Adventures, Rain Catching, Soil, Varmints
Year of the Gopher
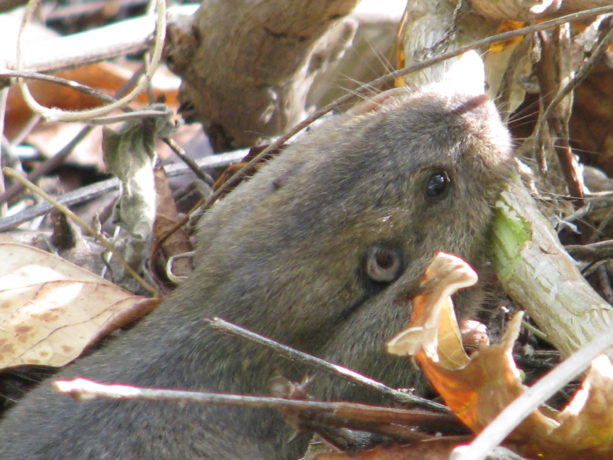
They’ll eat tasty above-ground plants, too. This year should have been dubbed The Year of the Gopher. Every year brings an increase (and decrease) in some element in nature. There are big earwig years, painted bug years, cabbage moth years, just as there seem to be good and bad years for certain crops. This year seems to be a big one for gophers.
Pocket gophers are native to Southern California, and have their special roles to play in the landscape. They aerate, their tunnels are homes to lots of other animals and insects such as Pacific Chorus frogs, toads and lizards. They are food for snakes, raptors and even greater egrets. Their tunnels allow rainwater to penetrate the soil. And, like any of us, if offered really tasty specialty food they’ll go for it.
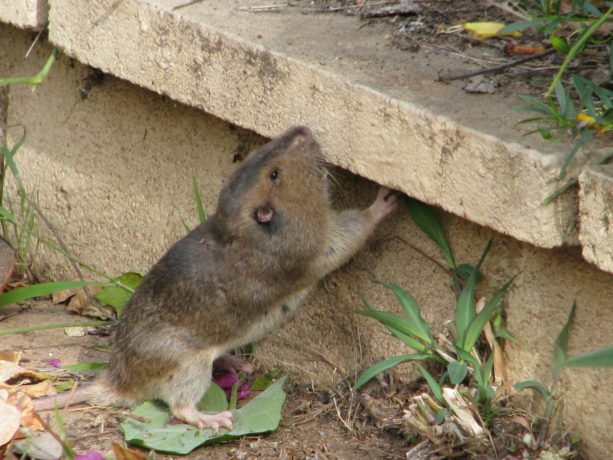
Cute little guy. Gopher tunnels are prime real estate. As explained in a past post, it takes a considerable amount of energy for gophers to dig tunnels, and if you kill them, new gophers reoccupy the tunnels from surrounding property. They are territorial and so the young are always looking for opportunities to have their own tunnel system.
Methods we’ve been using to train our gophers have been challenged this year by the desperation of our gophers, caused no doubt by the changing weather and growth patterns. In our kitchen garden we’ve lost a lot of veggies this spring.
We don’t trap and kill here, so we work with animals because this is their home and habitat. Permaculture isn’t about taking over an area to the loss of everything that usually lives there, its about working with nature and learning from it. So the reason our kitchen garden has been attacked is that we didn’t prepare well enough to live with the gophers. The only way to keep plants safe is to have boundaries around root balls. Trees we plant in gopher cages, but vegetables -not so much.
So Miranda and I decided to bury 24″ tall 1/4″ wire around the garden.
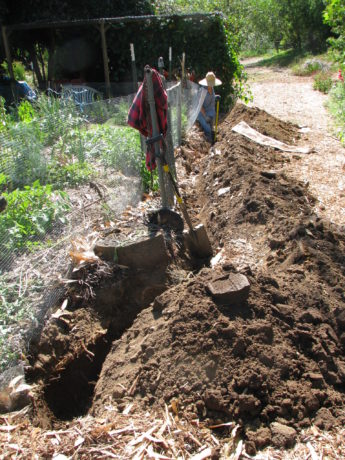
The north side oddly revealed no gopher tunnels. These tasks always sound so easy! Trenching through clay in the heat of early summer has been a challenge. Gopher tunnels dug for food collection are within the first 18″ of dirt, and their nests are down to about 24″.
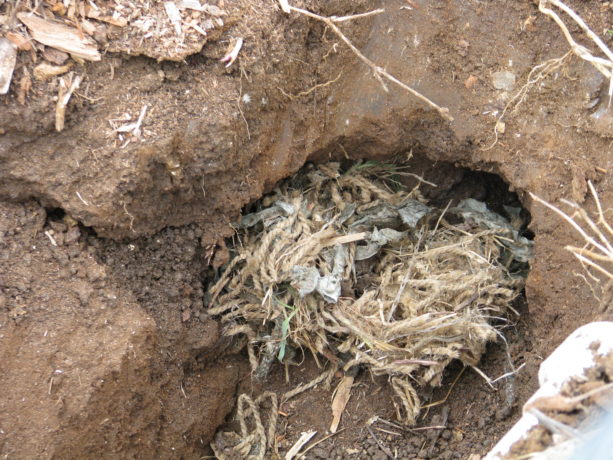
Gopher nesting material about nine inches under the ground. This is in such hard dirt that I have to use a pick on it. We pulled back sheet mulch on the pathways and found incredible fungal activity, loads of worms and moisture.
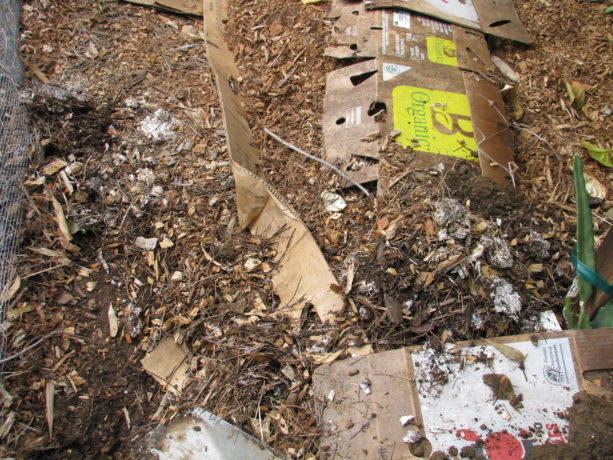
Peeling back sheet mulch that was only six months old showed lots of fungal activity already. 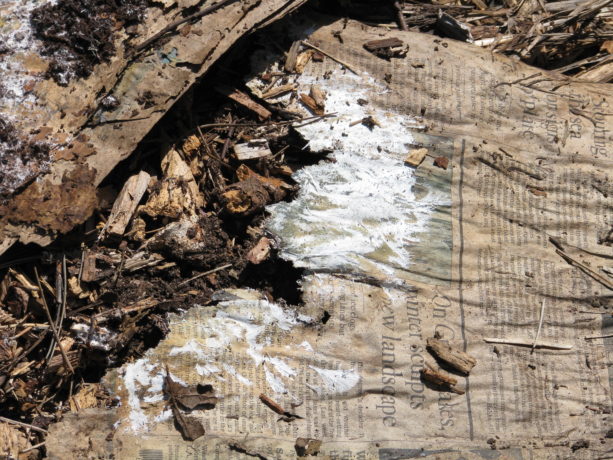
Newspaper being consumed by fungus and turned into soil. 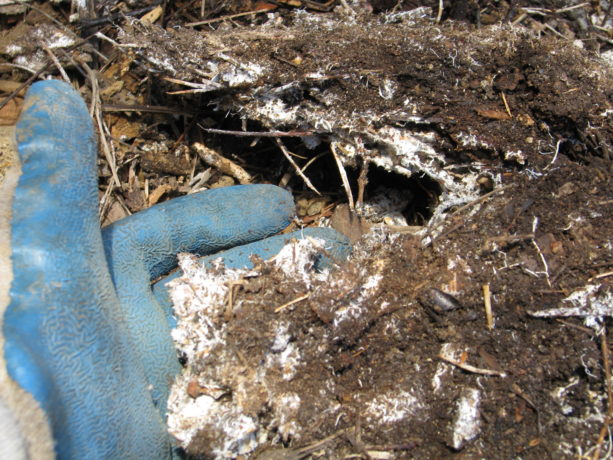
A great lump of fungal hyphae, if I may say so myself. While trenching we found gopher tunnels into the garden, and often would find dirt in the trench under the holes as the gopher backfilled, trying to make a new dirt tunnel across the channel.

The east side we thought would be the most difficult, with the dirt rock-hard at the corner. We thought that until we began the fourth trench. Yikes! Along one active area I buried the wire, but also wanted to retard the invasion of Bermuda grass. Along with the wire I buried a couple of pieces of scrap 3/4″ plywood to make a physical boundry for the grass, and these happen to be right where a gopher tunnel was. The next morning I was in the garden and I heard a strange thumping sound, and finally realized that it was coming from underground where the wood was buried. The gopher was trying to get through the new wooden fence and wire!
We’ve buried wire around three sides (40′ long by 20 – 24″ deep), and are slaving away at the last trench where the most gopher activity is.
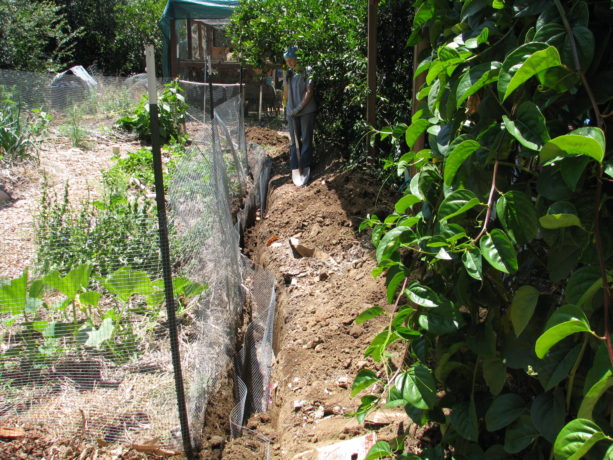
Burying the wire, shoving some rotten fruit into the gopher tunnel entrances and refilling. As we’re working, we’re also using a spade to collapse gopher tunnels from the back out, and using the smucky water (this batch is made from onion peels and bits leftover from pickling whole onions) to ruin those tunnels. We’re herding the gopher out of the garden and fertilizing at the same time.
We’ve a couple more bouts left to go before finishing; my partially numb hands are ready to be done with it. Narrow trenches in heavy clay right next to a fence aren’t easy to work in, which slows the process down a lot. Knowing that we’re being true to what we believe in, to not trap and kill in our garden, makes it all worth the work. The gopher is welcome to all the weed roots it wants elsewhere.
-
Ducklings!
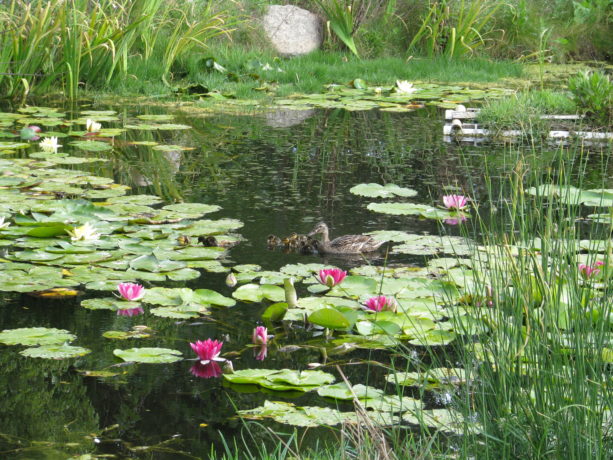
Mrs. Mallard returned today, introducing her very young ducklings to our pond! Mrs. and Mr. Mallard really love our pond, and have adopted us for several years. She had tried to nest on land here, even up by our garage which is a long walk from the pond, but the eggs were always destroyed in the night. Last year she returned with four young, which all disappeared quickly. They were probably food to bullfrogs, birds, rats or other creatures. It was very sad.
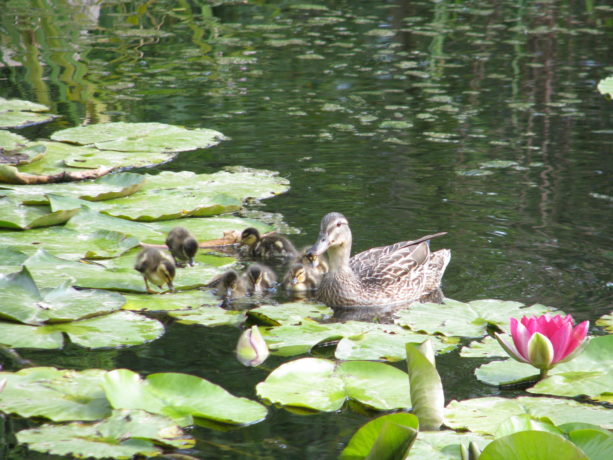
Some are standing on lily pads!!! This year Mrs. Mallard went through her usual breeding time with Mr. Mallard, then disappeared, and then reappeared without ducklings. We figured that her brood hadn’t been successful and that was that for this year. Mr. Mallard has been losing his mating plumage, and she hadn’t been visiting. Miranda and I figured that she was enjoying herself elsewhere. Today as I worked outdoors I passed by the pond and to my astonishment there was Mrs. Mallard and seven adorable ducklings! These babes are only a few days old. She would have had to lead them walking from wherever her nest was, and somehow navigate a chain-link fence! At first she was cautious because I was talking to her excitedly and taking photos.
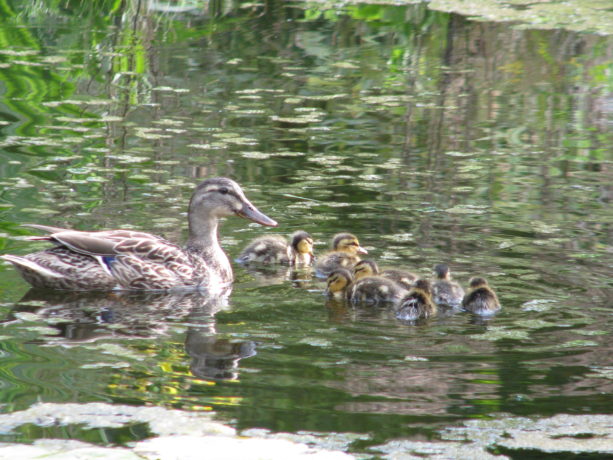
She watched me carefully, but then decided I was still safe and led them ashore. I calmed myself down and went about my work, and on one of my trips past the pond she gave me a decided look and then quickly led her brood out of the big pond just in front of me and paraded them across to the little pond. The babies had their first sample of duckweed.
Mrs. Mallard and Ducklings
Mrs. Mallard decides I’m still a friend and leads her ducklings from the big pond to the small pond at Finch Frolic Garden. I think she was showing her firs…
As these ponds have no chemical treatments, are topped off with rain and well water and cleaned by the plants and fish, the water is wonderful for wildlife. They can bathe, eat and drink without ingesting or absorbing chemicals. Good water is as microbially diverse as good soil, and all those microscopic critters are food, protection and healthy flora for all the creatures that flock to these ponds.
Later I noticed her crouched in the bog by the big pond, with all of her young out of sight underneath her. I looked around for a predator, but saw that Mr. Mallard was on the duck island and she was uncertain of him. I stood watching them, ready to protect her. Finally he noticed her, and all went well. A little later they were sitting together, still with no babes in sight.
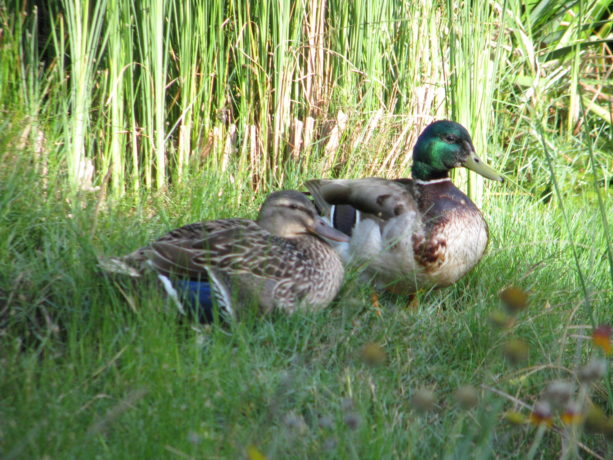
The ducklings are safely tucked under mama in case dad has other ideas. I heard him fly off, probably to join some other males for some companionship.
Mrs. Mallard led her young across the pond and right to the floating duck island that is anchored in the middle of the pond.
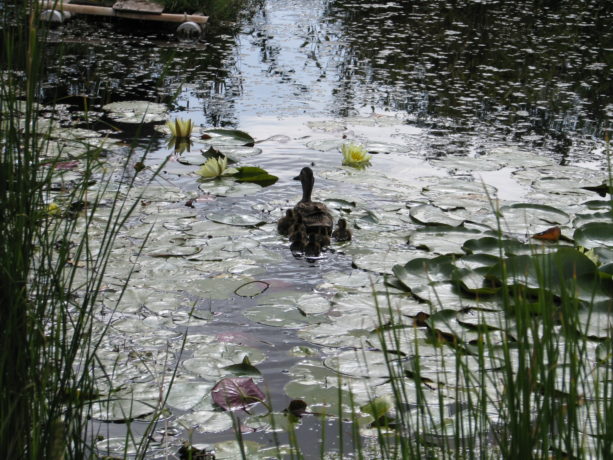
Mrs. Mallard heads for the duck island for the evening. Smart mama! This island has a board down the middle and loose plants stuck in without soil. It is a remediation float as well, cleaning the water as it floats.

Everything is so new, especially this island! Miranda and I were worried that the little ducklings wouldn’t be able to get aboard the raft, but they had no trouble.
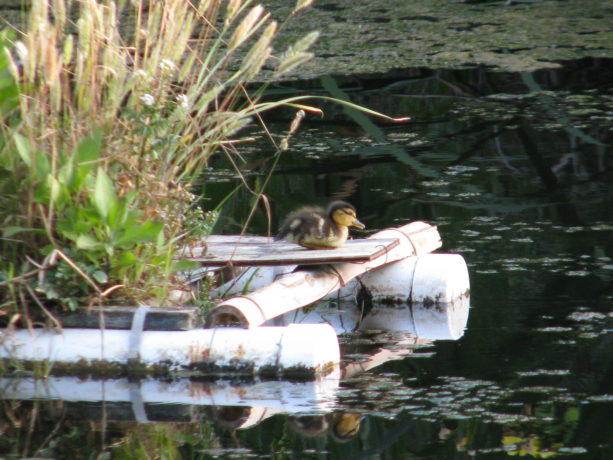
This little one is so tempted to get back in the water, but he or she resists. Its been a tiring day. 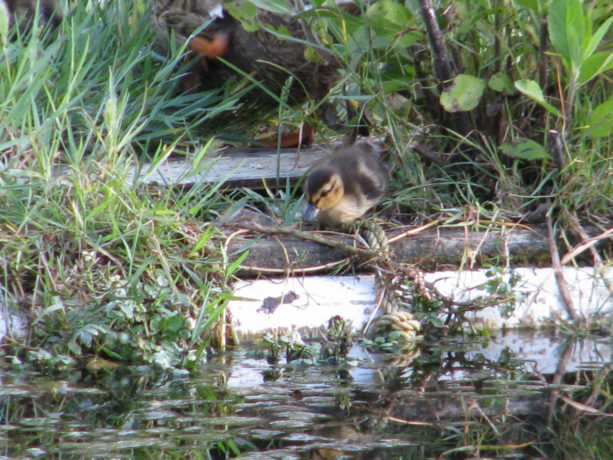
Taking a last longing look at the water, which he only learned the existence of today. 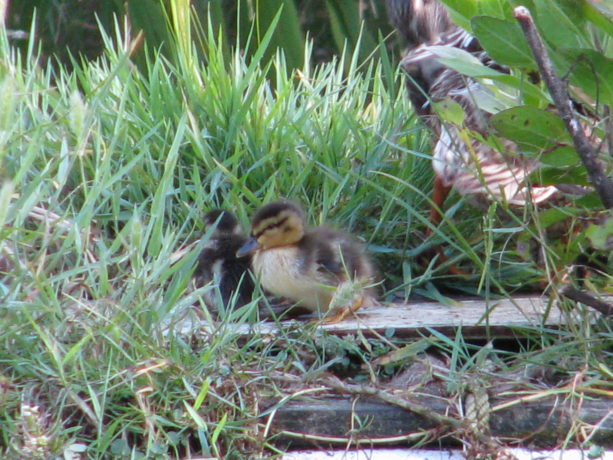
The ducklings are in an array of colors, from light yellow and grey to all dark. 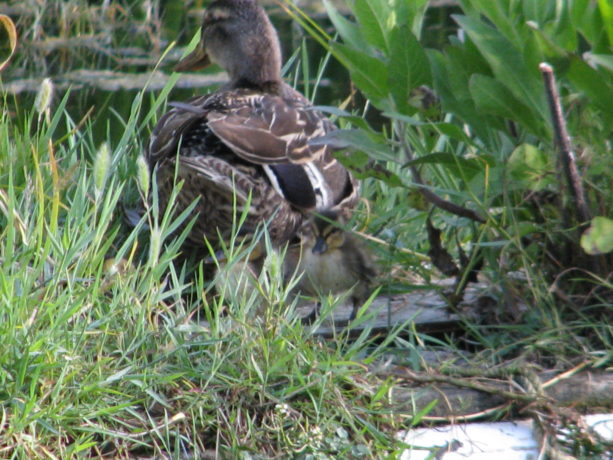
Almost everyone is tucked under for the night. After exploring a little, falling off a few times and grooming themselves, they tucked under their very good mama for a warm and safe sleep. Squeee!
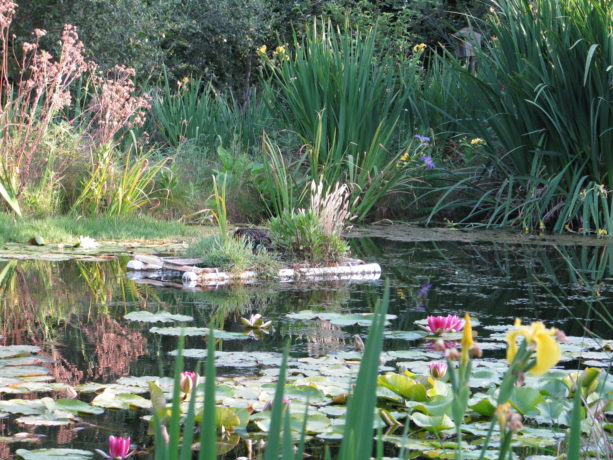
Safely afloat, Mrs. Mallard and children are tucked away for the night, safe from coyotes, raccoons, rats and snakes. - Compost, Fungus and Mushrooms, Gardening adventures, Hugelkultur, Microbes and Fungi, Other Insects, Perennial vegetables, Permaculture and Edible Forest Gardening Adventures, Pets, Predators, Rain Catching, Seeds, Soil, Water Saving
Polyculture In A Veggie Bed
 Polyculture is, obviously, the opposite of monoculture, but in permaculture (a lot of -cultures here) it means more than that. The best way to plant in polyculture is to follow the guidelines for a plant guild . A plant guild is how plants arrange themselves in nature so that each fulfills a niche. The variety of plants aren’t competing for the same nutrients and are delivering something other plants need; i.e. shade, nutrients, root exudates, leaf drop, soil in-roads via deep tap roots, etc.
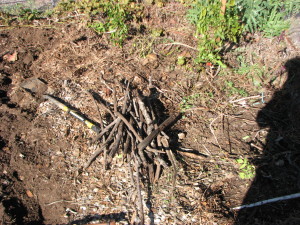
By burying sticks in planting holes you are helping feed the soil and hold water. When planting veggies here at Finch Frolic Garden I often mix up a handful of vegetable, herb and flower seeds that fulfill the plant guild guidelines and plant them all in one area. They come up in a mix of heights, colors, shapes and scents to fool bugs. The result is like a miniature forest.

A merry mixture of vegetables, herbs and flowers in a mature bed. However that sort of wild designed planting has its drawbacks. Harvesting is more time consuming (although more fun, like a treasure-hunt). Many people find peace in looking at rows of vegetables, and peace is valuable.
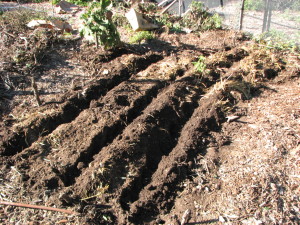
We disturb the soil as little as possible, and pull the soil back for potatoes. You can plant polyculture in rows as well. Just plant each row with a different member of the plant guild, and you’ll achieve a similar effect with insect confusion, and with nutrient conservation.
In this small, slightly sunken bed (we are in drylands so we plant concave to catch water), we planted rows of three kinds of potatoes, two kinds of shallots, a row each of bush beans, fava beans, parsnips, radish and carrots.
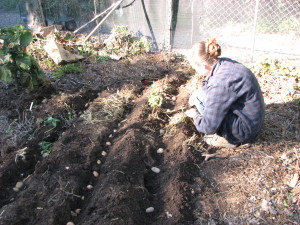
Miranda planting potatoes and shallots before the smaller seeds go in. We covered the bed with a light mulch made from dried dwarf cattail stems. This sat lightly on the soil and yet allowed light and water penetration, giving the seedlings protection from birds and larger bugs.
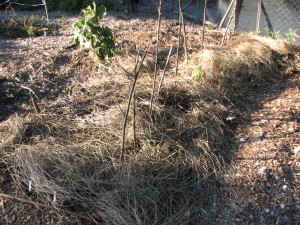
This light, dry mulch worked perfectly. Since cattails are a water plant, there are no worries about it reseeding in the bed. The garden a couple months later. Because we had a warm and rainless February (usually our wettest month), our brassicas headed up rather than produced roots and only a few parsnips and carrots germinated. However our nitrogen-fixing favas and beans are great, our ‘mining’ potatoes are doing beautifully and the shallots are filling out well.
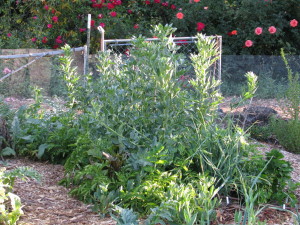
Every plant accumulates nutrition from the air and soil, and when that plant dies it delivers that nutrition to the topsoil. In the case of roots, when they die it is immediate hugelkultur. Without humans, plants drop leaves, fruit and seeds on the ground, where animals will nibble on them or haul them away but leave juice, shells and poo behind. When the plant dies, it dies in place and gives back to the topsoil. When we harvest from a plant we are removing that much nutrition from the soil. So when the plants are through producing, we cut the plants at the soil surface and leave the roots in the ground, and add the tops back to the soil. By burying kitchen scraps in vegetable beds you are adding back the sugars and other nutrients you’ve taken away with the harvest. It becomes a worm feast. Depending upon your climate and how warm your soil is, the scraps will take different lengths of time to decompose. Here in San Diego, a handful of food scraps buried in January is just about gone by February. No fertilizer needed!
- Building and Landscaping, Compost, Fungus and Mushrooms, Gardening adventures, Hugelkultur, Microbes and Fungi, Permaculture and Edible Forest Gardening Adventures, Rain Catching, Recycling and Repurposing, Soil, Water, Water Saving, Worms
Using Pathways For Rain Catchment
Here in the drylands of San Diego we need to be especially sure to catch whatever rain may fall. Building good soil is vital for the entire planet because humans are going through decent topsoil like nobody’s business. Here at Finch Frolic Garden we’ve sheet mulched around trees to replicate decades of leaf drop, and on pathways to block weeds, prevent compaction and create good soil for shallow plant roots. We’ve also continued making our pathways work more for us by burying wood (hugelkultur) in the paths themselves. Most of our soil here is heavy clay, so creating drainage for roots is imperative. In sandy soils, creating more fungal activity to hold together the particles to retain water is important. We also need to store rain water when we get it, but not drown the roots of plants. This all can be accomplished by burying wood, the older the better.
Miranda and I have worked on many pathways, but for a few months this year the garden was given a huge boost forward with the help of Noel, a permaculture student and future farmer, who can move mountains in an afternoon with just a shovel.
The chosen pathways had these features: they were perpendicular to water flow, or were between trees that needed supplemental drainage, food and water access, and/or were where rainwater could be redirected. Eventually we’d like to do all the pathways like this but because of time, labor and materials we worked where it was most needed.

An area that becomes flooded when we have a deluge. The existing sheet mulch was pulled aside. Sections of the pathways were dug up (Noel’s work was very neat; my work is usually much less so). Wood was laid in the hole, and layered back with the dirt.

The pathway dug up and wood being layered. The nice, neat hole is Noel’s doing, not mine. Notice I said dirt, not soil. We don’t want to disturb good soil because we’d be killing microbes and destroying fungal networks. Dirt is another story; it needs amendment. As we’ve already buried all of our old wood, we timed these pathway ‘hugels’ to coincide with some appropriate tree removal.
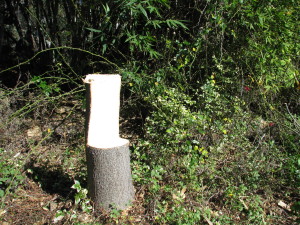
You can be creative when cutting trees and make a chair! Watch out for sap on your pants, though. Trees were cut down and some climbing roses pruned back out of the pathway, and the green ‘waste’ was used in the nearby pathways.
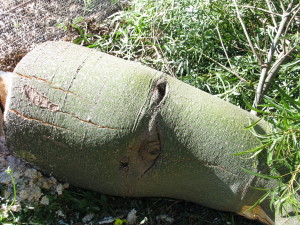
This euphorbia was only sucking up water and not giving back anything, so it and its friends had to go. This one had a marking like an eye on it, and I was glad to see it go… as it was seeing me! Old palm fronds went in as well. No need to create additional work – good planning means stacking functions and saving labor.
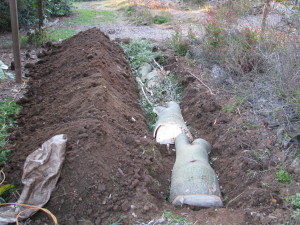
The first layer of wood is covered with dirt, and then another layer added. After the wood was layered back with the dirt, the area was newly sheet mulched. Although the pathways are slightly higher, after another good rain (whenever that will happen) they’ll sink down and be level. They are certainly walkable and drivable as is. Although the wood is green, it isn’t in direct contact with plant roots so there won’t be a nitrogen exchange as it ages. When it does age it will become a sponge for rainwater and fantastic food for a huge section of the underground food chain, members of which create good soil which then feeds the surrounding plants. Tree roots will head towards these pantries under the paths for food. Rain overflow that normally puddles in these areas will penetrate the soil and soak in, even before the wood ages because of the air pockets around the organic material.
The best part about this, is that once it is done you don’t have to do it again in that place. Let the soil microbes take it from there. Every time you have extra wood or cuttings, dig a hole and bury it. You’ve just repurposed green waste, kept organics out of the landfill, activated your soil, fed your plants, gave an important purpose to the clearing of unwanted green material, and made your labor extremely valuable for years to come. Oh, and took a little exercise as well. Gardening and dancing are the two top exercises for keeping away dementia, so dig those hugels and then dance on them!
Burying wood and other organic materials (anything that breaks down into various components) is what nature does, only nature has a different time schedule than humans do. It takes sometimes hundreds of years for a fallen tree to decompose enough to create soil. That’s great because so many creatures need that decomposing wood. However for our purposes, and to help fix the unbelievable damage we’ve done to the earth by scraping away, poisoning and otherwise depleting the topsoil, burying wood hastens soil reparation for use in our timeline.
Another pathway is hard clay and isn’t on the top of my priority list to use for burying wood. However it does repel water due to compaction and because rainwater is so valuable I want to make this pathway work for me by catching rain. I’ve recommended to clients to turn their pathways into walkable (or even driveable) rain catchment areas by digging level-bottomed swales.
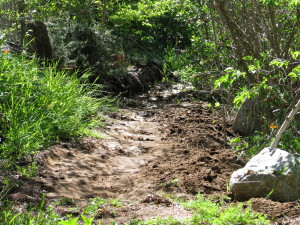
Digging gentle swales along a pathway can turn it into a rain catchment system. Make your paths work for you! A swale is a ditch with a level bottom to harvest water rather than channel water. However many pathways are on slopes or are uneven. So instead of trying to make the whole pathway a swale in an established garden, just look at the pathway and identify areas where the land has portions of level areas. Then dig slight swales in those pathways. Don’t dig deeply, you only have to gently shape the pathway into a concave shape with a level bottom. The swales don’t need to connect. You can cover the pathway and swales with bark mulch and they will still function for harvesting rain and still be walkable.
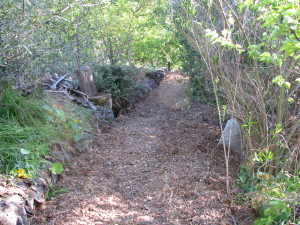
Mulching over the top makes the pathway even and still functional for rain catchment. If the pathways transect a very steep slope, you don’t want to harvest too much water on them so as not to undermine the integrity of your slope. This is a swale calculator if you have a large property on a steep slope.
So up-value your pathways by hugelkulturing them, and sheet-mulching on top. Whatever your soil, adding organics and mulching are the two best things to do to save water and build soil. And save the planet, so good going!
- Animals, Culture, Gardening adventures, Humor, Photos, Ponds, Predators, Reptiles and Amphibians, Water
Turtle Recall
Howdy there — it’s Miranda popping in from the Facebook page to bring you a cool update. It’s been quite a while since my last post on Vegetariat: I mostly leave all the easy-peasy blog work to Diane while I’m concentrating on the excruciatingly complex and tiring Facebook stuff. I know, I’m a saint. Hey, did you know old Shakespeare the Bard invented the name Miranda? — it’s the feminine form of the Latin gerund mirandus, meaning “worthy to be admired”; so really I’m Saint Admirable of Vultusliber. (One in there for the dead language folks, thank me in the comments — or, you know, not.)
Today I want to tell you a story about some ponds, and some turtles, and some recollections. No elephants.
Those who visit us on the Facebook page may already know of our glee last April when a pair of Southern Western Pond Turtles (Actinemys pallida) appeared in our big pond.
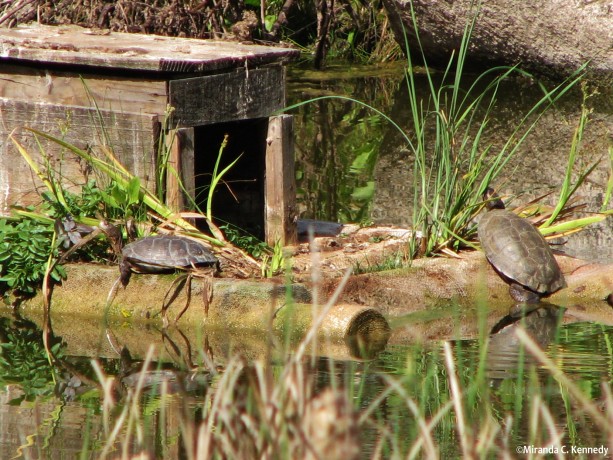
Click me, I takes you to Facebook! The Western Pond Turtle group which our Southern race (I think species status for pallida is still under study) belongs to, Actinemys marmorata, is an IUCN Red List “Vulnerable” species. This listing is due mostly to late 1800s to mid-1900s overharvest for food and extensive, continuing destruction and alteration of habitat. We simply don’t have wetlands anymore. They also struggle under pressures from invasive species such as Red-eared Sliders (Trachemys scripta elegans) — which will eat small pond turtles and usurp pond turtle habitat niches — and many other trials from the cornucopia of threats we offer our native species. Actinemys pallida‘s conservation status hasn’t been updated since 1996, and probably warrants at least the more critical status of “Threatened” by now.
Soooo, we were pretty excited to see not one, but two, apparently male and female judging by size, actual pond turtles in our pond. We’ve had visits from Red-eared Sliders, certainly, and captured and relocated them to sites which already have established slider populations that aren’t going anywhere. I’m afraid we haven’t the heart to kill them, so although we’re not reducing the problem, we are working to maintain an exclusive pond turtle club in our own pond.
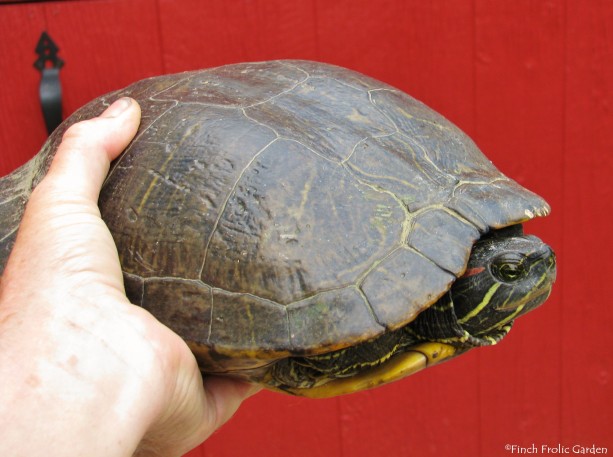
Adorable but sadly very destructive invasive species here in California. We were even more ecstatic when the pond turtles stayed. We’d catch glimpses of one or both of them all summer, until in the fall only the small one seemed to still be around, popping up on the duck raft to catch some sun in the warm afternoons. As it got colder, we saw him less often, but every now and then, we’d come round by the pond and there’d be the quiet “ploop” of a small scaly body slipping into the water.
The April pair, however, were not actually the first pond turtles we’d ever had on the property.
Back in July of 2011, our big pond was still under construction and was just a big dirt bowl with water in it, and lots of other activity was under way around it as old building materials were being moved and the garden being shaped.
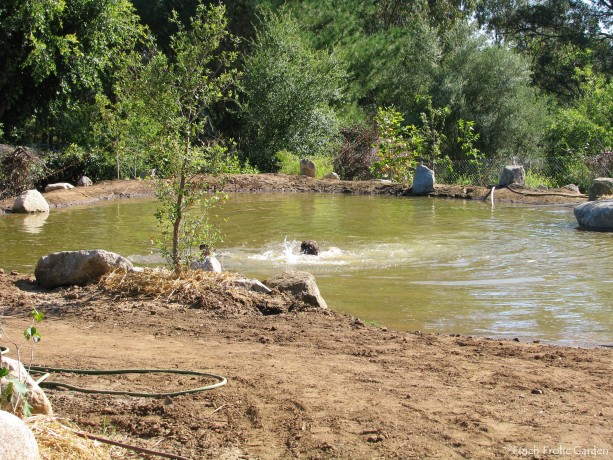
As you can see, the early pond had no habitat fit for anything except a pair of loons. (June 18, 2011) We were quite astonished, therefore, when Jacob Hatch (of Hatch Aquatics) who was managing the installation discovered a small turtle hiding in a stack of boards behind the pond. Delighted and bemused by the appearance of this usually wary and probably quite squashable reptile near our stark pond, around tractors and trucks, we examined it for injuries and to determine what species it was.
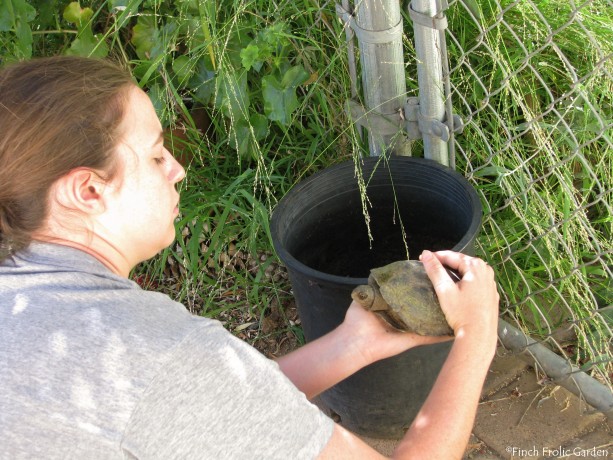
A comparison with the images and info. on the wonderful CaliforniaHerps website confirmed the stripeless turtle as a rare native Western Pond Turtle, and probably a female from the apparent concavity of her plastron (‘belly’ half of shell).
The most cursory examination, however, immediately revealed the turtle’s startling absence of a left front foot.
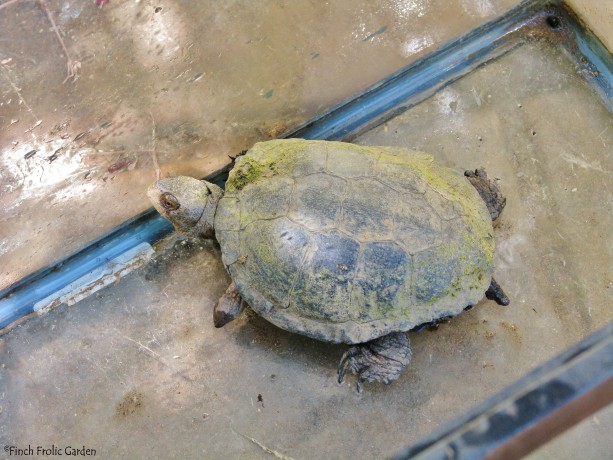
The wound was old and well-healed, and the turtle was admirably (Miranda-ishly) sprightly and seemingly unperturbed and unhindered by her partial flipperlessness.
Of course, we instantly dubbed the gimpy, watery, gimlet-eyed fighter ‘Rafael Sabatini’ (author of such famous swashbuckling tales as The Sea Hawk and Captain Blood). When we determined it was, in fact, a she, we respectfully redubbed her ‘Mrs. Sabatini’.
The second real Mrs. Rafael Sabatini, née Christine Dixon, I imagine to have been a person of some intelligence and depth of feeling, due to the fact that she had Rafael’s tombstone inscribed with “He was born with a gift of laughter and a sense that the world was mad”, the poignant first line of his novel of the French Revolution, Scaramouche.
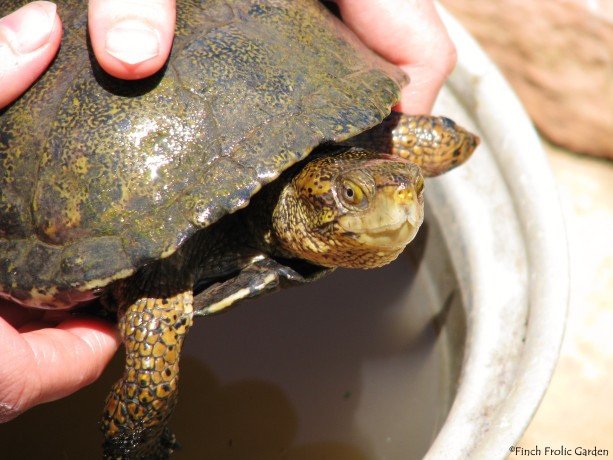
Our Mrs. Sabatini was certainly full of a sense of madness — at her unjust captivity! — so we quickly released her in the only place that seemed suitable and safe on the property: the small pond at the front of our house.
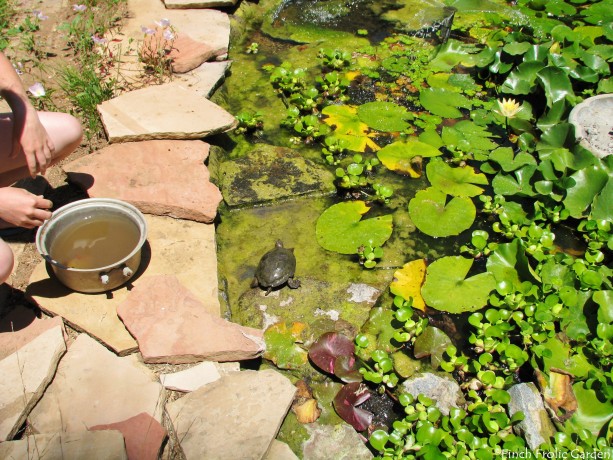
And that, despite our warm feelings of companionship and our admonishments to stay safe and show her face now and then, was the last we saw of the delightful Mrs. Sabatini.

Life went on, as it does. And we gained that pond turtle couple last spring, so maybe-maybe we might end up with baby turtles here down the line. A distinguishing trait of a Shakespearean comedy (rather than a history or other) is that it ends with marriage, which implies future babies: it ends in the expectation of life. And I think Mrs. Sabatini would rather like the turtle story she was involved in to be a comedy — ‘gift of laughter’ and all. I can just imagine her rusty, grudging little whistly cackle guffing out as we fade to black.
However, in January this year, we began seeing multiple turtles in the pond again, rather than simply the lone male that had lingered into the fall. We became fearful that we’d been infiltrated by sliders again, as we’d see three turtles at once sunning on the raft — a new turtle maximum, and sliders are prolific and less picky about personal space. I had trouble getting good shots to check for the clearest field marks (the rounded vs. pointed shapes of the marginal scutes over the tail) so we were feeling rather turtle-scouraged, to be frank, a little turtle-glum. It’s difficult to catch a slider, but if we had them in the pond, as we had the grim feeling we did, they couldn’t stay or we’d risk all the balanced habitat we’d built up for our native species.
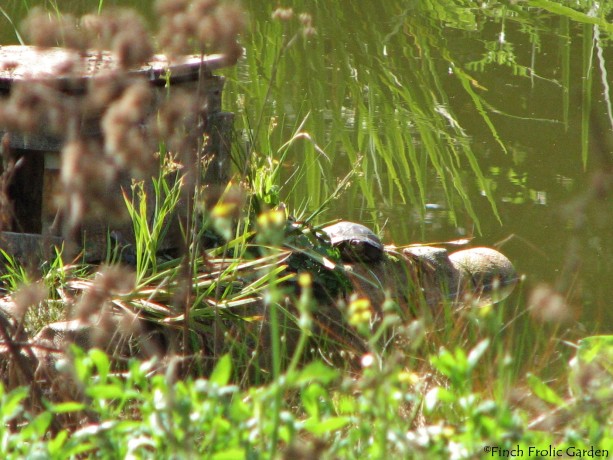
“Who am I? I’ll never tell! Keh-heh-heh-heh-hui! (neck in, neck in)!” Last night I decided to start catching up on my new year photo sorting. I take a lot of photos, and they all come off the camera into my ExternalHD Limbo on my desktop, where they’re eventually sorted and distributed to their homes in various folder nestings on my external harddrives. I’d managed to grab a few shots of the January turtles, and determined to examine them as best I could for slidery traits. It was time, I felt, to know for certain.
I pulled up a photo of a chummy pair of turtles I’d taken January 17th as they enjoyed the weak sunshine on the raft.
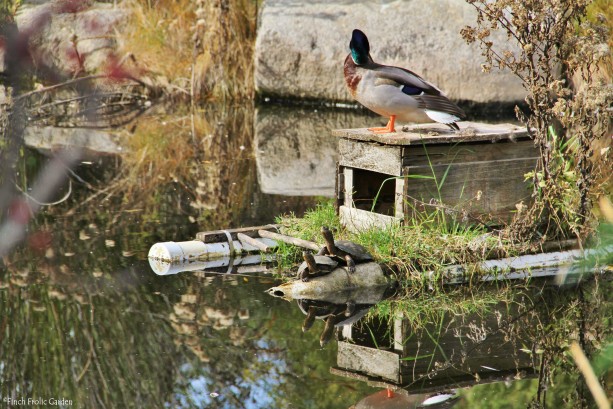
The resolution was good, so I was able to zoom in on their faces with fair clarity. Happily, I couldn’t see any stripes, red or yellow, on the face that would indicate a slider, and their chins looked mottled-yellow as pond turtles’ do.
Looking for more clues, I panned down from the faces along the necks and shells-fronts and —
— and there it was. Or there it wasn’t.
For on the smaller turtle, who was relaxing under the friendly claw of its chelonian compatriot, where there ought to have been a small reptilian left front leg — there was none.
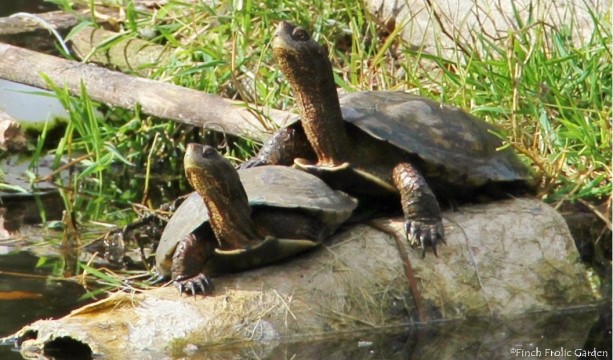
Mrs. Sabatini… had returned.
(Scaramouche, Scaramouche, she finds it difficult to do the fan-dan-go!)
“Faith, it’s an uncertain world entirely”! We certainly didn’t expect the same small, appendagially-impaired pond turtle to suddenly reappear in our pond after five years of absence.
Well, whether she’d truly been away or was simply being a lot more sneaky about using the pond so we never saw her, we’re exceedingly chuffed to know she’s back. She’s a jewel in our healthy, chemical-free habitat crown, and we’re pretty chuffed with ourselves for creating a safe, natural pond that she and her buddies — and so many other water-dependent species — can rely on.
If you build it, they will come — and come back!
Let’s keep making habitat for the small, wild, heart-pirating creatures in our lives, eh?
(Please direct Mrs. Sabatini fanmail c/o Finch Frolic Garden.)
M
- Animals, Arts and Crafts, Birding, Building and Landscaping, Gardening adventures, Houses, Natives, Permaculture and Edible Forest Gardening Adventures, Ponds, Predators, Water
A Mallard House

The Finch Frolic Garden Mallard Nesting Tube, by Miranda. For about four years now a pair of wild mallards have called Finch Frolic Garden home. They visit most of the year, especially in mating season as it is now. The male guards her closely as she goes off to lay an egg a day in some secluded, secret nest. This is Mrs. Mallard’s best time of the year.
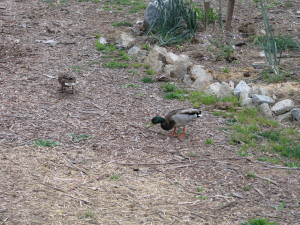
Mrs. Mallard leading her mate all over the property as he protects her. She’ll stroll all over the property while he has to follow, and it is hilarious to watch. They get in more walking time now than in the whole year put together. She deserves to enjoy the attention because the rest of mating season isn’t so much fun for her.
The mating occurs in the water, with the male biting her neck and holding her head under water. Ducks have drowned during mating. A couple of years ago Mr. Mallard was losing his mating plumage and decided to allow a rather mean drake have at Mrs. Mallard. It was a violent mating, and she tried hard to get away.
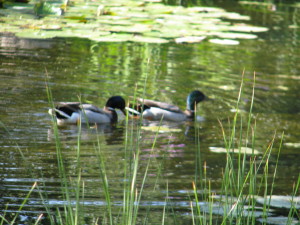
Mr. Mallard and his terrible surrogate. The next time the imposter flew in Miranda and I were close to the pond by a lime tree, with some bushes between us and the pond. Suddenly we noticed Mrs. Mallard slowly walking around the bushes, her head held low. If she could have tip-toed with webbed feet she would have. She slowly approached us and hid behind the lime tree next to us. We took action and chased the males away, then spoke soothingly to Mrs. Mallard in a sense of female solidarity. It was quite touching to have a wild creature so trust us as to come to us for rescue.
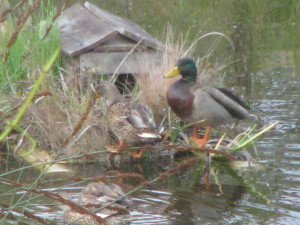
The Mallards checking out the duck island. Once the eggs have been laid the female is entirely in charge of the eggs and the hatchlings. However, if the clutch fails, the male will keep re-mating with her and she’ll keep re-nesting. Mrs. Mallard has attempted to lay eggs on our property in the bushes, but rats or other creatures have eaten them. She had a nest right next to our garage one year, perhaps hoping that we could protect the eggs even though by the time we realize why we’d meet a duck on the pathway by the house every day it was too late. The stress of the mating, the egg production and laying is taxing to a wild duck’s health. Last year she appeared leading several ducklings to our pond. We have no idea how far she’d lead them, or how many there were to begin with, and we knew the babies probably wouldn’t last long. We were right; they were gone by the next day. Predation by the invasive bullfrogs in the pond, rats, weasels, hawks or any number of animals. So sad for the mallard family.
This year Mrs. Mallard has been disappearing daily, obviously to lay an egg a day elsewhere again. However Miranda decided to help out for future nests. She built a mallard nesting tube. Following instructions she found online from people who have proven this design works, she rolled the first three feet of a piece of 7’x3′ hardware cloth to form a tube.
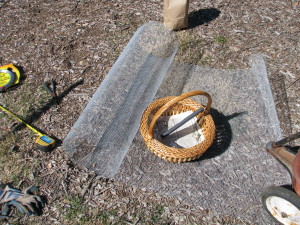
A 7′ x 3′ piece of hardware cloth. Larger wire would let too much debris fall into the pond. This was wired together, and the last four feet was layered with natural plant materials and rolled.
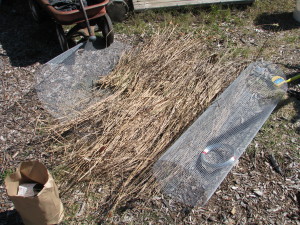
The first 3′ are rolled and fastened, then Miranda lay dry cattails on the rest. 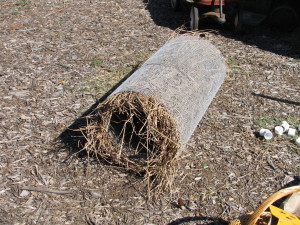
The nesting tube. Kind of like a jelly roll for mallards. 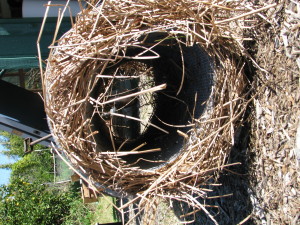
The inside of the tube isn’t large, but apparently it is large enough. This tube was wired onto a cradle she made mostly of recycled PVC parts, and painted dark green.
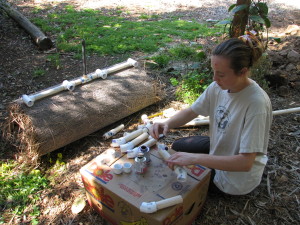
Gluing together the cradle. All of the pipe we had salvaged from old irrigation systems. 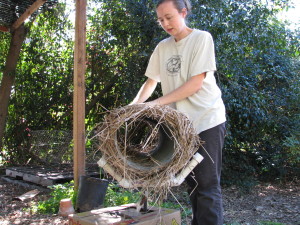
The cradle supports the tube, but is also loosely wired onto it. 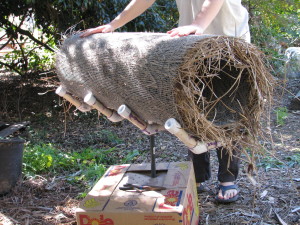
A sprinkler riser is what will fit into the support pipe. 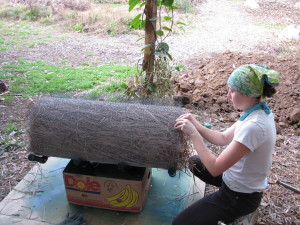 Also, to prevent hawks, egrets and other opportunistic birds from perching on top and snacking on eggs or hatchlings, Miranda attached strips of pokey chicken wire along the top.
Since egrets visit the pond regularly, the top of the tube had to be inhospitable. 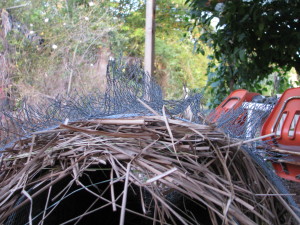
Miranda cut strips of chicken wire and these were bent and wired on top to prevent birds from landing. Slipping into the chilly February pond was a shock until our legs became acclimated (or “numb”). We pounded a hollow pipe, then slipped another pipe into it (both found materials), and then mounted the tube on top.
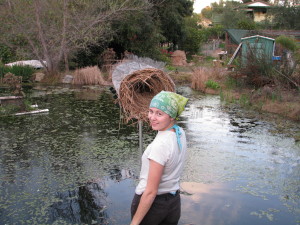
After mounting the nesting tube, Miranda stuffed leaves and dry grass inside, because mallards don’t carry in their own nesting materials. Miranda then lined the inside of the tube with soft nesting materials – dried grass and leaves – because mallards don’t bring them in. A little interior decorating for future lodgers. A sprinkler riser screwed into the PVC cradle slipped into the pipe. This way the nesting tube can be easily removed for maintenance. The tube is about three feet above the water surface.
Mrs. Mallard hasn’t shown any interest at this point, but she’s involved with her other nest right now. We have high hopes for a successful nest. Anyone want to come catch bullfrogs?
- Animals, Bees, Compost, Fungus and Mushrooms, Gardening adventures, Health, Heirloom Plants, Hugelkultur, Microbes and Fungi, Natives, Other Insects, Perennial vegetables, Permaculture and Edible Forest Gardening Adventures, Rain Catching, Recycling and Repurposing, Reptiles and Amphibians, Seeds, Soil, Water, Water Saving, Worms
Plant Guild #9: The Whole Picture
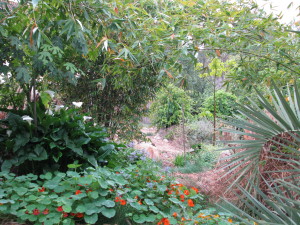 When set in motion the many parts of a plant guild will create a self-sustaining cycle of nutrition and water. By understanding the guild template and what plants fit where, we can plug in plants that fulfill those roles and also provide for us food, building materials, fuel and medicine as well as beauty.
Plant the appropriate plants for where you are placing them, for your soil and water use, and stack them in a guild with compatible plants that you can use. The ground will be covered by a foliar density that will keep grasses and other weeds at bay and provide excellent habitat for a full range of animals and insects. By stacking plants in a guild you are bringing life and abundance back to your garden.
Does it still sound so complicated? Rather than try to learn the roles of all the plants in the world, start small. Make a list of all the plants you want to plant. List them under food bearing, culinary/medicinal herb, craft/building material, and ornamental. Then read up on those plants. What size are they at maturity? Do they need full sun, partial or full shade? If trees, do they have an upright growth so you may plant under them (stonefruit), or do they like to have their roots covered and don’t like plants directly under them (citrus and avocado)?
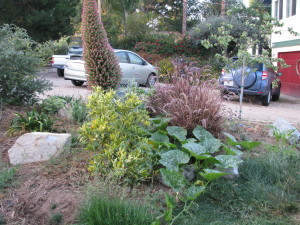
Citrus doesn’t like plants under its canopy, but does like plants outside its dripline. Are they annuals, perennials or biennials? What is their growth habit: sprawling, rooting where they spread, upright bushy, do they need support and can they cling or do they need to be tied to a support?
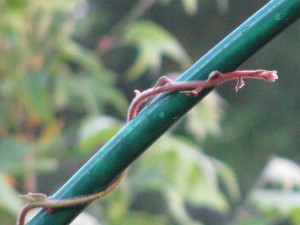
Will the plant twine on its own? Do they require digging up to harvest? Do they fix nitrogen in the soil? Do they drop leaves or are they evergreen? Are they fragrant? When are their bloom times? Fruiting times? Are they cold tolerant or do they need chill hours? How much water do they need? What are their companion plants (there are many guides for this online, or in books on companion planting.)
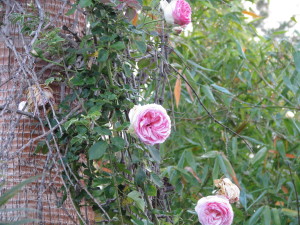
Do vines or canes need to be tied to supports? As you are acquainting yourself with your plants, you can add to their categorization, and shift them into the parts of a plant guild. Yes, many plants will be under more than one category… great! Fit them into the template under only one category, because diversity in the guild is very important.
Draw your guilds with their plants identified out on paper before you begin to purchase plants. Decide where the best location for each is on your property. Tropical plants that are thirsty and don’t have cold tolerance should go in well-draining areas towards the top or middle of your property where they can be easily watered. Plants that need or can tolerate a chill should go where the cold will settle.
Once it is on paper, then start planting. You don’t have to plant all the guilds at once… do it as you have time and money for it. Trees should come first. Bury wood to nutrify the soil in your beds, and don’t forget to sheet mulch.
Remember that in permaculture, a garden is 99% design and 1% labor. If you think buying the plants first and getting them in the ground without planning is going to save you time and money, think again. You are gambling, and will be disappointed.
Have fun with your plant guilds, and see how miraculous these combinations of plants work. When you go hiking, look at how undisturbed native plants grow and try to identify their components in nature’s plant guild. Guilds are really the only way to grow without chemicals, inexpensively and in a way that builds soil and habitat.
You can find the rest of the 9-part Plant Guild series here: Plant Guilds: What are they and how do they work? The first in a series. , Plant Guild #2: Canopy , Plant Guild #3: Sub-Canopy , Plant Guild #4: Nitrogen-Fixers, Plant Guild #5: Mining Plants, Plant Guild #6: Groundcovers, Plant Guild #7: Vines, Plant Guild #8: Insectiaries .
