Permaculture and Edible Forest Gardening Adventures
I am turning my acre + watershed filled with junk palm trees into an edible forest garden, using permaculture and recycled materials. The journey begins Feb. 1, 2011.
- Gardening adventures, Permaculture and Edible Forest Gardening Adventures, Recipes, Vegan, Vegetables, Vegetarian
Dinner with the Pandas: Harvesting Your Own Bamboo
Hello.
Before you cry, “Imposter!”, let me assure you that I have authorization to be here. Mostly. I happen to be Diane’s daughter Miranda, guestblogging and wordsmithing for you today. You might recognize my powdery feet or recollect me when keeping company with chickens (or from diverse other adventures). As much as I enjoying rolling in dust and home decorating with hens, today I’m here to talk about an unusual topic for Vegetariat – food.
The handy rhyme isn’t the only reason I’m sometimes known as Miranda the Panda – I also have a great partiality for a bit of bamboo, much like the vegetarian carnivore from whom I draw my catchy moniker. Luckily, we happen to have a fair bit of the stuff around Finch Frolic these days (bamboo, not pandas). Bamboo shoots are a common – and delicious! – component of Asian cuisines, and bamboo has been used for many culinary purposes, such as flavoring rice, wherever it grows. During this past summer, I was overcome with the need to find more things to eat on the property and began a foray into harvesting our own bamboo shoots.
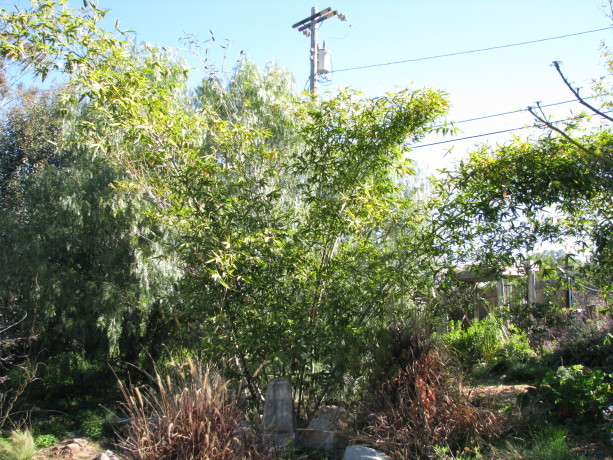
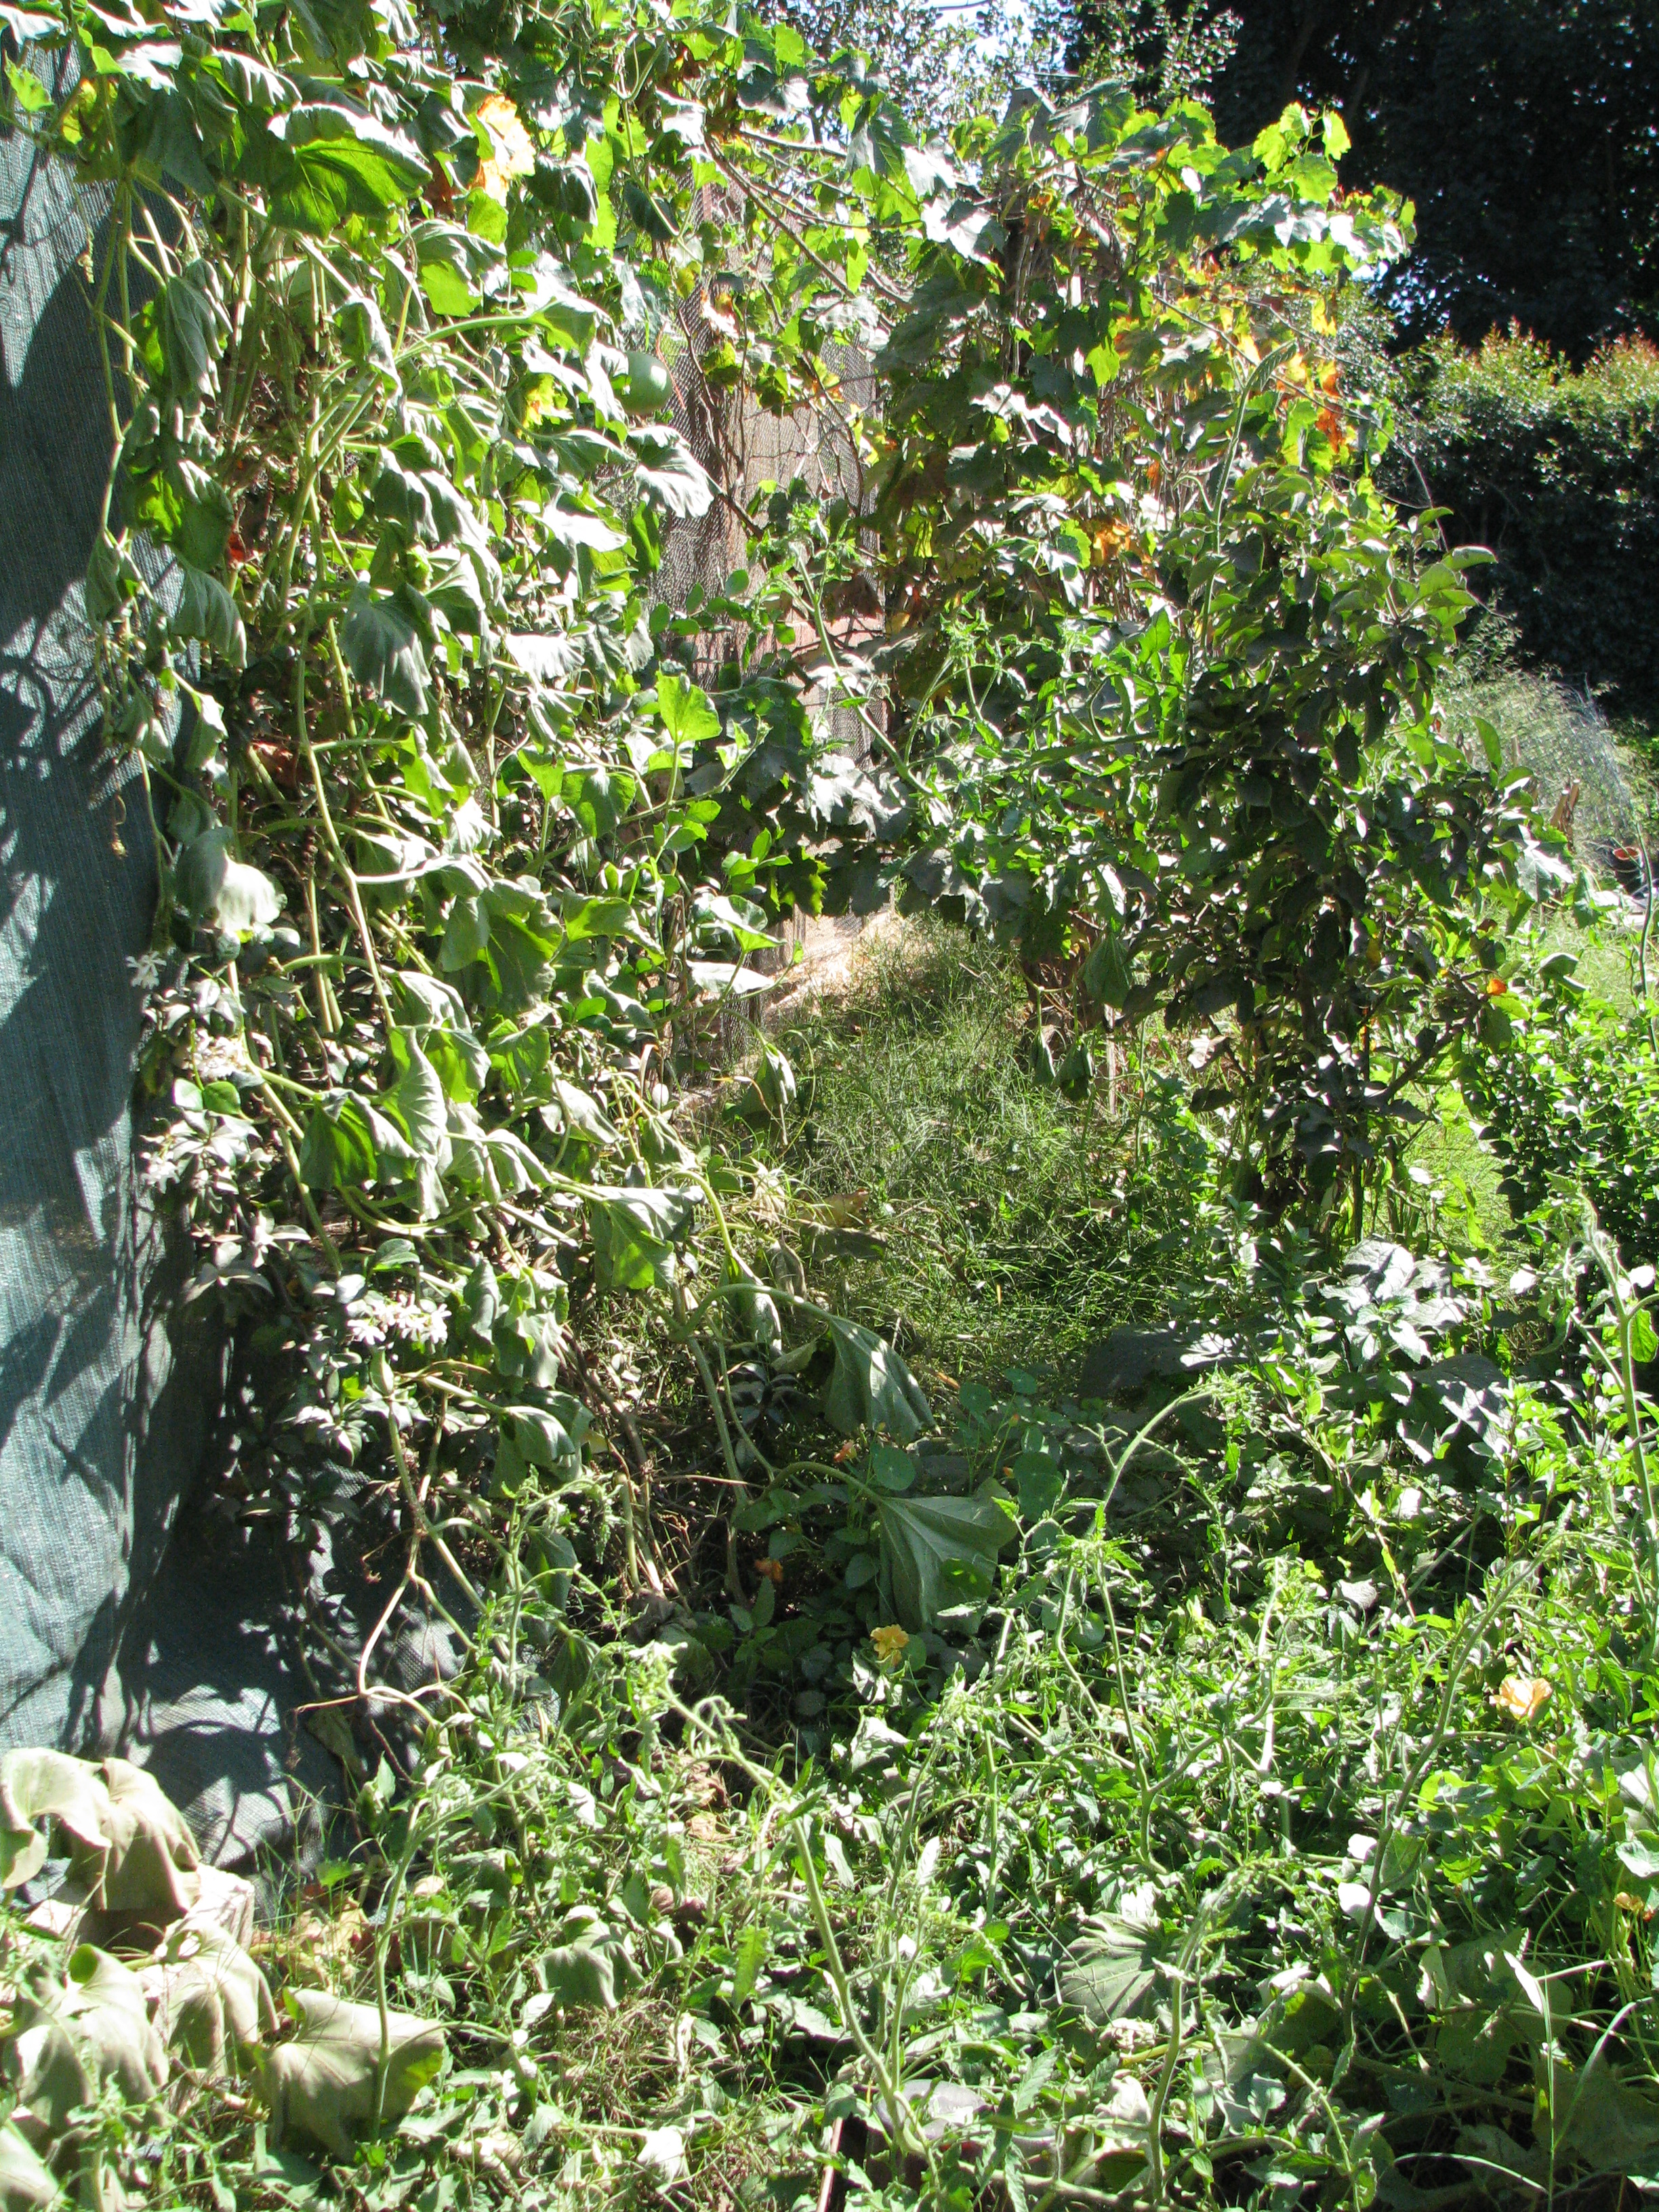
Our giant species of bamboo arches over many of our paths — perfect for building material, and any shoots that venture into the soil of the paths are prime targets… 🙂 Before I stepped outdoors and started gnawing on the nearest clump, I had to be sure that our bamboo is an edible variety, and hopefully a tasty edible variety. You need the scientific name of your bamboo for that, but once we ferreted out ours (Bambusa beecheyana), it was easy to find notation of its edibility and delectability online. One helpful and extensive listing is on Guadua Bamboo. Happily, there is a large number of edible and tasty bamboo species.
Proof of mange-ability in hand, the next obstacle was divining the best way to get bamboo shoots from the ground to my mouth. Harvesting can be more or less of a challenge, depending on what variety of bamboo one has and how it’s established (e.g., moisture and soil conditions, obstacles like stones around it). To harvest shoots, it’s best to pick fat green ones poking no more than a foot above the ground. You want to catch them before they get too woody, but old enough to have a bit of meat on them, so to speak. The shoot is mostly leaf (tightly layered sheaths), so bulkier shoots are more rewarding.
Removing our bamboo from the ground and its parent plant turned out to be on the more side of challenging.
Miranda and Diane bust out the Finch Frolic arsenal on the recalcitrant shoot.
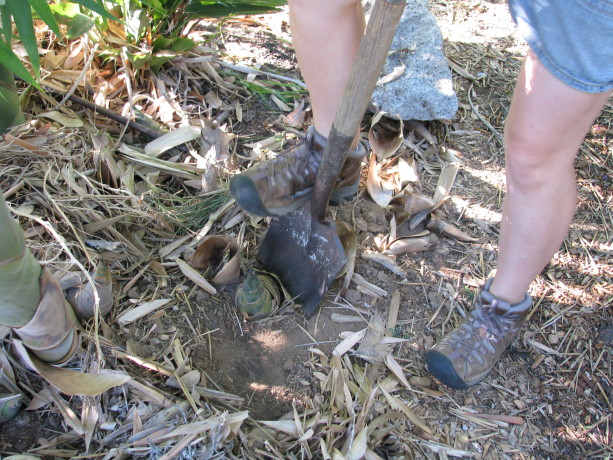
First, the inimitable spade is set to the task. 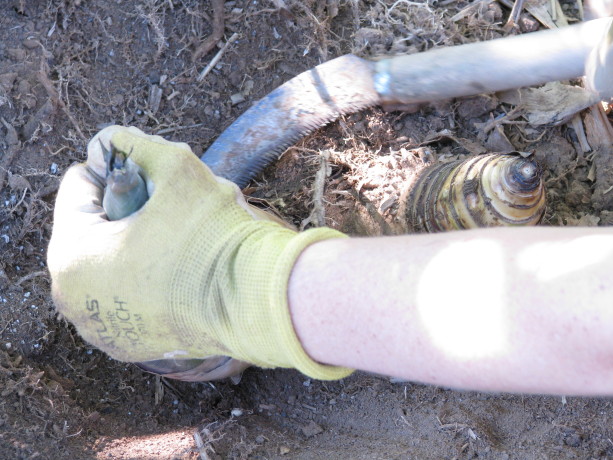
Legs weary and spade abandoned, the small sickle saw is recruited, to little effect. Diane had just returned home and gleefully plunged into the fray, skirt, white sandals and all.
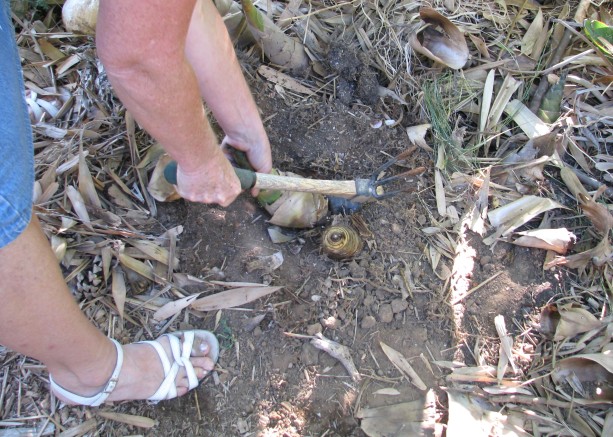
Finally, Diane wades into battle with the winning implement. 
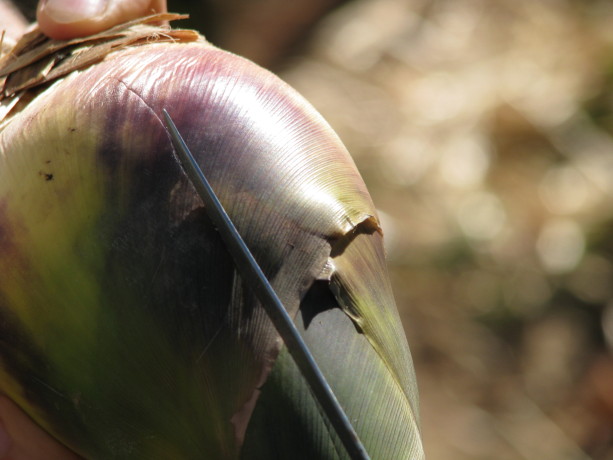
The shoot, freed from the earth and its parent plant. Once we finally achieved success, processing could begin! It is somewhat tiresome to strip a shoot down to the edible white core, because the leaves cling so tightly and are fibrous. It’s like shucking the most stubborn ear of corn in the world. It’s good to slit the tougher outer leaves with a very sharp knife and peel them away.
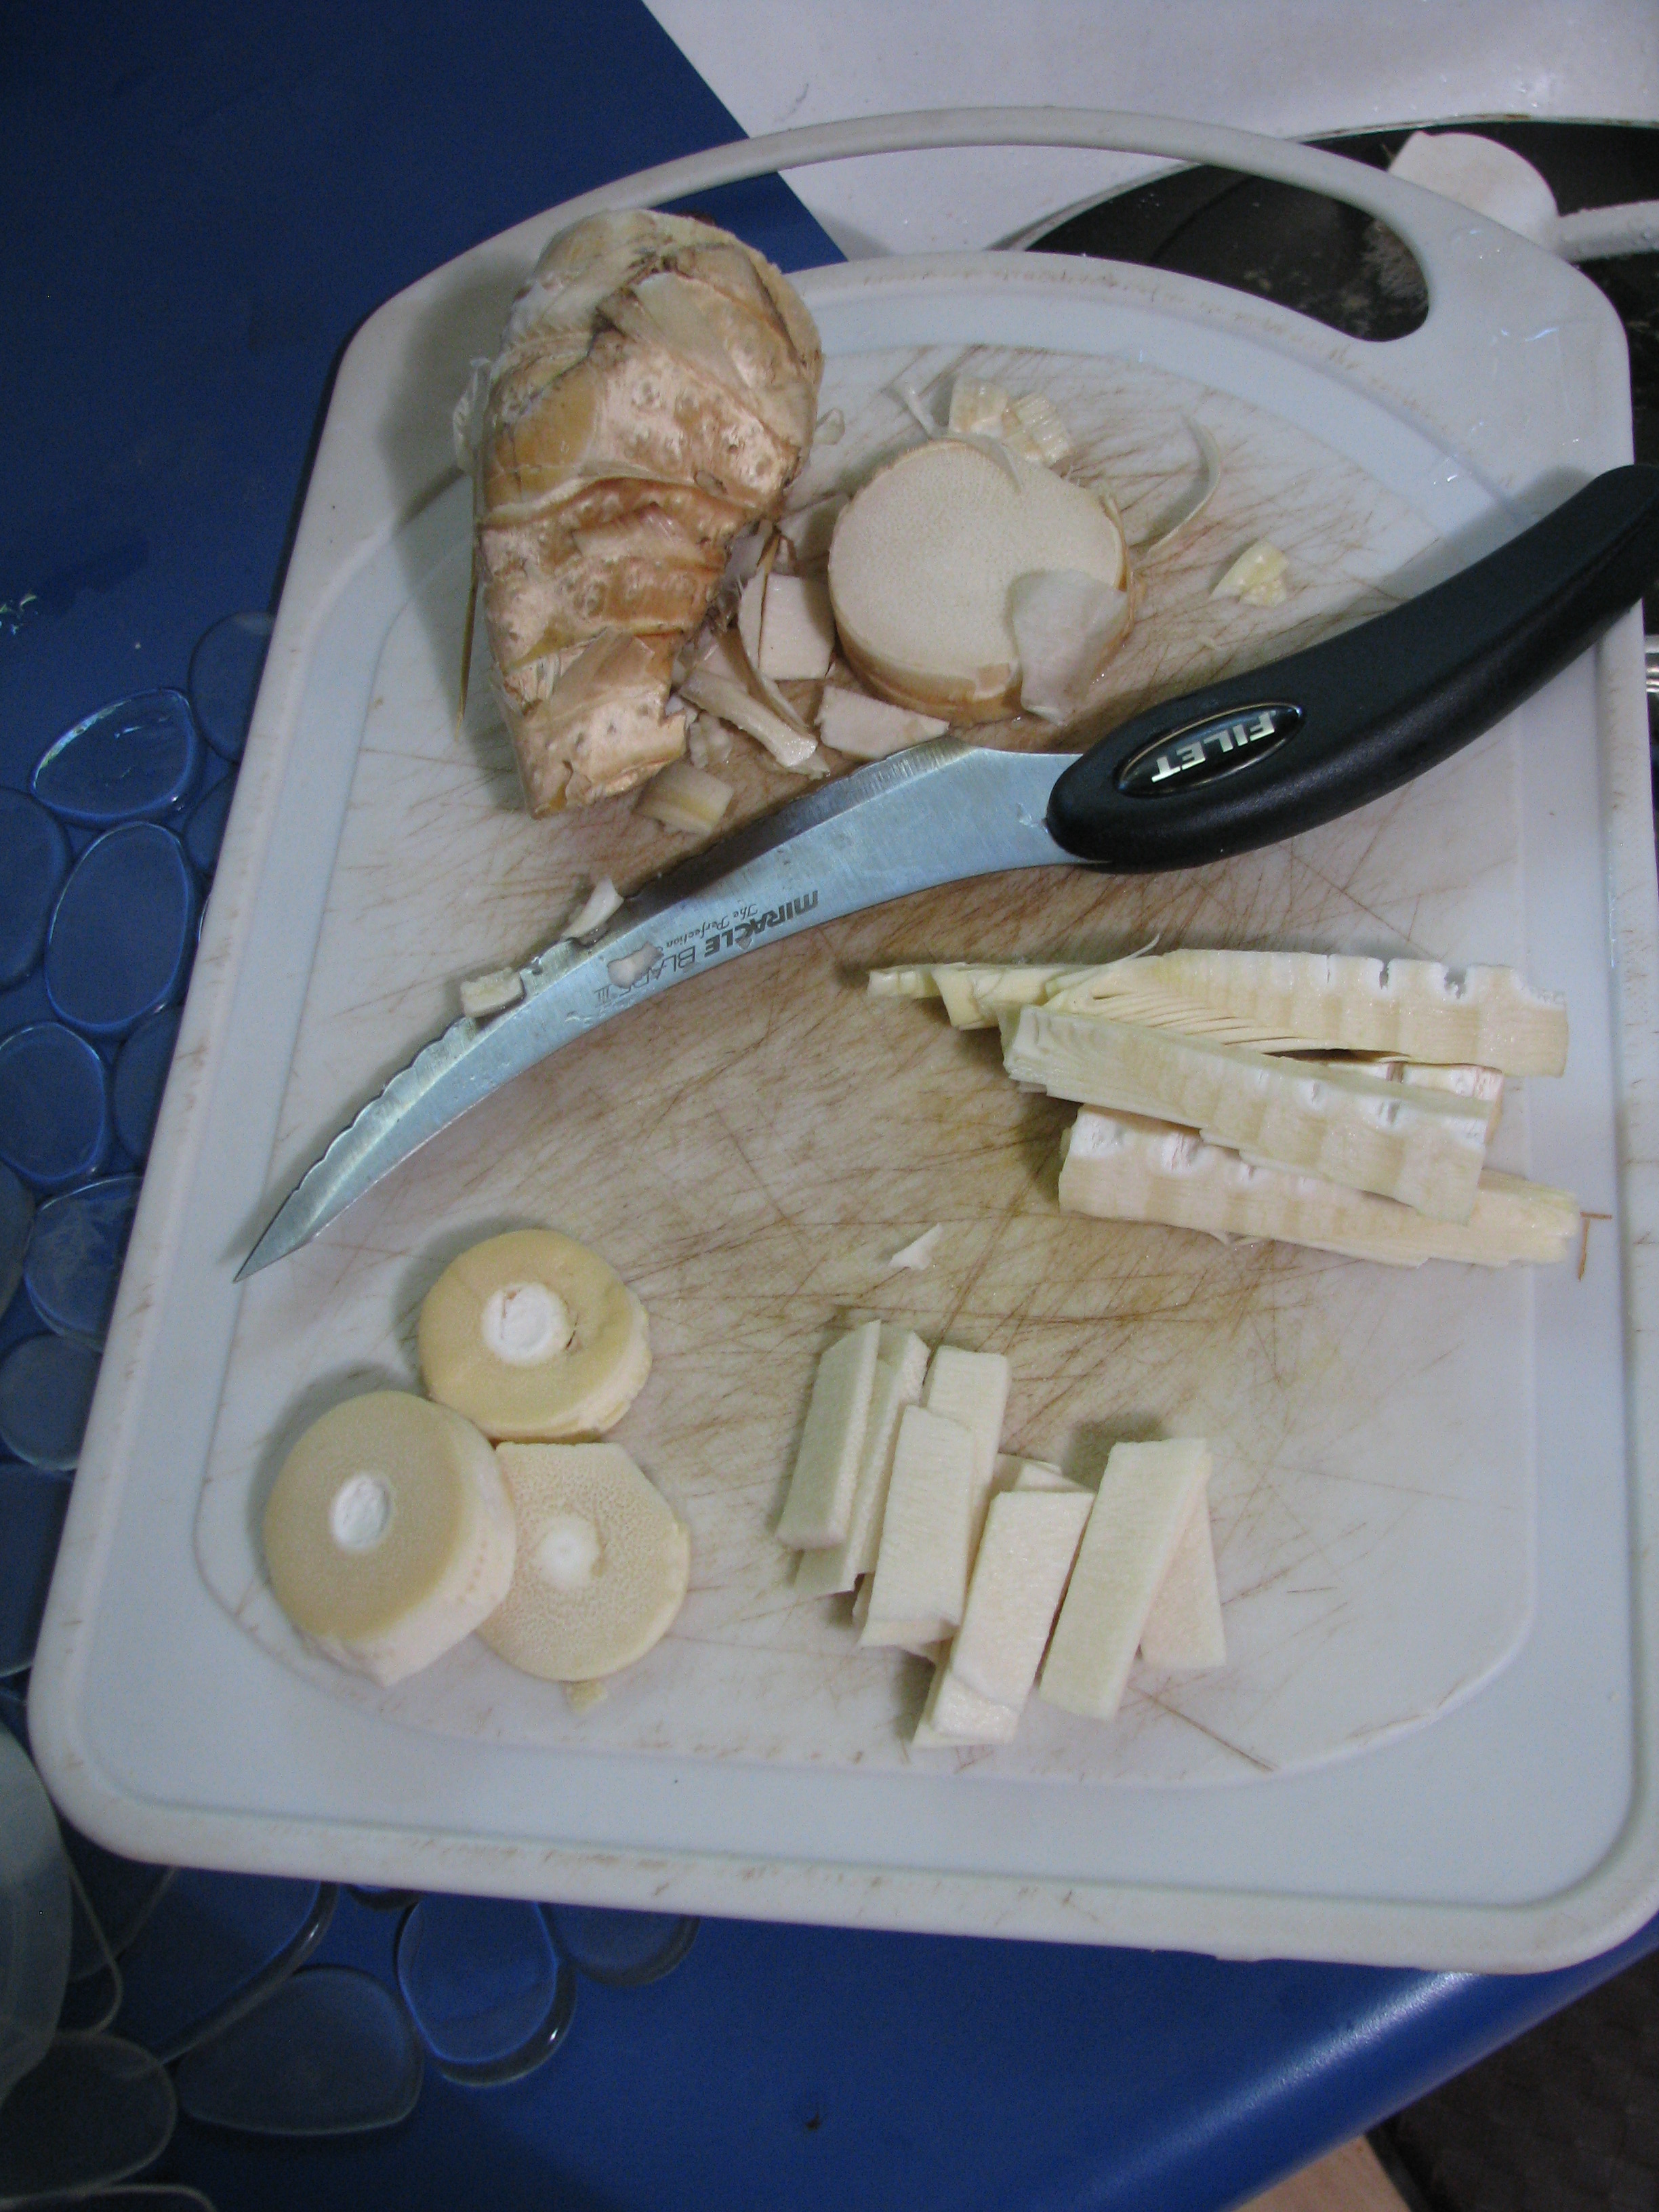
Slitting the fibrous outer leaves with a filet knife. 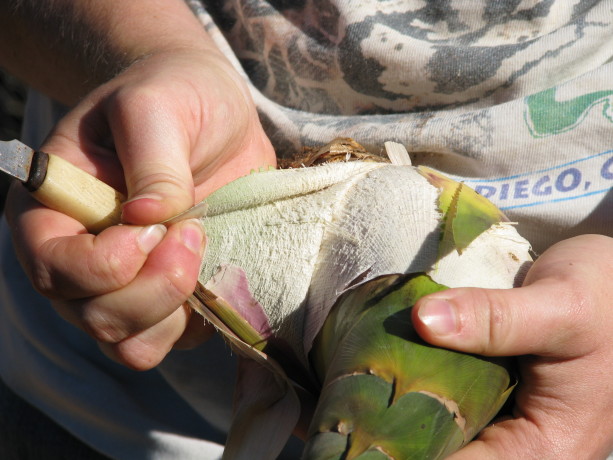
Peeling. The inner leaves come away more easily – rather like the layers of canned hearts-of-palm – as you get closer to the heart of the bamboo shoot. The innermost leaves are basically fetal, and so are edible because they haven’t gotten tough yet. They make the tip of your shoot look hairy.
Many layers of increasingly tender leaves. 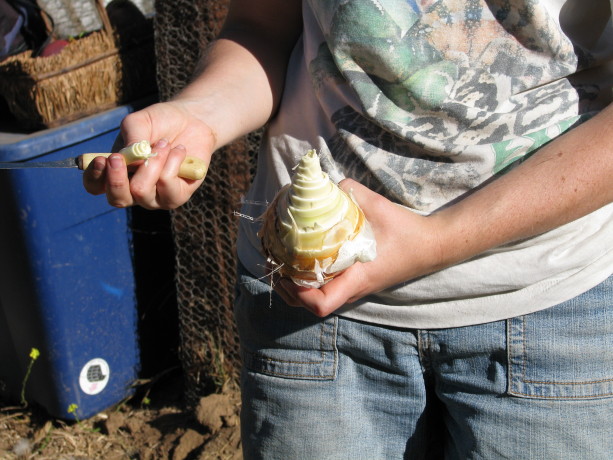
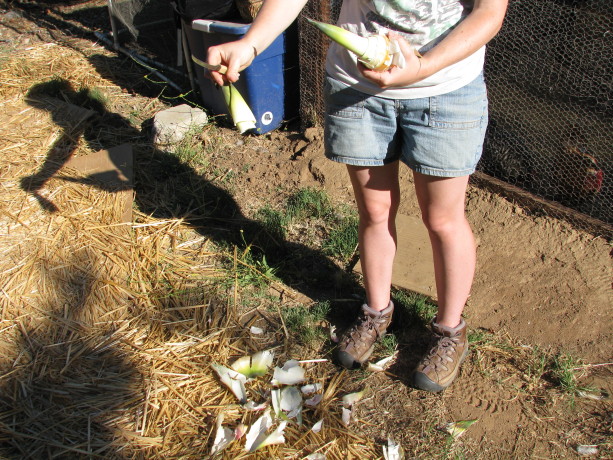
The edible shoot. A peeled bamboo shoot can be cut up in whatever way the chef desires. The shoot grows more fibrous towards the base, where there is probably some inedible hard material. My current rule of thumbs-carefully-tucked-away is if a sharp knife can pretty easily get through it, it’ll be fine to eat.

A shoot cut in three different ways. The material behind the knife (upper left) is too fibrous to eat. You just have to boil your slices before cooking and consumption because they contain a mild toxin that dissipates with boiling. The first time, we tried boiling in lightly salted water for only 30 minutes, and while the shoots were tender and not really bitter, they left a teeny tingling sensation in our mouths, like stir-fried Pop Rocks. The last time I cooked them, I boiled them for a whole 50 min. to much more satisfactory, un-tingly results.

Boiling to remove toxins. Bamboo is delicious and a lot of fun (in a somewhat laborious way) to harvest. The beauty of harvesting your own bamboo shoots is that you are saving yourself a trip to specialty markets and controlling your bamboo’s growth at the same time!
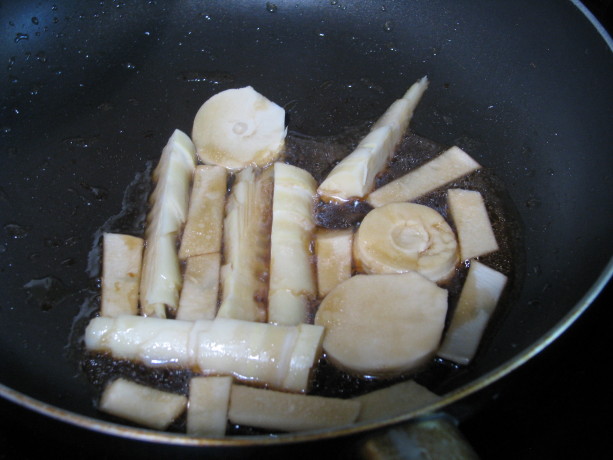
Frying up — yummy! So that’s another thing going on here at FFG. Thanks for wandering the bamboo lane with me.
TTFN!
Miranda (the Panda), B.S.
-
Belle: Adventures of a Crossbill Chicken

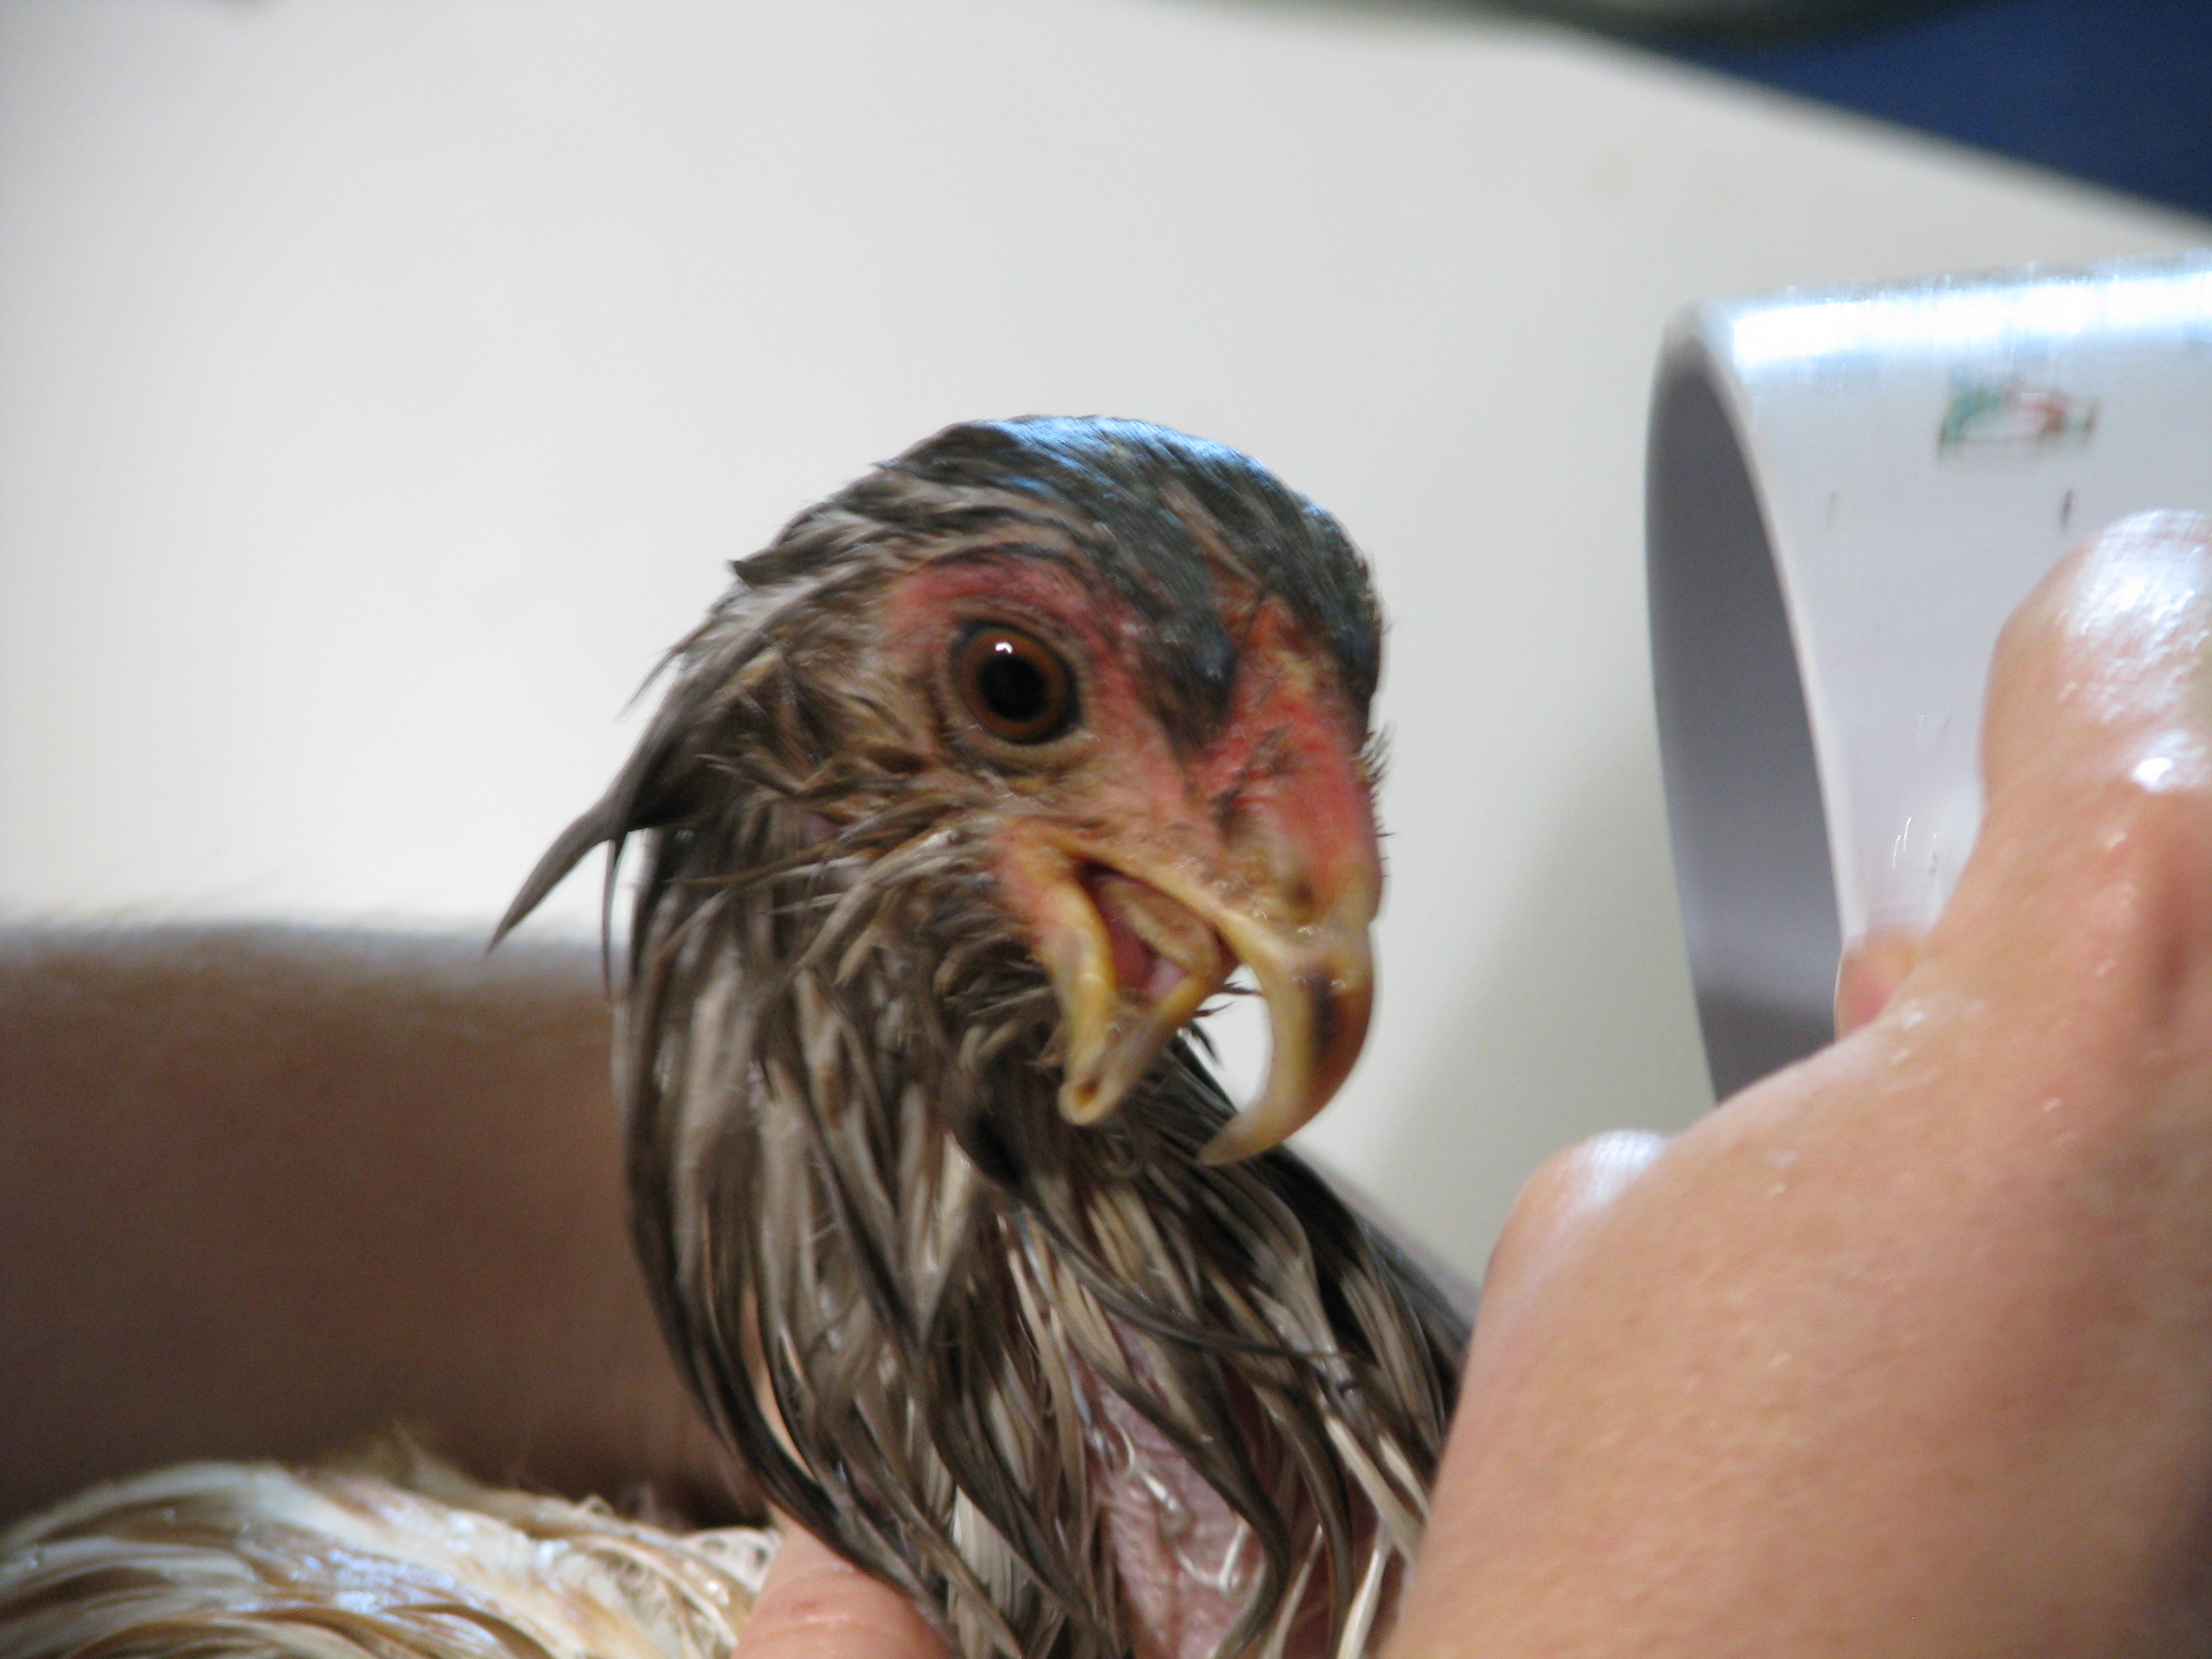
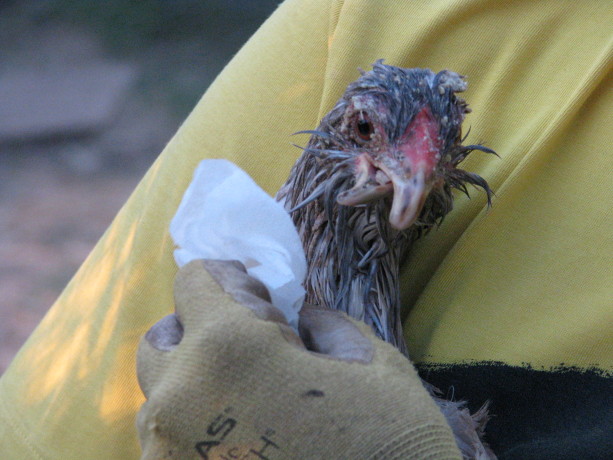
Belle looks much jauntier than she is while being rinsed in her bath. When we added to our flock of five last March by acquiring chicks, we soon discovered that our Americauna (ironically already named Belle), was a genetic crossbill. Crossbill is a genetic mutation found particularly in Americaunas which causes the beak to scissor so that they don’t meet. Some unfortunate crossbills are affected so extremely that the hen eventually would starve to death. Because of the crossbill, the hens can’t peck at food.
Aww! Belle as a baby. Sigh. So far Belle is able to eat, provided that we give her special food. We also use nail clippers and a nail file to trim as much of her beak off as we can without nipping the wick and making it bleed. Belle is very patient during the process. Mostly.
Gently and carefully trimming and filing Belle’s beak, keeping clear of the wick. She also can’t preen well. Preening in hens means that they dip their beak into an oil gland over their tail feathers and smooth that over their feathers, knitting them together and combing out the pin sheaths emergent feather shed as well as dirt and other itchy things.

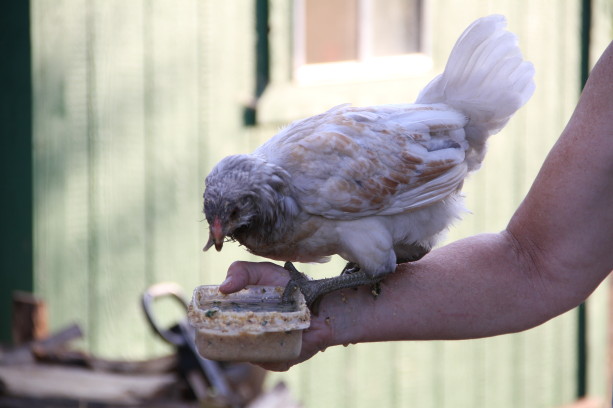
Grooming is a challenge for her. Here feather sheaths and bits adorn Miranda after we finger-groom Belle. Belle’s food has to be mushy so that she can scoop it rather than peck at it. We grind up the foods we feed our other hens and then mix it with water until it has a scoopable consistancy.

Lay pellets, egg shells, oyster shell, cracked corn, and greens are ground up then mixed with water for Belle’s mush. We feed Belle the mush in a deep container with enough room for her twisted beak. Because the pecking behavior is so natural to her she finds it hard even with months of practice to scoop to the side. She shakes her head often but miraculously enough goes down.
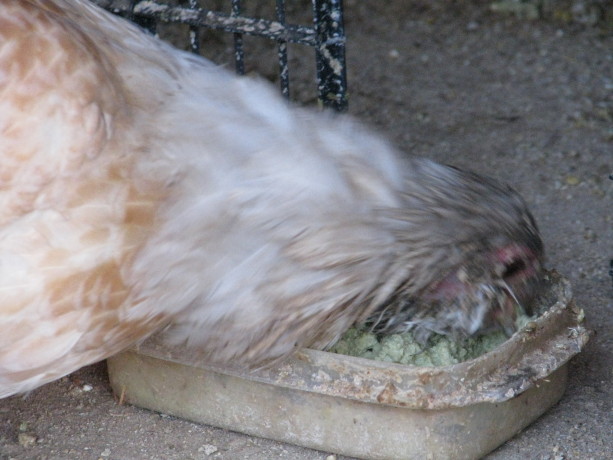
Belle’s eating habits are not a pretty sight. Although what we feed Belle is exactly what we feed the other hens, only wet, they still are jealous and will push her away from her food. So she is fed in a special upside-down milkcrate of my daughter’s design, in the upper portion of the quail coop (the quail won’t go upstairs). The door is closed to just a Belle-sized crack and held open with a sophisticated latching unit (a stick). Even so some of the bolder girls will invade.
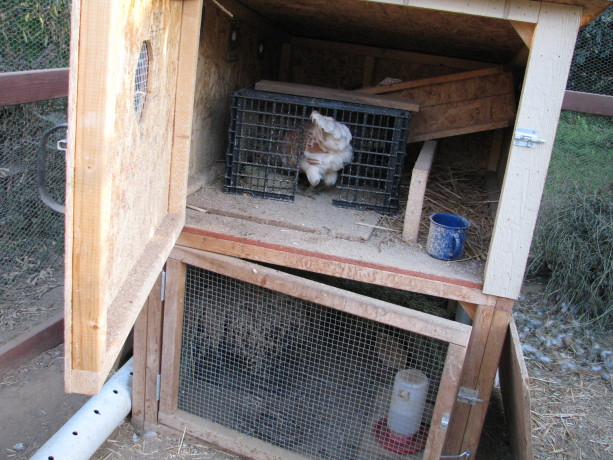
Belle eats upstairs in the quail coop. A crate helps keep her food from being raided by other hens. Some food does go down Belle’s throat, but much of it decorates the crate.

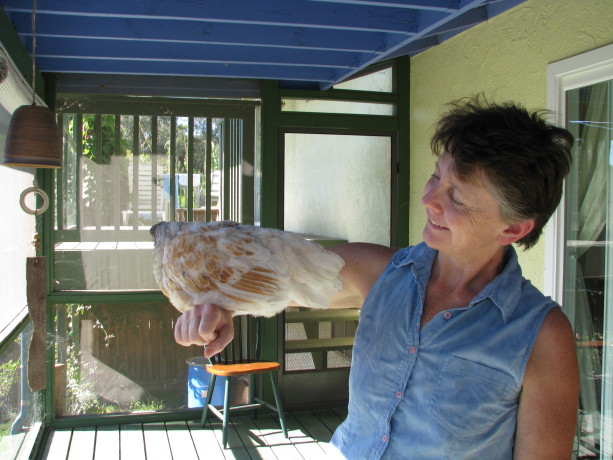
The wall of splatter inside her eating crate. After giving her a bath (as in the top photo) to soak off the dried hen food, her feathers looked so pretty (and she strutted around the porch so much as she dried) that I endeavored to find a solution to keep her clean. Alas, nothing worked. We ended up trimming her neck feathers to reduce the dried clumps.

I tried an old bib of my children’s on Belle to try and protect her clean feathers from splatter. It didn’t work. With all the handling Belle gets she has become a spoiled girl. She lives outside the hen’s pecking order, often scooting under their legs or pushing them out of the way when a treat comes even though she can’t eat it and has to have hers separately.
Belle, the falcon. Or the time is quarter-past Belle. Belle likes to help. I usually feed the hens in the morning while in my bathrobe. As I bend to scoop their food I find there is a chicken clawing her way up my back. She enjoys sitting on one’s head as well, particularly on my daughter’s as she has so much hair coiled up that it gives Belle a nice place, albeit an unwelcome one, to perch.
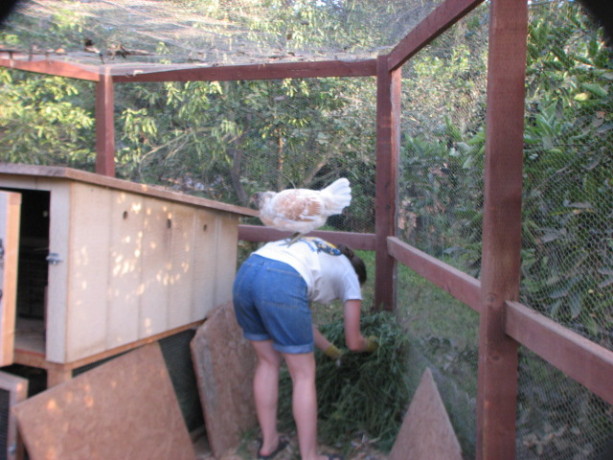
Belle likes to help whenever she can. When we fill Belle’s food dish with water outside the Fowl Fortress, she often sneaks under the door as it is closing and makes a leap for her food. Usually this results in food everywhere but in Belle’s very hungry stomach.
Belle usually can’t wait until she’s served. Belle is a happy chicken, eager for attention and enjoying being ‘teacher’s pet’. She doesn’t mind being carried around like a small football.

With all the frequent handling she gets, Belle enjoys being carried around… spoiled girl! After making fried zucchini for dinner one night I had extra beaten egg and soy milk left over. On a whim I cooked it into a custard for Belle. Well. I’ve never seen a hen eat so much. It was the perfect consistancy for her to scoop and it was tasty. Giving her a few day’s break I eventually made her a more nutritious custard. In my handy-dandy Vitamix (I really should be paid to sponsor them, although hen custard probably isn’t in their advertising scheme) I mixed quail eggs and their shells, lay pellets, ground cracked corn, oyster shell, buttermilk, and celery greens which I happened to have right there (from home-grown celery). The custard turned out very unappetising.
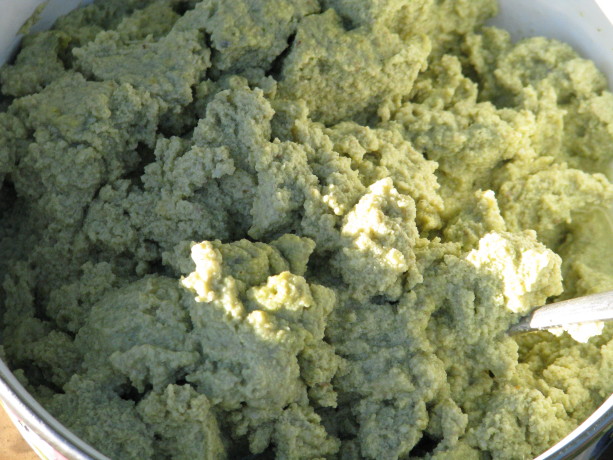
Although it looks like a cross between brocciflower and a sea sponge, it is really a dry custard. Apparently it was only unappealing to me and Miranda.
After-custard clean-up is necessary due to the dairy products. Belle’s not happy about being dabbed. It is worth the extra effort to insure Belle has a good meal and a full crop at the end of the day. When she’s full of custard she actually struts around the yard, happy with her fullness and the fact that she had a treat no one else had. Belle is of laying age but her size is smaller than the other hens and she’s still growing. I don’t mind if she doesn’t lay; she’s a darling friend and a neutral hen in the coop. I’m sure Belle will be the source of many more stories and certainly a lot more mess. Just another crazy, high-maintenance, unproductive little animal here at Finch Frolic!
You May Also Like

Native Insects and IPM
-
Fruit Tree Guild, Revisited
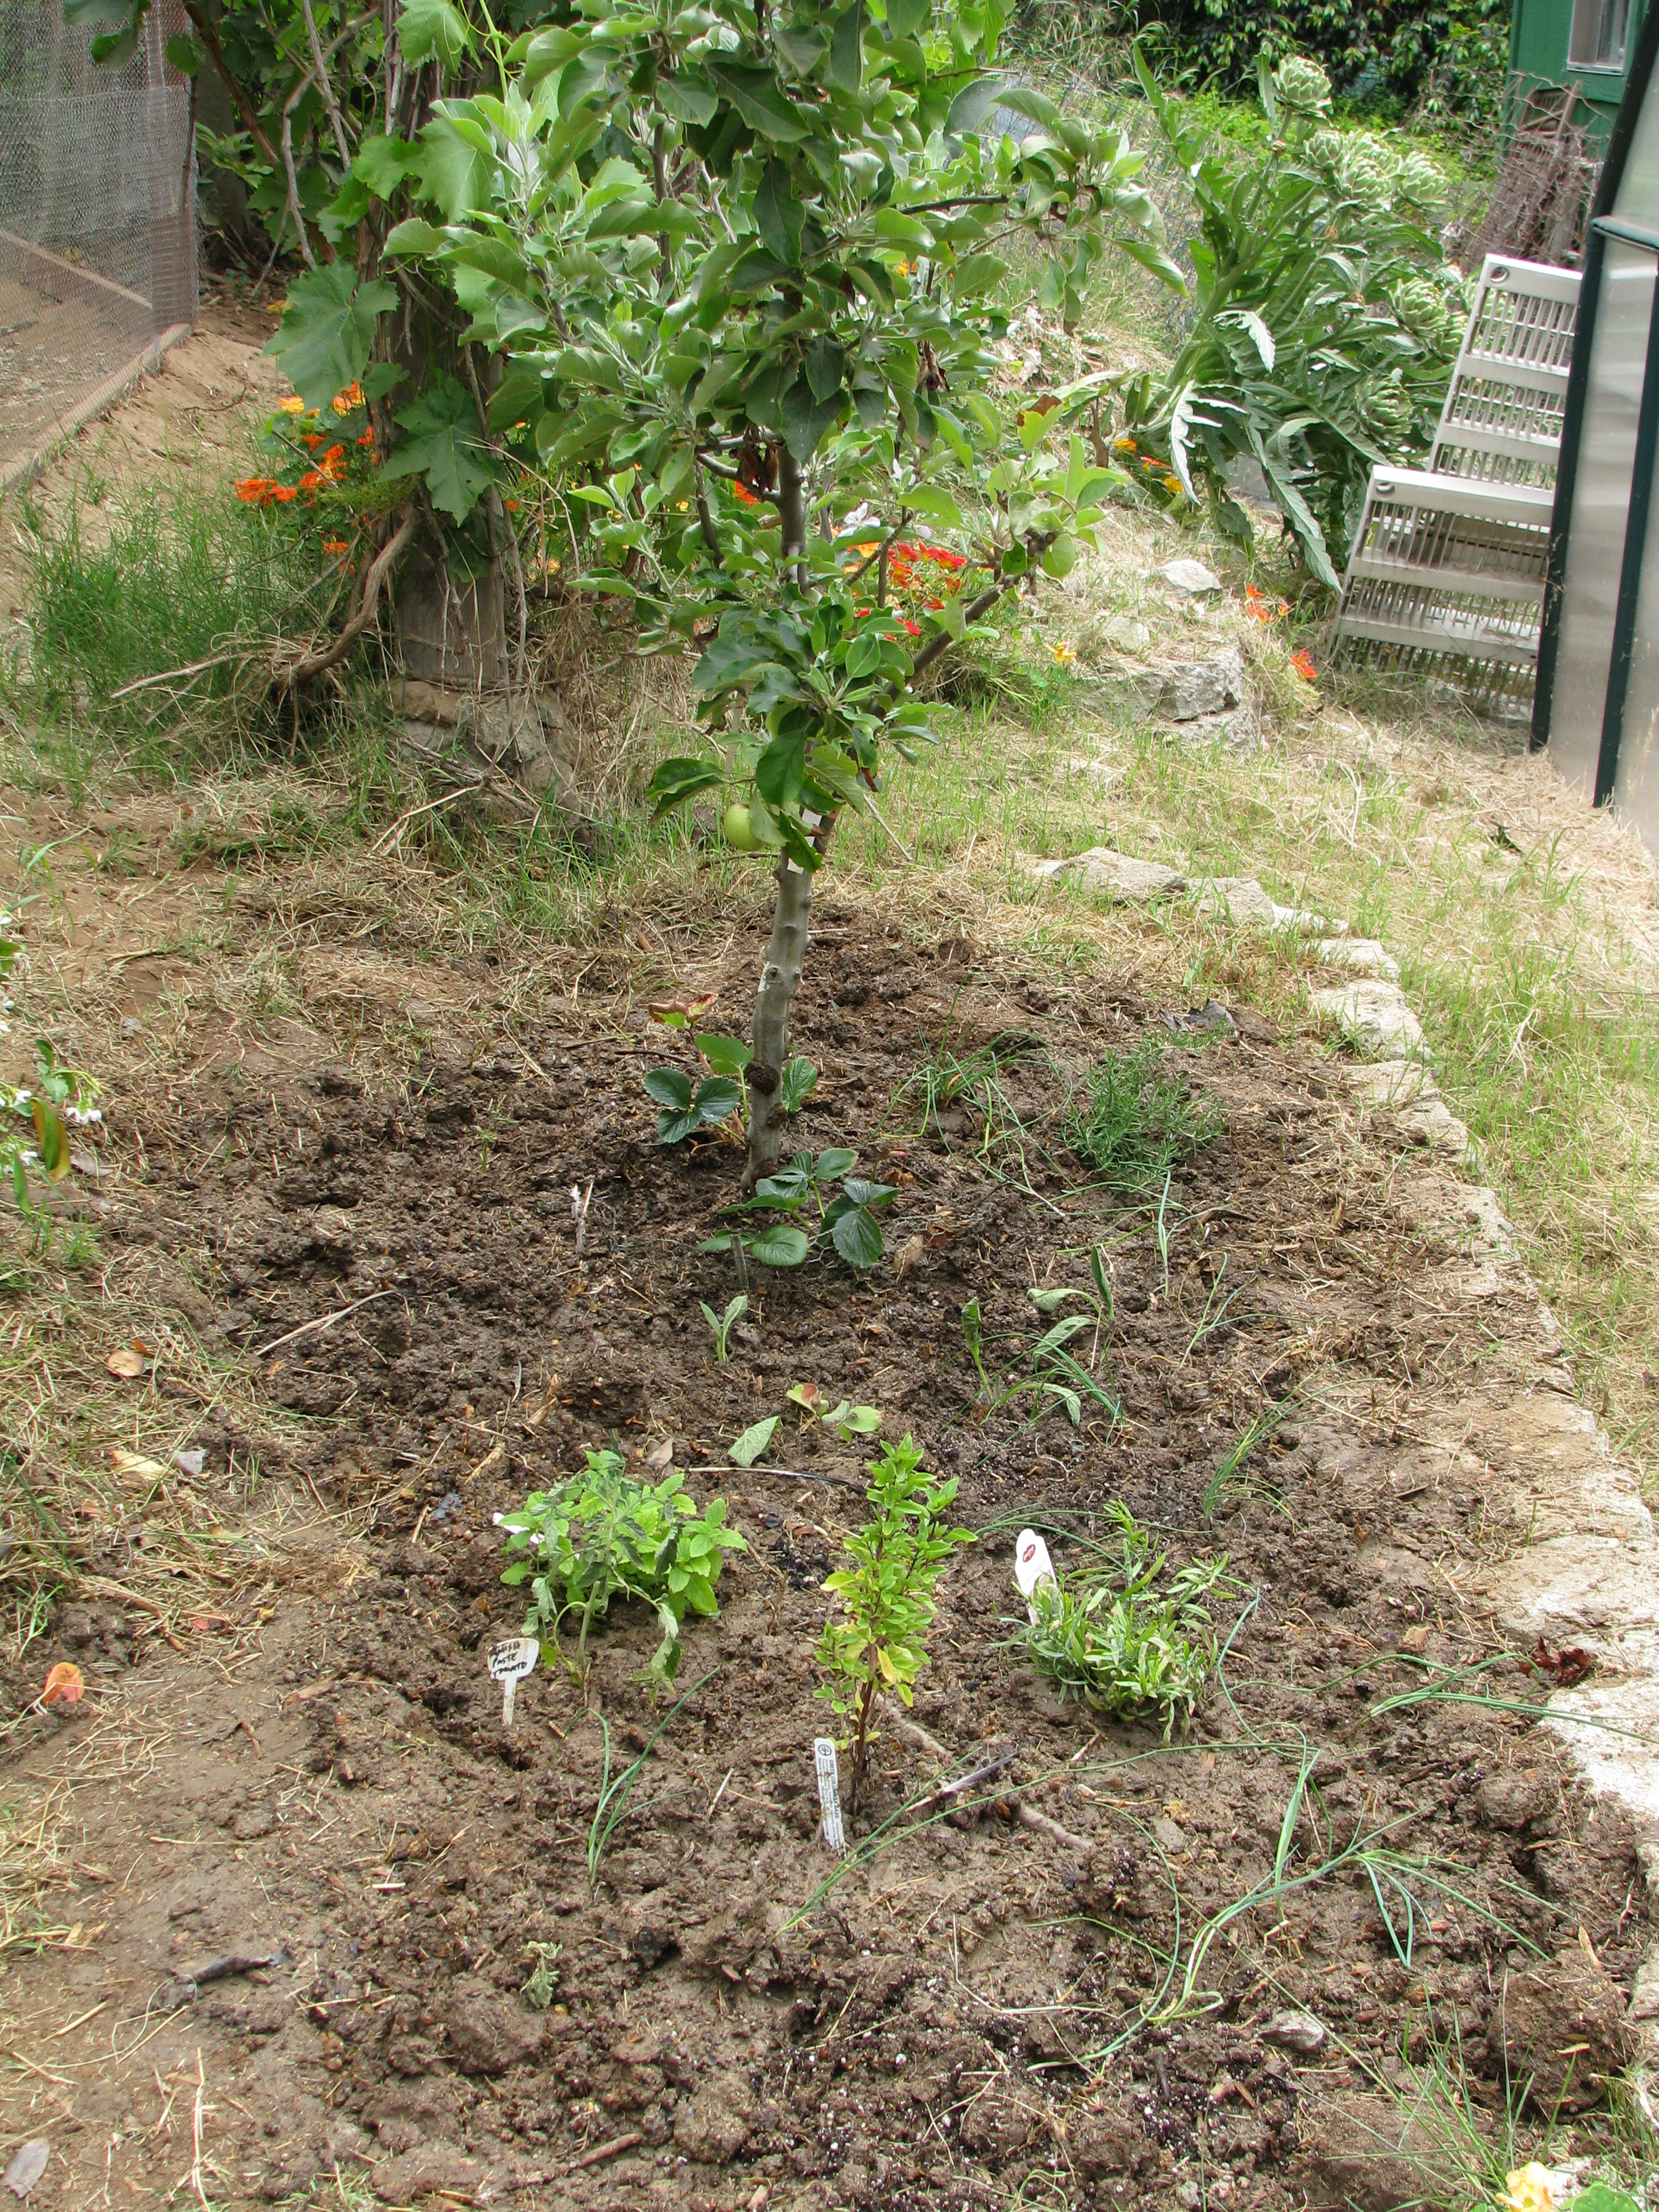
In June I blogged about how to plant a fruit tree guild, and gave the example of one I was planting by the Fowl Fortress. I thought I’d show you how it matured.

Apple tree in trouble: heavy clay thoroughly shot through with Bermuda grass. Yuck! This was the area four months ago. Heavy, sticky clay taken over with Bermuda grass. A struggling apple tree begs for my help. A star jasmine climbs the side of the Fowl Fortress. A portion of the brown subterranean irrigation system lies aboveground.
Using permaculture design, I created a plant guild with herbs and vegetables that would build the soil and help the apple tree.

A guild is planted. Strawberries went around the trunk of the tree for groundcover and grass competition. Comfrey, a valuable nutrient accumulator in there, too, for slash and drop fertilization. There is also a perennial basil, marjoram, gourds, golden runner bean (a nitrogen fixer), garlic chives, a prostrate rosemary and a tomato, along with other flower seeds. This is how it looks now from the same vantage point:
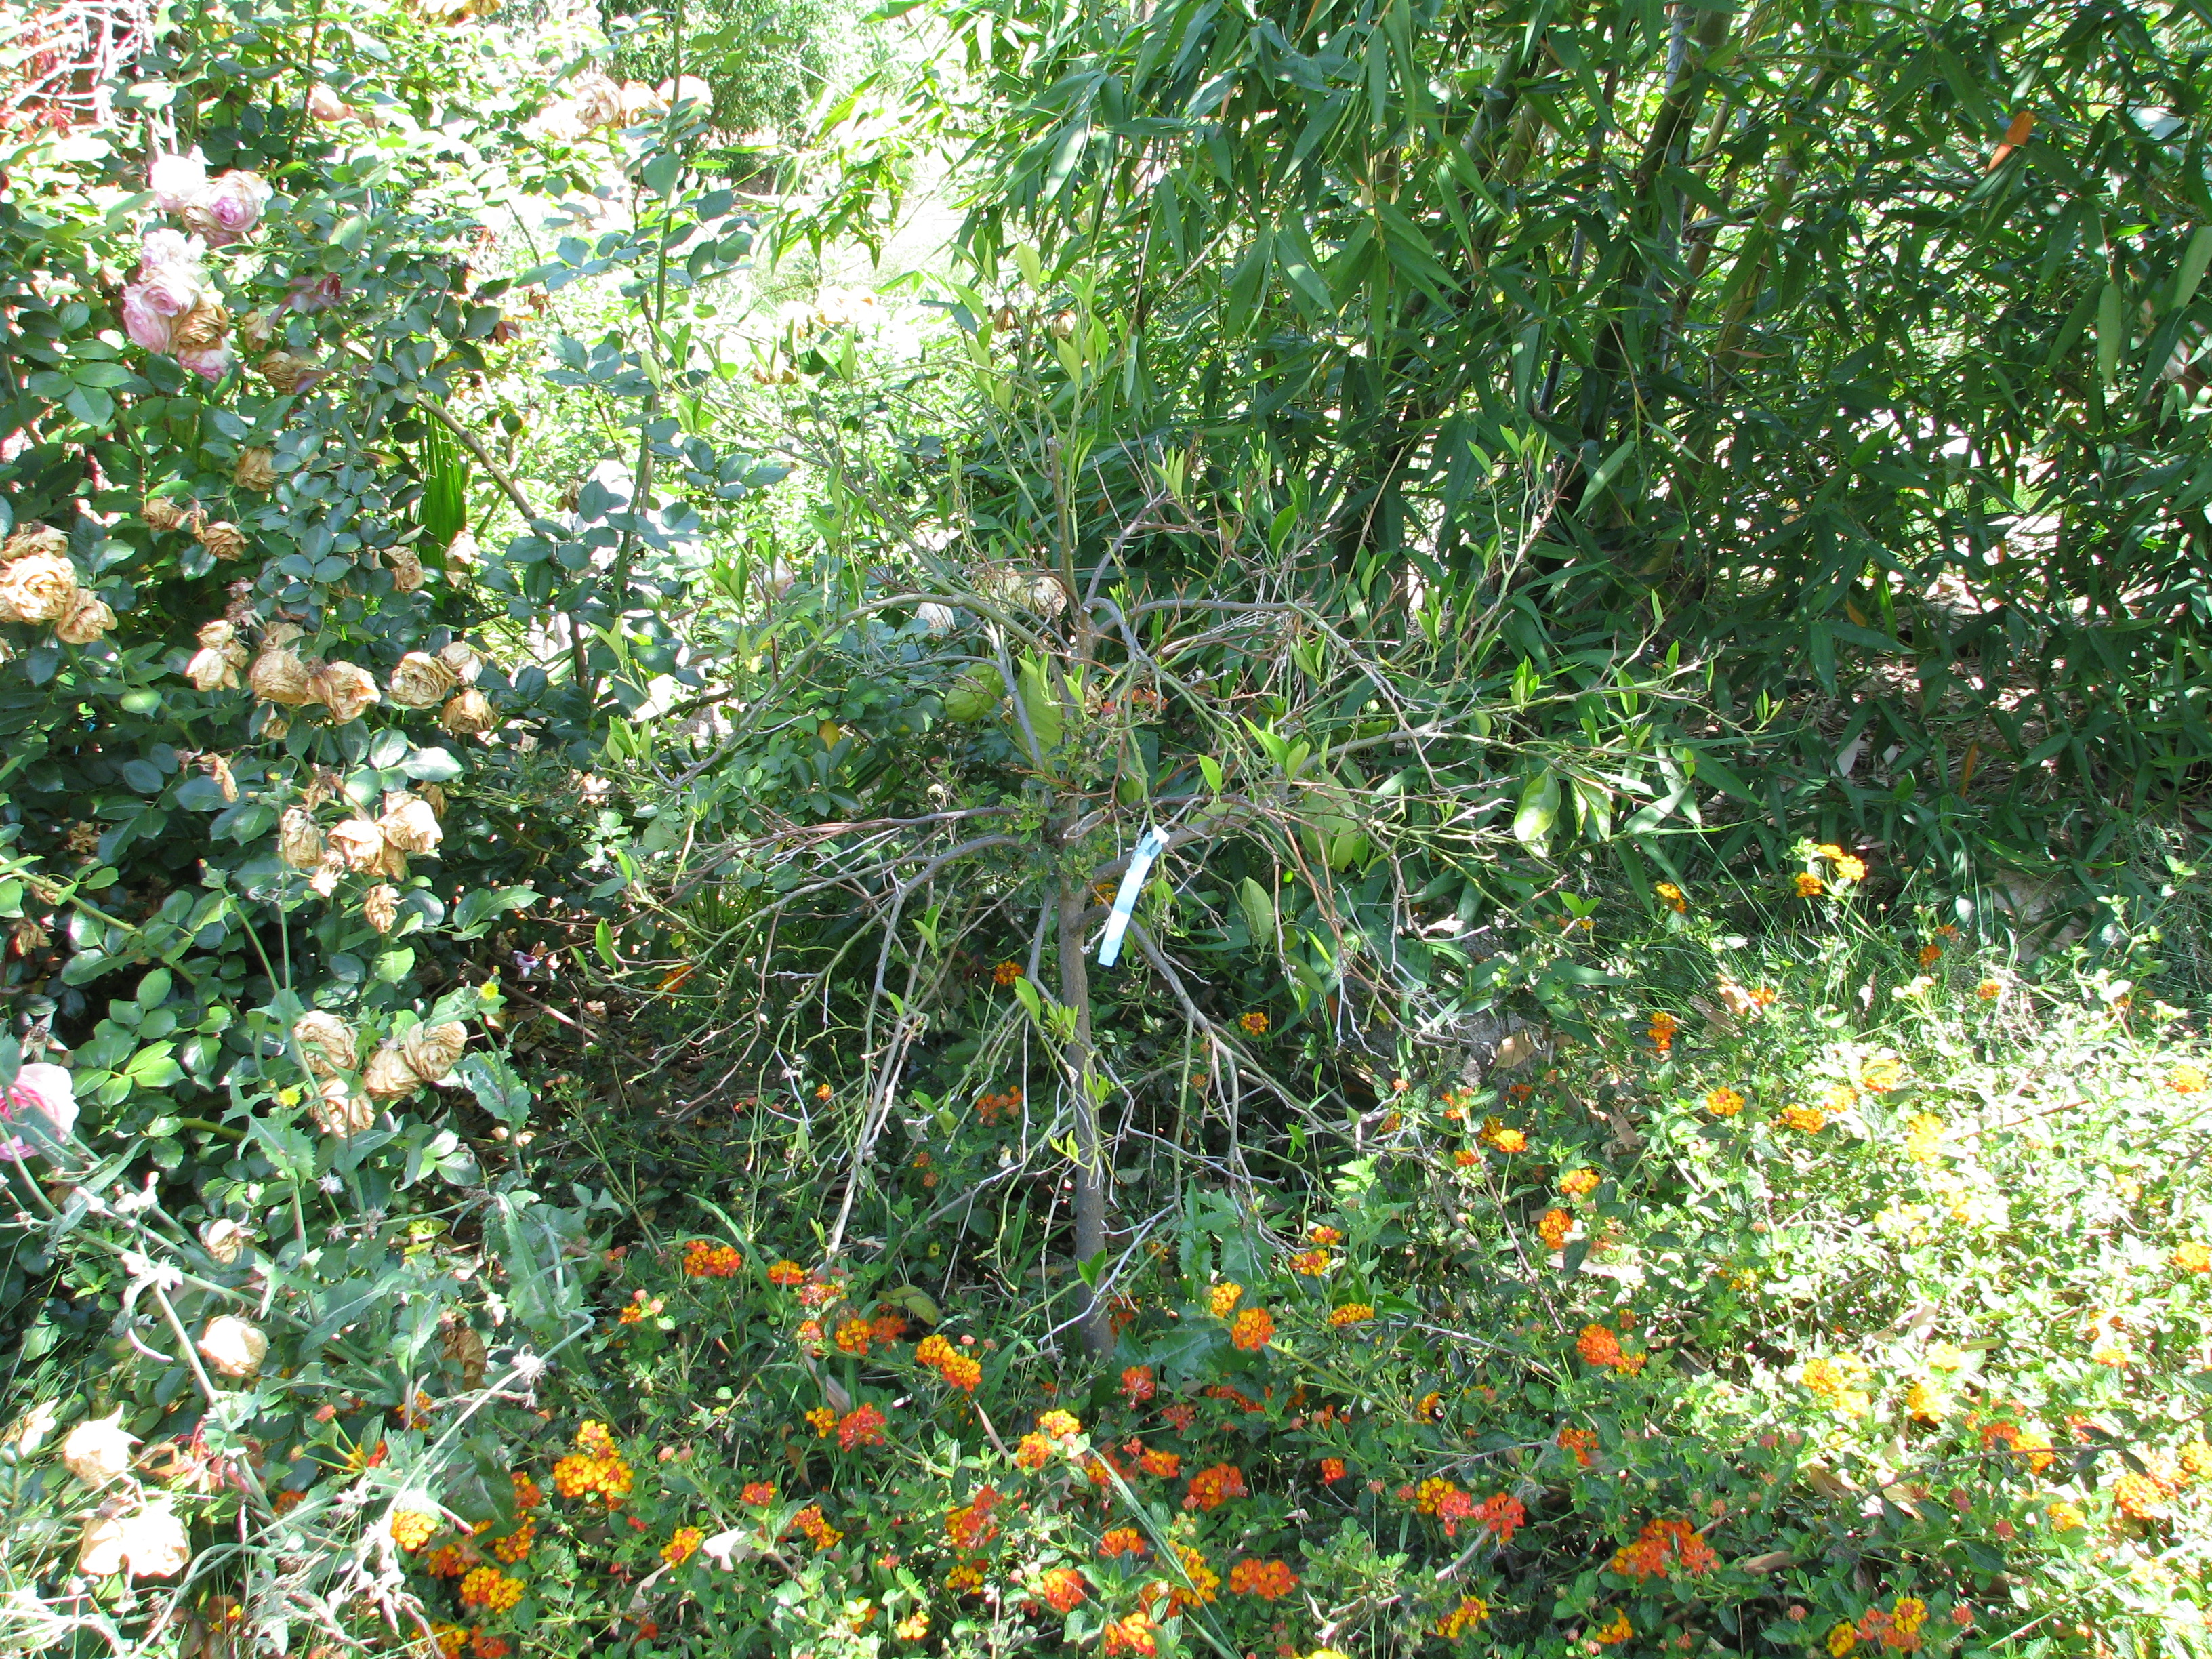
The guild in September. 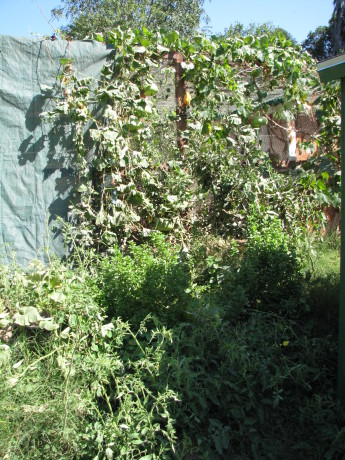
Layers of plants protect the ground and produce food. 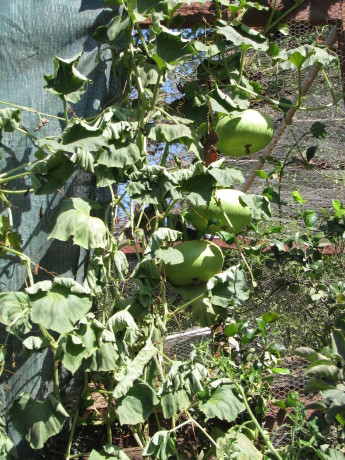
These gourds can be dried and made into bowls. 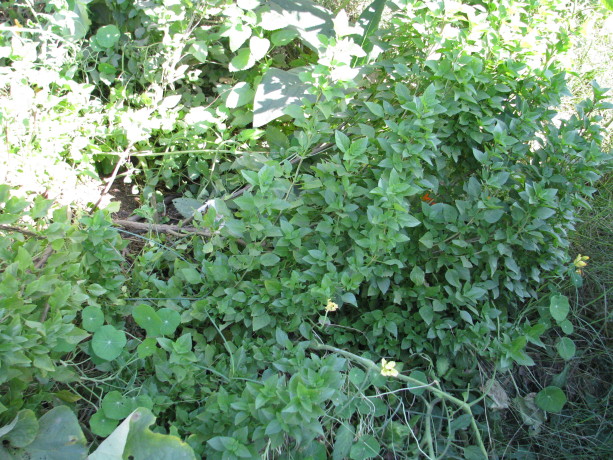
Perennial basil, Amish paste tomatoes smother the weeds and enrich the soil. 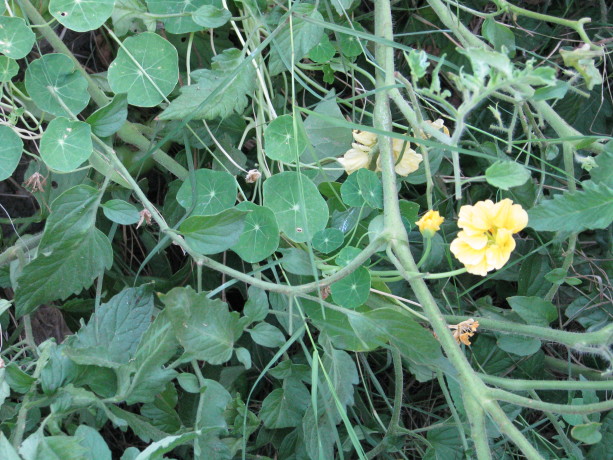
Nasturtiums reseed and fill in as the other vegetables die off. Polyculture beds produce abundant, insect-confusing food guilds which help fertilize and water each other and improve the soil quality. Meanwhile the apple tree has a few apples on it and looks healthier than it has been. Next year’s growth should be drastically improved, and the amount of invasive grasses should be nil. If I don’t grow consecutive annual crops here around the perennial plants, I will sheet mulch the bed.
- Compost, Gardening adventures, Health, Hugelkultur, Other Insects, Permaculture and Edible Forest Gardening Adventures, Soil, Vegetables, Worms
Don’t Clean Up, Dig It In!

Use old vegetables to grow new ones! Tomatoes, eggplant, peppers, fennel, carrots, string beans, three kinds of basil, and probably other things I’ve forgotten about! In January of this year I wrote about Lazy Composting. Frost had killed off sweet potato and tomato vines,

- Frosted vegetable stems are perfect.
and the soil in the raised garden beds were becoming very low.

- Soil level is very low on the raised beds.
Instead of hauling all the vines to the compost heap or bin, I thought I’d create soil in place. The raised beds are lined with chicken wire to protect veggies from gophers. Although I didn’t want to disturb the microbes and fungus in the soil, I dug out half the beds down to the wire.

- I dug out half the bed down to the chicken wire. Miss Amelia and Chickpea checking out the worm situation. I had to kick them out…the worms stay!
Then I layed all those vines right on the soil and covered them up.

- I piled on the old tomato vines, then covered them up with the soil I’d removed.
Then I did the other half…
- Spent tomato vines, with some green ‘maters still attached.

- You can see bits of the vines sticking up out of the first half. That’s okay!
… and then did the other bed. Any thick stalks in other beds which didn’t need extra soil I simply cut close to the ground so that their roots can decay in place and feed the wormies.

- Snip off vegetables at the surface and allow the roots to decay in the soil. Use the tops for mulch, or dig them in, too.
I sprinkled the whole thing with a little Epsom salts for the magnesium sulfate, and a little sugar to start the disturbed microbes feeding and reproducing heavily, which would cause them to decompose the vines more quickly.
In one bed I planted cold weather crops right away; peas, brassicas, garlic, onions and more. I am a firm practicioner of polyculture, or integrated gardening , which means that I plant an assortment of seeds of plants which will help each other in small areas instead of planting all one thing to a bed. I can still plant a row of peas so that I can string them up easily, but I’ll plant all kinds of other plants around them. Usually I don’t plant in a line at all anymore, but rather stake the plants as they need them. Often they’ll use taller plants as support. This is why planting peas and sweet peas next to trees and bushes is a great idea (they fix nitrogen in the soil which helps the tree).
In the other bed I waited to plant until March when the weather warmed up, because I was planting early summer crops. Here it is the beginning of September, and here are the beds, still producing. Even the winter veg one.

- Two of the beds, one still with winter brassicas in them in Sept.
In the bed to the right there is a yellow current tomato blocking the view, and growing into the tree. You can see a Japanese eggplant, and behind it the red is a pepper. Under the tomato and along the bed are three kinds of basil, many string bean plants, some of the sweetest carrots we’ve grown, fennel (one of which we allowed to be the host plant for the Anise Swallowtail, which ate the tops. The bottom of the fennel, which is the part we eat, will still be harvestable). In the bed to the right is the January plants still alive and kicking. Collards, kale, garlic, celery, onions, brussels sprouts, kohlrahbi and more. We’ve harvested most of the garlic and onions. We’ve harvested kale, collards and celery by cutting leaves and allowing the plant to continue to grow. The stalks are now so thick that it is hard to cut them. Out of season, these plants have had attack by cabbage moths and other bugs, but because of the integration of plants and the health of the soil, they’ve bounced right back. I’m harvesting the plants now to feed to the chickens so that I can use the bed for something else soon.
So what happened? A teaspoon of great soil has a billion microbes in it, a million fungi, tens of thousands of amebas, bacteria and all kinds of things we don’t even know about yet. This is a good thing. This is the secret to continued life on this planet. Healthy soil doesn’t wash away, doesn’t erode, feeds the underground waterways, grows excellent food for healthy wildlife and healthy humans. If we feed the soil, we save the planet. That simple. That means no Roundup, no GMOs, no chemical (even organic) fertilizer. Just compost. Very cheap and easy.
Vegetables tend to like a soil that is heavier in bacteria than in fungus, although both should be present. Woody plants such as bushes and trees tend to like a more fungal soil. The vines that I buried had both dry (stems) and wet (green leaves and tomatoes) on them. The stems made the fungus flourish in the soil, and the green bits made the bacteria active. There wasn’t enough matter to become anaerobic, or to rob nitrogen from the soil. The vines weren’t compacted so lots of soil surrounded all the parts, aiding in quick composting and keeping the soil aerated. Water could be absorbed better as well.
If you are starting a garden and want to buy compost, be careful of what stores sell you. In August I was asked to look at a few raised beds that hadn’t succeeded. The soil was low in the beds, there were a few straggly pepper plants, a poorly tomato and some brassicas of some sort which were so stunted that they were just green balls of leaves. When I pulled one up there was white stuff on the roots. A couple of strawberry plants looked very healthy but unproductive. I tried the soil and couldn’t get my finger into it because the roots from those poor peppers had made a thick mat just under the surface of the dirt well beyond their dripline. Two major things were wrong. One was the dirt in the beds. Splinters of shredded wood made up the bulk of it. The woman who had asked me to look at the beds said that she had described her project at Home Depot and they’d recommended two kinds of bagged stuff. I say stuff, because it isn’t soil. What they recommended would be appropriate for hardwoods such as bushes and trees, or acid-loving plants. That is why the strawberries were healthy, only they were in the full sun in a searing hot place and would have done much better under the shade of other plants. I showed the white stuff on the brassicas to her; it was fungal net, which showed the high fungal activity in the soil. Perfect for trees, not perfect for vegetables. Also the brassicas are cold-weather plants and just won’t develop in our summer heat here in San Diego County. They should be planted from October through the beginning of March. The spongy soil… honestly, I’ve never before felt root mat so thick that I couldn’t wiggle my finger into the soil… was the result of desperate plants and poor watering. A custodian would occasionally hose water the beds, which meant that he’d shoot some water on them for a few minutes every day or so. This topical water didn’t sink into the bark-heavy soil. It was only enough to water the top, so the plant roots couldn’t go deep. It was often enough that the plants didn’t die entirely, but survived stunted and striving for water and nutrition that the fungal soil wasn’t providing. Vegetables (and roses!); indeed, most plants except grasses and seedlings, need deep watering less frequently. This allows the roots to go where they want to go, deep into the ground where they can mine nutrients and stabilize the plant. My advice for her was to dig in the few plants that were there, use the compost in the compost bin next to the beds, even if it wasn’t decomposed and add some vegetable-friendly soil to the beds to bring up the heighth. I recommended mixing seeds and scattering them, making sure she planted winter crops, not corn or tomatoes. I also recommended a long watering twice a week; none when it starts raining. If it ever does.
Recommending permaculture techniques to people makes me want to work in the garden! That is because there is so much life, so much success, so many happy surprises and such great feelings that come out of naturally planted gardens. Rows of veggies look so neat and peaceful, but beds chock full of veggies are more fun, better tasting and far more productive.
I just wanted to follow up on the old post about digging in the vines and show you how well the plants did. I have never fertilized these beds after burying the vines and sprinkling on the Epsom salts and sugar. All this growth is due to the happy microbes making nutrients available to the vegetable roots. If you think about it, plants in the wild shed their seeds and then either completely die off or drop leaves. The seeds naturally grow up through the debris of the last generation. Makes sense, doesn’t it?
When these beds are done (if they ever are! They keep producing!) I will practice no-dig gardening on them and simply cut all the plants at the soil surface and drop the tops. I’ll plant seeds for winter crops right in among the debris of the summer crops. They’ll use the nutrients, shade and support of the old crops to grow. October is a good planting time for winter crops because the weather finally changes and the daylight hours are shorter which these plants need. What to plant? Potatoes, garlic, onions, Brussels sprouts, cabbage, peas, broccoli, cauliflower, rhubarb, kohlrabi, celery and much more. Cover crops when it frosts and allow good drainage for the potatoes when it rains. Be sure if you buy starter sets that they are guaranteed organic! Best of all plant organic seeds… they do the best of all and are the best value.
Have a happy, easy Fall garden!
- Animals, Bees, Birding, Gardening adventures, Heirloom Plants, Other Insects, Permaculture and Edible Forest Gardening Adventures, Quail, Seeds
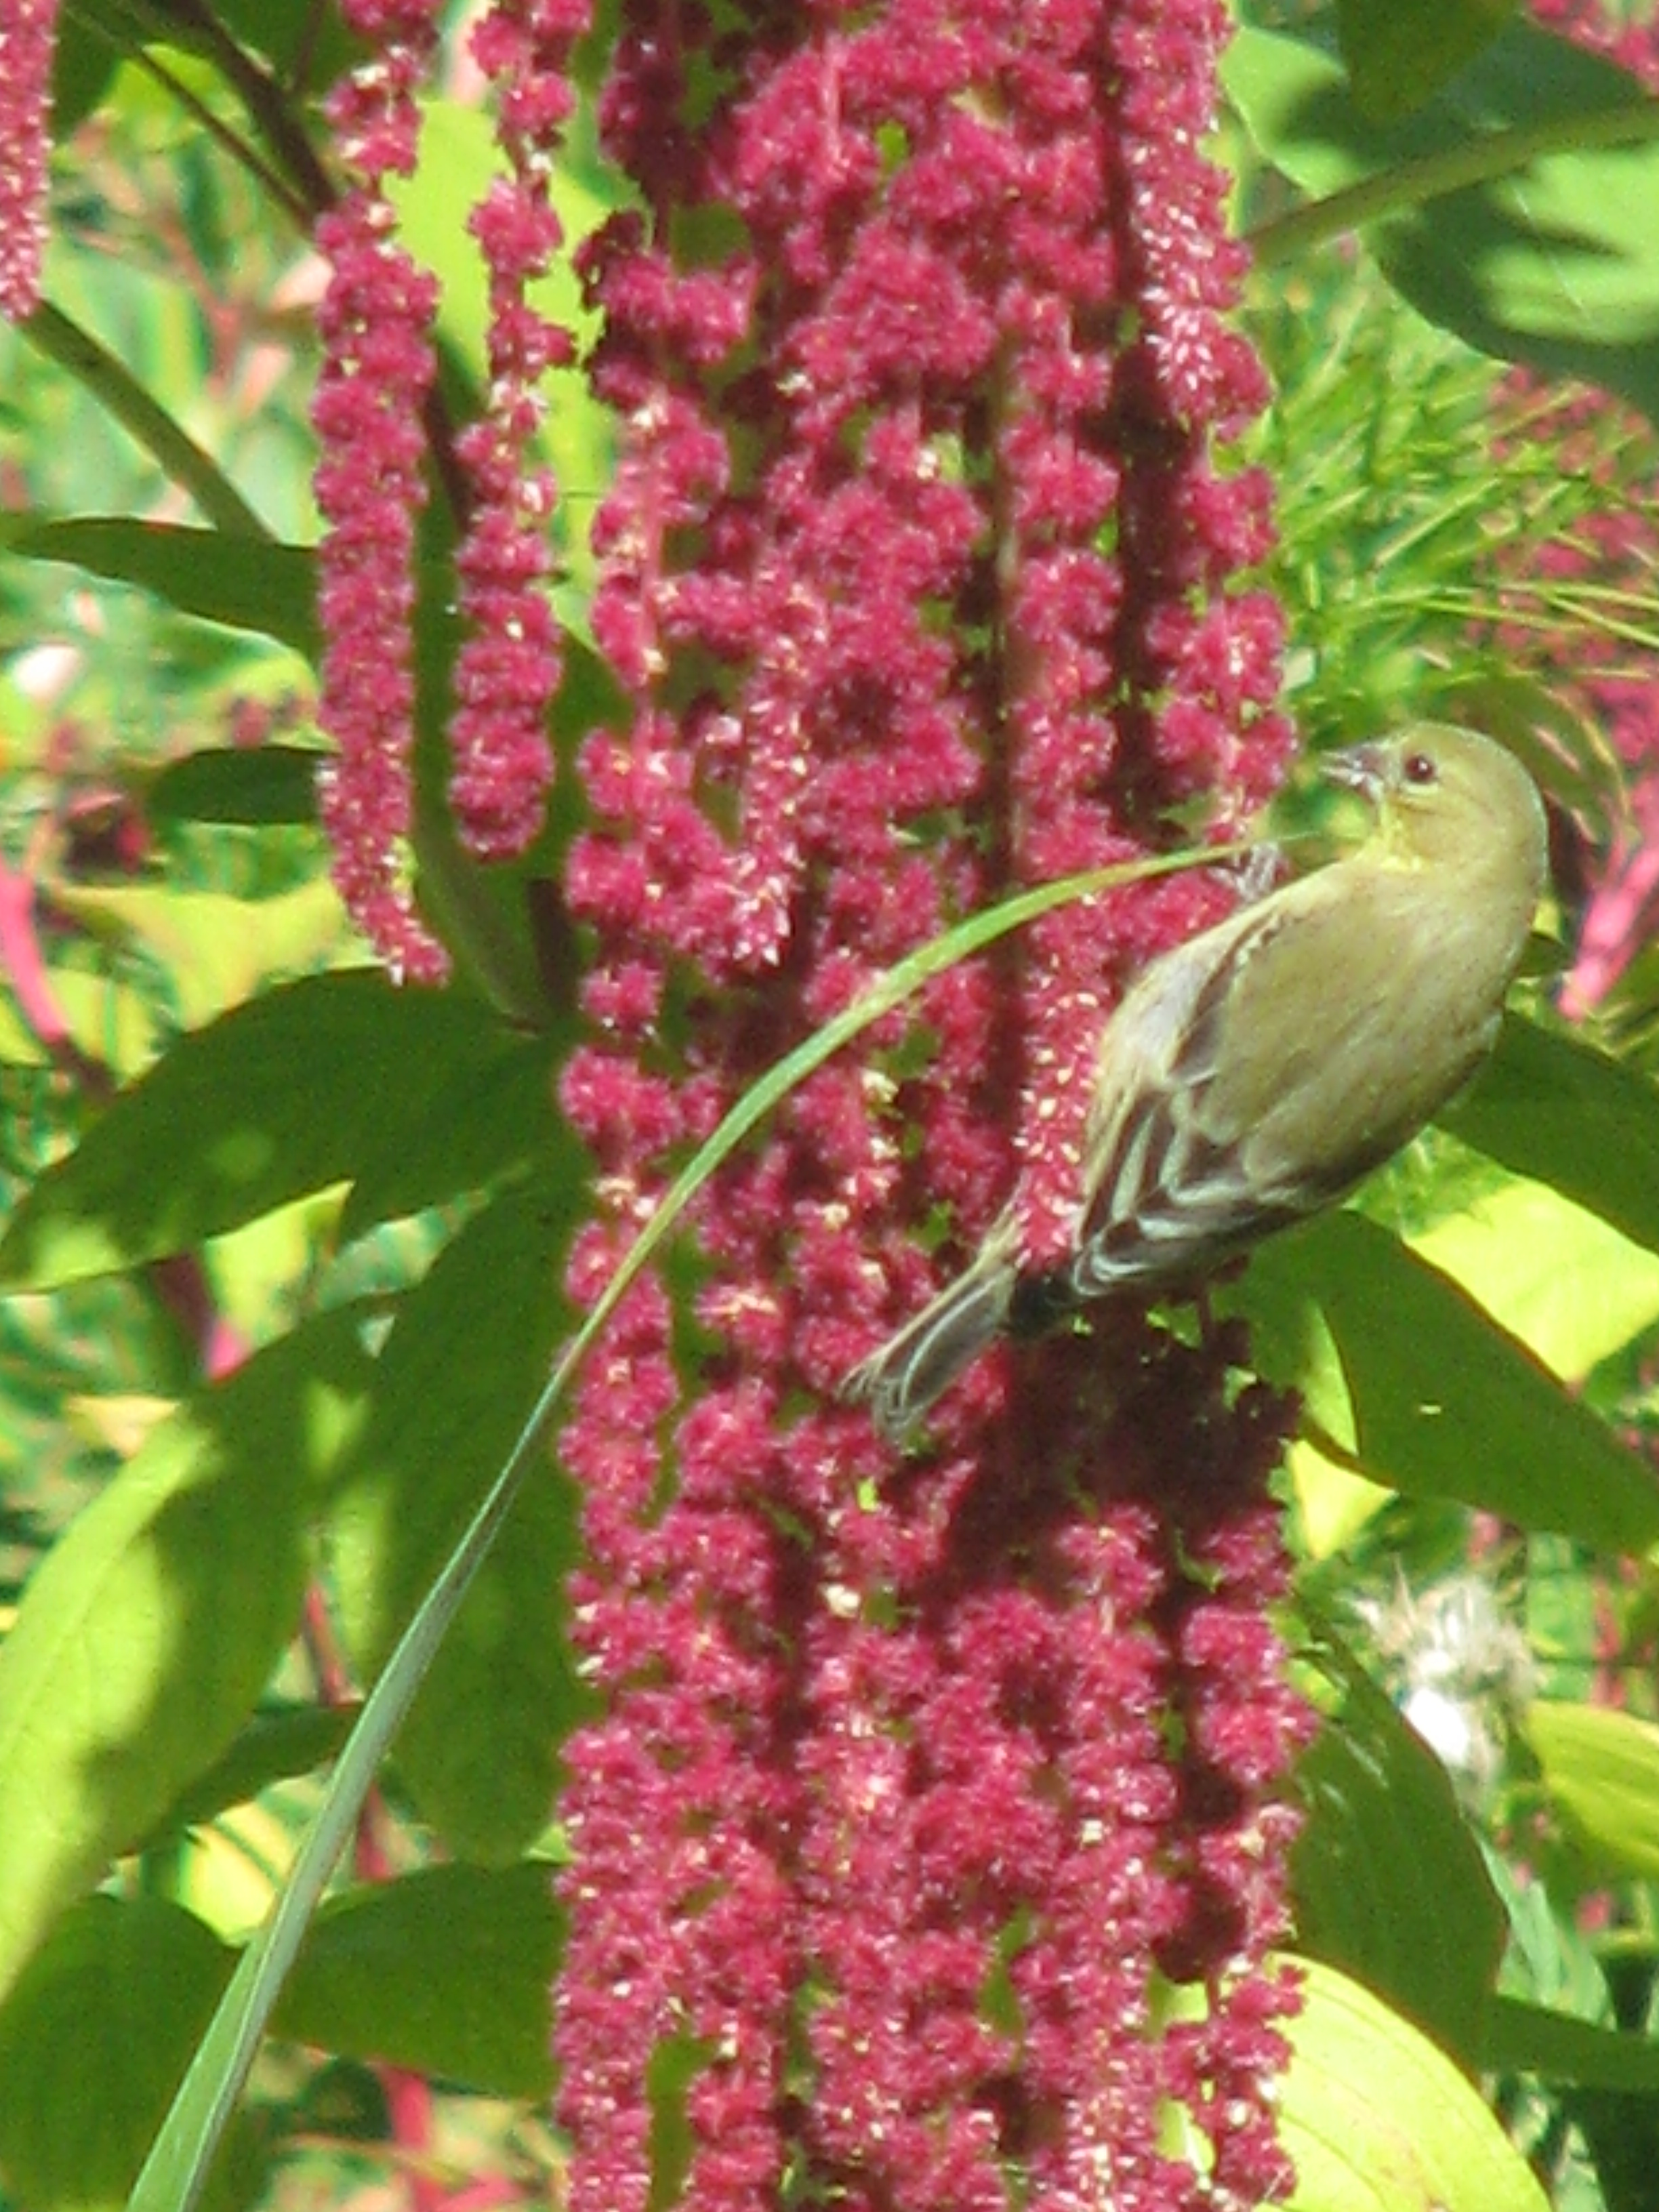
Growing Birdseed: Love Lies Bleeding Amaranth

Love-Lies-Bleeding amaranth is a dramatic addition to your garden… ask a bird! We’ve participated in Cornell University’s winter Project Feederwatch for about six years. It is a volunteer amateur scientist-type program where, from November through March, you fill bird feeders and two days a week count how many birds come. Then you report your results on an online form. This helps trace changes in migration patterns and in habitats in wild birds, as well as sitings of diseased birds.
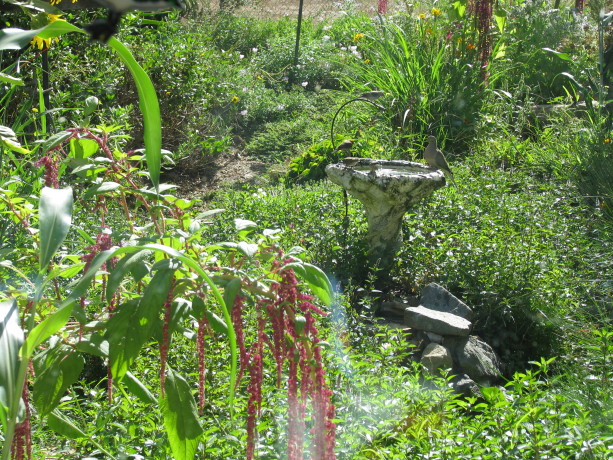
The sound of dripping water attracts birds more than food does… from long distances, too. This year I found out that most birdseed is contaminated by insecticide; some brands are reported to have illegal levels of pesticides in them. Geez! How am I going to get around that problem? I’m not sure about this winter, but I’m going to grow more of my own birdseed. In the past we’ve rolled pine cones in peanut butter and hung them out for woodpeckers and many other birds. I’ve also grown sunflowers, for both their seeds and for their leaves, which lesser goldfinches just love to eat! This year I planted heirloom Love Lies Bleeding Amaranth (Amaranthus caudatus) to some pretty spectacular results. Yes, this is one of the types of amaranth that produces an edible seed for humans; the leaves are edible as well. It can grow 3 -6 feet, with long ruby-red falls of seed heads that the birds just love.

One of our Finch Frolic Finches feeding! There are many other amaranths to grow for both your own consumption as well as for the birds. Sometimes you grow it for yourself and end up feeding the birds! Of course there are many plants which attract hummingbirds all year, especially those with tubular flowers. Why do you want to attract birds? Besides their right to habitat, and their appeal to our better selves, all native animals play important roles in the preditor/prey relationship in a healthy garden. The birds may eat some of your produce, but they are also eating large amounts of bugs. They are also pooping, and you know how valuable poop is to any garden! If you plant a bird garden away from your vegetable crops, then plant your veg crops using the polyculture method, you will have birds and food for yourself as well. Please, please don’t put up those dangerous tree nets! They tear apart your trees when you try to remove them, they don’t really work, and birds can be stuck in them. When they are on the ground snakes are trapped in them! No plastic netting. Ever. Please!
Try planting some amaranth – especially this one with the dramatic name and dramatic fall of color – next spring when you plant a bird garden. Or in your edible forest garden and plant guilds. Or between your fruit trees, or along the back of your flower beds. Take a nibble for yourself if the birds will let you!
You May Also Like
Native Insects and IPM
- Animals, Bees, Chickens, Health, Natural cleaners, Other Insects, Permaculture and Edible Forest Gardening Adventures, Pets, Quail, Worms
DE for Birds, and More About Chickens
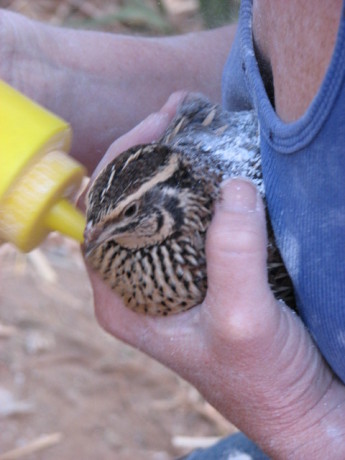
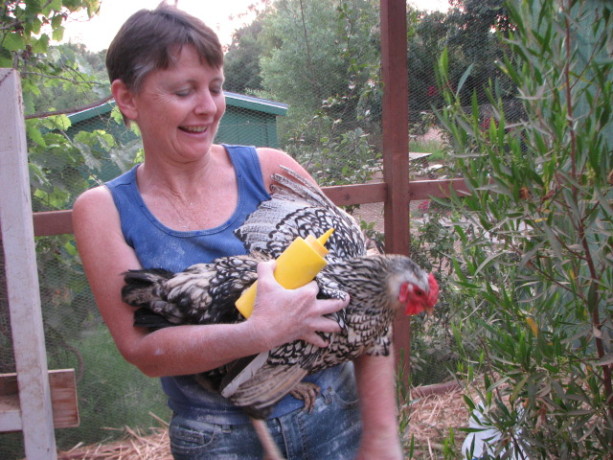
A little mustard with your quail? Cleopatra being treated. I’ve written about using Food Grade Diatomaceous Earth around plants to keep down ants and other sectioned insects. It is also used around the feet of my bee hives; as long as it isn’t where bees and other beneficials go it won’t hurt them because it has to be on the bug to work. I’ve also used FGDE around my cat’s bedding to kill hatching flea eggs, and have rubbed it into their fur. It is scentless, edible (will help kill interior parasites when eaten), tasteless, and the food grade is so fine that it won’t hurt your lungs if you breathe it in, although if you have lung conditions you should wear a mask. More about FGDE in a minute.
Some of our laying hens have difficulty laying eggs recently. Chickpea we found panting on the ground in a wet spot, with ants on her. She had a soft-shelled egg break inside of her.

Madge in the house cage, recooperating. Madge, our partially blind RIR passed a soft shelled egg, then was ill for a day when she passed a broken shell. Warm Epsom salts baths and time spent in the house cage with a heating pad helped both of them. Because of the threat of infection I used some of the Cephalexin left over from our dog (divided into small doses) on both of them and they recovered. My daughter finally deduced that in the mornings when the pullets and hens were released the big girls ran over to eat the chick mash. It probably tastes better than the lay pellets, and more importantly in their little brains it kept the pullets from eating it. Even with the supplemental oyster shell the big girls were probably not getting the calcium and other nutrition their bodies needed to make good eggs. It was time to switch the small girls to lay mash anyway, so I did and yesterday we had all four of our laying hens lay eggs… first time in a long time!
While we were bathing Madge in the sink for her illness, my daughter noticed mites on her. Now a few mites are usual on everyone and everything. When you can see several on the skin when you blow on the feathers, then you have a problem. She wasn’t having a problem, but at that time we still didn’t know what was wrong with her. After she was better we instituted FGDE Day in the Fowl Fortress.
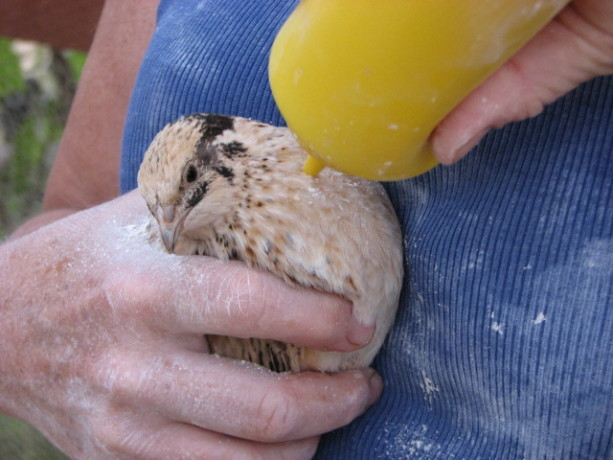
Miss Lemon, one of three coturnix hens, is treated with FGDE. You can buy pricey powder dispensers, which usually clog. I bought a set of mustard and ketchup dispensers for less than two dollars and they work just fine. We caught all the hens and our three quail and puffed FGDE into their feathers and, of course, all over ourselves.
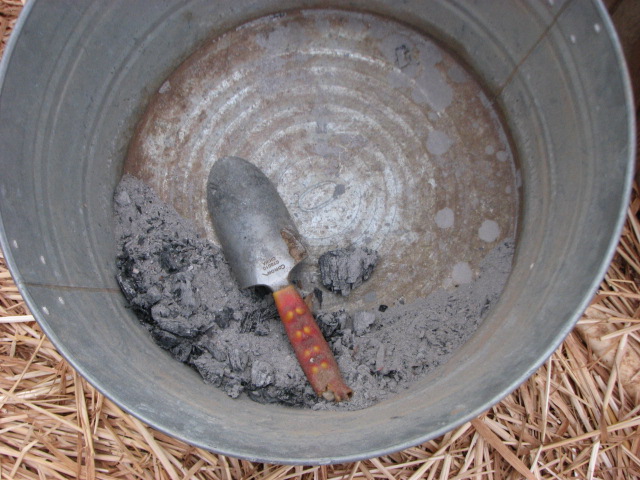
We treat ourselves, too. I puffed it into the nesting boxes, and into the ‘attic’ of the pullet house where they roost, and into the straw in the coops. Since we don’t have a problem we don’t need to treat often, just every few months or so. Any that they eat helps with any internal parasites as well. We also had some wood ash left over from making pizzas in Harry Mud the cob oven and sprinkled them where the birds take dust baths. That fine ash helps to keep their feathers clean and keep away mites too.
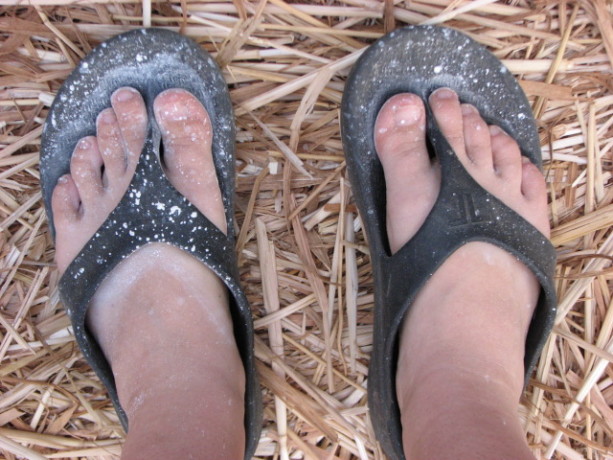
Wood ashes are good for dust baths. Very little went a long way, so even after treating all the hens and the Fowl Fortress, the cat bedding repeatedly, several cats, the feet of the bee hives, a variety of plants, and the feet of the food tables I’d set up for a garden party to protect from ants, along my window sills and around the privy where ants were getting in, I’m still working on the first bag that I bought on Amazon.com.
Amelia objecting to her dusting. When you compare with buying expensive different poisons for all of these problems, the health hazards and impact on non-target species including ourselves, and the negative impact on the Earth, one bag of FGDE is such a deal that you really can’t not try it.
You May Also Like
Native Insects and IPM
-
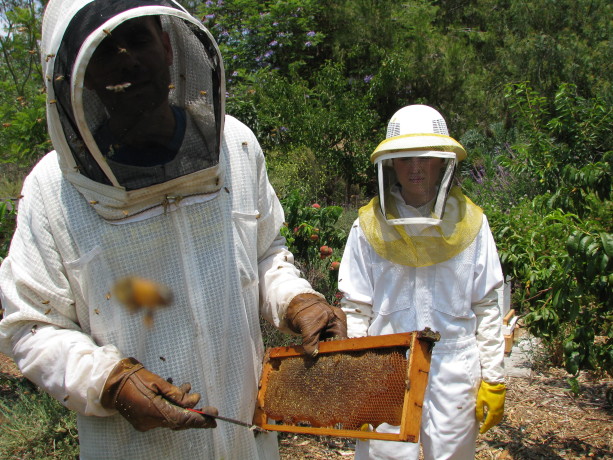
Why Is July So Busy?
Quentin holds a frame full of wax-capped honey cells while Miranda looks on. Whew! What an early hot spell, and what a lot of things to do! The daylight is longer but animals, plants and people have a way of filling it all up. It is almost 9 pm again and still no dinner for humans this night. It is cooking. We’ve had a sick kitty, Maow, who we had to put to sleep due to kidney failure yesterday, and our ancient dog Sophie keeps us busy nursing her. She refuses dog food and only will eat veggie sausage and eggs, but none of our hens are laying in this hot weather. One of our chickens, Chickpea, had an egg break inside of her and had to have an Epsom salts warm sink bath which worked its chicken magic and pulled her through. Tonight our partially blind Rhode Island Red, Madge, has been acting funny so into the sink she went. The hens all like the warm bath so much that we don’t have to hold them down.
The garden produce has been good and keeping up with ripening fruit while beating the birds to it has been my newly graduated collegiate daughter’s role. Irrigation difficulties have created large problems, however, and lots of seeds never germinated, and several crops have shrivelled due to irregular or not enough water, while some others were drowning because of holes in the lines. Minerals from our hard water have clogged up holes in the lines, and running vinegar through the system seems to dissolve the calcium pretty well. If only it repelled the gophers who occasionally nip the underground lines, or the weeding tools that unerringly nick them.

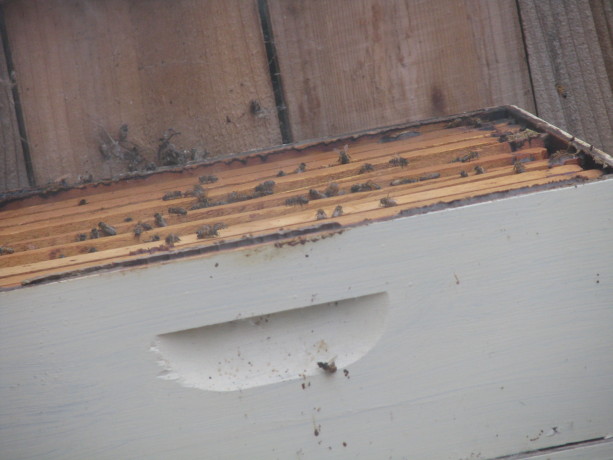
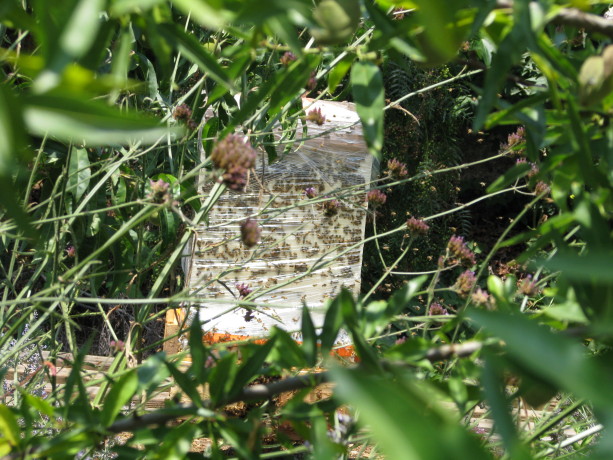
Quentin and Miranda with one of the new hives of Italian bees put up two months ago. We have two co-op bee hives, set in place by Quentin Alexander of BeehiveSavers.com. He performs humane bee removal, and also has the co-op program where he sets up hives in your yard with calm Italian bees. You pay for the equipment, and he monitors the hive for a year to study the bees and see what is affecting the disappearance of European honeybees. He harvests the honey and gives you half of it, too. This is a perfect set-up for me since I just don’t have the time to deal with the bees anymore, and because I swell up when stung now. We had a swarm in a stack of empty bee boxes next to our trashcans for a couple of years and they never gave us any trouble, but I wanted to move them to the Bee Garden.

Quentin beginning to move a two-year hive that had settled in my stack of supers. The bees objected. When Quentin moved them a few months ago, he found out that they were an enormous ‘hot’ hive… pretty aggressive.
Bees complaining about having their home ripped apart… I can’t blame them. Yesterday he came with two ‘nuc’s, or ‘nucleuses’. A ‘nuc’ is a new queen bee and about a pound of workers devoted to her. With my daughter’s help, and with me hanging back with the camera, he opened the moved hive. It was breezy, humid, mid-day and in the 90’s, all bad conditions for opening a hive.
The wild hive wrapped with the ‘hot’ queen isolated in one of the supers by queen excluders. She will be replaced by a gentle queen. He looked for the old queen and couldn’t find her, so trapped her in one of the three boxes he thought she was in, moved honey and larvae over to two new boxes and set up the new queens. The idea is that the new kinder and gentler queens will breed more docile bees, and in a few weeks the whole swarm will not only have been divided into two but will have produced calm bees.
Explaining this to bees who were stressed from drought, heat, direct sunlight and humidity while tearing apart their hive, taking out brood and honey and looking to kill their queen, was a different story. A normal hive can have 60,000 bees or more in it at its peak. This was a larger hive. The bees decided that Quentin – and anyone else in the area – were going down with them. I don’t blame them. Attack my family and I’d come after you, too. Quentin’s gloves were studded brown with a forest of stingers. The neighbor called asking about bees because his gardeners were stung.
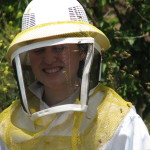
Miranda surrounded by very angry bees. No stings penetrated her bee suit, but on a humid day in the mid-90’s that suit sure was hot. We had to walk the property, roll in some jasmine to mask the ‘anger’ pheramone with which our bee suits were covered, and dash into the house. Quentin drove off in his suit with bees in his car – not an unusual sight for a beekeeper, but with the BeeHiveSavers logo on the side it looked very appropriate. We had to stay in the house until dusk when the bees went to bed (they don’t fly at night). Today the rest of the property was back to normal, but we did stay away from the Bee Garden for several more days. There are peaches to harvest in there, too, but we’ll have to donate some to the birds.
You May Also Like
Native Insects and IPM
- Bees, Gardening adventures, Other Insects, Permaculture and Edible Forest Gardening Adventures, Seeds, Soil
Hairy Vetch

Attractive flowers and seeds. Hairy vetch (Vicia villosa), also known as winter vetch is a nitrogen-fixing plant that is used mostly for cover-cropping in monoculture fields. Native to Europe and Asia, it is a winter plant sown in the Fall and, in places where it snows, is killed off with the cold or tilled into fields. When a nitrogen-fixing plant dies or is cut back, roots die and release the nitrogen nodules into the soil. Here is sunny San Diego the vetch thrived since I sowed it in Spring of last year. It is a pretty, vining plant, with lovely dark purple blooms that bees and other pollinators love. It produces pea pods like its edible relative the fava bean, but I wouldn’t eat them. The seeds may be bad browse for livestock as well. The roots help hold soil during winter rains, too.
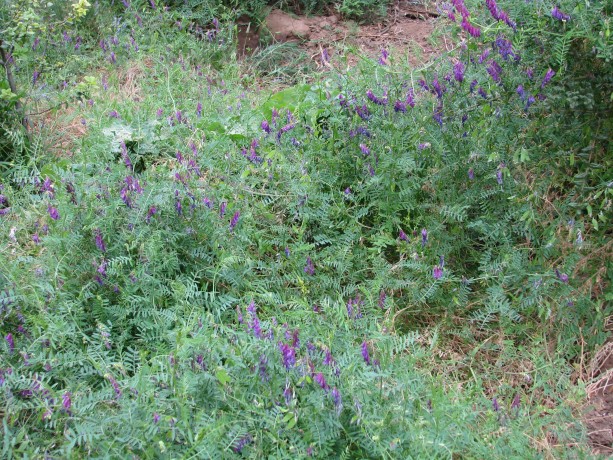
Hairy vetch clamboring all over the place Vetch can be hard to get rid of because it reseeds easily. It will also climb up bushes, competing with the bush for sunlight. If I didn’t know about the nitrogen-fixing properties and if the bees didn’t like it so much, I’d suspect it of being an invasive.
To control it I take my trusty hand scythe and cut the vetch out of bushes and close to the ground. I leave the vines to decompose and protect seedlings that I plant to take advantage of the newly-enriched soil.
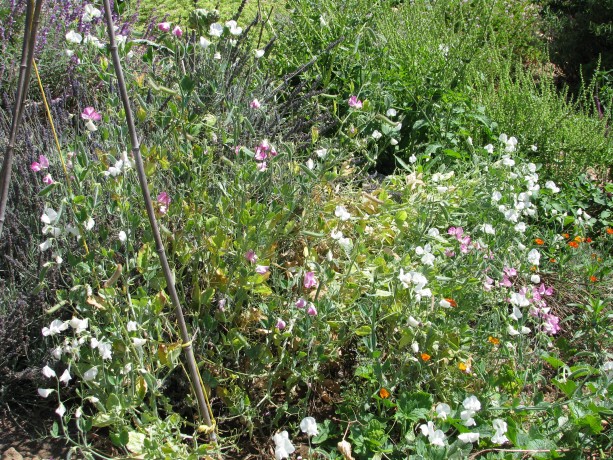
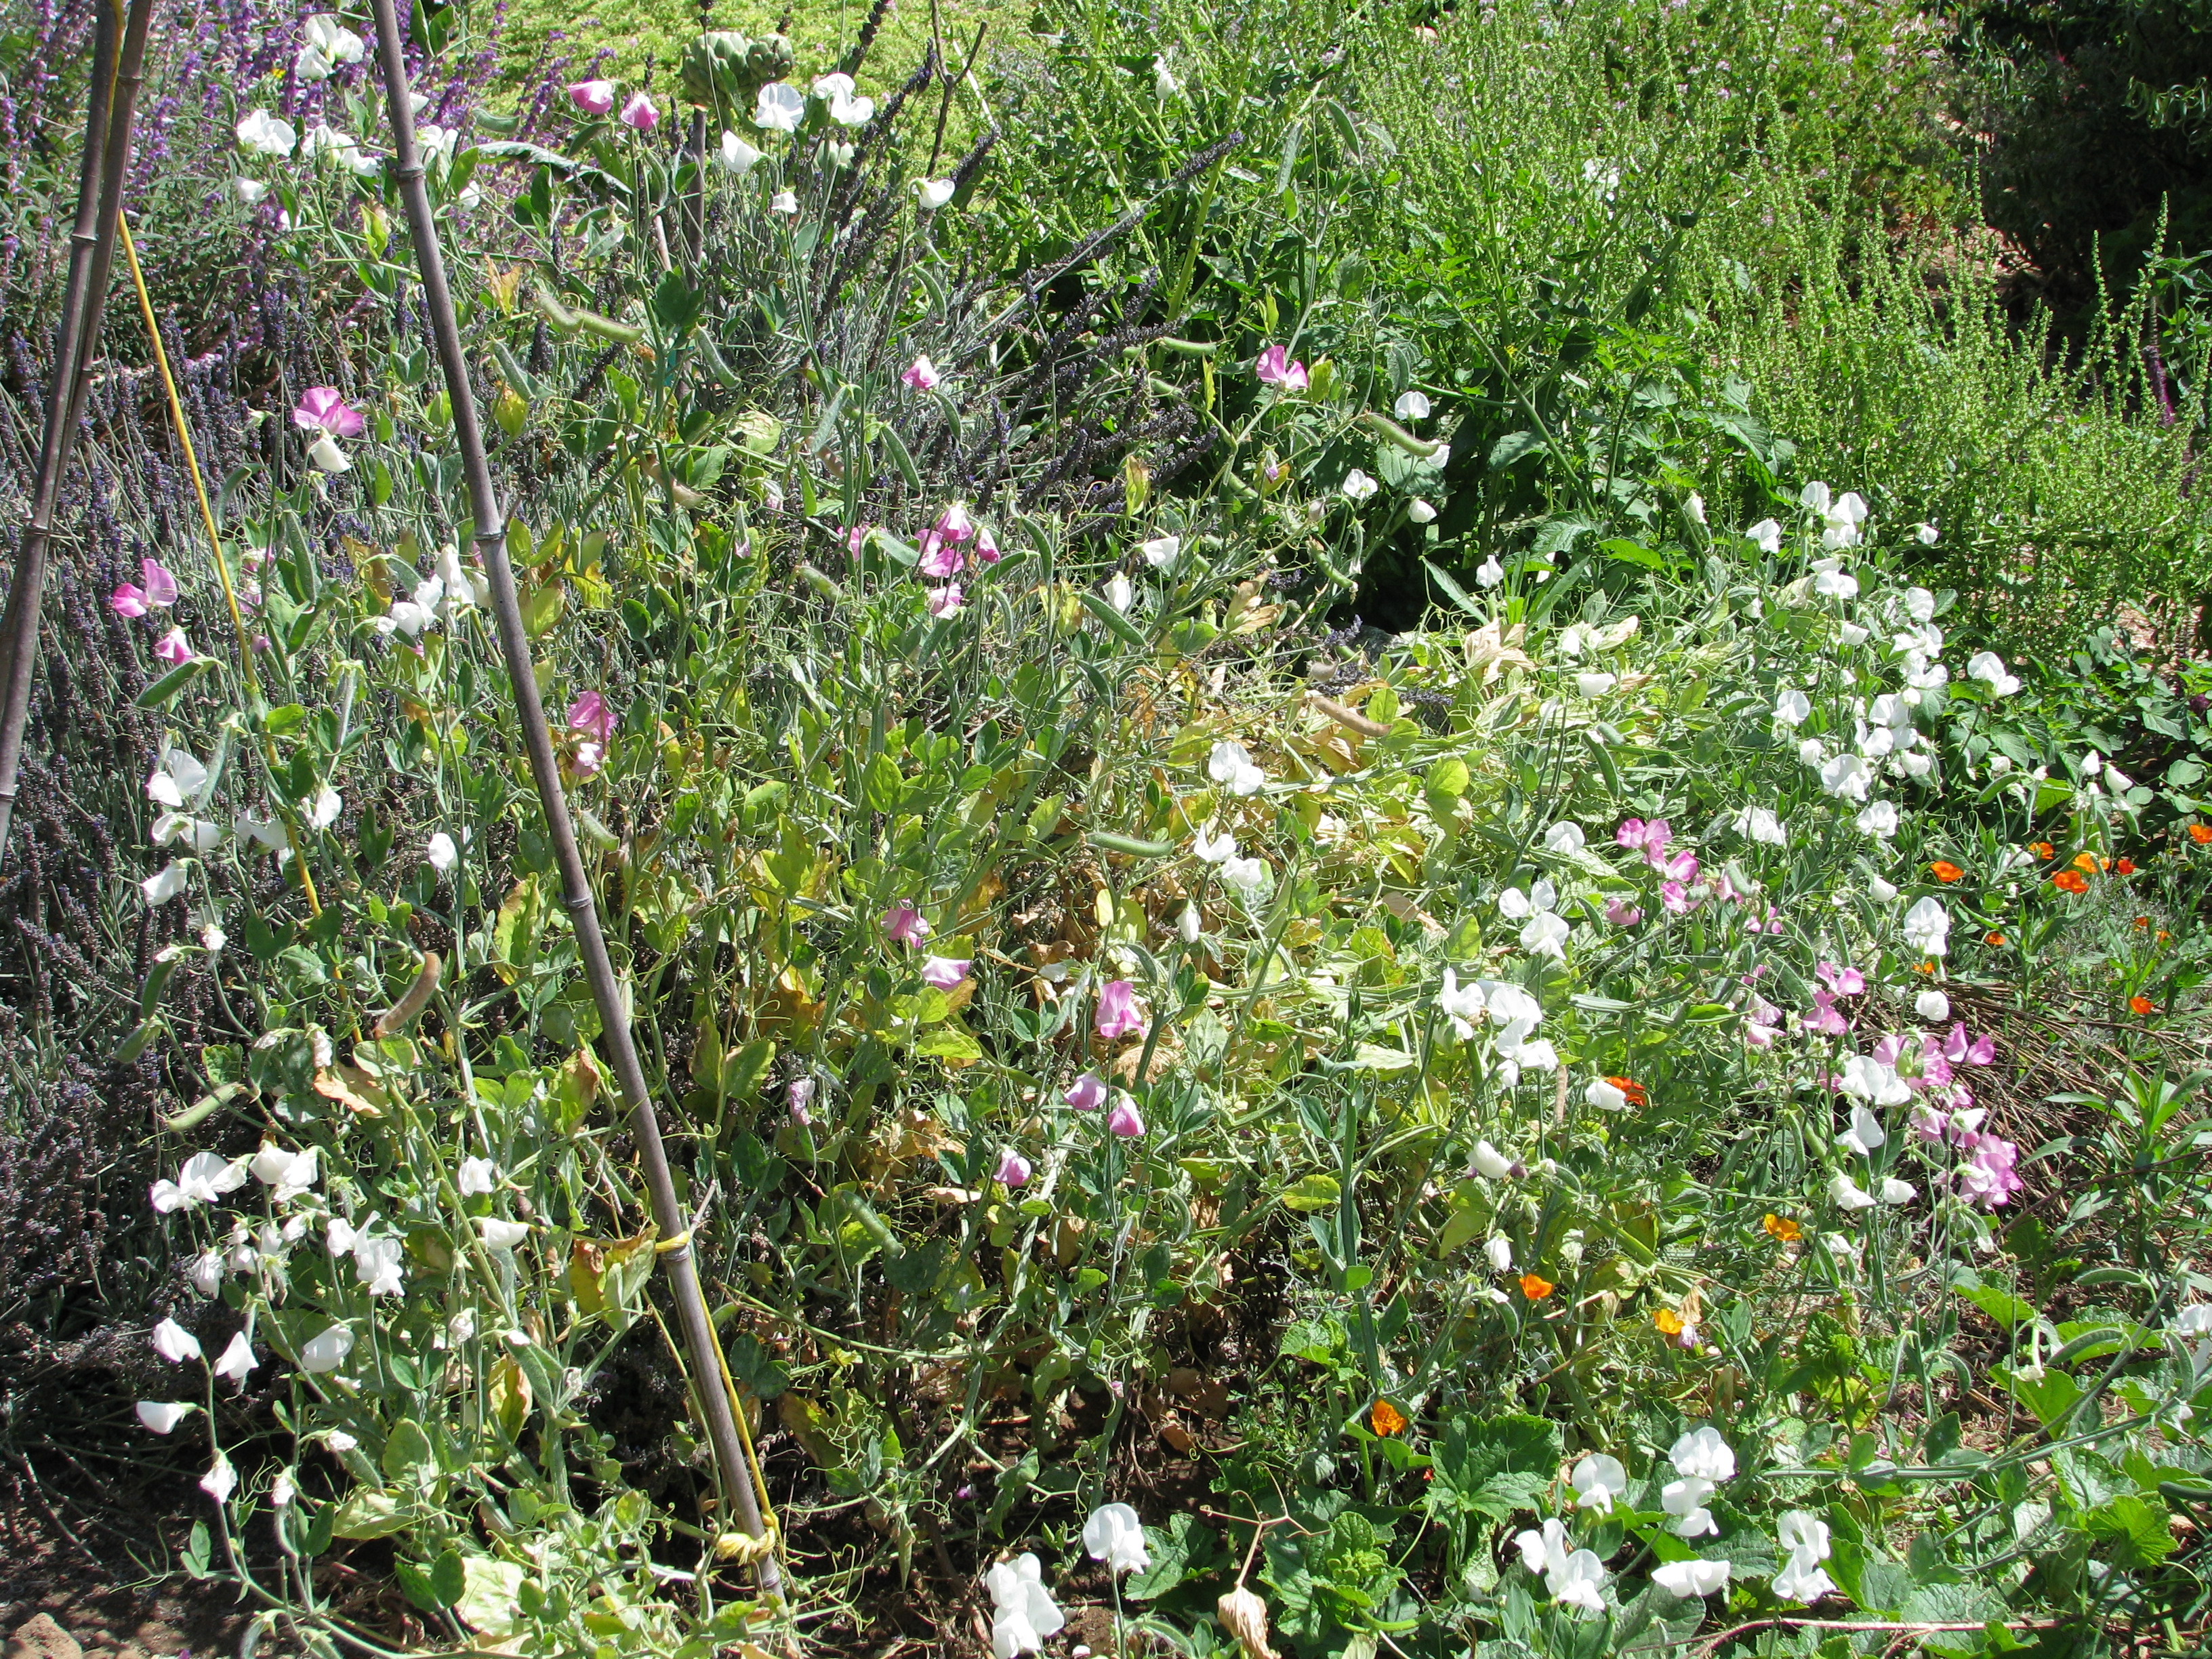
A mass of sweet peas climbing a lavendar. If you don’t want a cover crop that is so aggressive I suggest sowing a mixture of lupine, sweet peas, edible peas and fava beans in the Fall here in Southern California, and again in early Spring. In cold areas check with your farm advisor on when to plant.
You May Also Like
Native Insects and IPM
-
Fruit Tree Guilds: Making Your Trees Healthy and Happy
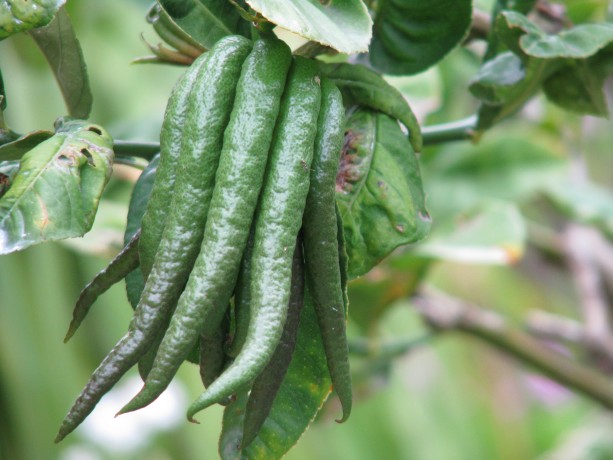
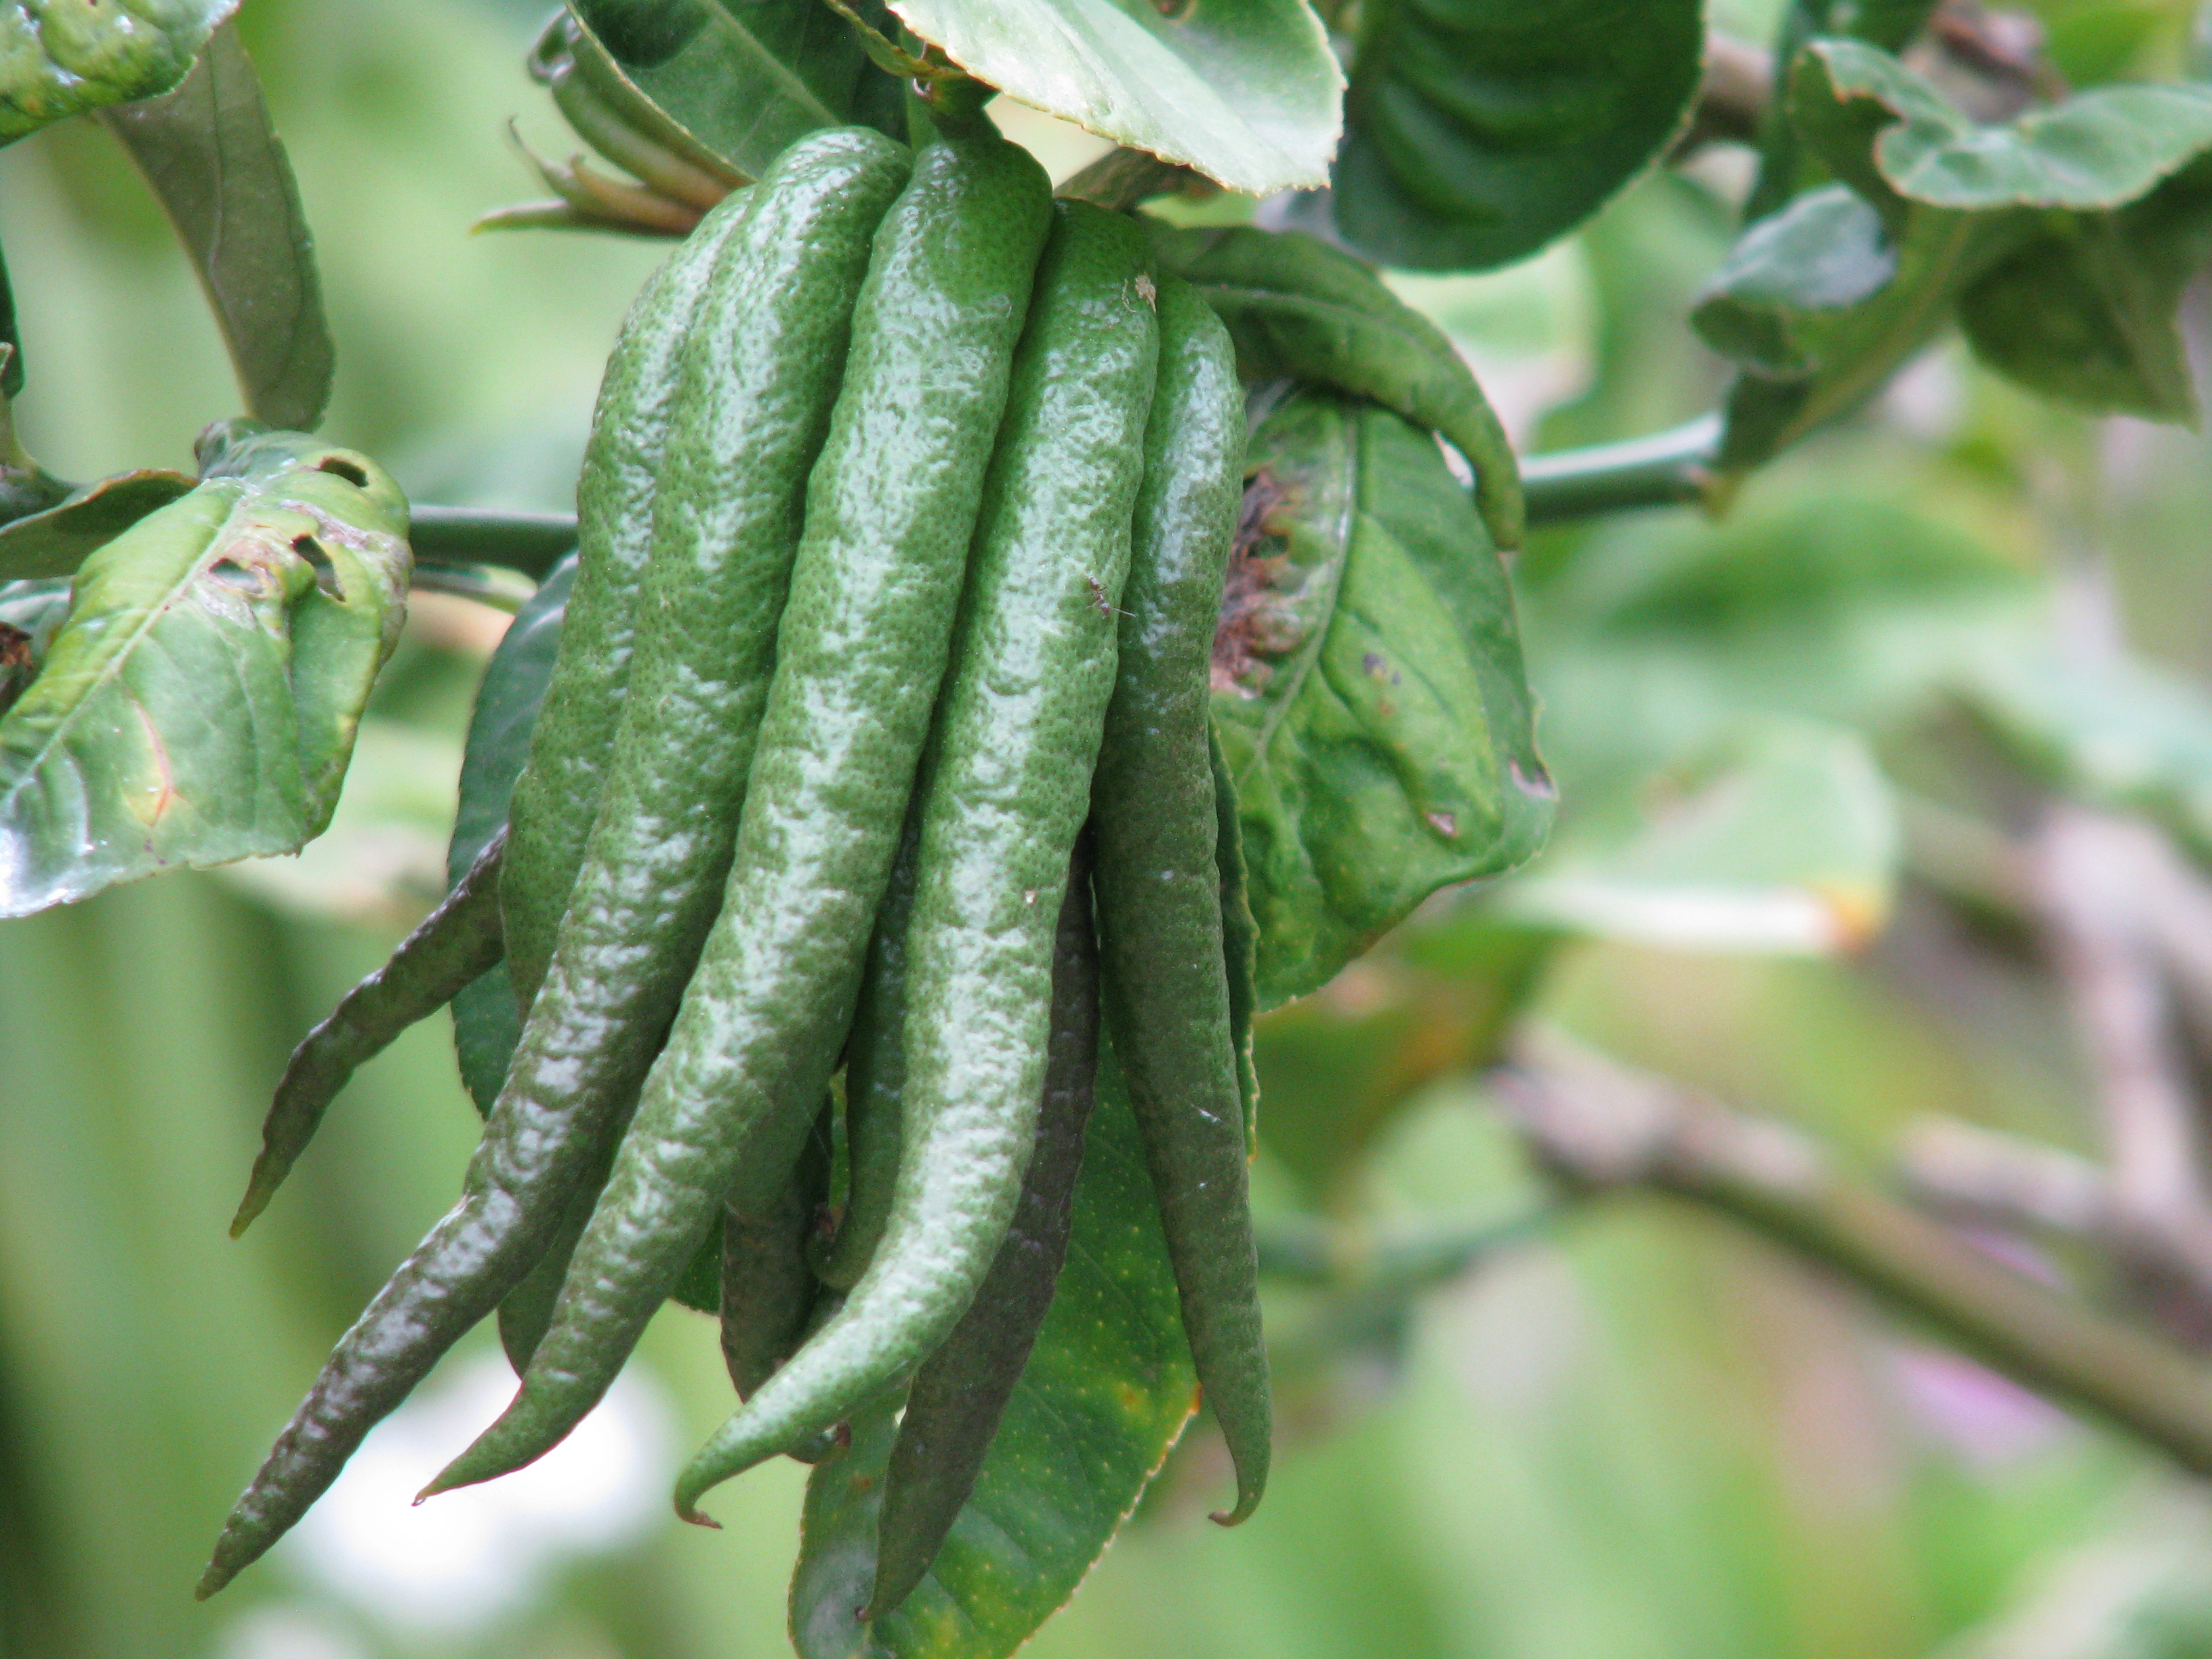
An unripe Buddha’s Hand citron. When bright yellow it freshens a room with a citrusy floral fragrance; is zest is wonderful in cooking and it can be candied. Or simply stuck up a sleeve and used to frighten people. A guild in permaculture terms is, as you know, an arrangement of symbiotic plants that serve as a plant community for the benefit of the whole. Visitors to Finch Frolic Garden often remark that planting guilds sounds so difficult; that they’d need to study so much about plants that it would be impossible for them to do. Not so. However, it isn’t just a whole bunch of plants planted so that they are stepping on each other’s shoes. The typical permaculture plant guild is defined by plants which do these functions: an upper canopy tree (shade, mulch from falling leaves, deep tap roots, roosting for birds which poop, hunt, etc., traps humidity, catches and filters rain and fog moisture), a lower canopy tree (same functions but shorter), a ground cover (habitat for small hunters and moisture trap), a miner plant (deep tap root to bring nutrients from deep in the soil to its leaves which deliver said nutrients when they decompose, and tap root breaks up soil and gives passage for water and worms), a nitrogen-fixing plant (works symbiotically with bacteria to trap nitrogen from the atmosphere on root nodules, which release into the soil when the top dies), and a pollinator-attractor (flowers for bees and all the tiny native bees, wasps and flies).
Buddha’s Hand citron (Citrus medica) happy in a guild of yarrow, sweet peas, artichoke (the leaves of which are regularly slashed and dropped), Cleveland sage, scented geranium and a variety of bulbs. The formula isn’t that complicated. I challenge you to come up with an example of each right now. Yes, you can do it. (Dum dee dum… I’m waiting for you to be done before I move on. ) Have it? Okay, here’s a quick example. Mulberry, dwarf peach, strawberries, carrots, sweet peas, dwarf yarrow and fava beans. The canopy trees will lose their leaves allowing sun to warm the understory plants in the winter. Strawberries make an excellent ground cover that grows food and loves the fungus-rich loam made by decomposing leaves. Carrots like cool weather and will thrive until ready to be pulled (and tops broken off and thrown on the ground) about when the trees fully leaf out. Sweet peas attract insects, smell great, and as a bonus are nitrogen fixers, and can twine up the tree trunks. Dwarf yarrow helps choke out grass, is used for many purposes including as a dye plant, and its flowers are clusters of small flowers perfect for the tiny pollinators, and bush peas are completely edible and also fix nitrogen. See? Easy.

Just in time for summer’s heat, a kabocha squash is rapidly covering the ground around the variegated dwarf orange and a young pink guava. I have to pull squash out of trees because they think they own the world, and it hurts to hit your head on a dangling pumpkin. I leave the vines to decompose in place after harvest. I have many, many trees which were all planted at the same time, and some of them have been neglected. A combination apple tree had been planted in extremely heavy clay and it hasn’t grown much in two years although it keeps trying to produce fruit. Bermuda grass (I cross myself when I mention it) has infiltrated the area to about four inches down. It is helping to break up the clay, but it is also choking out everything else. Plant guild time.

Bermuda grass in heavy clay right next to the trunk: no good. Last weekend I spent about three hours in the morning (mercifully before the June gloom dissipated so I didn’t roast in the heat) digging up and pulling out as much Bermuda grass as I could from the clay. I’d even soaked the area well the night before. That was the stuff of cob ovens. When I’d finally cleared past the tree (I’ll continue another day; there’s only so much of that my hands can take!), I shoveled in some pigeon guano that my good friends up the street deliver to me (tied with a ribbon! Christmas comes all year for a gardener!). The guano is very high in urea… you can smell the ammonia, but it also has feathers, corn and pigeon peas in it. Pigeon peas are a perennial legume that set nitrogen and produce wonderful pea pods for stir-fry. I watered it in well.

This apple was planted in clay in this planter. Never create a planter around an existing tree; mulch around the trunk will kill it. I had purchased some plants for the area, but to keep costs down just chose some that would fill out and help choke out the angry Bermuda grass bits yearning for revenge. Also, the tree is close by Harry Mud, the cob oven, so I wanted pizza-themed plants for easy picking. I planted strawberries right by the trunk inside the gopher cage in which the tree is planted. They will help retain moisture without compromising the bark of the tree. You never want to pile mulch up around the base of a tree above the root ball because you will rot your tree.
I also planted a tomato, a perennial basil, garlic chives all around the edge (bug protection), sunflowers, a prostrate rosemary and French tarragon. The pigeon peas and corn will very likely sprout. What I didn’t have was an upper canopy, but the tree is on the east side of a shed which protects it from the worst of the summer afternoon sun, and there is a grapevine nearby which produces leaf litter. When daffodil bulbs are readily available in the late Fall I’ll plant a ring of them around the drip line. Gophers don’t eat them, they help keep away the grass, they break up the soil and they are one of my favorite flowers (ranking second to sweet violets). All these plants as they grow up, down and across will help the apple tree, and the apple tree will help them. All of them produce food within easy reach of the cob oven and outdoor dining, are attractive and smell good, too. The tree should flourish. I don’t kid myself that I won’t be pulling Bermuda grass in the future, but the plants will help control it by shading and crowding out.

It doesn’t look like much now, but there are eleven support plants/seeds to help the apple tree now. Friends! If you have citrus trees you should plan a little differently. When trying to understand a plant, think of where it came from and in what growing conditions it thrived. Avocados are from South America, with humidity, rainfall, protection from intense heat, deep leaf litter and adequate drainage. Stonefruit are from areas with cold winters; their leaf drop keeps the roots protected from the freezing that triggers the trees to set fruit (chill factor).

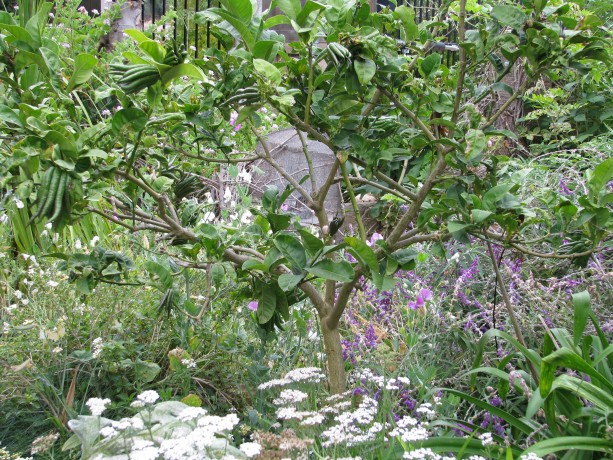
This citrus was planted before the bamboo grew up to shade it. Notice how the leaves grow straight up, and none below? It is aiming to collect light at noon, which is the only direct sun that it receives. He needs to be moved. We think of citrus trees perfuming the air of Spain, Greece or Arabia, but actually they come from Southeast Asia and before that, New Guinea and Australia. All of these places have warm or hot temperatures and plenty of sunlight. Although you can plant stonefruit close together, for citrus it is best to ensure that the trees receive lots of direct sunlight or they will drop leaves and have stunted growth.
This citrus receives sun all day, and is very happy with the tomato, roses and sage that surround it. Raking all the leaves out from under your trees is so wrong. The tree drops leaves because it needs them on the ground around its roots, not because its careless or its waiting for a human to come by and clean up its mess. Leaf mulch makes the ideal conditions for microbial growth and perfect soil, so let it sit. Augment the mulch by giving your tree company of other plants. Unless the tree is allelopathic (secretes a substance that keeps anything from rooting nearby so that it doesn’t like competition, such as walnuts and eucalyptus) then in nature it reseeds close by and allows other plants to grow under it. Give your trees some appropriate company, and you’ll be rewarded with lots of food, medicine, habitat and very little work except for harvesting. Can’t beat that with a stick.
-
New Bog
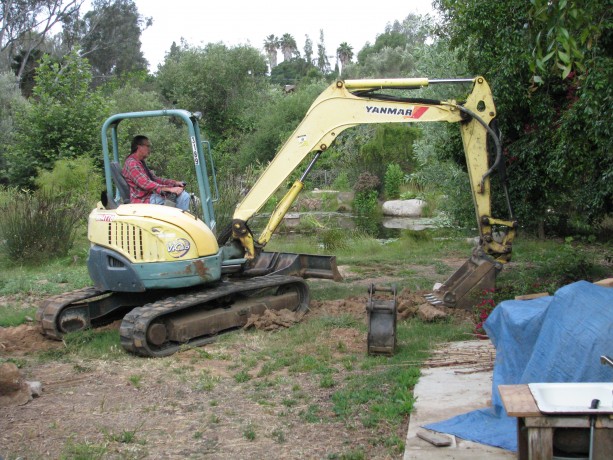
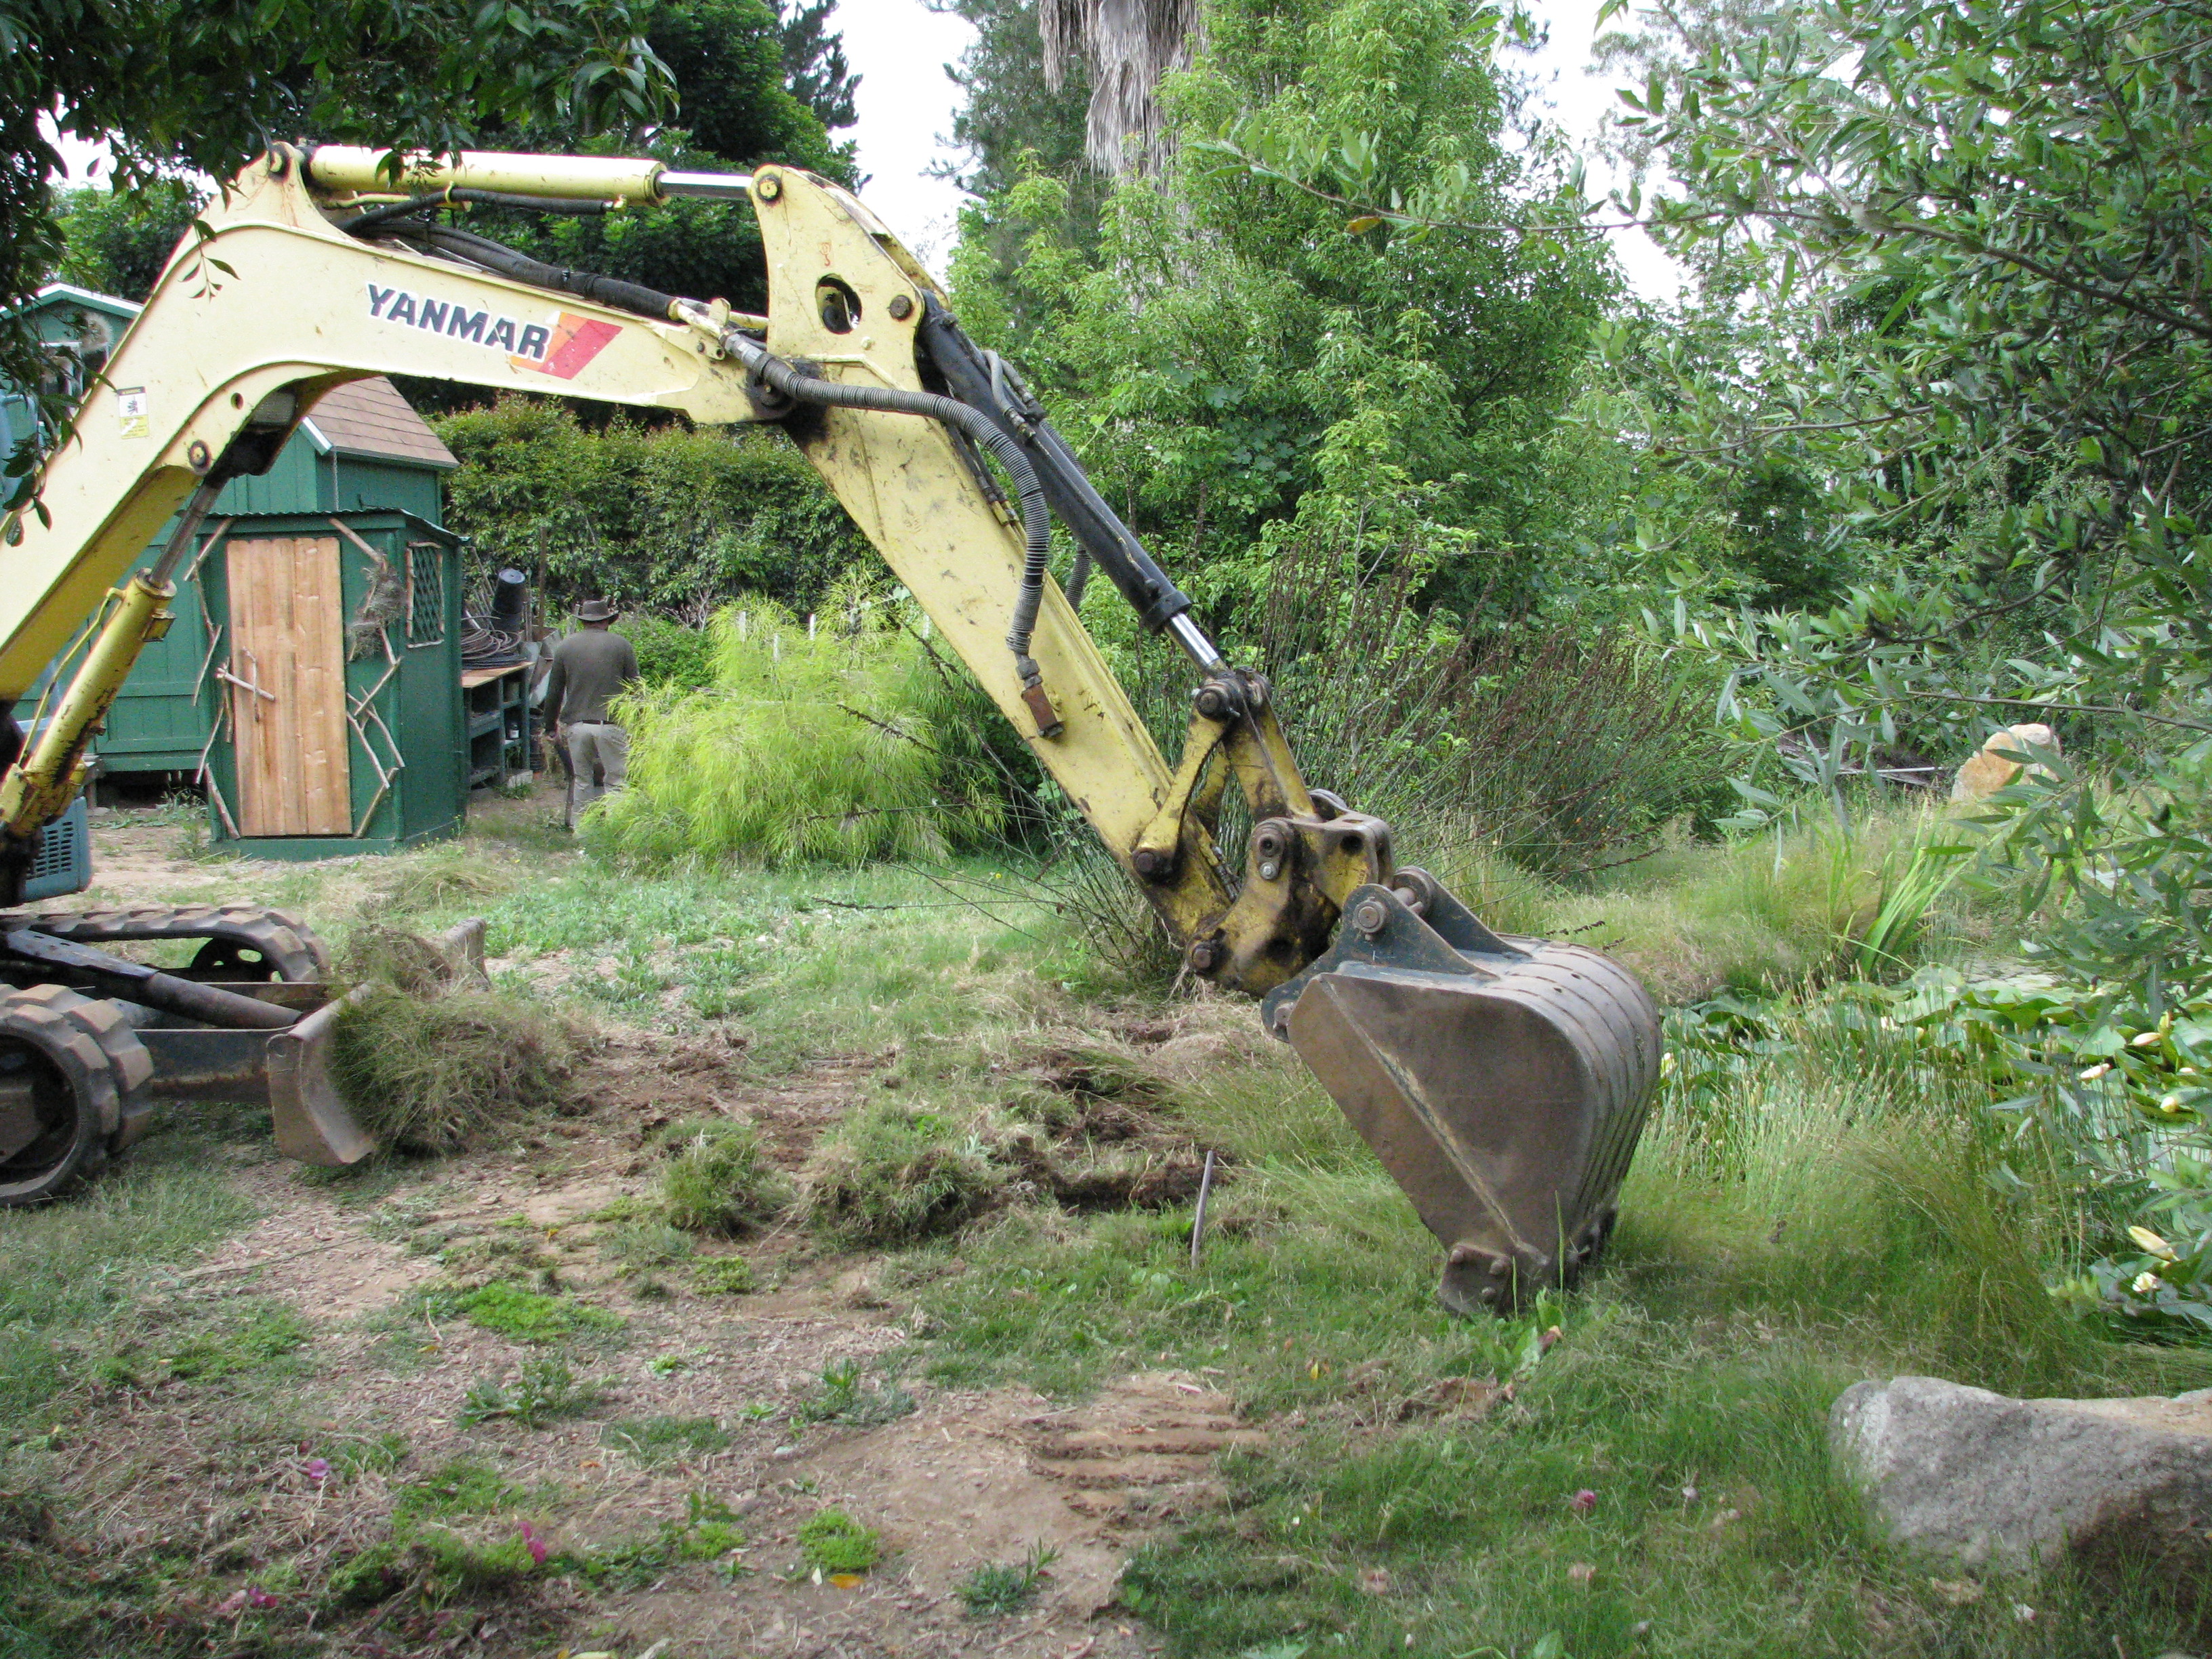
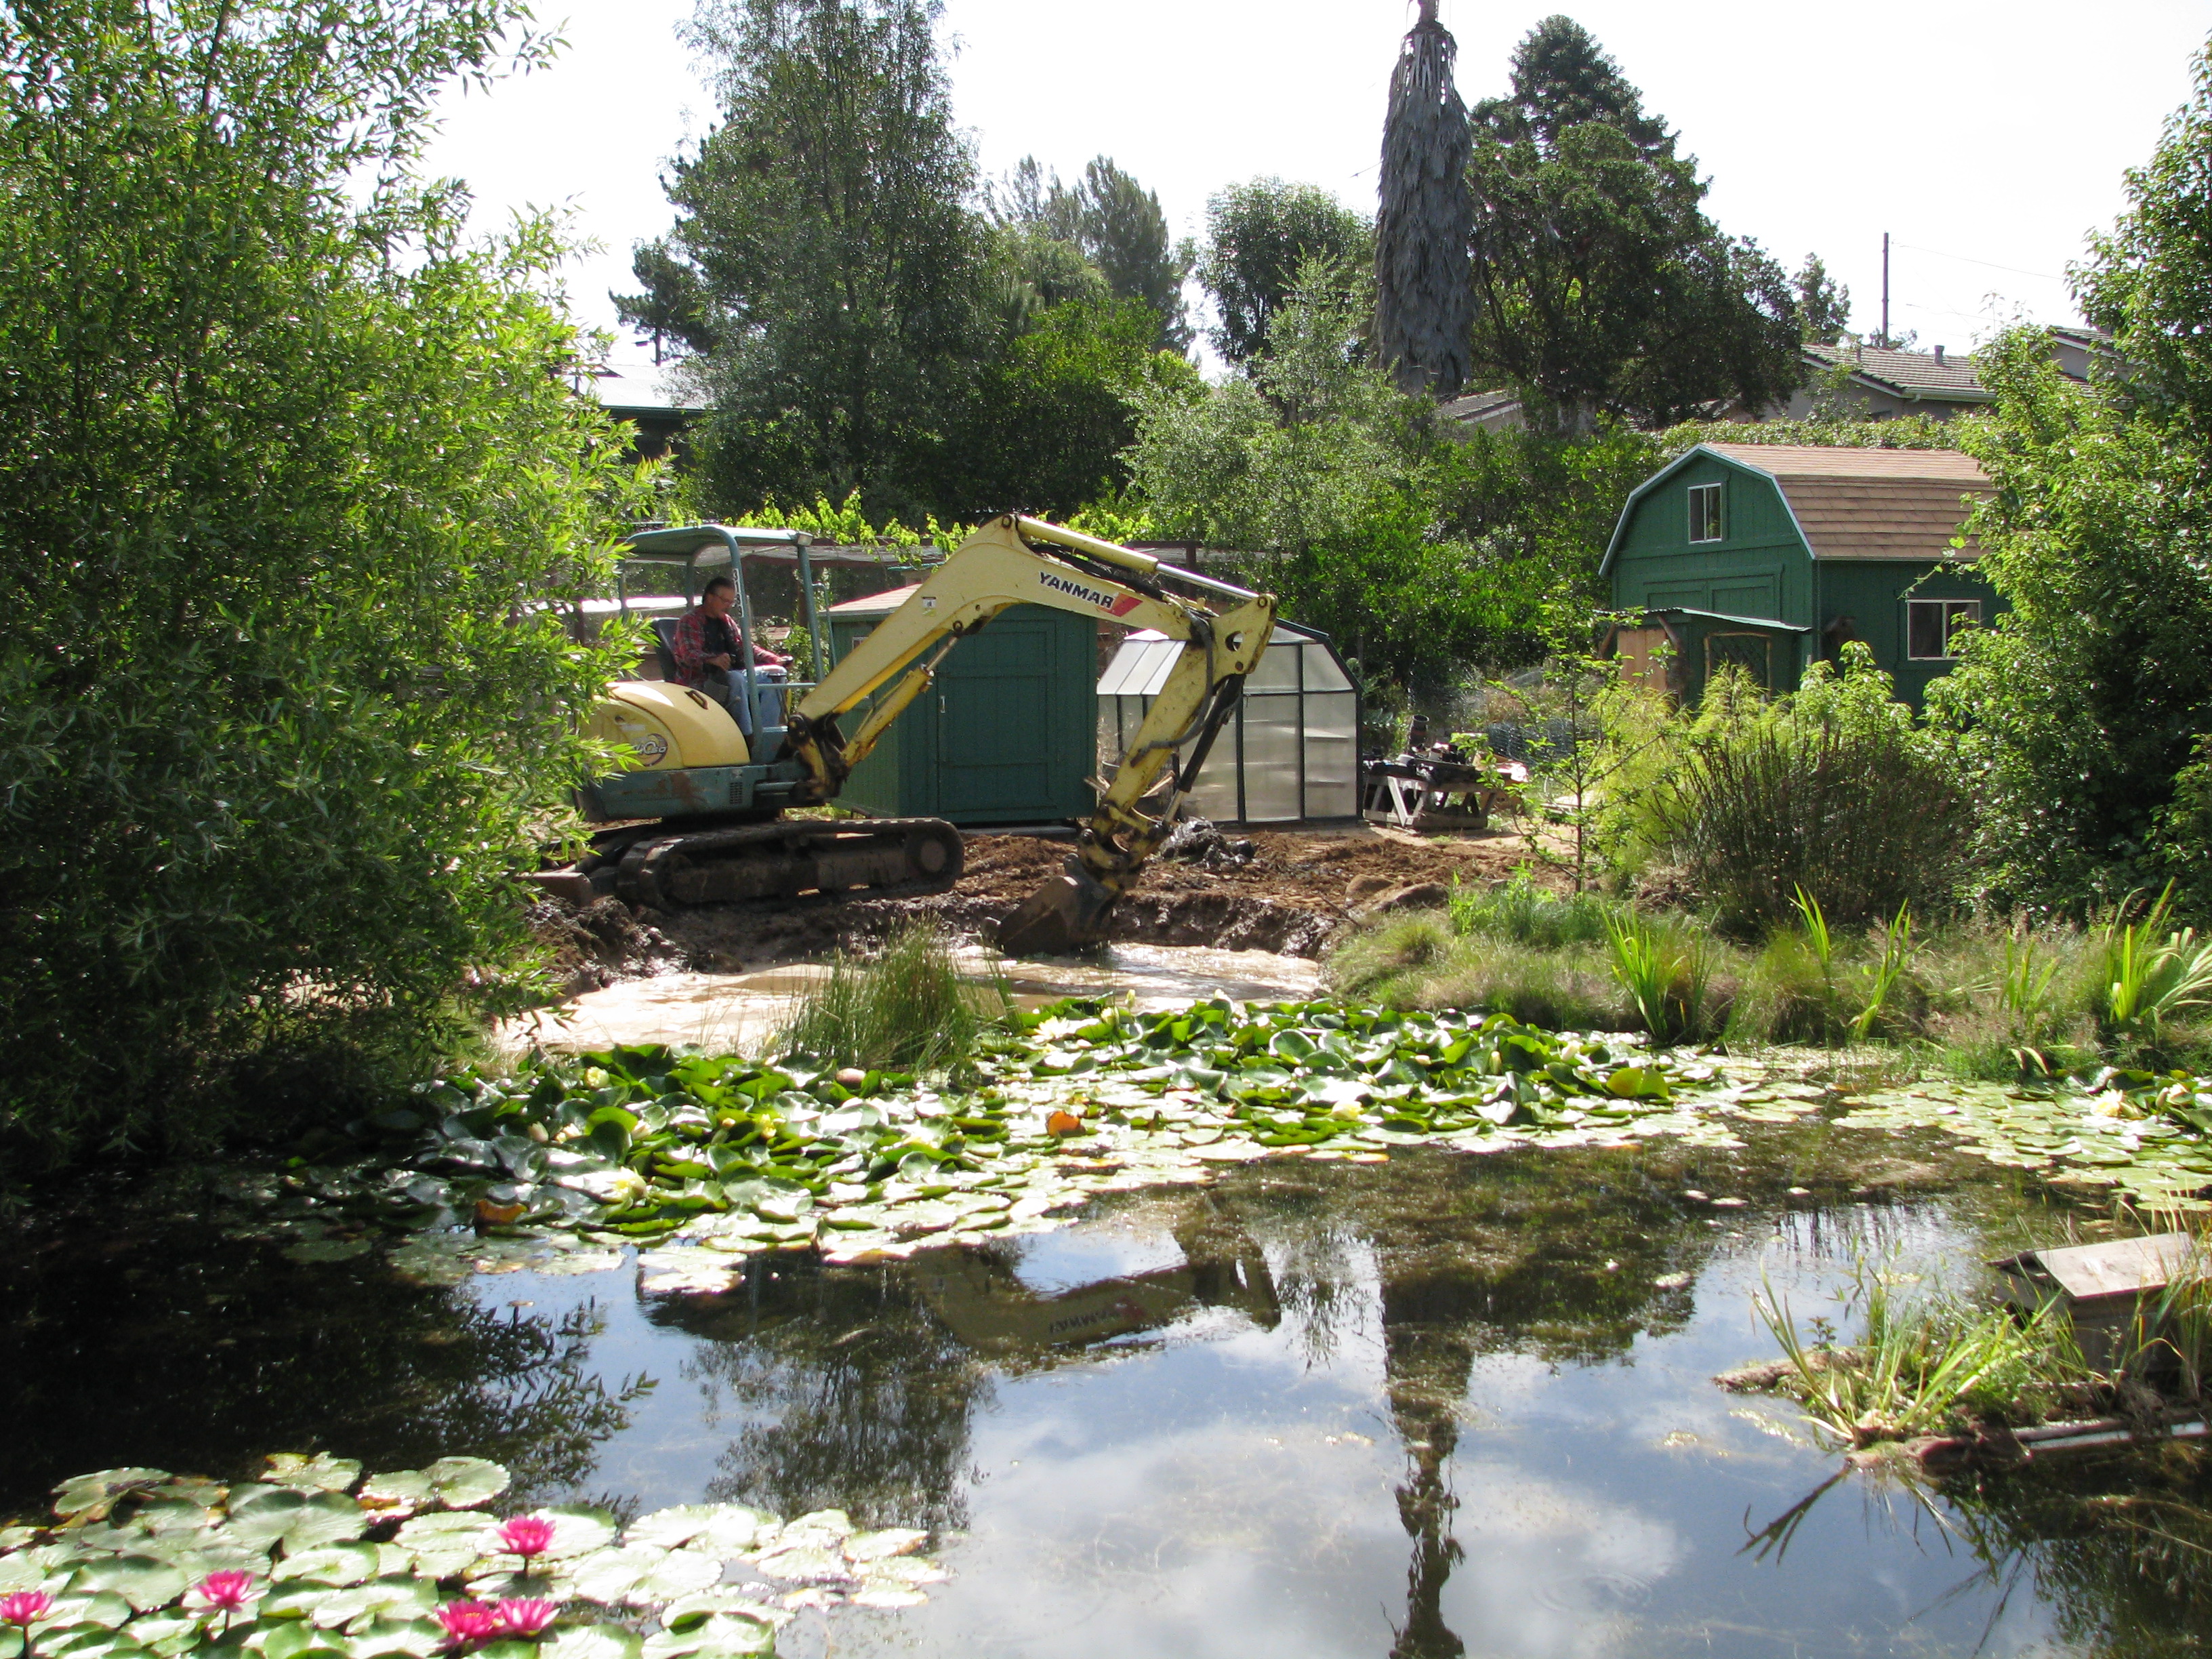
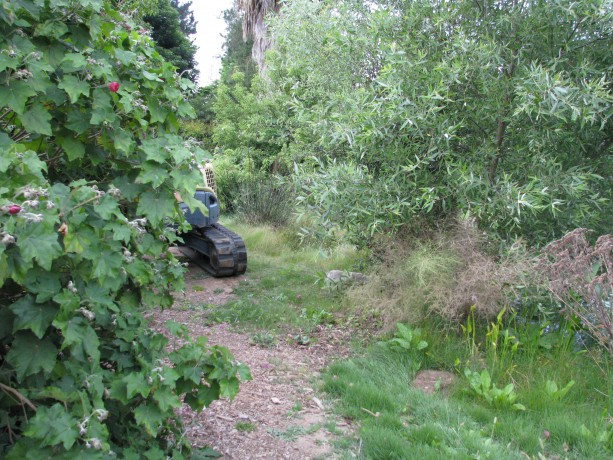
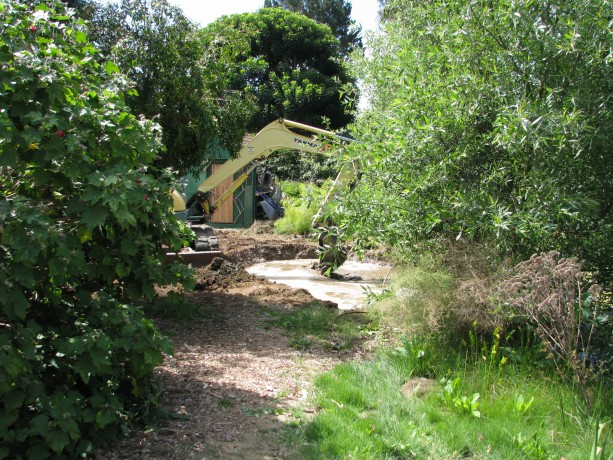
Steve demostrating years of expertise by finessing this large piece of equipment. Last week a new bog area was added to the main pond. The first bog area was dug by hand, created so that there would be a shallow, flat habitat for wading birds and tadpoles.
Preparing to start. This is called adding edge, which is an important component of any permaculture design. The first bog is connected to the series of rain catchment basins and now is the link between rain overflow system and the large pond. This year no rainwater left the property; it was all captured. Edge areas in both water and plant design provide more sun and growth areas than a round or straight design. More interesting things happen on the edge.

Gentle scraping with the bucket to discover where the subterranean irrigation lines were without stretching them. This bog area was dug up by a tractor bought from a farm auction that I’d shared rental with a friend. It took a large mound of dirt and filled in some dips, leveling a walking and working area.

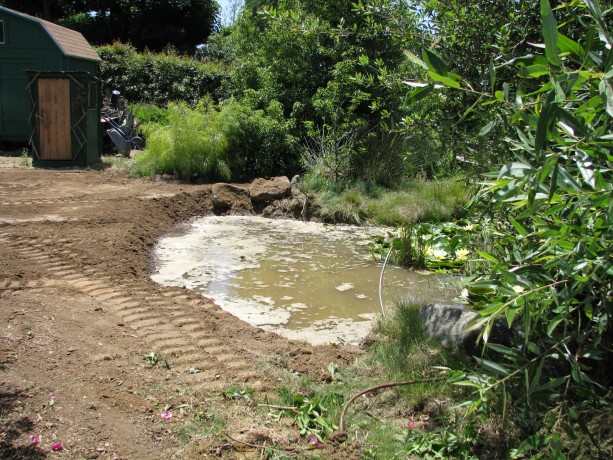
Another, cross-pond view of the new bog. Steve, who among his many talents is also a heavy equipment operator, did a terrific job grading and then expanding the pond. A small problem is that he found some more porous soil with the clay, so the water level on the pond dropped.
Water is filling in. We’re seeing how far it goes down to tell if the seepage is occurring on the edge or on the bottom of the new area. Once found, we’ll move extra clay over and tamp it all in.
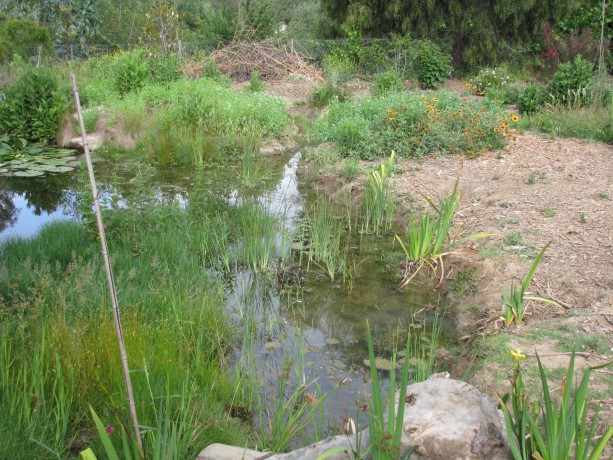
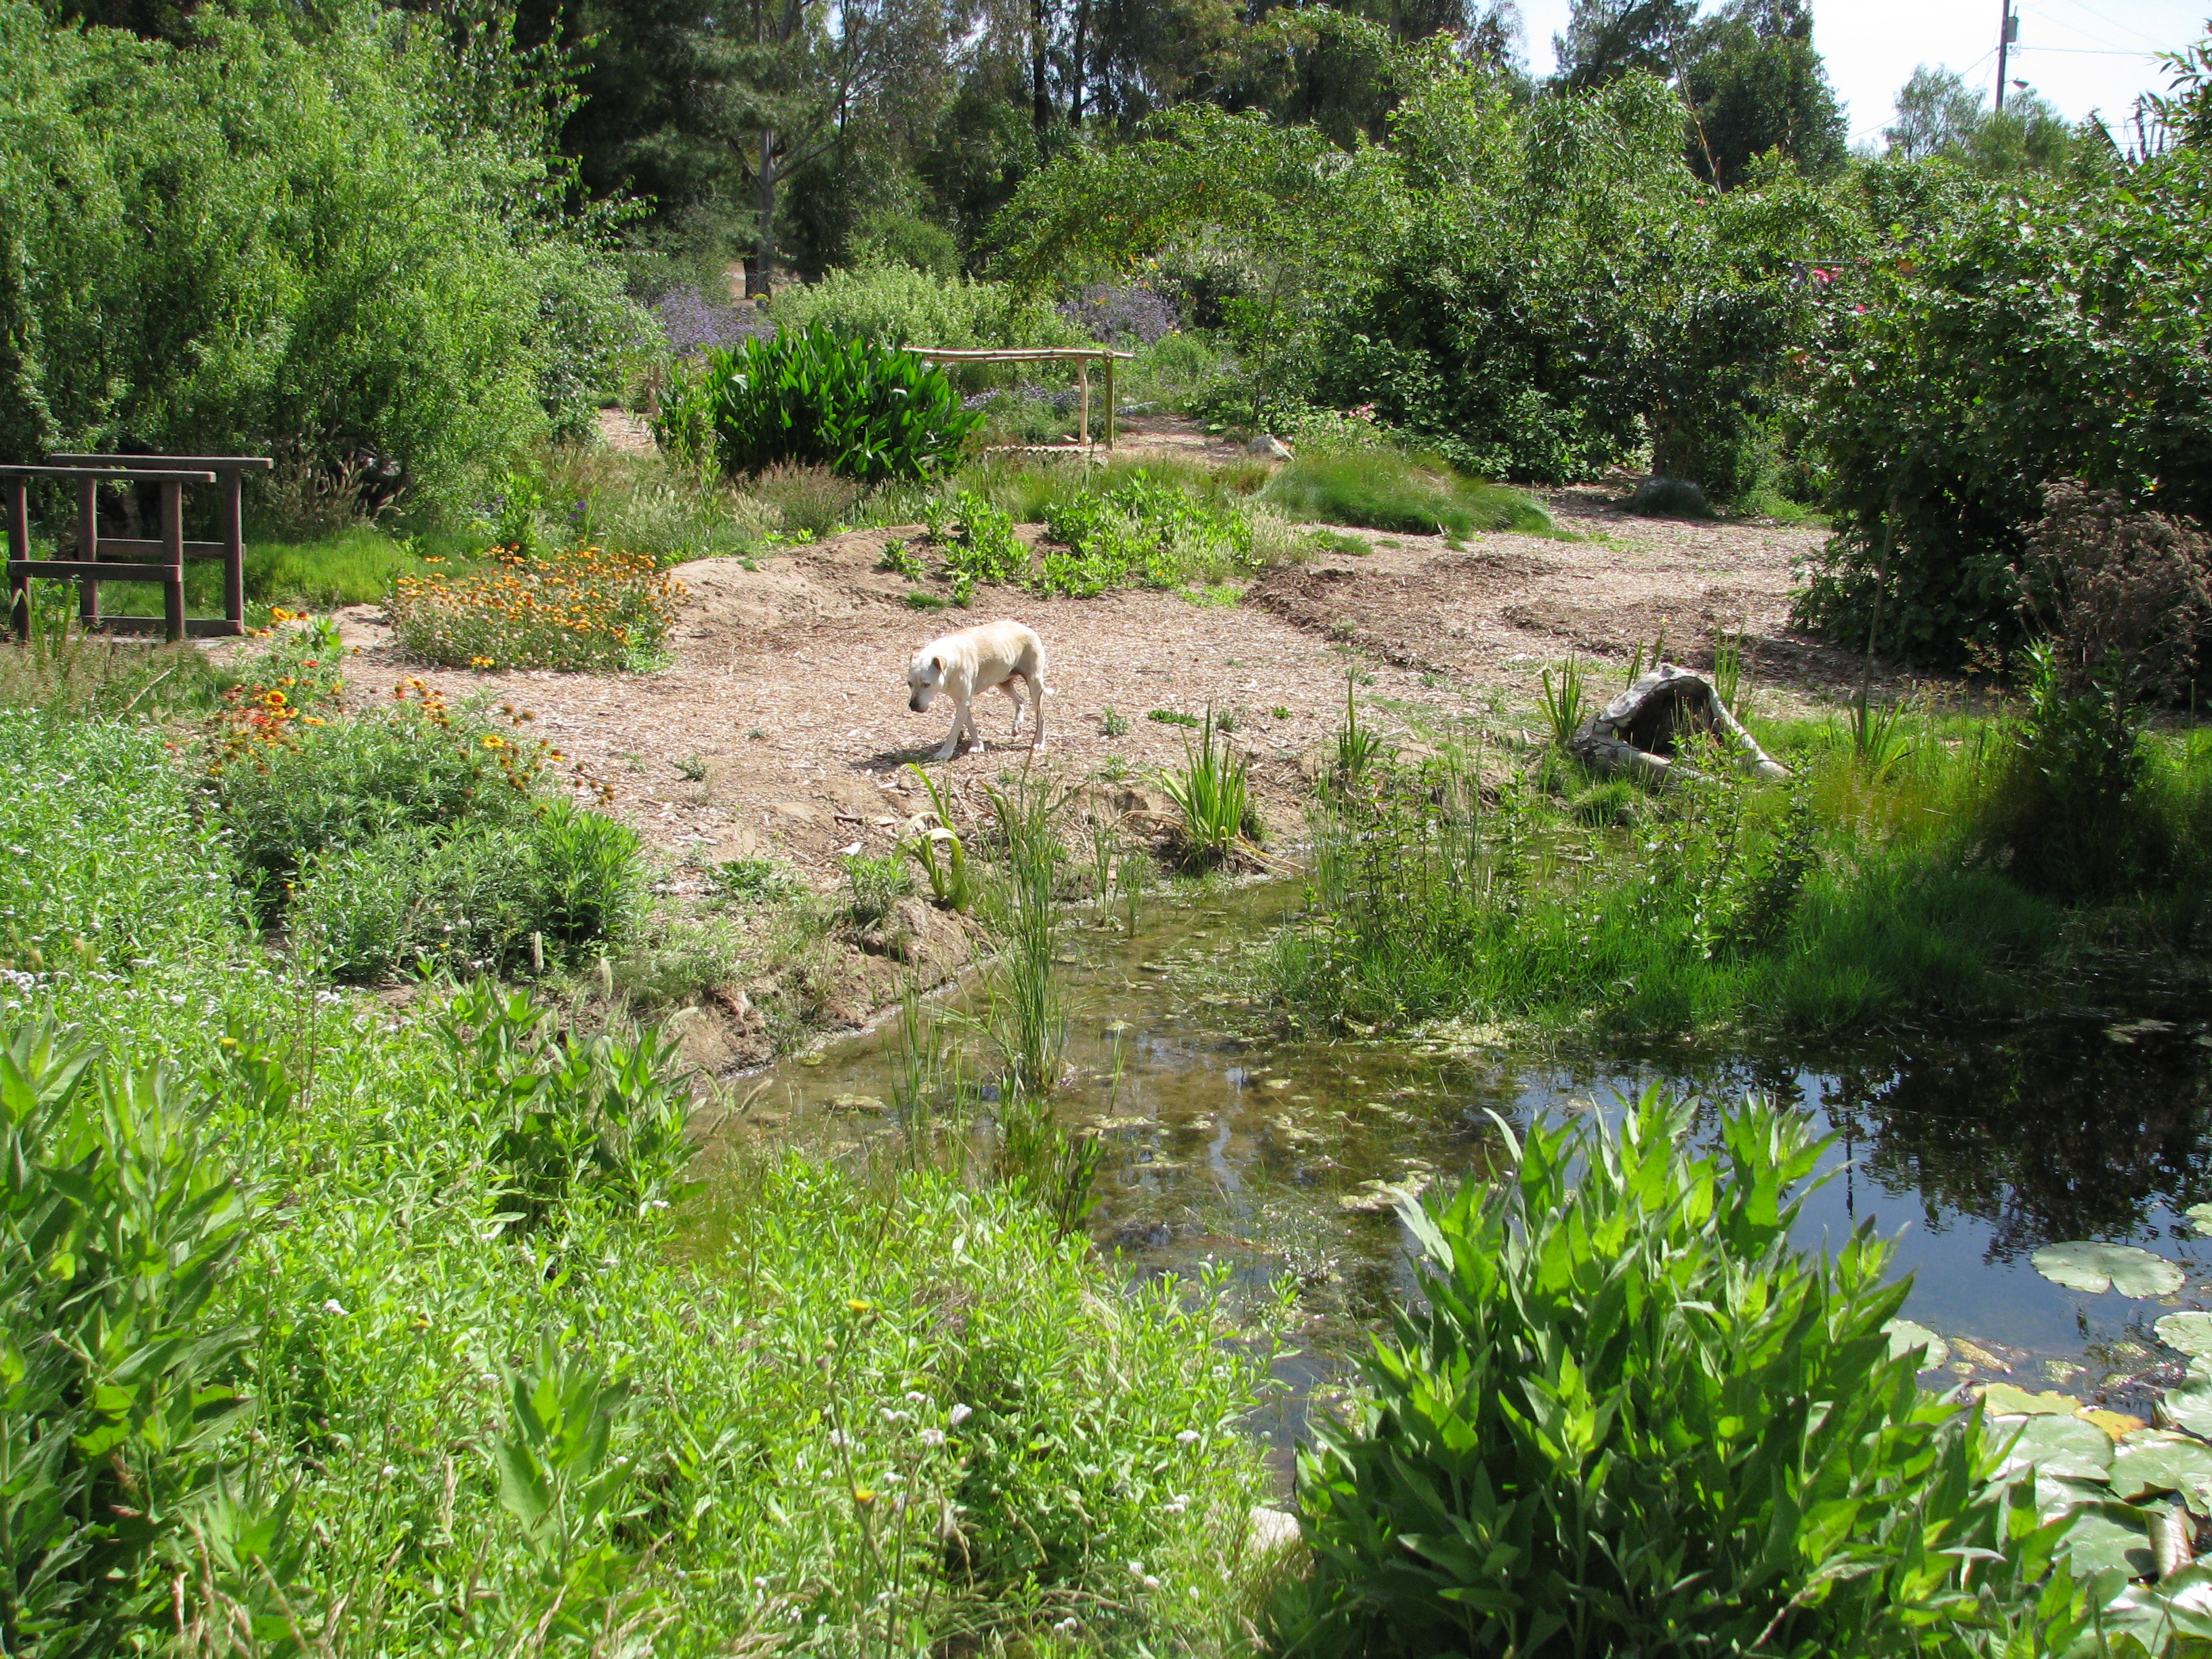
The first, hand-dug bog now filling with plants. Plants Jacob has put into the first bog include graceful cattails, which are a dwarf cattail that isn’t so invasive, iris, rushes, watercress, and some Mexican waterlily.

Sophie admiring the first bog. Very soon the plants will cover the bog areas providing excellent cover for many animal species which… wait for it… live on the edge.
Waiting to see how it sealed and then ready for planting.