Recycling and Repurposing
- Bees, Compost, Frost and Heat, Fungus and Mushrooms, Gardening adventures, Hugelkultur, Irrigation and Watering, Microbes and Fungi, Natives, Other Insects, Permaculture and Edible Forest Gardening Adventures, Rain Catching, Recycling and Repurposing, Reptiles and Amphibians, Seeds, Soil, Water, Water Saving, Worms
Shade
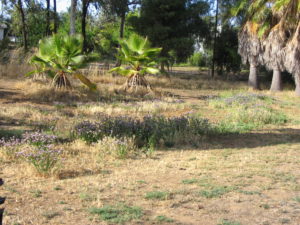
 In drylands there is a noticeable lack of trees. This situation is kind of a Catch-22. The hotter and drier it is, the less water there is in the ground to provide for plants that can attain height, and the more the leaves of the existing trees must adapt (become smaller) to prevent transpiration and sunburn. Yet the very lack of trees and their extensive root systems, and the shade and habitat they create, and the transpiration that allows humidity to keep the air moist for pollen to survive, is one of the causes of desertification.
So how do we stop this cycle?
First, work on a manageable area. If you have a large property, then start on the area closest to your home or where you need water the most, or where water settles. As in the Annie Lamont title, Bird by Bird, you work on a piece a little at a time.
- Put in earthworks to harvest rainwater. Simple swales or rain catchment basins, perpendicular to the water flow and on contour with your property, will harvest hundreds of gallons of water each rain. You can do them with tractors, you can do them with shovels, you can do small ones with trowels above small plants. Just do them.
- Bury organic matter: hugelkultur. Do you have old wood laying around? Palm trees that are growing and being a fire hazard? Old untreated lumber full of nails? Branches? All of this can be layered into the ground. Bury organic matter downhill from your swales. If you cannot bury, then pound sticks vertically into the ground. The important thing is that you are adding organic material back into your depleted soil. It will hold rainwater, it will activate soil microbes and fungi, it will open oxygen and nutrient channels, it will sequester carbon and make it available to the plants. Our soil is mostly just dead dirt. By layering organic material with dirt you are doing what nature does, but at an accelerated pace.
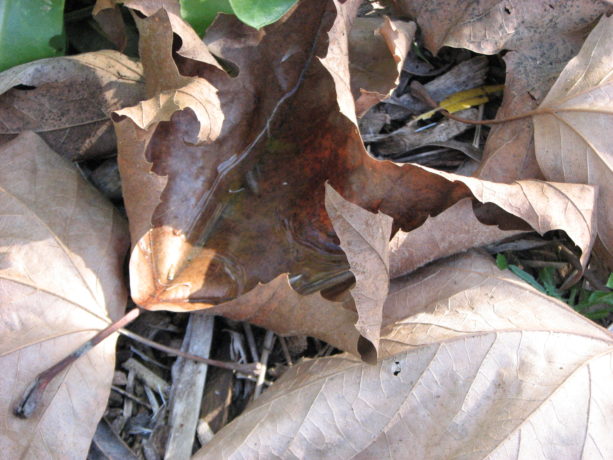
 If your soil is unmanageable, or you can’t dig, then layer on top of the soil. Its called, among other things, lasagne gardening. Lay out newspaper, top it with fresh grass clippings or other greens, top that with dried grass clippings, dried leaves or other ‘brown’ materials, and depending upon what you want to plant in this, you can top it with mulch or with a layer of good compost and then mulch. Then plant in it! You create soil on top of the ground.
 - Mulch and sheet mulch! Protect your soil from the heat and wind, and from pounding rain. A thin layer of bark will actually heat up and accelerate the evaporation process: add several inches of mulch to the ground. Better yet, sheet mulch by laying cardboard and/or newspaper directly on top of the weeds and layering an inch or more of mulch on top.
 This can be free mulch from landscapers, old weeds, grass clippings, animal bedding, softwood cuttings… just cover the soil to keep it moist and protected. Thick mulching alone will help keep some humidity in the air and begin soil processes, as well as reduce evaporation by reflected heat that comes from bare earth or gravel.
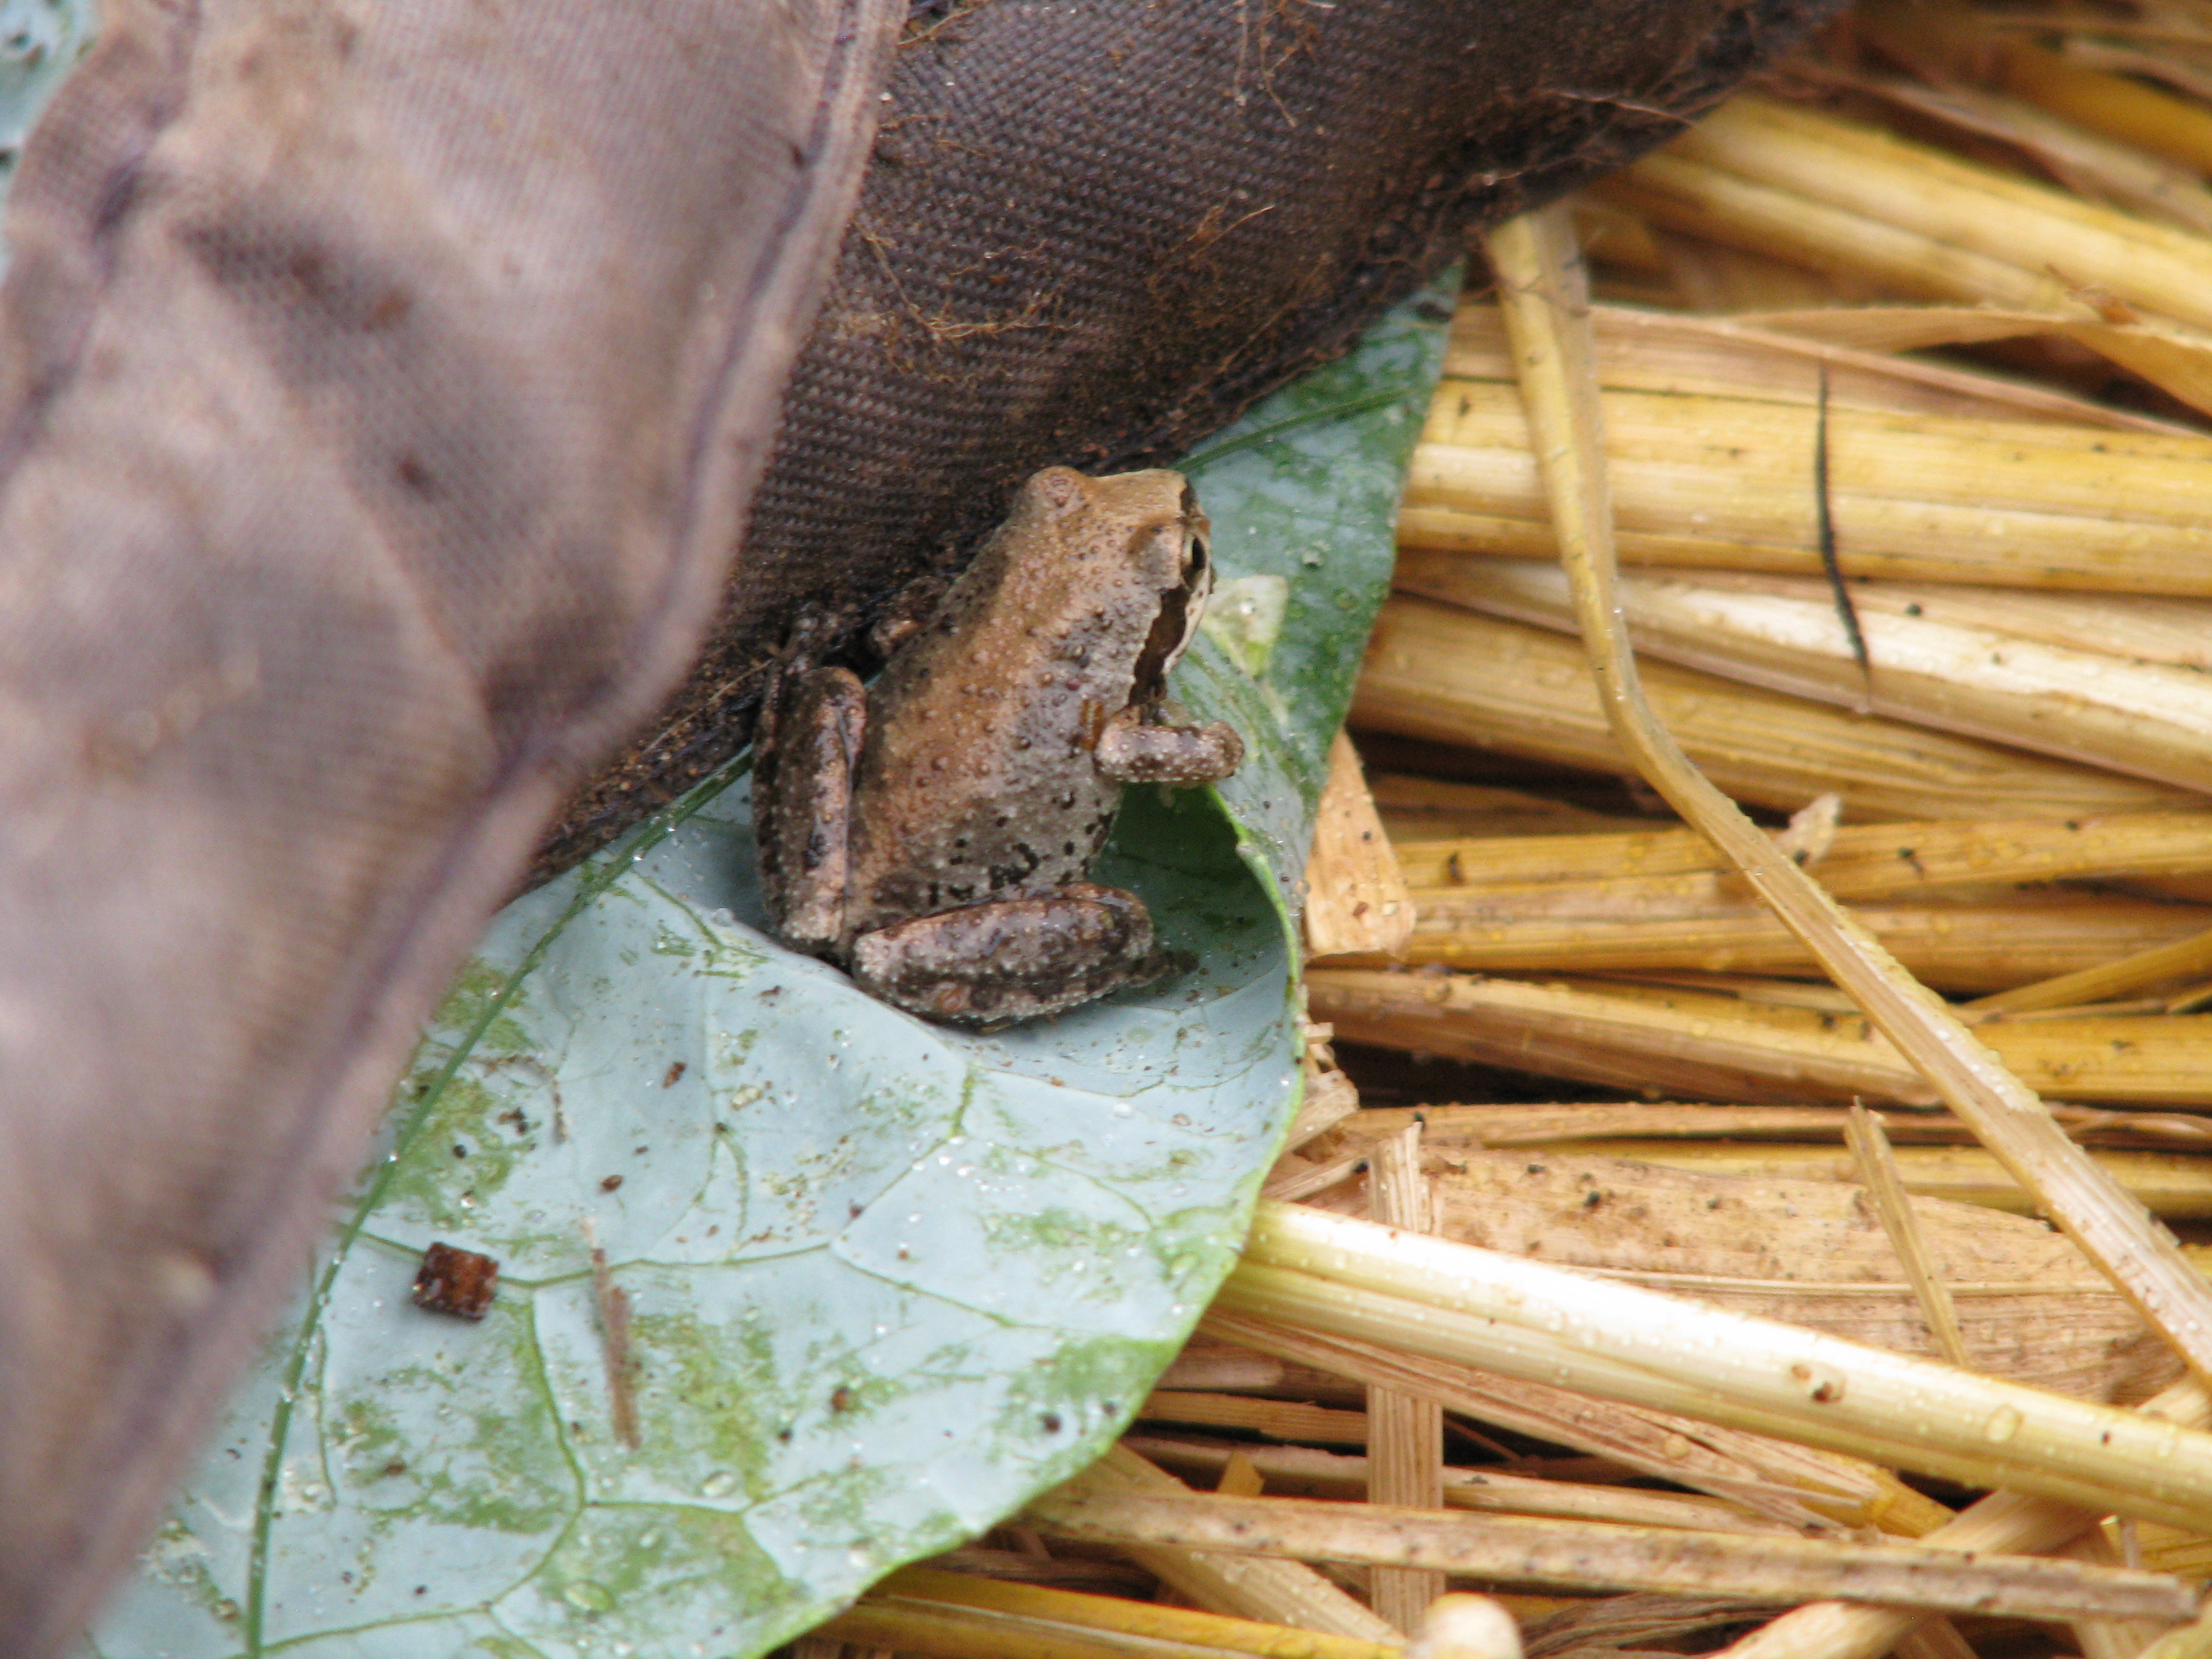
 - Plant native plants. They thrive in our soil. Grow trees that filter the sun and don’t like a lot of water, such as palo verde, or those that take minimal additional water such as desert willow, California redbud, valley oak, or others. Grow tall bushes such as toyon, lemonadeberry, sugarbush, quailbush, ceanothus
 or others. Use these wonderful plants to invite in birds,butterflies, lizards and other wildlife that will begin pollination and help activate the soil.
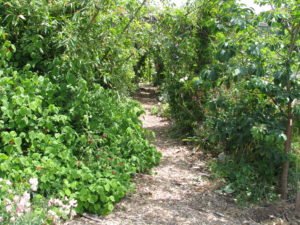
 - Design your garden for what you want to grow besides natives. Fruit trees? Vegetables? Ornamentals? They can be arranged in your mulched area in guilds to grow cooperatively.
- Grow shade. Fast-growing trees and shrubs are invaluable for protecting – ‘nurserying in’ – less hardy plants. Acacia and cassia are both nitrogen-fixers and will grow quickly to shade your plants, can be cut for green waste in the fall and also attract pollinators. Moringa is completely edible and is also an excellent chop-and-drop tree. There are many others. You need to protect what you plant from the harsh summer sunlight, and using sacrificial trees and shrubs is the most productive way to do it.
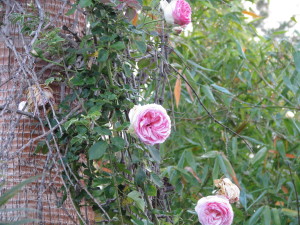
- Protect your tree trunks from scorching by growing light vines up them, such as beans or small squash.
Once you have done this process in one area, then move on to the next, like a patchwork quilt. These areas should all be planted in accordance with a larger plan that covers your entire property, so that you plant what you want in the best possible place. However, the earthworks, hugelkultur and mulching can be done everywhere. By following these guidelines, and working one small area at a time, you’ll have success, have trees, shade, food and be helping reverse desertification, one plot at a time.
You May Also Like

Native Insects and IPM
- Animals, Arts and Crafts, Bees, Birding, Building and Landscaping, Chickens, Fungus and Mushrooms, Gardening adventures, Heirloom Plants, Hugelkultur, Microbes and Fungi, Natives, Other Insects, Perennial vegetables, Permaculture and Edible Forest Gardening Adventures, Photos, Ponds, Rain Catching, Recycling and Repurposing, Soil, Water, Water Saving
Six Years of Permaculture

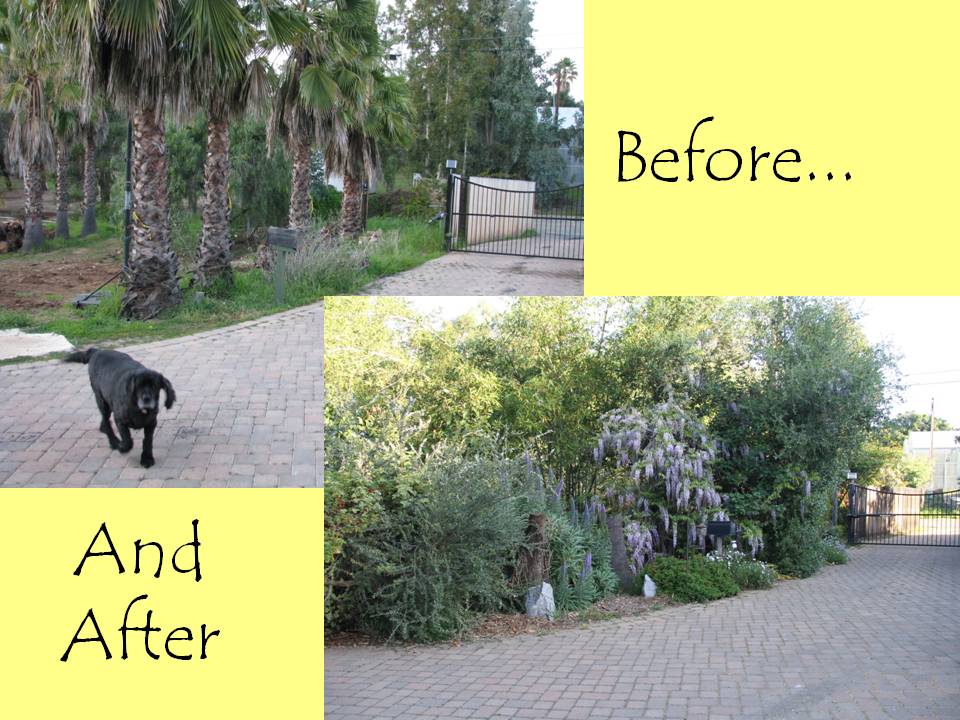
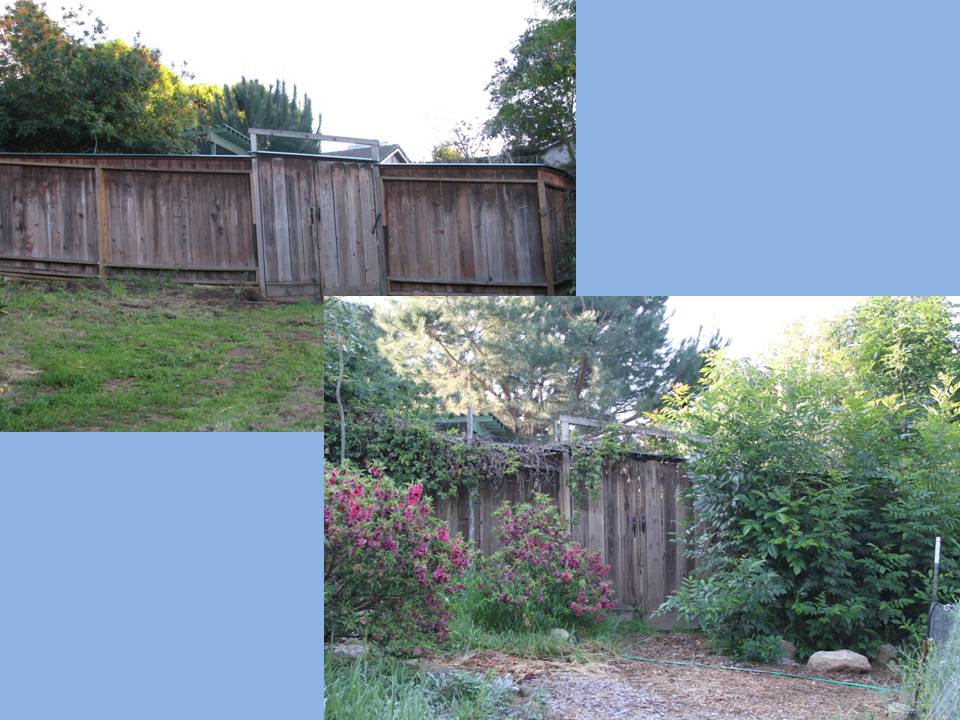
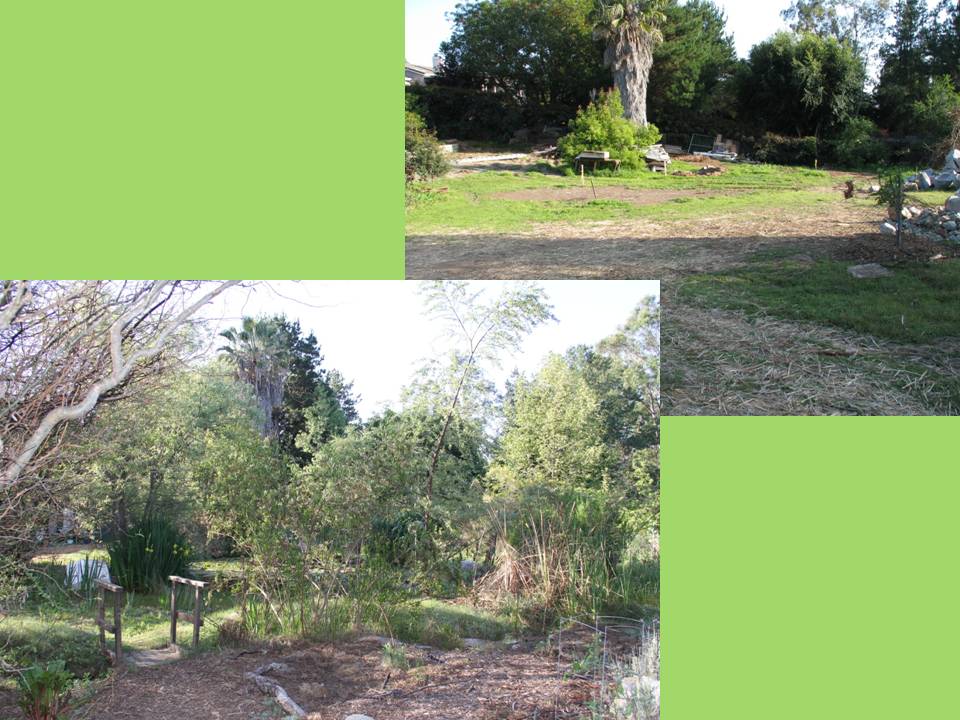
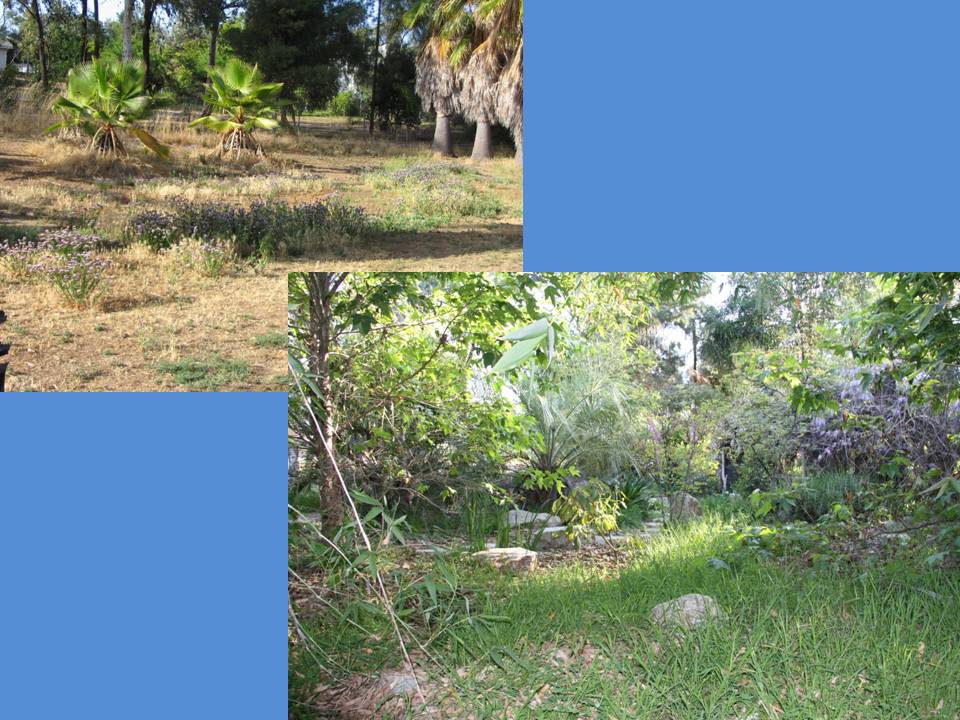
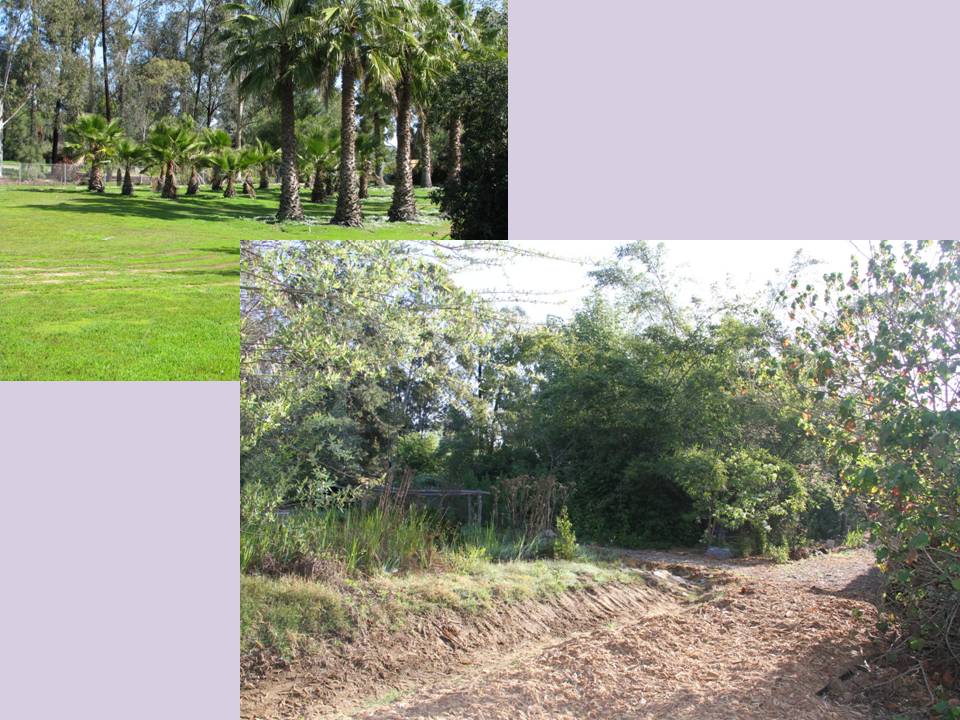
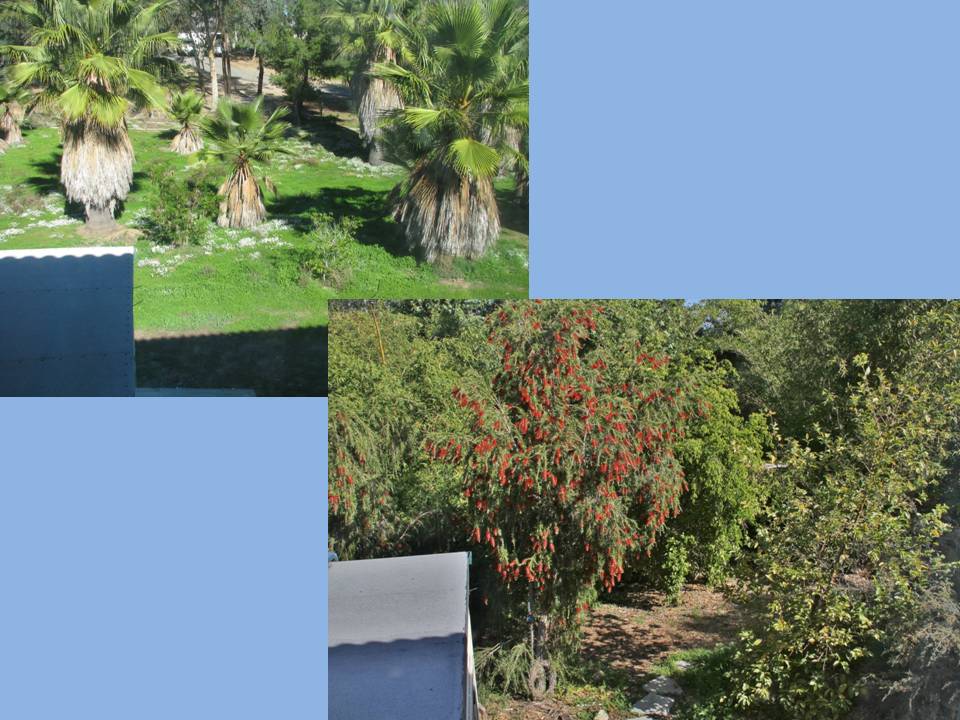
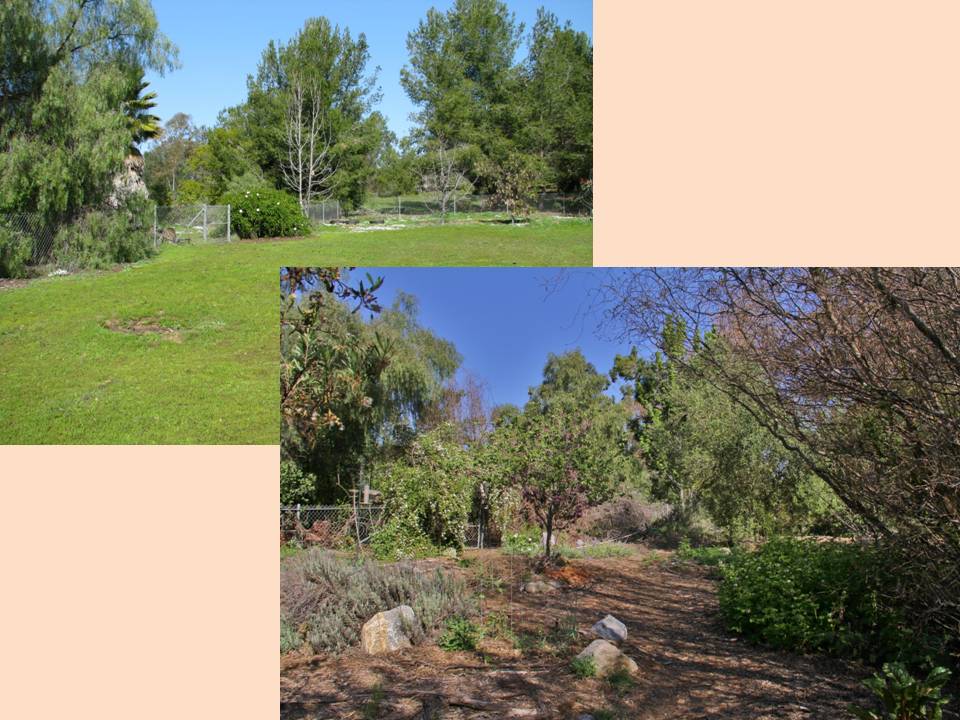
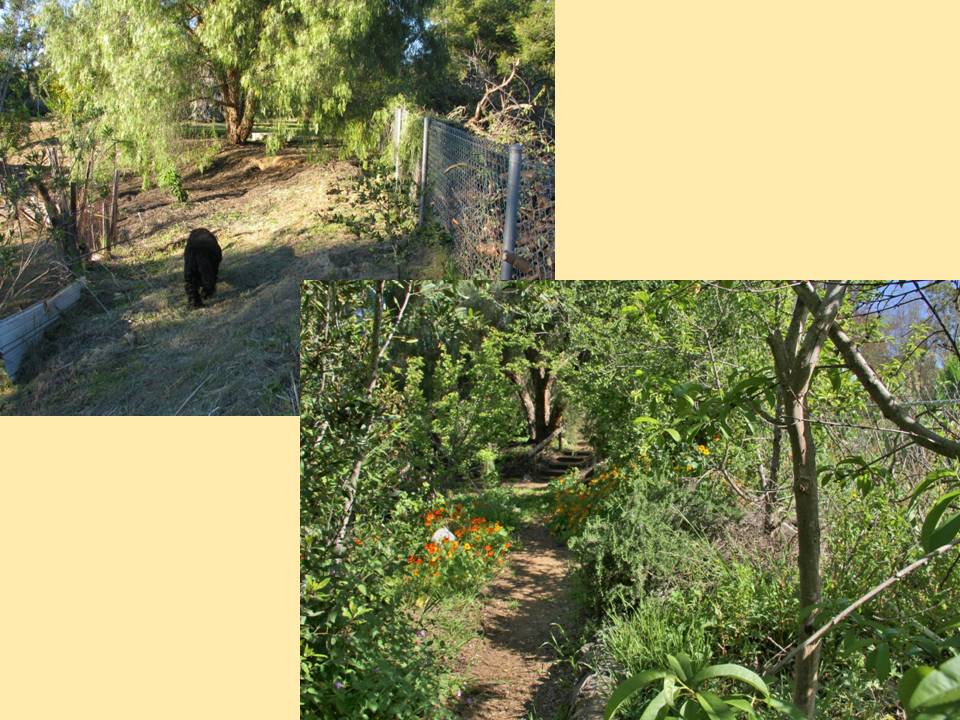
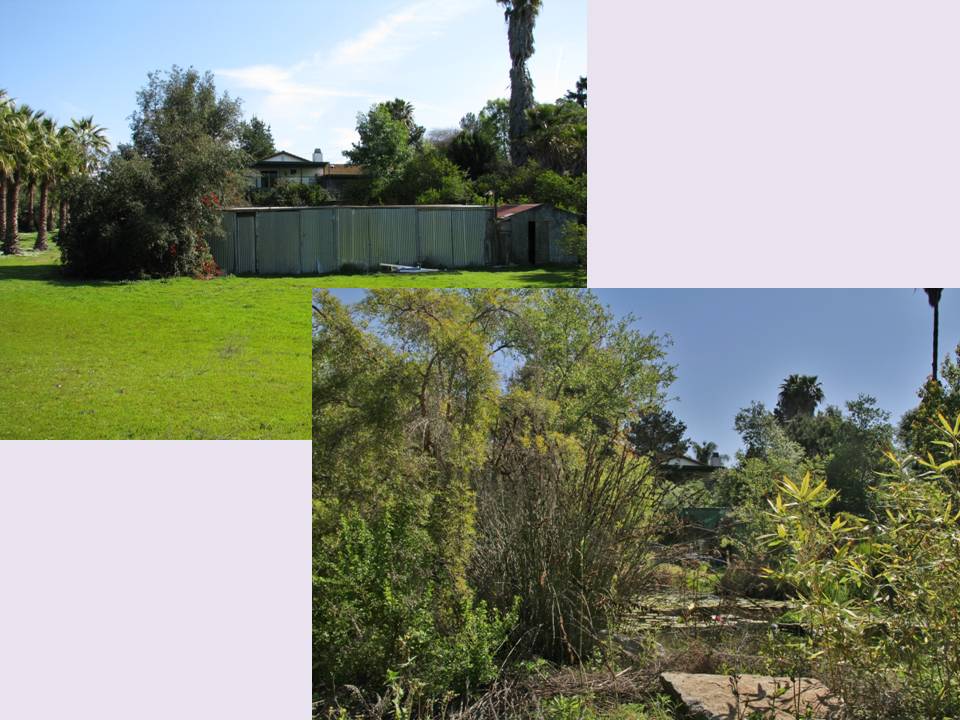
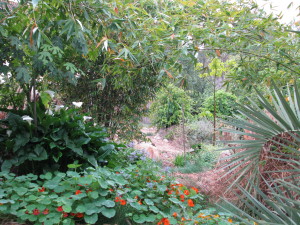
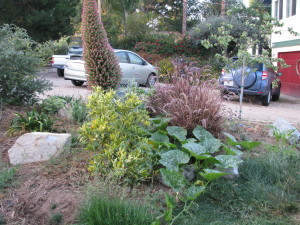
 In February, 2011, I signed the contract with Roger Boddaert to create a permaculture food forest. The goals at that time were to stop the erosion on the property, to create a wildlife habitat, and to grow food, medicine, native plants, building materials, herbs and ornamentals in a sane way: no chemicals. So the journey began, and it hasn’t been easy. Nor did I at that time know that the garden would evolve into Finch Frolic Garden and my business would be education.
 In preparing for a talk about our garden, Miranda and I worked on before and after photos. The garden this April, 2017, is stunning, with blooming wisteria, fruit trees, red bud, roses, angel-wing jasmine, iris, and so much more. Best of all Mrs. Mallard has brought her annual flock of ducklings from wherever she nests, and the four babies are still alive and thriving after a week! So I thought I’d share the incredible difference between what had been, and what is now. All done with low water use, no fertilizer, herbicide, insecticide, additives or supplements. Come visit when you can! Slideshow images change in ten seconds:

You May Also Like
Native Insects and IPM
- Building and Landscaping, Gardening adventures, Hugelkultur, Permaculture and Edible Forest Gardening Adventures, Rain Catching, Recycling and Repurposing, Soil, Water, Water Saving
Irrigation for Drylands, Part 1: Options
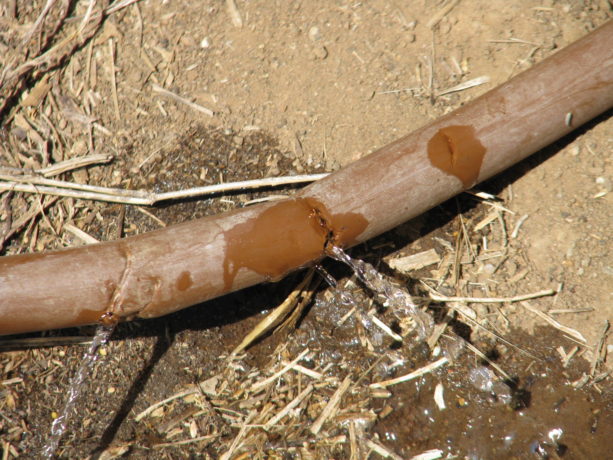
This tubing is so easily nicked that weeding around it often results in a bad leak that isn’t detected for awhile. Leaks cause flooding with dry areas past them on the line. A previous draft of this post was about 2,000 words of mostly rant against Netafim, so I’m starting over trying to be more helpful. You’re welcome.
In Southern California, and many dryland areas, if you are to grow food crops you have to irrigate. I have met several people who believe that they can ‘dry farm’ crops such as grapes here, and that is problematic. Even in Central California where they receive many inches more rain than we do, farmers struggle in the long hot, dry summers.
There are many ways to water, and I’ll address as many as I can.
The first and most important step for irrigating your property is installing the earthworks that will harvest what rain we do receive and allow it to percolate into the soil. Paring that with burying wood and other organic material to hold that water, planting in shallow depressions rather than on raised mounds and sheet mulching will greatly increase the health of your plants and decrease your water bill.
For delivering captured or purchased water you’ll need some kind of tubing and a force to deliver the water. We’ll discuss the natural methods first:

Ollas (oy-ahs) should have a lid or stone or something to block the top, to keep creatures from falling in and drowning. Photo from link page. For small yards, or for orchards with lots of labor, burying ollas (porous clay pots) in the center of a planting area is a wonderful idea. There is a really good article with diagrams and suggestions here. You can manually fill the ollas by carrying water to them (the best would be from rain barrels), or dragging a hose around to fill them. Or they can be combined with a water delivery system of pipes as discussed below. Water is then drawn through the porous pots by the dry soil around them, and thus to plant roots. There is a tutorial about making inexpensive ollas from small clay pots, and interesting comments, here. There are problems, but then, there are problems with everything. Clay pots can break, especially if you have soil that freezes or foot traffic. A larger pot doesn’t mean that water will be delivered farther underground; absorption is based on soil density. This is a system that you need to monitor and replace periodically. On the plus side, clay is natural and will decompose in the soil. Many years ago, long before I ‘discovered’ permaculture, I buried gallon milk jugs in which I punched small holes by some trees beyond any irrigation pipes. I didn’t know about ollas then; I just thought it was a good idea to get water close to the roots of the plants. This really worked and those trees are mature and still exist almost thirty years later, and still don’t have irrigation to them. However, I found that the plastic milk jugs become brittle and break apart, as will plastic soda bottles, and you really don’t want to bury plastic. Clay is much better.

Clay pipe photo from Permanomades. Please follow link to website. These look very large, but are not. Next would be delivering water via some kind of pipe. Clay pipes are the most natural, but unless you have the clay, the labor and the time to create lots of long, hollow clay pipes, this is a pricey option. Clay pipes break easily, too.

Split bamboo delivers water downhill. Photo from link page. If you have lots of bamboo you can season it, split it, remove the nodes (partitions) and then mount it to deliver water to individual plants, to ollas, or to swales. Again, you need time, bamboo, labor and some expertise. There is a good article about it here.
Plastic:
There are a lot of plastic pipes out there, and although I hate to invest in more plastic, it is often a necessary evil. Drip irrigation comes in many forms. There are bendable tubes that ooze, tubes that have holes spaced usually 12″ or 24″, tubes that can be punctured and into which spray heads are inserted, and tubes which can support spaghetti strands that are staked out next to individual plants. The popularity of drip irrigation has been huge in water-saving communities. Unfortunately they have lots of problems. Here I’ll indulge in just a little rant, but only as an illustration.
One of the big problems with flexible tubing in arid areas is the high mineral content of the water and what it does to these tubes. Any holes -including those in small spray heads- will become clogged with minerals.
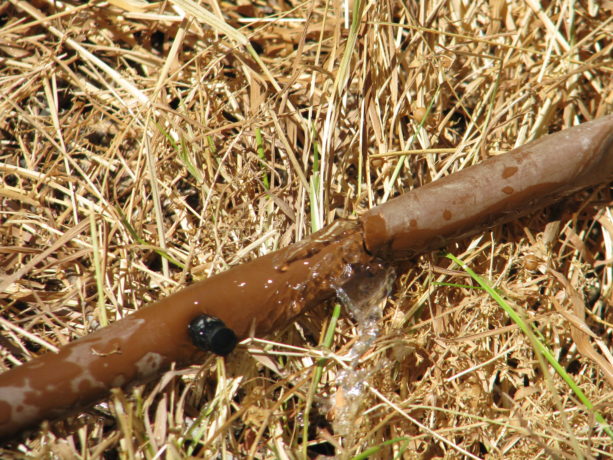
A nozzle that is clogged next to a hole that is not. Flushing the system with vinegar works for a short time, but eventually the minerals win. If the tubing is buried, then it is virtually impossible to discover the blocked holes until plants begin to die. Tubing above ground becomes scorched in the sun and breaks down.
Also, flexible tubing is extremely chewy and fun with a little drink treat as a reward.
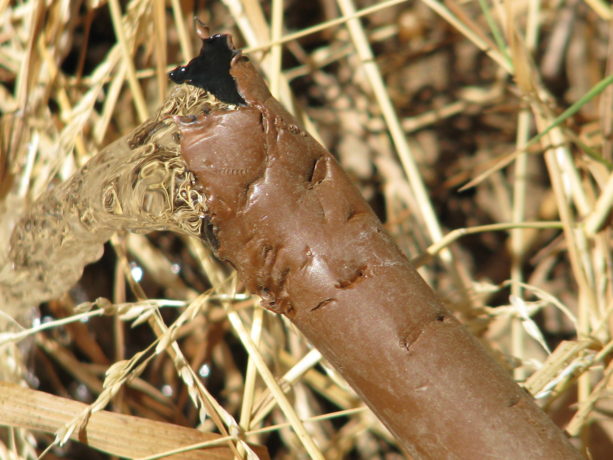
Coyotes and many other animals find flexible pipe so fun to chew. This is the opinion of gophers (who will chew them up below ground and you won’t know unless you find a flood or… you guessed it… dying plants), coyotes (who will dig the lines up even if there is an easier water source, because tubing is fun in the mouth), rats (because they are rats), and many other creatures. Eventually a buried flexible system will be overgrown by plant roots, will kink, will clog, will nick (and some products such as Netafim seem to nick if you even wave a trowel near it), and will be chewed. Some plants will be flooded; others will dry up. You will have an unending treasure hunt of finding buried tubing and trying to fix it, or sticking a knife point into the emitter holes to open them up and then having too much water spray out.
Plus, drip irrigation is not good for most landscape plants. Most woody perennials love a good deep drink down by their roots, and then let go dry for a varying time depending upon the species, weather and soil type. Most native California plants hate drip irrigation. According to Greg Rubin, co-author along with Lucy Warren of The California Native Landscape (Timber Press; March 5, 2013) and a San Diego native landscaper, native plants here enjoy an overhead spray such as what a rain storm would deliver. Some natives such as Flannel Bush (Fremontia) die with summer irrigation and are especially intolerant of drip. Drip is most appropriate with annuals or perennials that have very small root bases and that require regular watering. Small root balls are closer to the hot surface and will dry up more quickly. Vegetables, most herbs and bedding plants can use drip. Plants that have fuzzy leaves that can easily catch an air-born fungal disease such as powdery mildew are better watered close to the ground rather than with an overhead spray of chlorinated water.
Then there is PVC, the hard, barely flexible pipe that is ubiquitous in landscaping for decades. PVC is hard to chew, can be buried or left on the surface if covered with mulch (to protect from UV rays), is available in a UV protected version if you want to spend the extra money and still give it some sun protection, utilizes risers with larger diameter water deliver systems such as spray heads, bubblers, and even drip conversion emitters that have multiple black spaghetti strands emerging from them like some odd spider.
At Finch Frolic Garden I had taken advice to install Netafim, a brown flexible tubing with perforations set 12″ apart, which was buried across the property from each valve box. It has been a living nightmare for most of that time. Besides all the reasons that it could fail (it did all of them) listed above, it also at its best delivered the same amount of water to all of the plants no matter what their water needs. It was looped around most trees so that the trees would receive more water, but since then roots have engulfed the tubing, cutting off the water flow. There are areas with mysterious flooding where we can’t trace the source without killing many mature plants.
Over the past year we’ve lost about 1/4 of our plants including most of our vegetables, because we plant where there should be water, and then mysteriously, there isn’t any. Flushing with vinegar helped a little, but whatever holes are still functioning are closing up with mineral deposits. Okay, I’m ranting too much here. But this was an expensive investment, and an investment in plastic, that has stressed me and my garden. So upon weighing all my alternatives I’ve decided to install above-ground PVC with heads on risers that either spray or dribble, and the dribblers will go into fishscale swales above plants.
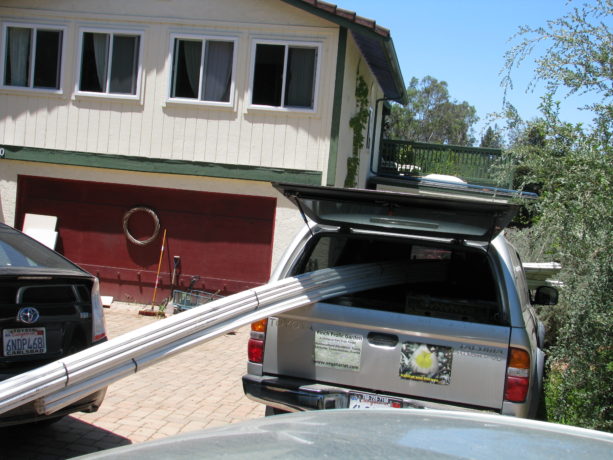
Twenty-foot lengths of PVC can fit in the Frolicmobile, and sure beats carrying it down the property. In the next few posts in this series I will talk about how to draw up an irrigation plan, installation, valves and other watering options, as Miranda and I spend our very hot summer days crawling through rose bushes and around trees gluing, cutting, blowing out and adjusting irrigation. Thanks for letting me vent.
You can read Part 2 Evaluating Your System here, Designing Your System Part 3 here , and Part 4 Conclusion here.
- Building and Landscaping, Compost, Fungus and Mushrooms, Gardening adventures, Hugelkultur, Microbes and Fungi, Permaculture and Edible Forest Gardening Adventures, Rain Catching, Recycling and Repurposing, Soil, Water, Water Saving, Worms
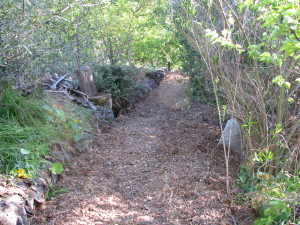
Using Pathways For Rain Catchment
Here in the drylands of San Diego we need to be especially sure to catch whatever rain may fall. Building good soil is vital for the entire planet because humans are going through decent topsoil like nobody’s business. Here at Finch Frolic Garden we’ve sheet mulched around trees to replicate decades of leaf drop, and on pathways to block weeds, prevent compaction and create good soil for shallow plant roots. We’ve also continued making our pathways work more for us by burying wood (hugelkultur) in the paths themselves. Most of our soil here is heavy clay, so creating drainage for roots is imperative. In sandy soils, creating more fungal activity to hold together the particles to retain water is important. We also need to store rain water when we get it, but not drown the roots of plants. This all can be accomplished by burying wood, the older the better.
Miranda and I have worked on many pathways, but for a few months this year the garden was given a huge boost forward with the help of Noel, a permaculture student and future farmer, who can move mountains in an afternoon with just a shovel.
The chosen pathways had these features: they were perpendicular to water flow, or were between trees that needed supplemental drainage, food and water access, and/or were where rainwater could be redirected. Eventually we’d like to do all the pathways like this but because of time, labor and materials we worked where it was most needed.

An area that becomes flooded when we have a deluge. The existing sheet mulch was pulled aside. Sections of the pathways were dug up (Noel’s work was very neat; my work is usually much less so). Wood was laid in the hole, and layered back with the dirt.

The pathway dug up and wood being layered. The nice, neat hole is Noel’s doing, not mine. Notice I said dirt, not soil. We don’t want to disturb good soil because we’d be killing microbes and destroying fungal networks. Dirt is another story; it needs amendment. As we’ve already buried all of our old wood, we timed these pathway ‘hugels’ to coincide with some appropriate tree removal.
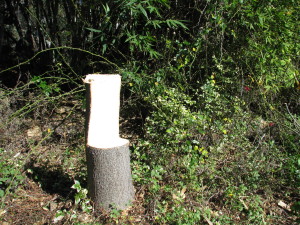
You can be creative when cutting trees and make a chair! Watch out for sap on your pants, though. Trees were cut down and some climbing roses pruned back out of the pathway, and the green ‘waste’ was used in the nearby pathways.
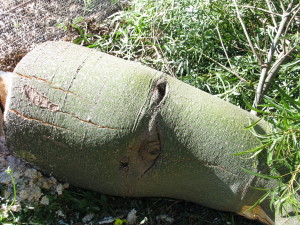
This euphorbia was only sucking up water and not giving back anything, so it and its friends had to go. This one had a marking like an eye on it, and I was glad to see it go… as it was seeing me! Old palm fronds went in as well. No need to create additional work – good planning means stacking functions and saving labor.
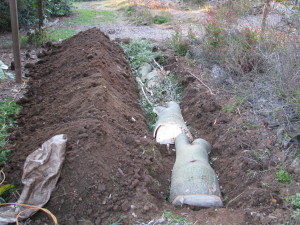
The first layer of wood is covered with dirt, and then another layer added. After the wood was layered back with the dirt, the area was newly sheet mulched. Although the pathways are slightly higher, after another good rain (whenever that will happen) they’ll sink down and be level. They are certainly walkable and drivable as is. Although the wood is green, it isn’t in direct contact with plant roots so there won’t be a nitrogen exchange as it ages. When it does age it will become a sponge for rainwater and fantastic food for a huge section of the underground food chain, members of which create good soil which then feeds the surrounding plants. Tree roots will head towards these pantries under the paths for food. Rain overflow that normally puddles in these areas will penetrate the soil and soak in, even before the wood ages because of the air pockets around the organic material.
The best part about this, is that once it is done you don’t have to do it again in that place. Let the soil microbes take it from there. Every time you have extra wood or cuttings, dig a hole and bury it. You’ve just repurposed green waste, kept organics out of the landfill, activated your soil, fed your plants, gave an important purpose to the clearing of unwanted green material, and made your labor extremely valuable for years to come. Oh, and took a little exercise as well. Gardening and dancing are the two top exercises for keeping away dementia, so dig those hugels and then dance on them!
Burying wood and other organic materials (anything that breaks down into various components) is what nature does, only nature has a different time schedule than humans do. It takes sometimes hundreds of years for a fallen tree to decompose enough to create soil. That’s great because so many creatures need that decomposing wood. However for our purposes, and to help fix the unbelievable damage we’ve done to the earth by scraping away, poisoning and otherwise depleting the topsoil, burying wood hastens soil reparation for use in our timeline.
Another pathway is hard clay and isn’t on the top of my priority list to use for burying wood. However it does repel water due to compaction and because rainwater is so valuable I want to make this pathway work for me by catching rain. I’ve recommended to clients to turn their pathways into walkable (or even driveable) rain catchment areas by digging level-bottomed swales.

Digging gentle swales along a pathway can turn it into a rain catchment system. Make your paths work for you! A swale is a ditch with a level bottom to harvest water rather than channel water. However many pathways are on slopes or are uneven. So instead of trying to make the whole pathway a swale in an established garden, just look at the pathway and identify areas where the land has portions of level areas. Then dig slight swales in those pathways. Don’t dig deeply, you only have to gently shape the pathway into a concave shape with a level bottom. The swales don’t need to connect. You can cover the pathway and swales with bark mulch and they will still function for harvesting rain and still be walkable.
Mulching over the top makes the pathway even and still functional for rain catchment. If the pathways transect a very steep slope, you don’t want to harvest too much water on them so as not to undermine the integrity of your slope. This is a swale calculator if you have a large property on a steep slope.
So up-value your pathways by hugelkulturing them, and sheet-mulching on top. Whatever your soil, adding organics and mulching are the two best things to do to save water and build soil. And save the planet, so good going!
- Animals, Bees, Compost, Fungus and Mushrooms, Gardening adventures, Health, Heirloom Plants, Hugelkultur, Microbes and Fungi, Natives, Other Insects, Perennial vegetables, Permaculture and Edible Forest Gardening Adventures, Rain Catching, Recycling and Repurposing, Reptiles and Amphibians, Seeds, Soil, Water, Water Saving, Worms
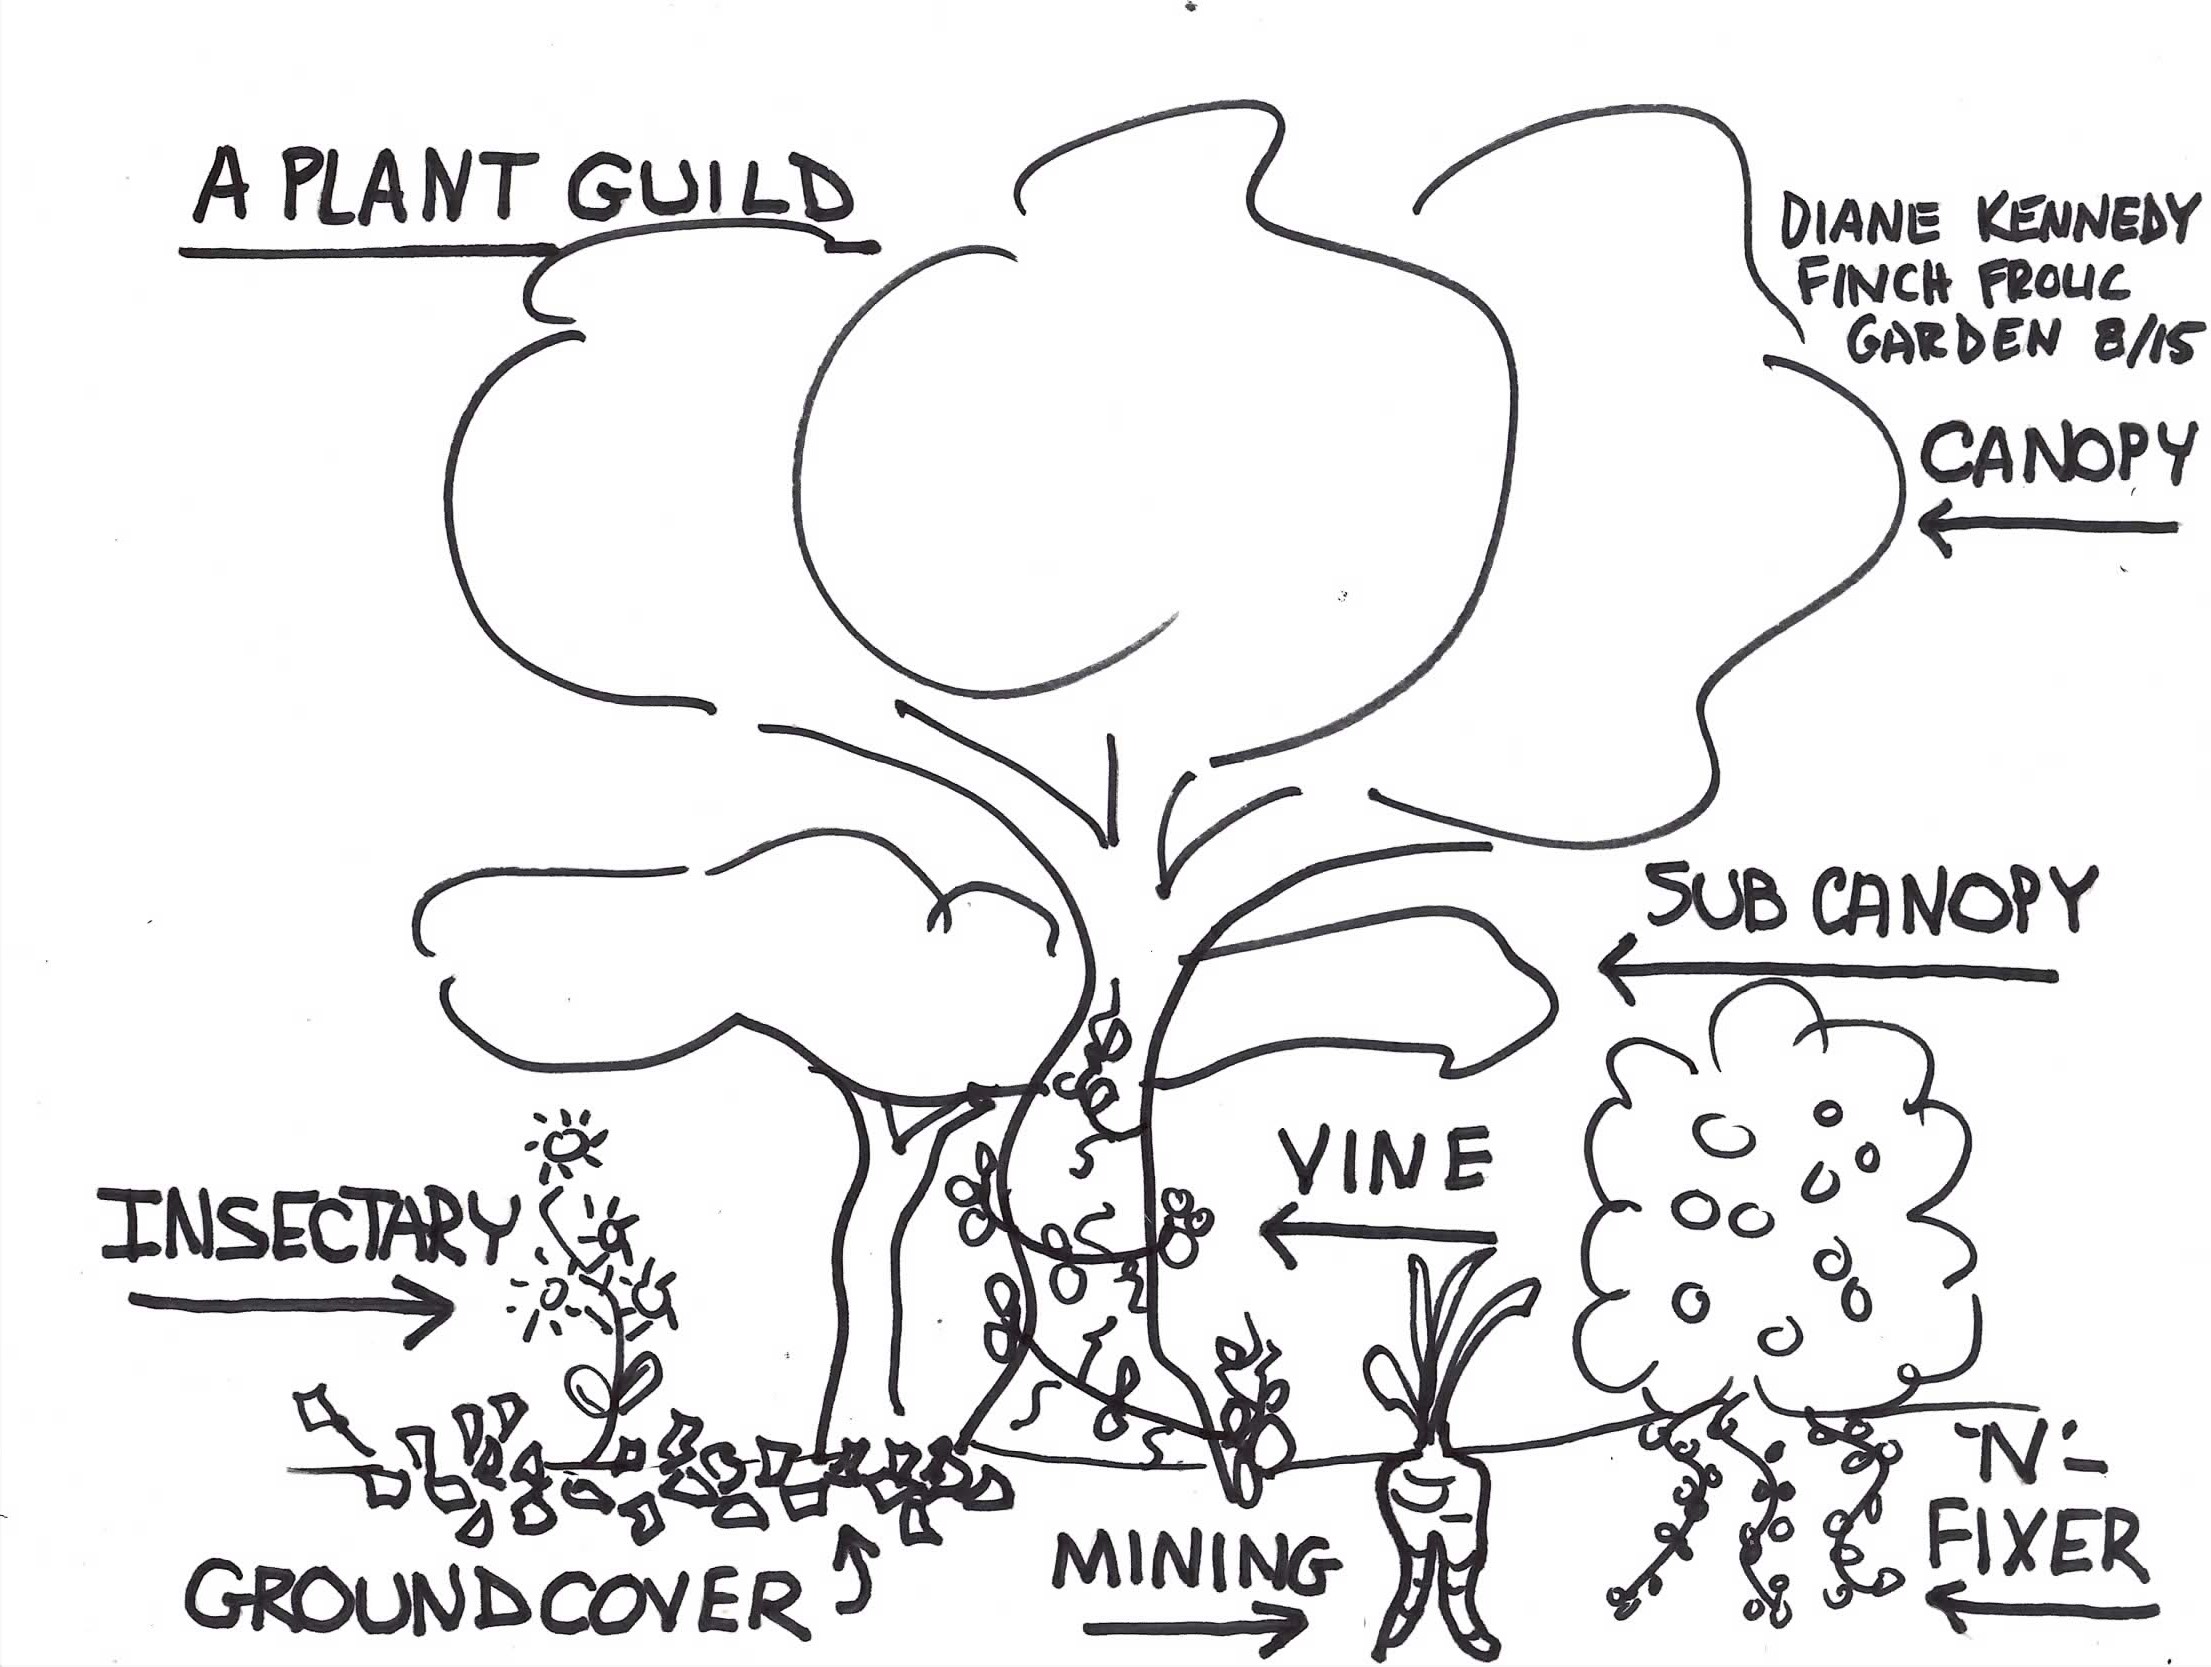
Plant Guild #9: The Whole Picture
 When set in motion the many parts of a plant guild will create a self-sustaining cycle of nutrition and water. By understanding the guild template and what plants fit where, we can plug in plants that fulfill those roles and also provide for us food, building materials, fuel and medicine as well as beauty.
Plant the appropriate plants for where you are placing them, for your soil and water use, and stack them in a guild with compatible plants that you can use. The ground will be covered by a foliar density that will keep grasses and other weeds at bay and provide excellent habitat for a full range of animals and insects. By stacking plants in a guild you are bringing life and abundance back to your garden.
Does it still sound so complicated? Rather than try to learn the roles of all the plants in the world, start small. Make a list of all the plants you want to plant. List them under food bearing, culinary/medicinal herb, craft/building material, and ornamental. Then read up on those plants. What size are they at maturity? Do they need full sun, partial or full shade? If trees, do they have an upright growth so you may plant under them (stonefruit), or do they like to have their roots covered and don’t like plants directly under them (citrus and avocado)?
Citrus doesn’t like plants under its canopy, but does like plants outside its dripline. Are they annuals, perennials or biennials? What is their growth habit: sprawling, rooting where they spread, upright bushy, do they need support and can they cling or do they need to be tied to a support?
Will the plant twine on its own? Do they require digging up to harvest? Do they fix nitrogen in the soil? Do they drop leaves or are they evergreen? Are they fragrant? When are their bloom times? Fruiting times? Are they cold tolerant or do they need chill hours? How much water do they need? What are their companion plants (there are many guides for this online, or in books on companion planting.)
Do vines or canes need to be tied to supports? As you are acquainting yourself with your plants, you can add to their categorization, and shift them into the parts of a plant guild. Yes, many plants will be under more than one category… great! Fit them into the template under only one category, because diversity in the guild is very important.
Draw your guilds with their plants identified out on paper before you begin to purchase plants. Decide where the best location for each is on your property. Tropical plants that are thirsty and don’t have cold tolerance should go in well-draining areas towards the top or middle of your property where they can be easily watered. Plants that need or can tolerate a chill should go where the cold will settle.
Once it is on paper, then start planting. You don’t have to plant all the guilds at once… do it as you have time and money for it. Trees should come first. Bury wood to nutrify the soil in your beds, and don’t forget to sheet mulch.
Remember that in permaculture, a garden is 99% design and 1% labor. If you think buying the plants first and getting them in the ground without planning is going to save you time and money, think again. You are gambling, and will be disappointed.
Have fun with your plant guilds, and see how miraculous these combinations of plants work. When you go hiking, look at how undisturbed native plants grow and try to identify their components in nature’s plant guild. Guilds are really the only way to grow without chemicals, inexpensively and in a way that builds soil and habitat.
You can find the rest of the 9-part Plant Guild series here: Plant Guilds: What are they and how do they work? The first in a series. , Plant Guild #2: Canopy , Plant Guild #3: Sub-Canopy , Plant Guild #4: Nitrogen-Fixers, Plant Guild #5: Mining Plants, Plant Guild #6: Groundcovers, Plant Guild #7: Vines, Plant Guild #8: Insectiaries .
You May Also Like
Native Insects and IPM
- Animals, Bees, Birding, Compost, Fungus and Mushrooms, Gardening adventures, Hugelkultur, Microbes and Fungi, Natives, Other Insects, Permaculture and Edible Forest Gardening Adventures, Predators, Quail, Rain Catching, Recycling and Repurposing, Reptiles and Amphibians, Soil, Water, Water Saving, Worms
Plant Guilds #2: Upper Canopy

An oak is home to over 300 species. Not counting human. Whether you are planting small plants in pots, ornamentals in your yard or a food forest, you need plants that will provide an upper canopy for others. If you have small plants, then you will have a short canopy. Maybe your canopy is a tomato plant. Maybe its an oak. Whatever it is, canopy has many functions.

Upper canopy provides shade so that other plants can grow. It drops leaves, bark, flowers and seeds and/or fruit to provide compost and food for all levels of animals down to soil microbes. Canopy provides protective shelter for many kinds of mammals, birds, reptiles and insects as they hide under the leaves. A mature oak is home to over 300 species. Old scarred canopy full of holes is the natural home for honeybees, and many types of bird and other animal. It is a storage unit for acorns gathered by woodpeckers. Where you have animals, you have droppings. All the poo, feathers, regurgitated pellets, fur, scales and other organic waste that falls from canopy is vitally important for the health of the soil below.
Canopy provides a perch for raptors and larger birds that help with rodent control.
Canopy helps slow the wind; the fewer trees we have the harder the winds. Canopy also filters the wind, blocking dust and other debris. Canopy helps cool and moisturize the wind. The leaves of canopy trees help buffer the rain. Rain on bare ground is as compacting as driving over the dirt with a tractor. If rain hits leaves it bounces, rolls or shatters. Rain can then hit other layers below the canopy, finally rolling through leaf mulch to percolate into the soil without compacting it.
Canopy catches moisture as well. Here in Southern California we may not receive a lot of rain, but we do have moisture during the night.
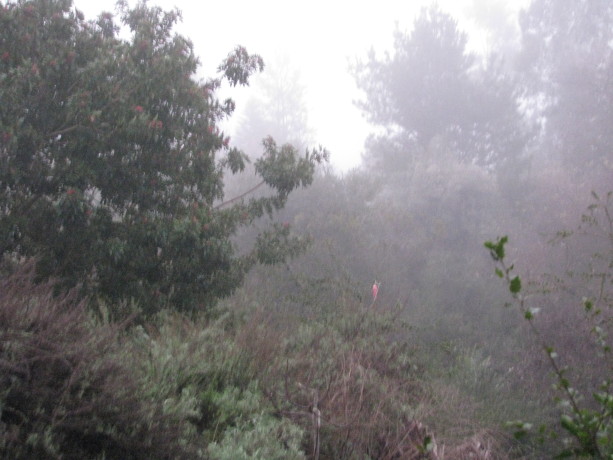 Often I’ve walked through Finch Frolic Garden of a morning to feed the hens, and the garden sounded as if it had its own special rain cloud over it. That is because moisture condenses on the leaves and rolls off. The more canopy and the higher the canopy, the more water we can collect. In that same way, canopy begins to hold humidity on the property, which the rest of the guild contributes to. Pollen dries out. With longer, hotter, drier summers there is worse pollination even if the pollinators are active, because the pollen isn’t viable. Less humidity equals fewer fruits, nuts and vegetables. Therefore, the more canopy, and other parts of a guild, the moister the air and the better the harvest.
Canopy is in connection with all other plants in its community, linked via webs called mycorrhizal fungi. Through these webs the canopy sends chemical messages and nutrients to other plants. Every plant in the community benefits from the strong communications from the canopy trees.
Canopy builds soil. Canopy trees are large on top and equally large underground. Tree root growth can mirror the height and width of the above-ground part, and it can be larger. Therefore canopy trees and plants break through hard soil with their roots, opening oxygen, nutrient and moisture pathways that allow the roots of other plants passage, as well as for worms and other decomposers. As the roots die they become organic material deep in the soil – effortless hugelkultur; canopy is composting above and below the ground. Plants produce exudates through their roots – sugars, proteins and carbohydrates that attract and feed microbes. Plants change their exudates to attract and repel specific microbes, which make available different nutrients for the plant to take up. A soil sample taken in the same spot within a month’s time may be different due to the plant manipulating the microbes with exudates. Not only are these sticky substances organic materials that improve the soil, but they also help to bind loose soil together, repairing sandy soils or those of decomposed granite. The taller the canopy, the deeper and more extensive are the roots working to build break open or pull together dirt, add nutrients, feed and manage microbes, open oxygen and water channels, provide access for worms and other creatures that love to live near roots.
Canopy roots have different needs and therefore behave differently depending upon the species. Riparian plants search for water. If you have a standing water issue on your property, plant thirsty plants such as willow, fig, sycamore, elderberry or cottonwood. In nature, riparian trees help hold the rain in place, storing it in their massive trunks, blocking the current to slow flooding and erosion, spreading the water out across fields to slowly percolate into the ground, and turning the water into humidity through transpiration. The roots of thirsty plants are often invasive, so be sure they aren’t near structures, water lines, wells, septic systems or hardscape. Some canopy trees can’t survive with a lot of water, so the roots of those species won’t be destructive; they will flourish in dry and/or well-draining areas building soil and allowing water to collect underground.
In large agricultural tracts such as the Midwest and California’s Central Valley, the land is dropping dramatically as the aquifers are pumped dry. Right now in California the drop is about 2 inches a month. If the soil is sandy, it will again be able to hold rainwater, but without organic materials in the soil to keep it there the water will quickly flow away. If the soil is clay, those spaces that collapse are gone and no longer will act as aquifers… unless canopy trees are grown and allowed to age. Their root systems will again open up the ground and allow the soil to be receptive to water storage. Again, roots produce exudates, and roots swell up and die underground leaving wonderful food for beneficial fungi, microbes, worms and all those soil builders. The solution is the same for both clay and sandy soils – any soil, for that matter. Organic material needs to be established deep underground, and how best to do that than by growing trees?
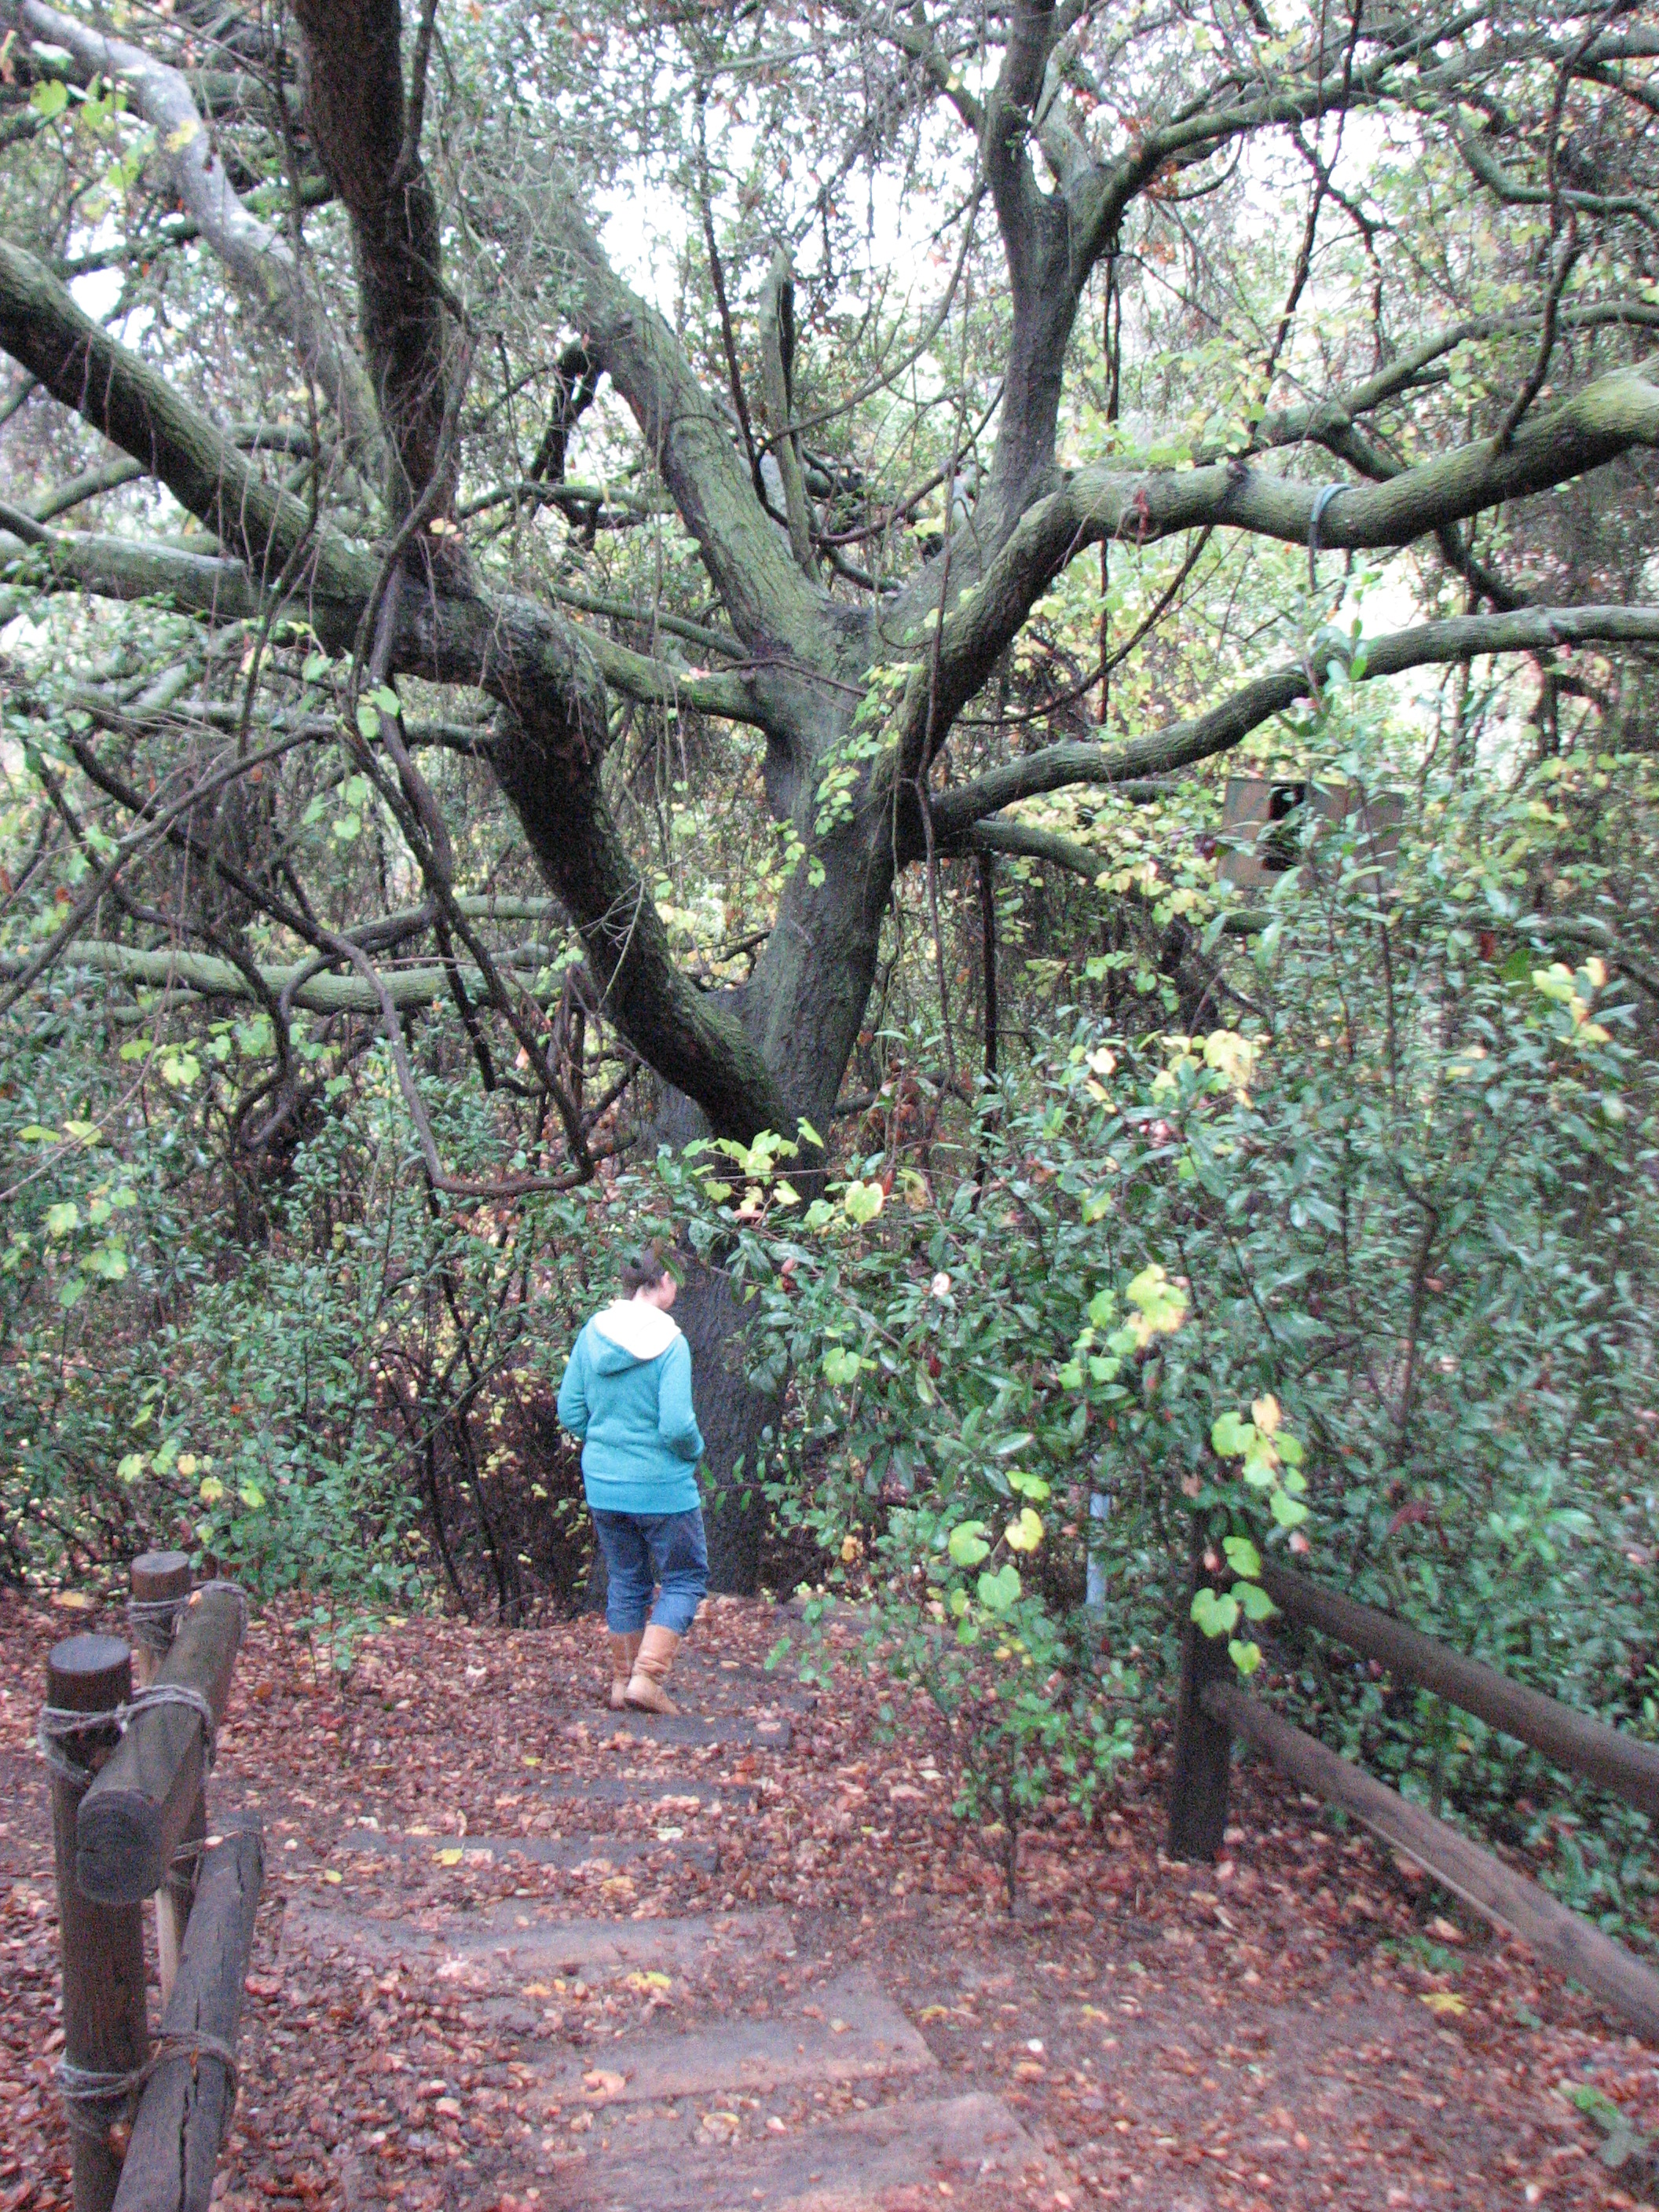
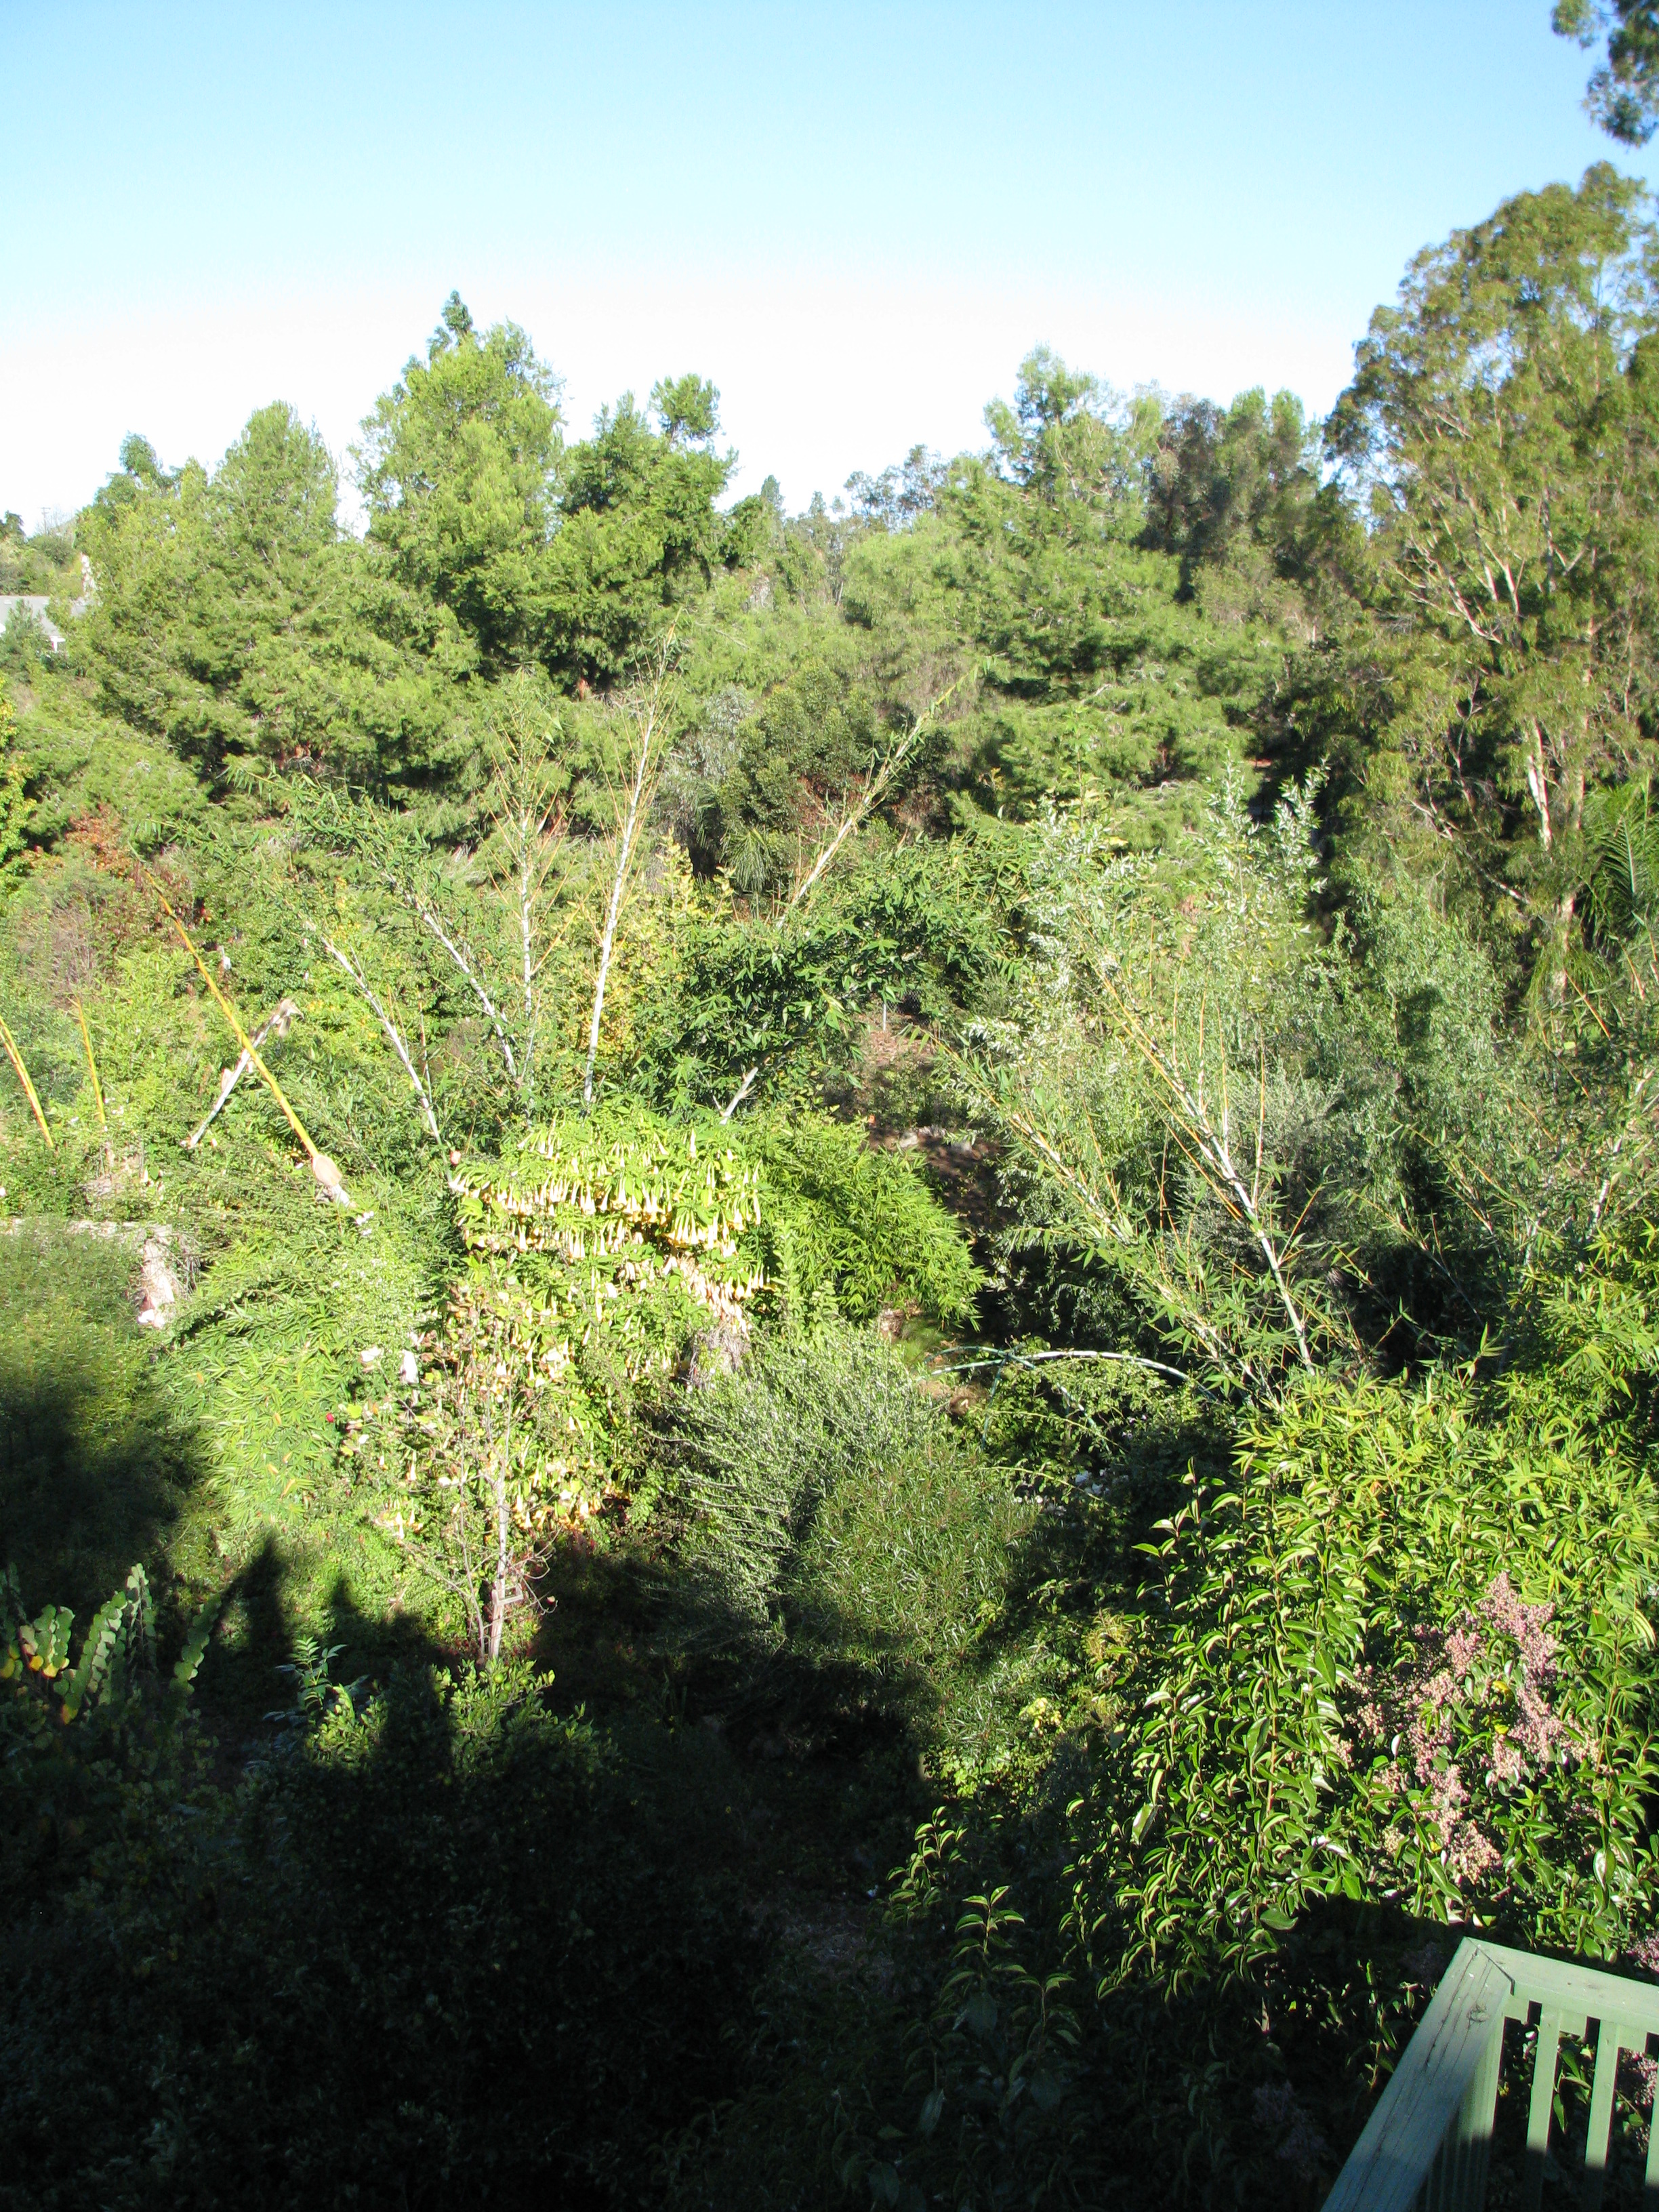
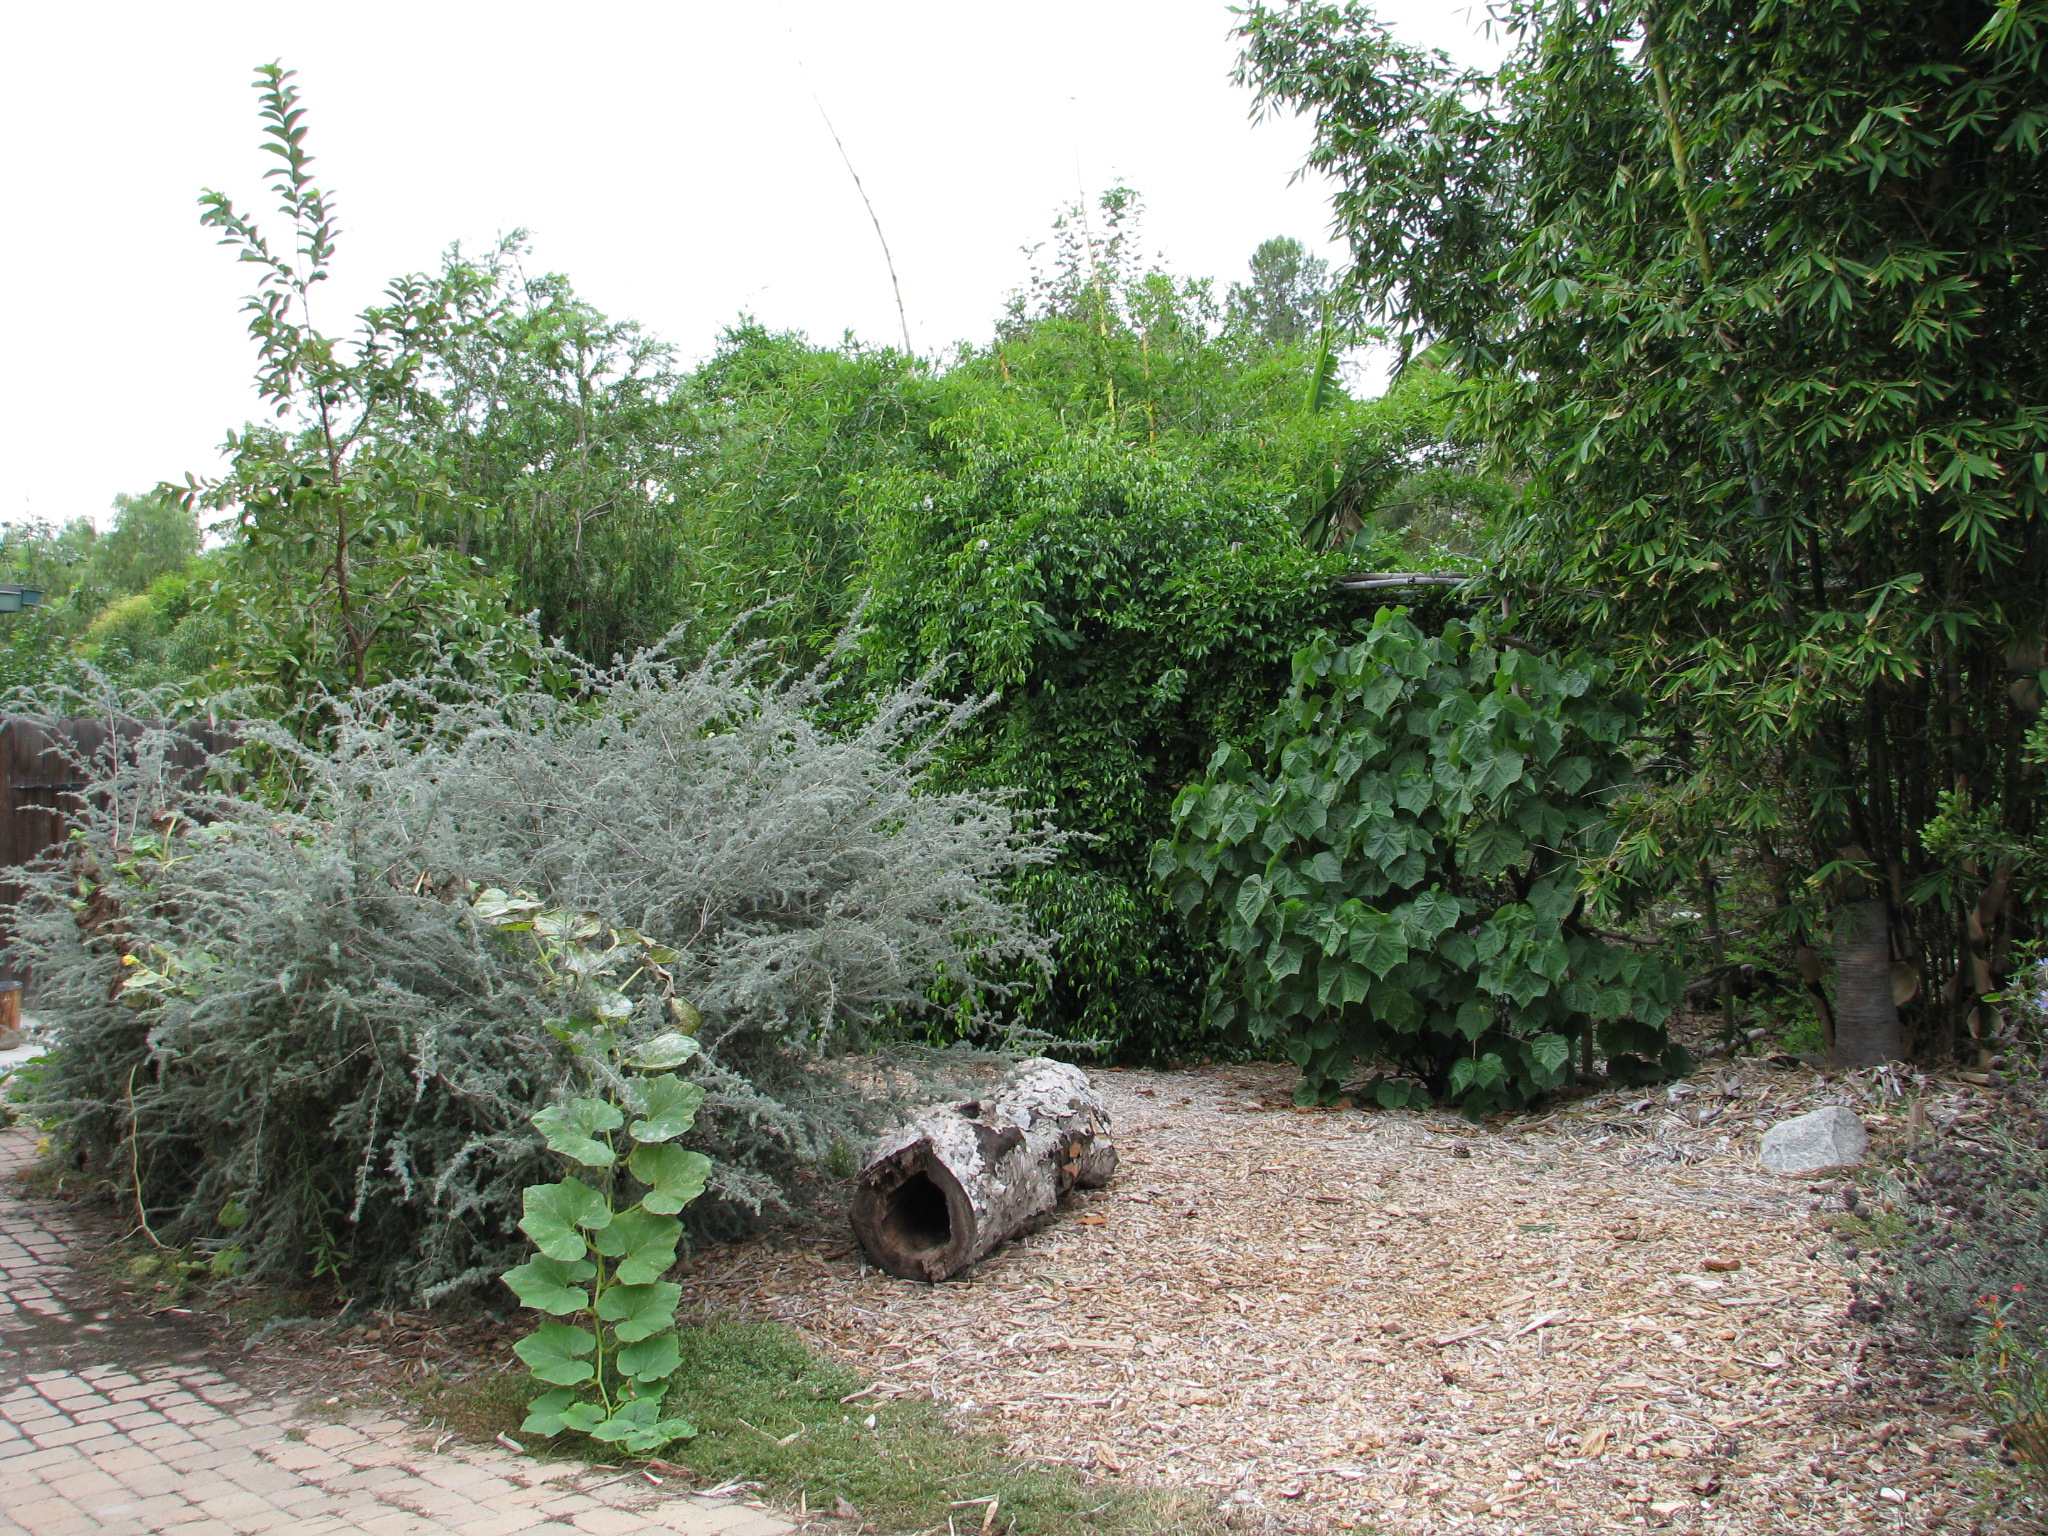
In permaculture design, the largest canopy is often found in Zone 5, which is the native strip. In Zone 5 you can study what canopy provides, and use that information in the design of your garden.
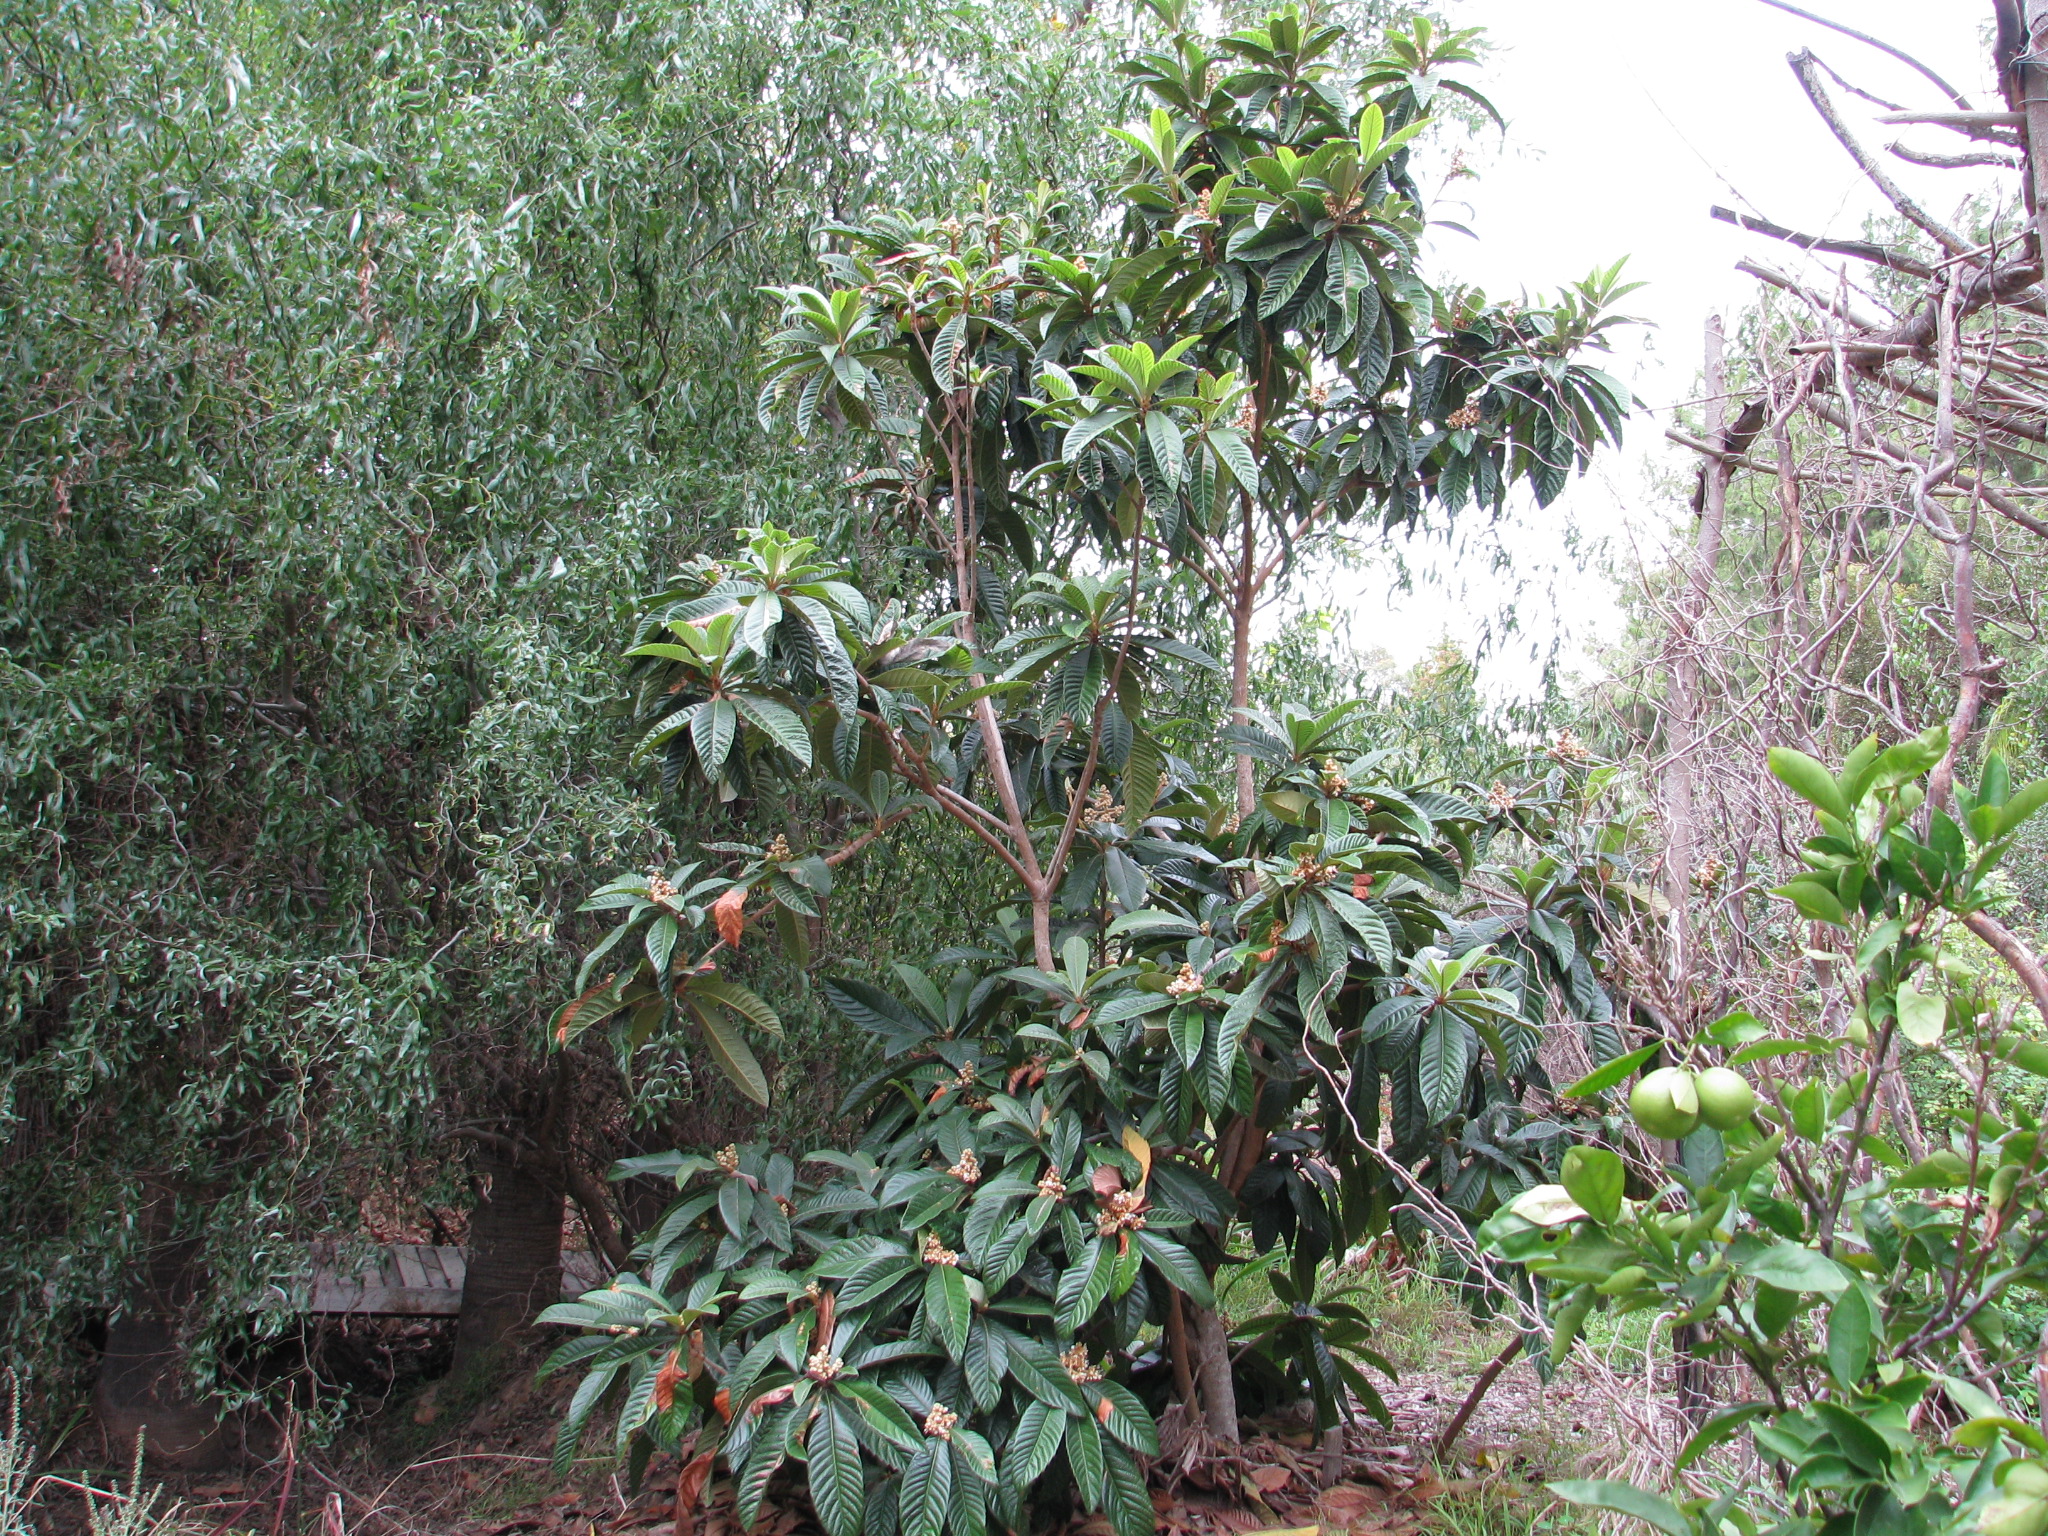
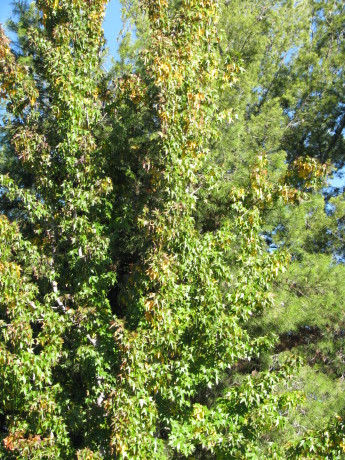 How do you achieve canopy in your garden? If your canopy is something that grows slowly, then you will need to nursery it in with a fast-growing, shorter-lived tree that can be cut and used as mulch when the desired canopy tree becomes well established. Some trees need to be sacrificial to insure the success of your target trees. For instance, we have a flame tree that was part of the original plantings of the garden. It is being shaded out by other trees and plants, and all things considered it doesn’t do enough for the garden to be occupying that space (everything in your garden should have at least three purposes). However a loquat seeded itself behind the flame tree, and the flame tree helped nursery it in. We love loquats, so the flame tree may come down and become buried mulch (hugelkultur), allowing that sunlight and nutrient load to become available for the loquat which is showing signs of stress due to lack of light. With our hotter, drier, longer summers, many fruit trees need canopy and nurse trees to help filter that intense heat and scorching sunlight. Plan your garden with canopy as the mainstay of your guild.
Therefore a canopy plant isn’t in stasis. It is working above and below ground constantly repairing and improving. By planting canopy – especially canopy that is native to your area – you are installing a worker that is improving the earth, the air, the water, the diversity of wildlife and the success of your harvest.
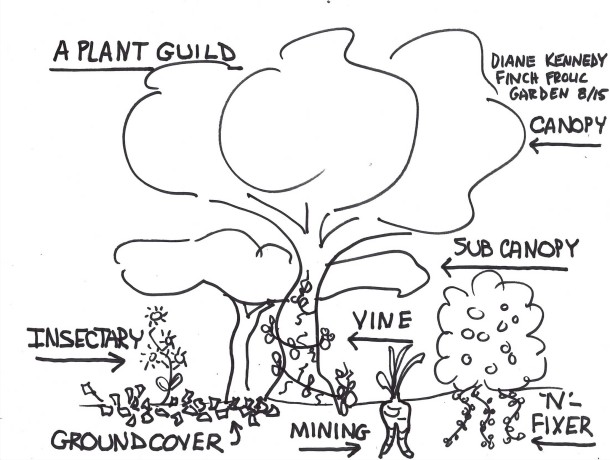
What makes up a plant guild. Canopy is improving the water storage of the soil and increasing potential for aquifers. The more site-appropriate, native canopy we can provide in Zone 5, and the more useful a canopy tree as the center of a food guild, the better off everything is. All canopy asks for in payment is mulch to get it started.
Next week we’ll explore sub-canopy! Stay tuned! You can find the entire 9-part Plant Guild series here: Plant Guilds: What are they and how do they work? The first in a series. , Plant Guild #3: Sub-Canopy , Plant Guild #4: Nitrogen-Fixers, Plant Guild #5: Mining Plants, Plant Guild #6: Groundcovers, Plant Guild #7: Vines, Plant Guild #8: Insectiaries, Plant Guild #9: The Whole Picture.
You May Also Like
Native Insects and IPM
- Animals, Bees, Birding, Compost, Fungus and Mushrooms, Gardening adventures, Heirloom Plants, Hugelkultur, Living structures, Natives, Other Insects, Perennial vegetables, Permaculture and Edible Forest Gardening Adventures, Photos, Ponds, Rain Catching, Recycling and Repurposing, Reptiles and Amphibians, Seeds, Soil, Water, Water Saving, Worms
October Garden
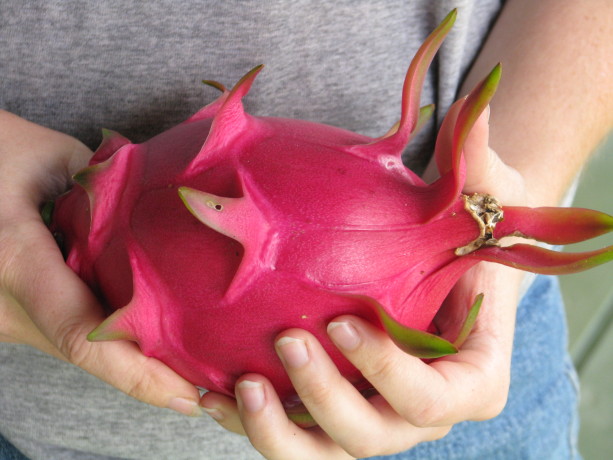
A huge dragonfruit; this kind is white inside. October is one of my favorite months, even when we’re on fire here in Southern California. This year we’ve been saved, and October is moderate in temperature and lovely.

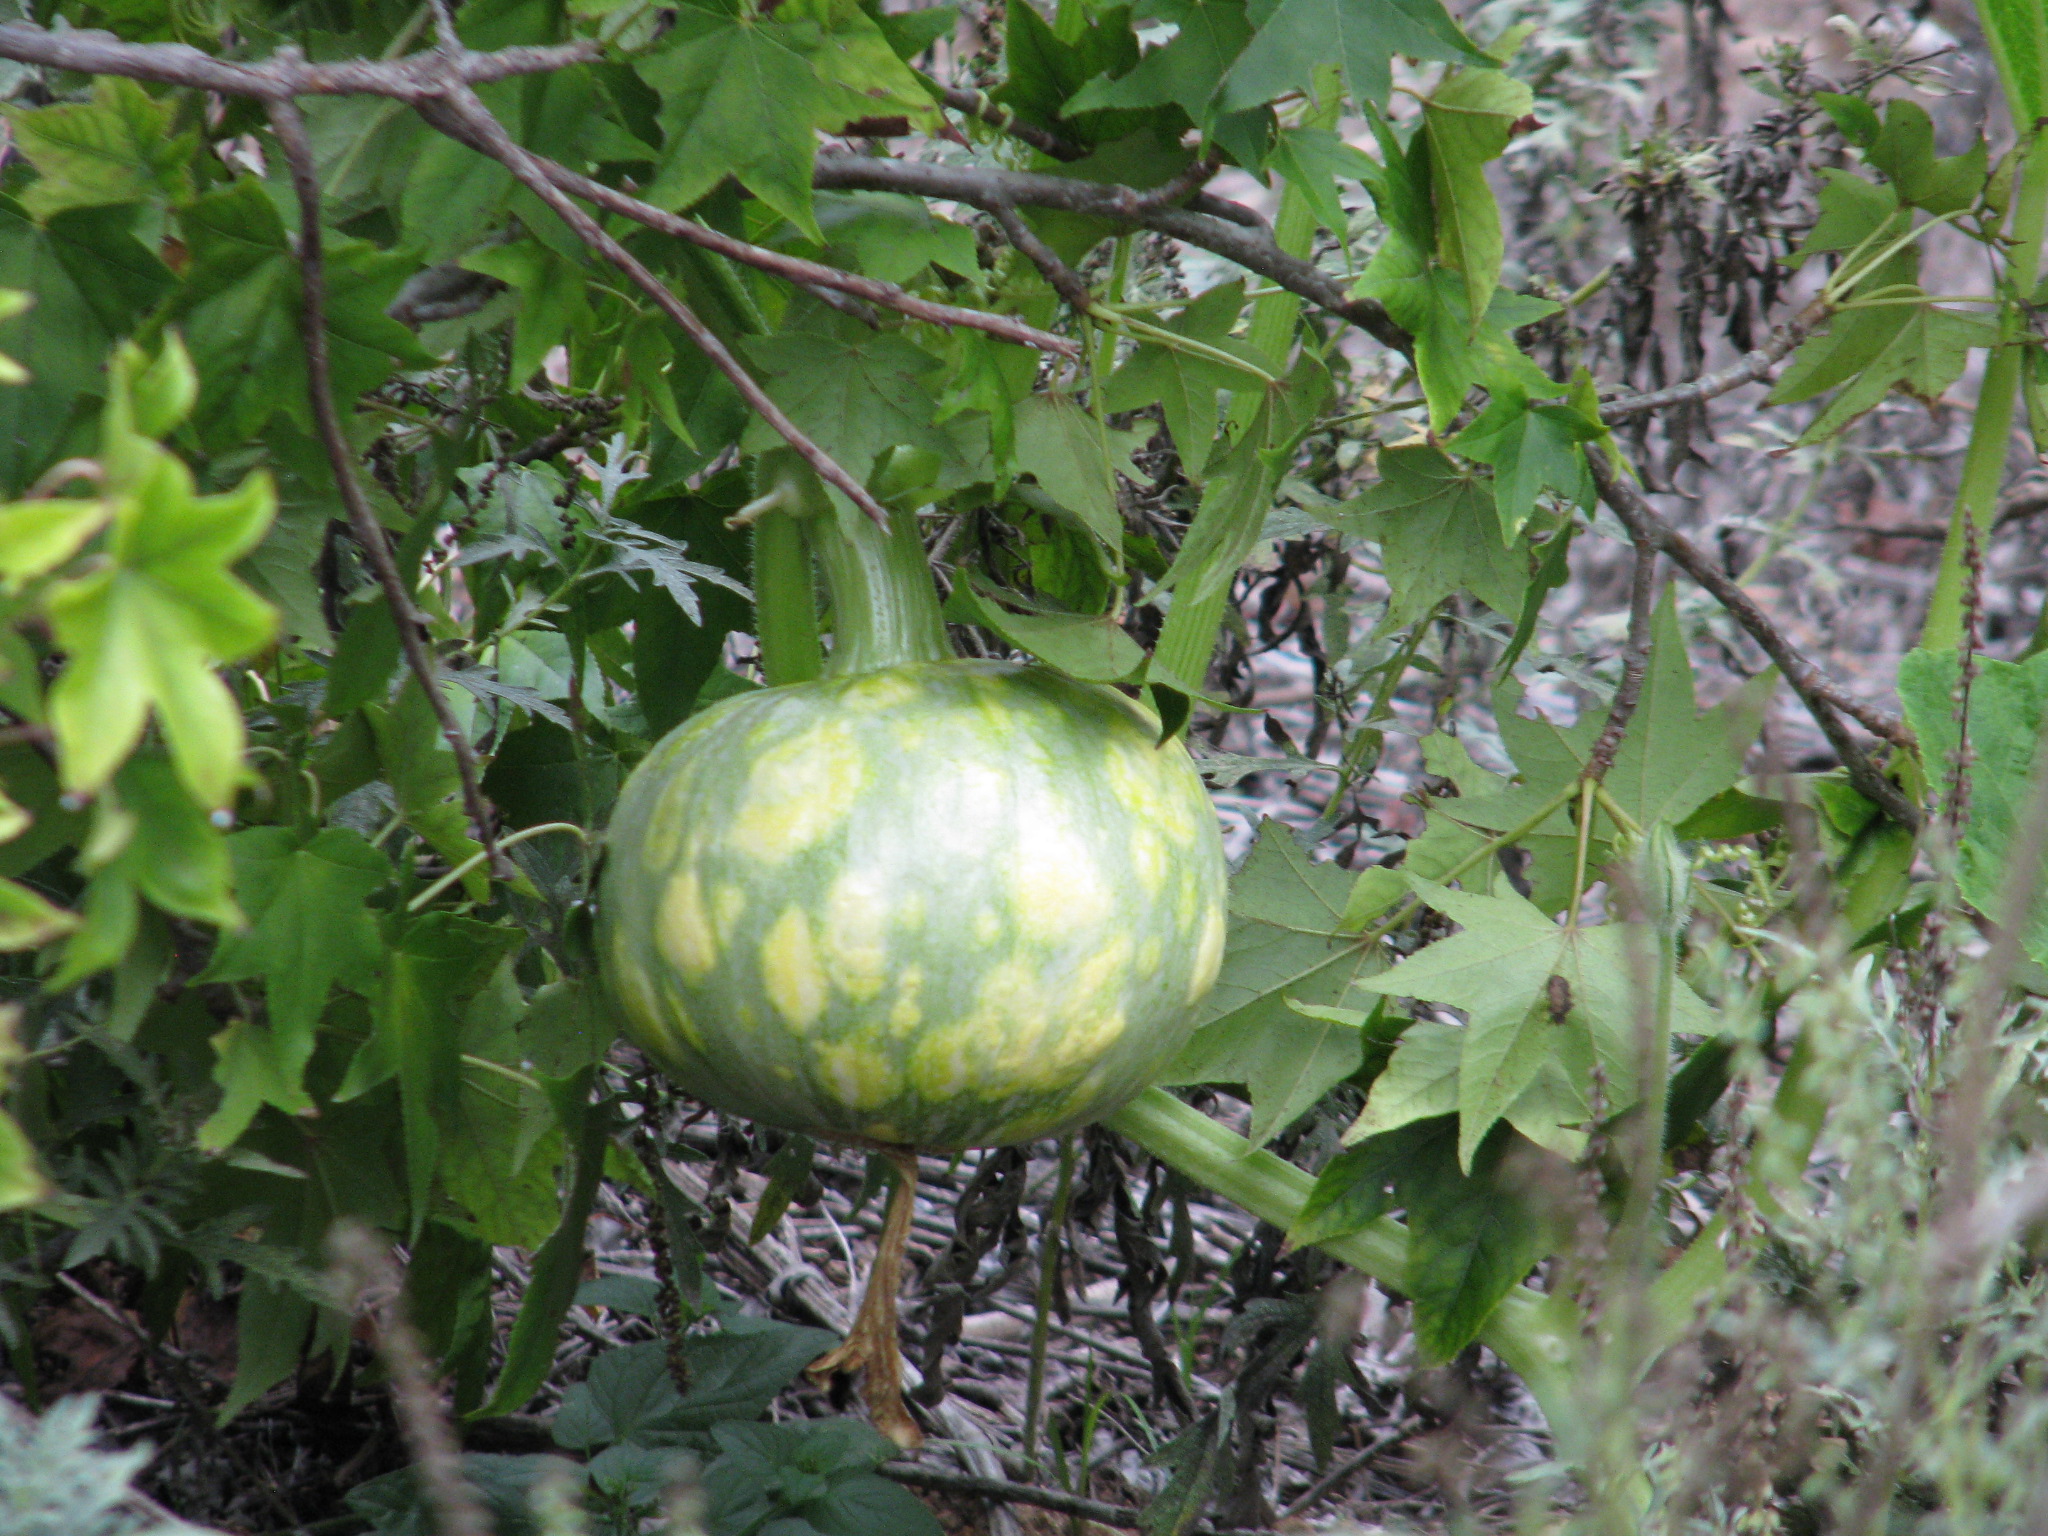
A volunteer kabocha squash vining its way through a bush. 
Our first ripeing macadamia harvest from a 3 year old tree, with a dragonfriuit snaking through. 
Edible hibiscus, volunteer nasturtiums and pathway across the rain catchment basin. 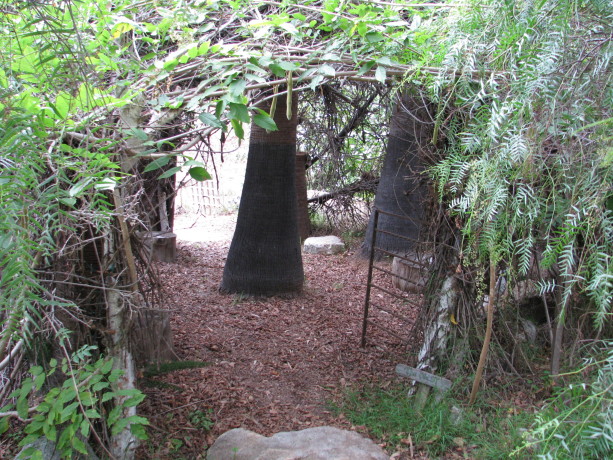
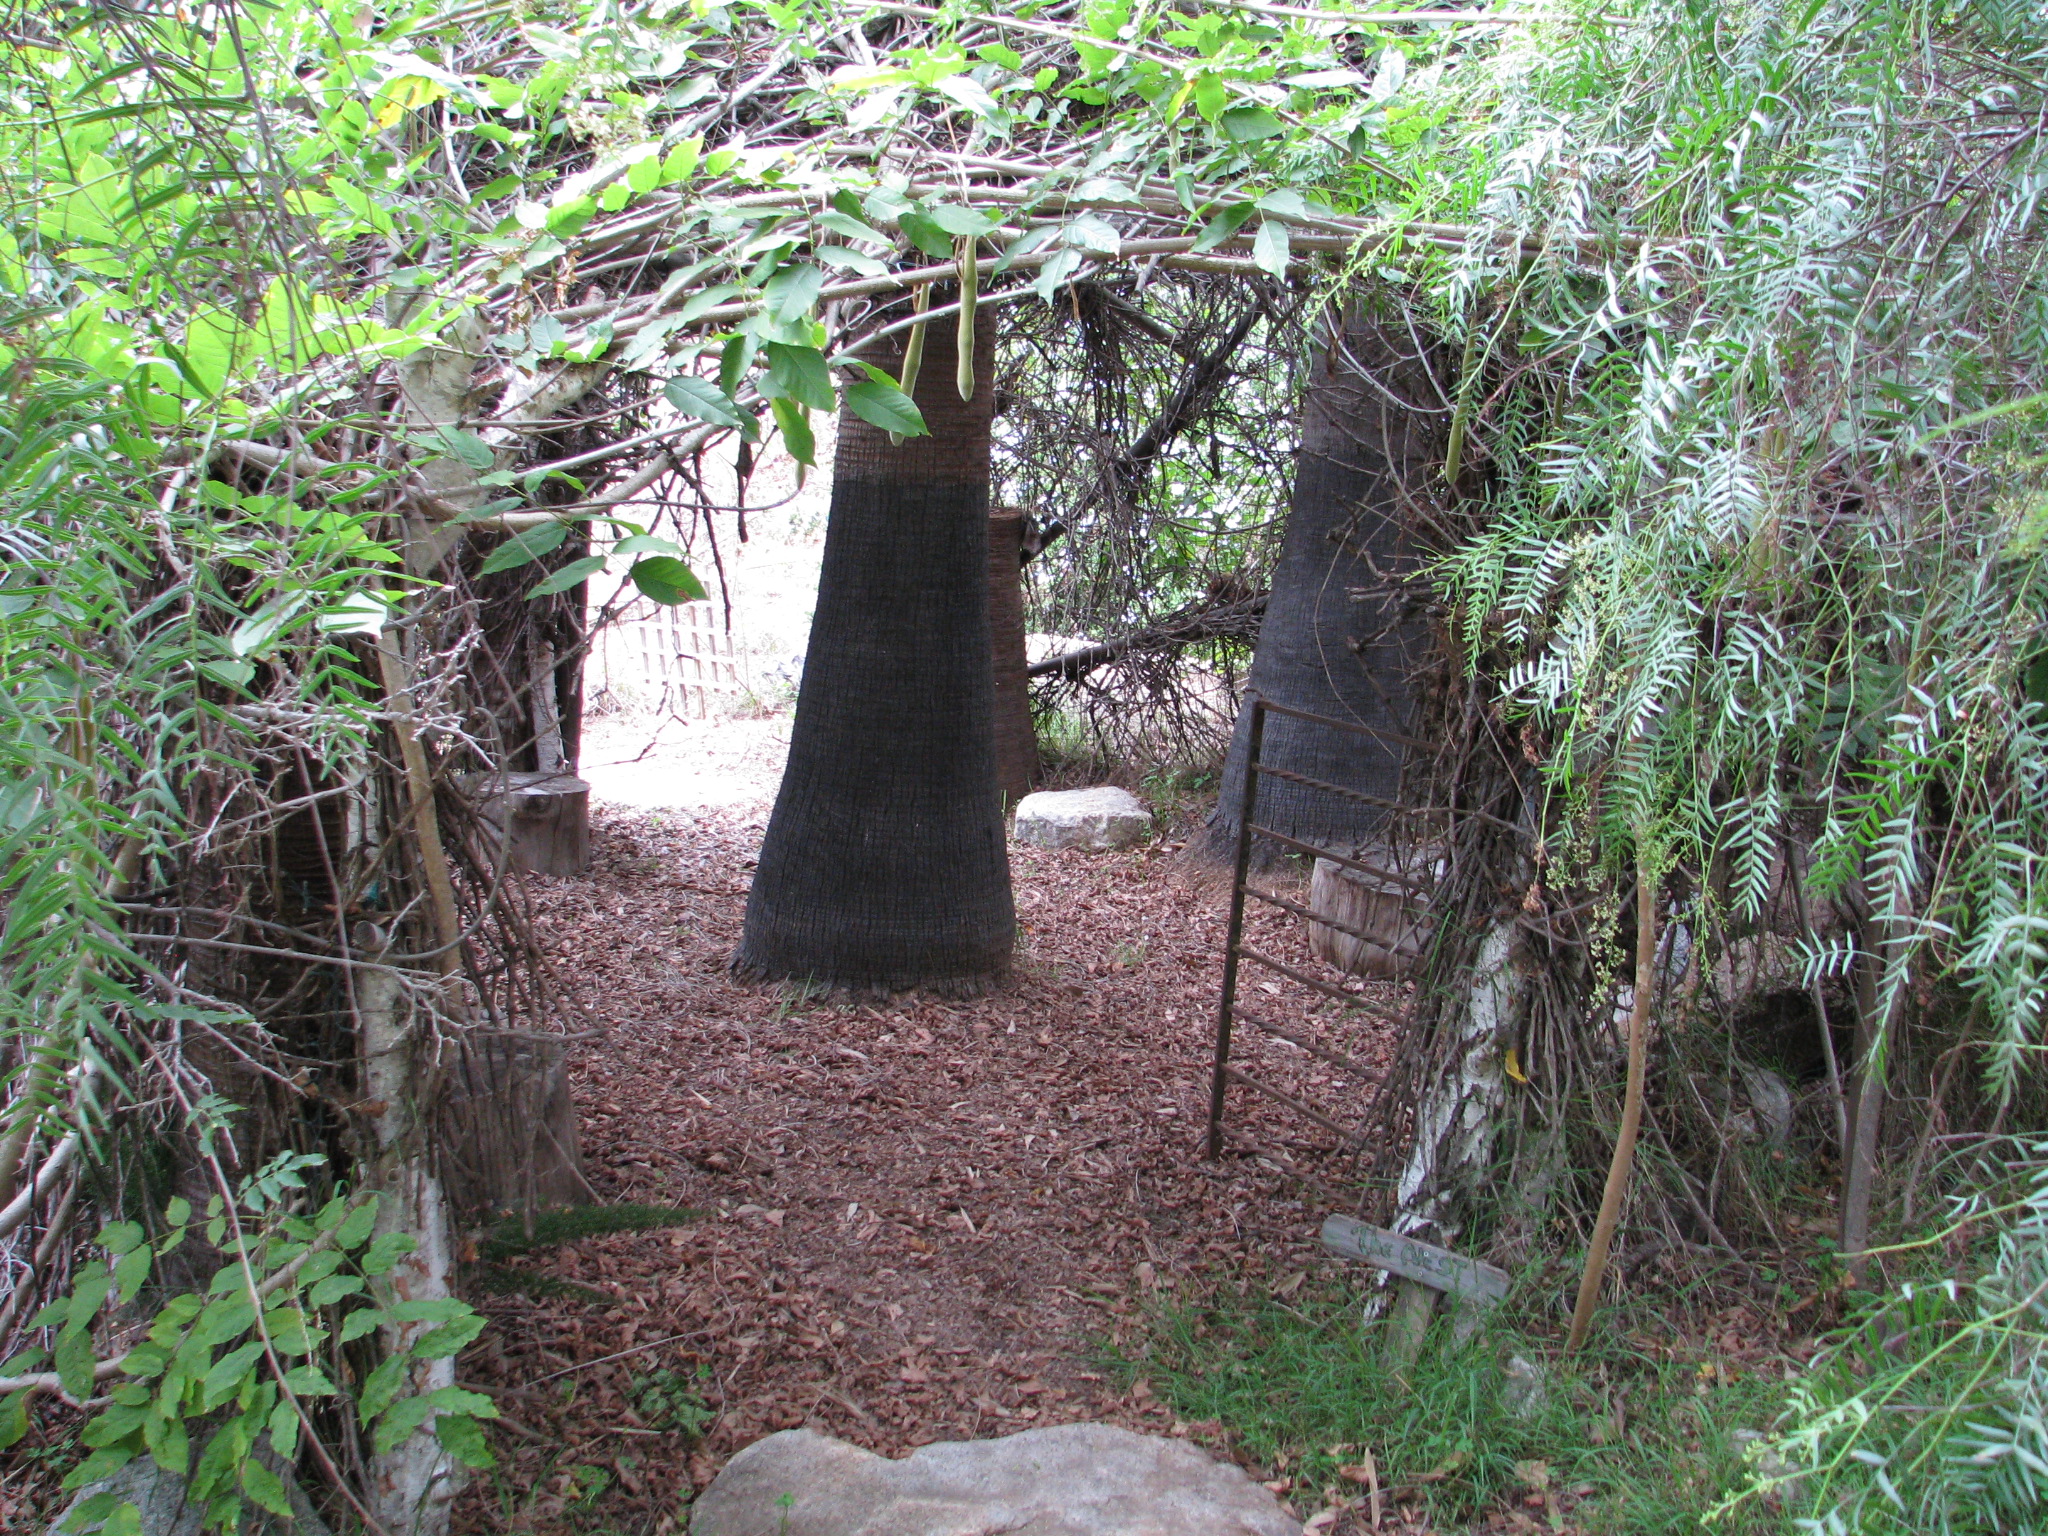
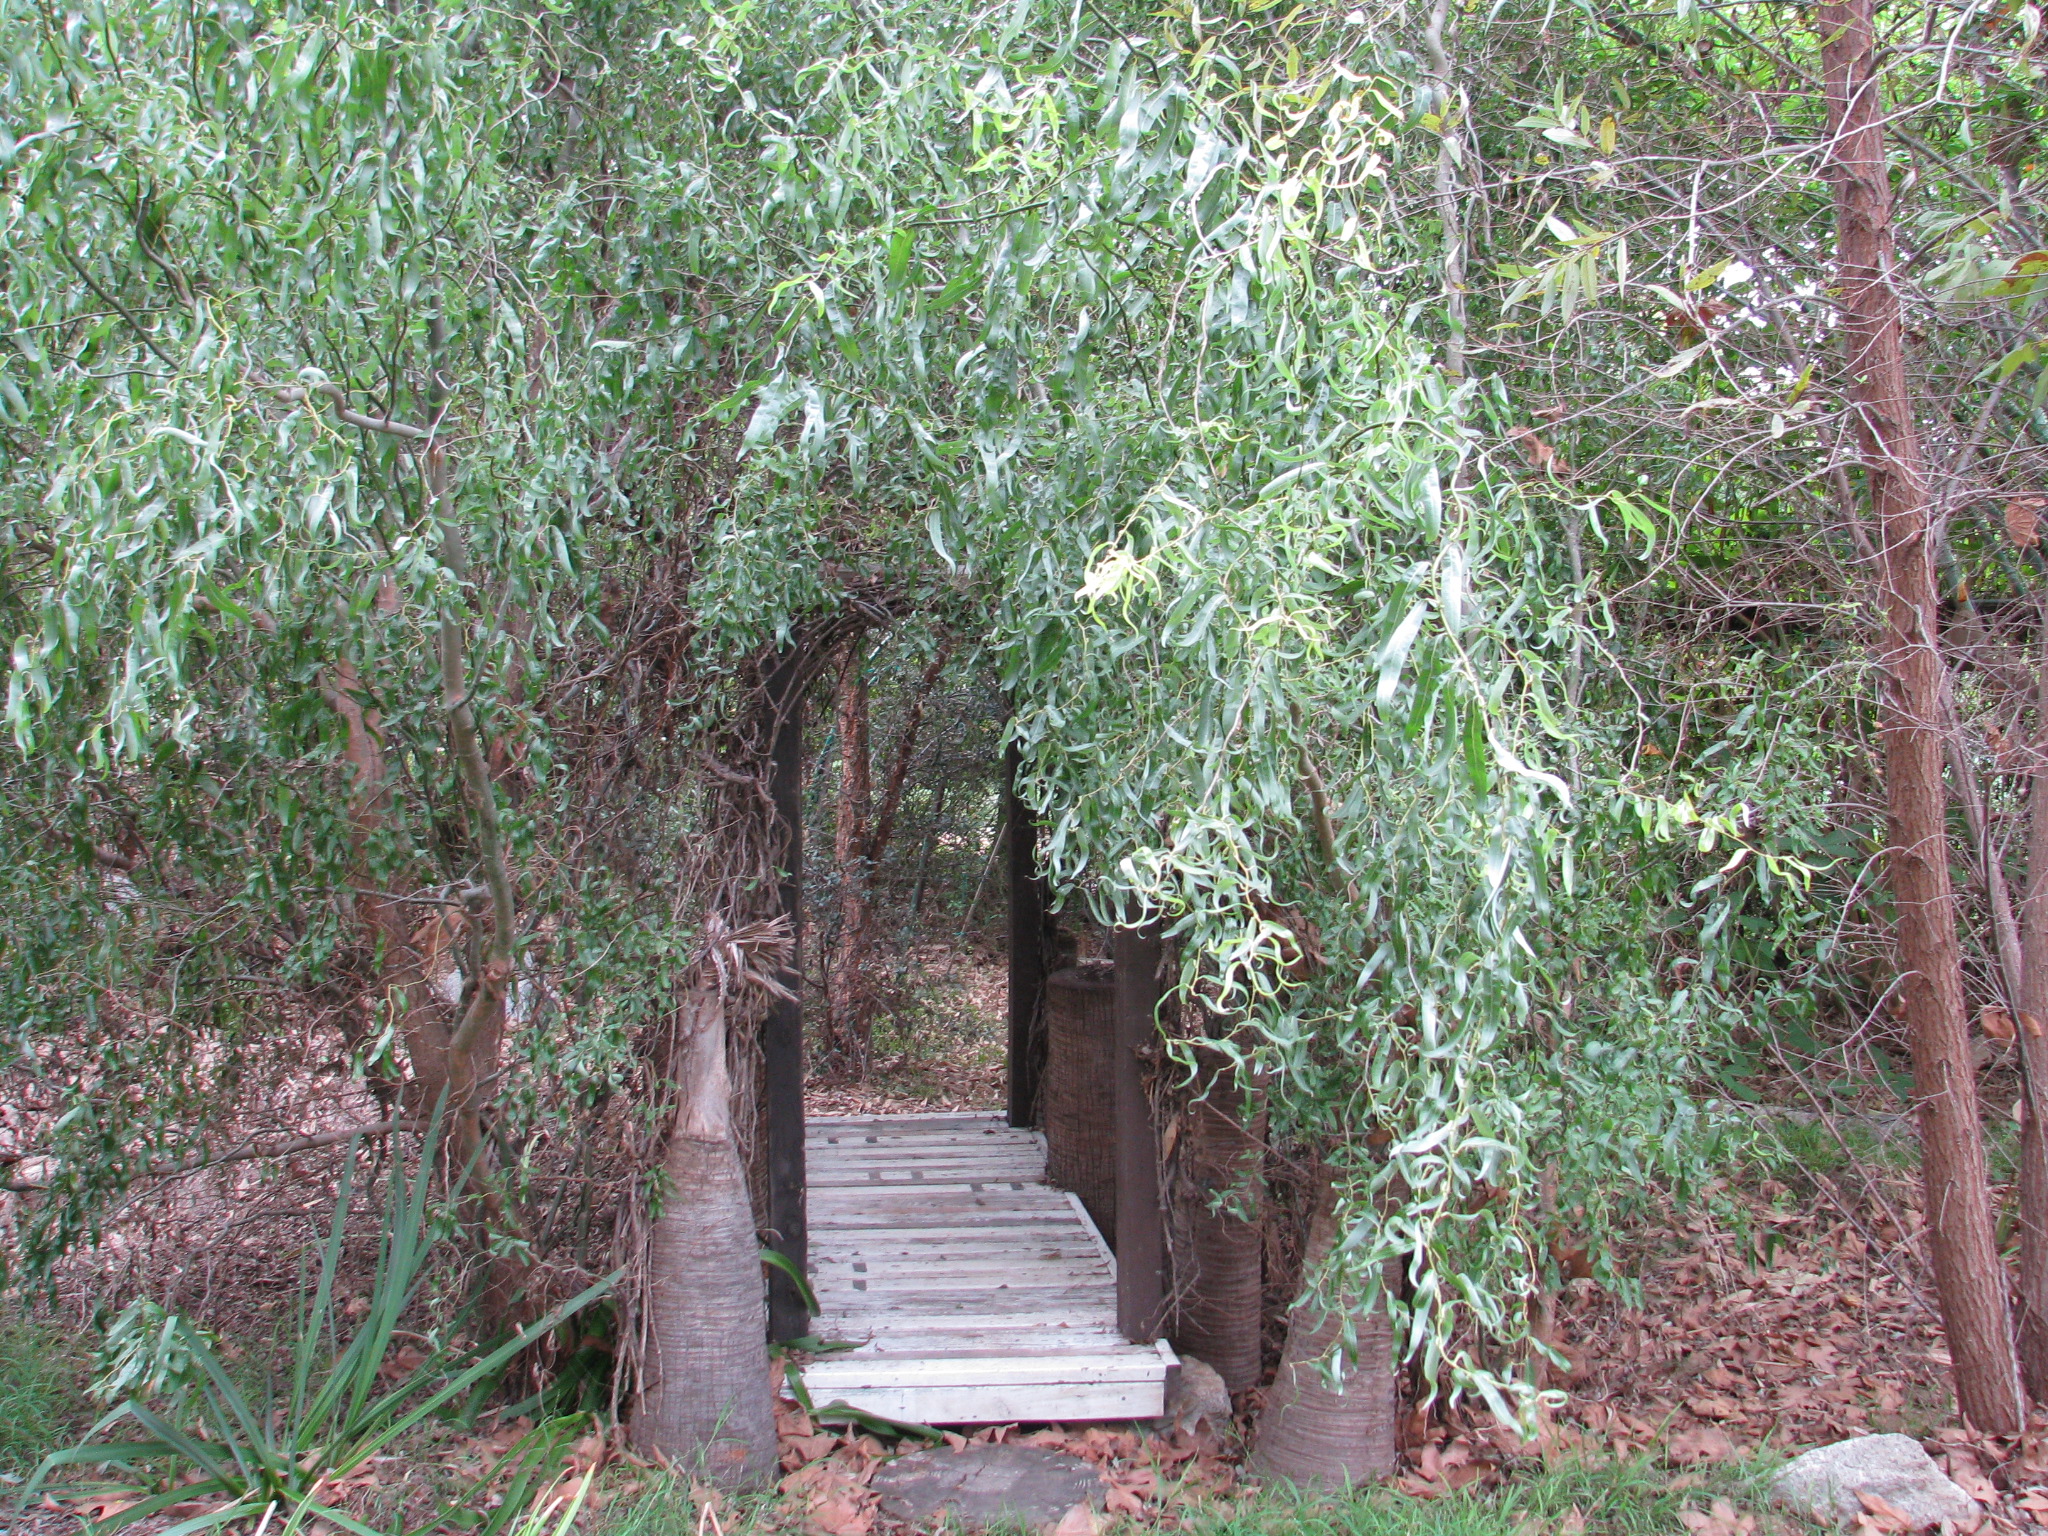
Into the wisteria-covered Nest. Summer has lost her vicious grip and we have time until the holiday rush and winter cold. Finch Frolic Garden has withstood the heat, the dry, the inundations, the snow and the changes, all without chemicals or much human intervention.

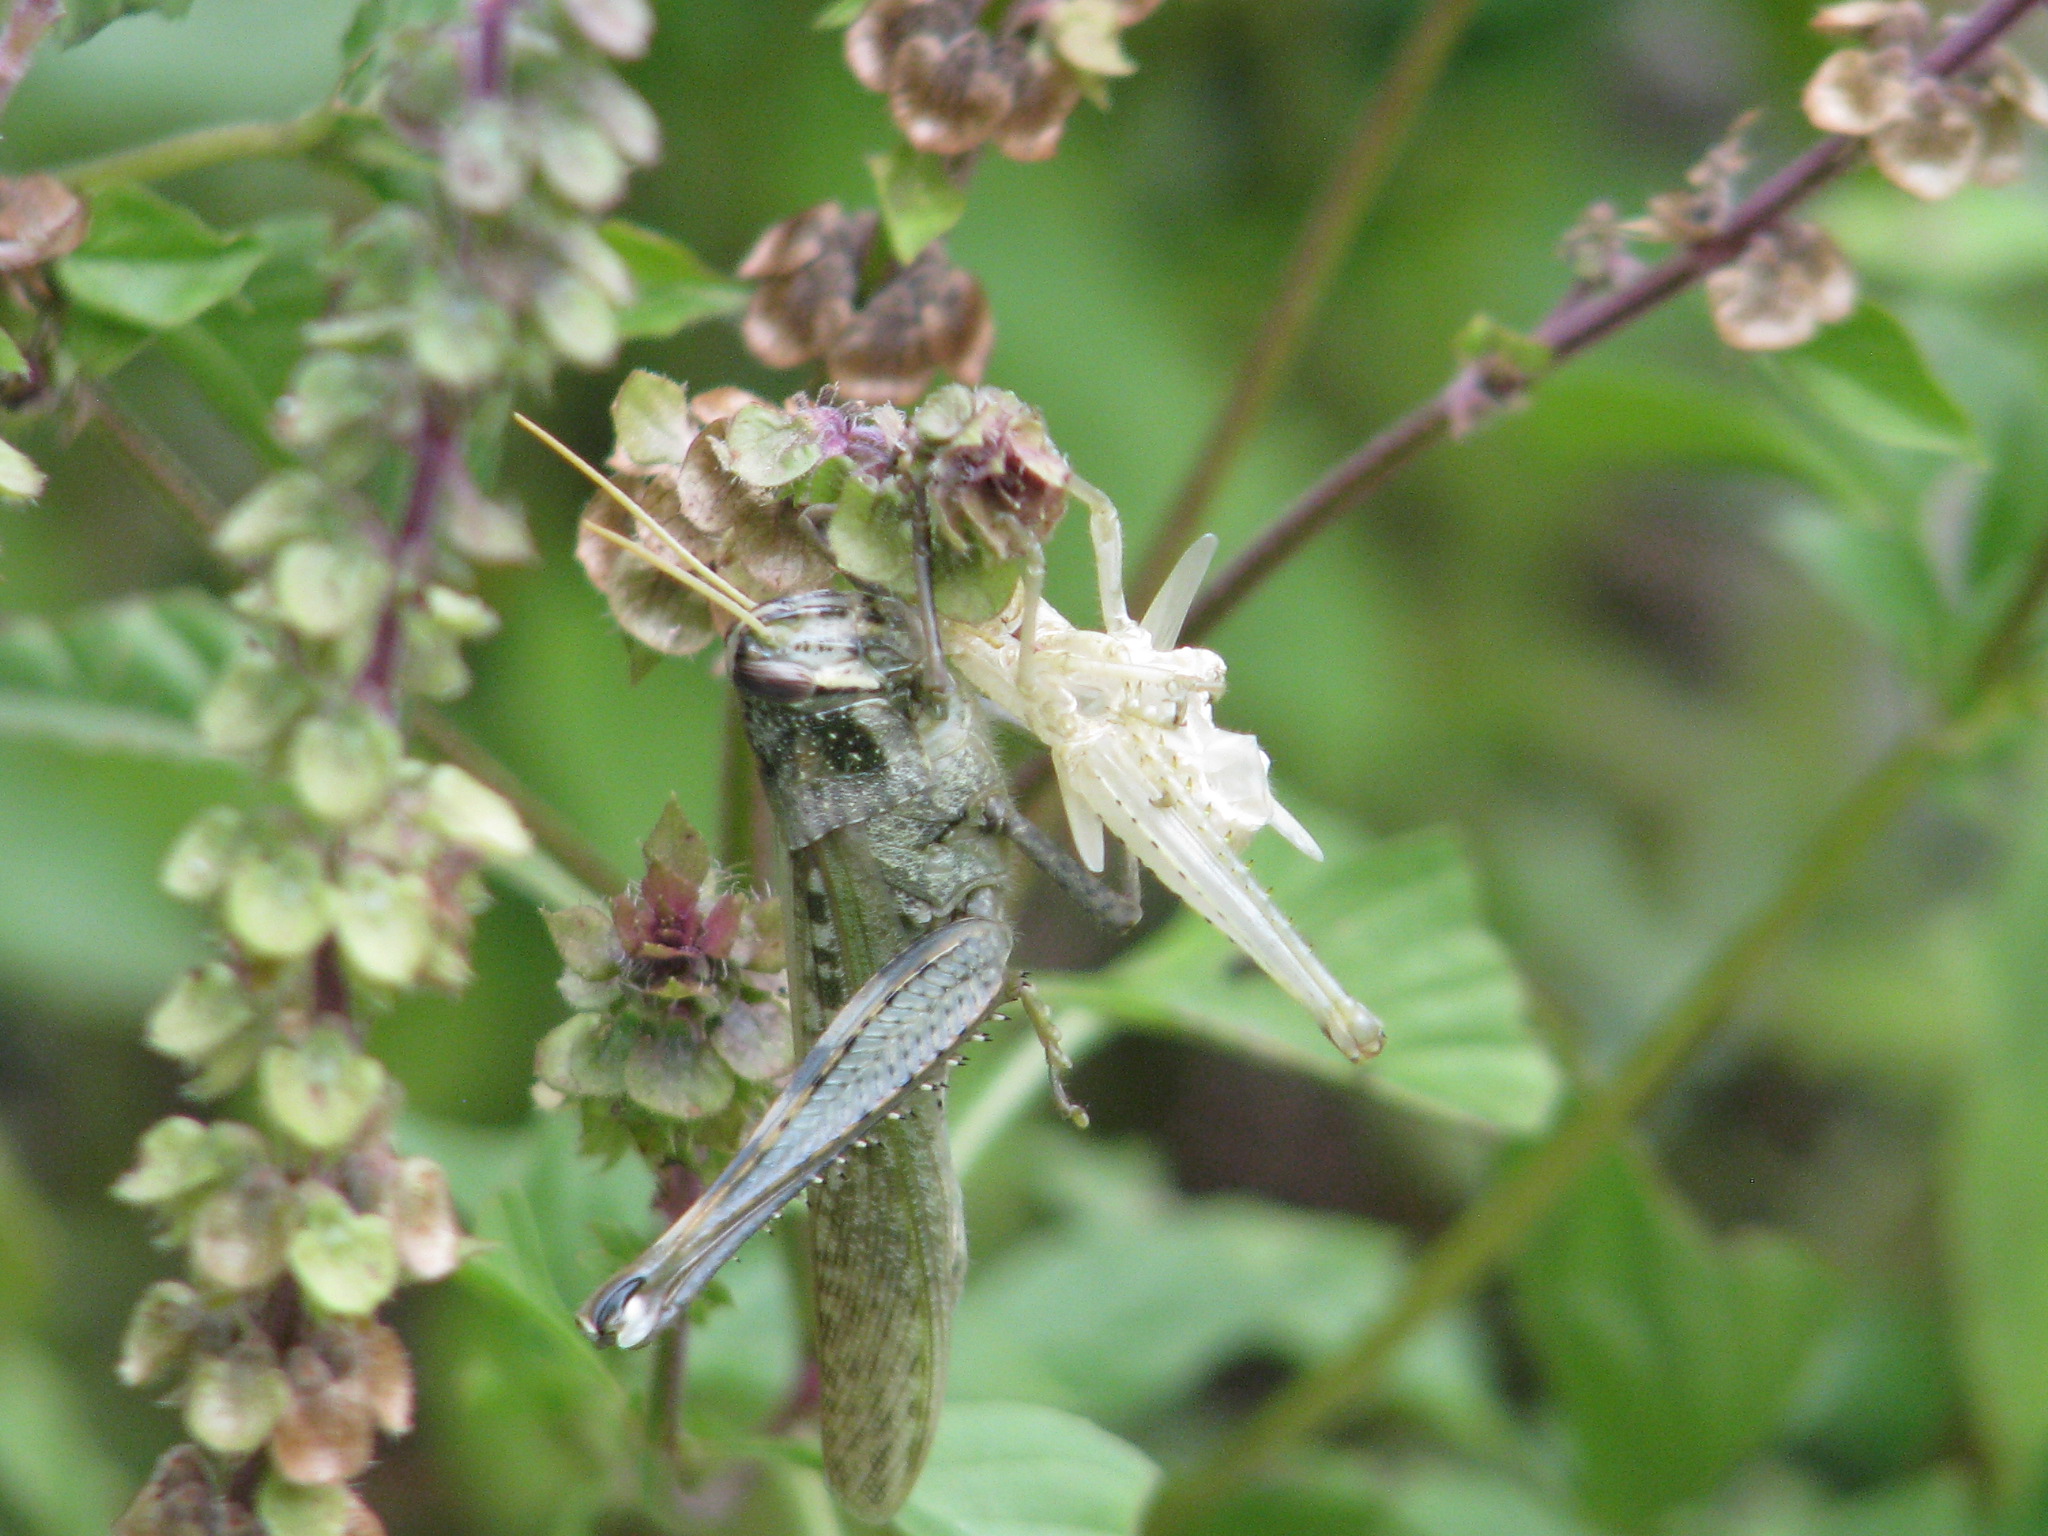
Grasshopper freshly out of last instar. 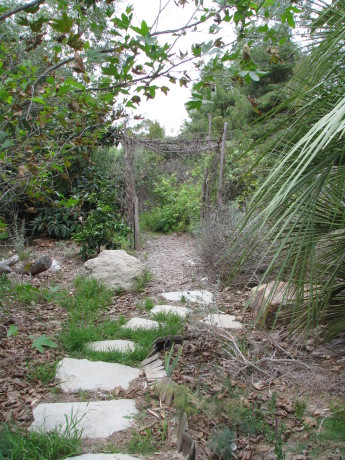
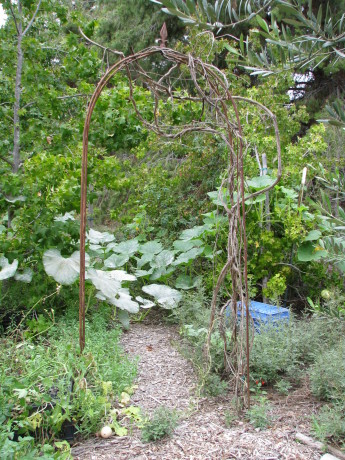
The curly willow trellis. We’ve lost some trees and shrubs this year, but that is mostly due to the faulty irrigation system which delivers too much or too little, and is out of sight underground.
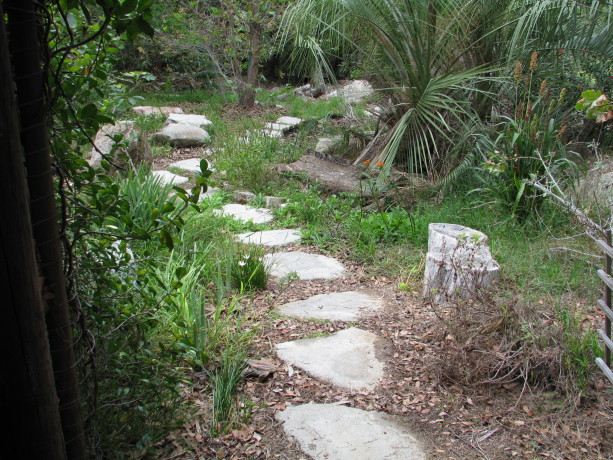
Urbanite pathway. 
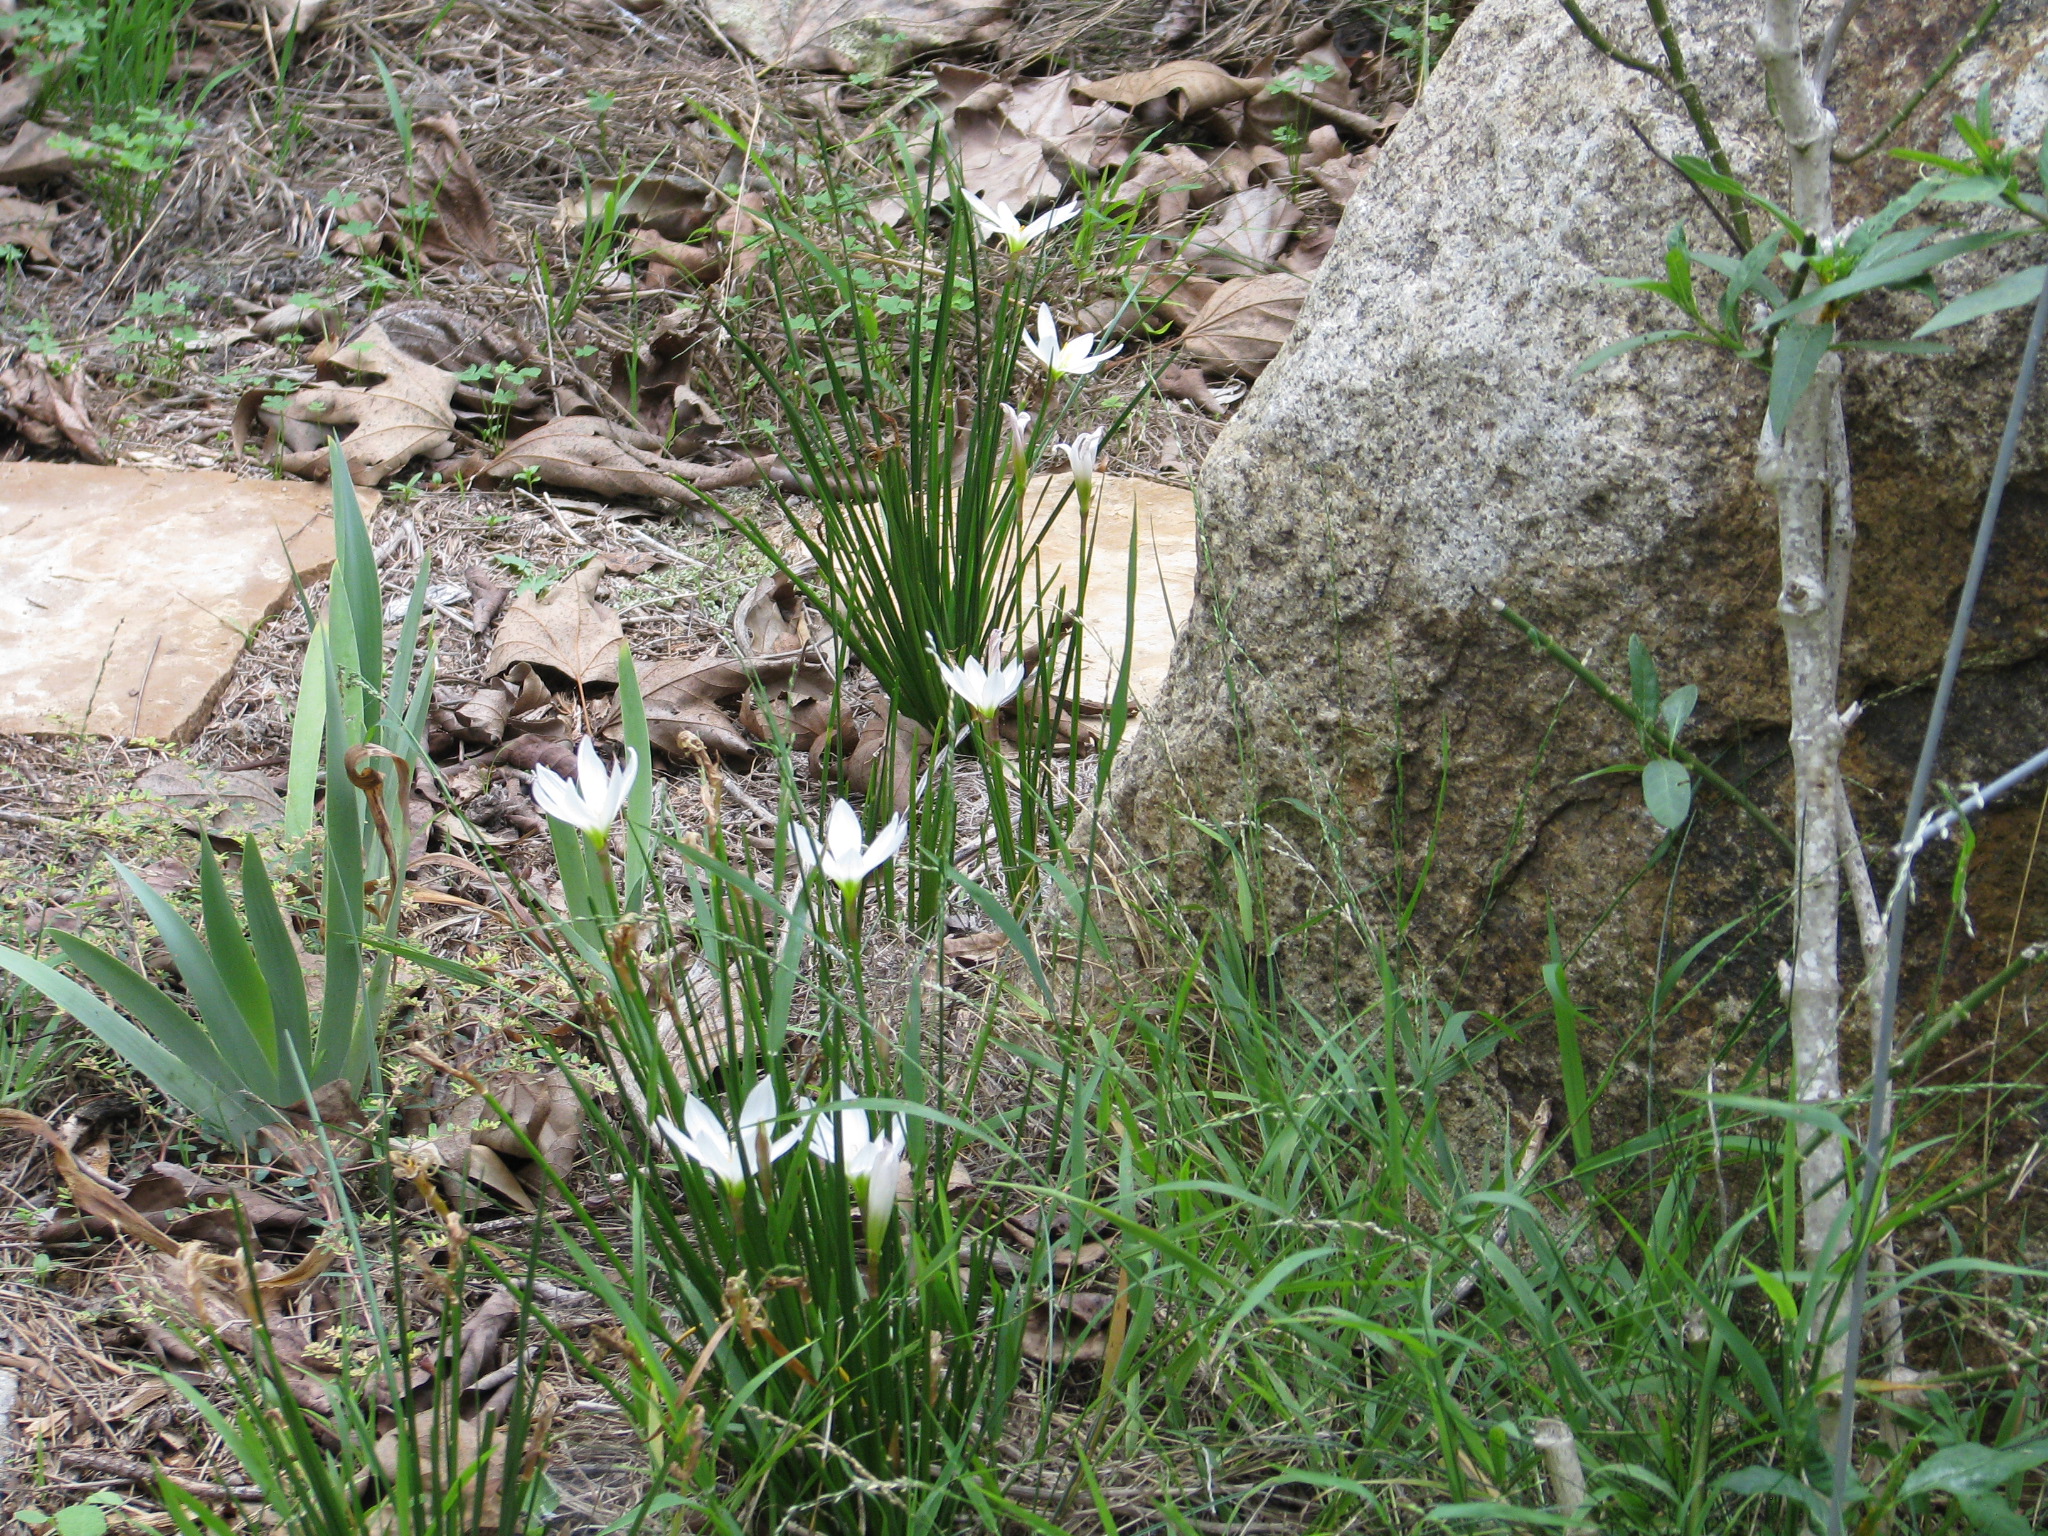
Bulbs will pop up year round for wonderful surprises. Permaculture methods in sheet mulching, plant guilds, swales, rain catchment basins, and the use of canopy have pulled this garden through.
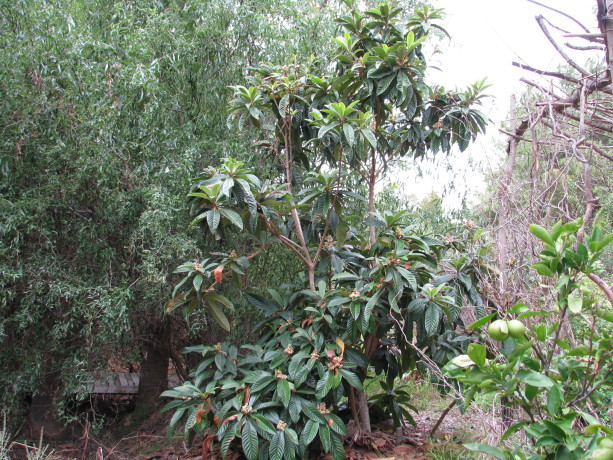
Loquat in bloom. 
Bridge over currently dry streambed. 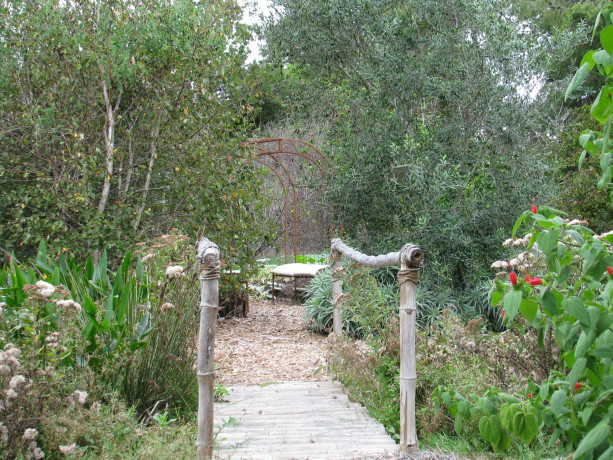
Bamboo bridge. 
A gourd in a liquidamber. The birds, butterflies and other insects and reptiles are out in full force enjoying a safety zone. A few days ago on an overcast morning, Miranda identified birds that were around us: nuthatches, crows, song sparrows, a Lincoln sparrow, spotted towhees, California towhees, a kingfisher, a pair of mallards, a raven, white crowned sparrows, a thrush, lesser goldfinches, house finches, waxwings, robin, scrub jays, mockingbird, house wren, yellow rumped warbler, ruby crowned kinglet, and more that I can’t remember or didn’t see.

Squash! 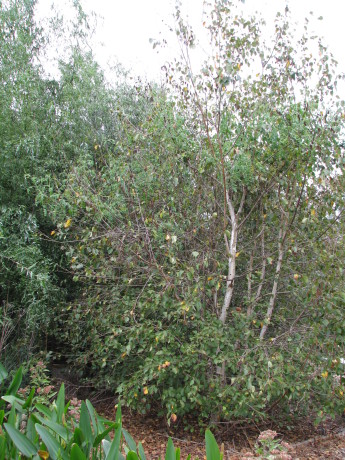
This birch has strange red fruit in its top boughs… 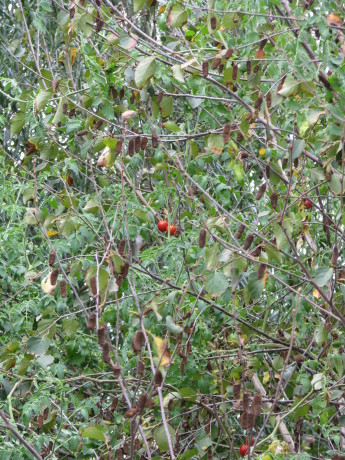
…a volunteer cherry tomato that is fruiting inconveniently ten feet up. Birds have identified our property as a migratory safe zone. No poisons, no traps. Clean chemical-free pond water to drink. Safety.

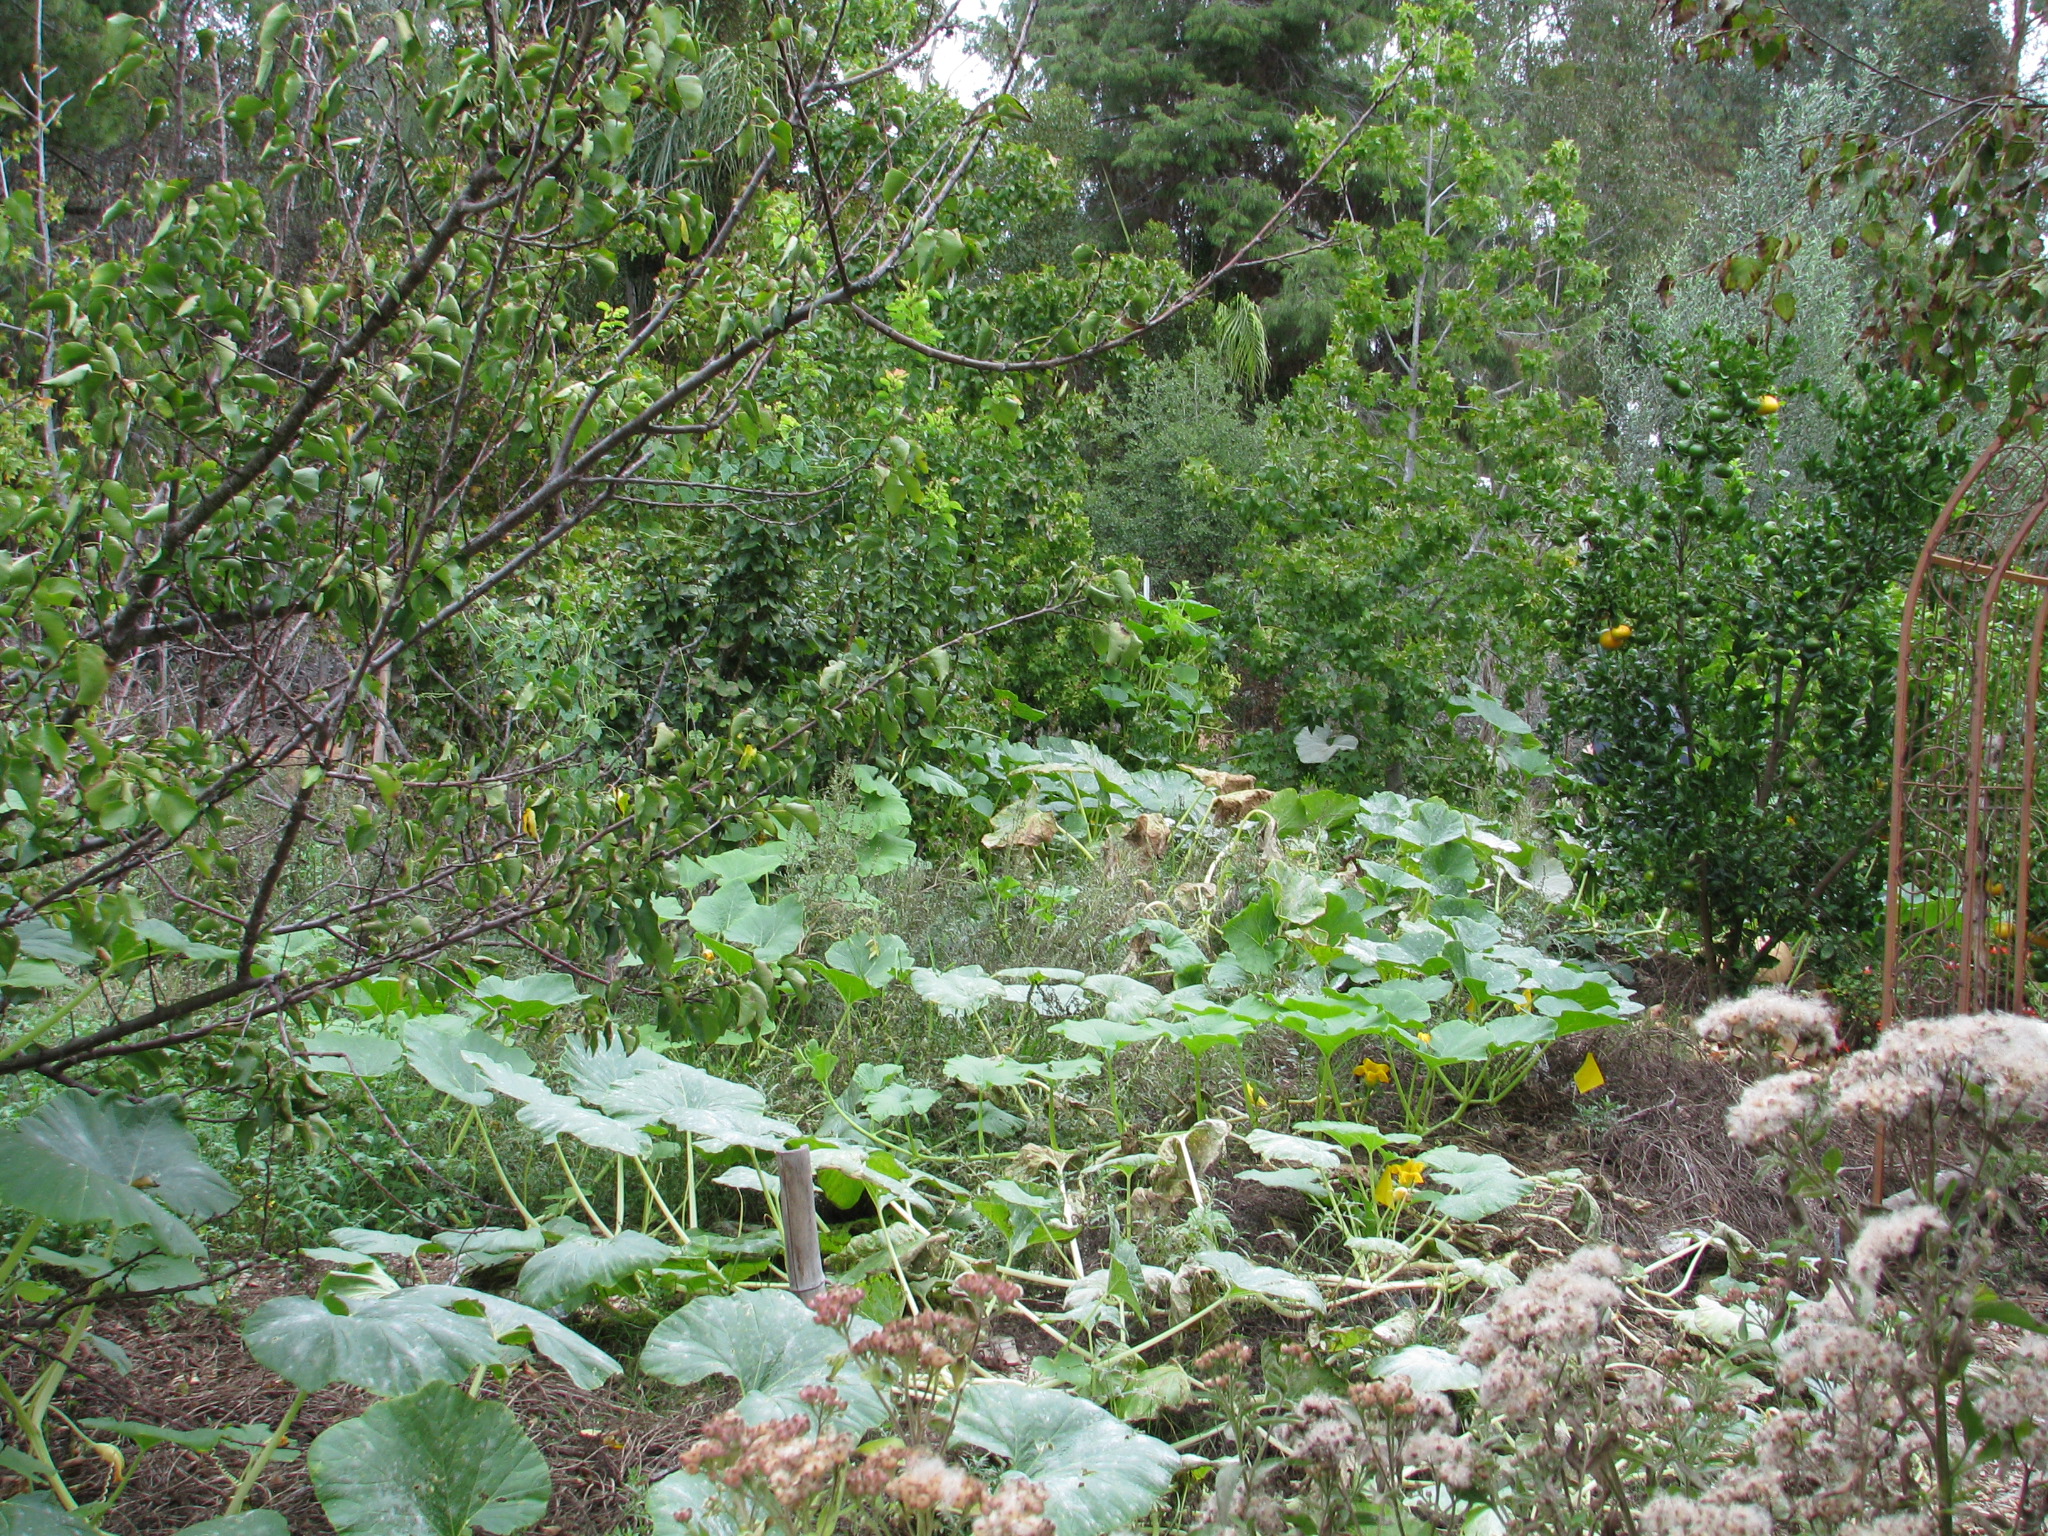
Squash and gourds happily growing out of the hugelkultur mound. 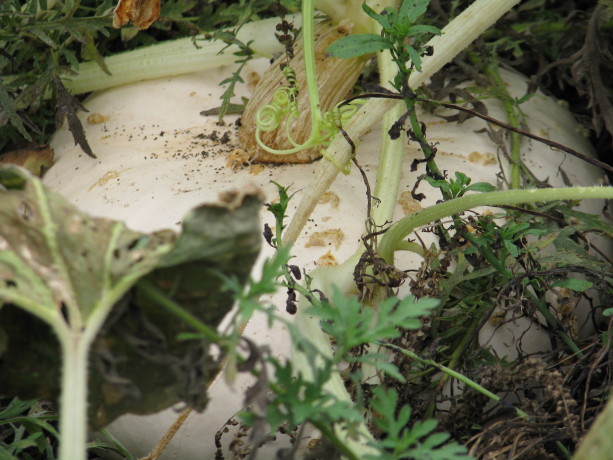
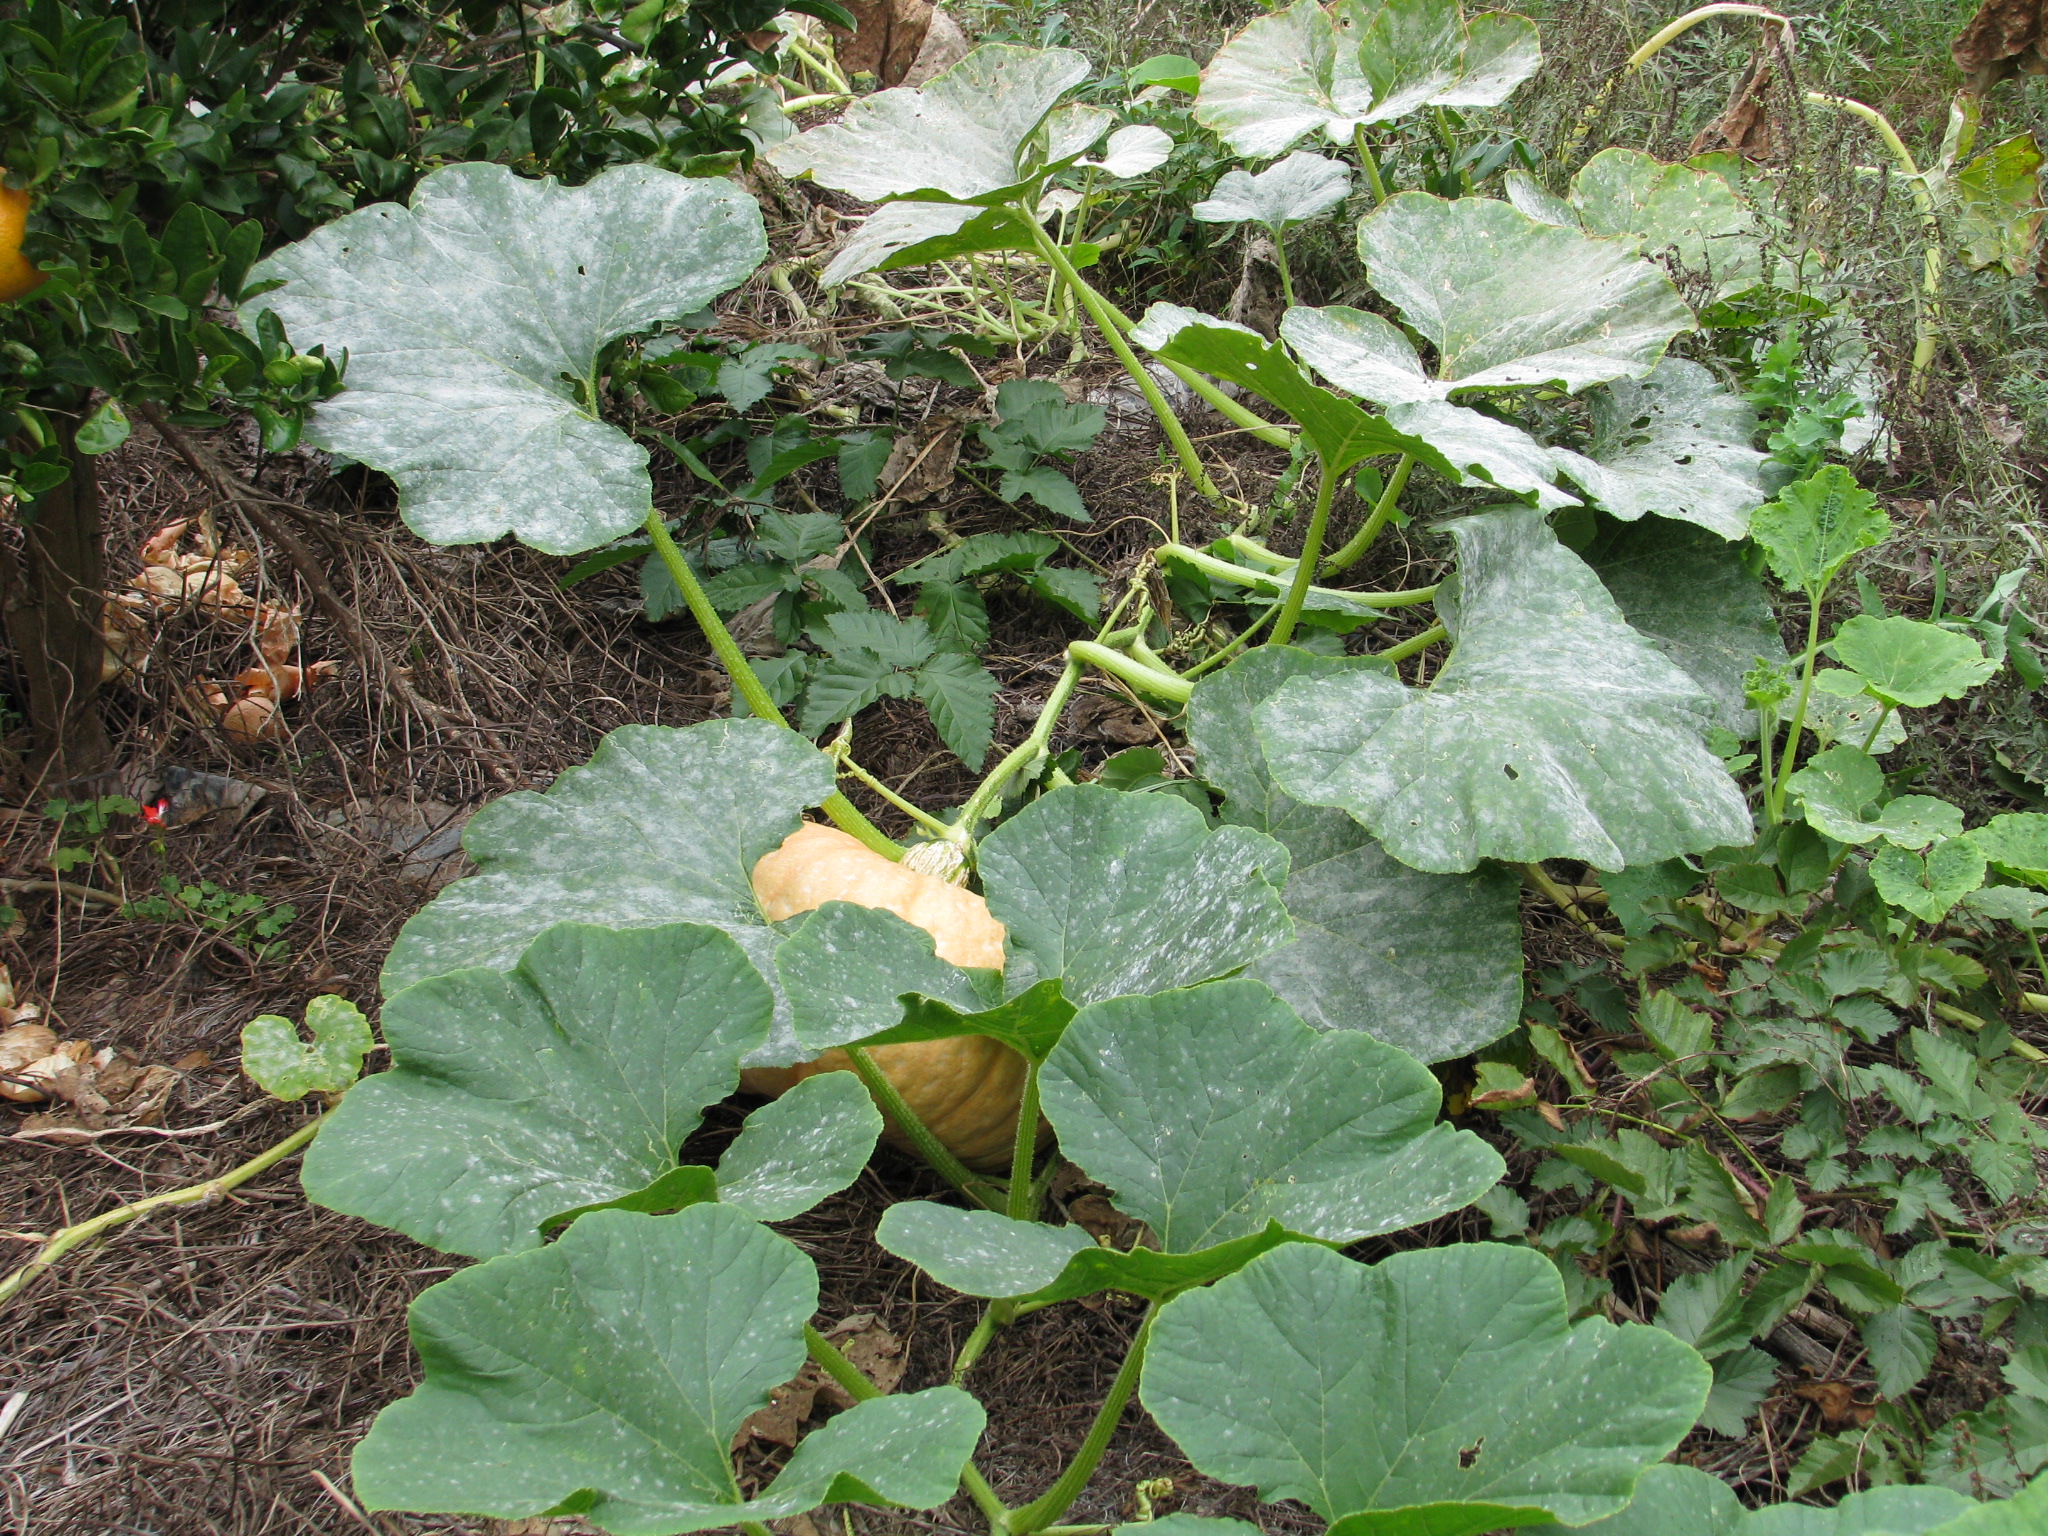
A surprise pumpkin hiding in the foliage. 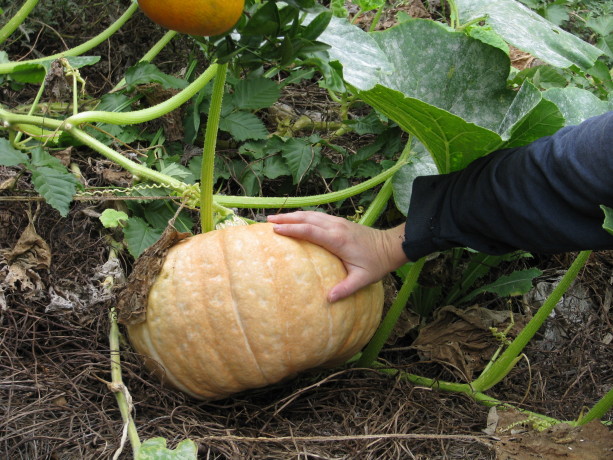
A huge and lovely gourd. 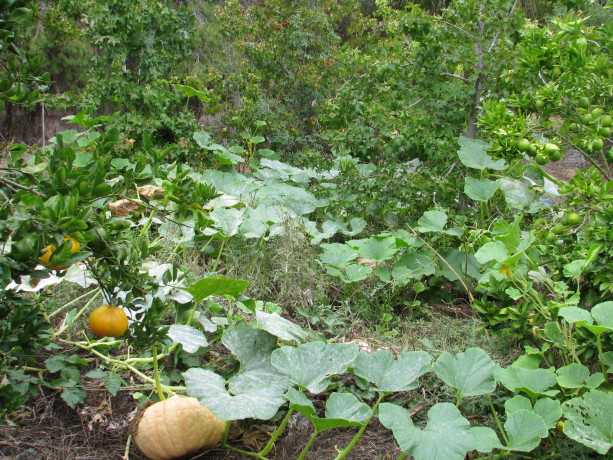
Vines taking advantage of vertical spaces by going up the trees. You can provide this, too, even in just a portion of your property. The permaculture Zone 5.
Why did the gourd cross the road? To climb up a liquidamber, apparently. 
A glimpse of pond through the withy hide 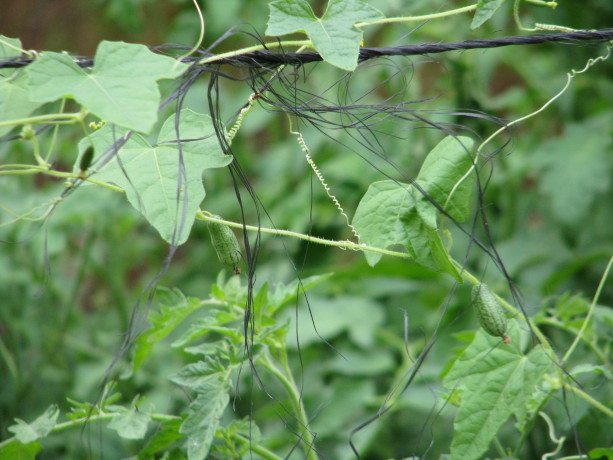
Mouse melons on a tiny vine. More cucumber than melon, they grow to be olive-sized. 
Time for me to get in the water and trim back the waterlilies before the water temperature drops! 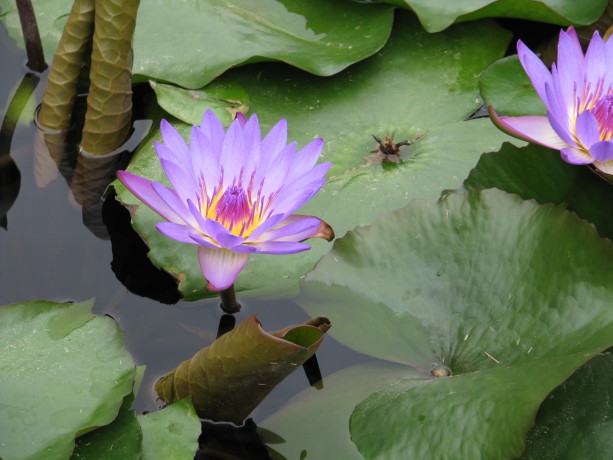
Purple water lilies in the pond. I’m indulging in showing you photos from that overcast October morning, and I hope that you enjoy them.

Eden rose never fails. 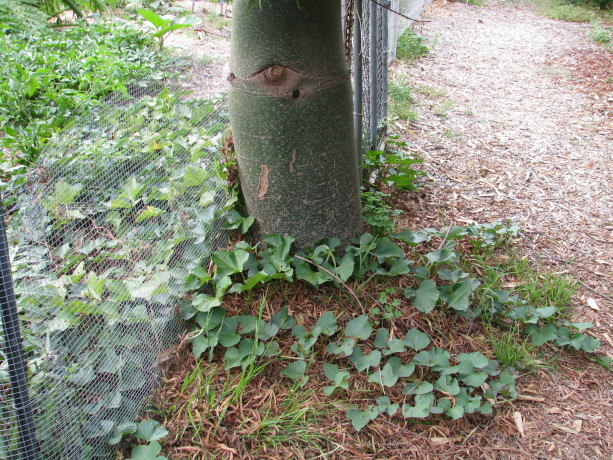
Sweet potato vines escaping the veggie garden; the leaves are edible. 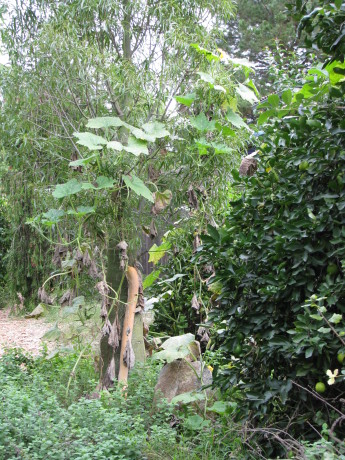
See the long tan thing on the trunk? That’s a zucchino rampicante, an Italian zucchini. Eat it green, or leave it to become a huge winter squash. 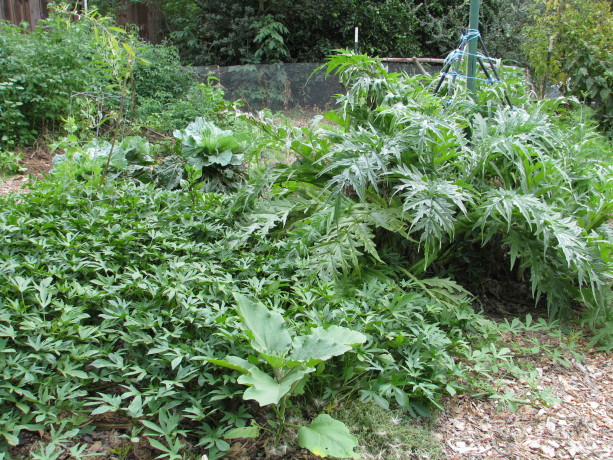
Violetta artichokes regrowing in our veggie garden, with a late eggplant coming up through sweet potato vines. You May Also Like
Native Insects and IPM
- Building and Landscaping, Compost, Composting toilet, Gardening adventures, Health, Houses, Hugelkultur, Humor, Living structures, Natives, Permaculture and Edible Forest Gardening Adventures, Ponds, Rain Catching, Recycling and Repurposing, Soil, Special Events, Water, Water Saving
How To Evaluate Your Property: The July Lecture In The Garden at Finch Frolic
Finch Frolic Garden’s Program in the Garden Series for July:
Analyzing Property for Maximum Use:
Site Evaluation Step-by-Step
Sunday, July 26, 2 – 4 pm
Looking for property? Creating a landscape? Planting a garden? Building a house? Diane Kennedy of Finch Frolic Garden will take you through the steps of evaluating your site for maximum effectiveness with the least labor and cost.
This class is for the average homeowner, with little or no permaculture background. All terms will be defined and explored. Guaranteed, you will leave the class excited about your property, and able to find new potential in it.
In permaculture, 99% of the work should be in design, and only 1% in labor, so find out how to look at property with new eyes and start designing! Participants are encouraged to bring a Google Maps image of their property to work on.
We will, of course, offer homemade vegetarian refreshments. Cost is $25 per person, mailed ahead of time. Finch Frolic Garden is located at 390 Vista del Indio, Fallbrook. Please RSVP to dianeckennedy@prodigy.net . More information can be found at www.vegetariat.com. You’ll love what you learn!
- Animals, Bees, Birding, Building and Landscaping, Gardening adventures, Health, Microbes and Fungi, Natives, Other Insects, Permaculture and Edible Forest Gardening Adventures, Pets, Ponds, Predators, Quail, Rain Catching, Recycling and Repurposing, Reptiles and Amphibians, Water, Water Saving, Worms
Turn Your Pool Into a Pond, and Help Restore Wetlands!
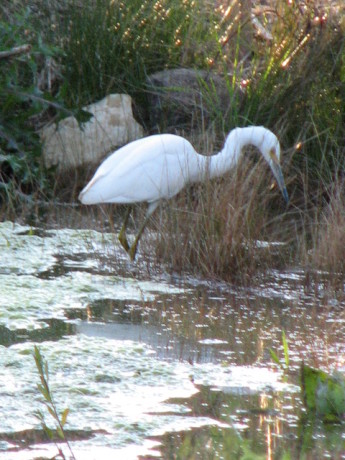
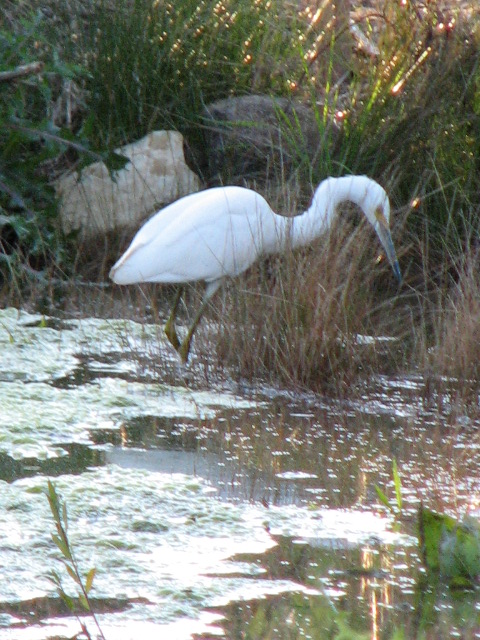
An egret on the hunt. Water birds now rely on flooded agricultural fields, which are saturated with herbicides and pesticides. It is estimated that 97% of California’s wetlands are gone. Gone. About two-thirds of that remaining 3% is dysfunctional and polluted. In Los Angeles, only 1% of wetlands remain. We have constructed our properties to drain precious rainwater and even irrigation water into culverts and out to the ocean, rather than collect it in our soil where it belongs. All the riparian animals, from specialized aquatic microbes and fungi up to large mammals, have gradually all but disappeared. What we have instead of wetlands are millions of chlorinated swimming pools, lined ponds and bird baths. Although we may believe that these help animals, the treated water is weakening and killing them with chemicals when they are desperate enough to drink from them, and offer no shelter or food source.
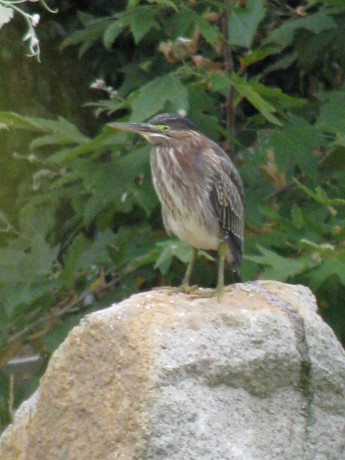
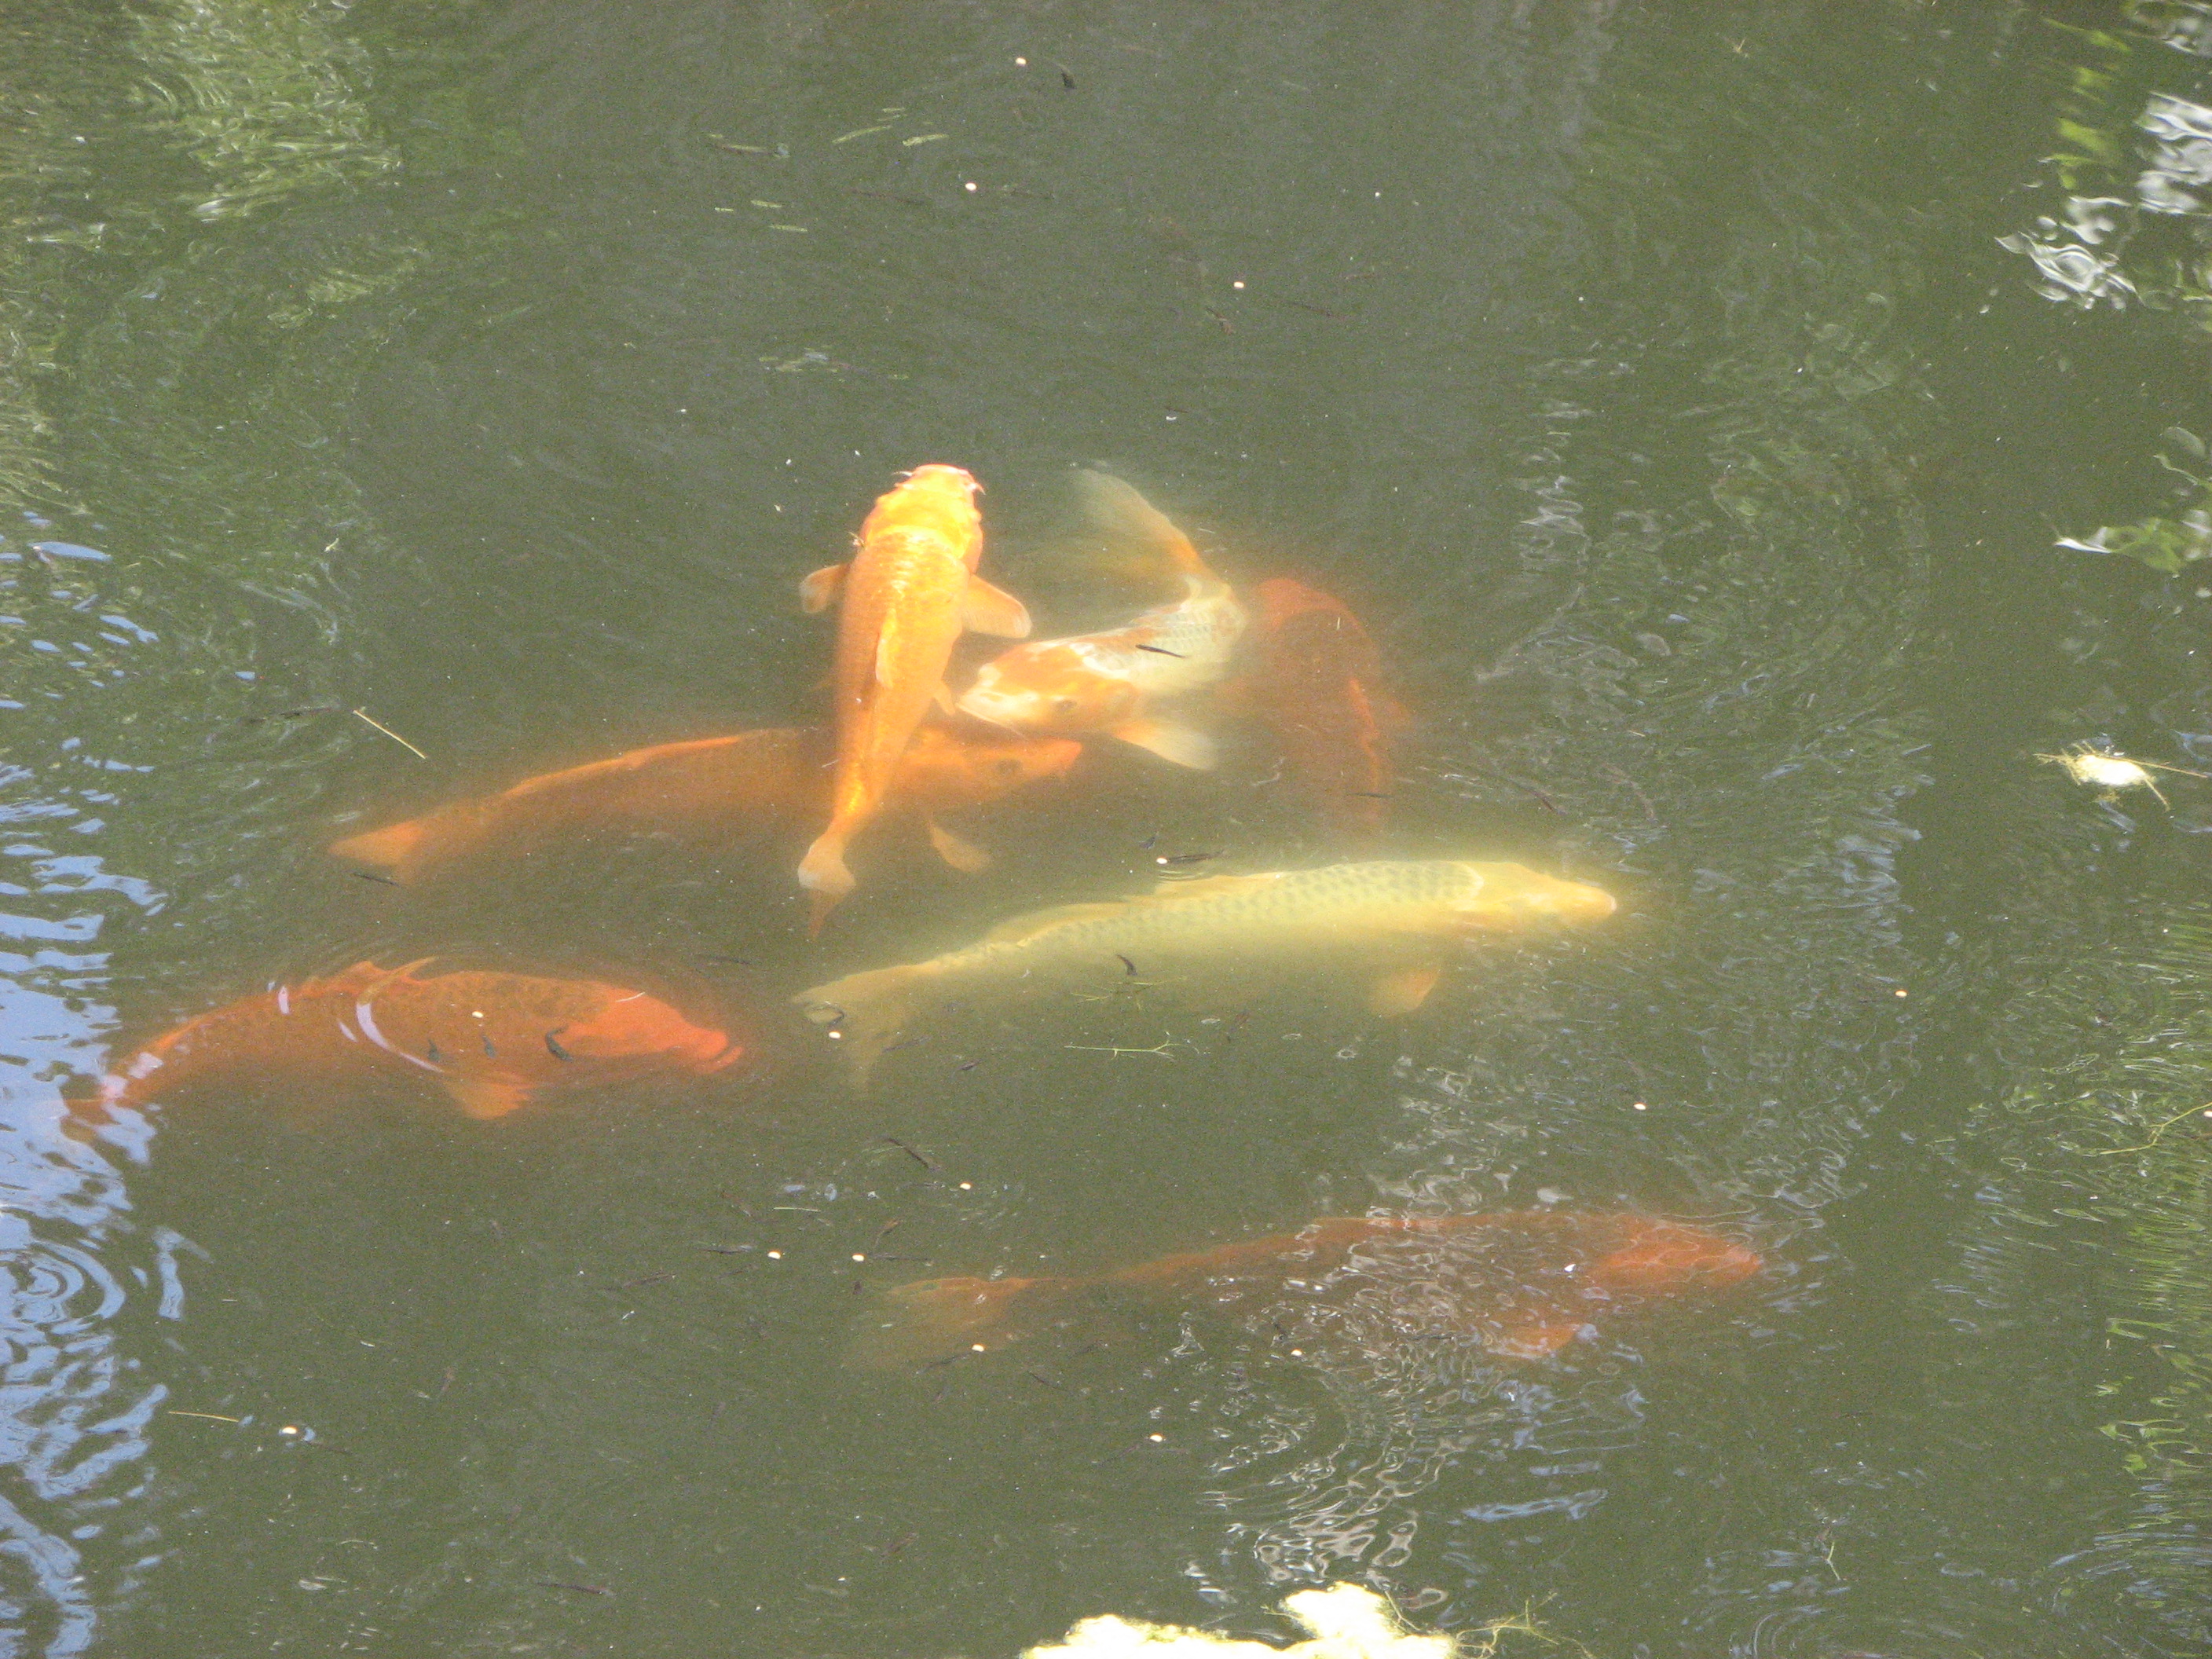
A young green heron. Dr. Bob Lloyd of Pura Vida Aquatics, a Southern California-based business, has spent the last 20 years maintaining ponds chemical-free. “Algicide will kill aquatic microbes, and hurt hummingbirds and all the other creatures that drink it,” he says. To help offset some of the loss of wetlands Dr. Lloyd converts swimming pools into swimming ponds that are cleaned with plants and fish rather than with chemicals.
You may see photos of some methods of pool conversions on the Internet that look fantastic, but really are expensive and drastic, and hard to maintain. They require the draining (and waste) of the 22,000 gallons (more or less) of pool water, the altering of the pool itself by building a cement planting bed along the inside and the filling of that bed with a large amount of gravel. Plants are set in the gravel and after refilling a pump sends water through this system to clean it. The gravel would need to be cleaned over time, which would mean draining water again and hauling out a ton of slimy gravel, and buying new.
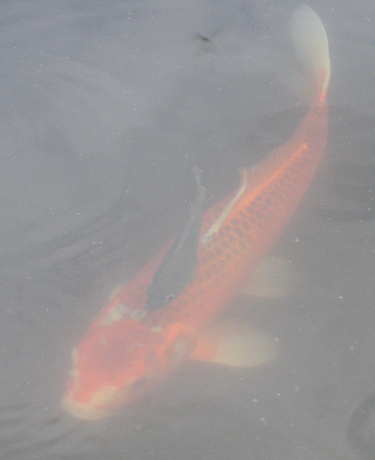
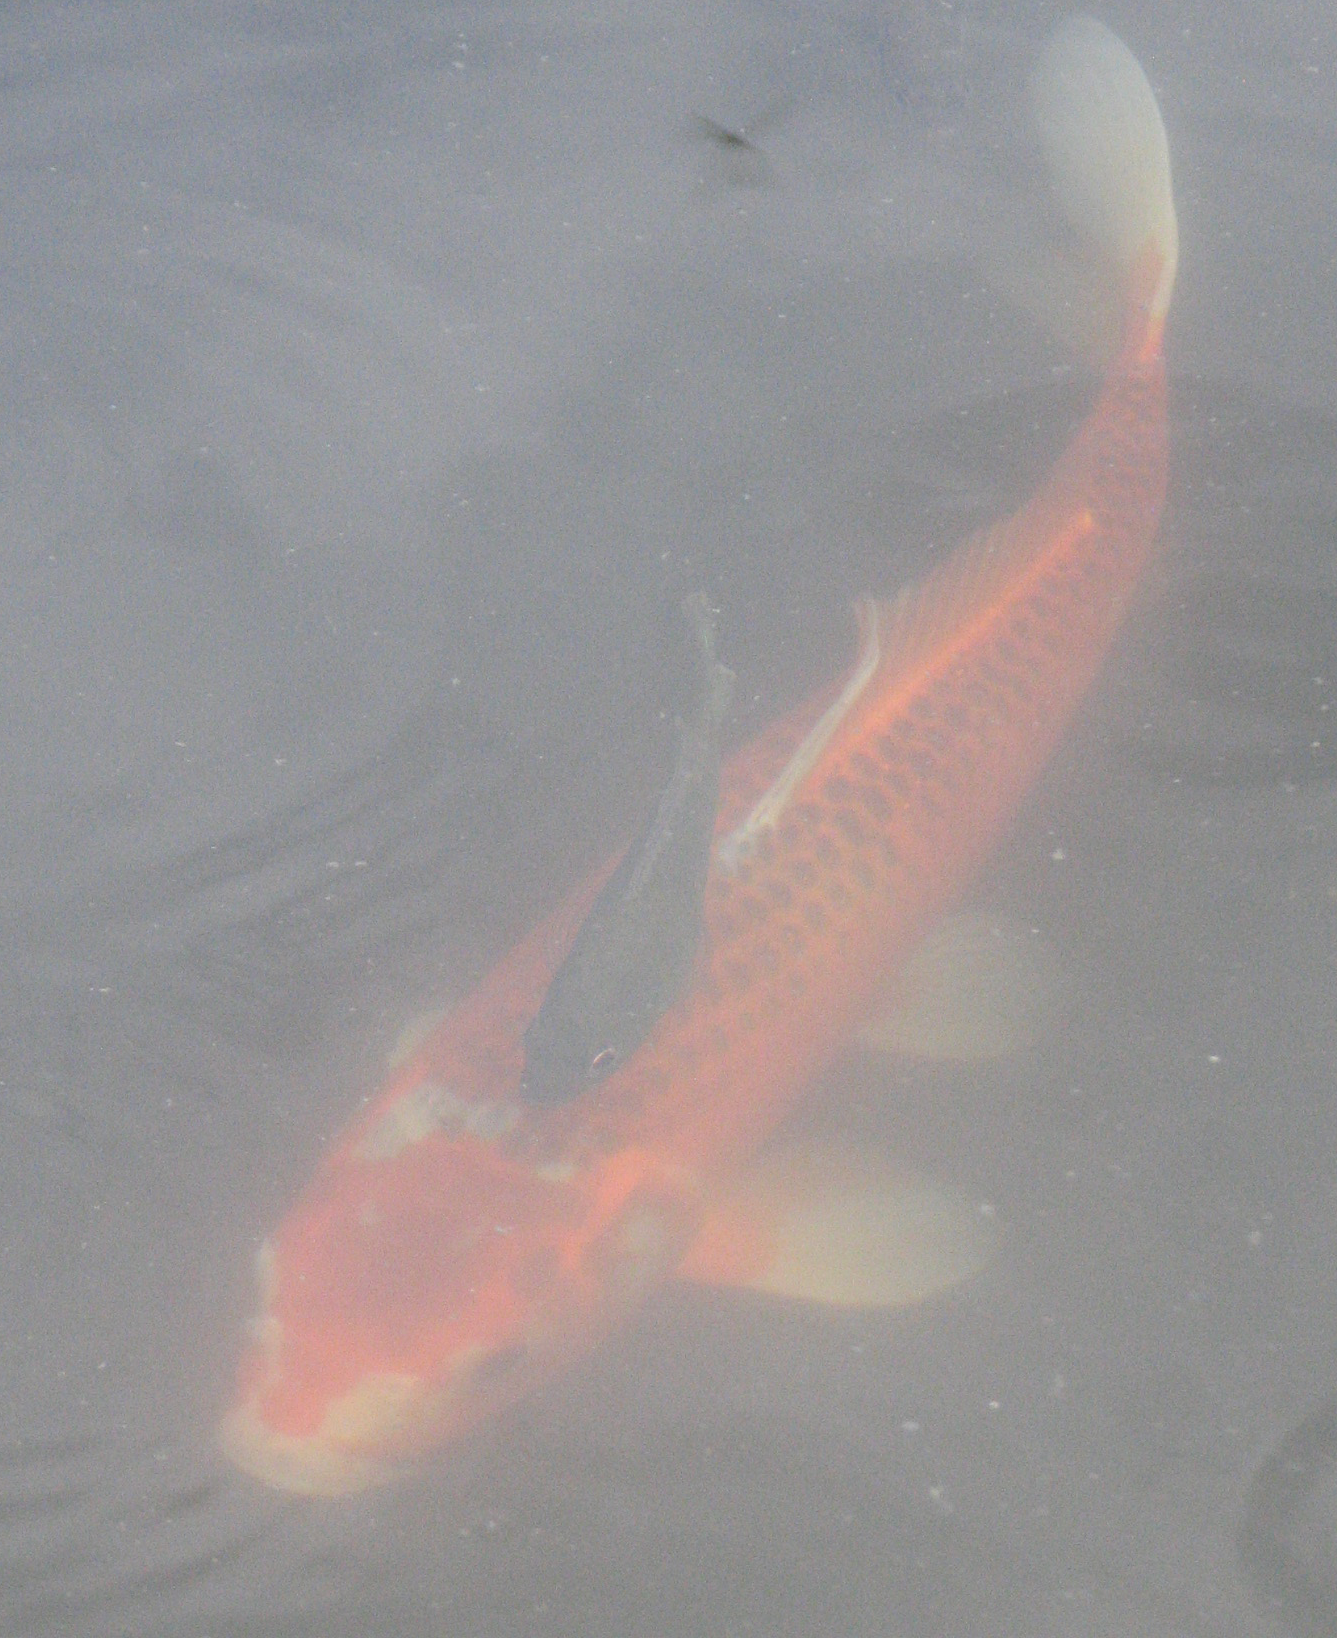
Bluegill and koi buddies. Dr. Lloyd’s system is far less expensive, not invasive to the pool structure at all and is easily removable if years down the road the system is no longer desired. His system is unique and is the product of his PhD in microbiology and his decades of experience working with natural ponds. The plants that are installed are outside of the pool and can have a look that goes with the surrounding vegetation. Even aquatic edibles can be experimented with, such as watercress, water chestnuts and more.
Installing plants inside a pool can be done without changing the pool structure if the pool isn’t going to be used for swimming, or only for gentle laps. The reason is that the splashing water and waves from vigorous swimming is very hard on plants. Many plants die from having too much water on their leaves, and from being battered against the sides of the pool. Using Dr. Lloyd’s method of external decorative plants the pool has the ambiance of a pond and the usability of a regular swimming pool. And you can still swim with koi and other fish! How cool is that?
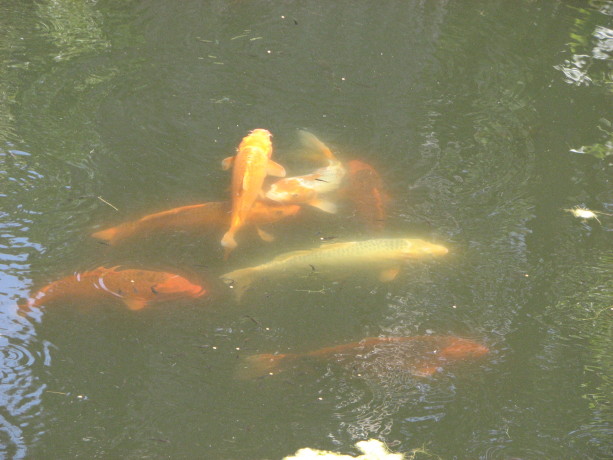 Converting your pool or pond takes a little patience as the biology develops; do you remember the adage that you can’t rush Mother Nature? The evolution of a pool conversion lasts several months. Watching the evolution of a chemical pool to a swimming pond is exciting. With the absence of chlorine, there is a natural algae bloom which turns the inside of the pool a bright, beautiful green. The algae help clear the water of harmful chemicals. As the water is routed through plants, some of the aquatic creatures that balance a pond are added from a local source. As the water clears, fish are added. The fish eat the algae so there are no fuzzy green threads growing up from the bottom or floating on the surface. Fish can be added within weeks of the start of the project. “Its like managing a 20,000 gallon fishtank,” Dr. Lloyd grins.
Immediately the changes to the environment are apparent. Dragonflies, butterflies, hummingbirds and many more creatures desperate for truly clean (chemical-free) water are attracted to the water and the plants.

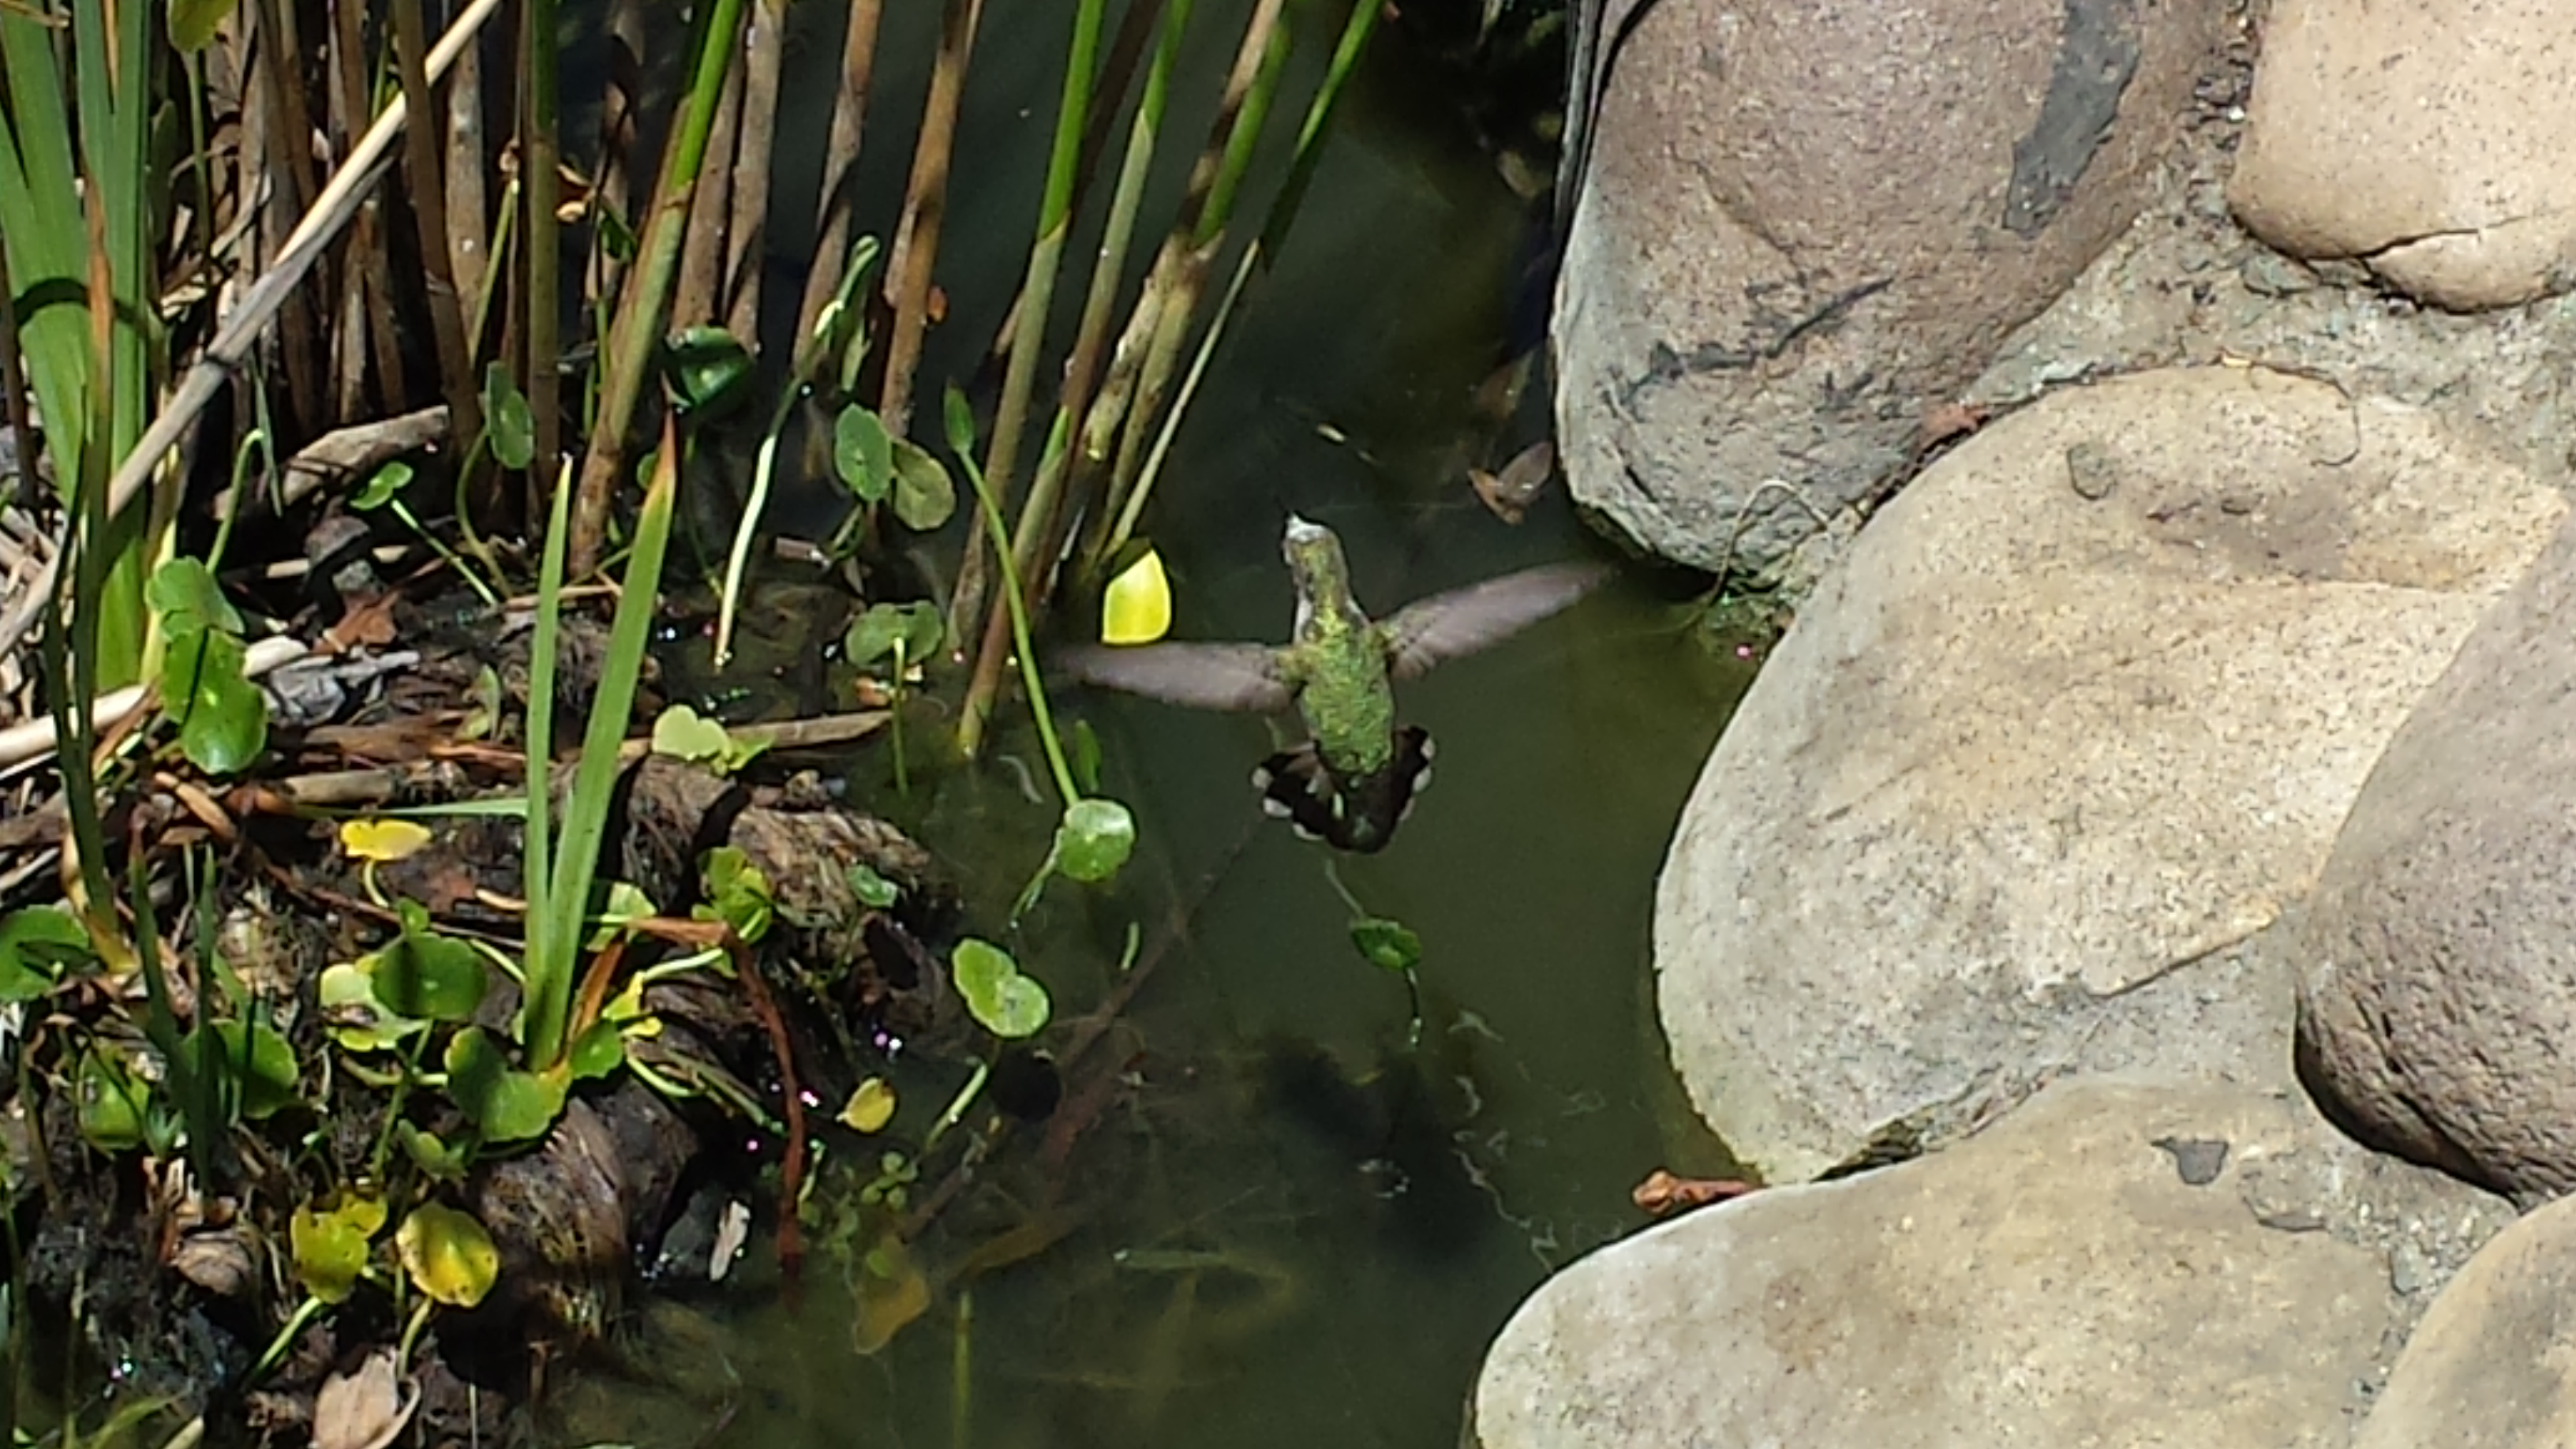
A hummingbird coming in for a drink in one of Dr. Lloyd’s newly chemical-free ponds. “I have clients who tell me how excited they are to see so many birds, insects and lizards in their yards that they’d never seen before,” Dr. Lloyd relates about his converted ponds. “Finding (native) Pacific chorus frogs around the ponds has been very fun.” Some of his clients have become active bird watchers as the wildlife come to ponds that he manages.
Best of all, you can swim with the fish and have no red eyes, green hair or other bad reactions to the harsh chemicals. The plants phytoremediate the water as it is pumped through the planting beds. Children can dangle their feet in the pond without fear of absorbing algicide and other harsh chemicals through their skin.

Pacific Chorus frogs are native and disappearing. They live in your garden during the year and eat insects. Because we are in a drought, people believe that drying out their pond or pool is necessary. No! Pools evaporate far less water than irrigated lawns and landscapes. What does evaporate helps hold humidity around your plants, something which our drying climate is eliminating. Humidity keeps pollen viable and helps trees and plants survive the lack of rainfall. If you convert your pool and/or pond to a chemical-free one, then it is now supplying habitat to creatures further taxed by dried-up water supplies. What’s more, your pool which isn’t attractive and is rarely used, which must be doctored with chemicals weekly, can be converted into something that benefits wildlife year-round, is interesting to watch all the time, and needs absolutely no chemicals.
Pools are also excellent catchment basins for rain. Instead of buying a large water tank, divert your roof water to your pool and allow the plants to clean it. Then you can use that water at any time during the year for watering plants – with chlorine- and chloramine-free water. In permaculture, everything should have at least three purposes. By converting your pool you can have a free rain-catchment system, a water cleaning system, a safe recreation area, a pleasing view, and some habitat, all while saving money and reducing your carbon footprint and reducing your water bill. How can you not do it?
A converted pool does require weekly maintenance, but not the usual kind with chemicals and cleaners. I remember having to clean the family’s pool when I was growing up and testing the pH, even though we didn’t swim very often. It wasn’t fun. The maintenance on a chemical-free pond consists of checking on the pump, the caring for the plants and fish, and insuring that the clarity of the water and the product is satisfying to the customer. The ecosystem evolves and must be watched. It also costs a fraction of what a pool cleaner charges.
If you have a pond or pool that is on a chemical system, consider a conversion. You’ll spend far less money, have far more entertainment, decorative and educational value, have safe water for your family and wildlife to enjoy, will be helping the environment by not supporting harmful chemicals and by helping off-set the millions of acres of wetlands that are gone.
Dr. Lloyd estimates that he’ll need to convert 1.6 billion swimming pools to offset all the wetlands that have been drained and paved over in California alone. How can it be done?
“One pool at a time,” he smiles.
You can find out about pool and pond conversions by contacting Dr. Bob Lloyd at Pura Vida Aquatics, 310- 429- 8477 http://www.PuraVidaAquatic.com. He has accounts from San Diego through Los Angeles, and can consult elsewhere.
You May Also Like
Native Insects and IPM
- Animals, Bees, Birding, Building and Landscaping, Chickens, Compost, Fungus and Mushrooms, Gardening adventures, Heirloom Plants, Hugelkultur, Microbes and Fungi, Natives, Other Insects, Perennial vegetables, Permaculture and Edible Forest Gardening Adventures, Pets, Ponds, Predators, Quail, Rain Catching, Recycling and Repurposing, Seeds, Soil, Special Events, Water, Water Saving, Worms
Water Harvesting With Simple Earthworks
Finch Frolic Garden’s Program In The Garden Series for June:
Shaping the land to harvest energy and water – easily!
With permaculturalist Jacob Hatch of Hatch Aquatics and Landscaping
 Sunday, June 28, 2015 2-4 pm.
Use 30% – 70% less water on your landscape!
Jacob Hatch of Hatch Aquatics will show you how to catch free, precious, neutral pH rainwater using earthworks. Whether you use a trowel or a tractor, you can harvest that free water. Each attendee will receive a plant! We will, of course, offer homemade vegetarian refreshments. Cost is $25 per person, mailed ahead of time. Finch Frolic Garden is located at 390 Vista del Indio, Fallbrook. Please RSVP to dianeckennedy@prodigy.net . More information can be found at www.vegetariat.com. You’ll love what you learn!
You May Also Like
Native Insects and IPM