- Arts and Crafts, Gardening adventures, Heirloom Plants, Living structures, Permaculture and Edible Forest Gardening Adventures, Seeds, Soil, Vegetables
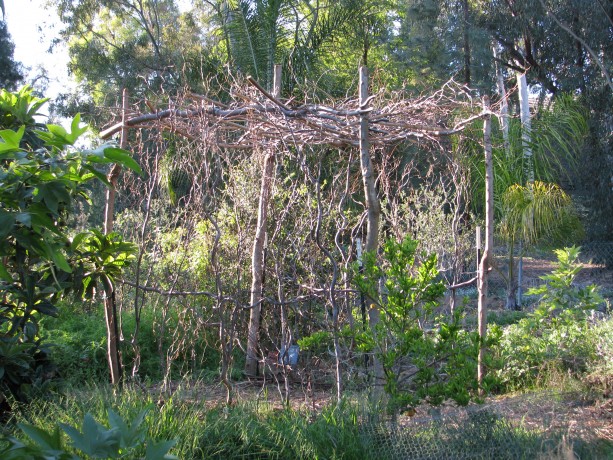
Curly Willow Trellis
A walk-through squash trellis. The vines will give it stability, and hang through. Thanks to generous friends, free seed opportunities and wonderful seed catalogs, we have many, many squash varieties to choose from this year. We also want to grow vertically where we can to save space so my daughter and I are creating trellises. No builder, I, but we’re hoping these will last for years to come.
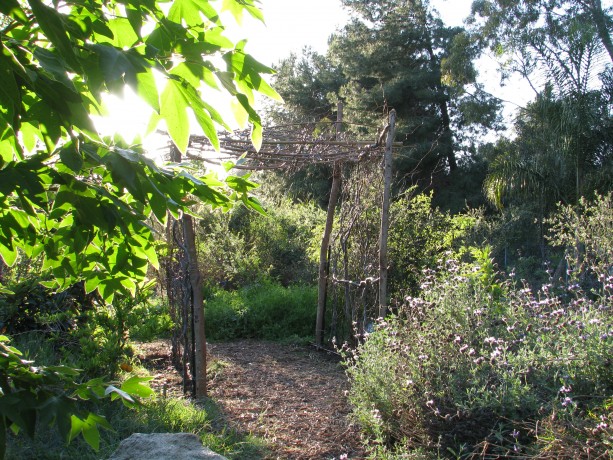
This part of the trail was perfect for vertical growing space. This area of the upper trail isn’t lovely when not covered by vines. It is also quite warm when people are touring and it could use some shade and interesting focal point. Miranda had cut down a large curly willow tree a few months back (it was taking too much water from an avocado). We used a couple pieces of the trunk to inoculate with mushroom spores, and the rest was fair game for a trellis.
Curly willow (Salix matsudana ‘Tortuosa’) has wonderfully shaped branches that twist and curl naturally. You’ll see it often in bouquets, where it usually roots while in water. This willow enjoys more sun and a little less water than native willows do. Willows all produce salicin, the pain-killing ingredient that has now been synthetized as aspirin. Willows also produce a rooting hormone which can be used to encourage sprouting and rooting of other plants. Cut up a willow branch, soak it in water for a couple of days (if water is chlorinated, leave it sit for a day before adding willow) and use to water seedlings.

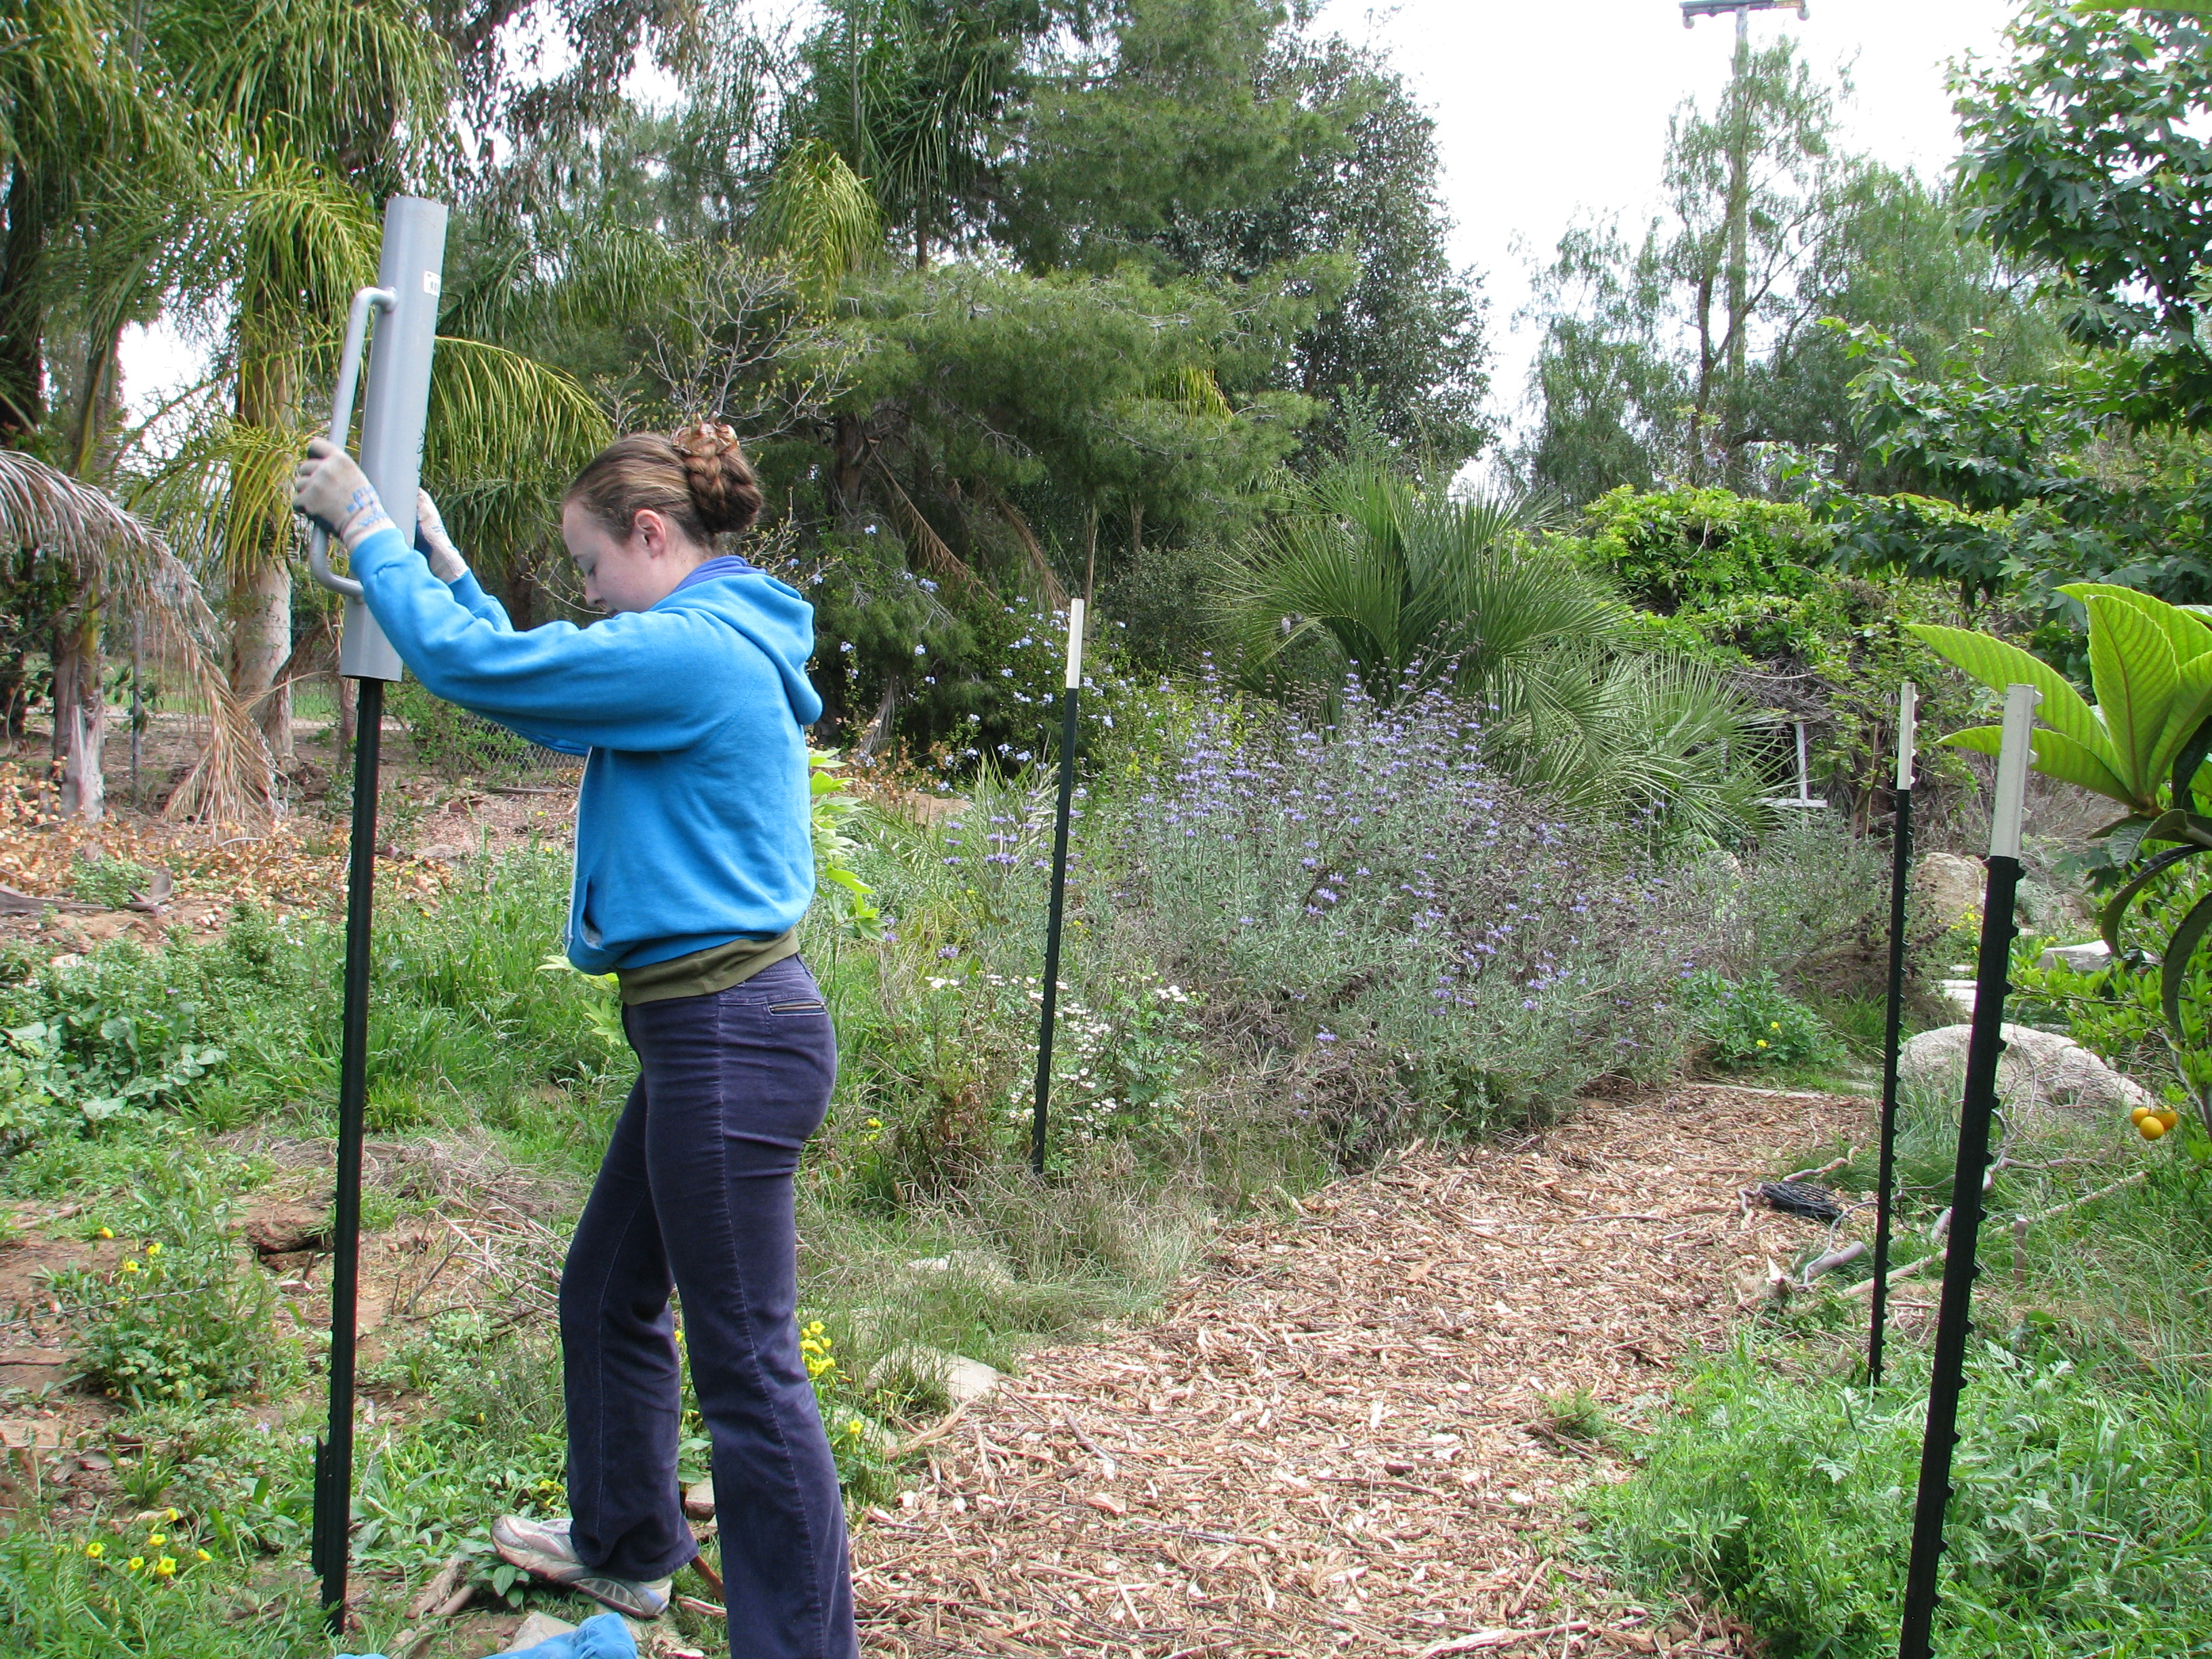
Miranda makes this look so easy! After we’d put these in, a friend recommended sliding the post pounder over the post before standing it up… for we short people who have trouble lifting the really heavy thing over our heads! Wanting to avoid cutting wood and nailing things together, we sunk four T-posts into the corners. The trellis is six feet across and eight feet wide; any wider and we would have put a center post on each side as well.

We wired on curly willow trunks in the corners, and wired long branches across the tops and the middle. We wired on the side posts and cross posts, cutting long branches from the willow. This willow was long dead; fresh willow could be sunk into the ground and it would root to make a living trellis, like the Withy Hide. We didn’t want that here, though.

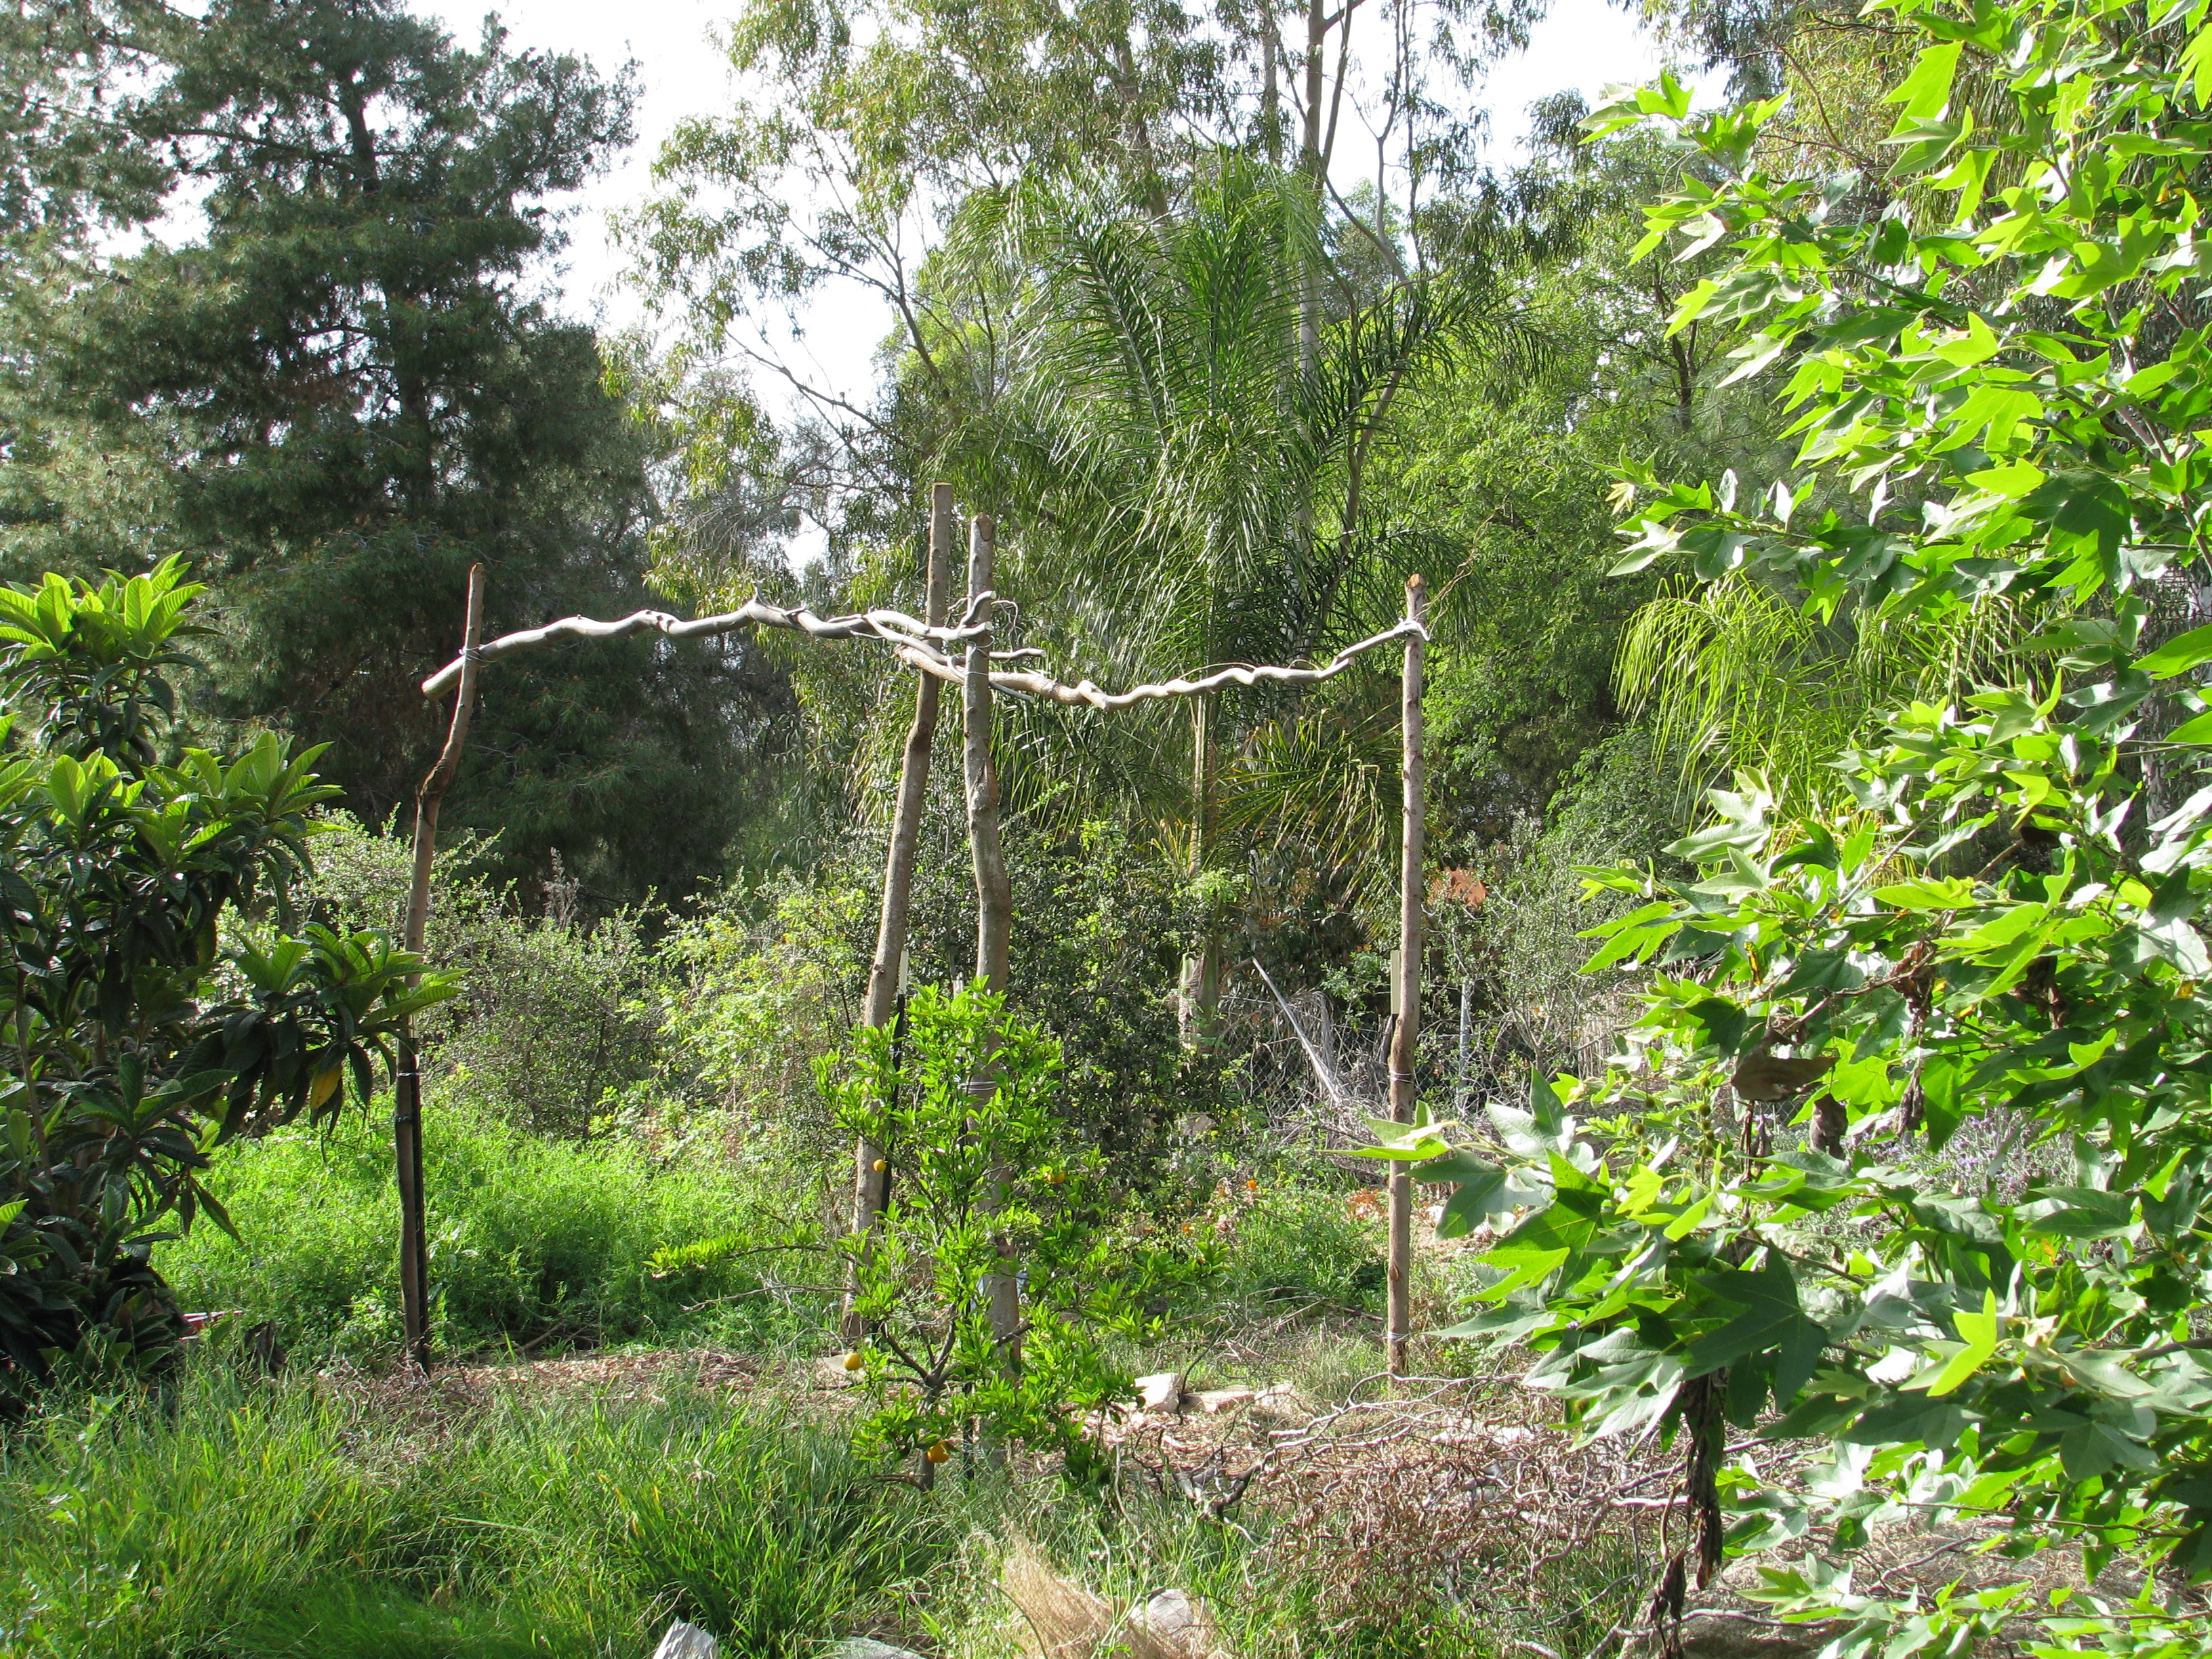
We laid long whips from a Brazilian pepper tree across, then wove curly willow through for the top. We stood smaller branches upright along the sides and wired them on, keeping in mind spaces where the squash vines will want to find something on which to grab. Over the top we laid long slim branches from a Brazilian pepper that is growing wild in the streambed and really needs to come out. By pruning it and using the branches, we’re making use of the problem. In permaculture, the problem is the solution! I wanted to make an arched top and tried to nail the slim branches in a bended form, but this was difficult and didn’t work for me. I didn’t want to spend days finishing this… too much else to do! So we laid the branches over the top, wiring some on, and then wove curly willow branches long-wise through them. This weaving helps hold the branches in place, will give the vines support, and brings together the look.
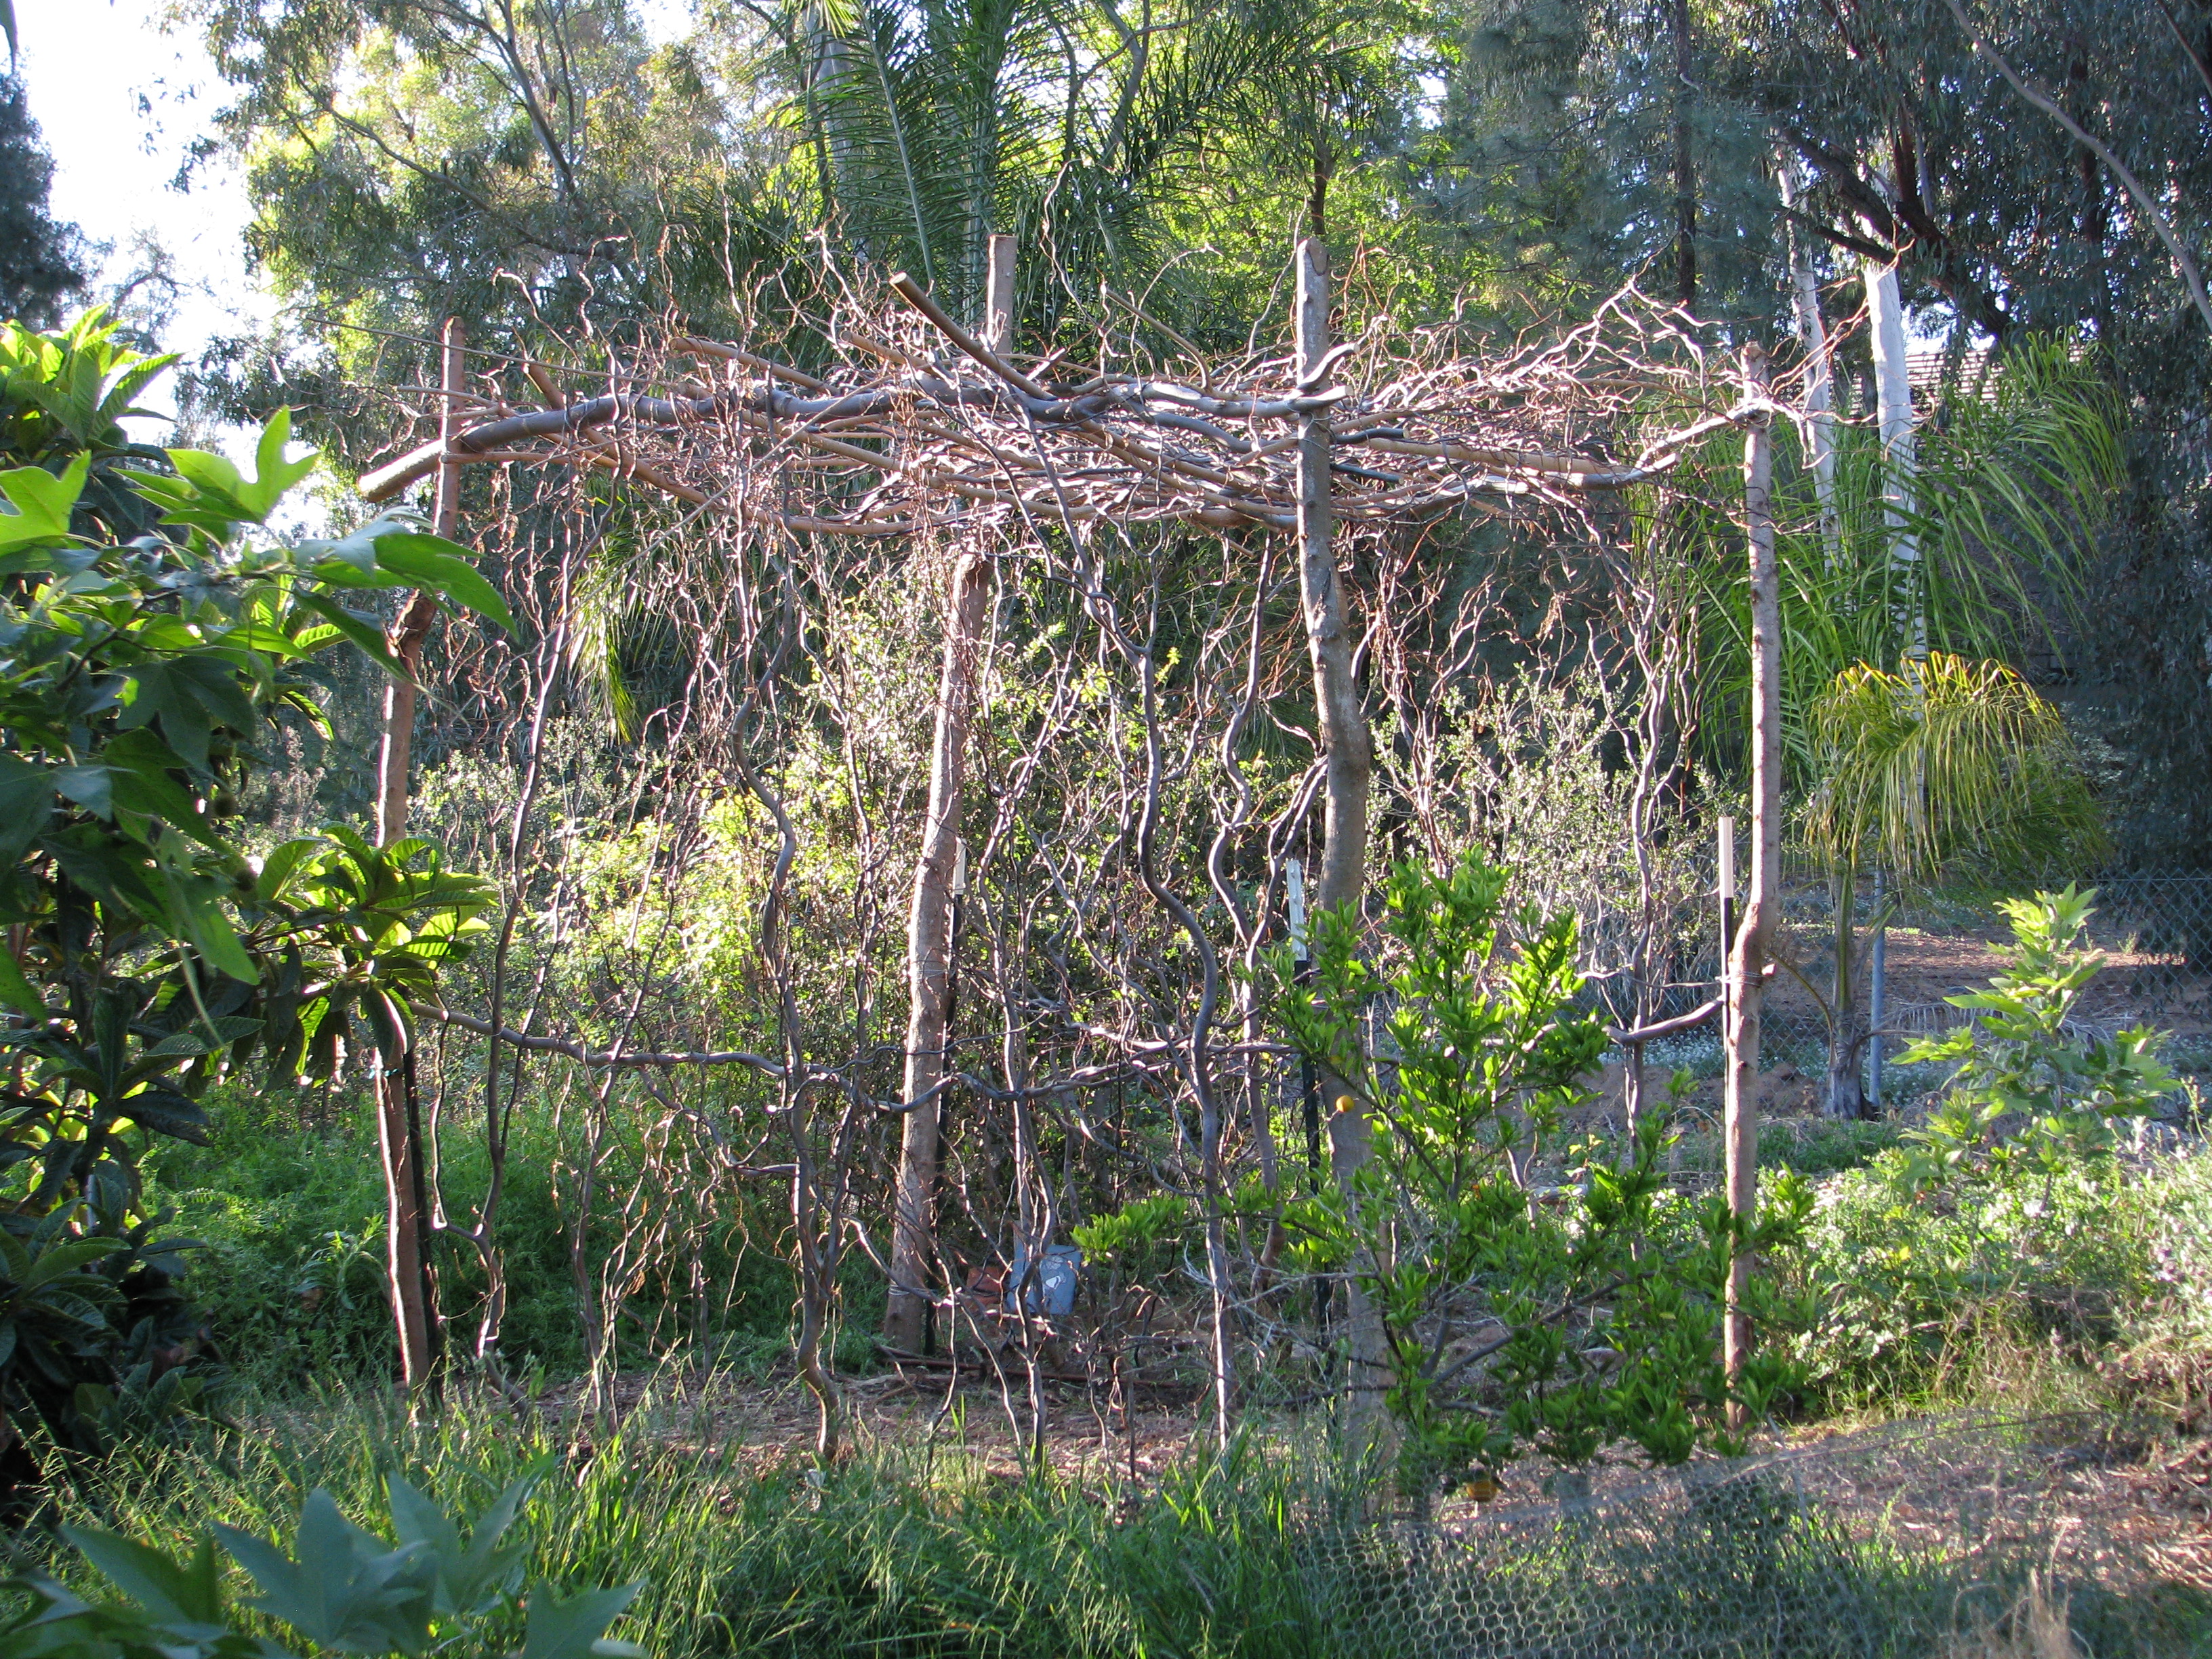
We planted four kinds of squash along the poles. And it was done. It should stand up to wind. We may need to add some vertical support depending upon the weight of the squash vines. We planted four varieties of squash that have small (2-3 lb.) veg. We planted four seeds of each, two on either side. We also planted some herbs, flowers and alliums, and some perennial beans, the Golden Runner Bean.
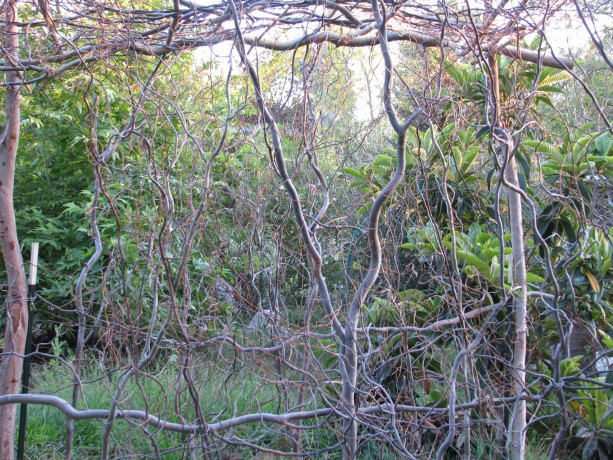
Architecturally interesting when not covered by squash as well. If nothing else, it is lovely and interesting to look at; better in person than in the photos. We can’t wait for the squash to start vining! Now, onto the next trellis.
- Compost, Gardening adventures, Permaculture and Edible Forest Gardening Adventures, Seeds, Soil, Vegetables
Crate Potatoes
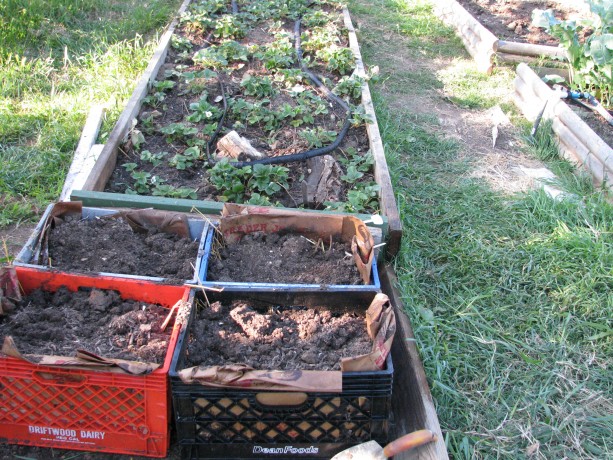
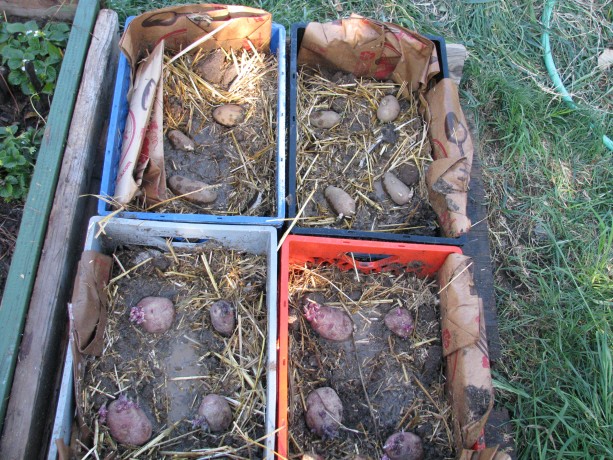
Milkcrate potatoes! This area receives sun for half a day and is shaded on the West side; perfect for keeping them cool. I’ve been frequently asked to write about trashcan potatoes. I haven’t yet, simply because I don’t have a trashcan to use for that purpose. Instead I used what I had and am experimenting with milkcrate potatoes. I’ll let you know how it works.
The potatoes that work in trashcans are any of the standard potatoes in the Solanaceae family, related to tomatoes and eggplants; sweet potatoes and yams are in the morning glory family and grow very differently. A good article with photos that shows growing potatoes in a barrel is at greenupgrader.com. There are many videos on the web about growing trashcan potatoes; a good one is at Farmers Almanac . Two things that she does in this video that I do differently is that after cutting the ‘eyes’ of the seed potatoes, I allow them to harden off for a day or so before planting, and also potatoes can grow with less than 8 hours of light a day which makes it a good over-wintering crop, especially here in Southern California. Potatoes like shorter daylight and cool night temperatures, so plant now! If you plant later, protect the trashcan from the afternoon sun. Hardening off means to allow the cut potato to sit in the shade for a day or so to allow the cut end to form a ‘scab’, or harden up before planting. It helps keep the potato eye from molding and provides protection from insect or bacterial attacks, and keeps drier soil from leaching water out of the potato. This is the same process you’d do when taking cuttings from cactus, geraniums and other easily-rooted, sappy plants. When watering trashcan potatoes, don’t overwater because you’ll rot them. Like their cousin the tomato they’ll do better slightly drier than wetter.
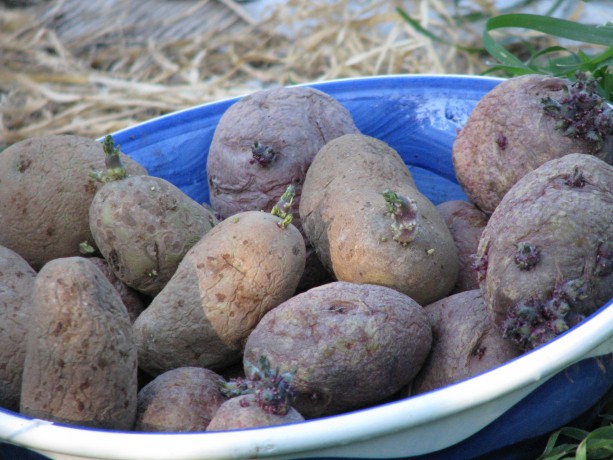
Organic chitted potatoes. ‘Seed’ potatoes aren’t potato seeds. They are small tubers that are ready to plant. Always buy organic seeds. Period. You can buy seed potatoes online or in nurserys available in Southern California just after Christmas, and sometimes in the late Fall. They usually purchase the seed from other states which have snow and don’t ship during the winter. Buying online or from organic catalogs allows you to shop among a wide variety of potatoes differing in size, color and purpose. However since we can plant potatoes in the Fall and don’t want to wait for shipping times, we can buy a bag of organic potatoes locally and sprout them ourselves. Non-organic potatoes have been treated so that they don’t sprout in the store, and are genetically modified (GMO) to last on the shelf. Sprouting potatoes is called ‘chitting’ and is very easy. Mine usually sprout in a bowl on my kitchen counter. Keep them in a light, cool area out of direct sunlight and they’ll grow. When the potatoes have chitted and ‘greened’ (have sprouts), you can either plant them whole or slice them so that each piece has at least one eye. Allow them to harden off and plant them. Give the extras to your neighbor!
Potatoes can be grown in the ground, or in a raised bed, and then you hill up around the plant to produce more tubers. The reason for growing trashcan potatoes is that you can grow vertically, save garden space, and in particular save your back from trenching, hilling and then digging. The harvest is more productive, too, because you won’t be accidentally cutting through or spearing potatoes in the ground. Potatoes can grow this way because the tubers are actually specialized underground stems called stolons. Potatoes will produce tubers underground, but anywhere along their stems they also can grow a potato under the right conditions. Once you plant a potato ‘eye’, the eyes being the growth buds, it will send out stolons. The plant will produce potatoes below ground, and if you hill up around the stems they will also begin to swell and produce tubers.
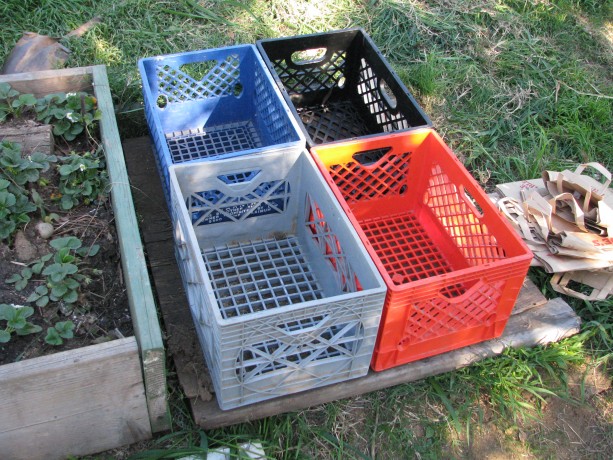
I have extra milk crates, and a source for more, so why not use them? When you plant in a trash can (with drainage holes!), as the greens shoot up you keep layering compost or straw or woodshavings or potting soil or whatever around the stems keeping a little green showing until you can’t fill the trashcan anymore.

I lined the bottoms and the outside edges with extra paper bags and watered them. When the plant is done growing the plant will bloom and sometimes even produce seeds. When the stems die back, you knock over your trashcan and harvest. Save some of the smaller ‘taters for seed for planting in the Fall.
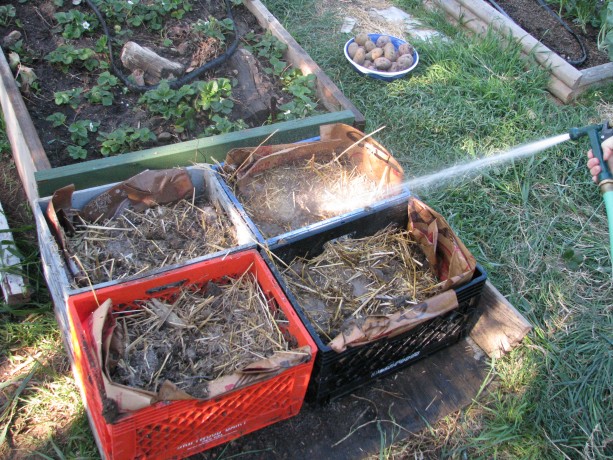
I filled the crates 2/3s full with compost mixed with chicken straw and watered well. You don’t want heavy soil or the potatoes will rot. You also want to insulate the potatoes from outside warmth. You can also root around in there earlier and pick new potatoes, or you can delay your harvest, keep water out of the trashcan and keep it in a cool spot, and harvest when you want them. The beauty of trashcan gardening is that you don’t need a trashcan. Very zen! You can drill holes in a plastic carrier, use burlap sacks, stack old tires, nursery containers, large plant pots or whatever you have. If you have a bottomless or rusted out trashcan, use it! Place it over good garden soil and allow the potatoes to grow down, too. You’ll have a little digging to harvest after you knock over your trashcan full of potatoes, but not much. To make holes in a plastic or aluminum trash can, borrow a digging bar (a long metal pry bar), place your trashcan right-side up on a dirt area, hold the bar high vertically over your trash can pointy side down and let it go. It should make a hole. Or turn the can over and use a hammer and something sharp like an awl or screwdriver (be careful you don’t shatter the top of the screwdriver! You don’t have to pound too hard. Be wise and wear safety glasses just in case). Do this multiple times to make as many holes as you can without making the bottom unstable.
Also be sure to keep the trashcan or crate potatoes in a cool place, especially if you are planting in the early spring here in Southern California. Warmth will keep the potato stems from swelling into tubers. Insulate the potatoes well and keep them cool while still allowing them enough sunlight. Fall and winter are the best times for planting potatoes here, as long as they have adequate drainage.
There is concern about leaching chemicals from plastic, or tires, or aluminum. Do the research and make yourself happy. I don’t think there is that much leaching to be worried about because the plants aren’t in there for a long time. You can always make a barrier between the soil and the sides of the containers with undyed paper or newspapers using soy ink. So save your garden space for other crops, and pop your ‘tatties in a can. Or crate. Or whatever.
Update: here is a very comprehensive article about planting potatoes. Rather than use commercial fertilizer, of course, we recommend rich compost, which will provide what your potatoes need. Also use dead garden debris such as old pea stalks (cut rather than pull them up to allow the nitrogen nodules on the roots to remain in the soil) in your planting bed or container.
I planted whole potatoes just because I didn’t have room for lots of cut ones and these needed planting or tossing. I then covered them with about an inch of light compost and now I’m waiting!