Recipes
Tried and true, these are some of my favorites, and some newbies. Come eat virtually with me!
-
How to Cook Swiss Chard

Swiss Chard Swiss chard is that bright green leafy vegetable, usually with a red mid vein, that most people inch past in the supermarkets. It looks so darn healthy it is scary, and also looks complicated and possibly bitter. I’ve been growing chard for years. One of the easiest of plants to grow from seed, this perennial in our San Diego climate reseeds itself if you let it. To harvest you cut off all the leaves except a few in the middle (to keep the plant producing food for itself). You can easily feed off of a few of these plants for years.
Chard is Mediterranean, not Swiss, but wherever its from it comes packed with antioxidants and many other great health benefits. There is the most common red veined chard that you see in the supermarket, and there is also white or yellow veined varieties. If you buy a package of seeds called Bright Lights, it contains seeds for a mixture of these. The taste difference is negligible, and since in preparing chard you usually strip the mid vein out, it really doesn’t make much difference except as color variety in the garden.
You can cut the leaves while very young and add them directly to lettuce mixes for salads, especially wilted salads. Or you can stir-fry them up or use them as you would baby spinach. The wonderful thing about chard is that you can use the old leaves as well. Older chard takes a little longer to prepare, but oh, it is worth the effort. To prepare older leaves, I fill half the kitchen sink with water, then with my fingers or a sharp knife, strip the green away from the mid veins and drop the greens into the water.
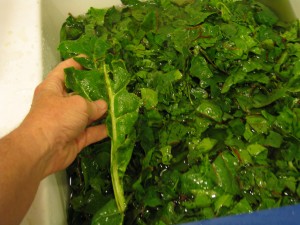
Strip the green part from the midrib Wash the greens well. If your garden doesn’t have a lot of mulch around the plants, then there might be soil kicked up on the leaves. Also, look out for any freeloaders such as snails or earwigs. I usually soak the leaves for a while, letting any thing extra float to the top or sink, then drain and rinse again. Squeeze the extra liquid from the greens and you are ready to cook.
If you want to freeze the chard for later, boil water in a big pot (depending on how much chard you have; you can do it in batches, too), then blanch the greens by briefly submerging them in the boiling water, fishing them out and bathing them in cold water to stop the cooking process. Dry the greens and freeze in containers.
This is my recipe for cooking chard, which my kids and I have loved for years. You can prepare it this way and eat directly, or use it as filling for enchiladas, frittatas, empanadas, or any other tas or das you may desire! Photos follow the print version of the recipe.
Chard SauteAuthor: Diane C. KennedyRecipe type: Side DishPrep time:Cook time:Total time:Serves: 4-6Swiss chard is easy to grow and a little more involved to prepare, but oh! how it is worth the effort!Ingredients- 2 tsp olive oil
- 1 large shallot (or half an onion, or a clove or two of garlic)
- ¼ cup vegetable broth or water
- 2 large bunches Swiss chard (or more)
Instructions- Wash, wring out, de-stem and chop large chard leaves.
- In a large saute pan (that is a frying pan with high sides), heat two tablespoons olive oil to medium high. Or, if doing a mondo-huge pile of chard, use a pot.
- Chop one large shallot, or half an onion, or a clove or two of garlic and add to pan.
- If using onion, then allow to cook for a few minutes until softened.
- Add wrung-out Swiss chard and stir a little.
- Add a quarter of a cup of vegetable broth (the greens will still hold water, so you don't need much broth. Or you can add the same amount of water).
- Cover the pan and reduce heat to low.
- Allow chard to steam for about twenty minutes (it should be simmering in there; if it isn't, turn up the heat a little).
- Lift the lid once and stir chard.
- At the end of the cooking time, remove the lid and turn up the heat.
- Allow any extra broth to cook until almost completely gone. Be careful not to scorch!
- Remove from heat, adjust the salt to taste, and serve. I eat it with butter, or sprinkled with Parmesan cheese is also good. Yum!!
Chard Saute
In a large saute pan (that is a frying pan with high sides), heat two tablespoons olive oil to medium high. Or, if doing a mondo-huge pile of chard, use a pot.
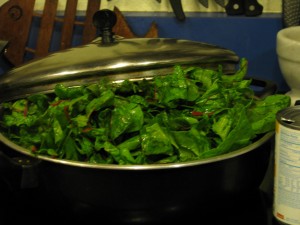
Pan o'chard Chop one large shallot, or half an onion, or a clove or two of garlic and add to pan.
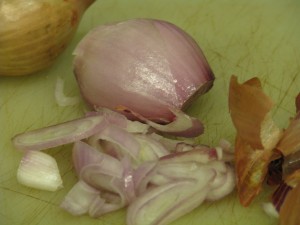
Slice shallots If using onion, then allow to cook for a few minutes until softened. Add wrung-out Swiss chard and stir a little. Add a quarter of a cup of vegetable broth (the greens will still hold water, so you don’t need much broth. Or you can add the same amount of water). Cover the pan and reduce heat to low. Allow chard to steam for about twenty minutes (it should be simmering in there; if it isn’t, turn up the heat a little). Lift the lid once and stir chard.
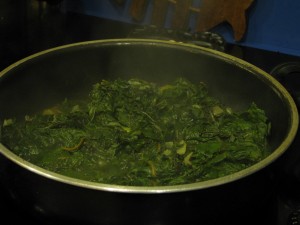
Stir the chard At the end of the cooking time, remove the lid and turn up the heat. Allow any extra broth to cook until almost completely gone. Remove from heat, adjust the salt to taste, and serve. I eat it with butter, or sprinkled with Parmesan cheese is also good. Yum!!
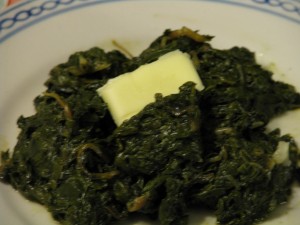
Buttered Chard: YUM! -
Apfelpfannkuchen, or Dutch Baby Pancakes with Apples
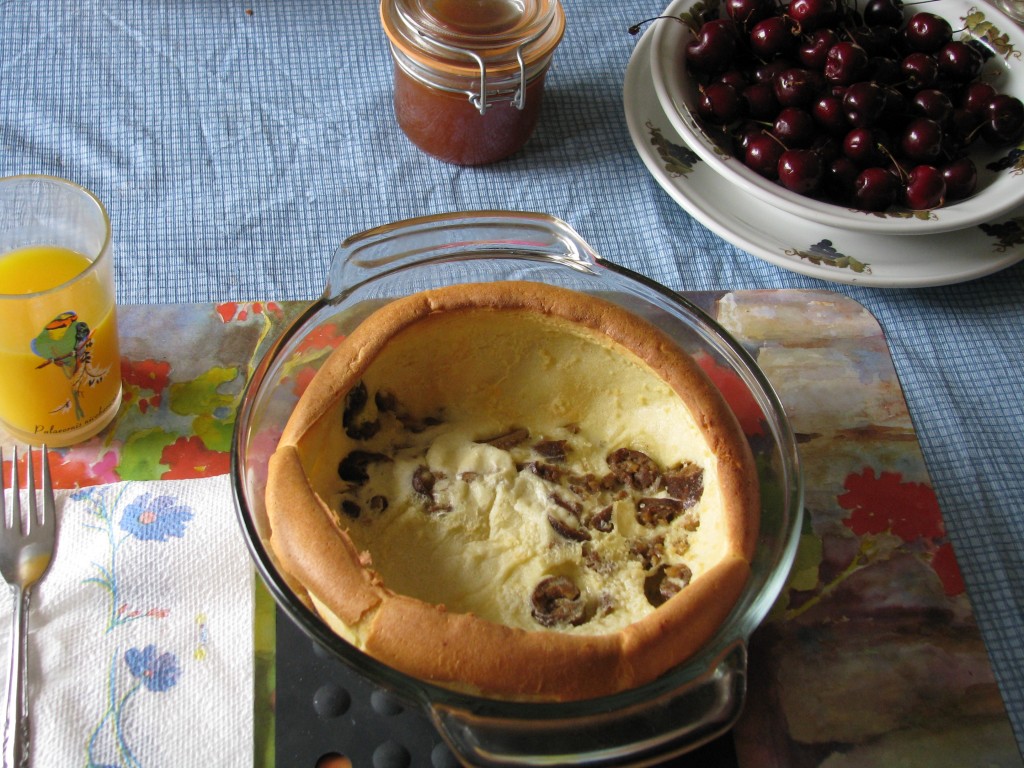
Apfelfannkuchen Breakfast. Sigh. My favorite meal. Too often it consists of a bowl of healthy cereal, orange juice and my fistfull of vitamins and supplements. Once in awhile when I have a child or two at home I’ll make these very easy, extremely impressive and delicious pancakes. One pancake per person. Just with some egg, milk and flour in a buttered dish you make this glorious puffed pancake that is a delight to eat. I copied this recipe from my mother’s recipe files back in 1977, my second year of high school. Where she copied it from I don’t know, but I do know that puffed pancakes have been a restaurant sensation on and off for decades. They can also be made plain for dessert and served with fresh fruit or even ice cream and chocolate sauce. Instead of apples make them savory with the addition of mild vegetarian sausage (you don’t want strong flavors to overbalance the delicate pancake) or cooked mushrooms.
Two kinds of pancake You can dress them up with powdered sugar at the last moment, or serve with syrup. It is important that you serve them right out of the oven so that your guests see them in all their risen glory, because the pancakes will deflate to some extent but still be gorgeous. If you pour a little syrup between the pancake and the hot dish it will sizzle and bubble very dramatically. Because the pancakes are served so hot, they take a little while to eat, which makes breakfast more of the leisurely time of enjoyment it should be. Make certain your guests know how hot the dishes are, and protect the place settings with potholders.
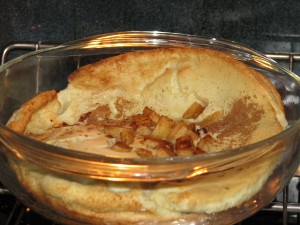
Apple filling Apfelpfannkuchen, or Dutch Baby Pancakes with ApplesAuthor: Diane C. KennedyRecipe type: BreakfastPrep time:Cook time:Total time:Serves: 1-6Ingredients- 1-2 apples, peeled and diced (or 1 vegetarian sausage link per person such as Morningstar Farms, cooked and chopped)
- Use the following chart (going across) to measure ingredients:
- Pan Size Butter Eggs Milk Flour
- 2-3 quarts ¼ cup 3 ¾ cup ¾ cup
- 3-4 quarts ⅓ cup 4 1 cup 1 cup
- 4-4½ quarts ½ cup 5 1¼ cup 1¼ cup
- 4½ - 5 quarts ½ cup 6 1½ cup 1½ cup
Instructions- Choose oven-proof bowls, preferably clear glass (for effect). I use one quart Pyrex bowls.
- Divide butter between bowls and set bowls in cold oven.
- Heat oven to 425 degrees F.
- Meanwhile, cook apples in a little butter or juice in a frying pan for a few minutes to soften.
- In a blender or with a hand mixer, whirl eggs at high speed for one minute. Gradually pour in milk, then slowly add flour. Whirl for 30 seconds. You don't want to overmix because you don't want air in the batter.
- With oven mits, remove hot dishes from oven; butter should be melted.
- Pour batter carefully into melted butter in dishes, dividing the batter equally.
- Divide apples (or veg sausage) evenly between bowls, if using. Dust with cinnamon, if desired.
- Return to oven and bake until puffy and browned, 20-25 minutes.
- Pancakes will be like a firm bread pudding at the bottom.
- Serve immediately. (Pour syrup around the inside edge and listen to it sizzle! It impresses children and easily impressed minds like mine!) Nom!

Vegetarian Sausage Filling -
Genetically Modified Foods, and a curious, unrelated photo
Genetically modified food (GMs) are what happens when scientists manipulate cells or even nuclei by inserting genes or viruses to change the DNA. Before GMs farmers would hybridize plants by breeding for preferred character traits. GMs may or may not cause damage to human DNA, but it’s use has escalated the use of pesticides, herbicides and animal cruelty. Since Monsanto, the makers of the herbicide Roundup(tm) are also the leaders in GM food, it seems that they are lining their own pockets by selling products for both cause and effect. If eating GM food is something you’d rather not do, I have just come across a useful article that might help. In the April/May, 2011 Vegetarian Times, there is an article by Neal D. Barnard, MD on the subject. In the article he reveals that manufacturers in the U.S and Canada aren’t required to label GM food. However he says that most US-grown corn, soy, cotton, Hawaiian papaya and canola is GM, but most other fresh fruit or vegetables aren’t, such as apples, oranges, bananas, broccoli. (These, however, are often heavily sprayed with pesticides and need to be washed before eating. The Environmental Working Group http://www.ewg.org/ updates a Dirty Dozen and Clean Fifteen list of produce that is effected most or least by pesticides; you can see that list here: http://www.healthyreader.com/2008/05/13/12-most-contaminated-fruits-and-vegetables/ .)
Dr. Barnard goes on to give these interesting tidbits: The labels on fresh produce carry a four-digit standardized code for cashiers to look up the price of the item, called a PLU (price look-up). If the code is preceded by an 8, it is genetically modified. If preceded by a 9, it is organic, and organics cannot be genetically modified. So watch your tofu packages if you don’t want GM soybeans.
Since becoming a vegetarian some sixteen years ago, I’ve been a label reader (even now when it requires pulling out my glasses or holding a can at arm’s length!). The amount of sodium in foods is outrageous, as is the amount of sweetners such as corn syrup. High amounts of salt and sugar is in there not for taste, but for its addictive qualities. When you eat salt or sugar, just like drinking caffeine, you crave more. As a vegetarian, it’s amazing what meat products are slid into foods, even those toted to be vegetarian. Now there is a more dangerous enemy than bad nutrition in packaged food. In my opinion, it is that of GM food and heavy herbicide and pesticide use. Even more reason to shop locally and organically, or to grow as much food as you can, and read all the labels. I am an ethical vegetarian, meaning that I decline to eat animals because I am protesting their horrible treatment and slaughter. GM animals are bred to continuously give milk, to grow enormous, to provide more of what humans eat off of them, despite the physical agony it brings. That coupled with already nightmarish living conditions is a monsterous state of affairs. Then humans injest the modified DNA, the herbicides that the animals eat that was sprayed on their food, and the pesticides that was sprayed directly on the animals. It is not a practice of which I will be a part.
Okay, I’m stepping off my soapbox now. As promised, I have a curious, unrelated photo. I have to balance reality with humor to keep sane This was taken by my daughter as we left the area on our recent Oregon sojourn, and we ask ourselves, “Huh?” A really big blowhorn faced the wrong way? A jet engine, faced the wrong way? A hood ornament…. faced the wrong way? Something unusual that fell out from under the car? A neutron accelerator? I love the care of placing a skid under the thing to protect the hood, but cinching the straps so tightly it dents the sides! Another funny incongruency in life, which keeps that humor in living. Any suggestions as to what? Or better yet, why?

Hood Ornament 
Horn? -
Lemon Strawberry Jellyroll Cake

Lemon Strawberry Jellyroll Cake Have you ever made a jellyroll cake? It looks very fussy, but is extremly easy. My daughter, home from college for a week, wanted a birthday cake that wasn’t “heavy and gunky like college food”. So I made a Lemon Strawberry Jellyroll cake for her, and it was wonderful if I do say so myself! You will need a jellyroll pan, which everyone should have anyway because you can do so much with it. You can fill this basic sponge cake with whipped cream, custard, curd, or even… um… jelly or jam. You can make a chocolate version with chocolate ganache, or even with pastry cream and mixed candied fruit to follow an Italian meal. I’ve made one with whipped cream and mango. This is the basic Yule Log, too. This recipe is bright with lemon, which is saved from being too much by the fresh strawberries inside, and is very light. Yum!
Lemon Strawberry Jellyroll CakeAuthor: Diane C. KennedyRecipe type: DessertPrep time:Cook time:Total time:Serves: 8-10An easy and delicious cake that looks complex.Ingredients- For the cake:
- ½ cup all-purpose flour
- 1 teaspoon baking powder
- 4 eggs at room temperature, separated
- 1 teaspoon fresh lemon juice
- ½ teaspoon vanilla extract
- 1 teaspoon lemon zest
- ⅓ cup granulated sugar
- and ½ cup granulated sugar
- One cup lemon curd (see recipes)
- 2-3 large ripe strawberries, sliced, then halved
- Sifted powdered sugar
- Sweetened Whipped Cream, Lemon Icing (recipes follow) and Meringue Mushrooms (optional; see 'recipes' on blog)
- For Icing:
- 1 cup powdered sugar
- 1 teaspoon fresh lemon juice
- For Sweetened Whipped Cream:
- 1 cup heavy whipping cream
- 1 teaspoon granulated sugar
- ½ teaspoon vanilla
- Add meringue mushrooms to complement the 'log' if desired (see 'recipes').
Instructions- For cake:
- Line a 15x10x1-inch jellyroll pan with parchment paper (not waxed paper, it will stick), or grease and lightly flour it.
- In a small bowl stir together flour and baking powder.
- In a medium mixing bowl beat egg yolks and vanilla with an electric mixer on high speed for 3-4 minutes or until frothy.
- Gradually add the ⅓ cup granulated sugar, beating until sugar is almost dissolved.
- In another bowl beat egg whites with very clean, dry beaters on medium speed until soft peaks form.
- Gradually add the ½ cup sugar, turning up the speed and beating until stiff peaks form and stop the mixer.
- Gently fold the egg yolk mixture into the beaten egg whites.
- Sprinkle flour mixture over the batter and gently fold in until just combined.
- Spread batter evenly in prepared pan.
- Bake 375 degrees F. for 12 to 15 minutes or until cake springs back when lightly touched and is just golden brown.
- Lay a towel or piece of parchment that is larger than the cake pan on the counter and sprinkle liberally with powdered sugar.
- Quickly invert the hot cake onto the towel and peel off parchment that was on the bottom of the cake, if used.
- Roll up the towel and cake, making sure the cake doesn't touch itself, starting from the short side.
- Cool rolled cake on a wire rack. You can refrigerate the cake now for a day, slid into a plastic bag.
- When ready to fill (on the same day as being served) bring the cake back to room temperature and carefully unroll. I haven't had a lemon jellyroll that hasn't stuck a little to the towel because it's so moist. If it cracks, its okay. You can cover the cracks with icing.
- Spread with lemon curd leaving one inch around the edges.
- Arrange sliced strawberries across the cake in rows.
- Carefully re-roll cake without the towel.
- Place on serving plate.
- Spoon lemon icing along top of jellyroll cake; it will slowly drip down the sides.
- Spoon sweetened whipped cream on servings or into a frosting bag and pipe rosettes or other decorations around cake.
- Add meringue mushrooms to complement the 'log' if desired.

Baked sponge Lay a towel or piece of parchment that is larger than the cake pan on the counter and sprinkle liberally with powdered sugar.
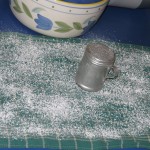
Powder a towel Quickly invert the hot cake onto the towel and peel off parchment that was on the bottom of the cake, if used.

Peel off parchment Roll up the towel and cake, making sure the cake doesn’t touch itself, starting from the short side.
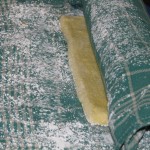
Roll it up Cool rolled cake on a wire rack. You can refrigerate the cake now for a day, slid into a plastic bag.
When ready to fill (on the same day as being served) bring the cake back to room temperature and carefully unroll. I haven’t had a lemon jellyroll that hasn’t stuck a little to the towel because it’s so moist. If it cracks, its okay. You can cover the cracks with icing. Spread with lemon curd leaving one inch around the edges. Arrange sliced strawberries across the cake in rows.

Mine cracked because I was too hasty, but cracks be hidden! Carefully re-roll cake without the towel. Place on serving plate.

Rolled cake ready for icing Spoon lemon icing along top of jellyroll cake; it will slowly drip down the sides.
Spoon whipped cream on servings or into a frosting bag and pipe rosettes or other decorations around cake.
Add meringue mushrooms to complement the ‘log’ if desired.

Yummy Slice Makes 8-10 servings.
-
Meringue Mushrooms
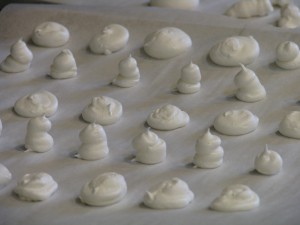
Stems and caps I had wanted to make these for Christmas, but didn’t get a chance. My chance came yesterday when I made my daughter’s Lemon-Strawberry Jellyroll birthday cake. What better to decorate a log than mushrooms? So here is the recipe; I’ll add the birthday cake recipes soon.
Meringue MushroomsAuthor: Diane C. KennedyRecipe type: Dessert GarnishPrep time:Cook time:Total time:Serves: ManyPiping little mushroom decorations for cakes is fun and will bring you great admiration from your family and friends! And they are so good to eat, too!Ingredients- 2 large egg whites, room temperature and with no bits of yolk in them
- ¼ teaspoon cream of tartar
- ½ cup superfine sugar (if you don't have it, you can use regular white, or blend white sugar up a bit in a blender)
Instructions- Oven to 200 degrees F., and place the two oven racks to upper and lower thirds. Line two baking sheets with parchment paper (don't use waxed paper; the 'shrooms will stick)
- Fit a large pastry bag with a number 6 (1/2 inch diameter) (1¼ cm) round plain tip.
- In a mixer bowl beat the egg whites on moderate speed until they are foamy, a minute or so.
- Up the speed a little and add the cream of tartar, beating until soft peaks form.
- Turn the speed to high and add sugar slowly.
- Beat until stiff peaks form and sugar is dissolved (you can rub a little between your fingers to make sure it isn't gritty). Reserve about an eighth of a cup of meringue for later.
- With a spatula, spoon the meringue into the pastry bag.
- Piping
- To make caps: Holding the bag upright and close to the parchment paper, pipe a round about 2 inches wide and one inch high, giving the bag a twist to separate. Make the caps as close to the same size as possible for even baking.
- Leave a good two inches between caps. Use your finger or a toothpick to smooth any points on the caps.
- To make stems: Holding the bag upright and close to the parchment paper, pipe a cone about one inch high straight up, making the base a little larger than the top. Some may fall over during baking, so leave good space between.
- Make as many stems as there are caps.
- Bake both sheets for an hour, rotating the sheets up and down, front to back about halfway through the baking time.
- The 'shrooms should be firm enough to be lifted from the sheets without sticking. Using a knife, make a little hole in the underside of the caps.
- Pipe a little of the reserved meringue into the hole, and stick in a stem, bottoms up. Return upside-down mushrooms to parchment paper, and bake for another 15 - 20 minutes until dry. (I found that some were still sticky, so I turned off the oven and let the pan sit in there for awhile to dry, like you do with traditional meringue cookies. It worked fine).
- Stand mushrooms up.
- Some might lean, some stand, some lie down... it all looks natural.
- Take about a teaspoonful of cocoa powder and very carefully shake a little over the caps.
- Using your finger or a kitchen paintbrush, smudge the cocoa just a little to make it look natural.
- Store these cute little devils in an airtight container for a week or so.
- Any exposure to moisture will make them sticky, so if using to adorn a cake put them on at the last minute.
- Makes about 25 little shroomies.

Piping To make caps: Holding the bag upright and close to the parchment paper, pipe a round about 2 inches wide and one inch high, giving the bag a twist to separate. Make the caps as close to the same size as possible for even baking. Leave a good two inches between caps (I put them too close together and the baking was uneven). Use your finger or a toothpick to smooth any points on the caps.
To make stems: Holding the bag upright and close to the parchment paper, pipe a cone about one inch high straight up, making the base a little larger than the top. Some may fall over during baking, so leave good space between. Make as many stems as there are caps.

Space them farther apart! Bake both sheets for an hour, rotating the sheets up and down, front to back about halfway through the baking time. The ‘shrooms should be firm enough to be lifted from the sheets without sticking. Using a knife, make a little hole in the underside of the caps. Pipe a little of the reserved meringue into the hole, and stick in a stem, bottoms up. Return upside-down mushrooms to parchment paper, and bake for another 15 – 20 minutes until dry. (I found that some were still sticky, so I turned off the oven and let the pan sit in there for awhile to dry, like you do with traditional meringue cookies. It worked fine).
Turn the mushrooms right-side-up. Some might lean, some stand, some lie down… it all looks natural. Take about a teaspoonful of cocoa powder and very carefully shake a little over the caps. Using your finger or a kitchen paintbrush, smudge the cocoa just a little to make it look natural. Store these cute little devils in an airtight container for a week or so. Any exposure to moisture will make them sticky, so if using to adorn a cake put them on at the last minute. Makes about 25 little shroomies.

Sift cocoa powder onto shrooms An option for putting the dried stems and caps together is to dip the end of the stem in chocolate ganache (see recipe for Buttermilk Chocolate Ganache Cake) or frosting, and using that as glue. Don’t do the additonal baking. With even a little ganache, the chocolate flavor overwhelms the meringue flavor, but that isn’t all that bad, is it?
-
How To Make Decaf Tea That Doesn’t Taste Like Dishwater
Okay, okay, this is an off-the-wall topic for many people. Its raining (a good thing), and hot tea is right there at the top of my list after an hour’s vigorous exercise at the Fallbrook Community Center’s Fitness Fusion Class. Actually, a cuppa is often on my mind. In fact, whenever I hear someone mention tea, I crave it. Hot, with honey. If I’m sick, then honey and lemon. If I’m REALLY sick, then honey, lemon and a shot of whiskey. If I’m feeling low, honey and fat-free half-and-half. If I’m REALLY low, then honey and cream. (Rice milk can do the trick, too.)

My sister and I used to brew up herbal teas when I was in my teens, reading about the medicinal value of each plant, according to this mint tea review mixing and matching can do wonders. I remember how Shephard’s Purse was particularly soothing. Since I never liked the taste of coffee (it makes me gag!), I took to black teas. A few years ago my dentist commented on how overly developed my jaw muscles were, and said that I probably ground my teeth when I slept. that is when I consulted Daytona Beach periodontist. It turned out that the caffeine in my one or two cups of tea a day acted like an amplifier for the usual stress and worry that comes with being alive. Like an alcoholic in denial I boasted that I could do with or without caffeine. Any ol’ time.
Sure.
I went off caffeine and for several days had the jitters, was even crankier than normal, and went through withdrawl. From a twice-a-day cuppa habit! It worked. When the caffeine was flushed from my system, the clenching stopped, the grinding stopped, and I became more stable in my energy levels during the day. That two o’clock droop disappeared. That was about three years ago, and now if I have caffeine I can feel it speeding up my heart rate, prickling along the back of my neck, and making my jaws clench. Yes, I’m sensitive to drugs of any kind, so perhaps this isn’t the normal person’s reaction, but for some I think it’s significant.
But what about my treasured cuppa? My daughter (who was also lectured by the dentist) and I switched to decaf tea. Ick. Brown sweetened water. We tried bulk decaf tea with better success, but it still was ick. Then my brilliant daughter came up with the most important part of the secret of a decent cuppa decaf tea, and I figured out a little more. And finally, here it is:
Whether you use a teabag or bulk decaf tea, make sure that it is fresh. Use freshly boiling hot water. If you use water that has already been heated and cooled, the oxygen has mostly bubbled out of it and the tea will be flat. Swish hot water in your cup to warm it, just like you’d do with a pot of tea, and dump it out. (This also removes any dust that may have settled, or creatures that have taken refuge there.) (I’m only partially kidding.) Put in your tea or teabag and pour just enough boiling water in to cover the tea. DO NOT FILL IT UP YET. That’s my daughter’s brilliant trick. Somehow the steeping in a small amount of boiling water intensifies the brewing and really imparts flavor. Here’s my addition: cover the cup to keep the heat in. You can used one of those teacups that comes with a strainer and lid, or use the saucer, or any borrowed lid.
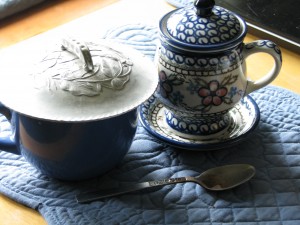
The cover keeps the heat in, and keeps the tea brewing at the same rate; if water cools, it doesn’t brew very well. After all, you aren’t making Sun Tea here. Steep for about three minutes this way. Then reboil some water. I have a Proctor Silex electric water pot with a thermostatic shut-off that I bought at K-Mart and I love it. I just turn the switch back on. Its amazing how cool water gets when sitting for just a few minutes. Fill the cup up with more boiling water, re-cover the cup, and let it steep for a few more minutes. Then, voila! Uncover a pretty decent-flavored cup of decaf tea. At this point add in anything you want in it: sweetener, cream, whiskey, lemon…. Don’t add anything during the steeping time because it inhibits the steeping.
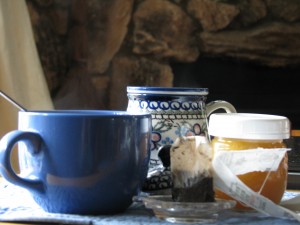
So, in a nutshell, use fresh, boiled water. Just cover the tea with water. Cover the cup and steep for a few minutes. Pour in the rest of the water which is boiling. Cover the cup and steep for a few more minutes. Uncover and add in stuff or don’t add in stuff. Enjoy and give up clenching forever. Of course, tea goes better with toast smeared with some of that lemon curd from the previous post.
Why couldn’t I have said all that right at the beginning? Geez….. 🙂
-
When Life Gives You Lemons… Make Lemon Curd!
What to do with a plethora of beautiful juicy lemons? There is, of course, just so much lemonade your dentist will allow you to drink (sugar and acid!). Here is something very British-teatime that you can do with those wonderful fruits, that you can also give to friends as a wonderful gift: Lemon Curd. You can also make curd from limes, oranges, and even passionfruit. This recipe is for lacto-ovo vegetarians, not vegans, because it contains eggs and butter.

Lemon Curd!Author: Diane C. KennedyRecipe type: CondimentPrep time:Cook time:Total time:Serves: 8 plusLemon curd goes well on bread, in pies and on cakes, and makes a thoughtful gift!Ingredients- For one cup (may be increased; I usually make it x 6):
- ⅓ cup sugar
- 2 teaspoons cornstarch
- 2 teaspoons finely shredded lemon peel (then mince)
- ¼ cup freshly squeezed lemon juice
- ¼ cup margarine or butter
- 2 beaten eggs
Instructions- In a medium saucier pan (rounded bottom rather than square, which is a sauce pan), combine the sugar and cornstarch.
- Stir in lemon peel (I use a microplane grater, then mince the peel so its very small) and lemon juice.
- Add butter.
- Cook over medium-high heat, stirring, until thick and bubbly.
- Carefully whisk half the lemon mixture into the beaten eggs, making sure that it mixes immediately so the hot mixture doesn't cook the eggs.
- When incorporated, whisk the egg mixture into the pan with the rest of the lemon mixture.
- Cook and stir for about two minutes more. Pour into sterilized canning jars, or into a serving bowl if using that day, and cover with waxed paper and cool. Makes about one cup of lemon curd.
- I give my jars of curd a turn in simmering water for about 5 minutes, just to make sure that it keeps, and I store it in the refrigerator.

Now that you have it, what do you do with it? Lemon curd is delectable served on hot scones. For something especially decadent, pair it with marscapone cheese. Oh, my! It can also be used as a cake filling, a spread for toast, pancakes, waffles, and as a pre-cooked pie filling (just bake a crust, spoon in the curd and chill. Top with whipped cream. Yum!).
If you have a lot of extra lemons, grate the peel, squeeze them all, mix the peel and juice together, and pour into ice cube trays, covering with plastic wrap. One tray holds about a cup and a half of juice. When frozen, empty the tray into a zip-lock freezer bag or freezer container, label and date, and you have juice ready for curd, lemonade or what you will, when lemons aren’t falling off the tree.
Do yourself and your friends a favor and make lemon curd for a wonderful hostess gift, a gift for a foodie, or to repay the person who gave you all those lemons!
-
Spring Is Here

Spring is here Today I really felt that Southern California had shrugged off Winter. It was warm and a little humid out, my Satsuma plum is in full bloom, and my desert tortoise (endangered species; I’m his third owner and he’s licensed) Homer came out of hibernation in the closet. He’s still sleepy and grumpy, and I can relate to that.

I also saw the first Red Diamondback Rattlesnake today, newly emerged from hibernation, sunning itself in the cleft of a boulder about head height. My hiking buddy Alex and I were at Santa Margarita River Preserve, and there was this somnamulant reptile soaking in the sun and enjoying the radiating warmth of the rock. We posed right next to him or her, and he or she didn’t care. This would not be the case on a hot summer’s day!

This intermediate dry spell is important for the construction of the permaculture garden because the soil is still too wet to allow trucks down on the property. We are investigating the best way to create the ponds, which at this time will incorporate a dry rock creekbed that will catch and channel rainwater and allow it to perculate into the soil, another pond for water holding, and a possible natural swimming pond. The swimming pond works on the same concept as a natural greywater system. Beside the swimming area is another deep area filled with different grades of rock. Water plants which clean water with their roots are planted on top in a naturalistic way. Water is pumped into this area from the bottom, and as the water rises through the gravel and plant roots it becomes clear, then is transported into the swimming area. No chemicals needed; in fact, chemicals would ruin the biological balance of the pond. The swimming pond is clean and ready for human use, and also provides riparian habitat, food and acts as a watering hole for many animals. They are popular in Europe and other countries, and are slowly catching on here in America. Of course, people throughout time have swum in gunky swimming ponds; this is just making one for oneself. This is a YouTube link to a UK pond builder. He is hawking a video on his project, which is only available in the UK and thus wouldn’t play on US DVD players, but this short video tells a lot about swimming ponds: http://www.youtube.com/watch?v=7JoQthEBl6U . Clicking on this link will navigate you away from this page. I just love his Liverpudlian accent.
Today I became the owner of clumping giant bamboo, and a Buddha’s Hand citron. So very cool! The bamboo can be used for all kinds of structures, and with the citron I can make my own candied fruit for desserts. Did you know that candied fruit is called succade? Nope, neither did I.

Creepy, but fun and very fragrant. The fruits are mostly peel, and are used to scent rooms and clothes in Asia. Also planted were various stonefruits, including 4-in-1 apples, apricot, cherry, pear, peaches, nectarines and Asian pear. I also became the proud owner of two little kumquat trees. They are loaded with fruit, and since they were purchased from an organic nursery, this crop doesn’t have to go to waste (you eat kumquats whole).
So, after a morning of Zumba at the Fallbrook Community Center, planting and feeding my many animals, then four hours of intense hiking, my legs are trying to get me to walk upstairs to bed and stay there. Sounds like a good idea to me.
-
Easy and Incredible Buttermilk Chocolate Ganache Cake with Perfect Chocolate Frosting
A rare thunderstorm in San Diego, after days of 100+ degree heat. A few drops of rain and enough crashing to make my dogs nervous. They are happily taking advantage of my push-over self and are in the living room, while my cats are furious in the rest of the house. The cooler fallish weather and darker skies makes me want to cook!
I bake for friends, and this is one of my most requested cakes. It is easy, it is wonderful, it is satisfying: it is chocolate. I don’t like wimpy chocolate cakes; if I’m going to invest my calories in a dessert, it better pay off in flavor and texture. Making this cake a day ahead allows the flavors to meld, but it can be eaten right away in case of chocolate emergency. This recipe does use dairy products, and the acid reaction between the buttermilk and baking soda helps it rise and makes the chocolate flavor be yum. I have directions for a layer cake or sheet cake, but it makes great little bundt cakes, too. I have a humongous sheet cake pan and I quadruple the recipe with complete success. I’ve given directions for chocolate frosting, which is absolutely great, by the way, but feel free to use other colors for decorations. Although I enjoy dark chocolate, I find semi-sweet is best in the ganache, although I’ve used extra-dark baking cocoa for the batter and frosting with much success. Enjoy!
Easy and Incredible Buttermilk Chocolate Ganache Cake with Perfect Chocolate FrostingAuthor: Diane KennedyRecipe type: DessertPrep time:Cook time:Total time:Serves: 10 - 12My best and most satisfying chocolate cake recipe, without a lot of hassle!Ingredients- Buttermilk Chocolate Ganache Cake
- For Cake:
- 2 cups white sugar
- 1 ¾ cups all-purpose unbleached flour
- cups powdered unsweetened baking cocoa
- 1 ½ teaspoon baking powder
- 1 ½ teaspoon baking soda
- 1 teaspoon salt
- 2 eggs
- 1 cup buttermilk
- cup vegetable oil
- 2 teaspoons vanilla extract
- 1 cup boiling water
- For Ganache:
- cup heavy cream
- 2 tablespoons unsalted butter
- 4 ounces semi-sweet chocolate in pieces
- For Frosting:
- 1 stick (1/2 cup) butter
- ⅔ cups powdered unsweetened baking cocoa
- 2 cups powdered sugar, sifted
- ⅓ cups milk, water or buttermilk
- 1 teaspoon vanilla
Instructions- Heat oven to 350 F.
- Grease and flour 2 9-inch round baking pans, or one sheet cake pan.
- Combine dry ingredients in a large bowl.
- Add eggs, milk, oil and vanilla; beat on medium speed for 2 minutes.
- Stir in boiling water (batter will be thin).
- Pour evenly into baking pan(s).
- Bake 30 – 35 minutes, or until wooden toothpick inserted in center comes out cleanly.
- Cool ten minutes.
- For layer cake, or for the more adventurous sheet cake bakers, turn cake(s) out onto wire racks and cool completely.
- For ganache, combine heavy cream and butter in a small saucepan and bring to a simmer.
- Turn off heat.
- Add the chocolate pieces and swirl around to cover them with the hot milk mixture, and then cover for five minutes until chocolate is melted.
- Stir until smooth and creamy.
- Pour into a small bowl, cover and refrigerate until ganache is thick enough to spread.
- For frosting, melt butter and pour into bowl.
- Stir in the cocoa.
- Alternately add sifted powdered sugar and milk, beating on medium speed to spreading consistency.
- Add more milk if needed.
- Stir in vanilla.
- Makes about 2 cups.
- To finish: If making a layer cake use the ganache as filling.
- Cake may then need to be chilled to keep ganache firm before and after frosting. Ganache can also be used both as filling and as a coating for the top layer, and the frosting spread around the sides of the cake and piped decoratively around the top edge as a barrier to contain the ganache.
- If making a sheet cake, spread thickened ganache on top of cooled cake.
- Pipe frosting decoratively around edge to contain ganache and, if you’ve managed to turn the cake out of the pan, spread the frosting around the sides.
- This cake is excellent if made the day before serving, to give the flavors a chance to meld.
-
Sun-Dried Fruit
When I look outside at the over 100 degree F. sunshine baking my property, I’m frustrated that I can’t use it all. I feel the same when it rains here in semi-desert San Diego county. I am hoping to purchase solar panels for my house, but until then I have my laundry on the line and fruit on the roof. Yep. The bounty of fruit and vegetables always appears during the hottest months, and I’ve spent many summers sweltering in the kitchen cooking jam and canning tomatoes. Something in my Celtic and Eastern European genes ignores the long growing season here and sends a message to my brain to preserve everything for the coming harsh winter imbedded in my genetic memory. Survival food for the blizzardy months! Um… yeah… reality check here. Although I try to eat locally grown seasonal produce, you can buy just about anything anytime of year here, although not without a decline in the quality. To give in to my desire to not waste sun energy or food this summer I’ve been slicing and drying fruit and vegetables on trays up on the roof, with excellent results.
If you have a flat sunny spot that ants haven’t found, you too can dry food. You don’t need to use preservatives. It is a great way to save bananas that are just about to go black, or the ends of the tomatoes that are too small to put on a sandwich. The most labor is in slicing the food and then later flipping it on the trays.
Sun-Dried Fruit and Vegetables
You will need:
Produce such as fresh apricots or other stonefruit, apples, pears, berries, tomatoes, squash.
Reflective cookie sheets (not Silpat)
Cheesecloth
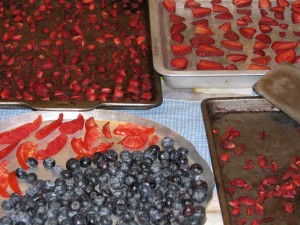
Thinly slice produce such as apricots, tomatoes, apples, bananas, etc. You don’t have to peel stone-fruit or tomatoes; actually the skin helps hold the innards together. If you have produce with inedible skins such as melon or bananas, then by all means take it off. I like small pieces so that the dried fruit can be directly used in baking or on top of fresh fruit or cereal without having to be cut up again. (Snipping dried apricots with a scissors is soooo time-consuming). However, don’t slice them too small or when they dry they will turn into little dots which are hard to scrape up. You can leave small fruit such as blueberries and alpine strawberries whole but they may take longer to dry.

Don't chop them too small! Place the sliced or whole fruit or vegetables on cookie sheets or pizza pans that are reflective aluminum. Space the fruit so that it isn’t touching, but the pieces can be very close together (they will shrink considerably).
Measure pieces of cheesecloth so that there is enough to cover the tops of the trays and hang over the sides so that it can be pulled taught and not touch the fruit
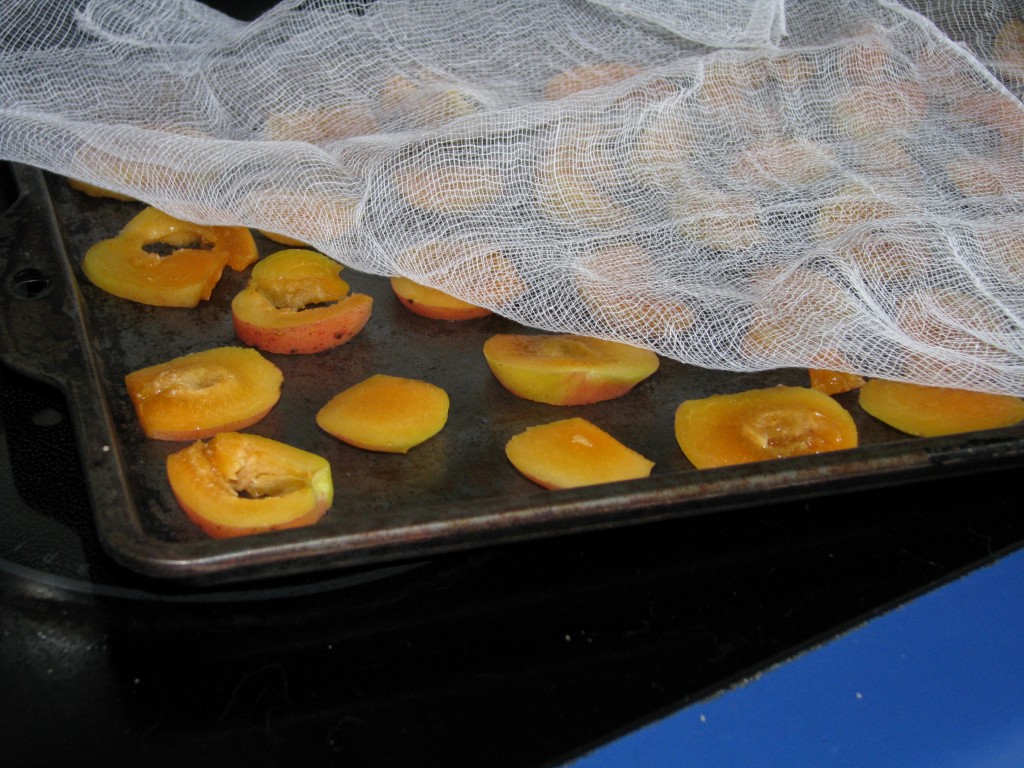 .
.Place prepared trays of covered fruit on the roof, on a hot porch, or anywhere it will not be invaded by ants. Leave the trays out all day until the sun is no longer on them, then bring them in for the night. Don’t leave them out in damp weather.
Using a sharp spatula, scrape up the fruit bits and turn them over, re-spacing them not to touch, and replace the cheesecloth.
The next day set the trays out again. Depending on how hot your roof is, the fruit should be dried at the end of the second day. If using whole fruit like blueberries or grapes, it may take a few days. Fruit is dried when there are no moist pockets in them.
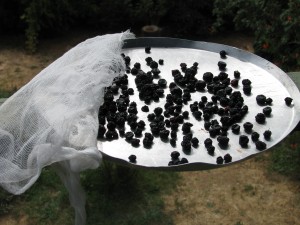
Ta-daaa! Store the fruit in covered jars, and use during those bleak winter months when you plot your spring garden.


