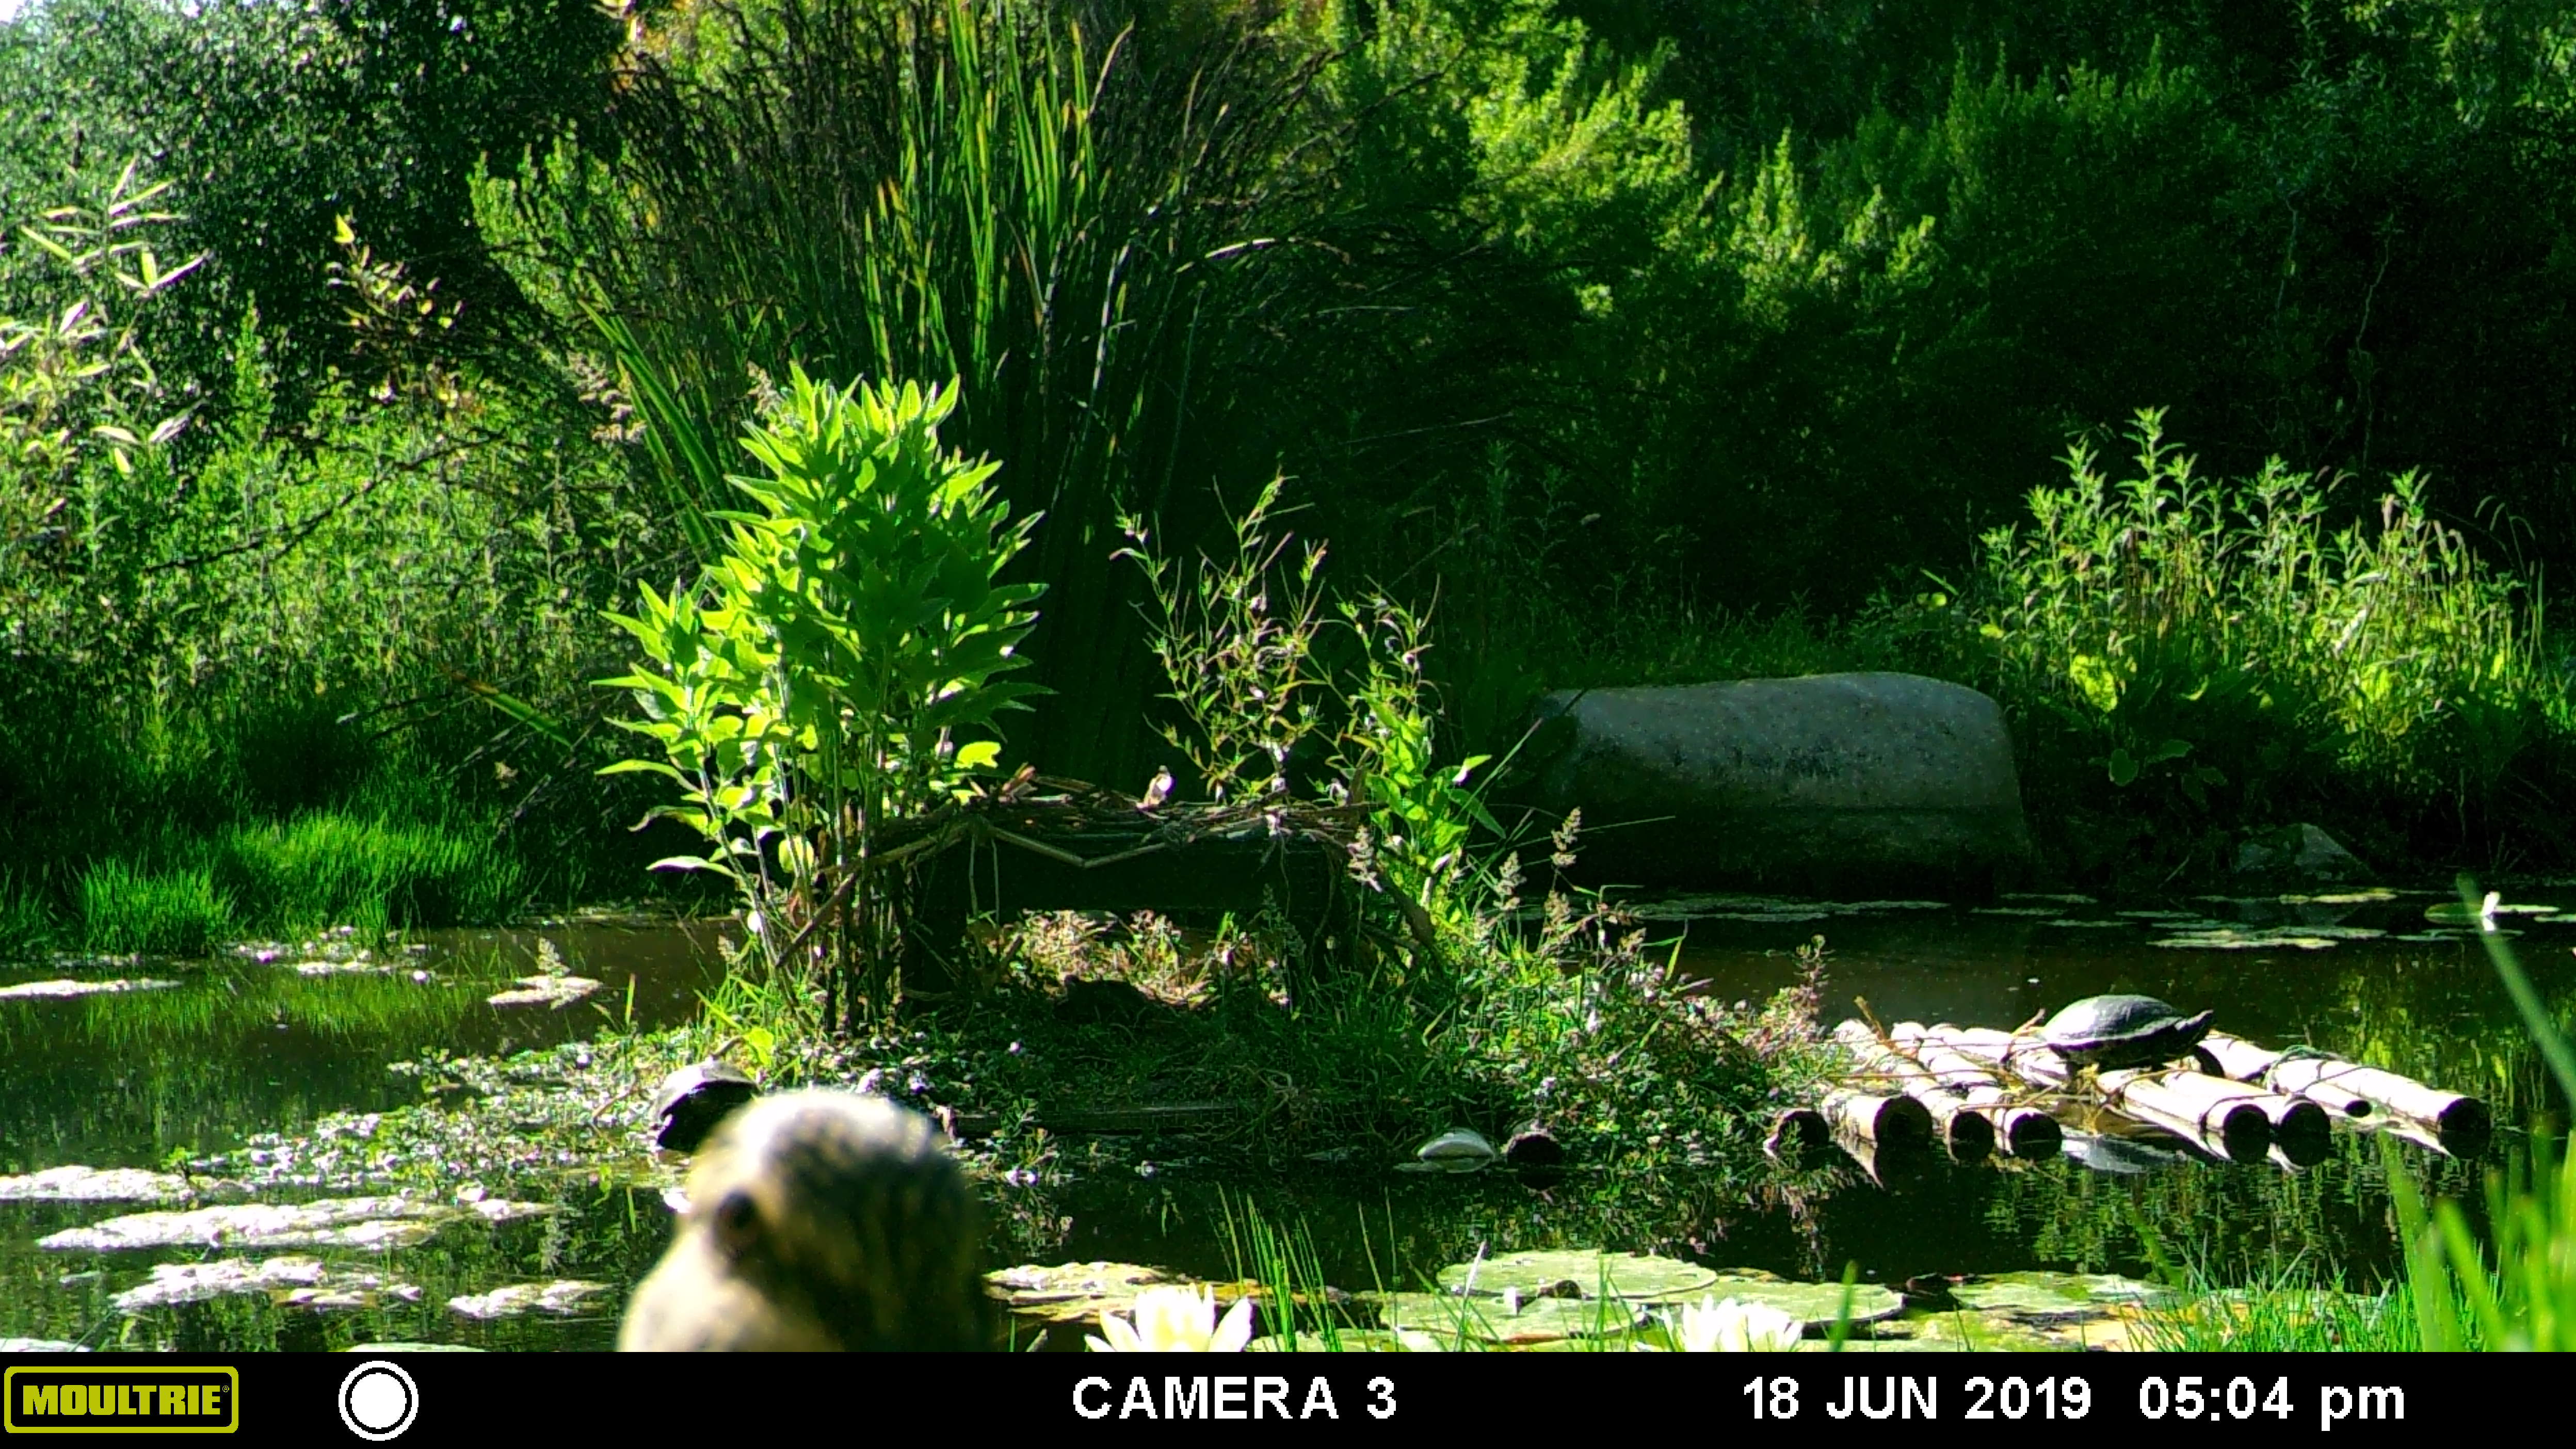
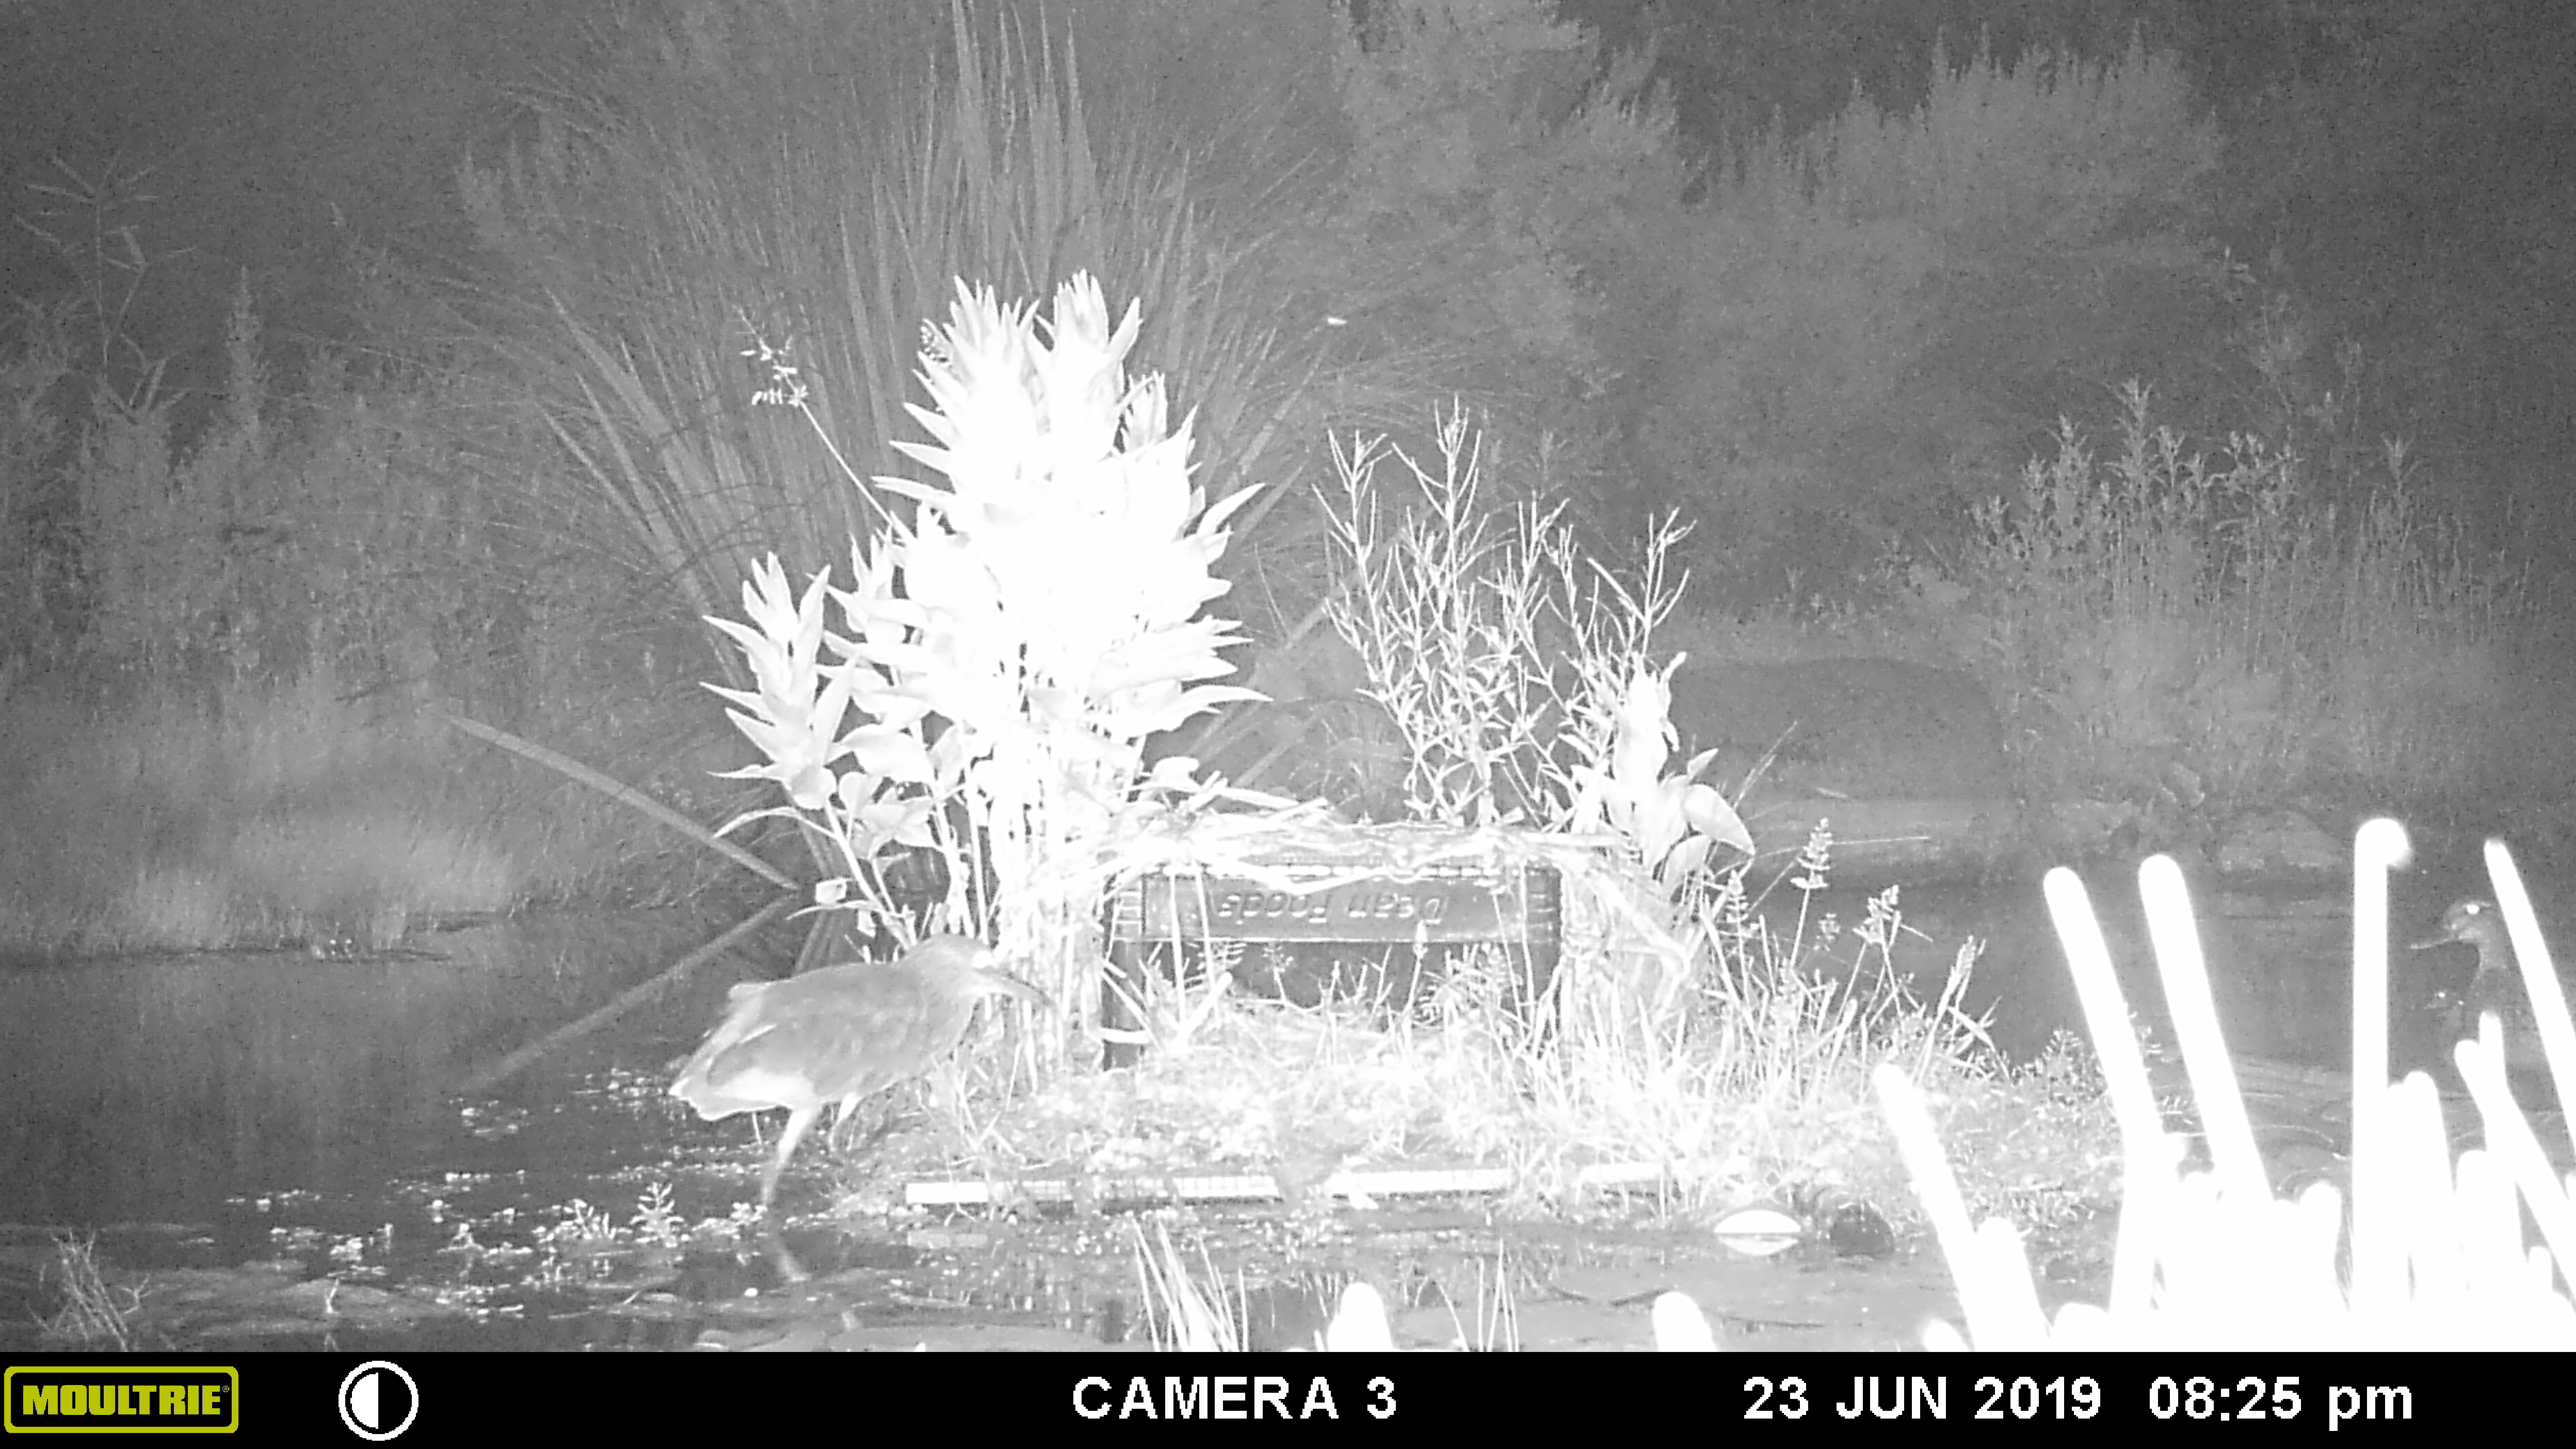
- Compost, Fungus and Mushrooms, Gardening adventures, Hugelkultur, Permaculture and Edible Forest Gardening Adventures, Rain Catching, Seeds, Soil, Vegetables, Water Saving, Worms
Planting Spores in the Garden

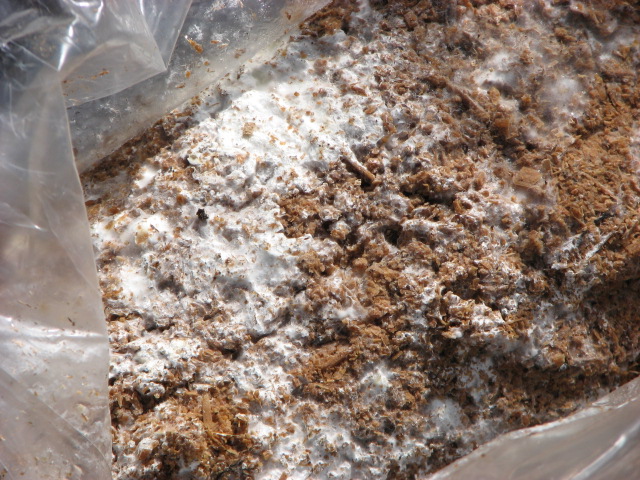
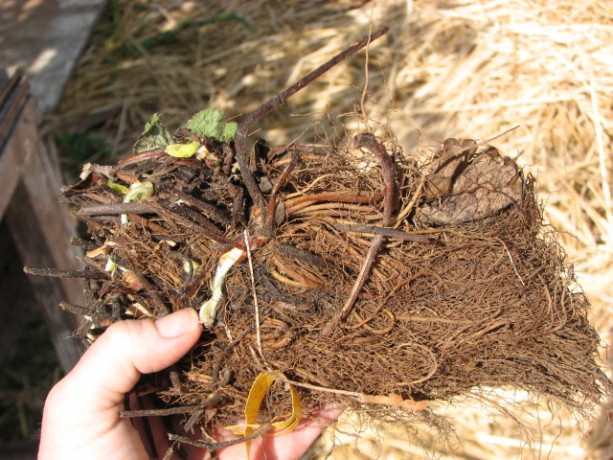
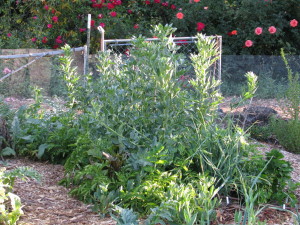
The mycelium is white in the sawdust and ready to go. If you remember the trenching, filling and designing the new veggie patch, then this post will make more sense to you.

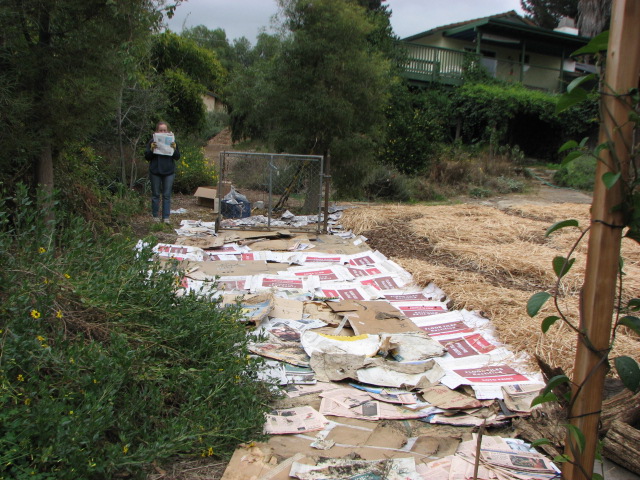
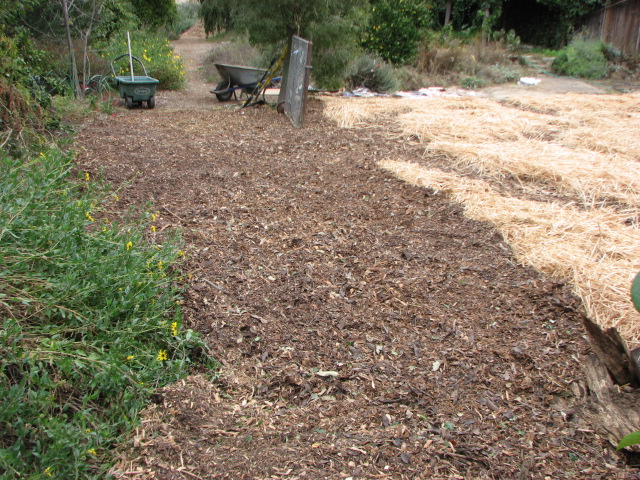
The next step was to cardboard the pathways where Bermuda grass has been taking over, then mulch them as well. The mulch makes it all look so nice!

Covered with mulch, the cardboard is only a memory. Next it was time to plant. We’d already transplanted three-year old asparagus, and hopefully not shocked them so much that they won’t produce well this year. The flavor of fresh asparagus defies description.

Asparagus popping up some feather shoots from its new home. The strawberry bed was older and completely taken over by Bermuda grass, so it all was buried and I purchased new organic and extremely reasonably priced bareroot strawberries.
A bundle of twenty-five strawberries. I purchased two June-bearing types and three ever-bearing, heat-loving types, from www.groworganic.com. When they bloom this year we’ll have to nip off the buds so that next year when their roots have taken hold and fed the crown, we can have lots of strawberries.

Soaking the strawberry roots for a few minutes rehydrates them. We planted some in the asparagus bed, which will do nicely as groundcover and moisture retention around the asparagus, while the asparagus keeps the heat off the strawberries. Some we planted around the rock in the center of the garden. The rest will be planted around fruit trees as part of their guilds.
Strawberries surround the rock. We also planted rhubarb in the asparagus bed; these poor plants had been raised in the greenhouse for several months awaiting transplanting.
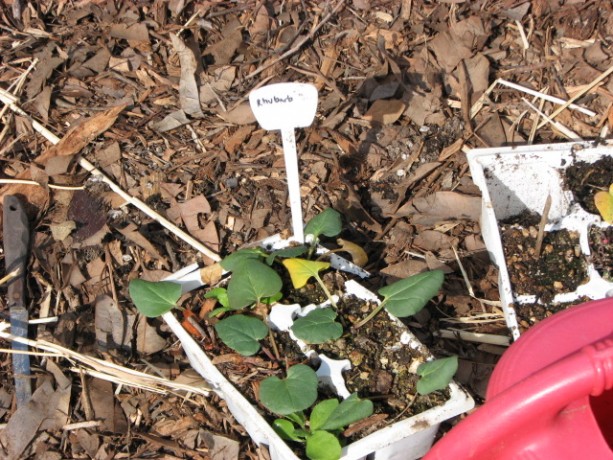
Rhubarb, really eager to be put in the ground. Hopefully the asparagus will protect them from the heat. I plan to raise more rhubarb from seed and plant them in other locations on the property, aiming for the coolest spots as they don’t like heat at all.
With a strong knife (weak blades may snap) cut a cross in wet cardboard the pull aside the edges. The way to plant through cardboard is to make sure that it is wet, and using a strong knife make an x through the cardboard. Use your fingers to pull the sides apart. Stick your trowel down and pull up a good shovel full of dirt (depending on how deeply your plant needs to go.
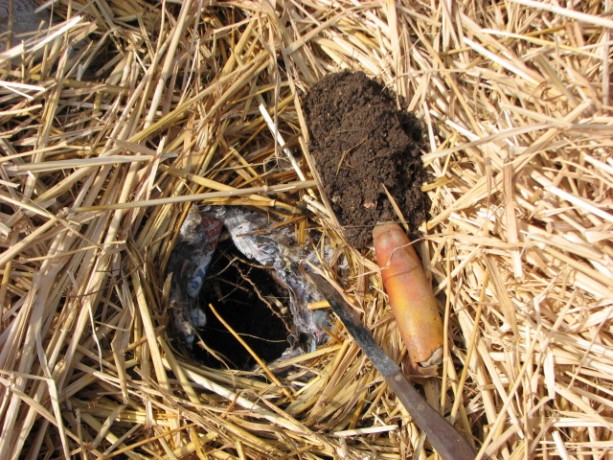
Insert a trowel through the hole and scoop out some dirt. The base of plants and the crowns of strawberries should all be at soil level. Seeds usually go down three times their size; very small seeds may need light to germinate). Gently plant your plant with a handful of good compost, then water it in. You won’t have to water very often because of the mulch, so check the soil first before watering so that you don’t overwater.
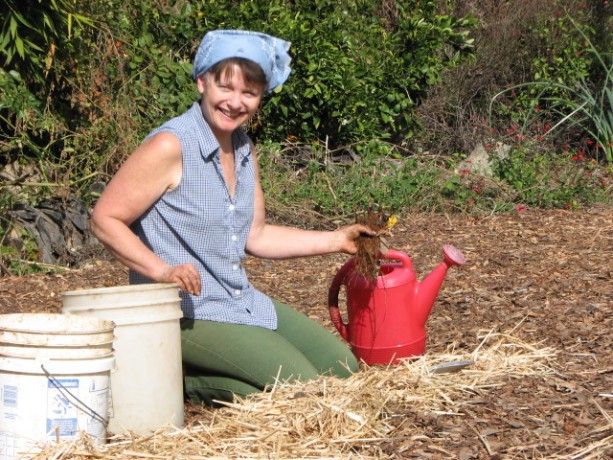
Don’t forget to water in the plants! For the first time in years I ordered from the same source Jerusalem artichokes, or Sunchokes as they’ve been marketed. They are like sunflowers with roots that taste faintly like artichoke. We planted some of them in one of the quadrants, and the rest will be planted out in the gardens, where the digging of roots won’t disturb surrounding plants.
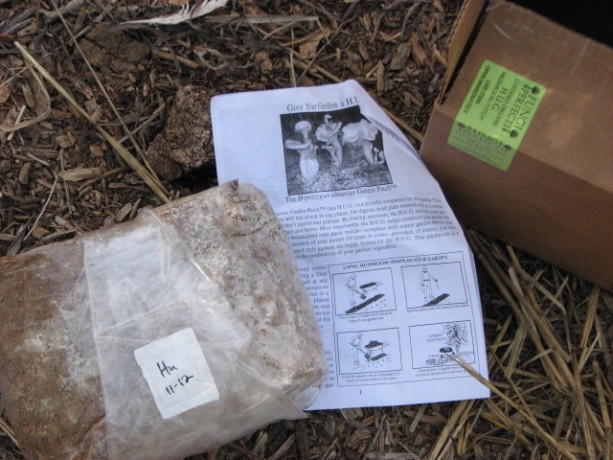
The oyster mushroom kit, or H.U.G. You’ll have to visit Fungi Perfecti to read up on it. Most excitingly, we’ve purchased mushroom spores from Fungi Perfecti, which is Paul Stamet’s business, the man who wrote Mycelium Running and several other books about growing mushrooms for food and for health. We bought inoculated plugs, but that will be another post. Almost as exciting are the three bags of inoculated sawdust to spread in the garden! They sell an oyster mushroom that helps digest straw and mulch, while boosting the growth of vegetables and improving the soil. You also may be able to harvest mushrooms from it! Talk about a wonderful soil solution, rather than dumping chemical fertilizers on the ground!
We’d already covered our veggie beds with wet cardboard and straw.
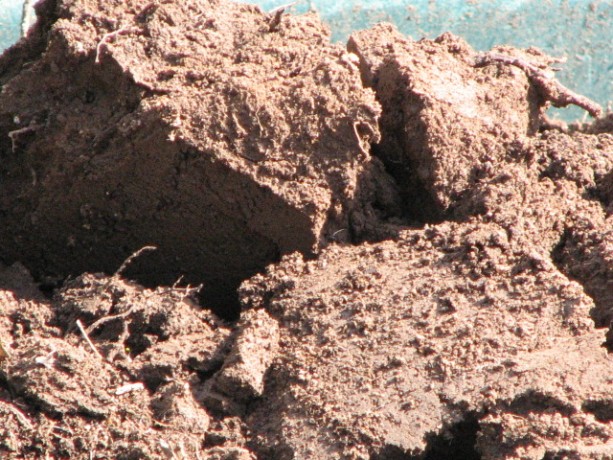
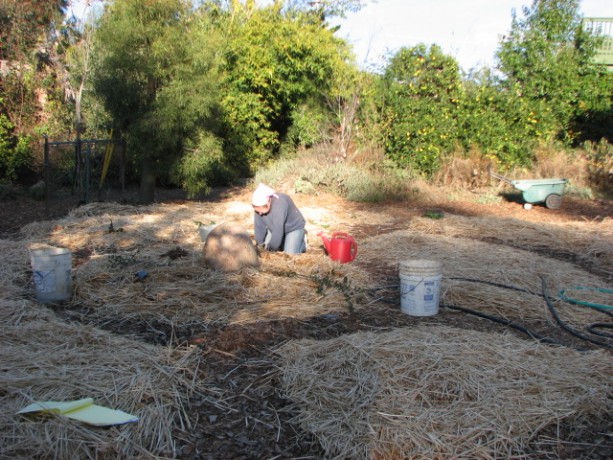
Really good soil from what is now a mulched pathway. To give the mycelium a good foundation I dug up good soil from one of the field beds, which needed an access path through the middle. By digging out the path I created new water-holding swales, especially when filled with mulch.
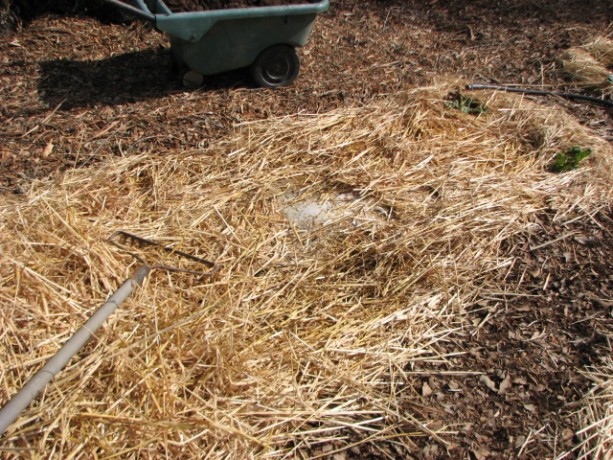
We pulled aside the straw. In the veggie garden we raked back the straw and lightly topped the wet cardboard with soil. On top of that we sprinkled the inoculated sawdust.
Good soil over cardboard. On top of that we pulled back the straw and watered it in.
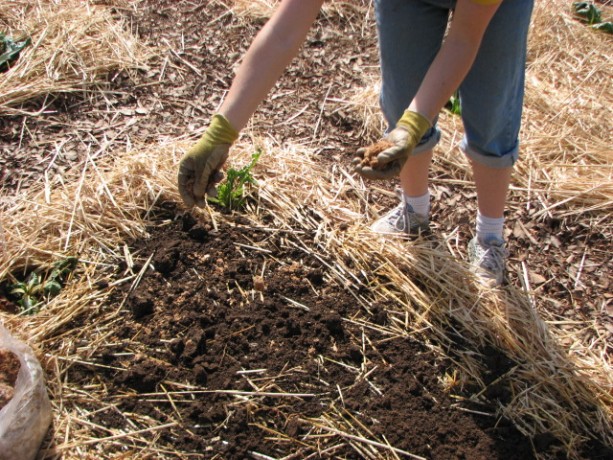
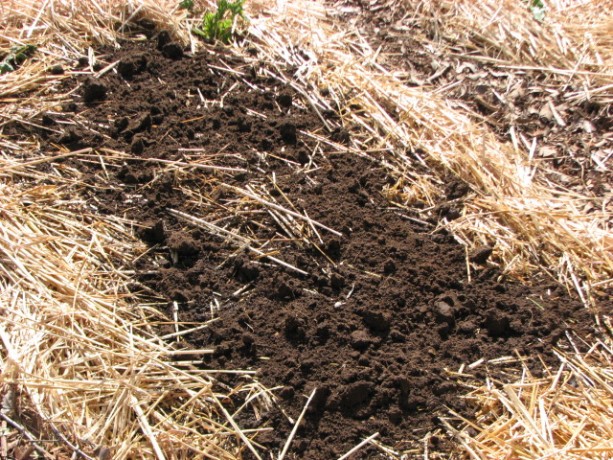
Sprinkling spore-filled sawdust over the soil. The fungus will activate on the wet soil, eat through the cardboard to the layers of mushroom compost and pidgin poo underneath that and help make the heavy clay beneath richer faster.
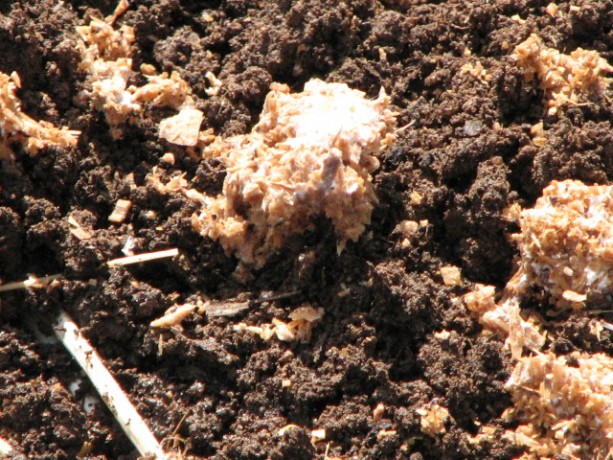
The fungi will immediately begin to colonize the wet soil. We treated the two top most beds which have the worst soil, the sunchoke bed and the asparagus bed. In four to six weeks we may see some flowering of the mushrooms, although the fungus will be working even as I sit here. There are several reasons why I did this. One, it is just totally cool. Secondly, there is no way for me to purchase organic straw. By growing oyster mushrooms in it, I’m hoping the natural remediation qualities of the oyster fungus will help cleanse the straw as it decomposes. Oyster mushrooms don’t retain the toxins that they remove from soil and compost, so the mushrooms will still be edible. Fungus will assist rebuilding the soil and give the vegetables a big growing boost. I know I’ve preached that vegetables like a more bacterial soil rather than fungal. This is true, except that there are different types of fungus. If you put wood chips in a vegetable bed, you’ll activate other decomposing fungus that will retard the growth of your tender veggies; the same wood chips around trees and woody plants will help them grow. However these oyster mushrooms will benefit your veggies by quickly decomposing compost and making the nutrients readily available to the vegetables. Their hyphae will help the veggie’s roots in their search for water and nutrients, too.
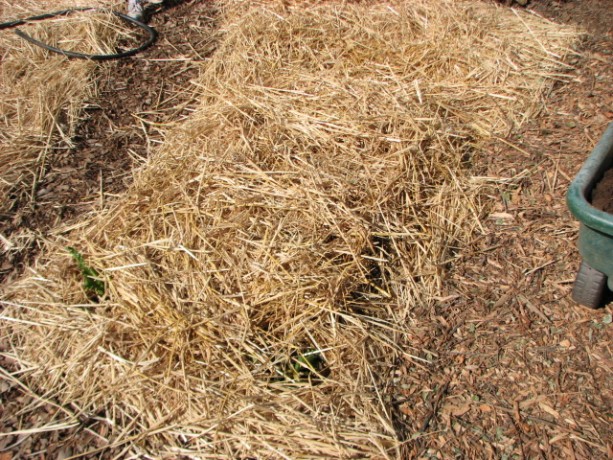
Straw is over the top and watered. We can continue to plant in the beds as the fungus does its magic. The other two bags of inoculated spores are for shaggy mane and garden giant, which we’ll find homes for in compost under trees. More on that as we progress. It is so nice to be planting, especially since these are perennial plants where the most work is being done now. Now we just need some rain!
-
Fruit Tree Guild, Revisited
In June I blogged about how to plant a fruit tree guild, and gave the example of one I was planting by the Fowl Fortress. I thought I’d show you how it matured.

Apple tree in trouble: heavy clay thoroughly shot through with Bermuda grass. Yuck! This was the area four months ago. Heavy, sticky clay taken over with Bermuda grass. A struggling apple tree begs for my help. A star jasmine climbs the side of the Fowl Fortress. A portion of the brown subterranean irrigation system lies aboveground.
Using permaculture design, I created a plant guild with herbs and vegetables that would build the soil and help the apple tree.

A guild is planted. Strawberries went around the trunk of the tree for groundcover and grass competition. Comfrey, a valuable nutrient accumulator in there, too, for slash and drop fertilization. There is also a perennial basil, marjoram, gourds, golden runner bean (a nitrogen fixer), garlic chives, a prostrate rosemary and a tomato, along with other flower seeds. This is how it looks now from the same vantage point:
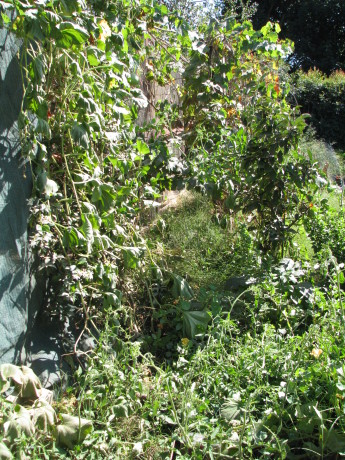
The guild in September. 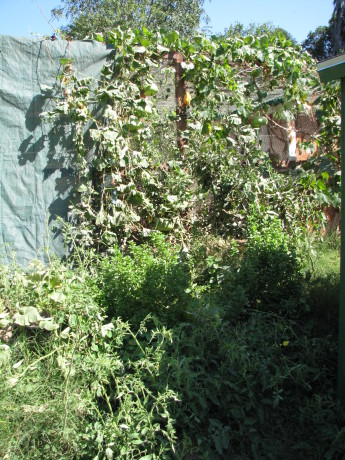
Layers of plants protect the ground and produce food. 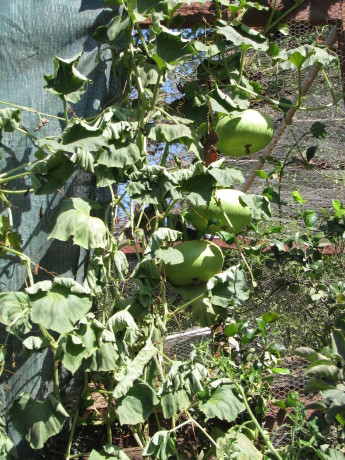
These gourds can be dried and made into bowls. 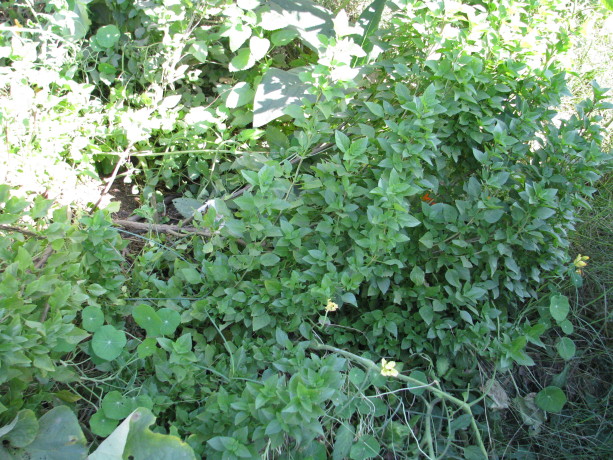
Perennial basil, Amish paste tomatoes smother the weeds and enrich the soil. 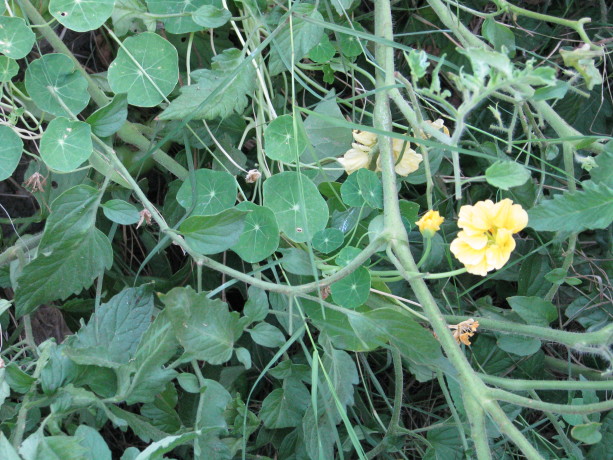
Nasturtiums reseed and fill in as the other vegetables die off. Polyculture beds produce abundant, insect-confusing food guilds which help fertilize and water each other and improve the soil quality. Meanwhile the apple tree has a few apples on it and looks healthier than it has been. Next year’s growth should be drastically improved, and the amount of invasive grasses should be nil. If I don’t grow consecutive annual crops here around the perennial plants, I will sheet mulch the bed.
-
Fruit Tree Guilds: Making Your Trees Healthy and Happy
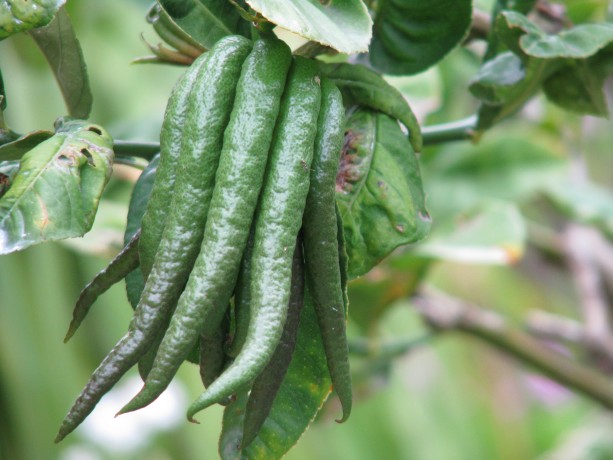
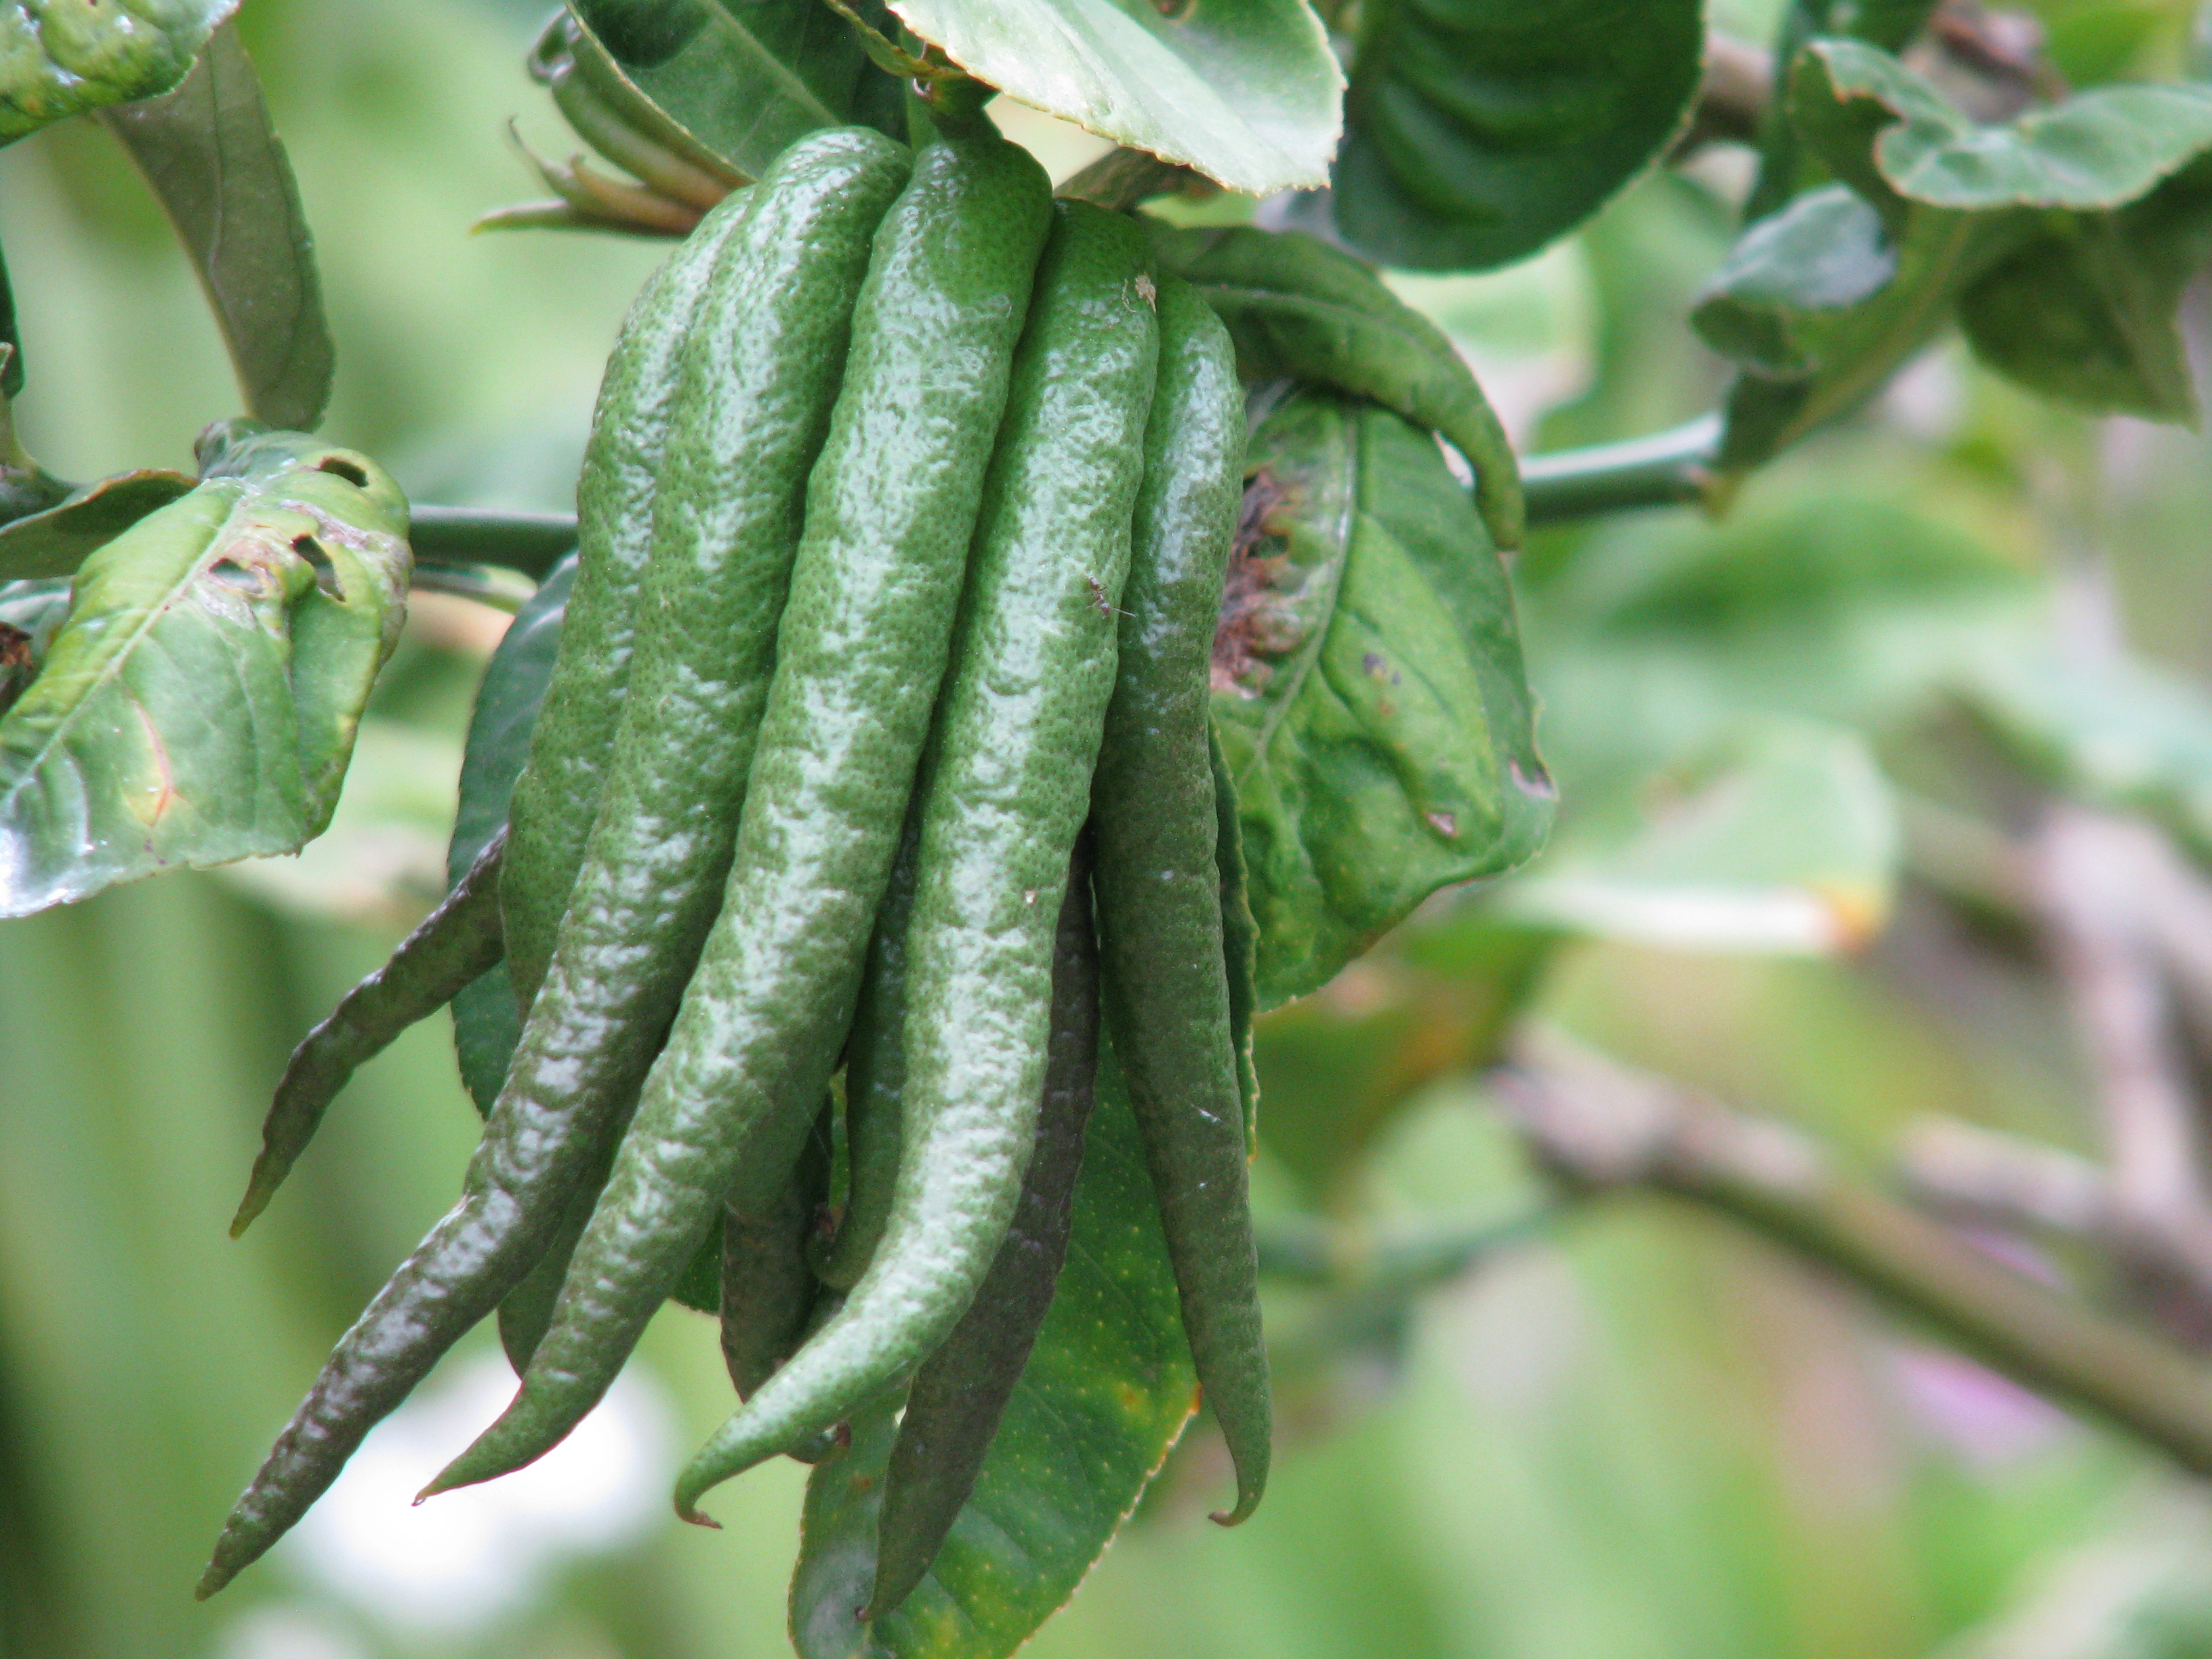
An unripe Buddha’s Hand citron. When bright yellow it freshens a room with a citrusy floral fragrance; is zest is wonderful in cooking and it can be candied. Or simply stuck up a sleeve and used to frighten people. A guild in permaculture terms is, as you know, an arrangement of symbiotic plants that serve as a plant community for the benefit of the whole. Visitors to Finch Frolic Garden often remark that planting guilds sounds so difficult; that they’d need to study so much about plants that it would be impossible for them to do. Not so. However, it isn’t just a whole bunch of plants planted so that they are stepping on each other’s shoes. The typical permaculture plant guild is defined by plants which do these functions: an upper canopy tree (shade, mulch from falling leaves, deep tap roots, roosting for birds which poop, hunt, etc., traps humidity, catches and filters rain and fog moisture), a lower canopy tree (same functions but shorter), a ground cover (habitat for small hunters and moisture trap), a miner plant (deep tap root to bring nutrients from deep in the soil to its leaves which deliver said nutrients when they decompose, and tap root breaks up soil and gives passage for water and worms), a nitrogen-fixing plant (works symbiotically with bacteria to trap nitrogen from the atmosphere on root nodules, which release into the soil when the top dies), and a pollinator-attractor (flowers for bees and all the tiny native bees, wasps and flies).
Buddha’s Hand citron (Citrus medica) happy in a guild of yarrow, sweet peas, artichoke (the leaves of which are regularly slashed and dropped), Cleveland sage, scented geranium and a variety of bulbs. The formula isn’t that complicated. I challenge you to come up with an example of each right now. Yes, you can do it. (Dum dee dum… I’m waiting for you to be done before I move on. ) Have it? Okay, here’s a quick example. Mulberry, dwarf peach, strawberries, carrots, sweet peas, dwarf yarrow and fava beans. The canopy trees will lose their leaves allowing sun to warm the understory plants in the winter. Strawberries make an excellent ground cover that grows food and loves the fungus-rich loam made by decomposing leaves. Carrots like cool weather and will thrive until ready to be pulled (and tops broken off and thrown on the ground) about when the trees fully leaf out. Sweet peas attract insects, smell great, and as a bonus are nitrogen fixers, and can twine up the tree trunks. Dwarf yarrow helps choke out grass, is used for many purposes including as a dye plant, and its flowers are clusters of small flowers perfect for the tiny pollinators, and bush peas are completely edible and also fix nitrogen. See? Easy.

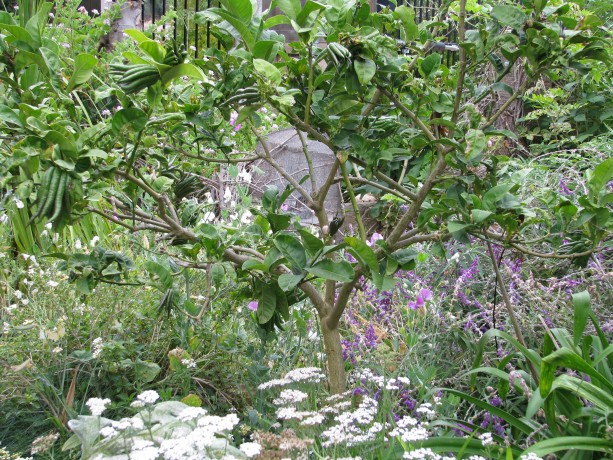
Just in time for summer’s heat, a kabocha squash is rapidly covering the ground around the variegated dwarf orange and a young pink guava. I have to pull squash out of trees because they think they own the world, and it hurts to hit your head on a dangling pumpkin. I leave the vines to decompose in place after harvest. I have many, many trees which were all planted at the same time, and some of them have been neglected. A combination apple tree had been planted in extremely heavy clay and it hasn’t grown much in two years although it keeps trying to produce fruit. Bermuda grass (I cross myself when I mention it) has infiltrated the area to about four inches down. It is helping to break up the clay, but it is also choking out everything else. Plant guild time.

Bermuda grass in heavy clay right next to the trunk: no good. Last weekend I spent about three hours in the morning (mercifully before the June gloom dissipated so I didn’t roast in the heat) digging up and pulling out as much Bermuda grass as I could from the clay. I’d even soaked the area well the night before. That was the stuff of cob ovens. When I’d finally cleared past the tree (I’ll continue another day; there’s only so much of that my hands can take!), I shoveled in some pigeon guano that my good friends up the street deliver to me (tied with a ribbon! Christmas comes all year for a gardener!). The guano is very high in urea… you can smell the ammonia, but it also has feathers, corn and pigeon peas in it. Pigeon peas are a perennial legume that set nitrogen and produce wonderful pea pods for stir-fry. I watered it in well.

This apple was planted in clay in this planter. Never create a planter around an existing tree; mulch around the trunk will kill it. I had purchased some plants for the area, but to keep costs down just chose some that would fill out and help choke out the angry Bermuda grass bits yearning for revenge. Also, the tree is close by Harry Mud, the cob oven, so I wanted pizza-themed plants for easy picking. I planted strawberries right by the trunk inside the gopher cage in which the tree is planted. They will help retain moisture without compromising the bark of the tree. You never want to pile mulch up around the base of a tree above the root ball because you will rot your tree.
I also planted a tomato, a perennial basil, garlic chives all around the edge (bug protection), sunflowers, a prostrate rosemary and French tarragon. The pigeon peas and corn will very likely sprout. What I didn’t have was an upper canopy, but the tree is on the east side of a shed which protects it from the worst of the summer afternoon sun, and there is a grapevine nearby which produces leaf litter. When daffodil bulbs are readily available in the late Fall I’ll plant a ring of them around the drip line. Gophers don’t eat them, they help keep away the grass, they break up the soil and they are one of my favorite flowers (ranking second to sweet violets). All these plants as they grow up, down and across will help the apple tree, and the apple tree will help them. All of them produce food within easy reach of the cob oven and outdoor dining, are attractive and smell good, too. The tree should flourish. I don’t kid myself that I won’t be pulling Bermuda grass in the future, but the plants will help control it by shading and crowding out.

It doesn’t look like much now, but there are eleven support plants/seeds to help the apple tree now. Friends! If you have citrus trees you should plan a little differently. When trying to understand a plant, think of where it came from and in what growing conditions it thrived. Avocados are from South America, with humidity, rainfall, protection from intense heat, deep leaf litter and adequate drainage. Stonefruit are from areas with cold winters; their leaf drop keeps the roots protected from the freezing that triggers the trees to set fruit (chill factor).

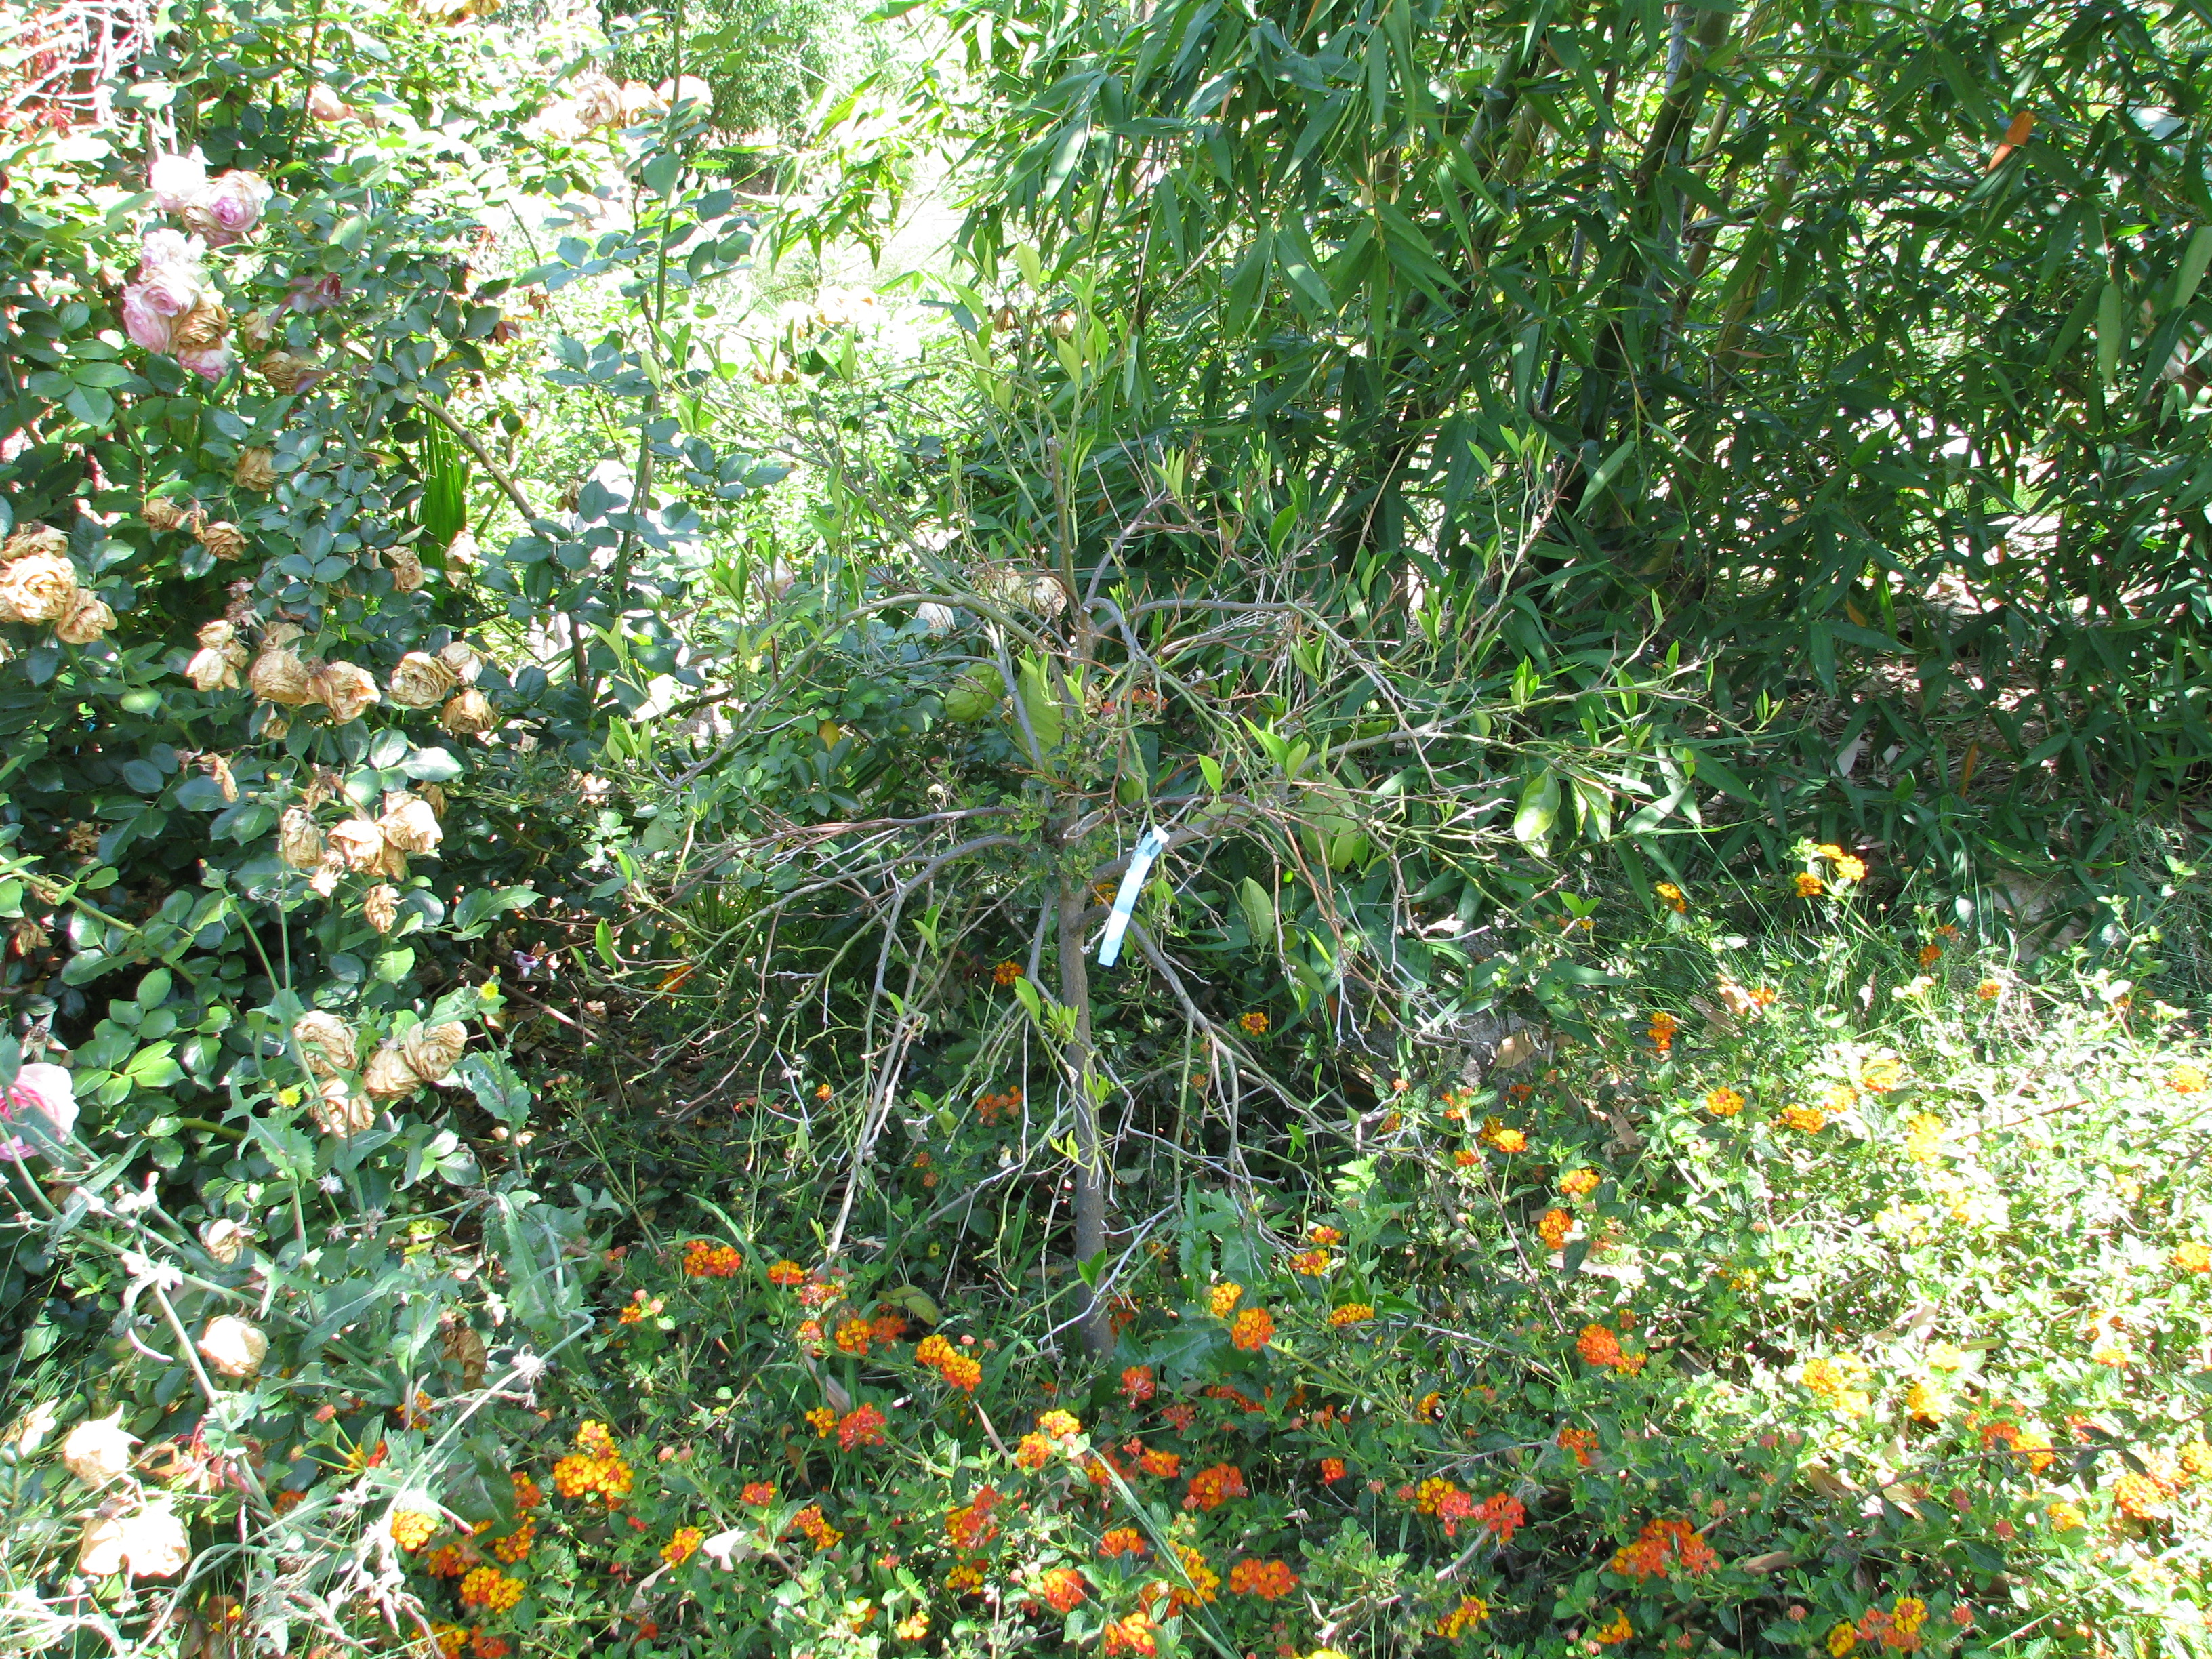
This citrus was planted before the bamboo grew up to shade it. Notice how the leaves grow straight up, and none below? It is aiming to collect light at noon, which is the only direct sun that it receives. He needs to be moved. We think of citrus trees perfuming the air of Spain, Greece or Arabia, but actually they come from Southeast Asia and before that, New Guinea and Australia. All of these places have warm or hot temperatures and plenty of sunlight. Although you can plant stonefruit close together, for citrus it is best to ensure that the trees receive lots of direct sunlight or they will drop leaves and have stunted growth.
This citrus receives sun all day, and is very happy with the tomato, roses and sage that surround it. Raking all the leaves out from under your trees is so wrong. The tree drops leaves because it needs them on the ground around its roots, not because its careless or its waiting for a human to come by and clean up its mess. Leaf mulch makes the ideal conditions for microbial growth and perfect soil, so let it sit. Augment the mulch by giving your tree company of other plants. Unless the tree is allelopathic (secretes a substance that keeps anything from rooting nearby so that it doesn’t like competition, such as walnuts and eucalyptus) then in nature it reseeds close by and allows other plants to grow under it. Give your trees some appropriate company, and you’ll be rewarded with lots of food, medicine, habitat and very little work except for harvesting. Can’t beat that with a stick.
- Gardening adventures, Natives, Other Insects, Permaculture and Edible Forest Gardening Adventures, Soil
Native Planting

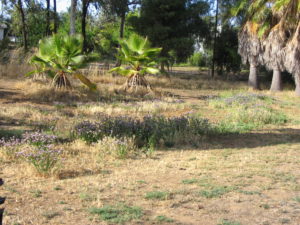
Milkweed and wildflowers are host to butterflies, and the garden is still full of them. Today the forecast searing sun hid behind clouds all morning, making it a perfect Fall day for planting natives. The area all along the northern property fenceline is dedicated to plants found in our San Diego coastal sage scrub habitat. The dirt along this area is bad. It is sandy dirt over hard clay, a product of years of runoff flowing in from the neighbor’s yard.

The native California strip with dirt, not soil. Last year coastal live oaks, cork oak and Engelmann oak were planted along this strip, and little else. The soil was covered with sheaths of palm leaves, and they helped protect the soil and hold in some moisture, but there is little decomposition rate from them. The soil needed oak leaves.

A coating of oak leaves will help fire the soil; more leaves will be coming soon. Last Monday Lori, a friend who is working here weekly did a tremendous job carefully raking back all the palm sheaths, then bagging oak leaves from the walkways around the massive old oak on the embankment and spreading them around between the new oaks. There are plenty of leaves left for the health of the big oak; just the leaves on the slippery stairs were moved. The oak leaves will decompose and provide the soil with the nutrients to host fungal action in the ground; the start of soil building.

Planting lemonade berry and sugarbush. Today Jacob and I planted a number of lemonade berry, sugarbush and deerweed, as well as two replacement coastal live oaks. I had purchased packets of seed mixes as well as several types of lupine (nitrogen fixer), making sure there was no alyssum, evening primrose or borage in the packets (they do very well on their own on the property!).

Take a lot of seed packets, empty them into a bucket, stir and voila! Diversity! I also took some seedheads from a couple of non-native sunflowers and threw them into the mix.

Breaking up a sunflower for seeds. In every damp spot from the subterranean irrigation we planted wildflower seeds.

The subterranean irrigation leaves damp spots on the soil, where I plant flower seeds. They’ll choke out future weeds as well. We’ve had stunning results from this method for several seasons. It is the middle of October and there are still flowers blooming, providing beauty and food for insects and birds.

Stands of wildflowers feed the insects and look wonderful. Some herbs such as purple basil and parsley have come up late.

Purple basil showing up between the last of the squash vines. Either I use it or let it go to seed to feed insects and reseed itself. California poppies that have died off are showing new leaf growth around the base of the plants. So all-in-all a very successful day, thanks to the hard work of my helpers and the cooperation of the weather. These native plant guilds of plants, mulch and flowers will all work towards turning that soil alive and begin the communication between the native plants that will make this habitat for native animals priceless.
- Compost, Gardening adventures, Permaculture and Edible Forest Gardening Adventures, Rain Catching, Soil, Worms
Why Plant Natives?
The following article was written for and published in the summer 2012 Fallbrook Land Conservancy’s newsletter, the Conservation Chronicle (http://www.fallbrooklandconservancy.org/News/Chronicles/Summer2012/Summer2012.pdf, pg. 6). It was slightly edited and retitled for publication.
Why is planting native vegetation a good idea? We all know that native plants arranged in natural combinations and densities provide safety corridors for our native animals. San Diego’s plant communities have, like all established ecosystems, developed a symbiotic relationship with native and migratory fauna. Our plants leaf out, bloom and fruit when native animals and insects need the food, and provide appropriate nutrition that imported or invasive plants may not. Wildlife then disperses seed and pollen in methods that suit the plants, as well as providing the fertilizer for which the plants have adapted. Flora and fauna have set up symbiotic relationships to an extent where some species rely solely on a single other species for their existence. A balanced ecosystem is a dance between inhabitants who know each other’s needs and satisfy them for their own survival.
We plant natives in our yards because they are hard-wired for our soil and climate. They naturally conserve water and do not need fertilizer or insect control. They also can be beautiful. Planting native plants is good for our wallet, our resources and our health. But there is more to the equation. Living in every handful of good soil are billions of microscopic creatures and fungi collectively called microbes that make nutrients available to plant roots. The smell of fresh soil is a chemical released by these microbes called geosmin. Scientists now know that the microbes in undisturbed soils form a communication network between tree and plant roots. When a tree is attacked by insects, communication is sent out chemically by the tree’s roots and carried via this microbial network throughout the ecosystem, and other trees set up defense mechanisms to lessen their own damage.
Plants also communicate via scents not detectable by humans. Lima beans and corn planted downwind of brother plants which had been subjected to grasshopper attack lowered their sugar content to be less desirable. Such plants received 90% less insect damage than those planted upwind. California sagebrush (Artemisia californica) allows sibling plants to grow nearby because when attacked, it emits an airborne chemical to repel insects. The more sagebrush in the area, the better the protection as other sages respond in kind. Some plants when attacked will release a chemical that attracts the predatory insect which will feed upon the bug that is attacking the plant.
Thus plants communicate via airborne chemicals and through their roots via the microbial network. They call for help, they send out alarms and insect invitations and what’s more, they respond to each other. The why of planting natives is therefore also this: It is important to plant natives because they all speak the same language. Plants introduced to an area by humans are like strangers in a strange land. They cannot communicate well with other plants. They don’t know which bugs are bad until it’s too late. They have no one to call for help; the pheromones they emit are for beneficial bugs that live far away. Their seeds cannot supply the proper nutrition for the wildlife, and the wildlife may not be able to supply the plant with what it needs to keep healthy. They struggle to succeed in our soils and become stressed and sickly. We pour fertilizer and pesticides on them to help them survive, which kills the microbes that create good soil. Also, without the natural checks and balances found at the plant’s native ecosystem it may well become invasive and rob space, water and nutrition from our natives. The weeds you see in reclaimed properties are mostly non-native. Foxtails and wild radish do not belong here. Hike in some of the preserves which have not been previously farmed. There you’ll see the real native wildflowers, such as California peony, rattlesnake weed, tidy tips and Blue-Eyed Mary, living in harsh decomposed granite soils on little water, in relationships with the other chaparral surrounding them. You’ll understand a little more about how plants form guilds to support each other, and create that wholesome rightness that we feel when we walk in undisturbed nature. Recreating those guilds in your garden, adapted to provide human food, medicine and building materials, is called Permaculture.
-
August at Finch Frolic

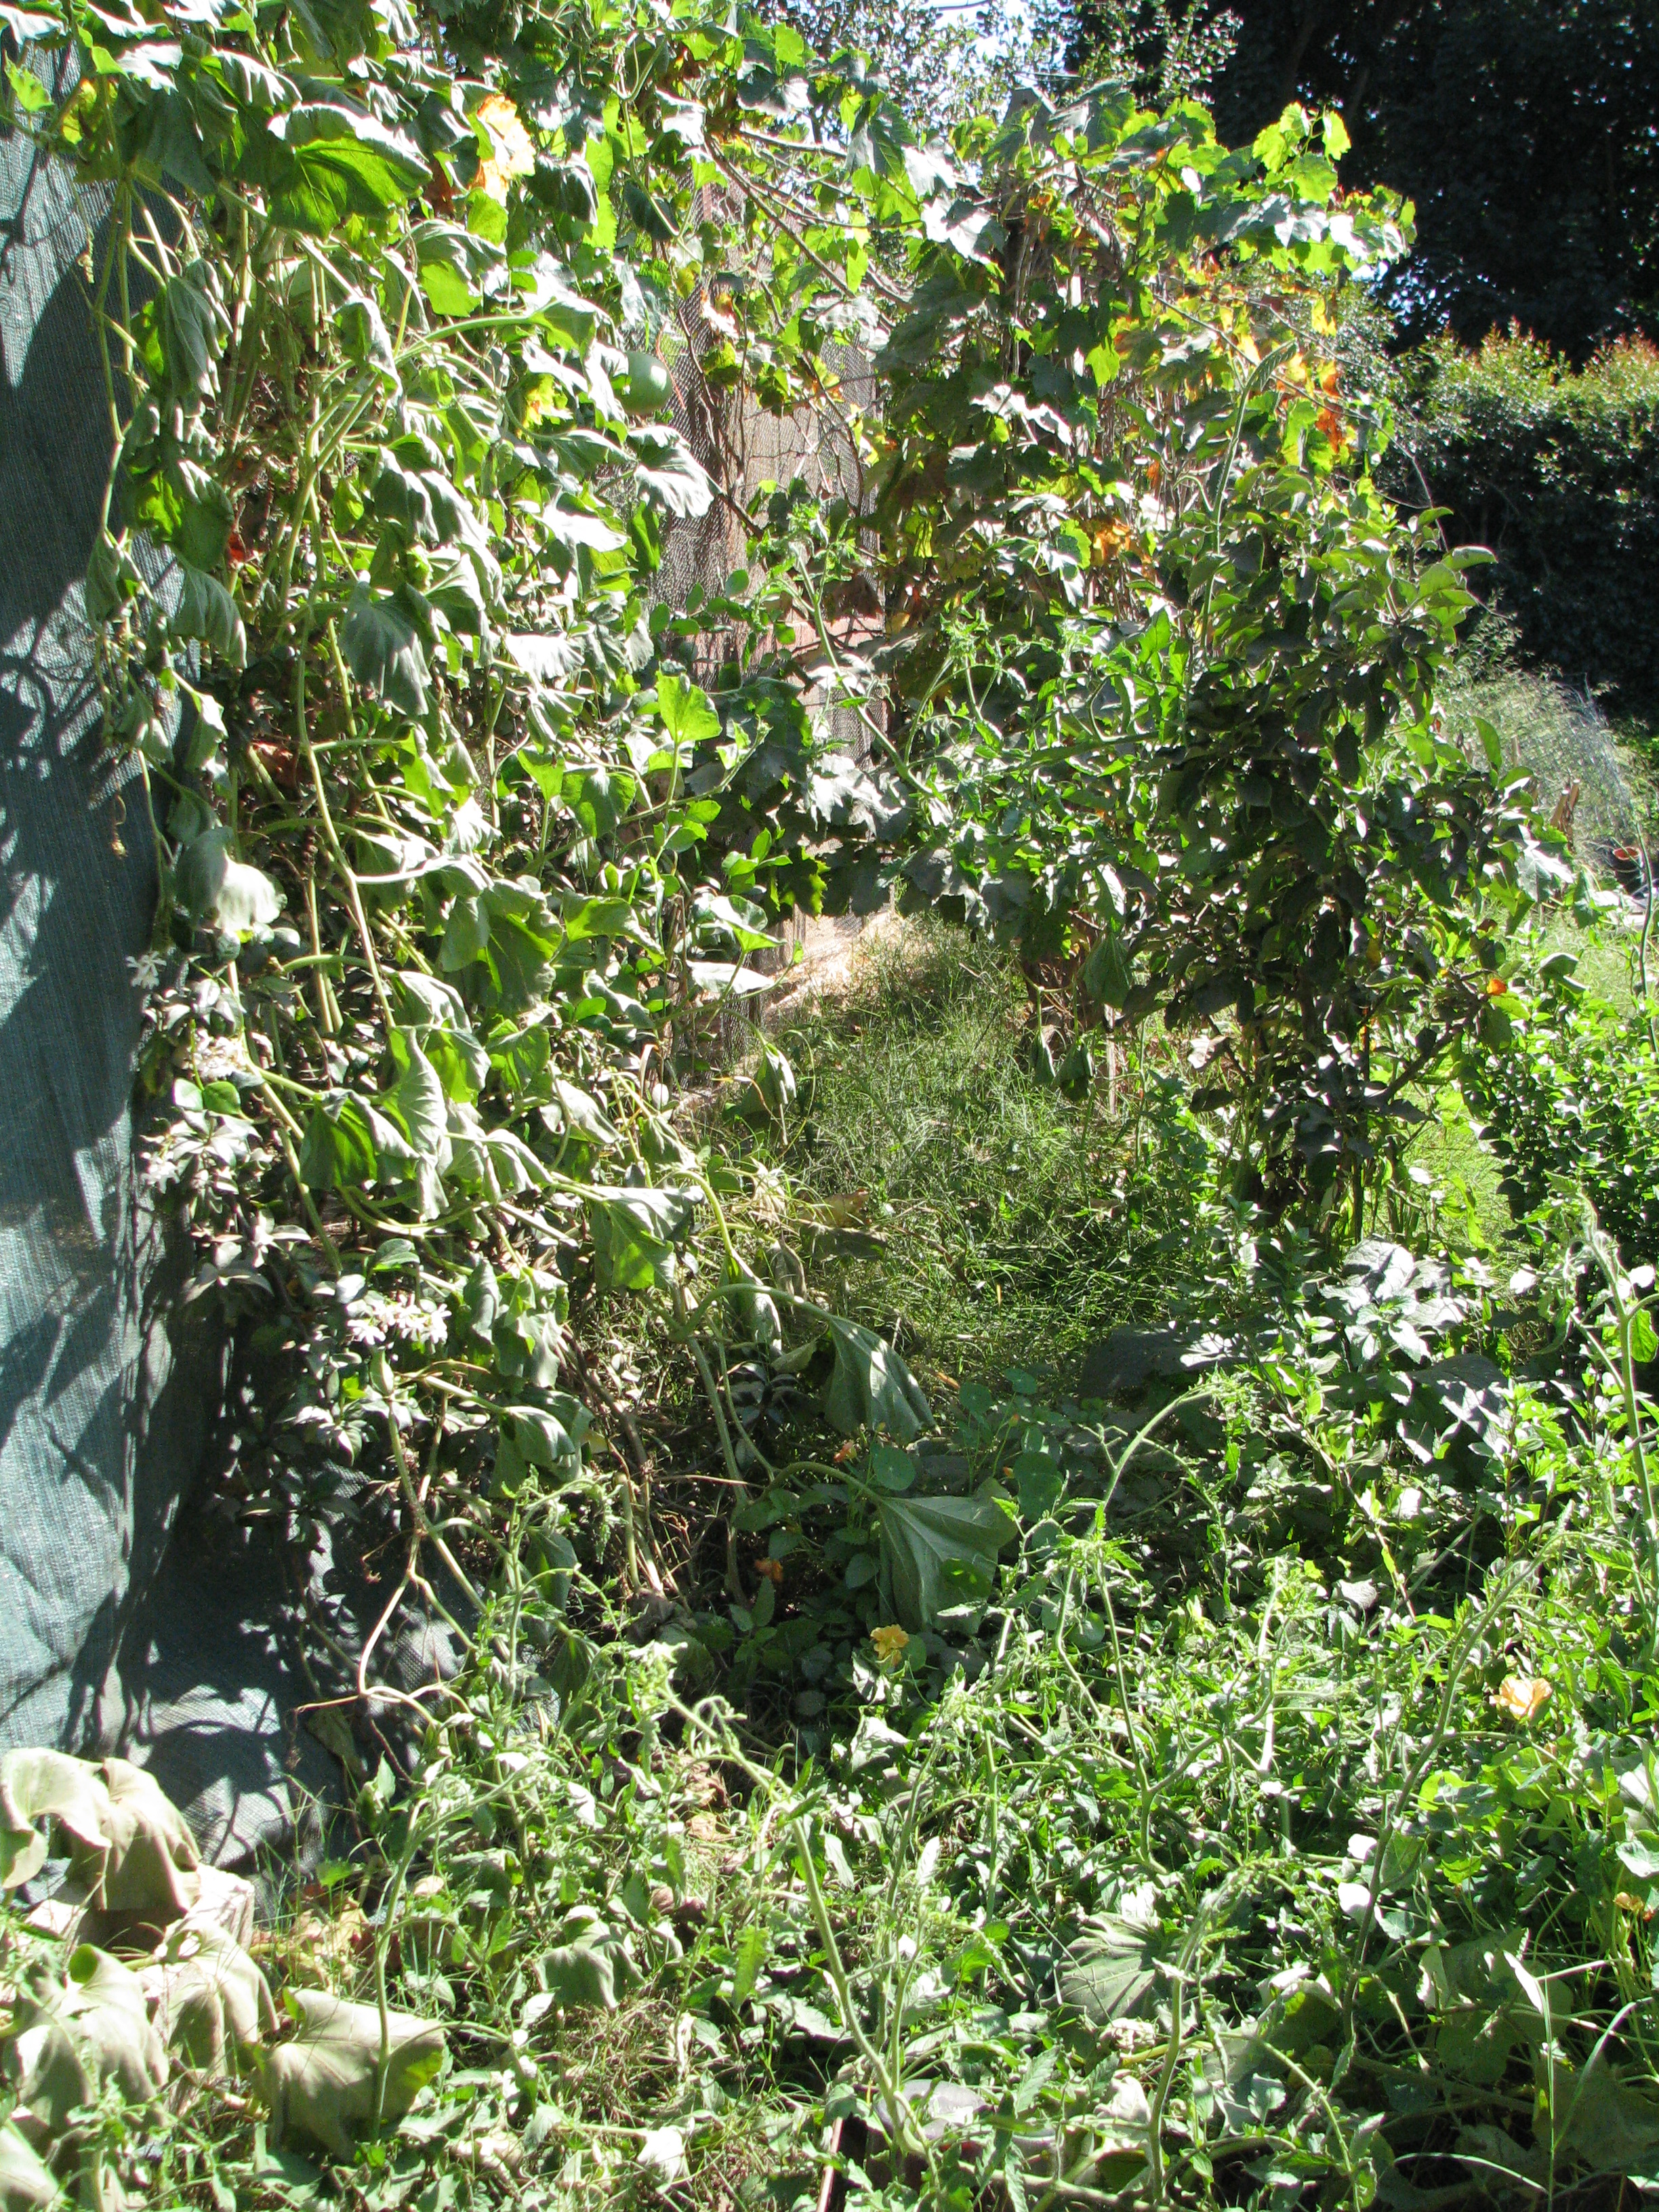
Black Beauty zucchini. This year Finch Frolic has been particularly beautiful. Of course, this year we had to close down throughout the spring. Fortunately we’ve been able to reopen for limited-capacity tours with safeties in place. However, I really miss sharing how lovely the garden is, and I want to let you have a little tour right in your home.

Little Marvel Popcorn. It tastes so good! These photos were taken this morning before the temperature rose; its in the 90’sF here today, in North San Diego County. I apologize for the phone camera, as my good camera is in for repair. I only wish that you could also smell the moist mulch from the light overnight dew, or hear the clug-clug of the crow, the tittering of a flock of bushtits and the scuttling of lizards through leaves, which I experienced as I walked around the garden. All of these friends and so many hundreds more are working the garden today and every day, keeping it in balance.

A blue dasher dragonfly, one of many species that patrol for insects all over our property. Their larvae in our ponds look like little dragons, and they eat mosquito larvae as well. Watercress behind. Our food forest is a low-water-use garden, on poor soil, using no additives to the ground other than occasional compost. There are no herbicides, pesticides or other factory-made chemicals used here, and there are two of us who care for the garden. Most of the seasonal beauty this year is due to the diligence of my daughter Miranda who took seed sprouting to a whole new level even before the pandemic arrived. We rely heavily on the insects, birds, lizards, frogs, soil and water microbes and creatures to do all the work protecting the plants, and the plants themselves to create good soil. All we add is a low dose of salty well water which the humus cleans, and leaves or sheet mulch on top. Our fruit trees receive a dose of blender compost once in awhile. Miranda and I hope that these photos bring you peace and lift your spirits, and that knowing you are looking at a safe habitat that is thriving with life gives you a feeling of security as well. It can be done. Permaculture must be done. Best of health! Diane

From the driveway looking down the main pathway into the garden. 
Lorenziana Gaillardia, to feed the pollinators. 
Rock steps cross the large rain catchment basin. Sycamore leaves protect the soil from the heat. 
Our new orchard, with beans trained up a teepee over a fruit tree, and tomato cages behind. 
Our old Ca. Live Oak. Oaks are home to over 300 species of bird and insect. 
Our jasmine-covered gate in the sun. 
Resting place, made from recycled wood. 
Figs! Panache Striped Tiger. 
Dawn through the birch trees, with Naked Lady amaryllis blooming behind the blackberries. 
Our small bamboo bridge next to our little pond. 
Dawn through an olive tree. 
A native mallow wildly blooming over a bamboo footbridge Miranda just built. 
Black Krim. 
A plant guild combines plants with different functions for the benefit of all. 
The Torch Tithonia is over 5′ tall, and butterflies and birds love it. A plum, squash and orange tree in the foreground. 
We pollarded our willow trellis in January, and these tall interesting limbs are waiting for some creative project to arise. 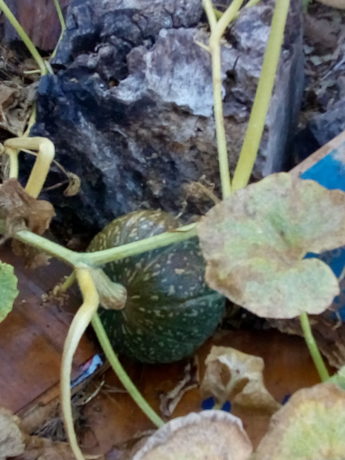
Kabocha squash. 
An army worm taking a sleep in a mallow flower. 
We grow the timber bamboo, and eat it, too! 
This beauty is a carrot, Lunar White, allowed to go to seed. Gorgeous and great food for our tiny native insects. 
Lorenziana Gaillardia. 
Straw flower and carrot. 
Apples do very well in hot weather. Cripps Two. 
Red Kuri squash vine past the seating. 
A whole mess of Naked Ladies! 
Tall Double Mix strawflowers, (Helichrysum bracteatum). 
The Withy Hide, or willow hut. 
Hard to believe that these massive trees grew so quickly. It has everything to do with water capture in the soil. 
This stump has personality! Brachychiton rupestris, Australian Bottle Tree. 
The leaf cover makes this rain catchment basin look full. 
California sycamore, 8 years old. 
A covered bridge over the rain catchment system. 
- Gardening adventures, Permaculture and Edible Forest Gardening Adventures, Recipes, Seeds, Vegan, Vegetables, Vegetarian
Glorious Beet Greens
 Did you know that beet greens are gloriously edible? That they are tender, not bitter, mild, easily cooked and full of nutrition? As I was never a beet lover, I didn’t know that either. I’ve loved Swiss chard with its slight bitterness, intense flavor,
 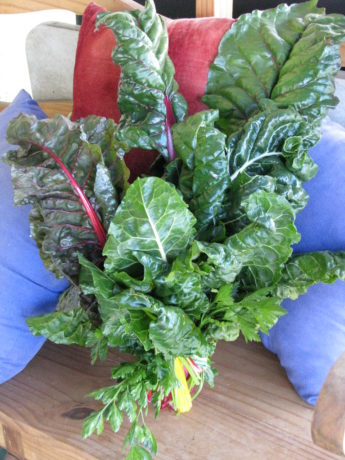 and huge leaves
  but I wouldn’t go near a beet until a few years ago. I would make vegetarian borscht (Russian beet soup) for my father but never taste it and hope that it came out well. Then I was gifted with a jar of pickled beets and I had to try them to not insult the giver… and I liked them. Strangely, pickled beets go really well with curry. So Miranda and I grew beets, and let some go to seed.
 This year we had hundreds coming up in the garden.
 Good thing that we found out about the greens. Now I’d grow beets just for their greens and pull some early for the root. Just keep cutting the greens and the beet root will continue to produce leaves, although the root will grow large and too tough to eat. Then allow it to go to seed.
 We planted many different kinds of beets, and although the roots tasted a little different the tops all tasted just as good. We also planted sugar beets, and they were so very sweet and yet earthy that I really didn’t care for them as a vegetable. My favorite beet root is chioggia which as lovely red circles when sliced. We purchased all of our beet seeds from Baker Creek Organics.
Beets have deep tap roots, therefore they are excellent ‘mining’ plants in a plant guild. They bring nutrients up from deep in the soil, and what leaves you don’t eat can be put back on or in the ground to create topsoil.
Beet greens can be torn up and put into a salad raw or used in place of lettuce on a sandwich. To cook beet greens, wash and tap off excess water, tear up and put into a medium hot pan that has a little olive oil coating the bottom. Stir until wilted. You can eat them from this point as they are not stringy. If the leaves are older I’ll put a little more water in if needed, turn down the heat, cover the pan and let the leaves steam for a few minutes. You don’t need salt or salty broth as the leaves have a strong enough taste. Eat them with vegan butter as a side dish, stir them into omelettes or frittatas, or use them any way you would spinach.
Freezing beet greens is easy. Wash them, shake off excess water, and put into freezer bags. They aren’t mushy black when thawed and cooked.
Grow your extra organic beets and leave some of them just for harvesting greens. You’ll want to fill your yard and your plate with them!
- Gardening adventures, Permaculture and Edible Forest Gardening Adventures, Planting, Soil, Vegetables
Growing Sweet Potatoes
 Sweet potatoes (Ipomoea batatas) were never one of my favorite foods… until I grew and ate one. It was a transformational experience. An entirely different experience from store-bought. If you’ve never had nor liked white sweet potatoes, grow one and try it. Or if you have to load marshmallows on top to get the orange ones down, you won’t need that gook with home grown.
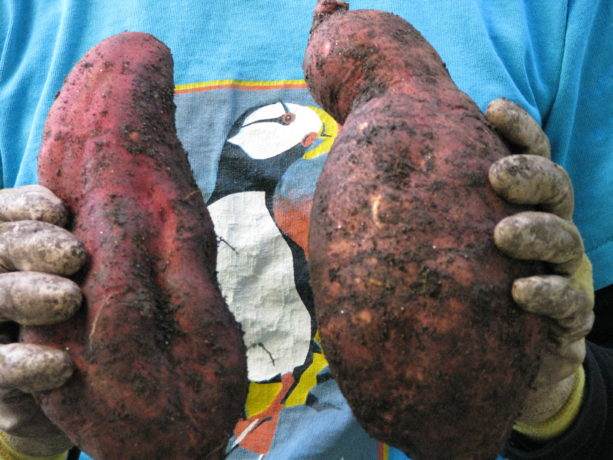
And by the way, what you find in a US chain store are all sweet potatoes, although the USDA calls the yellow ones yams just to make them different. A true yam has a rough bark-like skin and is an African dietary staple.
I put them in curries, steam them and top with a little vegan butter, cinnamon, chili-con-limon, a very light sprinkle of sugar and a squeeze of lime. I eat them here, I eat them there….. anyway, you get the picture. Not only are they low in fat and heavy in beta carotene, but people who eat a lot of healthy starches such as sweet potatoes, taro, cassava, potatoes, etc. have fewer chronic illnesses. Just don’t load the starch down with salt and fat.
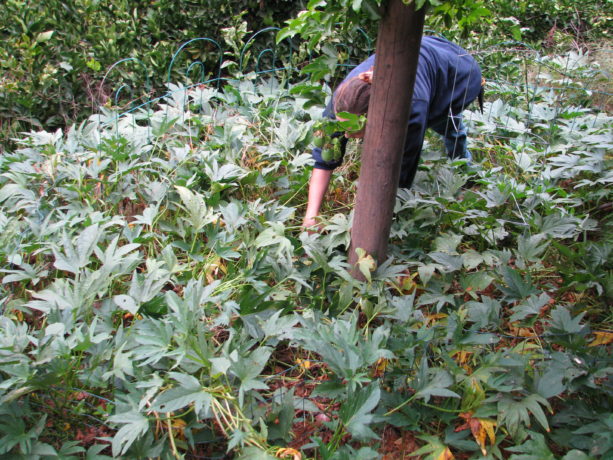
Sprouting and growing your own sweet potato is different from growing the common potato, which is a swollen tuber in the solanaceae family. Sweet potatoes are tropical vines that need sunshine and warmth, and a lot of room to spread. Give them space or provide a support because the vines can sprawl ten feet.
 The shiny leaves, unlike potatoes, are edible and very decorative. You can grow them in large pots in the house as long as you have space for the vines (up and over the window?). The flowers are pretty, too.
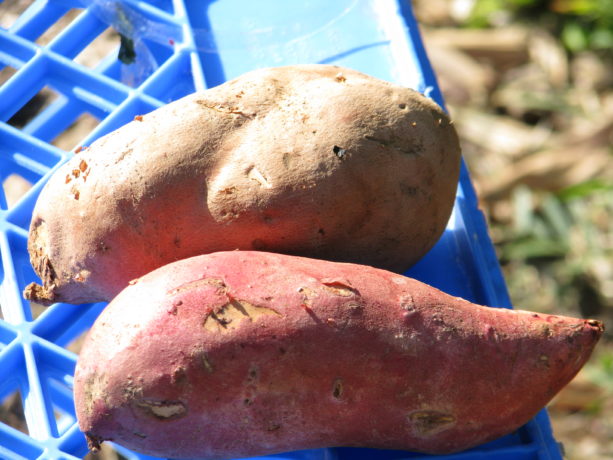
There are all kinds of sweet potatoes and crosses: purple inside, purple outside,
 yellow, orange,
 white and combinations thereof. They are all delicious. Some grow with clumps of potatoes directly under the plant, and some spread out and grow wherever the vine roots. You can grow them inside or outside, as long as they have warm soil and sunshine. For warmer areas, plant slips out in May or June. Its extremely easy to grow sweet potatoes. Here are some options:
Buy an organic sweet potato and keep it in a warm, dry, semi-dark place until you begin to see it sprout.
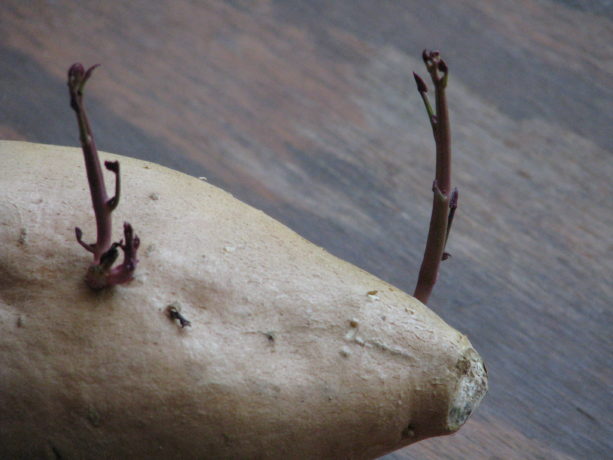 Allow these slips to grow until they are several inches long. Then give them a gentle pull; if they come off easily they are ready to root.
  You can keep sprouting from that potato, or just eat it. Put the slips in a glass of water in a bright window for a few days and you’ll see them begin to root.
 After that they are ready to plant.
Or, take your organic sweet potato and cut it into wedges about an inch long. Suspend the chunk, cut-end down, over a glass of water so that the bottom is wet but the piece isn’t submerged. Do this by sticking three toothpicks around the sweet potato so that the toothpicks are over the edge of the glass. Many sprouts can come from a chunk, so you can keep harvesting until the base starts to go bad. Follow the directions above for removing the slip, rooting and planting it.
What you don’t want to do is to bury an entire sweet potato. It might sprout, but the plant will have all the nourishment it needs from the big potato and won’t form many if any new ones. By planting slips you are forcing the plant to grow storage units, or sweet potatoes.
Be sure they are planted where the soil is well-draining, and watch out for animals in your area because sweet potatoes are very yummy to everyone. The soil should be enriched with compost, but not straight manure. Give the tubers a fighting chance by gently loosening up the soil under and around the planting hole with a garden fork. Remove any visible rocks or stones that might misshape or injure the tubers.
If you live where you can plant bananas outside, sweet potatoes are a great companion plant in a banana circle/guild. I’ve planted them as a groundcover (and choosing those varieties that root directly under the center, planted them in gopher cages). They are very ornamental.

In the right conditions you can grow sweet potatoes year round inside. Sweet potatoes want warmth so they are ideally suited to being planted indoors in areas where there are short summers. This is an excellent use for old fishtanks.

In the fall the vines will die off, and that is when you dig up the roots and enjoy them! Now you cure them – an important step for flavor development. Be sure that the roots are dry on the outside and keep in place at about 85F – 95F with a lot of humidity – about 80%, for five – ten days. They will develop a thicker skin, have a deeper flavor and be better keepers. Keep one for resprouting.

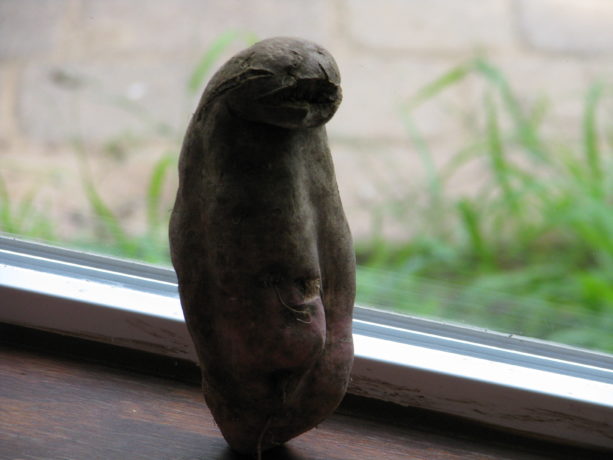
So sprout and grow your own, and don’t keep them just for Thanksgiving. Bake them like a regular potato and really enjoy a fabulously healthy meal. And maybe you’ll find one that looks like a walrus.

- Bees, Compost, Frost and Heat, Fungus and Mushrooms, Gardening adventures, Hugelkultur, Irrigation and Watering, Microbes and Fungi, Natives, Other Insects, Permaculture and Edible Forest Gardening Adventures, Rain Catching, Recycling and Repurposing, Reptiles and Amphibians, Seeds, Soil, Water, Water Saving, Worms
Shade
 In drylands there is a noticeable lack of trees. This situation is kind of a Catch-22. The hotter and drier it is, the less water there is in the ground to provide for plants that can attain height, and the more the leaves of the existing trees must adapt (become smaller) to prevent transpiration and sunburn. Yet the very lack of trees and their extensive root systems, and the shade and habitat they create, and the transpiration that allows humidity to keep the air moist for pollen to survive, is one of the causes of desertification.
So how do we stop this cycle?
First, work on a manageable area. If you have a large property, then start on the area closest to your home or where you need water the most, or where water settles. As in the Annie Lamont title, Bird by Bird, you work on a piece a little at a time.
- Put in earthworks to harvest rainwater. Simple swales or rain catchment basins, perpendicular to the water flow and on contour with your property, will harvest hundreds of gallons of water each rain. You can do them with tractors, you can do them with shovels, you can do small ones with trowels above small plants. Just do them.
- Bury organic matter: hugelkultur. Do you have old wood laying around? Palm trees that are growing and being a fire hazard? Old untreated lumber full of nails? Branches? All of this can be layered into the ground. Bury organic matter downhill from your swales. If you cannot bury, then pound sticks vertically into the ground. The important thing is that you are adding organic material back into your depleted soil. It will hold rainwater, it will activate soil microbes and fungi, it will open oxygen and nutrient channels, it will sequester carbon and make it available to the plants. Our soil is mostly just dead dirt. By layering organic material with dirt you are doing what nature does, but at an accelerated pace.
 If your soil is unmanageable, or you can’t dig, then layer on top of the soil. Its called, among other things, lasagne gardening. Lay out newspaper, top it with fresh grass clippings or other greens, top that with dried grass clippings, dried leaves or other ‘brown’ materials, and depending upon what you want to plant in this, you can top it with mulch or with a layer of good compost and then mulch. Then plant in it! You create soil on top of the ground.
 - Mulch and sheet mulch! Protect your soil from the heat and wind, and from pounding rain. A thin layer of bark will actually heat up and accelerate the evaporation process: add several inches of mulch to the ground. Better yet, sheet mulch by laying cardboard and/or newspaper directly on top of the weeds and layering an inch or more of mulch on top.
 This can be free mulch from landscapers, old weeds, grass clippings, animal bedding, softwood cuttings… just cover the soil to keep it moist and protected. Thick mulching alone will help keep some humidity in the air and begin soil processes, as well as reduce evaporation by reflected heat that comes from bare earth or gravel.
 - Plant native plants. They thrive in our soil. Grow trees that filter the sun and don’t like a lot of water, such as palo verde, or those that take minimal additional water such as desert willow, California redbud, valley oak, or others. Grow tall bushes such as toyon, lemonadeberry, sugarbush, quailbush, ceanothus
 or others. Use these wonderful plants to invite in birds,butterflies, lizards and other wildlife that will begin pollination and help activate the soil.
 - Design your garden for what you want to grow besides natives. Fruit trees? Vegetables? Ornamentals? They can be arranged in your mulched area in guilds to grow cooperatively.
- Grow shade. Fast-growing trees and shrubs are invaluable for protecting – ‘nurserying in’ – less hardy plants. Acacia and cassia are both nitrogen-fixers and will grow quickly to shade your plants, can be cut for green waste in the fall and also attract pollinators. Moringa is completely edible and is also an excellent chop-and-drop tree. There are many others. You need to protect what you plant from the harsh summer sunlight, and using sacrificial trees and shrubs is the most productive way to do it.
- Protect your tree trunks from scorching by growing light vines up them, such as beans or small squash.
Once you have done this process in one area, then move on to the next, like a patchwork quilt. These areas should all be planted in accordance with a larger plan that covers your entire property, so that you plant what you want in the best possible place. However, the earthworks, hugelkultur and mulching can be done everywhere. By following these guidelines, and working one small area at a time, you’ll have success, have trees, shade, food and be helping reverse desertification, one plot at a time.
You May Also Like

Native Insects and IPM
- Compost, Fungus and Mushrooms, Gardening adventures, Hugelkultur, Microbes and Fungi, Other Insects, Perennial vegetables, Permaculture and Edible Forest Gardening Adventures, Pets, Predators, Rain Catching, Seeds, Soil, Water Saving
Polyculture In A Veggie Bed
 Polyculture is, obviously, the opposite of monoculture, but in permaculture (a lot of -cultures here) it means more than that. The best way to plant in polyculture is to follow the guidelines for a plant guild . A plant guild is how plants arrange themselves in nature so that each fulfills a niche. The variety of plants aren’t competing for the same nutrients and are delivering something other plants need; i.e. shade, nutrients, root exudates, leaf drop, soil in-roads via deep tap roots, etc.
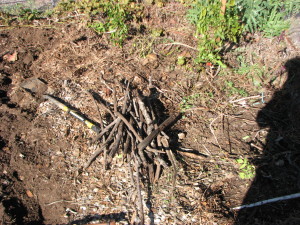
By burying sticks in planting holes you are helping feed the soil and hold water. When planting veggies here at Finch Frolic Garden I often mix up a handful of vegetable, herb and flower seeds that fulfill the plant guild guidelines and plant them all in one area. They come up in a mix of heights, colors, shapes and scents to fool bugs. The result is like a miniature forest.

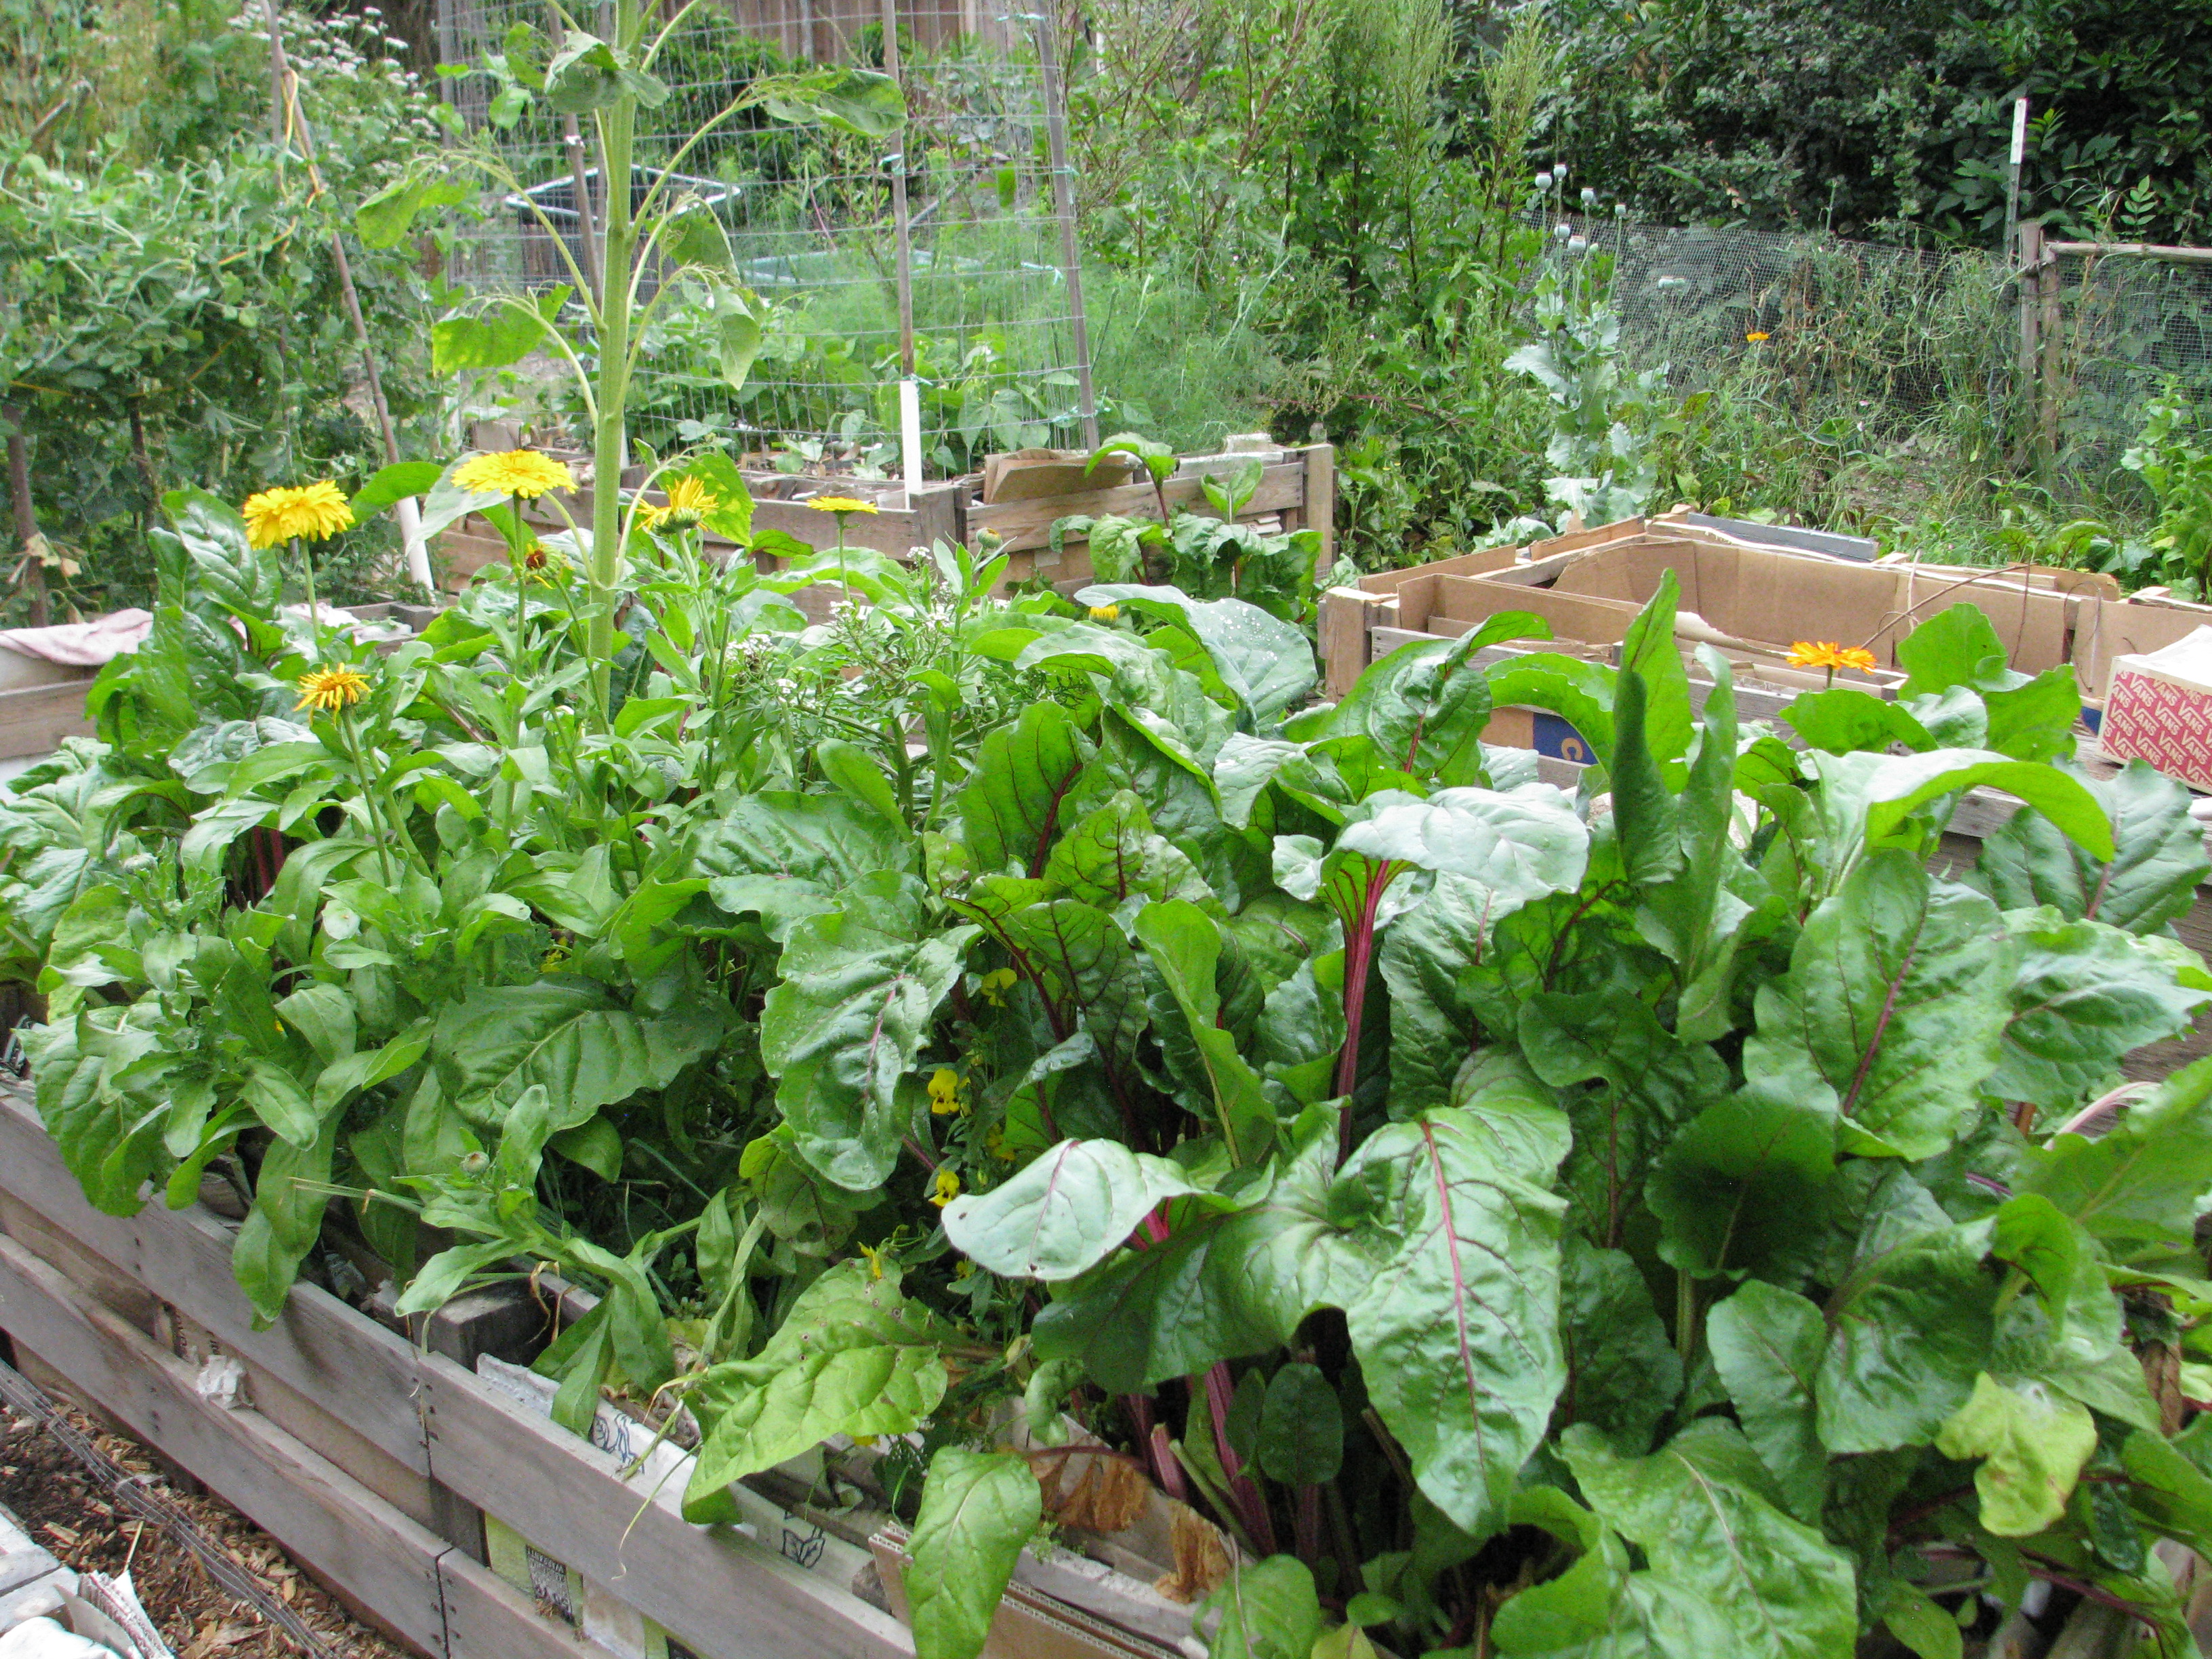
A merry mixture of vegetables, herbs and flowers in a mature bed. However that sort of wild designed planting has its drawbacks. Harvesting is more time consuming (although more fun, like a treasure-hunt). Many people find peace in looking at rows of vegetables, and peace is valuable.
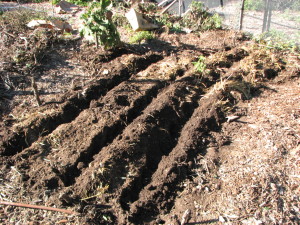
We disturb the soil as little as possible, and pull the soil back for potatoes. You can plant polyculture in rows as well. Just plant each row with a different member of the plant guild, and you’ll achieve a similar effect with insect confusion, and with nutrient conservation.
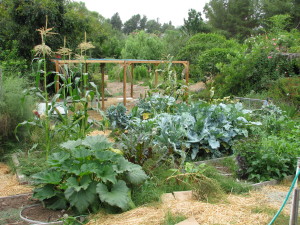
In this small, slightly sunken bed (we are in drylands so we plant concave to catch water), we planted rows of three kinds of potatoes, two kinds of shallots, a row each of bush beans, fava beans, parsnips, radish and carrots.
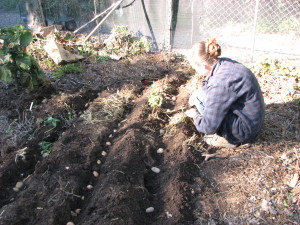
Miranda planting potatoes and shallots before the smaller seeds go in. We covered the bed with a light mulch made from dried dwarf cattail stems. This sat lightly on the soil and yet allowed light and water penetration, giving the seedlings protection from birds and larger bugs.
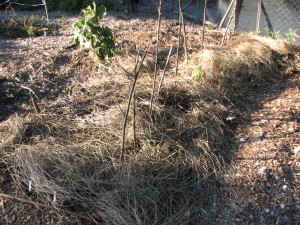
This light, dry mulch worked perfectly. Since cattails are a water plant, there are no worries about it reseeding in the bed. The garden a couple months later. Because we had a warm and rainless February (usually our wettest month), our brassicas headed up rather than produced roots and only a few parsnips and carrots germinated. However our nitrogen-fixing favas and beans are great, our ‘mining’ potatoes are doing beautifully and the shallots are filling out well.
Every plant accumulates nutrition from the air and soil, and when that plant dies it delivers that nutrition to the topsoil. In the case of roots, when they die it is immediate hugelkultur. Without humans, plants drop leaves, fruit and seeds on the ground, where animals will nibble on them or haul them away but leave juice, shells and poo behind. When the plant dies, it dies in place and gives back to the topsoil. When we harvest from a plant we are removing that much nutrition from the soil. So when the plants are through producing, we cut the plants at the soil surface and leave the roots in the ground, and add the tops back to the soil. By burying kitchen scraps in vegetable beds you are adding back the sugars and other nutrients you’ve taken away with the harvest. It becomes a worm feast. Depending upon your climate and how warm your soil is, the scraps will take different lengths of time to decompose. Here in San Diego, a handful of food scraps buried in January is just about gone by February. No fertilizer needed!