-
Sauteed Fennel
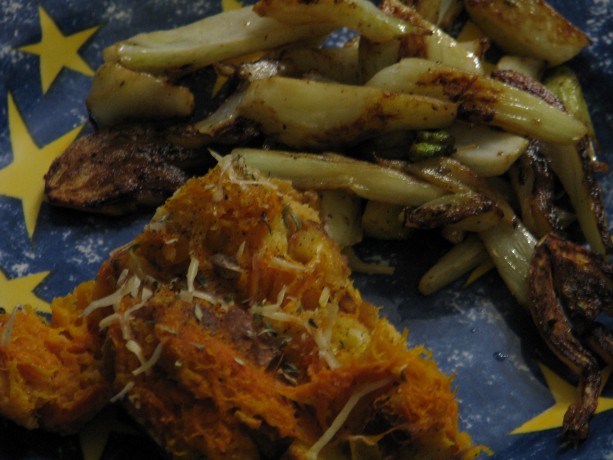
Sautéed fennel alongside squash bread pudding. The bread pudding recipe I have to work on, but not the fennel! It was so easy and so fantastic! Fennel is a sweet-tasting bulb with a satisfying crunch. This recipe is quick and easy, and absolutely delicious. I don’t have a good photo of it because, frankly, we ate it before I could make the light better.
Fennel apparently doesn’t have any companion plants according to every source I’ve checked. I grew a couple of bulbs in a polyculture bed without any problem, but to be on the safe side give it a spot by itself. Allow some to go to flower and you’ll attract lots of pollinators, and also have a host plant for swallowtail and other butterflies.
This recipe serves two as a side dish; feel free to up the number of bulbs. Enjoy!
Sauteed FennelAuthor: Diane C. KennedyRecipe type: Side dishCuisine: AmericanPrep time:Cook time:Total time:Serves: 2A simple, quick and utterly delicious vegetable side dish.Ingredients- One fennel bulb
- ⅛th cup olive oil
- Salt and pepper to taste
- Squeeze of lemon or lime
Instructions- Cut the top and bottom from the fennel bulb, then slice the fennel into small strips, about ¼ inch thick or so.
- Heat oil in a large frying pan and adjust heat to medium.
- Add fennel and cook, stirring occasionally to evenly brown, about ten minutes or until fennel is tender. Fennel should be slightly carmelized.
- Add salt and pepper to taste.
- Serve with a squeeze of lemon or lime, if desired.
-
Celery Soup
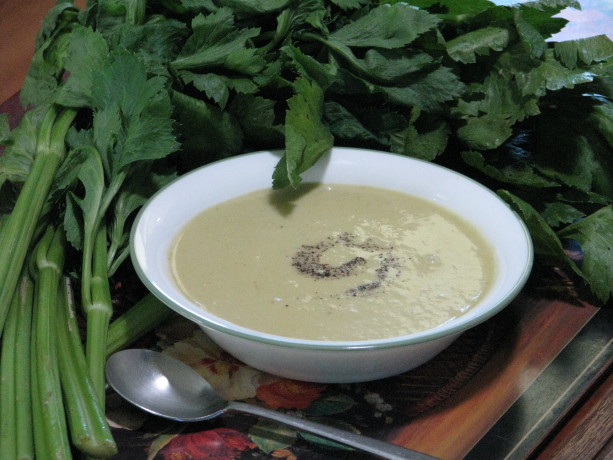
Celery soup, served hot or cold, is delicious and great for you! I thought I had posted this wonderful soup but apparently I hadn’t. Celery is a remarkable food for helping combat mental aging, among other attributes. This year we grew our own celery which is strong, fiberous and slightly bitter. We use it diced in stir-fry and many dishes including Celery Soup. This soup can be served hot or chilled, and you can either use cream at the end to finish it or just rely on the included potato for the thickener. Add a little cayenne to spice it up and increase its medicinal value. This is a blended soup that doesn’t freeze well (the flavor changes), so eat it all up! This is a lovely light green soup… great for Halloween! For another green soup, try my Zucchini and Rosemary Soup, too.
Celery SoupAuthor: Diane C. KennedyRecipe type: Main DishCuisine: AmericanPrep time:Cook time:Total time:Serves: 6 - 8This easy, delicious low-fat soup can be served hot or chilled, or dressed up with cream.Ingredients- ½ cup butter or butter substitute
- 10 ribs of celery (3½ cups) coarsely chopped (no leaves)
- ⅓ cup coarsely chopped shallots, or sliced leeks
- 1 small baking potato (russet-type) (6 oz), peeled and cubed
- Salt
- Pinch celery seed, ground (if using organic, stronger-flavored celery you may omit)
- ⅛th teaspoon cayenne pepper (optional)
- 6 cups vegetable broth
- ¼ teaspoon nutmeg
- ¼ cup heavy cream, or to taste (optional)
Instructions- Melt butter in a large saucepan over medium heat.
- Add celery, shallots or leeks, potato, celery seed and cayenne (if using), and a pinch of salt.
- Partially cover and cook, stirring occasionall,y until vegetables are soft but not browned, about 15 minutes.
- Add stock and bring to a simmer.
- Reduce heat to low, cover and cook 30 minutes.
- Stir in nutmeg.
- Allow to cool enough to be comfortable for you to puree in blender or food processor, in batches until completely smooth.
- If necessary pour through a fine sieve into a large bowl, pressing with a spoon to extract as much liquid as possible. If you have a Vitamix, just blend it on high and don't sieve.
- Return soup to pot, reheat slowly and adjust seasonings. (If serving cold, just adjust seasonings and chill.)
- Stir in cream (if using) and serve, garnished with celery leaves or croutons.
-
Melon Pie!?!

Melon. Pie. Nom. It is melon time in the garden. Fresh green melons served with a little lime juice, or fresh orange melons served with a little lemon juice, are just heaven. When you have too many melons, it is time to look for things to do with them.
Last year we froze melon slices in a mild sugar syrup. This worked well when using the melons in something; the texture was too goopy for eating fresh with any pleasure.
This year I found a recipe in my Baker Creek Heirloom Seed catalog for melon pie. Melon pie? I did a little Googling on the subject and found a lot of melon pie, cake and bread recipes. Who knew? Well, not me anyway.
This recipe works for any melon, the more fragrant the better. It was written for Mother Mary’s Pie Melon, an heirloom that we grew this year. It is small and fragrant, and just makes the right amount of melon the recipe. The version of the recipe in the catalog – which is also in their book The Baker Creek Vegan Cookbook – is vegan. I’ve changed it to vegetarian and you can do what you want with it. The cookie-like crust paired with the creamy yet firm filling is wonderful. Top it with a little whipped cream! They suggest topping with toasted coconut, but I’m not that much of a coconut fan. However I could really see this topped with merangue, like a lemon merangue pie. Yep.
Melon PieAuthor: Originally from Baker Creek Vegan CookbookRecipe type: DessertCuisine: AmericanPrep time:Cook time:Total time:Serves: 8A fragrant, yummy pie with a perfumy melon flavor and crisp cookie crust.Ingredients- Crust:
- ½ cup butter or vegan alternative
- ¼ cup packed brown sugar (or white)
- 1¼ cups unbleached flour (organic if possible)
- Filling:
- ½ cup sugar
- 3 Tablespoons cornstarch (organic if possible)
- 1 egg, beaten
- 1½ cups cubed melon, liquified in blender (makes 1½ cups)
- ¼ cup water
- 3 Tablespoons butter or vegan alternative
- 1 teaspoon fresh squeezed lemon juice
Instructions- Prepare crust: beat butter and sugar in mixer until fluffy.
- Add flour and mix thoroughly.
- Press into bottom and sides of a 9" pie pan.
- Bake crust at 375F for 10 - 12 minutes until lightly browned.
- Meanwhile, stir sugar and cornstarch together in medium saucepan and set aside.
- Blend egg, melon and water together until smooth.
- Over medium heat, gradually stir melon mixture into cornstarch mixture, stirring constantly until mixture thickens and begins to boil, about ten minutes. Don't rush!
- Reduce heat and cook 1 minute more.
- Remove from heat and stir in 3 T butter and lemon juice.
- Pour into pie shell, cool and then refrigerate at least an hour before serving.
- Serve with whipped cream... or not.
-
Black Plum and Basil Granita
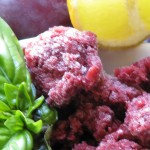 This is an interesting and delicious way to use some of those plums that ripen overnight. Basil is also in season, and combining it with the heavenly, winey flavor of ripe black plums is amazing. If you grow other types of basil such as lime basil or cinnamon basil, use those instead, reducing the lime juice to 1 tablespoon.
Granita is juice that is partially frozen, forked around a little, then refrozen. You don’t need an ice cream maker. Easy, quick and nutritious, too!
Black Plum and Basil GranitaAuthor: Diane C. KennedyRecipe type: DesertCuisine: AmericanPrep time:Cook time:Total time:Serves: 8½ cup servingsBasil and allspice give a wonderful depth of flavor to winey black plums in this frozen treat.Ingredients- 1 cup water
- ⅔ cup granulated sugar
- ¼ teaspoon vanilla extract
- ⅛ teaspoon salt
- 6 whole allspice (if you don't have allspice berries, use a small piece of cinnamon stick)
- 1½ pounds black plums, pitted and quartered
- 2 tablespoons fresh lime juice
- ¾ cup basil leaves (not packed)
Instructions- In a large saucepan combine water, sugar, vanilla, salt, allspice and prepared plums and bring to a boil.
- Reduce heat and simmer for 15 minutes or so, stirring occasionally, until the plums begin to fall apart.
- Pour into a small bowl set in ice water in a larger bowl and cool completely.
- Fish out and discard the six allspice.
- In a blender or VitaMix process plum mixture, basil and lime juice until well blended.
- Press the plum mixture through a fine sieve over a bowl and discard solids. If you have a VitaMix you may not have any residual solids; the granita will be cloudier but will be more nutritious. Don't worry about it.
- Pour the mixture into an 8-inch square glass or ceramic baking dish.
- Cover and freeze until partially frozen, about 2 hours.
- Scrape with a fork, crushing any lumps, and smooth down again.
- Freeze for 3 more hours, scraping with a fork every hour so that it doesn't freeze as a cube, until completely frozen.
- Serve in small scoops; really nice paired with little vanilla cookies.
-
Kamoodles: Cooking with Kamut Flour
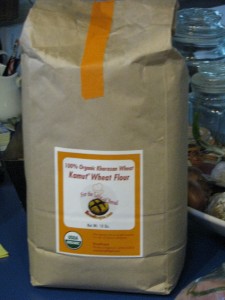
Organic Kamut flour A friend gifted me with a bag of Kamut® flour. Kamut® is the trademarked brand name for what is commonly known as khorasan
wheat, an ancient relative of modern durum wheat used by the ancient Egyptians which has finally made a comeback in popularity. It is a relative of duram wheat and very high in protein as well as trace ingredients such as magnesium, selenium and zinc. Kamut® has a buttery flavor and the grains can be cooked and eaten just like other grains, for breakfast, in addition to other foods as an extender, as a flavored filling, etc.
Rolling out kamut noodles Kamut® flour is a little heavier than processed white wheat flour, but much lighter than typical whole wheat flour. Therefore it may be used as a substitute for either flour without a sacrifice in flavor or texture.
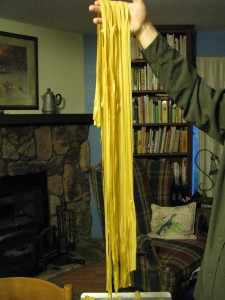
Very long noodles My son is visiting and we decided to use Kamut® flour in place of semolina.
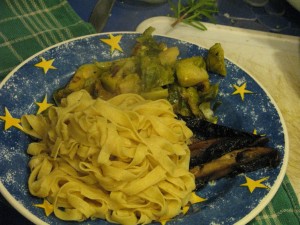
Kamoodles with portabella and broccoli. Kamut® noodles? Kamoodles!
KamoodlesAuthor: Diane KennedyRecipe type: Side DishCuisine: AmericanPrep time:Cook time:Total time:Serves: 6Kamut flour makes this side dish nutritious and delicious.Ingredients- Two cups organic kamut flour
- Three eggs
- Up to ¼ cup water as needed
- White flour for shaping
Instructions- Measure kamut flour into a large bowl.
- Mix eggs in a measuring cup or bowl until lightly combined.
- Make a well in the center of the flour and pour in eggs.
- Mix until completely combined.
- Form dough into a ball. If dough is too dry, add water a little at a time until dough sticks together enough to form a ball.
- Gently knead the dough a couple of minutes until it is slightly elastic.
- Wrap dough in plastic wrap and let sit for half an hour. If kept longer, refrigerate.
- Divide dough into quarters.
- Following the directions on your noodle machine, feed dough through repeating until it is at its thinnist level, then feed through cutter to make wide noodles.
- Hang noodles until all the dough is processed.
- Boil a large pot of lightly salted water (salt optional).
- When all kamoodles are cut, feed them gently into the boiling water and cook 2 - 3 minutes.
- Drain noodles.
- Serve with butter, or any other way you like to eat noodles.
The chapatis, which are the Indian version of tortillas or fry bread or pita bread, are simple and quick to make. With Kamut® flour they are far more nutritious. Besides, Kamut® chapatis is almost as fun to say as kamoodles!
Kamut chapatis For 12 chapatis, mix 2 1/3 cups Kamut® flour with a tablespoon of olive oil and up to 1 1/3 cup water until it sticks together. Form it into a dough ball. Allow it to rest for several minutes. Divide dough into twelve equal pieces. Heat a skillet on medium-high heat and add a scant teaspoon of olive oil. On a lightly floured board roll out the Kamut® chapatis to a 10-inch circle. When skillet is hot, transfer rolled-out chapatis to it and cook 3-4 minutes on each side then remove. They should develop slight brown marks from the skillet and may puff just a little.

Kamut chapatis with curry and avocado. Keep warm while you finish cooking the rest. Serve with butter, spreads, as a scoop for curry, in place of tortillas for Mexican food, and as a fold-over sandwich. Yum!
I’ve also very successfully substituted one cup of Kamut® flour for one of the two cups of regular flour in my Spiced Pumpkin Scones. Kamut® gave them a little grainier texture that was very appealing without making them heavy. Substituting all the regular flour with Kamut® flour in a yeast bread worked beautifully, too. The loaf isn’t at all heavy as it would be if I substituted whole wheat flour. Very nutty and buttery flavor. So yum!
-
Awesome Candy Alert: Cayenne and Cashew Brittle

Spicy brittle I’m not big into candy; give me cake, pie or bread, or a good rice pudding instead. However I’ve made this brittle at Christmas for years now, and it is always a big hit. The cayenne makes a nice mild burn to counter the sweetness of the brittle. Cayenne is good for you, too, as are cashews (no matter how creepy it is that cashews grow!), so it makes sense in some distorted way that this candy is good for you. It is so easy, too. I have much less salt tolerance than the general American public. If I eat out I find myself desperately thirsty for days. The original recipe was made for high salt intake, but I have shown options on cutting it back. You don’t need it, for the delight of the candy is in the burn with the sweet. I also don’t like very hot (spicy) foods, but I like this. Make some and try to share.
Cayenne and Cashew BrittleAuthor: Diane C. KennedyRecipe type: DessertCuisine: AmericanPrep time:Cook time:Total time:A yummy easy-to- make brittle with a slow spicy burn.Ingredients- 2 cups unsalted roasted cashews, whole or pieces (you can use salted, but I don't)
- 10 tablespoons (1¼ sticks) butter (if using salted cashews, use unsalted butter)
- ½ cup sugar
- ¼ cup packed light brown sugar
- 1 tablespoon light corn syrup
- 1 teaspoon cayenne pepper
- ¼ teaspoon salt (optional)
Instructions- Butter a nonstick baking sheet and set aside.
- Combine all the ingredients in a large nonstick skillet.
- Stir mixture over low heat until the butter melts and the sugars dissolve.
- Increase heat to medium and boil.
- Stir constantly until mixture turns golden brown, thickens and masses together, about 5 minutes (if you cook it longer it won't be as shiny; too little and it will be soft but still yummy).
- Immediately pour candy out onto the prepared baking sheet and quickly spread evenly using a spatula to help.
- Cool completely.
- Break into pieces.
- Makes about 1⅓ pounds
-
Preserving Squash and a Terrific Pumpkin Chai Recipe!

Beautiful patterns on the banana squash shell. Four sugar baby pumpkins that I’d kept for myself, and three pink banana squash, were all in need of preservation. They were not keeping well due to the warmth of our hot San Diego county Fall. During a rainy break in the weather I did something about it. You can preserve cooked pumpkin and winter squash best by freezing it. If you have a pressure canner you may can pureed pumpkin or pumpkin pieces in liquid, but since I only use the water bath method that wasn’t an option.

Even sugar baby pumpkins can be difficult to cut when raw. There’s a better way! Roasting a squash isn’t difficult at all. In fact, you only have to wash it, put it on a tray in a 350F oven for about an hour (longer if its a really large pumpkin), and then slice when cooled.

Roasting a whole pumpkin makes the scooping so easy! Its easy to scrape out the seeds and then spoon out the cooked flesh out of the hardened shell. This is what I did for the sugar baby pumpkins. There was too much banana squash to fit whole into the oven, however, so I cut them into chunks, scooped out the seeds, covered them with aluminum foil (it helps steam them) and baked 350F for forty-five minutes.

Three banana squash is a lot of squash I have more details here. I also roasted the pumpkin seeds.
Then I had a lot of squash to puree! These squash and pumpkins were dry, so I added a little water to the VitaMix and tossed in the chunks.

Pumpkin and seeds. I pureed batches until smooth, then spooned cups full into freezer bags. My pumpkin scone recipe calls for only half a cup, so I froze one-cup batches, as well as two-cup batches for pie. The secret to ‘vacuum-packing’ freezer bags is to close the top of the bag around a straw and then suck all the air out. It really works well, and is kind of fun, too.

Get a straw, suck out the air and presto: vacuum packed! However, the best thing that happened out of all this squashing was that I had a little less than a cup of pureed roasted squash left in the VitaMix, too little to freeze and really irritating to scoop out. It was a cold day and past lunchtime. I had an idea and spooned in what was left of some Chai tea mix, poured in vanilla soy milk, blended it until it warmed up and sat down to drink. Heaven! I’m not one for pumpkin flavored things, but this was the real deal.

Pumpkin puree. It was so good that the next day I took a cup of the pureed squash that I refrigerated, poured in 1 1/2 cups of vanilla soy milk, a touch of orange syrup left over from candying orange peel, added cinnamon and blended until it was hot. It was thick, satisfying, a little sweet, spicy and full of beta carotene, fiber, protein and other good things. I’m sure you can do the same thing with canned pumpkin and other liquids, such as milk, rice milk, almond milk or coconut milk. If fact, I insist that you try it.

Hot Yum! Pumpkin ChaiAuthor: Diane C. KennedyRecipe type: BeverageCuisine: AmericanPrep time:Cook time:Total time:Serves: 2Cold or hot, spiced pureed pumpkin or squash mixed with the milk of your choice is extreme comfort food that is actually terrific for you!Ingredients- 1 cup cooked pumpkin or squash puree, fresh or canned.
- 1½ - 2 cups vanilla soy milk, or milk of your choice. (Less for a thick drink).
- ½ - ¾ teaspoon cinnamon, pumpkin pie spice or up to 1 scoop Chai tea mix.
- Sweetener (optional); a natural syrup would do or honey.
- ½ teaspoon vanilla (optional)
Instructions- For cold pumpkin chai mix all ingredients briefly in a blender or VitaMix.
- Taste to adjust seasonings, thickness and sweetener, and serve.
- For hot pumpkin chai, heat milk and add to the rest of the ingredients in a blender and process. If you have a VitaMix, you can add all cold ingredients and then process until it is hot.
I’m going to make some more for me right now.


