-
Cob Oven 3

The bottom layer stayed damp This is the third installment of the cob oven building story. In our last episode, we saw permaculturalists mounding and shaping sand, then beginning to build the first insulation layer on the sand form. The lack of straw made the mixture of sand and clay a little challenging to work with (straw would burn off so it isn’t used for this layer). When my intrepid daughter and I ventured out this morning in the July heat, we found that the wet burlap and newspaper had worked well for keeping the insulation moist. The mixture still on the tarps was a little drier, and a batch that had been put into a 5 gallon black nursery container so it was easy to grab, and then forgotten, had turned into a cylindrical brick. That was good news, for it showed that the mixture was a good one.

The mud was still good on the tarps Although hot today, it wasn’t nearly as searing as yesterday. Intermittent clouds blew over and created some humidity, but sheltered us from the direct sun and the breeze stayed pleasant. I’d already baked a layer cake and a peach/apricot tart after blanching and peeling the fruit, to make sure the oven was used during the cool part of the morning. We also sliced extra fruit and put them out on cookie trays on our roof to dry (look at my post about drying fruit, if you would like to know more). I made sliced polenta with cheese and egg for breakfast, and cleaned up a mountain of dirty dishes from the cooking and baking by 10:30 am; a good start to the day.
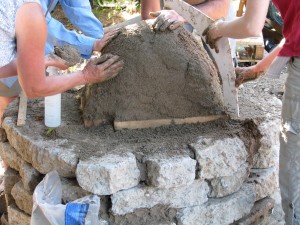
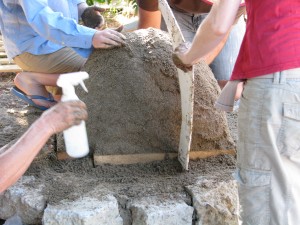
So we began layering the 2/1 sand and clay mixture, digging it into the layer below and being careful not to press inwards on the sand dome. We used our fists as guides to measure the same width all the way around, guiding with our other hand. If you don’t like having dirty fingers, or you value your fingernails, this isn’t the hobby for you. I think ninja masters must toughen up their hands by building cob ovens. Certainly no physical therapy I might have to do for my months-old sprained wrist could equal this kind of exercise!
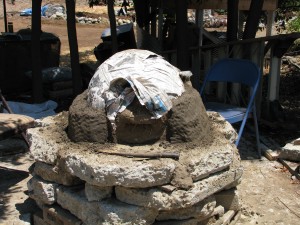
Slowly working up the sides While we worked we’d periodically hear chirps from a palm tree where a hooded oriole family was being fed by diligent parents. We were also watched most closely by our chickens; Emerson (who was supposed to have been a hen) practiced crowing.
Despite our drier mud, the sides liked to succumb to gravity. We used 2×4’s to press mud up from the bottom, similar to rolling out pastry dough. To make the front even, I took a mortar spatula and sliced off extra mud, then patted it even.
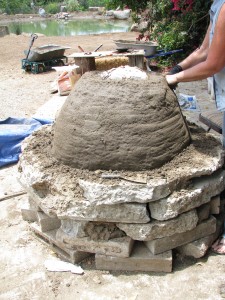
A bald pate The most valuable tools we used were a spray bottle of water, the pieces of 2×4’s and folding chairs. A good arguement for making the oven stands higher is to save your back when mudding!
Finally the top was attained!
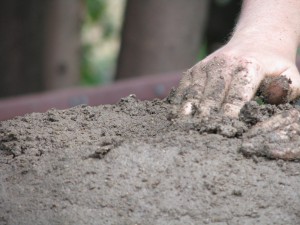
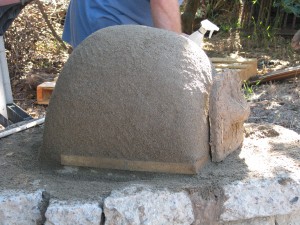
Closing up the top! The next part was to use the board to smooth out all the sides and make a beautifully rounded shape. An area in the back was a little slumpy due to extra wet mud, but it wasn’t a big problem. After it was smooth, we took the board and gave the dome gentle whacks to compress the insulation.

Using a board to shape the dome After about 3 1/2 hours today, and 45 minutes yesterday, the first layer is finished. All during the process it felt as if we were creating an entity. I was trying to puzzle it out as we worked, and I think working with soil from our own property, mixing with hands and feet, and the rounded soft shape of the earthen dome all created that illusion. Also, the handle of the door that we made of cob looks like a big nose. My daughter dubbed the oven Harry Mud (and all you Star Trek Classic fans will love that name even more).
The next phase will be to mix straw with the sand and clay and create another layer over the insulation layer. That process will be in the near future, but definitely after our hands heal up from the sanding they received today. Hot and humid as it was, we had a real sense of accomplishment and pride when we finished the bones of Harry Mud.
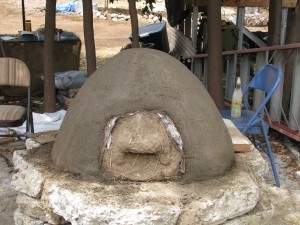
Harry Mud -
Cob Oven Part Deux (and still not done)
Mounding sand within a template Today three members of the San Diego Permiculture Guild joined my daughter and I in another go at finishing the cob oven. We had only two hours in which to work on a warm morning which was rapidly turning into a hot day. With the base already built, we now needed to build a sand dome which would serve as the inside mold for the oven. Mixing sand with water until it clumped wasn’t as easy as it looked in the books, and it never really clumped. However, after a long effort the group did a fantastic job making a sand mound of correct dimensions.
Measuring and spraying the sand with water My daughter and I had made a template to show how high and round the sand should go, and eventually the sand dome became something of which Sir Christopher Wren himself would of been proud. It is a shame that after the cob is added the sand will be scooped out, but the hollow that is left will be perfect for the roiling flames of the fire, with no cold spots.
A beautiful mound, with a door Our choices for a door was to make one out of wood with insulation on the inside, cut one out of the cob and then create one, or make one out of cob ahead of time and build around it. My daughter and I made one the day before, and albeit topheavy one, and propped it up so cob could be built around it.
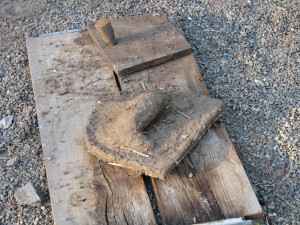
Mud door The sand dome was then covered with wet newspaper for protection from the cob.

The door looks like a big-nosed creature! Next came the insulation layer, which was two parts sand to one part clay. No straw was added because it would catch fire. The mud we used was a batch in a wheelbarrow that had been worked (all the hard pieces either discarded or squished) by the group during the first oven building session. We kept it wet and covered so that the clay would soften. This became a problem, though, because the clay was already saturated when we worked in the sand. As the sides were beginning to be built, the cob was soft enough to bulge out at the sides. Thinking quickly, the group put pieces of wood around to use as a frame while I began mixing another batch from the rest of the mud in the wheelbarrow and sand, using my feet. Others leant their feet to the project.
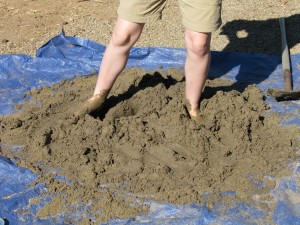
The cob dance This batch was wet as well, but not as wet as the first batch.
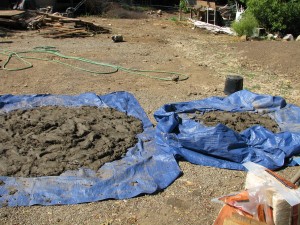
Two sand and mud mixes, the left one too wet The theory was that since the clay was in water, the heavier particles sunk to the bottom displacing the water, and so the first batch of mud from the top of the wheelbarrow held more water than the second, lower batch. This made perfect sense.
When building the insulation layer, care must be taken not to press into the sand mound. The first layer of insulation should be 3-4 inches wide. Each layer must be pressed into the one beneath so that the cob is uniform and doesn’t dry in layers. At first it is built straight up, then gradually around the curve of the dome.
With only 45 minutes to go, and the sides bulging enough to prevent any more building, we opted to take out what was already built and start in again with the drier mud mixture. This, too, needed some wooden support, but it was by far easier to use than the first batch. The wetter mud was spread out on a tarp to dry out more in the sun.
With the time coming to a close we stopped, covered the mound with wet burlap and the mud with tarps. Perhaps the next time will bring about the finale of the oven, and the long-hoped for pizza!

Covered with wet burlap until next time -
Cob Oven, Part One

Levelling the firebricks Today six members of the San Diego Permaculture Group converged upon my property to build a cob oven. No, not with corn cobs. Cob is an ancient building method that is similar to adobe, but without the brick. Cob buildings, some of them several stories high, have stood for centuries in as diverse areas as Turkey and Wales. Building a cob outdoor baking oven is a good exercise in cob building that is useful and easy. None of the members, nor my daughter who jumped right in to help mix mud, had made a cob oven before. That was okay, because neither had I! Using as a reference the book Build Your Own Earth Oven by Kiko Denzer, and having watched several YouTube cob oven videos, we set off on our learning experience with the energy and fellowship that this newly formed group radiates.
Because of all the deconstruction on my property, building materials were at hand. I decided to set the oven on a cement platform left from a torn-down shed. That eliminated digging and filling a drainage base. My son had helped carry bags of sand down to the work area, which besides straw and wood shavings were the only items I purchased for this project. With broken concrete and cinderblocks, the group made a circular base about two and a half feet high.

The base made with cinderblock and cement chunks The height helps the back of the baker, but if the oven isn’t used all day every day, a shorter one isn’t going to be a problem. Especially for a short person like myself. Not that short, but short.
When I moved onto the property there was all this gravel and stone around. I hated it. I removed a lot, but much disappeared into the pathways. Some has resurfaced with the tilling that has been done to loosen the soil and add mulch. We gathered a lot of the stone along with some dirt and used it to fill the base.
Then we made some rough cob. There was a pile of hard clay that came from the pond excavation. In fact, the bottom of the pond, which is unlined because of the clay content, is almost pudding-like in consistancy with the silky clay. How do I know? Well, let’s say that on a hot day this last week I got to know my pond a little better.

Collecting clay samples with my feet Anyway, the clay contains really hard lumps. It will make wonderfully strong cob, but first it has to be broken down. My daughter filled a wheelbarrow with it, then we dumped it out onto a tarp and added water, expecting it to be easy to mix when wet. Wrong!
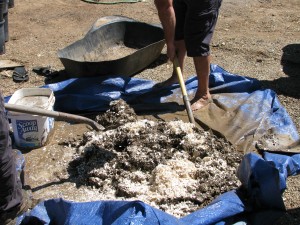
This insulation batch is made with clay, sand and wood shavings We added a lot of water and some sand, and mixed pretty well, then added some wood shavings to it for tensile strength. This was used to gap holes in the oven stand and form a base for the insulation. The insulation was made of the flat vodka bottles somebody in the history of this property obviously preferred, along with a broken necked Coke bottle that were found when the pond was excavated. Pretty cool, huh?
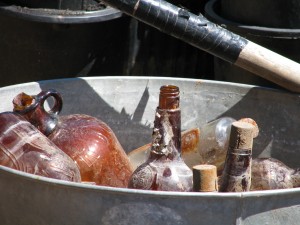
A treasure of old bottles 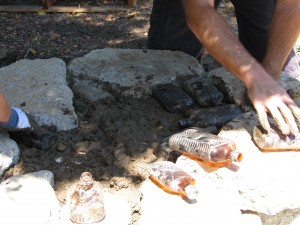
Bottles were layed on cob for insulation Meanwhile, another wheelbarrow was filled with clay and water, and a group started using their hands to mix it and disintigrate the hard lumps if possible. This took a long time, and still there were lumps. The scene looked like the part in Moby Dick when the whalers are kneeding the blubber with their hands, only a lot less gruesome. This clay mix must be smooth for the next step, building the oven itself.
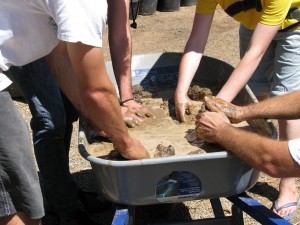
Finding the lumps in the clay On top of the bottles went a layer of sand, which was levelled as best we could. On top of that went firebricks, which were also levelled.
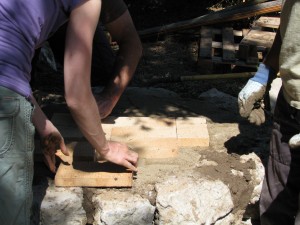
The firebrick was layed on sand At this point we stopped due to time. The whole process was only a little over two hours long. The wheelbarrow of prepared mud has been covered, as has the oven base. In the very near future we plan to reconvene and make the rest of the oven. After that… pizza!
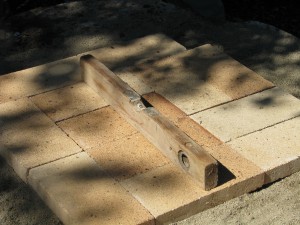
Everything was even except the middle