Vegan
-
How To Preserve Squash and Pumpkin
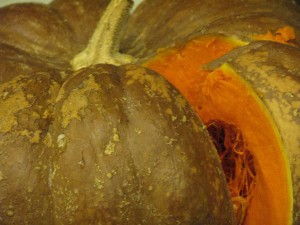
Test for doneness; if the flesh isn't soft, continue baking. You have this wonderful pumpkin sitting around, waiting to be eaten. The holidays pass and… there it sits. You don’t want to let it go bad, but you don’t have a use for it right away. What to do?
Here’s how to make your own pumpkin or squash puree and preserve it by freezing. I haven’t seen reliable methods of canning puree so I opt for the freezer method in plastic bags. I know, I too want to eliminate plastic bags from my life. However I own freezer bags and I will use them.

Stack the freezer bags and freeze flat First of all, choose a pumpkin bred for taste, such as Sugar Baby; Jack o’lantern pumpkins aren’t that tasty and are usually very fibrous. Wash your pumpkin or winter squash (not summer squash, like zucchini or crookneck) without soap. There are two good options for cooking the squash (pumpkin is a type of squash, so I’ll just say squash from now on): steaming or baking. Baking is the best method in my opinion. First of all, you can stick the whole squash into the oven and bake it, whereas if steaming you must cut up the squash and with some of these hard-skinned beauties that task can be difficult and dangerous (it is easy for the knife to slip). Secondly, steaming adds a lot of moisture to the squash, and it must be drained after pureeing before you freeze it, or else it will be too watery to use in pies and other baked goods. I steam squash when I want to serve it for dinner because it is quick and it preserves nutrients. Baking removes a lot of the moisture and increases the flavor of the squash. Some people recommend boiling it, but the squash would have to be whole, and dealing with a huge pot of boiling water is just not necessary.
If you are going to be obstinate and want to steam the squash, then cut it up, scoop out the seeds (save for replanting or making pepitas, recipe: Pepitas 1/15/12), steam until fork-tender, scoop out the flesh, puree it in batches, and leave it sit in a bowl, covered, in the refrigerator overnight. Water will seep out. Or tie into cheesecloth suspended over a bowl and allow to drain.

Quarter and scoop the seeds out of small pumpkins. If you are going to bake it, heat the oven to 400 degrees F. Lightly oil the outside of the washed squash. Line a baking dish with foil. If you have a whopper, just pop in the pumpkin (remove the stem if there is one).

You can bake a whole squash. If you have a thinner skinned pumpkin, you can carefully cut it into quarters, scoop out the seeds, and place on a piece of foil on a cookie sheet. I bake them face-up to improve flavor and remove moisture.

Baking brings out the flavor. Bake a large squash for about 60 minutes, until you can slide a knife easily into it. If you have a large, thick-skinned squash, you may need to leave it in up to another half an hour. If you have a thinner skinned pumpkin such as Sugar Baby, you may test it for doneness after 45 minutes. Allow the squash to cool, then slice it into chunks. Scoop out the seeds (no good for planting now, but still good for making pepitas) and then scoop out the flesh from the skin. Puree flesh in batches until there is no fiber left. If the puree looks thin (think of the consistency of canned pumpkin), then either leave it covered in a bowl in the ‘fridge overnight and pour off excess water the next day, or strain through a cheesecloth.
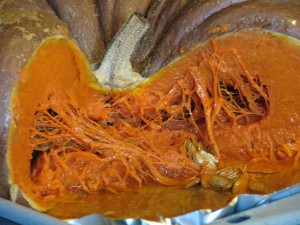
After baking it isn't pretty, but it sure is easy to cut! Once your puree is ready to go, then I suggest you measure it by 3/4 cupfuls into plastic freezer bags. That’s how much puree is in a 15 -oz can of pumpkin, and what pie recipes call for. Or if you have other recipes in mind with other measurements, freeze in those increments.

Some squash like this Cinderella pumpkin is more fiberous than others After filling the freezer bags (and I guarantee that you’ll get pumpkin everywhere!), flatten the bags and place on a cookie sheet that will fit into your freezer. Stack the bags (make sure to label with type of squash and date!) and freeze. They will be flat and much easier to deal with. Freeze for about six months.
Of course, before you freeze it all, save 1/2 a cup and make my Spiced Pumpkin Scones (posted on January 10, 2012).
- Chickens, Gardening adventures, Humor, Permaculture and Edible Forest Gardening Adventures, Vegan, Vegetables, Vegetarian
Planting Easter Dinner (in November)
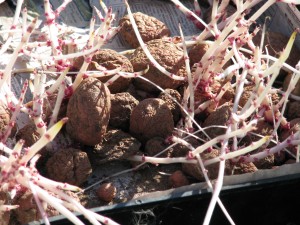
Creepy white fingers I finally was able to work in the vegetable garden today; me and my helpers, that is.
Kakapo, Miss Amelia and Lark, helping I am by no means done, but I did some major cleaning out of old veggies. Out went the tomatoes that aren’t producing, dead squash vines, weeds, a volunteer avocado tree and the two enormous zucchini plants which, although having been cut in half, abused and ignored, have still been putting on a squash a week. I have one more zuke plant left, but these big guys had to go. The compost heap is… well… a big heap.
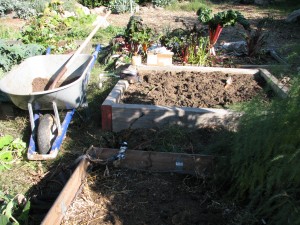
White potatoes in the closest bed, root veggies and brassica seeds in the back one As I study Permaculture, I’m more aware of the millions of microbes in the soil and the fine network of fungus that enriches plant roots. The less I disturb my garden soil, the better. After pulling the weeds, I sprinkled on GardenAlive’s soil enhancer, which are more microbes, as well as their organic Roots Alive fertilizer. I used a trowel to lightly work it all just under the soil surface, then topped it with compost from my compost bin. Having soil that is healthy, rich smelling and alive is any gardener’s dream. All those microbes free up nutrients in the soil so that your plants can suck them up and use them, which makes your veggies not only healthy and more resistant to bugs and diseases, but produce … um…. produce that is loaded with vitamins and minerals. Its like the old gardener’s joke: A gardener asks a man what he puts on his strawberries, and the man answers, “Cream.” The gardener shakes his head in disbelief and says, “I always put manure on mine.”
Potatoes from spring, which I’d stored in a dark cabinet under the house, decided they didn’t want to wait any longer.
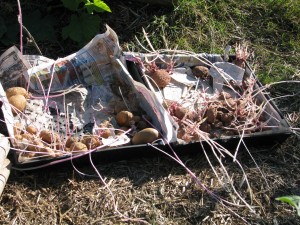
Eager potatoes Fall is a good time to plant potatoes, as long as you keep their greenery protected from frost. Since potatoes can be grown from cuttings (as well as tubers and seeds), and to produce more potatoes you slowly mound up compost or straw around the stem as it grows, I tried something with these long white fingers. I lay each potato on the soil, with the long white stem laying flat, and covered them all up with light mushroom compost.
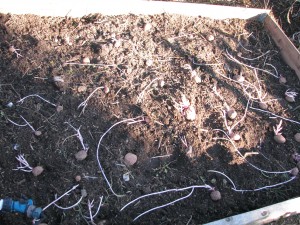
Laying down the potato stems to form new plants I’m betting that the stems will all take root and send up greenery along the nodes, using phototropism. That will multiply the number of potato plants by a lot. Then as the greenery grows, I’ll add more straw and compost around them. If all works out, sometime early next year I should be Potato Queen of Fallbrook! Of course, I had lots of help with the project.
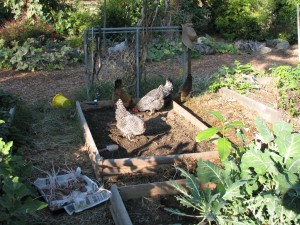
Lots of helpers. I fenced off the beds after I planted A few months ago I planted pieces of yam that had started to grow in the house. The vines flourished outside of the bed. Now that I’ve cleared the massive zucchinis out of the way, I’ve pulled the vines back into the bed, layed them out so that they (mostly) touch the soil, and have dumped mushroom compost on parts of them. The object is to allow them to root along the vines and make more yams. I’ll let you know if this works or not.

Taming the yams I’m also planting carrots and parsnips. The ‘nips won’t be ready until next spring, having improved in flavor for any frost we may receive. I’m hoping there may be some small carrots ready for Christmas dinner, but I really should have put them in last month to be sure. In will go the brassicas: Brussels sprouts (did you ever wonder if it smells cabbagy in Brussels?), broccoli and cauliflower. These guys all like a good chill, as long as they are protected from frost. More cool-weather lettuces will go in, as well as lots of endive for my tortoise. Onion sets and seeds can go in, as well as radishes. The arugula has reseeded itself again and is coming up in all the pathways, with even an elegant specimen right next to the large pond by the rushes!
You remember the pond, which was put in to attract wildlife, right?

Wildlife gathers at the watering hole.... I still have tomatoes and eggplants producing. I tied up the lazy ferny stalks of my first-year asparagus to get them out of the way. The horseradish plant seems to be doing well; I have to consider what to serve it with at Christmas. My dad loved horseradish sauce, as do I, and I grow it as a memory of him and our Polish heritage on his side. I used to make him his favorite soup, borscht, but I would never taste it because I just don’t like beets.
Tomorrow, if I can move my joints after many days of weeding, I’ll clear out the remaining ’empty’ bed and cover the unused ones with compost and straw to sit until spring. I am so glad that I can garden almost year-round!
-
Jook
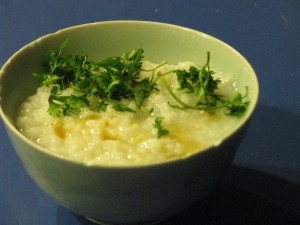
Jook with sesame oil and chopped cilantro Jook, Juk, Chinese rice soup, rice porridge, congee… these are many names for basically the same food, rice cooked with a lot of water. There are equally as many ways to fix this wonderful comfort food. Jook can be made with plain water and white or brown rice, then served with toppings such as cilantro, sesame oil, chopped peanuts, bits of cooked tofu, soy sauce, chopped hardboiled egg, preserved or cooked vegetables, chives… as little or as much as you’d like. Jook can be prepared with or without salt; I prepare mine without, then grind a little on the top when serving for that little burst of flavor. Jook can be served with cinnamon and sugar for dessert; this is especially nice for those who love rice pudding but don’t want to eat or can’t eat dairy. Commonly eaten as a savory breakfast dish, Jook is also a perfect food for when you are ill. Not only is it comforting and filling, but it is easy to eat for a sore throat, easy on a troubled stomach, nutritious, and if you are a victim of Montezuma’s Revenge (if you know what I mean), rice is very good for helping you to stop going. Ah-hem. Jook is a very good baby food for those little mouths that are just getting into semi-solids.
You can find hundreds of different versions of Jook on the Internet. Many make it with part broth, part water. Some throw in fresh ginger, some cook bones in it for added calcium. Cooking it plain allows you to top each bowl up the way you want, which is what I do. Leftover Jook can be mixed with water to loosen it up, or eaten in its more solid form. You can’t get a much easier comfort food to make that is so versatile. It is particularly good for celiacs (those who cannot eat gluten). With cooler weather upon us, make one dinner a Jook day!
JookAuthor: Diane C. KennedyRecipe type: MainPrep time:Cook time:Total time:Serves: 6-8Jook, rice porridge, rice soup or congee, is a wonderful versitile comfort food.Ingredients- 1 cup washed white rice (short or long grained depending on your taste)
- 8 cups water (if you like it thick)
- or
- 10 cups water (if you like it medium)
- or
- 12 cups water (if you like it very thin and soupy)
- optional: 1-2 tsp. salt)
- optional: substitute broth for equal parts of the water)
- optional: add a thumb-sized knob of fresh ginger)
- Topping suggestions:
- sesame oil, peanuts, fresh cilantro, chopped hardboiled egg, cooked tofu, seaweed, soy sauce, freshly ground salt and pepper, butter, cooked vegetables, pickled vegetables... leftovers. Also make it sweet with sugar, honey, cinnamon, nutmeg, dried fruit, chocolate chips!
Instructions- Put washed rice and the desired amount of water in a dutch oven
- Heat until boiling
- Turn down heat to a simmer and cook uncovered 2½ - 3 hours, depending on how thick or thin you want it.
- Serve hot in small soup bowls with choices of toppings.
-
Heavenly Steamed Eggplant
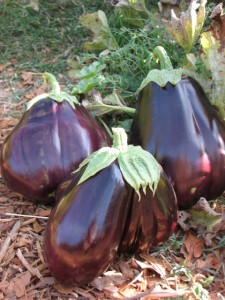
Black Beauty eggplant I love eggplant, but always thought it had to be salted, pressed and fried or baked. Cookbooks always talk about bitter juices that need to be leeched out. The recipe for Coucharas (see recipe list) calls for steaming eggplant until it is very soft so that the pulp can be mashed and combined with other ingredients.
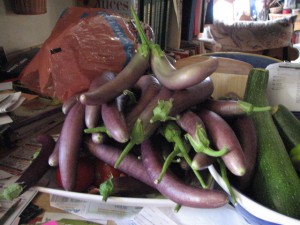
Japanese or Chinese (long) eggplants have few seeds Now with an abundance of eggplant, both Black Beauty and Japanese, in my garden, I looked for some simple eggplant recipes. Maybe everyone else in the world knows how incredible lightly steamed eggplant is, but I just found out!

Choose glossy, firm eggplants I took a Black Beauty (globe) eggplant that I’d harvested the week before and was beginning to go soft, cut off the stem end and quartered it lengthwise. I steamed the slices for 8 minutes (no more than 10!).
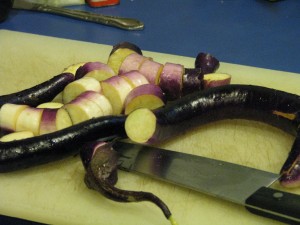
Slice long eggplants into bite-sized chunks The texture was silky and smooth, not at all bitter and incredibly light. Over the top of the quarters I spooned a very easy sauce. The eggplant, which is notoriously spongy, soaked up the sauce. Slicing the eggplant, skin and all, was a dream and eating it was sublime.
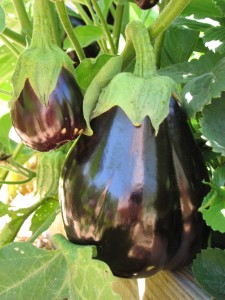
Eggplant is in the same family as tomatoes and potatoes It was so good in fact that I did the same with Japanese eggplant the next night, but instead of quartering them, I cut them into bite-sized chunks, then after steaming poured the sauce over them in a bowl and stirred them around to absorb the sauce. I served both with very thin noodles. Photos of cooked eggplant are rarely delicious-looking, so you’ll have to let your imagination guide you.
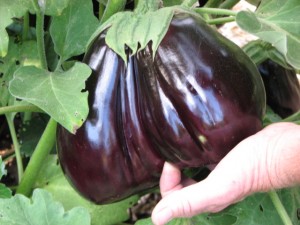
An enormous double eggplant! There are many sauce mixtures on the Internet, but here is mine:
Heavenly Steamed EggplantAuthor: Diane KennedyRecipe type: Main DishPrep time:Cook time:Total time:Serves: 2-4Quick, light, tasty, low-calorie and wonderfully different, this eggplant recipe is a gem.Ingredients- One large Black Beauty eggplant or 3 Japanese eggplants
- 2 Tablespoons Rice Wine Vinegar (or other mild vinegar)
- ⅛th cup Bragg's Amino Acids, Tamari Sauce or low-salt soy sauce
- ¼ teaspoon sesame oil
- 2 Tablespoons olive oil
- ½ teaspoon grated fresh ginger
- If you like garlic, dice or grate a small clove and add it in. You can also include chili paste to taste.
- Fresh cilantro (optional)
- Toasted sesame seeds (optonal)
Instructions- Cut stem end(s) off the eggplant
- If using one large eggplant, cut it into quarters long-wise from end-to-end. If using long eggplant, cut into ¾" - 1" bite-sized chunks. Do not peel.
- Steam eggplant for 8-10 minutes until a knife easily slides into the skin; do not overcook!
- Meanwhile, mix all sauce ingredients except cilantro or sesame seeds, if using.
- Plate the eggplant quarters and drizzle the sauce over the top slowly so it absorbs, or put chunks in bowl and mix with sauce, then plate. Offer extra sauce separately.
- Sprinkle with fresh, chopped cilantro and/or toasted sesame seeds.
- Very good with noodles or rice.
-
Dill Pickles

Try to keep uniform sizes in each jar Last year I planted regular cucumbers, and my daughter and I decided to try our hand at making pickles. We tried several recipes, and the results were okay but not fantastic. The pickles were kind of… flabby.

Sterilize jars and lids while simmering brine This year I planted pickling cucumbers, and they came in last month with the idea to outstrip even the zucchini plant. Trying to find the cucumbers which were cleverly hidden and camouflaged, before they grew too long, became a game. When we had enough, we made pickles. I wanted a recipe that didn’t have too much garlic, and used cider vinegar, which is healthier than white distilled (grain) vinegar. Most recipes called for white wine vinegar, but that was very hard to find and only sold in small expensive bottles. Red wine vinegar, however, I could find in a gallon, but it would have discolored the pickles to an unappetizing greyish red, and just wouldn’t have had the right flavor. Cider vinegar was inexpensive, easy to find and has the ‘mother’ in it, which is that strandy thing that is suspended in the bottle. That is live yeasty stuff that makes the vinegar what it is, and what makes it more healthy. You should use vinegar that has at least 8% acidity, to keep the pickles from spoiling. Also make sure all the cucumbers are covered with brine or they’ll spoil, especially after opening the jar.

Use fresh whenever possible Pickling cucumbers make all the difference. They are smaller at maturity and don’t have as many seeds, and are more crisp. Recipes wanted the cucumbers to be pickled within 24 hours of being picked. You’d have to have twenty plants to have enough cucumbers to pickle in quantity all at once, and then you’d be pickling twice a week. I kept ours in the refrigerator until we had enough, with some loss of crispness but that couldn’t be avoided. I had planted some dill, but not enough and not early enough for the recipe. It calls for the seed head, but I used dried dill instead since mine weren’t in bloom yet. We also put a grape leaf at the bottom of each jar because the tannin is supposed to help keep the pickles crisp. Many old fashioned recipes call for the addition of alum for that purpose; aluminum has been linked to Alzheimer’s, so finding and adding alum is a personal choice. I learned that you must cut off the blossom end of the cucumber because it has enzymes that will cause the cucumber to rot. That is nature’s way of making sure the seeds are dispersed, but doesn’t help with pickling. Larger cucumbers should be cut into disks or slices and pickled. If the cucumbers are yellowish and seedy, don’t pickle them. They are too old.

Grape leaf, garlic, dill and pickling spice in sterlized, hot jars Use wide-mouth jars if you have them. I don’t, and stuffing the cucumbers into the jar would have been a lot easier if I had.

The best gadget ever for picking up hot jars No recipes tell you when you they are done. I read where a ‘freshly’ canned food was put up in the last two years. We tried ours after 5 weeks and they were very good.

Sterilize jars and lids while simmering brine The origins of this recipe is the Ortho Complete Book of Canning, but I have tweaked it. I hope you like it: many happy pickles to you.

Pour hot brine over cucumbers Fresh-Pack Dill PicklesAuthor: Diane C. KennedyRecipe type: CondimentServes: Lots!A wonderful dill pickle recipe; not too garlicky, not too sour or salty, but with excellent flavor and bite.Ingredients- 3 quarts water
- 1 quart cider vinegar
- ½ cup pickling salt
- 1 fresh grape leaf per quart (optional)
- 1 head fresh dill per quart, or ½ teaspoon dried dill weed each quart
- ½ teaspoon mixed pickling spice per quart
- 1 clove garlic, peeled and halved, per quart
- 5 pounds small pickling cucumbers less than 4 inches long, washed and blossom ends removed
- 4-7 quart wide-mouth canning jars and lids, sterilized and kept hot
Instructions- Combine water, vinegar and salt in a pot and allow to simmer
- Place grape leaves, dill, garlic and pickling spice in the bottom of each clean, hot quart jar
- Pack in cucumbers without breaking or bruising them. (It is best to do one jar at a time so that jars and contents remain hot)
- Pour simmering vinegar solution over cucumbers, leaving ½ inch headspace from top of jar; run a spatula around the inside to release air.
- Wipe mouths of jars and seal with lids.
- Process in boiling water bath with water an inch over the jars, for twenty minutes
- Cool, label and store the jars in a dark place.
- Yields about 4 quarts, although we made 7.
- Try after five weeks and store in refrigerator after opening.

Label with a date! -
Herb-Fresh Tomato Soup

Soup with a swirl This recipe I copied from a newspaper when I was a teenager, and embellished on over the years. The dollop of whipped cream on top always appealed to me. It makes a very satisfying tomato soup. It is a good way to use an abundance of tomatoes. The key to the great flavor is to use low-acid tomatoes, and fresh basil and thyme. Of course, you can substitute canned tomatoes and dried herbs as well; if you do that, you can just blend up the cooked soup at the end. I have a lot of yellow tomatoes, which are not high-acid. I had an idea of making a golden tomato soup, but the tomato paste in the recipe turned the soup red, of course. I entertained ideas about making a tomato paste from yellow tomatoes, but I’m not sure I’m that ambitious.
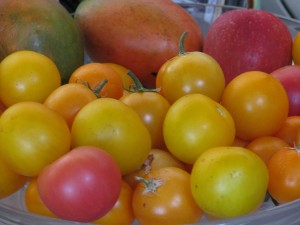
A bowl full of color (those are mangos in the back!) There are two ways of making this soup from fresh tomatoes, both of which incur a little extra effort. The first is to blanch then peel the tomatoes, and squeeze out the seeds. Then after the soup is cooked you can just puree the soup in a blender. This makes a little thicker soup. The other way is to quarter the whole tomatoes and cook, then at the end turn the soup through a food mill, and strain out the seeds. This soup is a little thinner. You don’t want to blend up the seeds and peel or the soup will be bitter. Both ways make a fresh, tasty soup that can be served hot or cold, and is great with cheesy croutons or sandwiches.
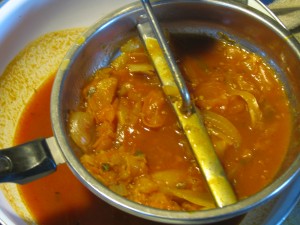
Press through a food mill The dollop of whipped cream can become a drizzle, or be eliminated. If you’d rather have a cream of tomato soup, then add more milk or cream to the soup and gently heat (but not boil) and then serve.
Below is the recipe for the food mill method.
Herb-Fresh Tomato SoupAuthor: Diane C. KennedyRecipe type: SoupPrep time:Cook time:Total time:Serves: 6A garden-fresh tomato soup that sings of summer. This soup should accompany a sandwich, salad, or be the first course of a larger dinner.Ingredients- 2 T butter
- 2 T olive oil
- 2 medium onions, thinly sliced
- 2 pounds fresh (low acid, if possible) tomatoes, quartered (about 5 cups)
- 1 6 oz can tomato paste
- 2 T snipped fresh basil (or 2 teaspoons dried crushed)
- 4 teaspoons snipped fresh thyme (or 1 teaspoon dried crushed)
- 3 cups vegetable broth
- 1 T cooking sherry, red wine or Tequila (optional)
- 1 teaspoon brown sugar (optional)
- 1 teaspoon salt
- ⅛ teaspoon pepper
- Dollop of unsweetened whipped cream (if desired)
Instructions- In a large saucepan, combine butter and oil and heat until butter melts.
- Add onion; cook until tender but not brown.
- Stir in tomatoes, paste, basil, thyme, sugar and alcohol (if using).
- Mash tomatoes slightly.
- Add vegetable broth.
- When boiling, reduce heat, cover and simmer 40 minutes.
- Press through food mill.
- Strain.
- Return mixture to saucepan.
- Stir in salt and pepper (to taste).
- Reheat and serve with a dollop or drizzle of cream and a sprinkling of herbs on top.
-
Pepinos

They look like white eggplants There is an unusual plant in my garden, one that I mistook for a white eggplant. Indeed, it is from the same Solanum family as eggplant, potatoes and tomatoes. The plant right now is small and has dark, shiny attractive leaves and flowers that remind you of eggplants. Then there are the egg-shaped and larger than egg-sized white fruit, which have purple striping. The plant arrived in my garden via Roger Boddaert, the landscape architect who has been working on my property, and there was no name on it. My daughter and I speculated on what the plant could be. A couple of years ago when we were traveling in Ecuador, we were usually served fruit with a sugar syrup for dessert. One of the fruits served was called a Tree Tomato. It was a local treat. It was one of the most god-awful things I’d ever put in my mouth. Thin, red bitter skin filled entirely with small hard seeds and sour pulp, it was everything we could do to eat enough of it to be polite. In our research for what this plant was, the Tree Tomato came into mind and we were apprehensive that we were now the owners of a white version of this disgusting fruit.
We were wonderfully incorrect! The plant in our yard is called pepino, or Solanum muricatum, or pepino melon, or sweet pepino, it is a South American shrubby plant with incredible sweet fruit. It is a relative of the Tree Tomato, and that only goes to show how different members of the same family tree can be! The fruit as it ripens doesn’t become particularly soft; in fact, when it wrinkles it is overripe. The fragrance of the uncut fruit is marvelous. When you open the fruit it has a small center of easily scooped small seeds, and flesh that isn’t too soft or too crunch and has a taste of a ripe melon with a hint of fresh cucumber.

A pleasant fruit with an exotic taste and fragrance The scent is intoxicating, and reminded one friend I showed it to of some elusive childhood fragrance. The perfume is even better than the fruit, but the fruit is wonderful cut up in a fruit salad. The bush itself is attractive, especially with the egg-like fruit dangling from it.

This small bush can grow up to seven feet tall Although pepinos are new to me (I’m always amazed at how many things I don’t know about, even with reading about five books a week and keeping my eyes and ears open in life), they’ve been in San Diego since the late 1800s, and are often grown in greenhouses. They’ve been eaten in the Andes, Ecuador, Peru and Chili from whence they came for so long as to appear in some artwork. If you have a spot in your yard for an unusual and highly satisfactory fruit, look for pepino. The fragrance of the fruit alone is worth it!
- Gardening adventures, Other Insects, Permaculture and Edible Forest Gardening Adventures, Rain Catching, Vegan, Vegetables
Beginning an Edible Forest Garden

Pumpkins by the chickens An edible forest garden is a mode of growing that mimicks the relationships between plants in a forest, while substituting food producing plants for humans. To achieve this, you have to examine what plants grow in forests near you. Here in San Diego County, we have chapparal communities, along with some pine and oak forests in the mountains. I cannot replicate a forest such as found in, say, Olympia, because we have completely different climates, soils, and plant interrelationships. Even for people who live in deserts, you can examine what once was there before the area was a desert, or what plants are in a nearby oasis if you have one. I’d substitute plants for more desirable ones, such as lemonade berry for its cousin poison oak. Plants should provide canopy, groundcover, mulch, nitrogen-fixing, and insect attracting. After these plant guilds mature they will provide fertilizer and moisture for themselves.
However, most of us are far away from this type of gardening, or just don’t want to go that far. Integrating your ornamentals with food plants, though, is not radical anymore and entirely practical. Any nook in your yard can be a place for food producing plants. Too many squash or tomatoes? Take them to a local food pantry.

Melons by a dead lime tree trellis 
A single Cinderella pumpkin vine under an apricot 
Zucchinis make lush bushes 
Watermelons suppressing weeds Tomatoes are a vining plant which will use any upright structure on which to climb.

Can you see the tomato plant? (Its up the palm trunk) Is your produce sprouting in the house? Try planting it instead of composting. Onions make particularly pretty plants with flowers that attract pollinators and hummingbirds. You may collect the seed from them as well. If the produce doesn’t survive, its okay: you’ve just buried compost.

Plant sprouting produce for ornamentals and to gather seed Sweet potatoes are perennial plants that produce swollen rhyzomes rather than swollen roots as other potatoes do. Plant them where you can dig up some of the roots but leave the main plant to thrive for years, depending on your climate. Their leaves are beautiful, and the plants are often sold as ornamentals.

Sweet potatoes have beautiful leaves Herbs in the shrubs, strawberries in the flowers, and melon and squash under the trees all make for a beautiful edible landscape that will provide food, compost, mulch and habitat while you study up for your edible forest garden.

Strawberries with yarrow 
Apple mint attracts pollinators and is good on fruit 
Passionvines are a host plant for Gulf Fritillary butterflies 
Hops are vigorous, tall vines for brewing and sleep pillows 
Grapes will hide a chain link fence - Gardening adventures, Heirloom Plants, Permaculture and Edible Forest Gardening Adventures, Vegan, Vegetables, Vegetarian
Scarlet Runner Beans, A Perennial Bean for Food and Beauty

Scarlet Runner Bean Seeds Scarlet runner beans (Phaseolus coccineus) are beautiful plants that are easy to grow, and are often grown just for their red flowers.

Use taller stakes than I did! A trellis or 8-10′ pole is necessary because the vines wind their way up high.

Eat green beans when small They produce a broad bean that can be eaten very young when green, or allowed to dry and the seeds harvested for storing and cooking later.

Shell the pods to store in a dark, cool place The seeds are a spectacular purple and black, making this whole plant ornamental. Cook the seeds before eating them.

Beautiful purple and black seeds The entire plant is also edible, including the starchy roots. The flowers and young tendrils dress up a salad. Although the vine will die down for the winter, the roots will live on in areas where they won’t receive heavy frost. They are native to many places in South America and have been harvested for hundreds of years. This is a perennial bean which will live about six years with care. It is also a nitrogen-fixer, which is excellent for your soil. How fantastic is that?
- Gardening adventures, Permaculture and Edible Forest Gardening Adventures, Recipes, Vegan, Vegetables, Vegetarian
Kale Chips
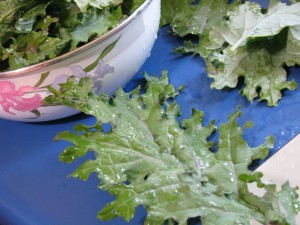
Purple kale You may have heard about these already; they seem to be a new fad food. Pieces of kale rubbed with oil and seasonings and dried until crispy. Well, we love to dry things in pans on our roof in the summer, so we thought we’d try them. Part of our mixed salad greens seed mix turned out to be this very pretty purple kale, and I figured that chips were meant to be. So we
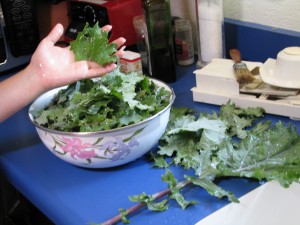
Tear into pieces and rub with oil then left them on the roof to dry. We were also playing around with zucchini chips, Swiss chard chips, and just about anything we could stick up there in the brilliant sunshine.
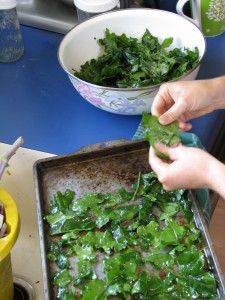
Place on drying tray The chips toasted in only about three hours. They were very crisp and dark, and had reduced in size by about a third. The first one had a wierd taste to it. The second one… and we were hooked! We crunched down several trays of them and one go. They are extremely nutritious, with calcium and folic acid among other things. We tried a more complicated recipe as well involving nutritional yeast, but it didn’t do anything special for me. The dried chard and zucchinis weren’t show-stoppers, either.
I also sauteed de-stemmed kale and it came out so creamy tasting with none of the bitterness that chard has, that it is now my favorite cooked green.
Dried kale can also be ground into a powder or flakes and used to top vegetables and grains for flavor, nutrition and color. If you use kelp flakes at all, you can substitute dried flaked kale.
Sun-Dried Kale ChipsAuthor: Diane C. KennedyRecipe type: SnackThis basic recipe is all over the Internet and produces the best resultsIngredients- At least one bunch kale
- Olive oil
- Salt (optional)
- Sunshine
Instructions- Tear kale leaves into chip-sized pieces without the midribs
- Put torn leaves into a bowl.
- Drizzle with olive oil and sprinkle with salt.
- Gently work the oil into the leaves so that each leaf is covered.
- Place on cookie tins closely but not overlapping.
- Place a piece of cheesecloth or a metal cooling rack over the kale to keep it from blowing away.
- Place cookie sheet in full sun for about three hours or longer.
- Eat!
So finally a fad that I can believe in!