-
A Painless Breakfast, and a Bombilla
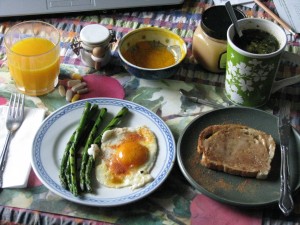
I'm all over this medicine! Food is the ultimate resource for health. As my body complains ever louder about all the years of abuse I’ve put it through, I’m turning to diet to help with the pain. Certain foods have anti-inflammatory properties, and they aren’t hard to eat at all. Cinnamon, turmeric, and ginger are high on the list. Cooked asparagus is excellent for kidneys and liver, and there is speculation that it cures serious illness as well. Whole eggs are much more healthy to eat than separating out the white and throwing away the yolk. The two parts compliment each other. As well great sources of protein, eggs are excellent for the eyes. The vitamin C found in fruit is an essential boost to your immune system, and helps other vitamins work better.
I also take some supplements. I take a multi-vitamin, a couple of natural menopausal relief pills, a vitamin C, and a couple of glucosamine/chondroitin tablets. G/C is a miracle supplement if you have arthritis. It helps keep the joints juicy.

Hot ginger tea; good for your tummy and good for your joints. So for mornings after a full day of weeding, carrying, hauling, flinging, and planting, I need everything I can get to help get my hands and back moving again. My ideal painless breakfast is: an egg from one of my hens, sprinkled with a turmeric and pepper combination (pepper is supposed to aid turmeric), some Trader Joe’s frozen grilled asparagus, heated, a piece of toast liberally sprinkled with cinnamon and coated with organic (sometimes home-harvested) honey, orange juice and a hot cup of ginger tea. I keep a small white container of cinnamon on the table, as well as a small bowl of the turmeric and pepper combination. That way I don’t forget to sprinkle it on my food. Inflammation is the source of almost all illness. If you can fight inflammation naturally, you’ll be a long way ahead health-wise. You’ll be relieved from pain that you never knew you had!

Bombilla I considered giving the bombilla its own post, but it was in the breakfast photo so I’ll talk about this wonderous gadget here. A bombilla is a metal or bamboo straw with a strainer on the end. Ingenious! Common in South America, it is commonly associated with the drinking of the new old fad tea yerba mate. However, to my delight it works perfectly with loose leaf and herbal teas! Instead of snapping and screwing and pressing tea strainers, I just put loose tea in my cup, brew it and drink it via the bombilla! So easy! Afterwards I scoop the spent tea into the compost, rinse the cup and the bombilla, and its good to go for the next batch. Loose leaf tea is such a better experience than using tea bags. With the bombilla, I now have herbal or loose leaf tea almost every time. Bombillas have transformed my drinking experience! I believe they are available at international marketplaces, but I bought mine online at Amazon.com. I bought two for me and my daughter, who took hers to college, and another as a gift for my son, and then two more as extras at home. Never can have enough bombillas! What a concept! A perfect drinking implement! My life will never be the same. Better still, I can now sip hot tea without losing my place in my book, or steaming up my glasses!
-
Passionfruit Curd
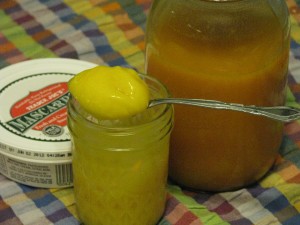
Passionfruit curd. Yum. Rather than post photos of the rabbits eating my vegetables,

or other Eastery things, I thought I’d put in a recipe that is rather exotic. If you have a passionfruit vine (the ones that produce edible fruit) you may be inundated with the fruit about now. Also the flowers were named passionflowers because of the Christian symbolism read into the shape of the flowers. I always wondered about this, but I figured that faced with ‘heathens’ who ate this aromatic, voluptuous and kind of sexy fruit, some Christian missionaries decided to put the stamp of Christianity onto the plant rather than try to ban its consumption. That’s just my theory, of course, but it makes sense. Therefore a post on passionfruit for the passion of Christ on Easter. Yep, I’m stretching it, but you’ll like the recipe.
Anyway, passionvines have abundant growth (as I mentioned in my post about building a trellis for them http://www.vegetariat.com/2012/03/questionable-carpentry/).

Gorgeous flowers. There are many colors of flowers of both the ornamental and edulis varieties. The flower has a tiny fruit all ready to go and awaiting some friendly bee to come rub herself all over the anthers and stamens (the missionaries are shuddering) and pollinate.

Looks like the fruit is wearing an Easter bonnet! Kind of. Okay, it doesn't. The fruit grows as the flower fades. There is some mother-child allusion somewhere in there but you’ll have to go there yourself.

A developing passionfruit. When the fruit is ready to fall, a good shake of the vines will make them come down. Usually they are still smooth-skinned at this point. You want to wait until the fruit starts to wrinkle before it is sweet, ripe and ready. (I’ll not touch that one at all.)

The fruit falls off still smooth... wait until it wrinkles to use Don’t eat the skin, but cut the fruit in half. Many people like to eat the seeds as well as the pulp. I’m not one of them, and neither is my daughter who very patiently sieved the insides of about 80 passionfruit to obtain the juice. I like to add the juice to tangerine juice for breakfast. We’ve also successfully made a hedonistic passionfruit ice cream that was stupendous. This time we decided to make passionfruit curd.

Wait until they're wrinkly, then scoop out the insides. I’ve posted already on how to make lemon curd (http://www.vegetariat.com/2011/03/when-life-gives-you-lemons-make-lemon-curd/). (You’re wondering, what is UP with this woman and curd, anyway?). The passionfruit curd is slightly different, but yet has that nice bite to it that doesn’t make it too sweet. I thought this curd came out tasting a little eggy, but I believe that is because we used eggs from our own spoiled hens, which have a definate healthy flavor to them. The eggs, not the hens (that we know of, nor will we find out). It was all okay, though.
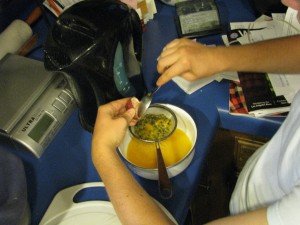
Scoop and strain. We made two half-pints, and I didn’t ‘can’ them. However you may sterilize the jars and lids, add the hot curd, and give them a 15 minute hot water bath and the curd will last for months. I still refrigerate it, just to be on the safe side.
I found the original recipe in Nigella Lawson’s How To Be A Domestic Goddess. She stirs some passionfruit seeds back into the curd, which looks nice (if you like the fish egg look to your food) and can certainly be done for all of you who enjoy the seeds. I like my curd seedless. On scones. With mascarpone cheese. Mmmm.
Happy Easter!
Passionfruit CurdAuthor: Diane C. KennedyRecipe type: SpreadPrep time:Cook time:Total time:This wonderful spread based on Nigella Lawson's recipe can be used to top baked goods, put in a pie shell, in a jelly roll cake, or used any way you would lemon curd, jam or jelly. It makes an exotic gift, too!Ingredients- 12 passionfruit
- 2 large eggs
- 2 large egg yolks
- ½ cup granulated sugar (superfine if you have it)
- 8 tablespoons unsalted (good quality) butter
- 2 sterilized ½ pint jars
Instructions- Cut the passionfruit in half and scoop out the insides into a sieve.
- With a spoon, strain the juice into a measuring cup. You should have about 10 tablespoons, or a scant ⅔ cup of juice. If you'd like seeds in the curd, reserve the pulp of the 12th one instead of straining it.
- In a bowl beat the eggs, yolks and sugar together.
- In a saucepan, melt the butter over low heat.
- Stirring continuously, add the passionfruit juice and then the sugar mixture, being careful not to cook the egg.
- Keep cooking and stirring until the mixture thickens, about five minutes. It should coat the back of the spoon.
- Take the pan off the heat. If you have reserved the pulp of that one last fruit, here is where you whisk it into the mixture.
- Pour the curd into the jars and seal.
- Store in refrigerator. Try it on scones with mascarpone cheese. Really. I mean it.
- Makes two half-pint jars full, about 1¾ cups.
-
Streusel Gingerbread Muffins

Gingerbread Streusel Muffins I love gingerbread. Take gingerbread, put some extra zing to it with freshly grated ginger, deepen the dark flavor with a tablespoon of cocoa, and sprinkle some gingery streusel on the top and wow, what a muffin!
Streusel Gingerbread MuffinsAuthor: Diane C. KennedyRecipe type: Breakfast/DessertPrep time:Cook time:Total time:Serves: 18These gingerbread muffins have an extra kick and a deeper flavor from special ingredients.Ingredients- 2 cups all-purpose flour
- 1½ teaspoons baking soda
- 1½ teaspoons ground ginger
- 1 tablespoon unsweetened baking cocoa
- 1 teaspoon salt
- 1 teaspoon cinnamon
- ⅛ teaspoon ground nutmeg
- ⅛ teaspoon ground cloves
- 1 tablespoon freshly grated ginger root
- ½ cup dark molasses
- ½ cup granulated sugar
- ½ cup vegetable oil
- ½ cup boiling water
- 2 large eggs, whisked
- Streusel topping:
- 1 cup granulated or brown sugar
- 2 tablespoons cinnamon
- ½ teaspoon ground ginger
- 2 tablespoons finely minced candied ginger
- 1 cup all-purpose flour
- ½ cup (one stick) butter, softened
- ½ cup all-purpose flour
- 4 tablespoons butter, softened
Instructions- Preheat oven to 325F.
- Line or grease 18 muffin cups.
- In a large bowl, sift together flour, baking soda, ground ginger, salt, cinnamon, nutmeg, cloves and cocoa powder.
- In a medium bowl, whisk together molasses, sugar, oil, water, eggs and grated fresh ginger.
- Add molasses mixture to flour mixture until well combined.
- Divide batter evenly among prepared muffin cups (an ice cream scoop really works!), each cup half full.
- In a medium bowl, combine the sugar, cinnamon, ground ginger and flour.
- Cut the butter into small bits and using a pastry blender, forks or your fingers, work the butter into the mixture until it is crumbly and there are no large chunks of butter.
- Stir in minced candied ginger.
- Sprinkle streusel on top of muffins, pressing lightly to firm it up.
- Bake 18 - 24 minutes, or until wooden toothpick inserted in the centers of the muffins comes out cleanly.
- Remove muffins from oven and cool.
-
Spiced Pumpkin Scones
Spiced Pumpkin SconesAuthor: Diane C. KennedyRecipe type: BreadPrep time:Cook time:Total time:Serves: 6Tender, healthy, satisfying scones for breakfast, break or dessert.Ingredients- 2 cups all-purpose flour
- ¾ cup granulated sugar
- 1 tablespoon baking powder
- ¼ teaspoon salt
- ½ teaspoon ground cinnamon
- ½ teaspoon ground nutmeg
- ½ teaspoon ground ginger
- ¼ teaspoon ground cloves
- ½ cup pureed pumpkin, canned or fresh (make sure fresh is drained)
- 3 tablespoons milk or milk substitute
- 1 large egg
- 6 tablespoons cold butter, cubed
- For Icing (optional):
- ¾ cup powdered sugar, sifted
- 1-2 tablespoons milk or milk substitute
- ¼ teaspoon ground cinnamon
- ⅛ teaspoon ground nutmeg
- pinch each of ground ginger and ground cloves
Instructions- Preheat oven to 425 degrees F.
- Grease a cookie sheet and dust with flour
- In a large bowl, whisk together the flour, sugar, baking powder, salt and spices.
- In a separate bowl, whisk together the egg, milk and pumpkin.
- Cut butter into dry ingredients using a pastry cutter, forks or your fingers, until there are no butter chunks left, and it is like fine crumbs.
- Fold the wet ingredients into the dry.
- Form dough into a ball. Dough should be sticky, but not stick to baking sheet, so add a little more flour if necessary.
- Pat dough onto prepared baking sheet into 9x3x1" rectangle.
- Using a greased knife (spray with cooking spray), cut rectangle into thirds.
- Cut each third diagonally to form a total of six rectangles. (If you want smaller ones, cut these in half to form twelve).
- Gently pull each section apart so that there is a half an inch between each scone (for even baking).
- (Alternatively, form dough into large circle 1" high, and cut crossways into wedges, and pull slightly apart).
- For six large scones, bake 14 - 16 minutes until slightly browned; for twelve smaller scones, bake 10 - 12 minutes until slightly browned.
- Remove scones to wire cooling tray set over a plate or piece of foil, and cool completely.
- Meanwhile, mix together icing ingredients until smooth, if using.
- Drizzle icing over cooled scones and serve.
- Serve plain, with marscapone cheese, cream cheese or butter.
What to do with leftover pumpkin? Here is the perfect thing, spiced pumpkin scones. Hearty without being heavy, healthy without being icky, these scones are more than just a morning treat. I used fresh pureed sugar-baby pumpkin, but canned pumpkin (unseasoned) works fine, too. The dough is a little damp, so instead of cutting the scones and removing them to a baking sheet, it is easier to form the scone dough right on a floured baking sheet and then cut them. The way I show how to do it makes large scones; you may cut them smaller and reduce the baking time. The scones are great without the icing. Eat them plain, with butter or best of all, with a smear of marscapone cheese or cream cheese. They also keep well for the next day, and freeze beautifully. Wrap them individually in foil and freeze, and when defrosted they are just as good as fresh. -
Jook
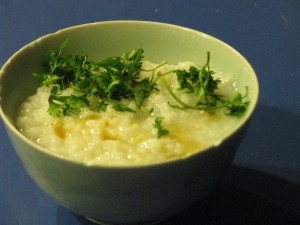
Jook with sesame oil and chopped cilantro Jook, Juk, Chinese rice soup, rice porridge, congee… these are many names for basically the same food, rice cooked with a lot of water. There are equally as many ways to fix this wonderful comfort food. Jook can be made with plain water and white or brown rice, then served with toppings such as cilantro, sesame oil, chopped peanuts, bits of cooked tofu, soy sauce, chopped hardboiled egg, preserved or cooked vegetables, chives… as little or as much as you’d like. Jook can be prepared with or without salt; I prepare mine without, then grind a little on the top when serving for that little burst of flavor. Jook can be served with cinnamon and sugar for dessert; this is especially nice for those who love rice pudding but don’t want to eat or can’t eat dairy. Commonly eaten as a savory breakfast dish, Jook is also a perfect food for when you are ill. Not only is it comforting and filling, but it is easy to eat for a sore throat, easy on a troubled stomach, nutritious, and if you are a victim of Montezuma’s Revenge (if you know what I mean), rice is very good for helping you to stop going. Ah-hem. Jook is a very good baby food for those little mouths that are just getting into semi-solids.
You can find hundreds of different versions of Jook on the Internet. Many make it with part broth, part water. Some throw in fresh ginger, some cook bones in it for added calcium. Cooking it plain allows you to top each bowl up the way you want, which is what I do. Leftover Jook can be mixed with water to loosen it up, or eaten in its more solid form. You can’t get a much easier comfort food to make that is so versatile. It is particularly good for celiacs (those who cannot eat gluten). With cooler weather upon us, make one dinner a Jook day!
JookAuthor: Diane C. KennedyRecipe type: MainPrep time:Cook time:Total time:Serves: 6-8Jook, rice porridge, rice soup or congee, is a wonderful versitile comfort food.Ingredients- 1 cup washed white rice (short or long grained depending on your taste)
- 8 cups water (if you like it thick)
- or
- 10 cups water (if you like it medium)
- or
- 12 cups water (if you like it very thin and soupy)
- optional: 1-2 tsp. salt)
- optional: substitute broth for equal parts of the water)
- optional: add a thumb-sized knob of fresh ginger)
- Topping suggestions:
- sesame oil, peanuts, fresh cilantro, chopped hardboiled egg, cooked tofu, seaweed, soy sauce, freshly ground salt and pepper, butter, cooked vegetables, pickled vegetables... leftovers. Also make it sweet with sugar, honey, cinnamon, nutmeg, dried fruit, chocolate chips!
Instructions- Put washed rice and the desired amount of water in a dutch oven
- Heat until boiling
- Turn down heat to a simmer and cook uncovered 2½ - 3 hours, depending on how thick or thin you want it.
- Serve hot in small soup bowls with choices of toppings.
-
Oatey Scones

Oatey Scones I’ve made traditional scones for years as a breakfast treat. They are quick, easy to make from scratch, and oh! so good. However, when I found this recipe for oatmeal scones in Cook’s Illustrated (September and October 2003), it was my lucky day. I really love these tasty devils. The trick is to toast the oatmeal before incorporating it into the batter.
Oatey SconesAuthor: Cook's IllustratedRecipe type: BreakfastPrep time:Cook time:Total time:Serves: 8These toasted oat scones are heavenly, especially with mascarpone cheese, fresh fruit or lemon curd.Ingredients- 1½ cups old-fashioned rolled oats or quick oats
- ¼ cup whole milk (I've used 2% milk just fine)
- ¼ cup heavy cream
- 1 large egg
- 1½ cups unbleached all-purpose flour
- ⅓ cup sugar
- 2 teaspoons baking powder
- ½ teaspoon salt
- 10 tablespoons cold unsalted butter, cut into small cubes
- Coarse sugar for topping.
Instructions- Heat oven to 375 degrees F.
- Spread oats evenly on a baking sheet and toast in oven until fragrant and lightly browned, about 7-10 minutes, stirring twice; cool.
- Increase oven temperature to 450 degrees F.
- Line a baking sheet with parchment paper.
- When oats are cooled, measure out two tablespoons and set aside.
- Whisk milk, cream and egg in a large measuring cup.
- Stir together flour, sugar, baking powder and salt until combined.
- Scatter cubed butter over the top of the dry ingredients and with your fingers, a fork or a wire pastry blender incorporate until mixture resembles coarse cornmeal.
- Stir in cooled oats.
- Using a rubber spatula, fold in all but a tablespoon of the liquid ingredients until large clumps form; continue gently folding until dough forms cohesive mass.
- Dust work surface with reserved oats and a little flour.
- Turn wet dough (it will be damper than you'd expect!) onto surface and gently pat into a 7-inch circle about 1 inch thick.
- Using a bench scraper or chef's knife, cut dough into 8 wedges and set about 2 inches apart on parchment-lined baking sheet, reshaping as needed.
- Brush tops of scones with reserved liquid and sprinkle with coarse sugar.
- Bake until golden brown, 12 -14 minutes.
- Cool scones on baking sheet on wire rack for 5 minutes, then remove scones to cooling rack and cool to room temperature (so they won't fall apart), about 20 minutes.
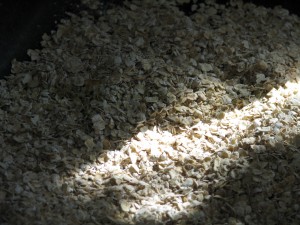
Toasting the oatmeal makes all the difference Watch the oats carefully so that they don’t burn, and give them a stir now and then. While they are achieving all that wonderful toastiness, combine the cold butter and the dry ingredients until it looks like coarse cornmeal.
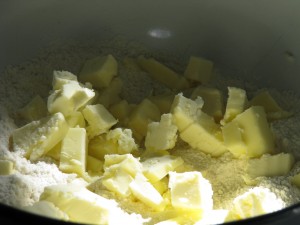
Incorporate butter into flour The batter will be suspiciously wet; don’t be alarmed. The dry oatmeal will soak it all up as the scones bake, and it all works out happily in the end. However it will be a little difficult to cut the scones and transfer them to the baking sheet; a little reforming might need to take place, but that’s okay. Bake until golden brown.

Bake until toasty brown The scones will be brittle until they cool, so let them sit for about twenty minutes or so (if you can!) before serving. If you are serving these to guests or as part of a larger breakfast, this waiting time can be a good thing… most other scones want to be served hot from the oven and leave you no time to do extras.

Serve cooled, so they won't fall apart Oatey scones are wonderful plain, with sweet butter, or (my absolute favorite) with mascarpone cheese and fresh fruit. The wholesome toasted grain flavor of the scones make a fabulous backdrop to the fresh plain flavor of the cheese and the sweet/tart flavor of fresh strawberries, peaches, plums, or whatever you have.

Serve with mascarpone cheese and fresh fruit -
Popovers (and a Pumpkin Turkey Cake Story)
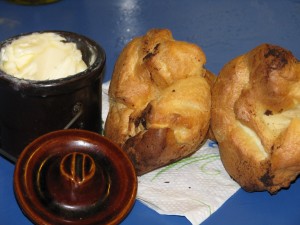
Serve Popovers Hot Popovers are usually thought of as a type of roll to make with roast beef, using the suet as the shortening and using the popovers to sop up the beef ‘juices’. In the immortal words of Penfold of the Danger Mouse cartoons, “Oh, ick!” I’ve made vegetarian popovers for many years and they are not only extremely easy to make, but fun to eat. My recipe contains dairy products, but any vegan cook could whip some up with rice or soy milk.
Popovers are made from a simple batter which relies on very high heat and steam to make them puff. There are two baking temperatures, the first is high to create steam for the lift-off, so to speak, and the second is moderate for the cooking through to the tender insides. For the last few minutes of baking you should stick each popover with a fork to release the steam, otherwise they’ll end up soggy.
You have to eat popovers right away, with as much butter as your conscience will allow. Or use them to sop up vegetarian gravy. You can also add cinnamon or nutmeg into the batter and serve them for breakfast.
For years I made popovers in oven-proof custard dishes. They didn’t rise as high and were wider than normal, but me and my children managed to choke them down pretty well.

Oven-proof custard cup Then I bought myself a real popover pan. I’m a real sucker for shaped baking pans. I think I could keep Nordicware in business if I didn’t control myself.

Popover Pan I don’t even bake very much anymore, but I do love my castle bundt pan, or turkey cake pan that my daughter bought me (there is a story there. I’ll tell it later*.) There are worse vices. I think. The popovers in the popover pan look terrific and are very impressive, but they eat just the same way that the custard cup ones did. So, go make some popovers! What are you waiting for?
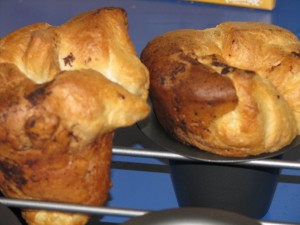
All popped and waiting for butter! PopoversAuthor: Diane KennedyRecipe type: BreadPrep time:Cook time:Total time:Serves: 6Popovers without the suet, for lacto-ovo vegetarians and the world!Ingredients- 1 tablespoon butter or vegetable oil
- 2 eggs
- 1 cup milk
- 1 tablespoon vegetable oil
- 1 cup all-purpose flour
- ¼ teaspoon freshly ground pepper (opt.)
- ½ teaspoon ground cinnamon or nutmeg if you are making breakfast popovers)
Instructions- Heat oven to 400 degrees F.
- Put ½ teaspoon of butter or oil in each of six 6-ounce oven-proof custard cups or in each cup of a popover pan. Coat the bottom and sides.
- Place custard cups on a cookie sheet, if using.
- In a blender, mixer, or in a bowl with a wire whisk, beat eggs, milk and oil until combined. Beat to blend; don't incorporate too much air into the batter.
- Add flour (and spice if using) and combine until smooth.
- Divide batter between prepared cups; each should be half full.
- Bake for twenty minutes in 400 degree oven, then reduce the heat to 350 and bake fifteen minutes more.
- Turn oven off.
- With the tip of a knife or a fork, prick the tops of the popovers and allow them to stay in the oven for about five minutes more. Popovers should be firm and crisp on the outside, and tender on the inside.
- Remove popovers from oven; turn out of pan or cups and serve immediately.
- Makes six.
* Okay, so here’s the turkey cake story. My daughter gave me this fabulous turkey cake mold last year. I decided to have Thanksgiving early with my son, then fly to her university to have Thanksgiving with her. I made most of the meal and packed it up in my carry-on (no liquids!). After some debate with myself, I caved in to my sillier side and baked a pumpkin cake in the turkey pan and sandwiched the sides together with buttercream frosting. It looked perfect! I wrapped that sucker up in lots of plastic wrap, stuck in on top in my carry-on, and headed for Carlsbad airport.Flying out of a small airport is the only way to go. Small lines, easy parking, and a not-so-hostile security. When my carry-on went through the X-ray machine, I wasn’t surprised when they pulled it off and called me over. I explained to the very nice female officer that the dark blob in my bag was a pumpkin cake shaped like a turkey. She said that they’d have to check it again, which they did. She and another security officer had a good laugh at the image and when she brought it back to me she said that in profile it looked exactly like a small real turkey on the screen. Then much more seriously she asked if I was going to change planes on my trip. When I told her that I was, in Los Angeles, she quickly advised, “Don’t go out of the security area there!” I don’t think the Los Angeles airport security force, on a high-risk day-before Thanksgiving holiday, would feel so friendly towards my turkey cake.
-
Apfelpfannkuchen, or Dutch Baby Pancakes with Apples
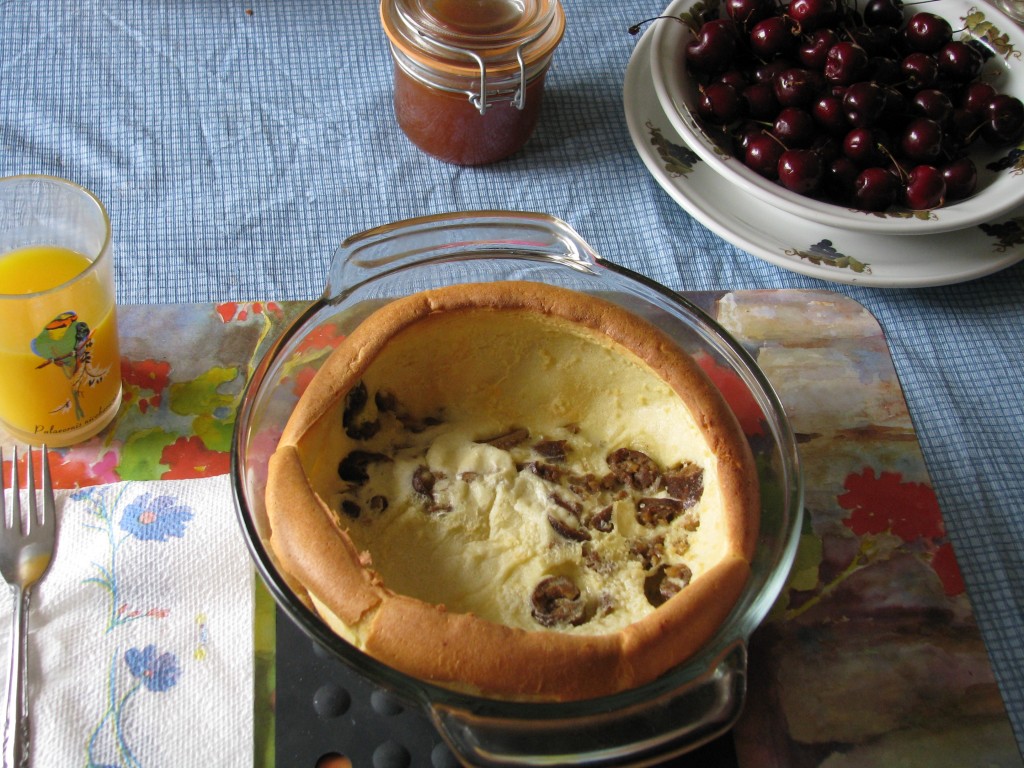
Apfelfannkuchen Breakfast. Sigh. My favorite meal. Too often it consists of a bowl of healthy cereal, orange juice and my fistfull of vitamins and supplements. Once in awhile when I have a child or two at home I’ll make these very easy, extremely impressive and delicious pancakes. One pancake per person. Just with some egg, milk and flour in a buttered dish you make this glorious puffed pancake that is a delight to eat. I copied this recipe from my mother’s recipe files back in 1977, my second year of high school. Where she copied it from I don’t know, but I do know that puffed pancakes have been a restaurant sensation on and off for decades. They can also be made plain for dessert and served with fresh fruit or even ice cream and chocolate sauce. Instead of apples make them savory with the addition of mild vegetarian sausage (you don’t want strong flavors to overbalance the delicate pancake) or cooked mushrooms.
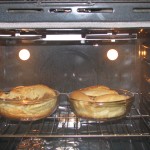
Two kinds of pancake You can dress them up with powdered sugar at the last moment, or serve with syrup. It is important that you serve them right out of the oven so that your guests see them in all their risen glory, because the pancakes will deflate to some extent but still be gorgeous. If you pour a little syrup between the pancake and the hot dish it will sizzle and bubble very dramatically. Because the pancakes are served so hot, they take a little while to eat, which makes breakfast more of the leisurely time of enjoyment it should be. Make certain your guests know how hot the dishes are, and protect the place settings with potholders.
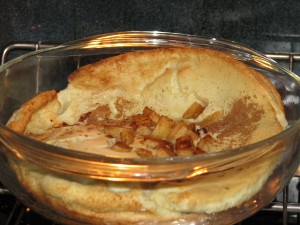
Apple filling Apfelpfannkuchen, or Dutch Baby Pancakes with ApplesAuthor: Diane C. KennedyRecipe type: BreakfastPrep time:Cook time:Total time:Serves: 1-6Ingredients- 1-2 apples, peeled and diced (or 1 vegetarian sausage link per person such as Morningstar Farms, cooked and chopped)
- Use the following chart (going across) to measure ingredients:
- Pan Size Butter Eggs Milk Flour
- 2-3 quarts ¼ cup 3 ¾ cup ¾ cup
- 3-4 quarts ⅓ cup 4 1 cup 1 cup
- 4-4½ quarts ½ cup 5 1¼ cup 1¼ cup
- 4½ - 5 quarts ½ cup 6 1½ cup 1½ cup
Instructions- Choose oven-proof bowls, preferably clear glass (for effect). I use one quart Pyrex bowls.
- Divide butter between bowls and set bowls in cold oven.
- Heat oven to 425 degrees F.
- Meanwhile, cook apples in a little butter or juice in a frying pan for a few minutes to soften.
- In a blender or with a hand mixer, whirl eggs at high speed for one minute. Gradually pour in milk, then slowly add flour. Whirl for 30 seconds. You don't want to overmix because you don't want air in the batter.
- With oven mits, remove hot dishes from oven; butter should be melted.
- Pour batter carefully into melted butter in dishes, dividing the batter equally.
- Divide apples (or veg sausage) evenly between bowls, if using. Dust with cinnamon, if desired.
- Return to oven and bake until puffy and browned, 20-25 minutes.
- Pancakes will be like a firm bread pudding at the bottom.
- Serve immediately. (Pour syrup around the inside edge and listen to it sizzle! It impresses children and easily impressed minds like mine!) Nom!

Vegetarian Sausage Filling