Rain Catching
- Animals, Bees, Compost, Gardening adventures, Irrigation and Watering, Microbes and Fungi, Natives, Other Insects, Permaculture and Edible Forest Gardening Adventures, Rain Catching, Reptiles and Amphibians, Soil, Water, Water Saving, Worms
Creating Rain with Canopy
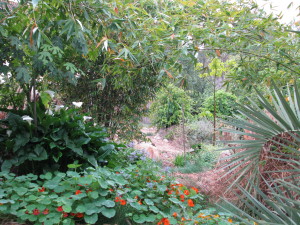
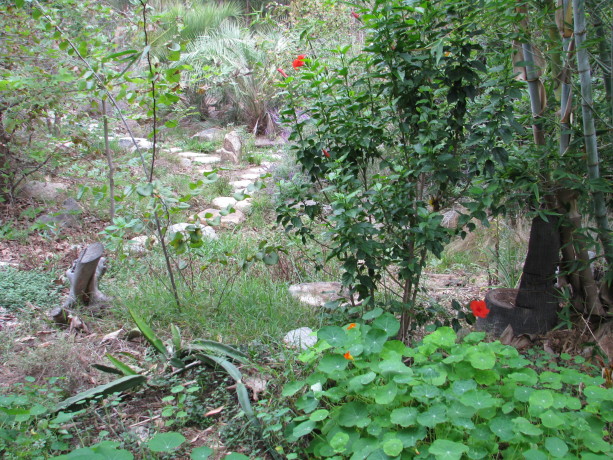
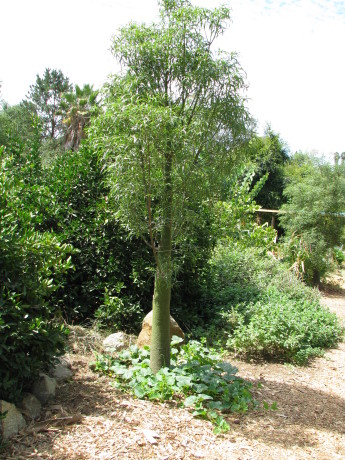
Even if we don’t receive a lot of rain in drylands, we might have fog, sprinkles and other degrees of ambient moisture. This moisture can burn off with reflected heat from hard-packed earth, from gravel and hardscape, and from buildings. It is too irregular and thin to make the use of mist nets feasible. However, a much better way to collect that moisture and turn it into rain is the method nature uses: trees. The layers of a plant guild are designed to capture, soften and sink rainwater, so why not just let them do it? Many trees are dying due to heat, low water table, lack of rainfall and dry air. Replacing them with native and drought-tolerant trees is essential to help put the brakes on desertification.
Please take five minutes, follow this link and listen and have a walk with me into Finch Frolic Garden as this 5-year-old canopy collects moisture and turns it into rain:
Plant a tree!
You May Also Like

Native Insects and IPM
- Building and Landscaping, Gardening adventures, Heirloom Plants, Natives, Perennial vegetables, Permaculture and Edible Forest Gardening Adventures, Rain Catching, Soil, Water
Irrigation for Drylands, Part 2: Evaluating your System
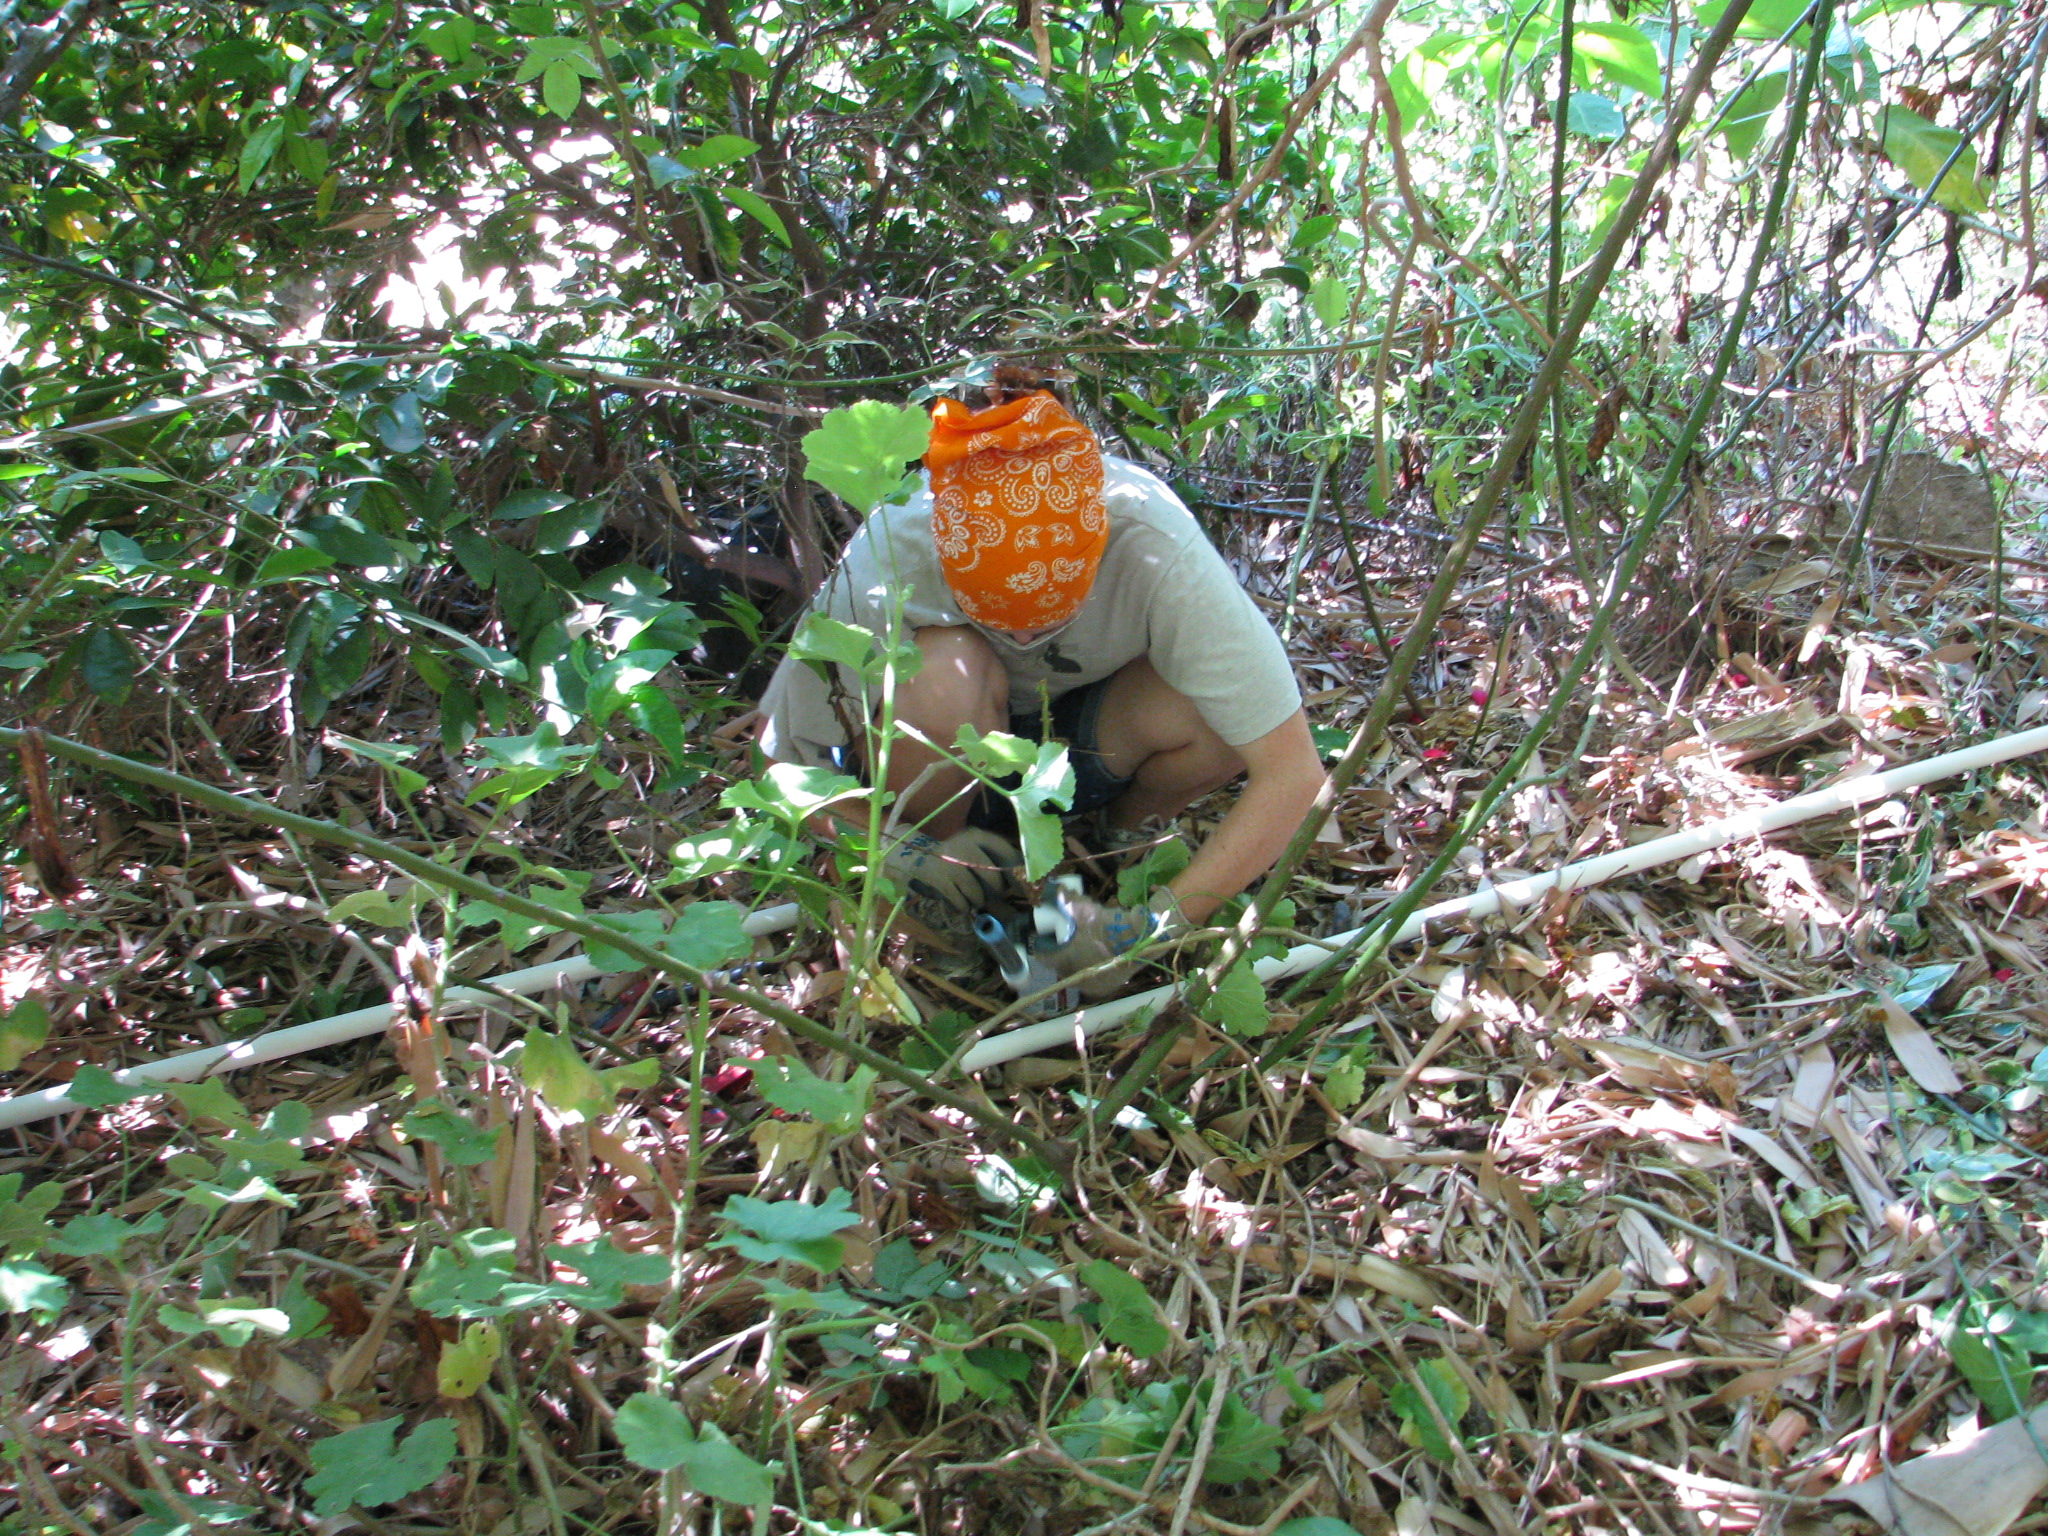
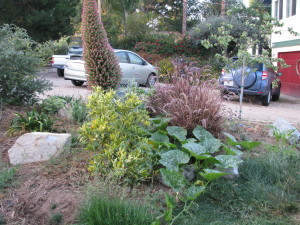
Miranda in the roses gluing pipe. If you have an existing irrigation system that works, you may easily convert it by adapting the heads for whatever you want to plant. Many lawn conversions I’ve designed utilize the existing spray system, particularly for natives, but with a different watering schedule. Don’t spend money when you don’t have to.
If you have an old grove that is to be converted and downsized, you’ll usually have far more pressure in your system than you need for smaller heads which may cause them to blow. Working with an irrigation specialist for the valves and pressure is advisable. For this re-irrigation project of Finch Frolic Garden, I found Vista-based John Taylor of Taylor-Made Irrigation and Landscape, 760-945-0118. He’s the first person to listen to and consider what I have to say, based on my experience with the old system, and he adapts to different situations. I’ve learned some cool new things that I will pass on to you, and he’s enjoying learning permaculture techniques, which will help both him and his landscape clients.
Here’s a little world-weary advice from someone who trusts too easily: Many professionals no matter what their field have one set way of doing things that they apply to every situation, be it irrigation, plant selection, tree trimming, construction, etc. (My neighbor has his poor coral tree topped every year. Topping trees is a bad practice. When I asked him about it, he said that his tree trimmer has been topping trees for years and recommends it, so he’s talking his expert advice! Do you see the problem here?) You, I’m sure, have dealt with these people too. Every situation needs a different solution, so look for someone who is flexible, listens to you, can offer several solutions with various price ranges, and who will give you a detailed estimate up front. Jobs will always run over, but they shouldn’t run too much over and the professional should be determined to keep on budget, and honest with you when there is an overrun. If you ask a professional to do extra things, the new tasks will need to be added on to the original contract because it will take up part of the time allocated towards the original project, so the project completion date will be moved ahead, and will add on to the total cost. On the other side, if your professional adds on projects that he thinks you’ll like, and you give him the verbal okay, realize that he’ll be working on those projects in addition to the original tasks, so it will take longer and cost more than the original contract. Look for people who don’t consider telling you their life story part of the time for which you are paying. If you tell them your life story, remember that they are on the clock and you are paying for that time. (I’d rather deal with a quiet, focused professional than a chatterbox who will talk more than work. If he’s not talking to you, he’s probably on his phone a lot while on the job.) Look for neat vehicles with organization, letterhead for estimates and invoices, someone who shows up on time when they say they will, and stays until they are done. They should schedule in their lunch; if they work through it they are not going to work well for you later in the day, and its unprofessional. Its okay for professionals to handle several clients at one time, but only if they are well organized and are eager to finish your project on your timeline. Contractors are infamous for tearing something apart the first day, then disappearing for days or longer holding you hostage while they work on other projects. Its okay to ask about all of this, and really important to read reviews. Don’t always rely on people your friends have recommended; I’ve had both really bad and really good referrals, so make up your own mind.

Extreme mineral buildup in a PVC pipe. Photo from http://www.marinechandlery.com/. Back to irrigation. Most irrigation is PVC, the white plastic pipe. If you have old buried metal pipes they should be examined for leaks. Mostly they will fail to function due to mineral buildup due to our hard water. The inner diameter of the pipe closes; if you’ve ever cleaned your shower head or seen house drains with the thick white inner coating, that’s what I’m talking about. It will slowly dissolve in vinegar, but the vinegar must remain in the pipe to soak it for awhile, then blown out an open riser to get rid of the chunks. All sprinkler heads must be decalcified as well. Often the buildup is so old that the pipes are deteriorating and just need to be replaced, usually with PVC. The galvanized pipe can either be left in the soil to gradually rot, which is fine, or else be dug up and sold for scrap. The labor cost involved with digging it up will probably be more than what you’ll get for scrap.
Here’s some understanding of water. The reason why domestic (potable) water is chlorinated is not to purify the water. That has already been done before it gets into the delivery pipes. It is to keep biomass from forming inside the water pipes. Biomass is any type of growth that forms, usually in wet conditions. Think of algae inside a fish tank or on the inside of a pool. Biomass is nature’s way of filtering and softening hard surfaces, and in nature is essential. In man-made pipes, the biomass can not only harbor things that can make humans sick, but also slows the flow of water. Garden hoses have some biomass inside of them, and any rough part will slow the water pressure. Lengths of any kind of pipe are the same. The longer the pipe, the slightly less pressure you’ll have. Pressure is important because you want your sprinkler heads to spray, not just dribble (unless you set them for dribbling). Pressure regulators are set in sprinkler heads, Netafim, and valves to keep lines from blowing out under normal pressure. If you don’t have an irrigation system set up for a large grove or large grasslands for animals, which require enough pressure to shoot water great distances, then you shouldn’t worry about the lines blowing out. But understanding about pressure and the effects of biomass and distance will determine what size pipe you lay.
Most people use domestic water for irrigation. Some rural areas have agricultural water available for commercial growers. Some people have well water, which is what I have. Well water has not been treated, so whatever has leached into that water is what you are delivering to the topsoil. Have your well water tested for contaminants and salts. You should have a filter after the pump on your well. However, our heavy-mineralized water will form a oozy barrier around the diaphragms in valves. If debris or too much of this slick mineral buildup accumulates, the valve won’t ‘seat’, or seal, and will allow some water to seep through the pipes even when the valve is off. This has been a huge problem here at FFG, and one which several irrigation ‘specialists’ have completely denied. They deal with treated water rather than well water, and just don’t understand. Some valves have diaphragms that can be very carefully cleaned and replaced, but not frequently before they are damaged. If you have a well, check with an irrigation specialist who has real-time experience with well water and valves to recommend the appropriate valves and filter system for you. I’ll talk more about the ones John recommended for FFG in a later post.
Large-diameter pipes will carry lots more water more slowly. Small-diameter pipes carry less water more quickly. If you lay out large diameter pipes from your valves, let’s say 1″ pipe like we’re using at FFG, then you can reduce the size of your pipe gradually to your sprinkler heads and that will be the best of both worlds. You will have volume of water and increased pressure. So John has recommended that we use 1″ PVC from our valves, which are connected to the well with 1″ PVC already.
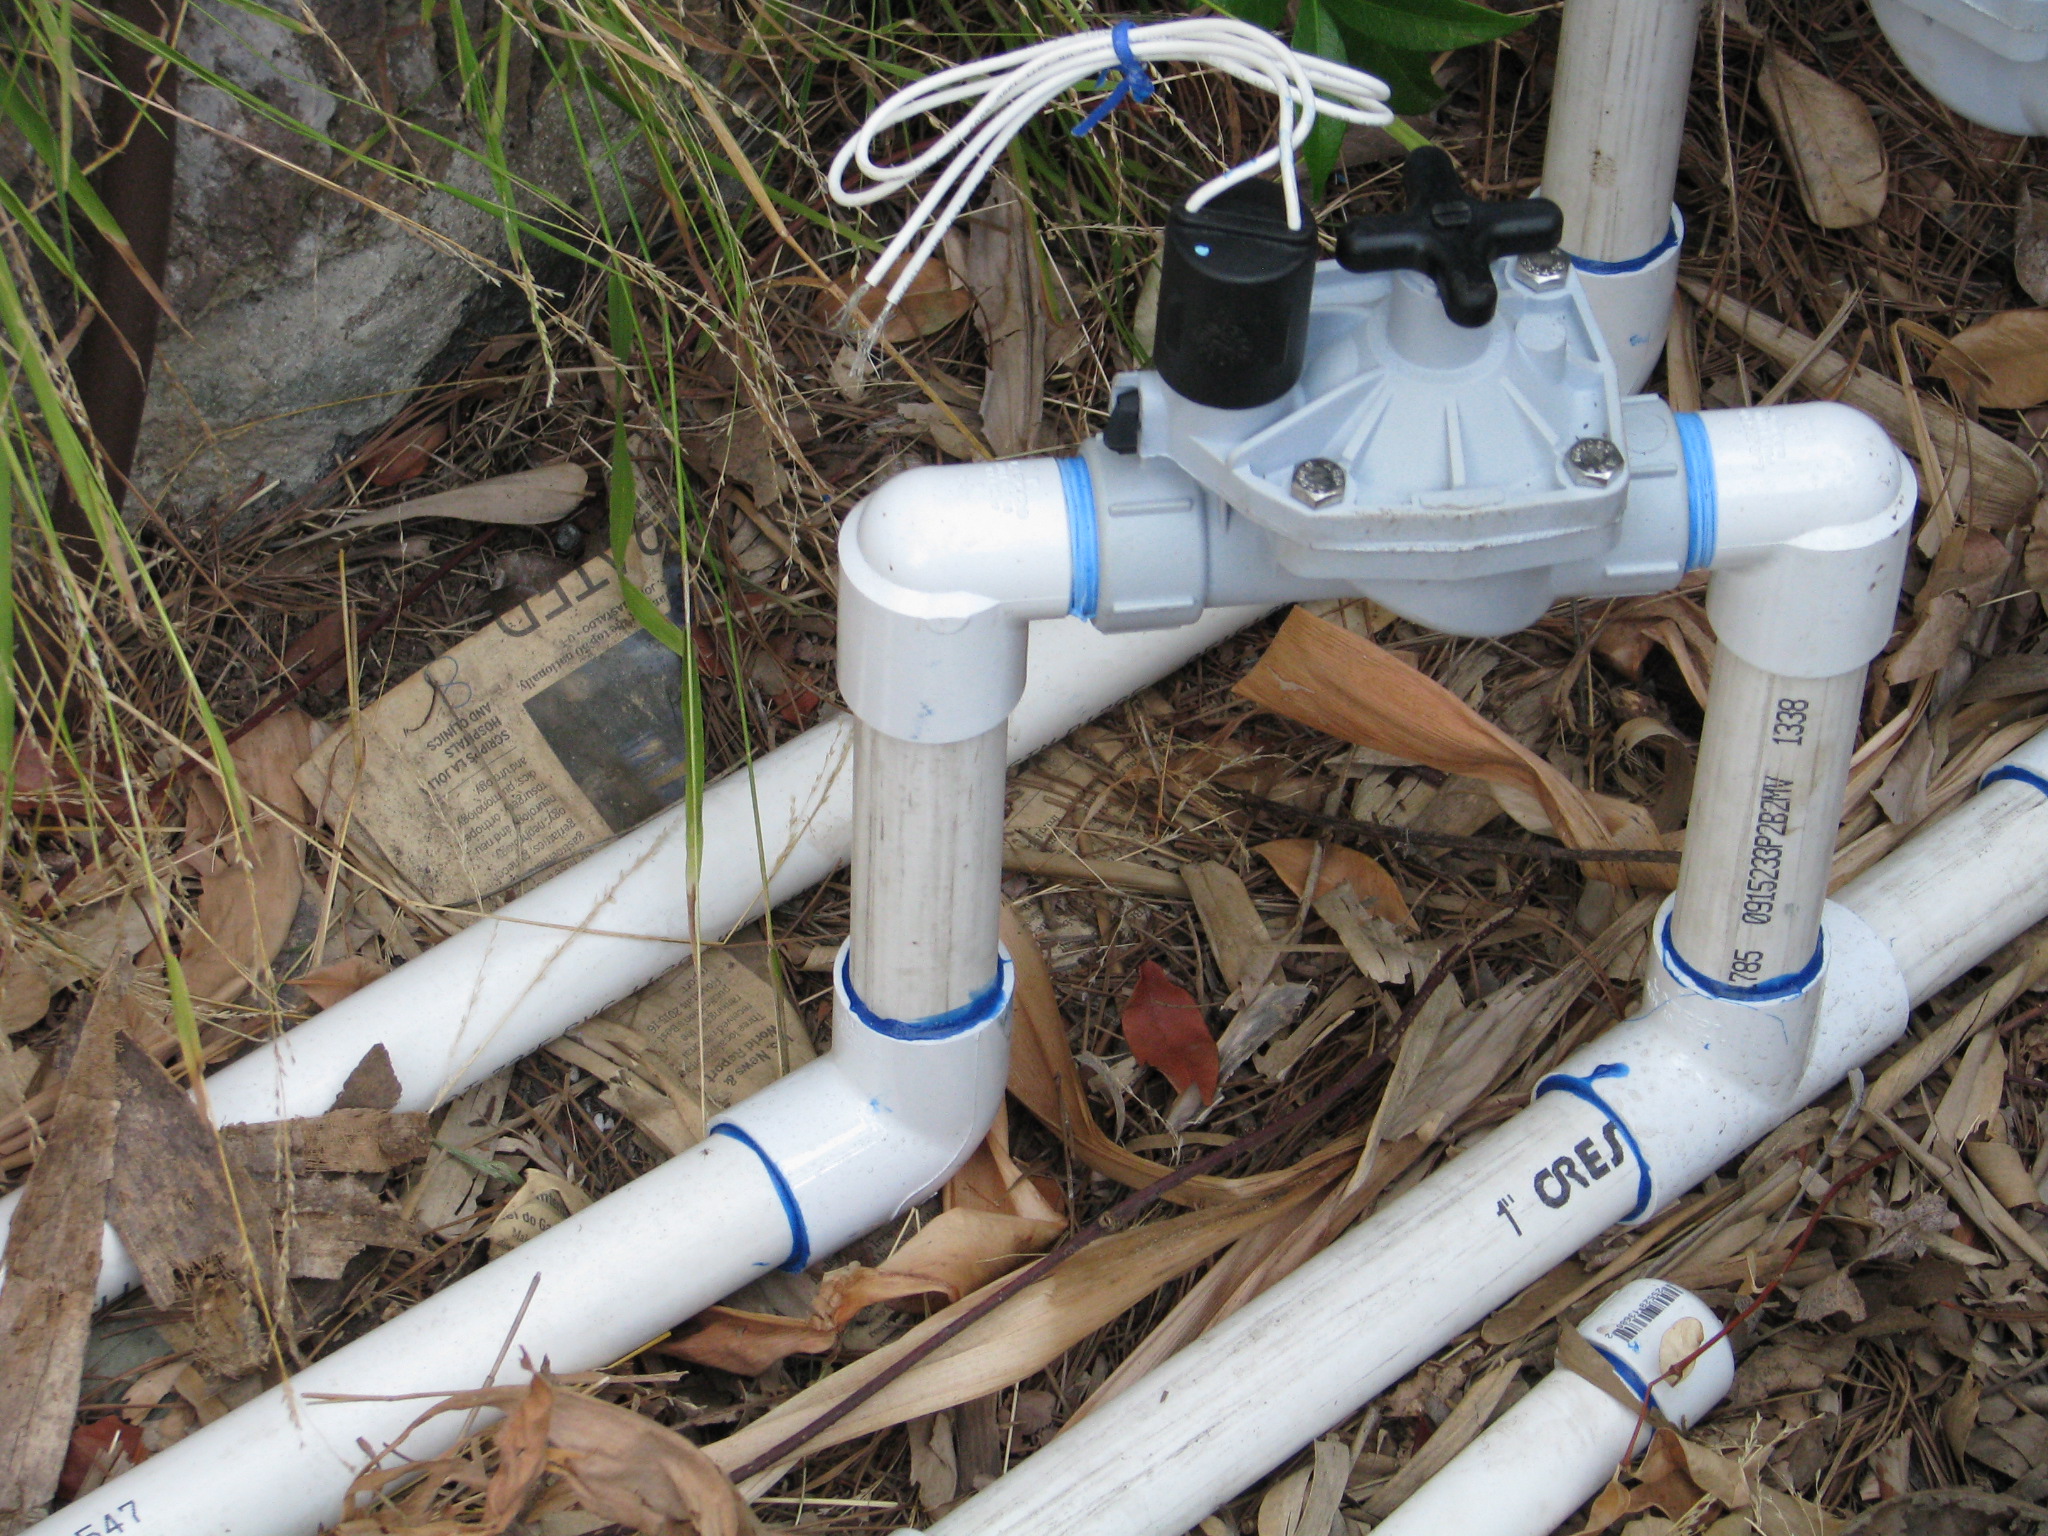
One-inch PVC runs from the valve. Then we reduce the pipe to 3/4″ at the nearest T, or closest to the first sprinkler head.
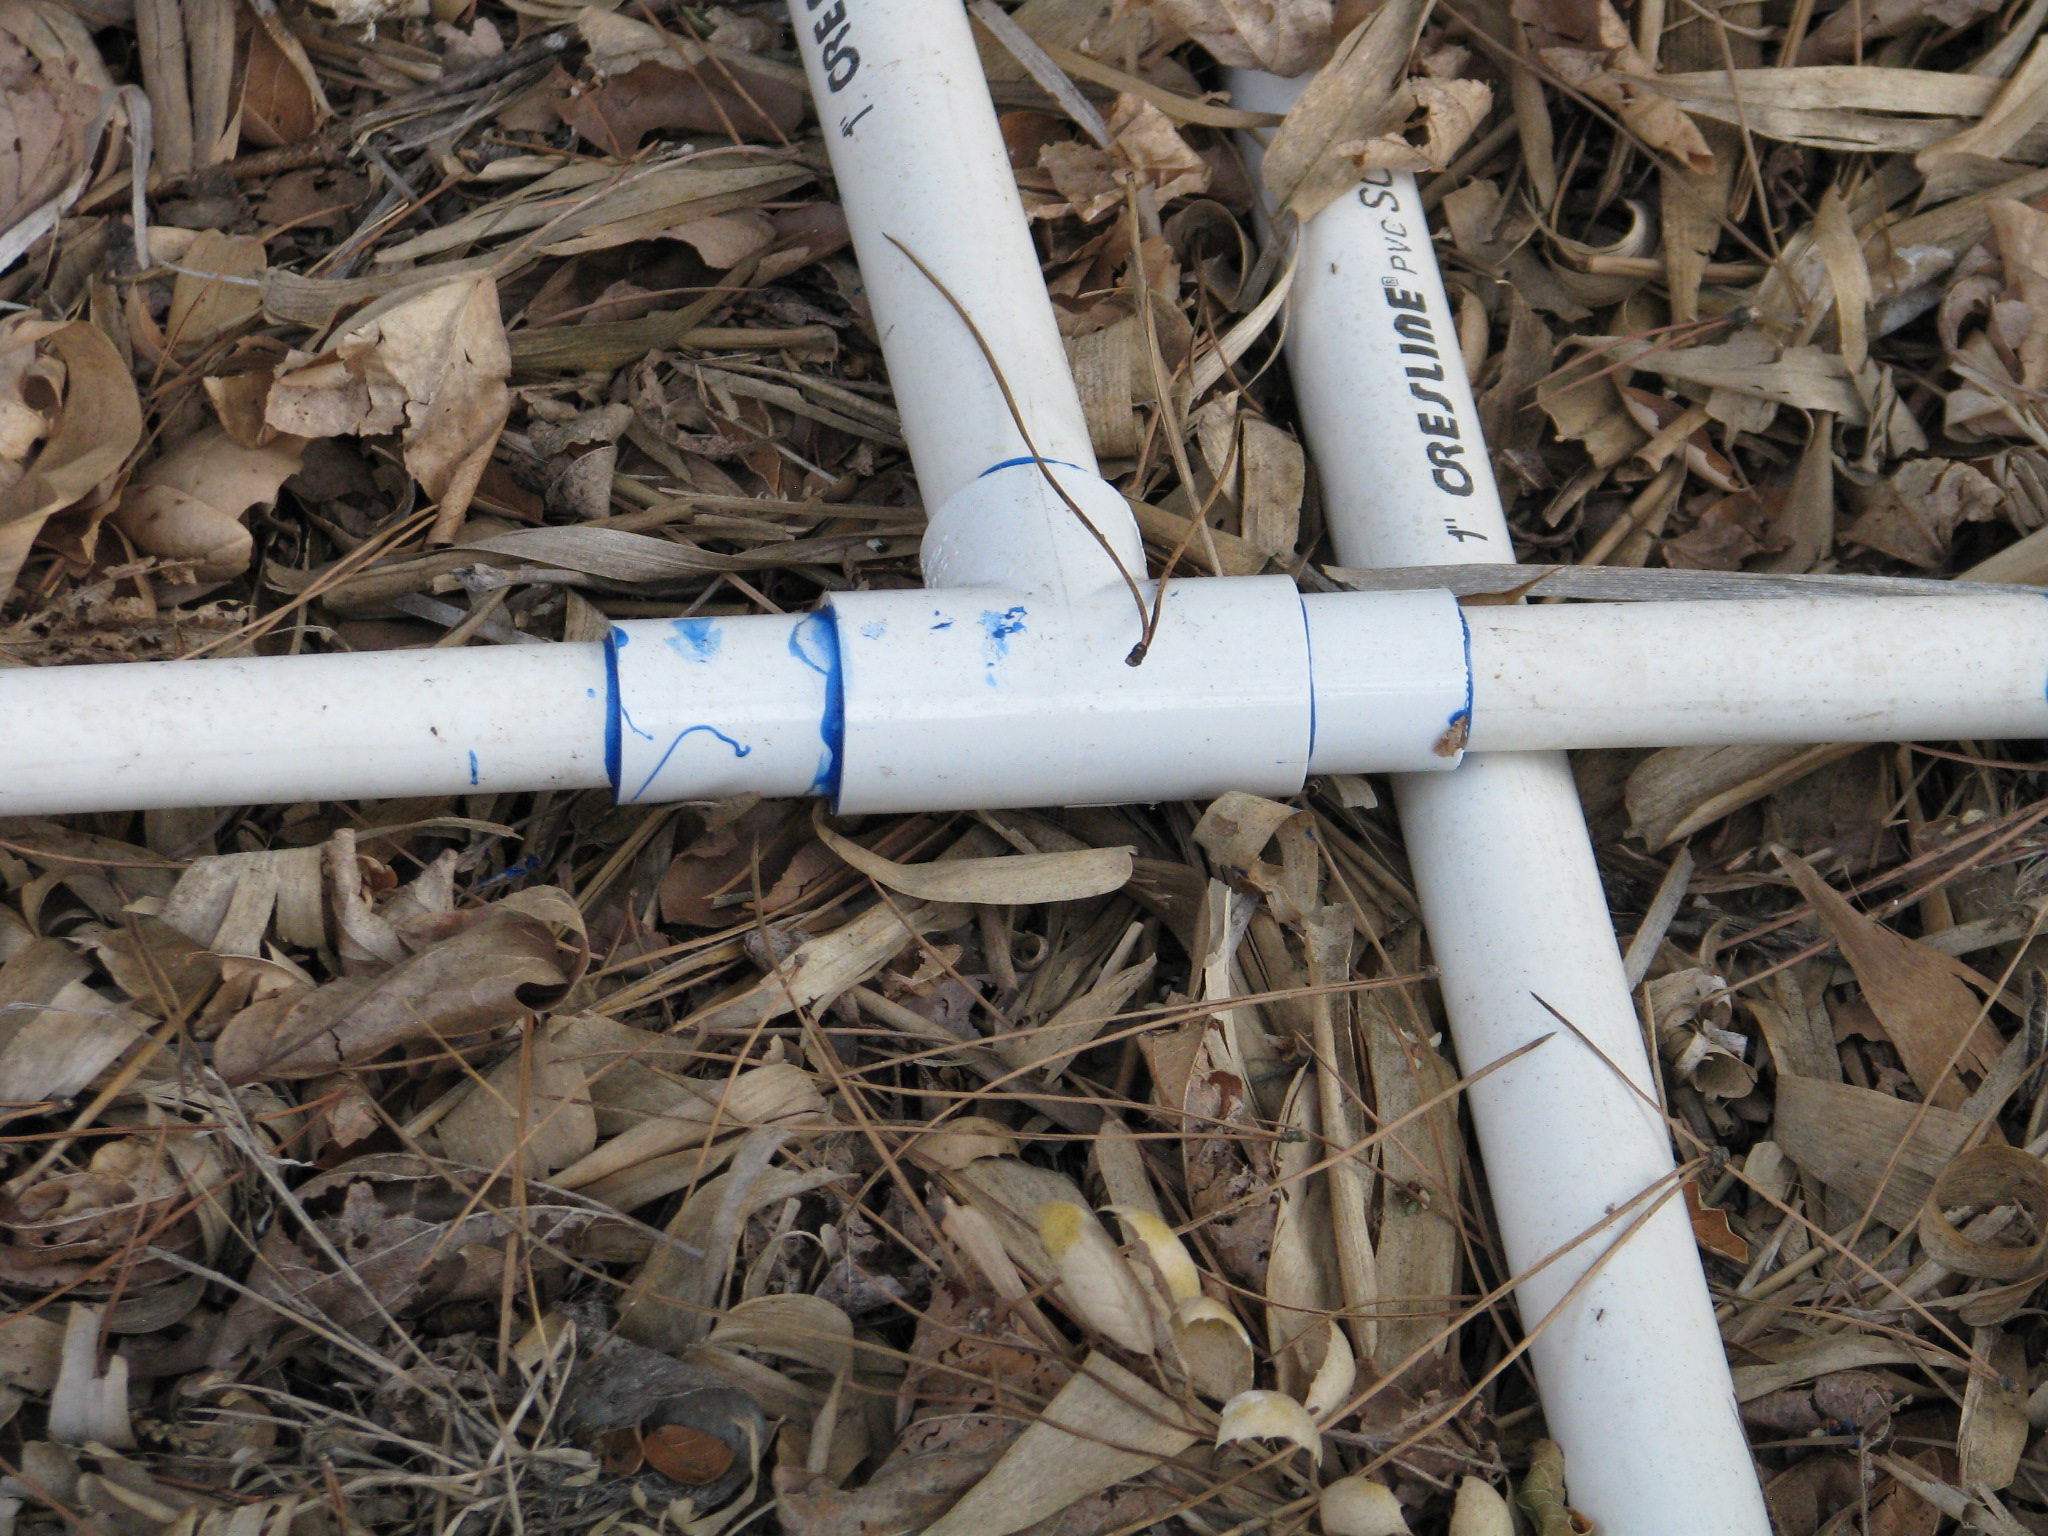
The one-inch pipe is then reduced to 3/4″ pipe at the first T, close to the first sprayer. Then the sprinklers are reduced down to 1/2″. Since our well is at the bottom of our slope and water needs to be pumped back to the top, this design really helps keep the topmost systems pressurized.
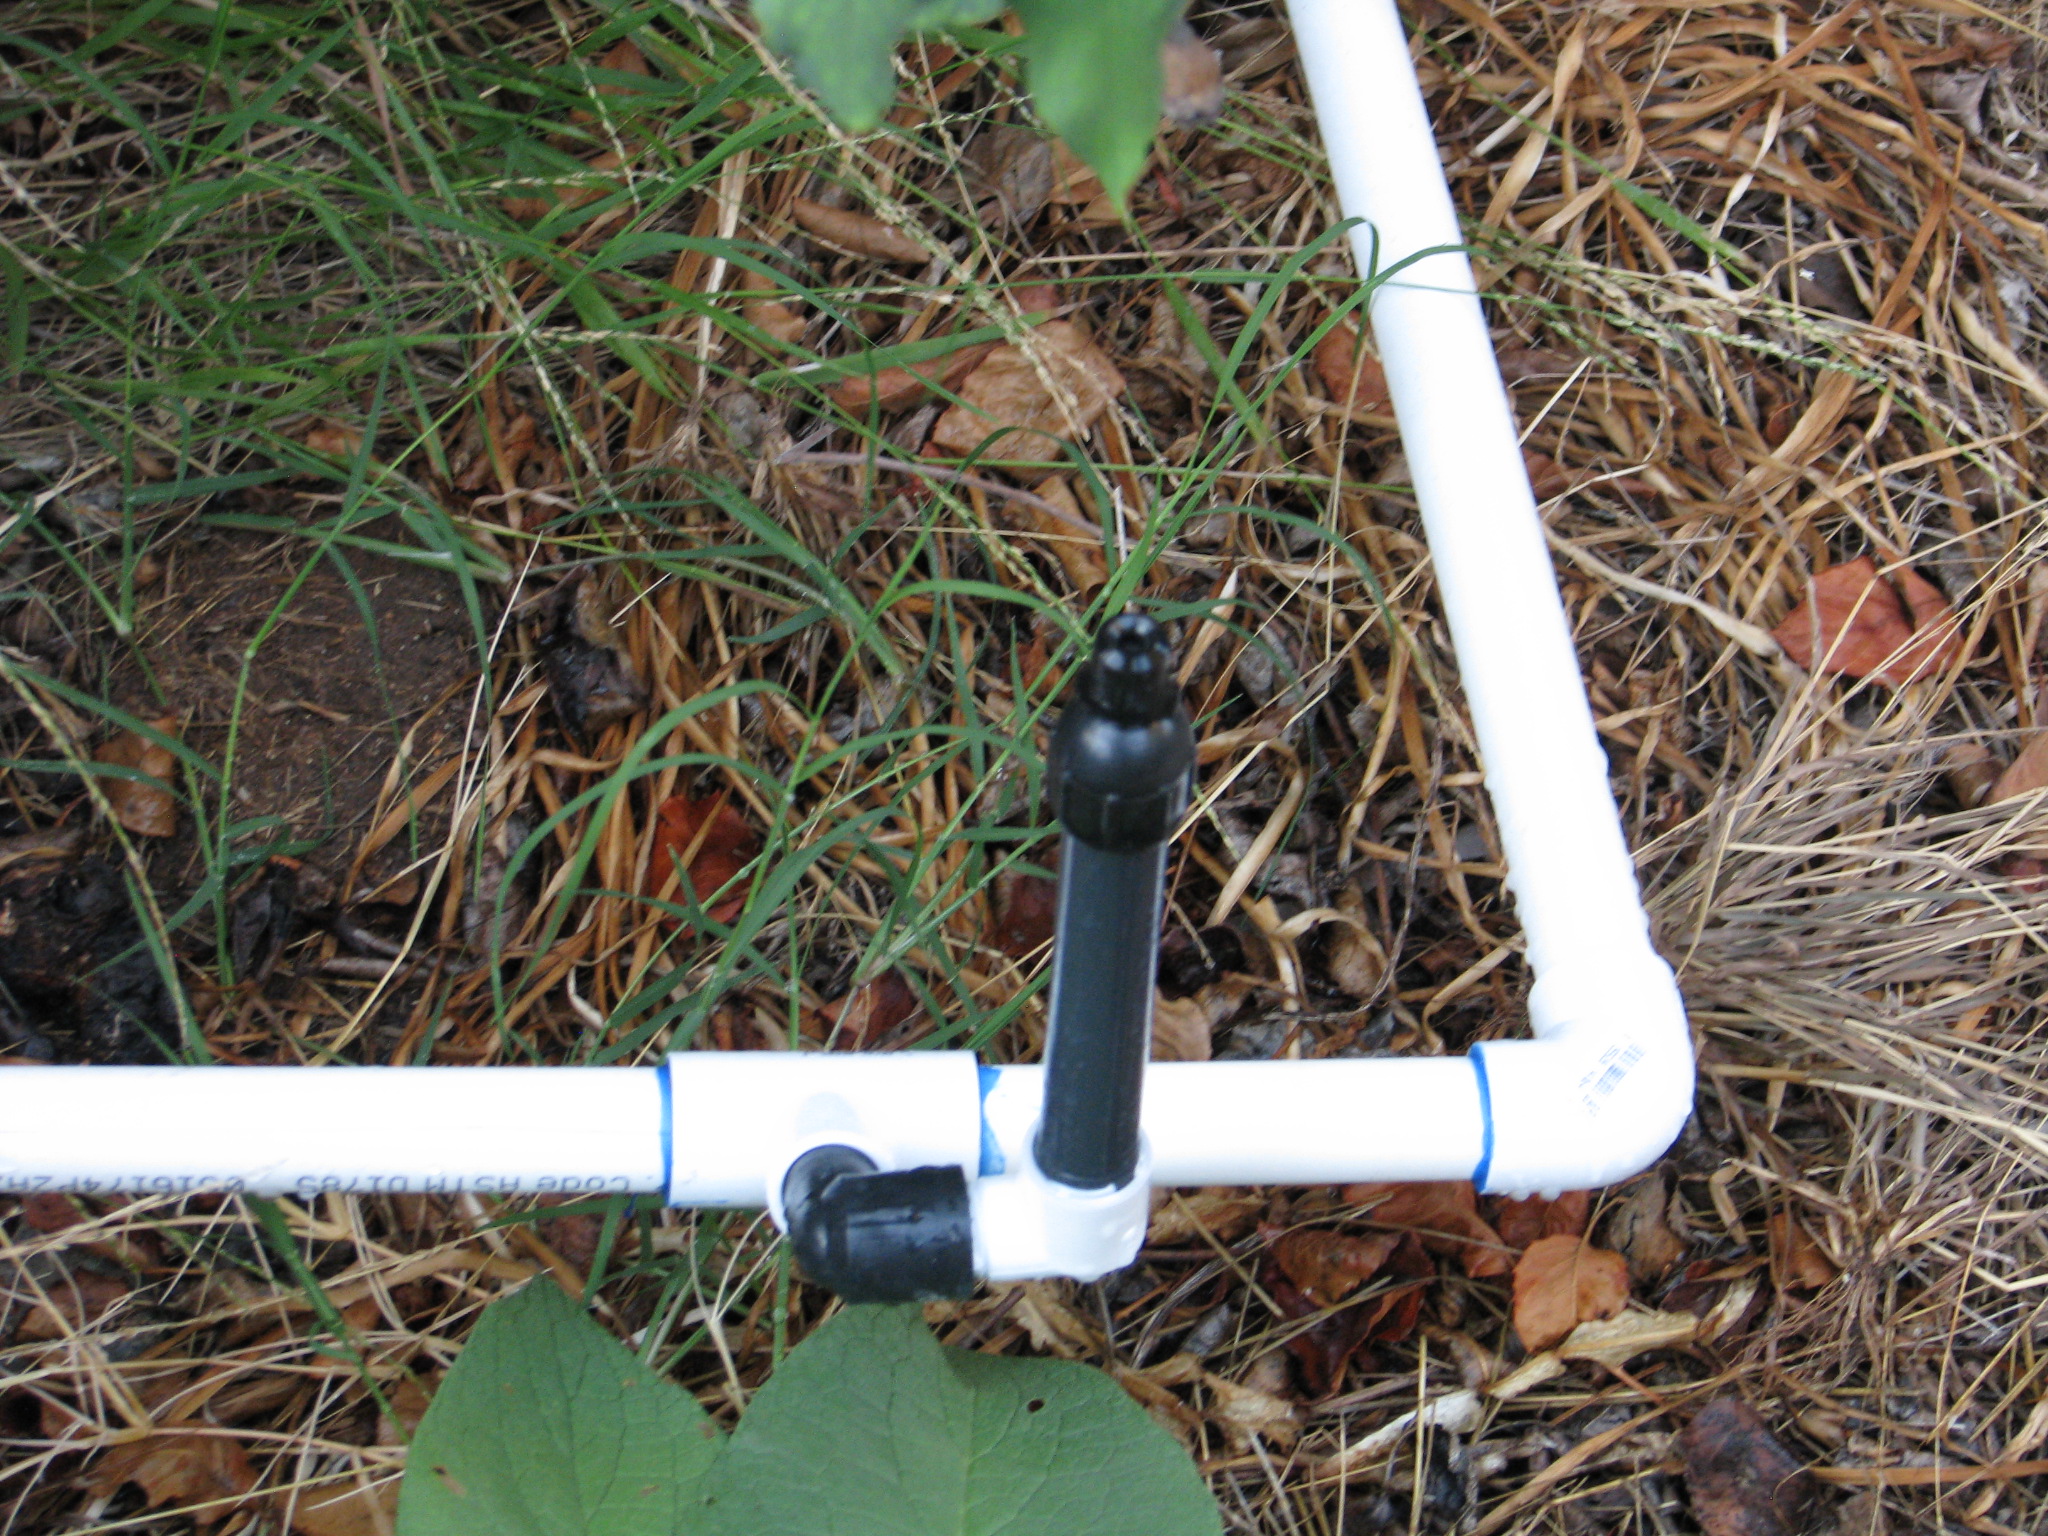
This sprayer is reduced from 3/4″ to 1/2″. So as you are laying out your garden and irrigation system, understand about slope, water pressure, volume of water and your water source. These factors all have large parts to play in the long-term success of your irrigation.
Next time I’ll discuss drawing up an irrigation plan.
You can read Part 1 Options here, Designing Your System Part 3 here , and Part 4 Conclusion here.
- Building and Landscaping, Gardening adventures, Hugelkultur, Permaculture and Edible Forest Gardening Adventures, Rain Catching, Recycling and Repurposing, Soil, Water, Water Saving
Irrigation for Drylands, Part 1: Options
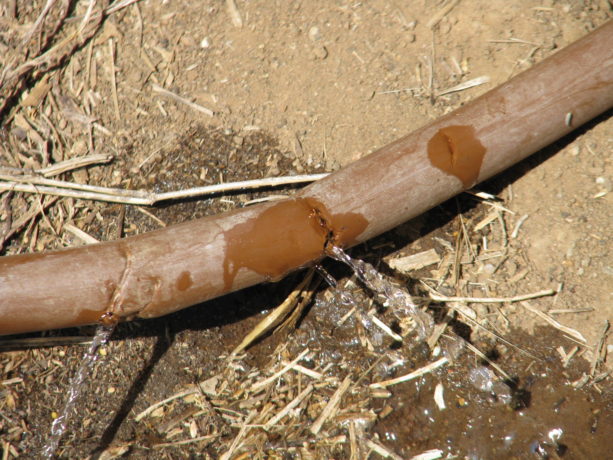
This tubing is so easily nicked that weeding around it often results in a bad leak that isn’t detected for awhile. Leaks cause flooding with dry areas past them on the line. A previous draft of this post was about 2,000 words of mostly rant against Netafim, so I’m starting over trying to be more helpful. You’re welcome.
In Southern California, and many dryland areas, if you are to grow food crops you have to irrigate. I have met several people who believe that they can ‘dry farm’ crops such as grapes here, and that is problematic. Even in Central California where they receive many inches more rain than we do, farmers struggle in the long hot, dry summers.
There are many ways to water, and I’ll address as many as I can.
The first and most important step for irrigating your property is installing the earthworks that will harvest what rain we do receive and allow it to percolate into the soil. Paring that with burying wood and other organic material to hold that water, planting in shallow depressions rather than on raised mounds and sheet mulching will greatly increase the health of your plants and decrease your water bill.
For delivering captured or purchased water you’ll need some kind of tubing and a force to deliver the water. We’ll discuss the natural methods first:

Ollas (oy-ahs) should have a lid or stone or something to block the top, to keep creatures from falling in and drowning. Photo from link page. For small yards, or for orchards with lots of labor, burying ollas (porous clay pots) in the center of a planting area is a wonderful idea. There is a really good article with diagrams and suggestions here. You can manually fill the ollas by carrying water to them (the best would be from rain barrels), or dragging a hose around to fill them. Or they can be combined with a water delivery system of pipes as discussed below. Water is then drawn through the porous pots by the dry soil around them, and thus to plant roots. There is a tutorial about making inexpensive ollas from small clay pots, and interesting comments, here. There are problems, but then, there are problems with everything. Clay pots can break, especially if you have soil that freezes or foot traffic. A larger pot doesn’t mean that water will be delivered farther underground; absorption is based on soil density. This is a system that you need to monitor and replace periodically. On the plus side, clay is natural and will decompose in the soil. Many years ago, long before I ‘discovered’ permaculture, I buried gallon milk jugs in which I punched small holes by some trees beyond any irrigation pipes. I didn’t know about ollas then; I just thought it was a good idea to get water close to the roots of the plants. This really worked and those trees are mature and still exist almost thirty years later, and still don’t have irrigation to them. However, I found that the plastic milk jugs become brittle and break apart, as will plastic soda bottles, and you really don’t want to bury plastic. Clay is much better.

Clay pipe photo from Permanomades. Please follow link to website. These look very large, but are not. Next would be delivering water via some kind of pipe. Clay pipes are the most natural, but unless you have the clay, the labor and the time to create lots of long, hollow clay pipes, this is a pricey option. Clay pipes break easily, too.

Split bamboo delivers water downhill. Photo from link page. If you have lots of bamboo you can season it, split it, remove the nodes (partitions) and then mount it to deliver water to individual plants, to ollas, or to swales. Again, you need time, bamboo, labor and some expertise. There is a good article about it here.
Plastic:
There are a lot of plastic pipes out there, and although I hate to invest in more plastic, it is often a necessary evil. Drip irrigation comes in many forms. There are bendable tubes that ooze, tubes that have holes spaced usually 12″ or 24″, tubes that can be punctured and into which spray heads are inserted, and tubes which can support spaghetti strands that are staked out next to individual plants. The popularity of drip irrigation has been huge in water-saving communities. Unfortunately they have lots of problems. Here I’ll indulge in just a little rant, but only as an illustration.
One of the big problems with flexible tubing in arid areas is the high mineral content of the water and what it does to these tubes. Any holes -including those in small spray heads- will become clogged with minerals.
A nozzle that is clogged next to a hole that is not. Flushing the system with vinegar works for a short time, but eventually the minerals win. If the tubing is buried, then it is virtually impossible to discover the blocked holes until plants begin to die. Tubing above ground becomes scorched in the sun and breaks down.
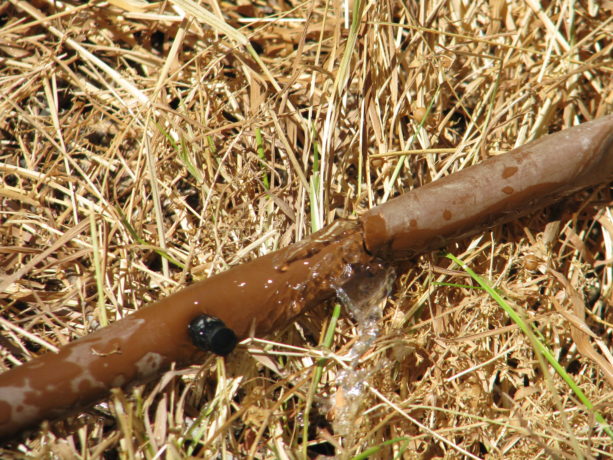
Also, flexible tubing is extremely chewy and fun with a little drink treat as a reward.
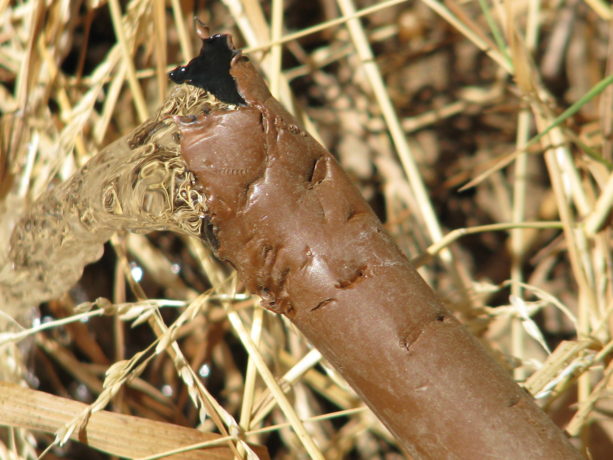
Coyotes and many other animals find flexible pipe so fun to chew. This is the opinion of gophers (who will chew them up below ground and you won’t know unless you find a flood or… you guessed it… dying plants), coyotes (who will dig the lines up even if there is an easier water source, because tubing is fun in the mouth), rats (because they are rats), and many other creatures. Eventually a buried flexible system will be overgrown by plant roots, will kink, will clog, will nick (and some products such as Netafim seem to nick if you even wave a trowel near it), and will be chewed. Some plants will be flooded; others will dry up. You will have an unending treasure hunt of finding buried tubing and trying to fix it, or sticking a knife point into the emitter holes to open them up and then having too much water spray out.
Plus, drip irrigation is not good for most landscape plants. Most woody perennials love a good deep drink down by their roots, and then let go dry for a varying time depending upon the species, weather and soil type. Most native California plants hate drip irrigation. According to Greg Rubin, co-author along with Lucy Warren of The California Native Landscape (Timber Press; March 5, 2013) and a San Diego native landscaper, native plants here enjoy an overhead spray such as what a rain storm would deliver. Some natives such as Flannel Bush (Fremontia) die with summer irrigation and are especially intolerant of drip. Drip is most appropriate with annuals or perennials that have very small root bases and that require regular watering. Small root balls are closer to the hot surface and will dry up more quickly. Vegetables, most herbs and bedding plants can use drip. Plants that have fuzzy leaves that can easily catch an air-born fungal disease such as powdery mildew are better watered close to the ground rather than with an overhead spray of chlorinated water.
Then there is PVC, the hard, barely flexible pipe that is ubiquitous in landscaping for decades. PVC is hard to chew, can be buried or left on the surface if covered with mulch (to protect from UV rays), is available in a UV protected version if you want to spend the extra money and still give it some sun protection, utilizes risers with larger diameter water deliver systems such as spray heads, bubblers, and even drip conversion emitters that have multiple black spaghetti strands emerging from them like some odd spider.
At Finch Frolic Garden I had taken advice to install Netafim, a brown flexible tubing with perforations set 12″ apart, which was buried across the property from each valve box. It has been a living nightmare for most of that time. Besides all the reasons that it could fail (it did all of them) listed above, it also at its best delivered the same amount of water to all of the plants no matter what their water needs. It was looped around most trees so that the trees would receive more water, but since then roots have engulfed the tubing, cutting off the water flow. There are areas with mysterious flooding where we can’t trace the source without killing many mature plants.
Over the past year we’ve lost about 1/4 of our plants including most of our vegetables, because we plant where there should be water, and then mysteriously, there isn’t any. Flushing with vinegar helped a little, but whatever holes are still functioning are closing up with mineral deposits. Okay, I’m ranting too much here. But this was an expensive investment, and an investment in plastic, that has stressed me and my garden. So upon weighing all my alternatives I’ve decided to install above-ground PVC with heads on risers that either spray or dribble, and the dribblers will go into fishscale swales above plants.
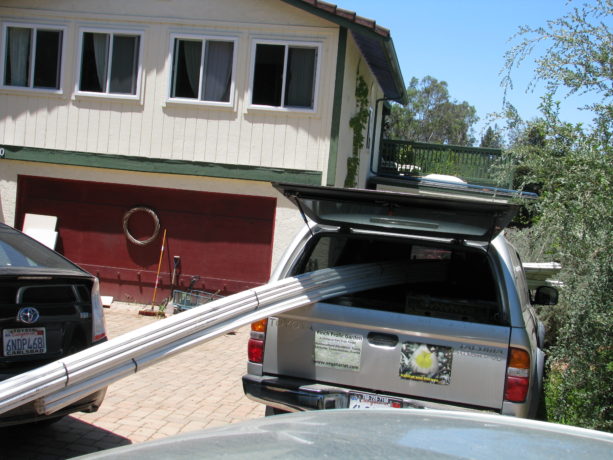
Twenty-foot lengths of PVC can fit in the Frolicmobile, and sure beats carrying it down the property. In the next few posts in this series I will talk about how to draw up an irrigation plan, installation, valves and other watering options, as Miranda and I spend our very hot summer days crawling through rose bushes and around trees gluing, cutting, blowing out and adjusting irrigation. Thanks for letting me vent.
You can read Part 2 Evaluating Your System here, Designing Your System Part 3 here , and Part 4 Conclusion here.
- Animals, Compost, Gardening adventures, Hugelkultur, Microbes and Fungi, Permaculture and Edible Forest Gardening Adventures, Rain Catching, Soil, Varmints
Year of the Gopher
They’ll eat tasty above-ground plants, too. This year should have been dubbed The Year of the Gopher. Every year brings an increase (and decrease) in some element in nature. There are big earwig years, painted bug years, cabbage moth years, just as there seem to be good and bad years for certain crops. This year seems to be a big one for gophers.
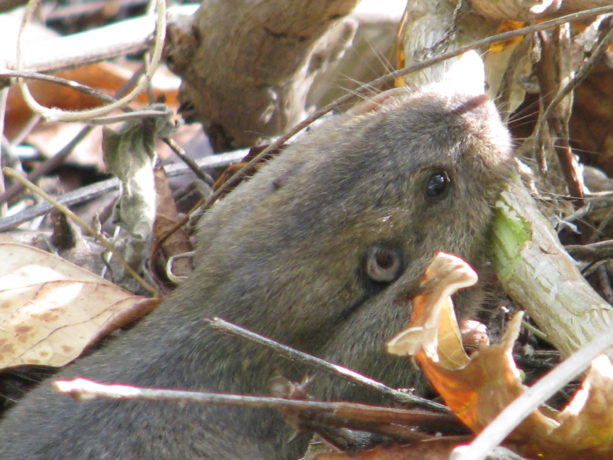
Pocket gophers are native to Southern California, and have their special roles to play in the landscape. They aerate, their tunnels are homes to lots of other animals and insects such as Pacific Chorus frogs, toads and lizards. They are food for snakes, raptors and even greater egrets. Their tunnels allow rainwater to penetrate the soil. And, like any of us, if offered really tasty specialty food they’ll go for it.
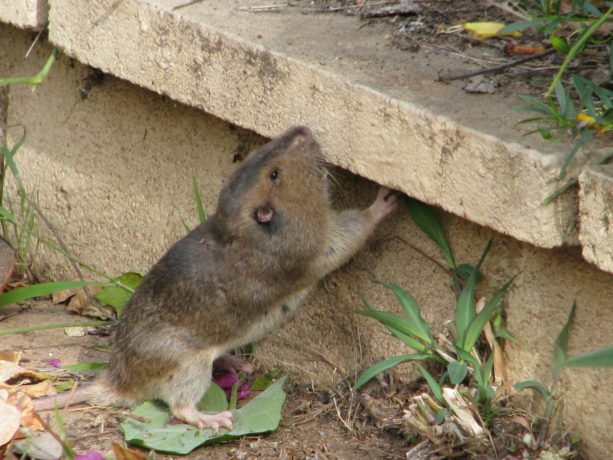
Cute little guy. Gopher tunnels are prime real estate. As explained in a past post, it takes a considerable amount of energy for gophers to dig tunnels, and if you kill them, new gophers reoccupy the tunnels from surrounding property. They are territorial and so the young are always looking for opportunities to have their own tunnel system.
Methods we’ve been using to train our gophers have been challenged this year by the desperation of our gophers, caused no doubt by the changing weather and growth patterns. In our kitchen garden we’ve lost a lot of veggies this spring.
We don’t trap and kill here, so we work with animals because this is their home and habitat. Permaculture isn’t about taking over an area to the loss of everything that usually lives there, its about working with nature and learning from it. So the reason our kitchen garden has been attacked is that we didn’t prepare well enough to live with the gophers. The only way to keep plants safe is to have boundaries around root balls. Trees we plant in gopher cages, but vegetables -not so much.
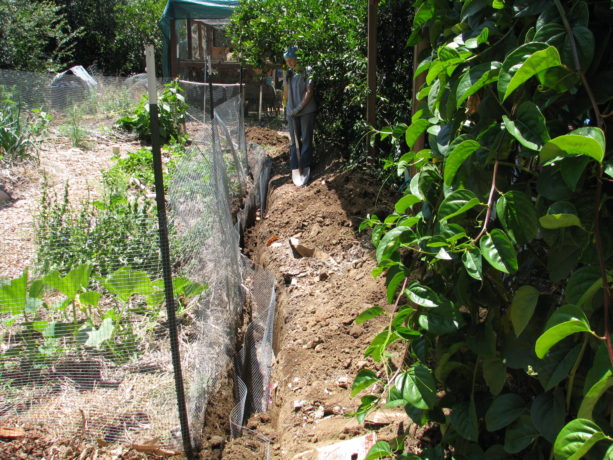
So Miranda and I decided to bury 24″ tall 1/4″ wire around the garden.
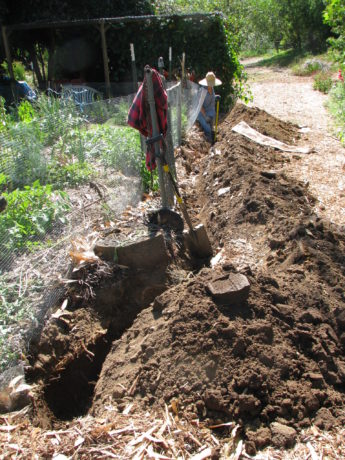
The north side oddly revealed no gopher tunnels. These tasks always sound so easy! Trenching through clay in the heat of early summer has been a challenge. Gopher tunnels dug for food collection are within the first 18″ of dirt, and their nests are down to about 24″.
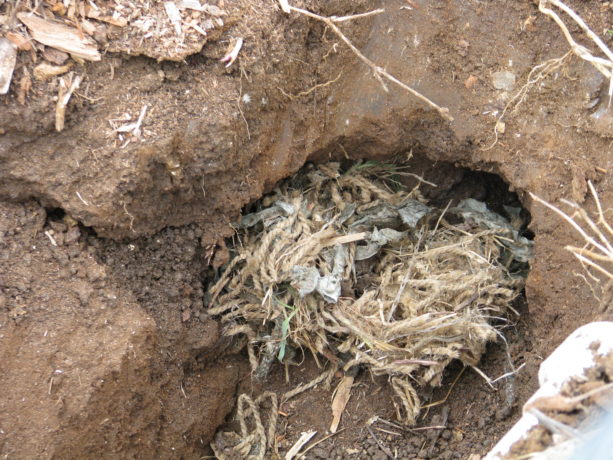
Gopher nesting material about nine inches under the ground. This is in such hard dirt that I have to use a pick on it. We pulled back sheet mulch on the pathways and found incredible fungal activity, loads of worms and moisture.
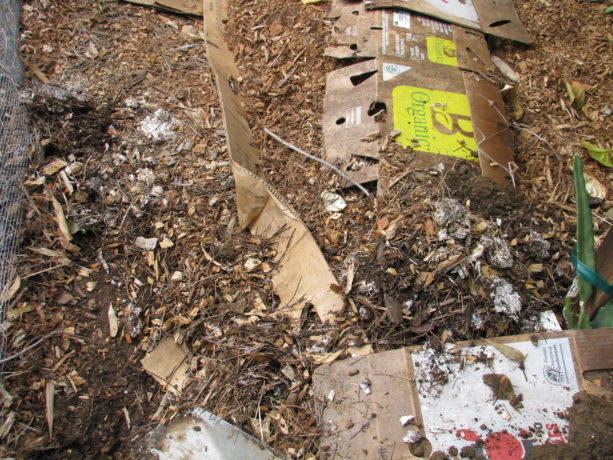
Peeling back sheet mulch that was only six months old showed lots of fungal activity already. 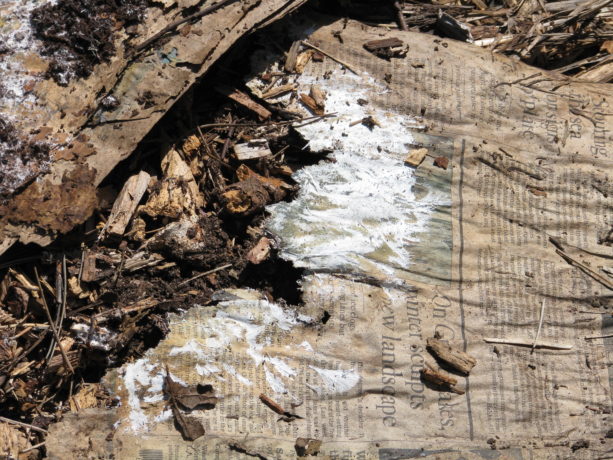
Newspaper being consumed by fungus and turned into soil. 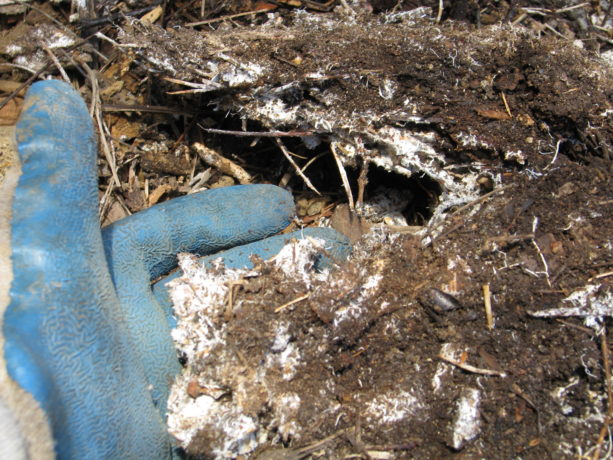
A great lump of fungal hyphae, if I may say so myself. While trenching we found gopher tunnels into the garden, and often would find dirt in the trench under the holes as the gopher backfilled, trying to make a new dirt tunnel across the channel.

The east side we thought would be the most difficult, with the dirt rock-hard at the corner. We thought that until we began the fourth trench. Yikes! Along one active area I buried the wire, but also wanted to retard the invasion of Bermuda grass. Along with the wire I buried a couple of pieces of scrap 3/4″ plywood to make a physical boundry for the grass, and these happen to be right where a gopher tunnel was. The next morning I was in the garden and I heard a strange thumping sound, and finally realized that it was coming from underground where the wood was buried. The gopher was trying to get through the new wooden fence and wire!
We’ve buried wire around three sides (40′ long by 20 – 24″ deep), and are slaving away at the last trench where the most gopher activity is.
Burying the wire, shoving some rotten fruit into the gopher tunnel entrances and refilling. As we’re working, we’re also using a spade to collapse gopher tunnels from the back out, and using the smucky water (this batch is made from onion peels and bits leftover from pickling whole onions) to ruin those tunnels. We’re herding the gopher out of the garden and fertilizing at the same time.
We’ve a couple more bouts left to go before finishing; my partially numb hands are ready to be done with it. Narrow trenches in heavy clay right next to a fence aren’t easy to work in, which slows the process down a lot. Knowing that we’re being true to what we believe in, to not trap and kill in our garden, makes it all worth the work. The gopher is welcome to all the weed roots it wants elsewhere.
You May Also Like
Native Insects and IPM
- Compost, Fungus and Mushrooms, Gardening adventures, Hugelkultur, Microbes and Fungi, Other Insects, Perennial vegetables, Permaculture and Edible Forest Gardening Adventures, Pets, Predators, Rain Catching, Seeds, Soil, Water Saving
Polyculture In A Veggie Bed
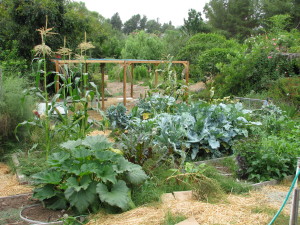 Polyculture is, obviously, the opposite of monoculture, but in permaculture (a lot of -cultures here) it means more than that. The best way to plant in polyculture is to follow the guidelines for a plant guild . A plant guild is how plants arrange themselves in nature so that each fulfills a niche. The variety of plants aren’t competing for the same nutrients and are delivering something other plants need; i.e. shade, nutrients, root exudates, leaf drop, soil in-roads via deep tap roots, etc.
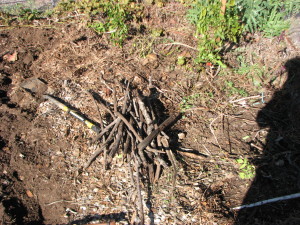
By burying sticks in planting holes you are helping feed the soil and hold water. When planting veggies here at Finch Frolic Garden I often mix up a handful of vegetable, herb and flower seeds that fulfill the plant guild guidelines and plant them all in one area. They come up in a mix of heights, colors, shapes and scents to fool bugs. The result is like a miniature forest.

A merry mixture of vegetables, herbs and flowers in a mature bed. However that sort of wild designed planting has its drawbacks. Harvesting is more time consuming (although more fun, like a treasure-hunt). Many people find peace in looking at rows of vegetables, and peace is valuable.

We disturb the soil as little as possible, and pull the soil back for potatoes. You can plant polyculture in rows as well. Just plant each row with a different member of the plant guild, and you’ll achieve a similar effect with insect confusion, and with nutrient conservation.
In this small, slightly sunken bed (we are in drylands so we plant concave to catch water), we planted rows of three kinds of potatoes, two kinds of shallots, a row each of bush beans, fava beans, parsnips, radish and carrots.
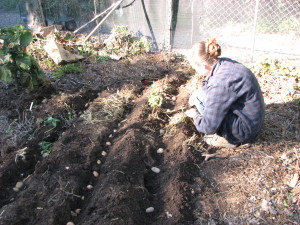
Miranda planting potatoes and shallots before the smaller seeds go in. We covered the bed with a light mulch made from dried dwarf cattail stems. This sat lightly on the soil and yet allowed light and water penetration, giving the seedlings protection from birds and larger bugs.

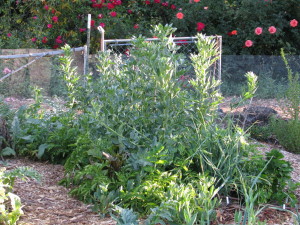
This light, dry mulch worked perfectly. Since cattails are a water plant, there are no worries about it reseeding in the bed. The garden a couple months later. Because we had a warm and rainless February (usually our wettest month), our brassicas headed up rather than produced roots and only a few parsnips and carrots germinated. However our nitrogen-fixing favas and beans are great, our ‘mining’ potatoes are doing beautifully and the shallots are filling out well.
Every plant accumulates nutrition from the air and soil, and when that plant dies it delivers that nutrition to the topsoil. In the case of roots, when they die it is immediate hugelkultur. Without humans, plants drop leaves, fruit and seeds on the ground, where animals will nibble on them or haul them away but leave juice, shells and poo behind. When the plant dies, it dies in place and gives back to the topsoil. When we harvest from a plant we are removing that much nutrition from the soil. So when the plants are through producing, we cut the plants at the soil surface and leave the roots in the ground, and add the tops back to the soil. By burying kitchen scraps in vegetable beds you are adding back the sugars and other nutrients you’ve taken away with the harvest. It becomes a worm feast. Depending upon your climate and how warm your soil is, the scraps will take different lengths of time to decompose. Here in San Diego, a handful of food scraps buried in January is just about gone by February. No fertilizer needed!
- Building and Landscaping, Compost, Fungus and Mushrooms, Gardening adventures, Hugelkultur, Microbes and Fungi, Permaculture and Edible Forest Gardening Adventures, Rain Catching, Recycling and Repurposing, Soil, Water, Water Saving, Worms
Using Pathways For Rain Catchment
Here in the drylands of San Diego we need to be especially sure to catch whatever rain may fall. Building good soil is vital for the entire planet because humans are going through decent topsoil like nobody’s business. Here at Finch Frolic Garden we’ve sheet mulched around trees to replicate decades of leaf drop, and on pathways to block weeds, prevent compaction and create good soil for shallow plant roots. We’ve also continued making our pathways work more for us by burying wood (hugelkultur) in the paths themselves. Most of our soil here is heavy clay, so creating drainage for roots is imperative. In sandy soils, creating more fungal activity to hold together the particles to retain water is important. We also need to store rain water when we get it, but not drown the roots of plants. This all can be accomplished by burying wood, the older the better.
Miranda and I have worked on many pathways, but for a few months this year the garden was given a huge boost forward with the help of Noel, a permaculture student and future farmer, who can move mountains in an afternoon with just a shovel.
The chosen pathways had these features: they were perpendicular to water flow, or were between trees that needed supplemental drainage, food and water access, and/or were where rainwater could be redirected. Eventually we’d like to do all the pathways like this but because of time, labor and materials we worked where it was most needed.

An area that becomes flooded when we have a deluge. The existing sheet mulch was pulled aside. Sections of the pathways were dug up (Noel’s work was very neat; my work is usually much less so). Wood was laid in the hole, and layered back with the dirt.

The pathway dug up and wood being layered. The nice, neat hole is Noel’s doing, not mine. Notice I said dirt, not soil. We don’t want to disturb good soil because we’d be killing microbes and destroying fungal networks. Dirt is another story; it needs amendment. As we’ve already buried all of our old wood, we timed these pathway ‘hugels’ to coincide with some appropriate tree removal.
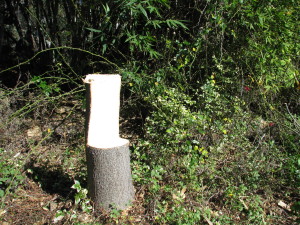
You can be creative when cutting trees and make a chair! Watch out for sap on your pants, though. Trees were cut down and some climbing roses pruned back out of the pathway, and the green ‘waste’ was used in the nearby pathways.
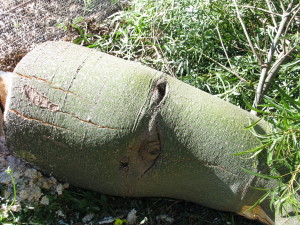
This euphorbia was only sucking up water and not giving back anything, so it and its friends had to go. This one had a marking like an eye on it, and I was glad to see it go… as it was seeing me! Old palm fronds went in as well. No need to create additional work – good planning means stacking functions and saving labor.
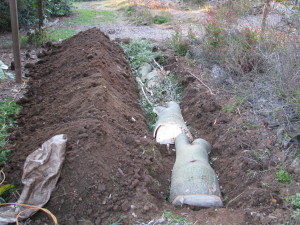
The first layer of wood is covered with dirt, and then another layer added. After the wood was layered back with the dirt, the area was newly sheet mulched. Although the pathways are slightly higher, after another good rain (whenever that will happen) they’ll sink down and be level. They are certainly walkable and drivable as is. Although the wood is green, it isn’t in direct contact with plant roots so there won’t be a nitrogen exchange as it ages. When it does age it will become a sponge for rainwater and fantastic food for a huge section of the underground food chain, members of which create good soil which then feeds the surrounding plants. Tree roots will head towards these pantries under the paths for food. Rain overflow that normally puddles in these areas will penetrate the soil and soak in, even before the wood ages because of the air pockets around the organic material.
The best part about this, is that once it is done you don’t have to do it again in that place. Let the soil microbes take it from there. Every time you have extra wood or cuttings, dig a hole and bury it. You’ve just repurposed green waste, kept organics out of the landfill, activated your soil, fed your plants, gave an important purpose to the clearing of unwanted green material, and made your labor extremely valuable for years to come. Oh, and took a little exercise as well. Gardening and dancing are the two top exercises for keeping away dementia, so dig those hugels and then dance on them!
Burying wood and other organic materials (anything that breaks down into various components) is what nature does, only nature has a different time schedule than humans do. It takes sometimes hundreds of years for a fallen tree to decompose enough to create soil. That’s great because so many creatures need that decomposing wood. However for our purposes, and to help fix the unbelievable damage we’ve done to the earth by scraping away, poisoning and otherwise depleting the topsoil, burying wood hastens soil reparation for use in our timeline.
Another pathway is hard clay and isn’t on the top of my priority list to use for burying wood. However it does repel water due to compaction and because rainwater is so valuable I want to make this pathway work for me by catching rain. I’ve recommended to clients to turn their pathways into walkable (or even driveable) rain catchment areas by digging level-bottomed swales.

Digging gentle swales along a pathway can turn it into a rain catchment system. Make your paths work for you! A swale is a ditch with a level bottom to harvest water rather than channel water. However many pathways are on slopes or are uneven. So instead of trying to make the whole pathway a swale in an established garden, just look at the pathway and identify areas where the land has portions of level areas. Then dig slight swales in those pathways. Don’t dig deeply, you only have to gently shape the pathway into a concave shape with a level bottom. The swales don’t need to connect. You can cover the pathway and swales with bark mulch and they will still function for harvesting rain and still be walkable.
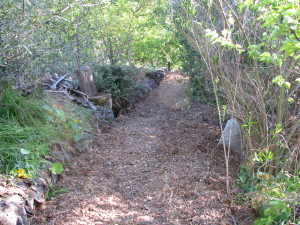
Mulching over the top makes the pathway even and still functional for rain catchment. If the pathways transect a very steep slope, you don’t want to harvest too much water on them so as not to undermine the integrity of your slope. This is a swale calculator if you have a large property on a steep slope.
So up-value your pathways by hugelkulturing them, and sheet-mulching on top. Whatever your soil, adding organics and mulching are the two best things to do to save water and build soil. And save the planet, so good going!
- Animals, Bees, Compost, Fungus and Mushrooms, Gardening adventures, Health, Heirloom Plants, Hugelkultur, Microbes and Fungi, Natives, Other Insects, Perennial vegetables, Permaculture and Edible Forest Gardening Adventures, Rain Catching, Recycling and Repurposing, Reptiles and Amphibians, Seeds, Soil, Water, Water Saving, Worms
Plant Guild #9: The Whole Picture
 When set in motion the many parts of a plant guild will create a self-sustaining cycle of nutrition and water. By understanding the guild template and what plants fit where, we can plug in plants that fulfill those roles and also provide for us food, building materials, fuel and medicine as well as beauty.
Plant the appropriate plants for where you are placing them, for your soil and water use, and stack them in a guild with compatible plants that you can use. The ground will be covered by a foliar density that will keep grasses and other weeds at bay and provide excellent habitat for a full range of animals and insects. By stacking plants in a guild you are bringing life and abundance back to your garden.
Does it still sound so complicated? Rather than try to learn the roles of all the plants in the world, start small. Make a list of all the plants you want to plant. List them under food bearing, culinary/medicinal herb, craft/building material, and ornamental. Then read up on those plants. What size are they at maturity? Do they need full sun, partial or full shade? If trees, do they have an upright growth so you may plant under them (stonefruit), or do they like to have their roots covered and don’t like plants directly under them (citrus and avocado)?
Citrus doesn’t like plants under its canopy, but does like plants outside its dripline. Are they annuals, perennials or biennials? What is their growth habit: sprawling, rooting where they spread, upright bushy, do they need support and can they cling or do they need to be tied to a support?
Will the plant twine on its own? Do they require digging up to harvest? Do they fix nitrogen in the soil? Do they drop leaves or are they evergreen? Are they fragrant? When are their bloom times? Fruiting times? Are they cold tolerant or do they need chill hours? How much water do they need? What are their companion plants (there are many guides for this online, or in books on companion planting.)
Do vines or canes need to be tied to supports? As you are acquainting yourself with your plants, you can add to their categorization, and shift them into the parts of a plant guild. Yes, many plants will be under more than one category… great! Fit them into the template under only one category, because diversity in the guild is very important.
Draw your guilds with their plants identified out on paper before you begin to purchase plants. Decide where the best location for each is on your property. Tropical plants that are thirsty and don’t have cold tolerance should go in well-draining areas towards the top or middle of your property where they can be easily watered. Plants that need or can tolerate a chill should go where the cold will settle.
Once it is on paper, then start planting. You don’t have to plant all the guilds at once… do it as you have time and money for it. Trees should come first. Bury wood to nutrify the soil in your beds, and don’t forget to sheet mulch.
Remember that in permaculture, a garden is 99% design and 1% labor. If you think buying the plants first and getting them in the ground without planning is going to save you time and money, think again. You are gambling, and will be disappointed.
Have fun with your plant guilds, and see how miraculous these combinations of plants work. When you go hiking, look at how undisturbed native plants grow and try to identify their components in nature’s plant guild. Guilds are really the only way to grow without chemicals, inexpensively and in a way that builds soil and habitat.
You can find the rest of the 9-part Plant Guild series here: Plant Guilds: What are they and how do they work? The first in a series. , Plant Guild #2: Canopy , Plant Guild #3: Sub-Canopy , Plant Guild #4: Nitrogen-Fixers, Plant Guild #5: Mining Plants, Plant Guild #6: Groundcovers, Plant Guild #7: Vines, Plant Guild #8: Insectiaries .
You May Also Like
Native Insects and IPM
- Animals, Bees, Birding, Gardening adventures, Heirloom Plants, Natives, Other Insects, Perennial vegetables, Permaculture and Edible Forest Gardening Adventures, Predators, Rain Catching, Soil, Water Saving
Plant Guild #7: Vines
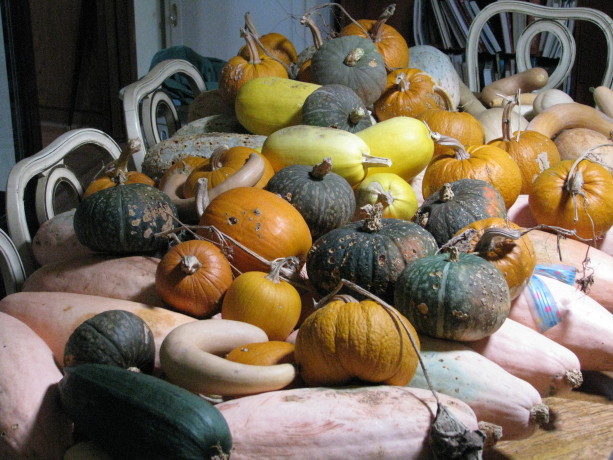
Our varieties of squash several years ago. You may think that vines and groundcover plants are pretty interchangeable, and they can share a similar role. However, as we covered in the Plant Guild #6: Groundcovers these plants do not have to vine, but just cover large spaces close to the ground and coming from a single trunk or stem.
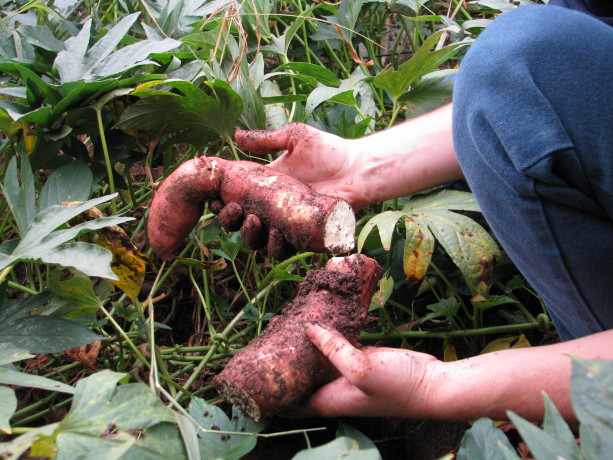
Sweet potatoes and yams make fantastic ground covers. The leaves are edible. Some root in one place, and some spread tubers over a larger area, so choose what is appropriate for digging up your harvest in your guild. They will die of frost. Vines can be large and heavy, small and delicate, perennial or annual. In a food plant guild vines are often food-bearing, such as squash. If you recall the legendary Three Sisters of planting – corn, beans and squash – there are two vines at work here. The corn forms a trellis for the light and grabby bean plant to climb upon (the bean fixing nitrogen in the soil as well as attracting pollinators with its flowers). The squash forms a low canopy all around the planted area. The big leaves keep moisture in, soften the raindrops to prevent erosion and deoxygenation, drop leaves to fertilize the soil, provide a large food crop, and attract larger pollinators. Even more than that, the squash protects the corn from raccoons. These masked thieves can destroy an entire backyard corn crop in a night, just when the corn is ripe. However, they don’t like walking where they can’t see the ground, so the dense squash groundcover helps keep them away.
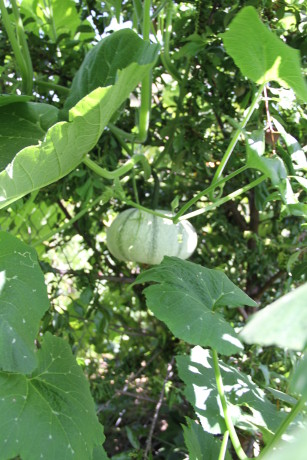
Pipian from Tuxpan squash supported by a plum and a pepper tree. Vines are very important to use on vertical space, especially on trees. With global warming many areas now have extremely hot to scorching sun, and for longer periods. Intense sun will scorch bark on tender trees, especially young ones. By growing annual vines up the trees you are helping shade the trunk while producing a crop, and if the vines are legumes you are also adding nitrogen fertilizer.
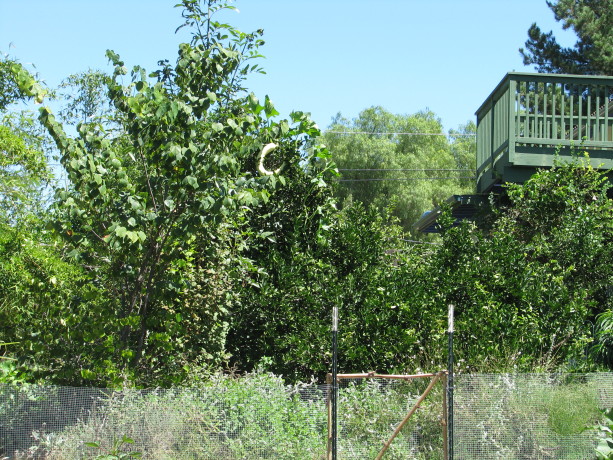
Can you spot the squash in the lime tree? It is crescent shaped and pale. Be sure the weight of the mature vine isn’t more than the tree support can hold, or that the vine is so strong that it will wind its way around new growth and choke it. Peas, beans and sweetpeas are wonderful for small and weaker trees. When the vines die they can be added to the mulch around the base of the tree, and the tree will receive winter sunlight. When we plant trees, we pop a bunch of vining pea (cool weather) or bean (warm weather) seeds right around the trunk. Larger, thicker trees can support tomatoes, cucumbers, melons, and squash of various sizes, as well as gourds. Think about how to pick what is up there! We allowed a alcayota squash to grow up a sycamore to see what would happen, and there was a fifteen pound squash hanging twelve feet above the pathway until it came down in a heavy wind!
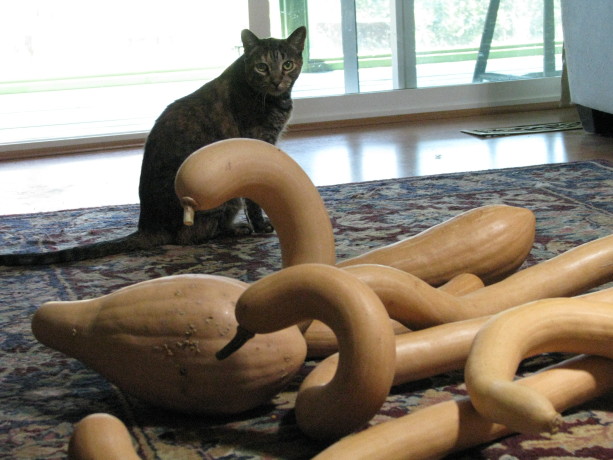
These zuchinno rampicante, an heirloom squash that can be eaten green or as a winter squash, form interesting shapes as they grow. These ‘swans’ and Marina are having a stare-off. Nature uses vertical spaces for vines in mutually beneficial circumstances all the time, except for notable strangler vines. For instance in Southern California we have a wild grape known as Roger’s Red which grows in the understory of California Live Oaks. A few years ago there appeared in our local paper articles declaiming the vines, saying that everyone should cut them down because they were growing up and over the canopy of the oaks and killing them. The real problem was that the oaks were ill due to water issues, or beetle, or compaction, and had been losing leaves. The grape headed for the sun, of course, and spread around the top of the trees. The overgrowth of the grape wasn’t the cause of the problem, but a symptom of a greater illness with the oaks.
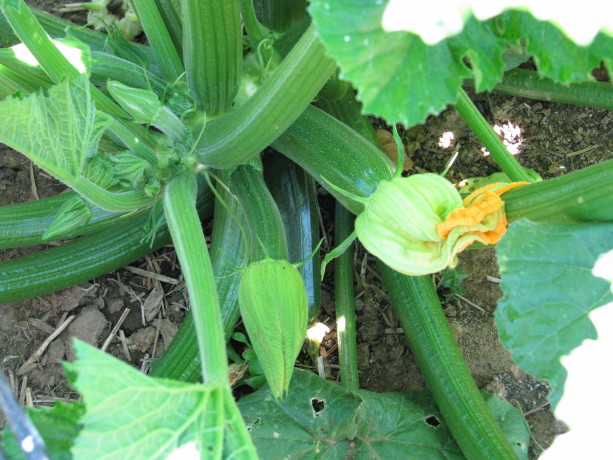
Zucchini! Some vines are not only perennial, but very long-lived and should be placed where they’ll be happiest and do the most good. Kiwi vines broaden their trunks over time and with support under their fruiting stems can be wonderful living shade structures. A restaurant in Corvallis, Oregon has one such beauty on their back patio. There is something wonderful about sitting in the protection of a living thing.
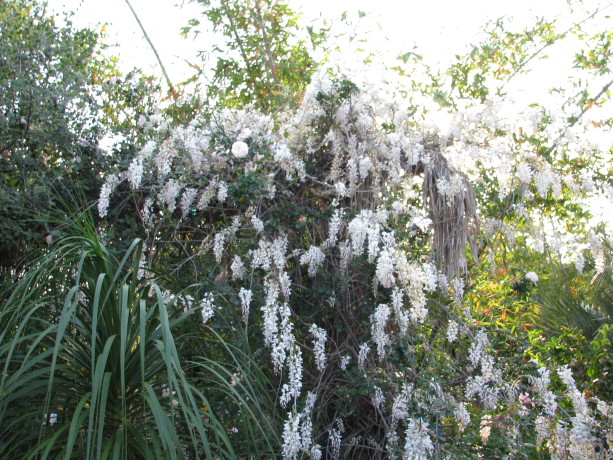
Wisteria chinensis is a nitrogen-fixer with edible flowers (and poisonous other parts), has stunning spring flowers and can make a nice deciduous vine to cover a canopy. It does spread vigorously, but can be trained into a standard, and are fairly drought tolerant when mature. Passionvines can grow up large trees where they can receive a lot of light. Their fruit will drop to the ground when ripe. The vines aren’t deciduous, so the tree would be one where the vine coverage won’t hurt the trunk.
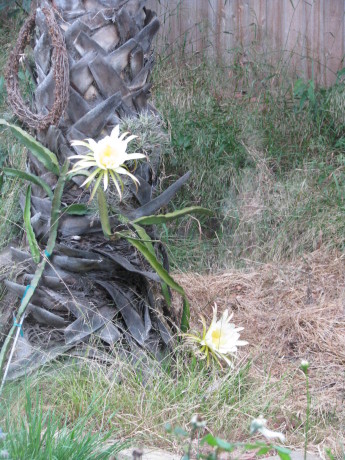
Dragonfruit aren’t exactly a vine, but they can be trained up a sturdy tree. Vines such as hops will reroot and spread wherever they want, so consider this trait if you plant them. Because the hops need hand harvesting and the vines grow very long, it is probably best to put them on a structure such as a fence so you can easily harvest them.
So consider vines as another important tool in your toolbox of plants that help make a community of plants succeed.
Next in the Plant Guild series, the last component, Insectiaries. You can find the entire 9-part Plant Guild series here: Plant Guilds: What are they and how do they work? The first in a series. , Plant Guild #2: Canopy , Plant Guild #3: Sub-Canopy , Plant Guild #4: Nitrogen-Fixers, Plant Guild #5: Mining Plants, Plant Guild #6: Groundcovers, Plant Guild #8: Insectiaries, Plant Guild #9: The Whole Picture.
You May Also Like
Native Insects and IPM
- Animals, Bees, Birding, Compost, Fungus and Mushrooms, Gardening adventures, Health, Heirloom Plants, Hugelkultur, Microbes and Fungi, Natives, Other Insects, Perennial vegetables, Permaculture and Edible Forest Gardening Adventures, Predators, Rain Catching, Reptiles and Amphibians, Seeds, Soil, Water, Water Saving, Worms
Plant Guild #6: Groundcover Plants

Artichokes are mining plants, but also have a low enough profile to be a groundcover plant. They make excellent chop-and-drop. Flanking are lavender, scented geranium (left), and borage. In most ecosystems that offer easy food for humans, the ground needs to be covered. Layers of leaves, organic matter from animals (poo, fur, carcasses, meal remains, etc.) , dropped branches and twigs, fallen flowers and fruit, and whatever else gravity holds close to the earth, compost to create soil and retain water and protect the soil from erosion and compaction. Areas that don’t have this compost layer are called deserts. If you want to grow an assortment of food for humans, you have to start building soil. Even in desert communities where there are some food plants growing, such as edible cactus, mesquite beans, etc., there is biodiversity on a more microscopic scale than in old growth forests. In deserts the soil needs to absorb what little rain there is and do it quickly before it evaporates, and plants have leaves adapted to have small leaf surfaces so as not to dry out, and there are few leaves to drop. Whereas in areas where there are large forests the weather is usually wetter, tall plants and thick underbrush provide multiple layers of protection both on the plants and when they fall to layer the earth.
Nasturtium reseeds itself annually, is edible with a bite of hotness, detracts aphids from other plants, and is charming. Don’t let it get away in natural areas, though. A quick way to build soil in plant guilds is to design for plants that will cover the ground. This isn’t necessarily the same groundcover as you would use to cover embankments. For instance, iceplant can be used in a pinch, but it really isn’t the best choice in most plant guilds unless you are in a very dry climate, and your plant guild is mostly desert-type plants: date palm, etc. Annuals can be squash or other aggressive food-producing vines such as unstaked tomatoes. However you don’t need to consider just ground-hugging plants; think sprawling shrubs.

Scented geraniums are a great ‘placeholder plant’. These Pelargoniums (not true geraniums) come in a wide variety of fragrances. We’ve found bird nests in these! When guests tour through Finch Frolic Garden, they often desire the lush foresty-feel of it for their own properties, but have no idea how to make it happen. This is where what I call ‘placeholder plants’ come in. Sprawling, low-cost shrubs can quickly cover a lot of ground, protect the soil, attract insects, often be edible or medicinal, be habitat for many animals, often can be pruned heavily to harvest green mulch (chop-and-drop), often can be pruned for cuttings that can be rooted for new plants to use or to sell, and are usually very attractive. When its time to plant something more useful in that area, the groundcover plant can be harvested, used for mulch, buried, or divided up. During the years that plant has been growing it has been building soil beneath it, protecting the ground from compaction from the rain. There is leave mulch, droppings from lizards, frogs, birds, rabbits, rodents and other creatures fertilizing the soil. The roots of the plant have been breaking through the dirt, releasing nutrients and developing microbial populations. Some plants sprawl 15′ or more; some are very low-water-use. All of this from one inexpensive plant.
Squash forms an annual groundcover around the base of this euphorbia. Depending upon your watering, there are many plants that fit the bill, and most of them are usable herbs. Scented geraniums (Pelargonium spp.), lavender, oregano, marjoram, culinary sage, prostrate rosemary, are several choices of many plants that will sprawl out from one central taproot. Here in Southern California, natives such as Cleveland sage, quail bush (which harvests salt from the soil), and ceanothus (California lilac, a nitrogen-fixer as well), are a few choices. Usually the less water use the plant needs, the slower the growth and the less often you can chop-and-drop it. With a little water, scented geraniums can cover 10 – 15 feet and you can use them for green mulch often, for rooted cuttings, for attracting insects, for medicine and flavoring, for cut greenery, for distillates if you make oils, etc.

Sweet potatoes make a great ground cover. Choose varieties that produce tubers directly under the plant rather than all along the stems so that you don’t have to dig up your whole guild to harvest. Groundcover plants shouldn’t be invasive. If you are planting in a small guild, planting something spreading like mint is going to be troublesome. If you are planting in larger guilds, then having something spreading in some areas, such as mint, is fine. However mint and other invasives don’t sprawl, but produce greenery above rootstock, so they are actually occupying more space than those plants that have a central taproot and can protect soil under their stems and branches. Here at Finch Frolic Garden, we have mint growing freely by the ponds, and in several pathways. Its job is to crowd out weeds, build soil, and provide aromatherapy. I’d much rather step on mint than on Bermuda grass, and besides being a superb tea herb, the tiny flowers feed the very small bees, wasps and flies that go unsung in gardens in favor of our non-native honeybees (there are no native honeybees in North America).
Here’s a general planting tip: position plants with fragrant leaves and flowers near your pathways for brush-by fragrance. You should have a dose of aromatherapy simply by walking your garden path. Mints are energizing, lavenders calming, so maybe plan your herbs with the pathways you take in the morning and evening to correspond to what boost you need at that time.
Consider groundcover plants and shrubs that will give you good soil and often so much more.
Next up: Vining Plants.
You can find the entire 9-part Plant Guild series here: Plant Guilds: What are they and how do they work? The first in a series. , Plant Guild #2: Canopy , Plant Guild #3: Sub-Canopy , Plant Guild #4: Nitrogen-Fixers, Plant Guild #5: Mining Plants, Plant Guild #7: Vines, Plant Guild #8: Insectiaries, Plant Guild #9: The Whole Picture.
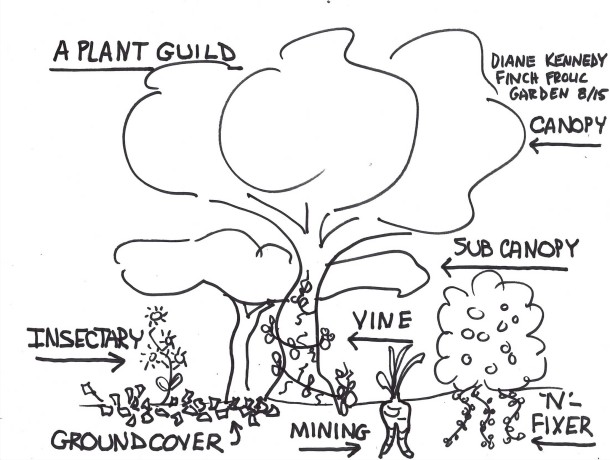
What makes up a plant guild. You May Also Like
Native Insects and IPM
- Animals, Birding, Compost, Fungus and Mushrooms, Gardening adventures, Hugelkultur, Humor, Microbes and Fungi, Natives, Other Insects, Perennial vegetables, Permaculture and Edible Forest Gardening Adventures, Ponds, Predators, Rain Catching, Reptiles and Amphibians, Seeds, Soil, Water, Water Saving, Worms
Ponds and Potatoes; A Finch Frolic New Year’s Celebration
 Our sixty degree weather here in Fallbrook, CA , gave us the opportunity to work in our garden. A year ago – 2014 – it snowed on New Year’s Eve. This year the nights are frosty, the days mercifully warmer, and the rain frustratingly rare. Our promised El Nino rains are expected to hit in force within the next couple of months. Weather they do or not, focusing on catching every precious drop in the soil, and protecting the ground from erosion and compaction, is paramount.
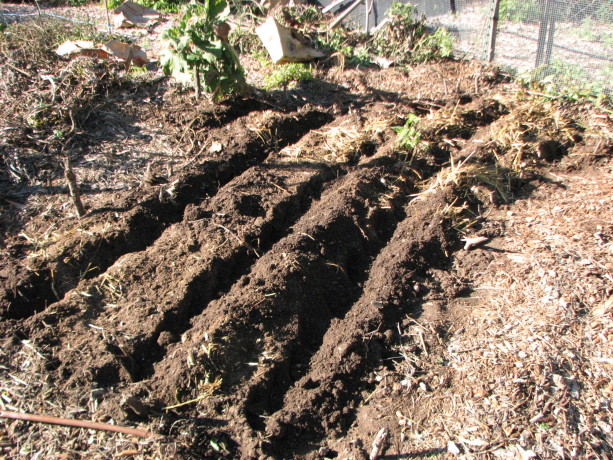
Permaculture in rows. Pretty nice soil, which had been silt from the street a couple of years ago, mixed with chicken straw, topped with leaves. No chemicals! The last day of 2015 Miranda and I spent working one of our vegetable garden beds, and reshaping our kitchen garden. When we redesigned this garden by removing (and burying) the raised beds, hugelkulturing and planting, we made a lovely Celtic design.
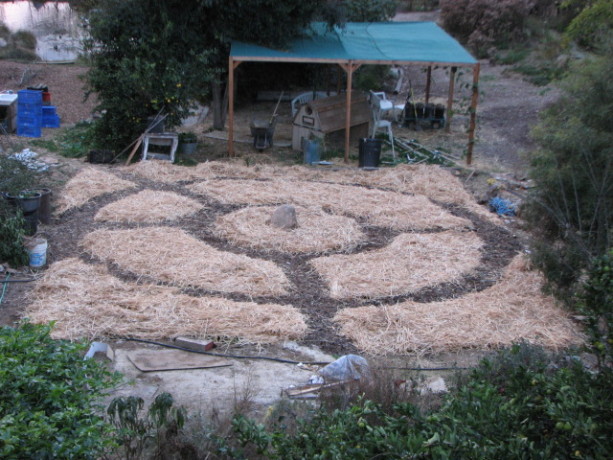
The unplanted kitchen garden newly designed in January, 2013. However the plants just won’t respect the design, so we’ve opted to lessen the pathways, turning the beds into keyhole designs for more planting space. I’ll blog more about that in the future. Because the pathways have been covered in cardboard and woodchips (sheet mulched), the soil below them is in very good shape, not dry and compacted.

How deep do roots grow? This clump of oxalis (sour grass) is white because it was growing without light under the pathway sheet mulch. The corms at the end of the long roots are about 8 inches below the plant. Good soil means deep roots; I’ve never seen this plant have anything but shallow roots. This bed has been home to sweet potatoes and various other plants, so although I try to practice the no-dig method, where you have root vegetables you must gently probe the soil for goodies. We left some of the roots, so sweet potatoes will again rise in this bed.

Miranda planting potatoes and shallots in rows. Between these rows and around the outisde other veggies were planted. We planted in rows. Usually I mix up seeds, but this time I wanted to demonstrate polyculture in row form. We planted three rows of organic potatoes (purchased from Peaceful Valley Organics), with a row of shallots between them. Between the root vegetable rows we planted a row of fava beans, and a row of sugar pod peas. Around the edges Miranda planted rows of bull’s blood beets, Parisienne carrots, and maybe some parsnips. This combination of plants will work together in the soil, following the template of a plant guild. We left the struggling eggplant, which came up late in the year after the very hot summer and has so far survived the light frost.
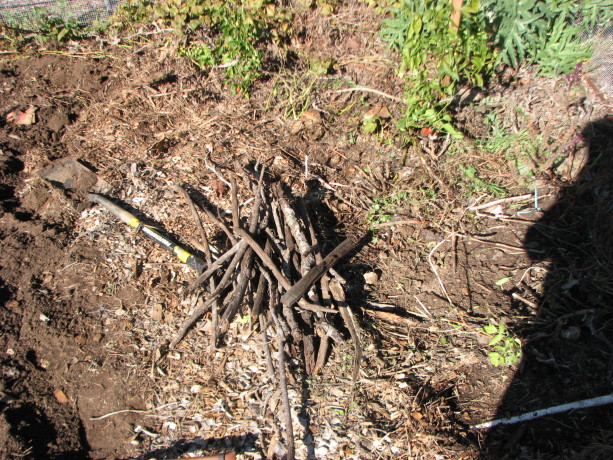
Sticks. So important for the soil. These went in vertically around the planting bed to act both as one type of gopher deterrent (a physical barrier) and also as food and as water retention for the veggies. On top of the bed we strew dead pond plants harvested from our small pond near our house, which will be receiving an overhaul soon (hopefully before the Pacific chorus frogs start their mating season in force). We didn’t water the seeds in, as there is rain predicted in a few days. The mulch on top will help protect the seeds from hungry birds.
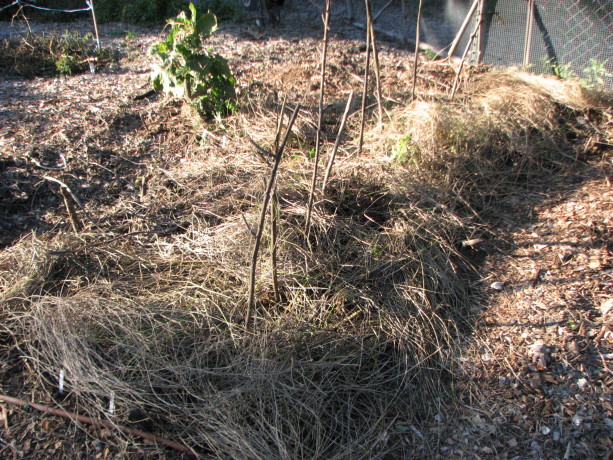
The finished bed topped with dead pond weeds (which don’t have seeds that will grow on dry land!). The sticks are to steady future bush peas. A good way to spend the last day of the year: setting seeds for food in the spring.
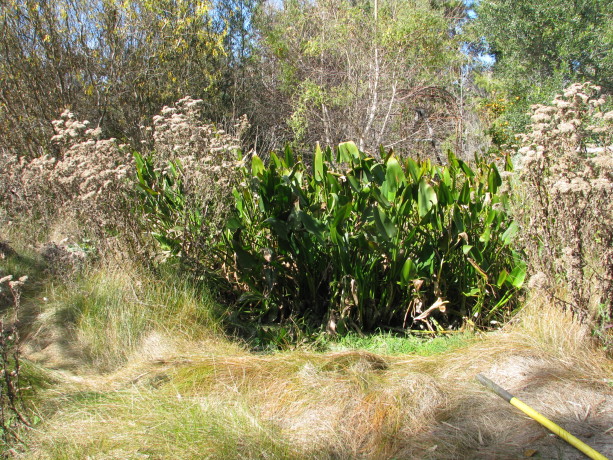
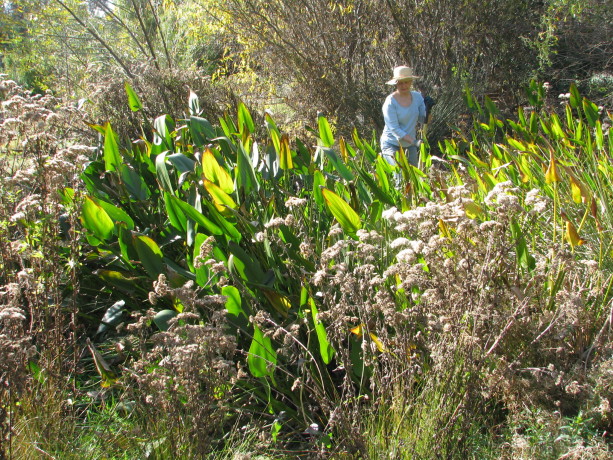
Before: The little pond, which is also a silt basin, almost completely filled by an enthusiastic clump of pickerel. This pond is wonderful habitat for birds, frogs, dragonflies, and so many other creatures, and as a water source for raccoon, possum, coyotes, ducks, and who knows what else that visits in the night. Then on January 1 I decided it was a good opportunity to clear out the excess pickerel that had taken over our lower small pond. With the well off for the winter, and very light rainfall, this pond has gone dry. A perfect opportunity for me to get in there with a shovel, especially knowing that I already had a chiropractor’s appointment set for Monday (!).

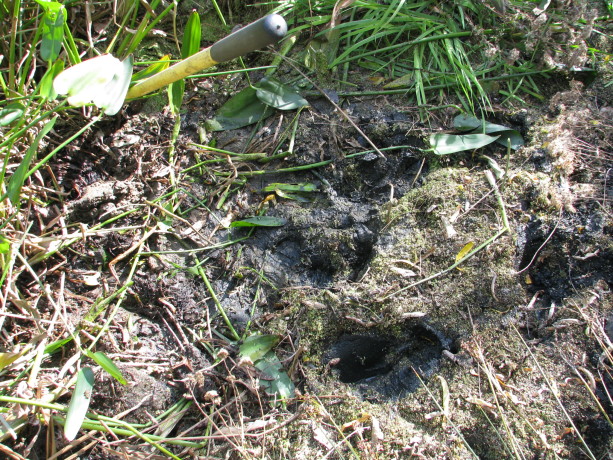
Making some headway. The mud was slick and spongy, but not unsafe, and not nearly as smelly as I had anticipated. Pickerel is not a native to San Diego, but it is a good habitat pond plant and it has edible parts. I wasn’t tempted, however. Its roots are thick and form a mat several inches thick hiding rhizomes that are up to an inch in diameter. I’d cut into the mass from several sides, pull the mass out with my gloved hands and throw the heavy thing out of the pond. Its good to be in contact with the earth, in all its forms. I couldn’t think of a better way to use the holiday afternoon.
Thick root mass hiding large rhizomes made removal a real exercise. This is why I practice yoga and attend Zumba class with Ann Wade at the Fallbrook Community Center! I moved at least a ton of material in four hours. Just before sunset I decided that I was done. About an hour before that, my body had decided that I was done, but I overrode its vote to finish. I left some pickerel for habitat and looks, and will try to contain it by putting some sort of a physical barrier along the roots, such as urbanite.
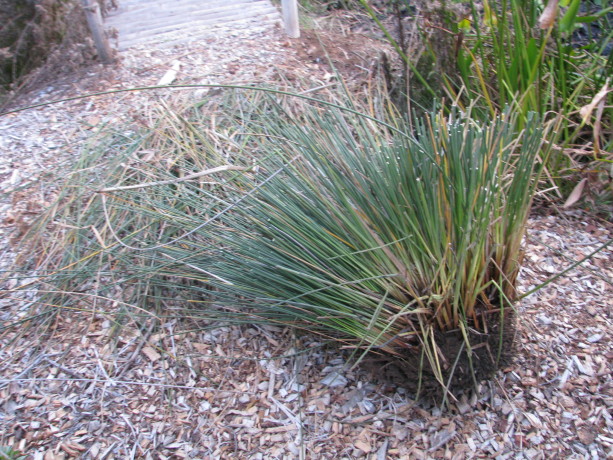
Removal of one of the three really nasty plants around the edge was a victory. The ends of their leaves are like needles, and impossible to walk past or work around, and dangerous for little kids. This root ball was harder to dig out than the mucky pickerel, and the success even sweeter. Revenge for all the pokes! We also might harvest some of the silty clay for use in the upper pond, although the prospect of carting heavy wet mud uphill isn’t as appealing as it might sound. That needs to happen today or tomorrow, as the aforementioned rain is expected, and I want to fill this pond again for the frogs.
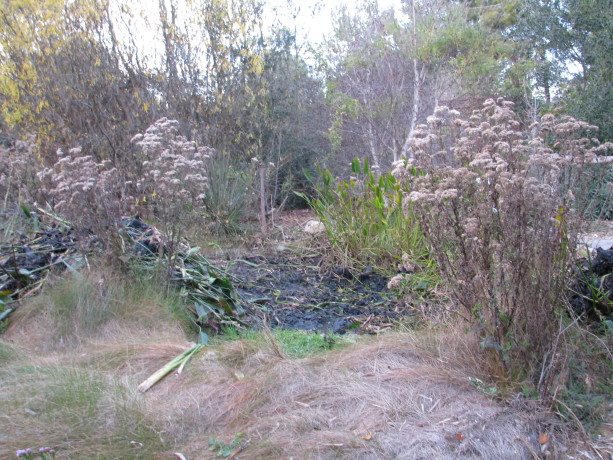
After: Finished with the digging. Still more work to do -including cleanup of the mountain of organic matter – before refilling. One good thing about the pond going dry is that there are no more mosquito fish (gambuzia) in it. Mosquito fish are very invasive, and love to eat frog’s eggs and tadpoles far better than they do mosquito larvae. When the pond fills with non-chemically treated water (rain and well water), some of the microscopic aquatic creatures will repopulate the water. I’ll add some water from the big pond as well to make sure there are daphnia and other natural water friends in it, which will do a much better job at mosquito control without sacrificing our native frogs. I can’t get all the gambuzia out of our big pond, but at least they are out of the other two. Once dragonflies start in again, their young will gladly eat mosquito larvae.
So here on the morning of the second day of 2016, I lay in my warm bed prior to rising to start the chores of the day, stiff as an old stiff thing as my body adjusts to strenuous manual labor again, looking forward to more gardening duties to prepare Finch Frolic Garden for the reopening March 1, and for the rains.
The best part of heavy gardening duties is that I can finish off the Christmas cookies guilt-free!
You May Also Like
Native Insects and IPM