- Arts and Crafts, Building and Landscaping, Gardening adventures, Permaculture and Edible Forest Gardening Adventures, Recycling and Repurposing
Urbanite, the New Name for Chunks of Cement
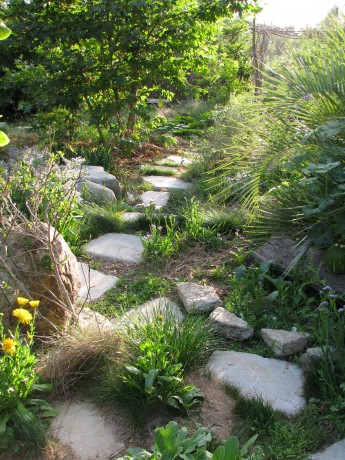
Urbanite stepping stones work beautifully in the garden allowing plants to grow in between. Just as old LPs or records are now called vinyls, so are chunks of a neighbor’s patio called urbanite. I like the term because it makes the mental transition from a waste product – cement chunks – to building material. Put an ‘ite’ at the end, and you can use it. The name urbanite also makes me envision pieces of nature-less cities being used for more natural landscapes. There are spaces around chunks of cement for plants to grow.
Urbanite lasts a long time, too, and it is free. The idea of working with cement chunks doesn’t sound aesthetically pleasing, but done well it always has visitors to Finch Frolic Garden enthusiastic. A pathway and two retaining walls were made of urbanite, and they are all wonderful.
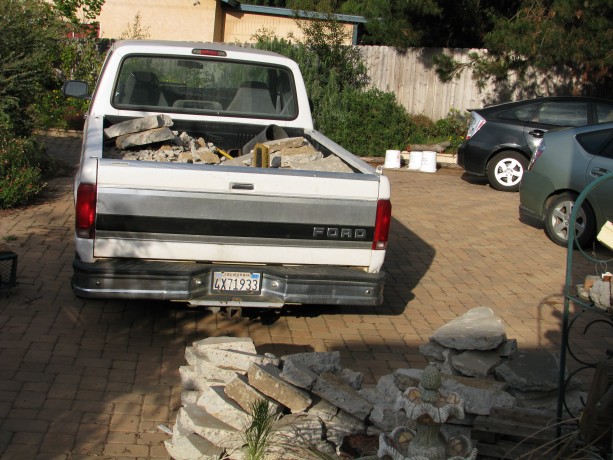
A friend and former co-worker called me a few weeks ago to offer urbanite from a piece of her patio that had to be repoured. It took awhile but I found some help to go pick it up. With a small pickup truck we managed two loads; the pieces were stacked on the patio, but the only way to access them was to drive the pickup below the patio wall. Unfortunately, the ground was at an unnerving angle, and quite sandy so there was little traction. I handed pieces of urbanite over the wall and down to Jacob, who loaded them into the tilted truck. It was quite warm that day so we were well cooked. There was a lot left.
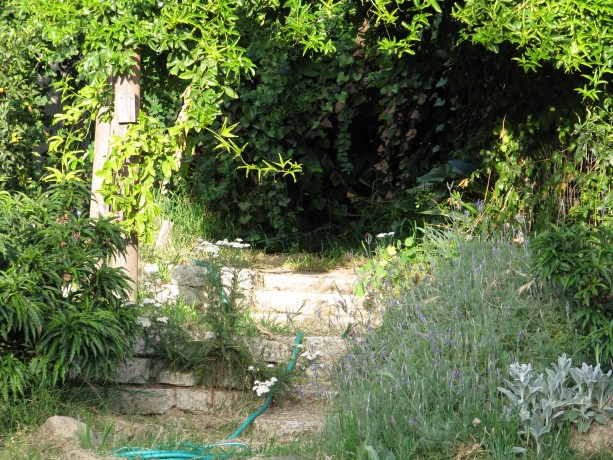
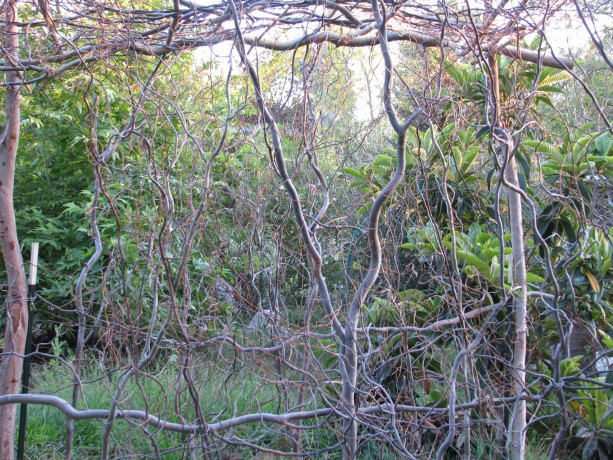
You can see the retaining wall and stairs made from urbanite peeking out from under the plants. Then Jacob arranged for me to borrow an old 2-ton pickup with 4-wheel drive. My daughter and I headed over two days ago during a cloudy morning intending to get the truck very close to the wall. No way. The truck tilted dangerously and began to slide, so I had to park it out on the driveway. Of course the sun came out. We spent three hours taking turns tossing huge chunks of cement over the patio wall, shot-putting the pieces so that they wouldn’t hurt the plants at the base of the wall, and then picking them up (finding some of them that had rolled downhill) and carrying them across the shifty dirt to hoist the pieces up and into the bed of the large truck. We swept rubble into nursery containers and dumped them into the truck as well.
Well cooked and completely exhausted, we made it home with the whole load, the truck tires just a little squished. Now we have urbanite to replace some of the stairs made from palms that are beginning to soften or which have been eaten by bunnies.
Ugh! Unfortunately, we still have to unload the truck.
- Animals, Birding, Chickens, Gardening adventures, Heirloom Plants, Humor, Permaculture and Edible Forest Gardening Adventures, Photos, Ponds, Reptiles and Amphibians
Happy Easter!

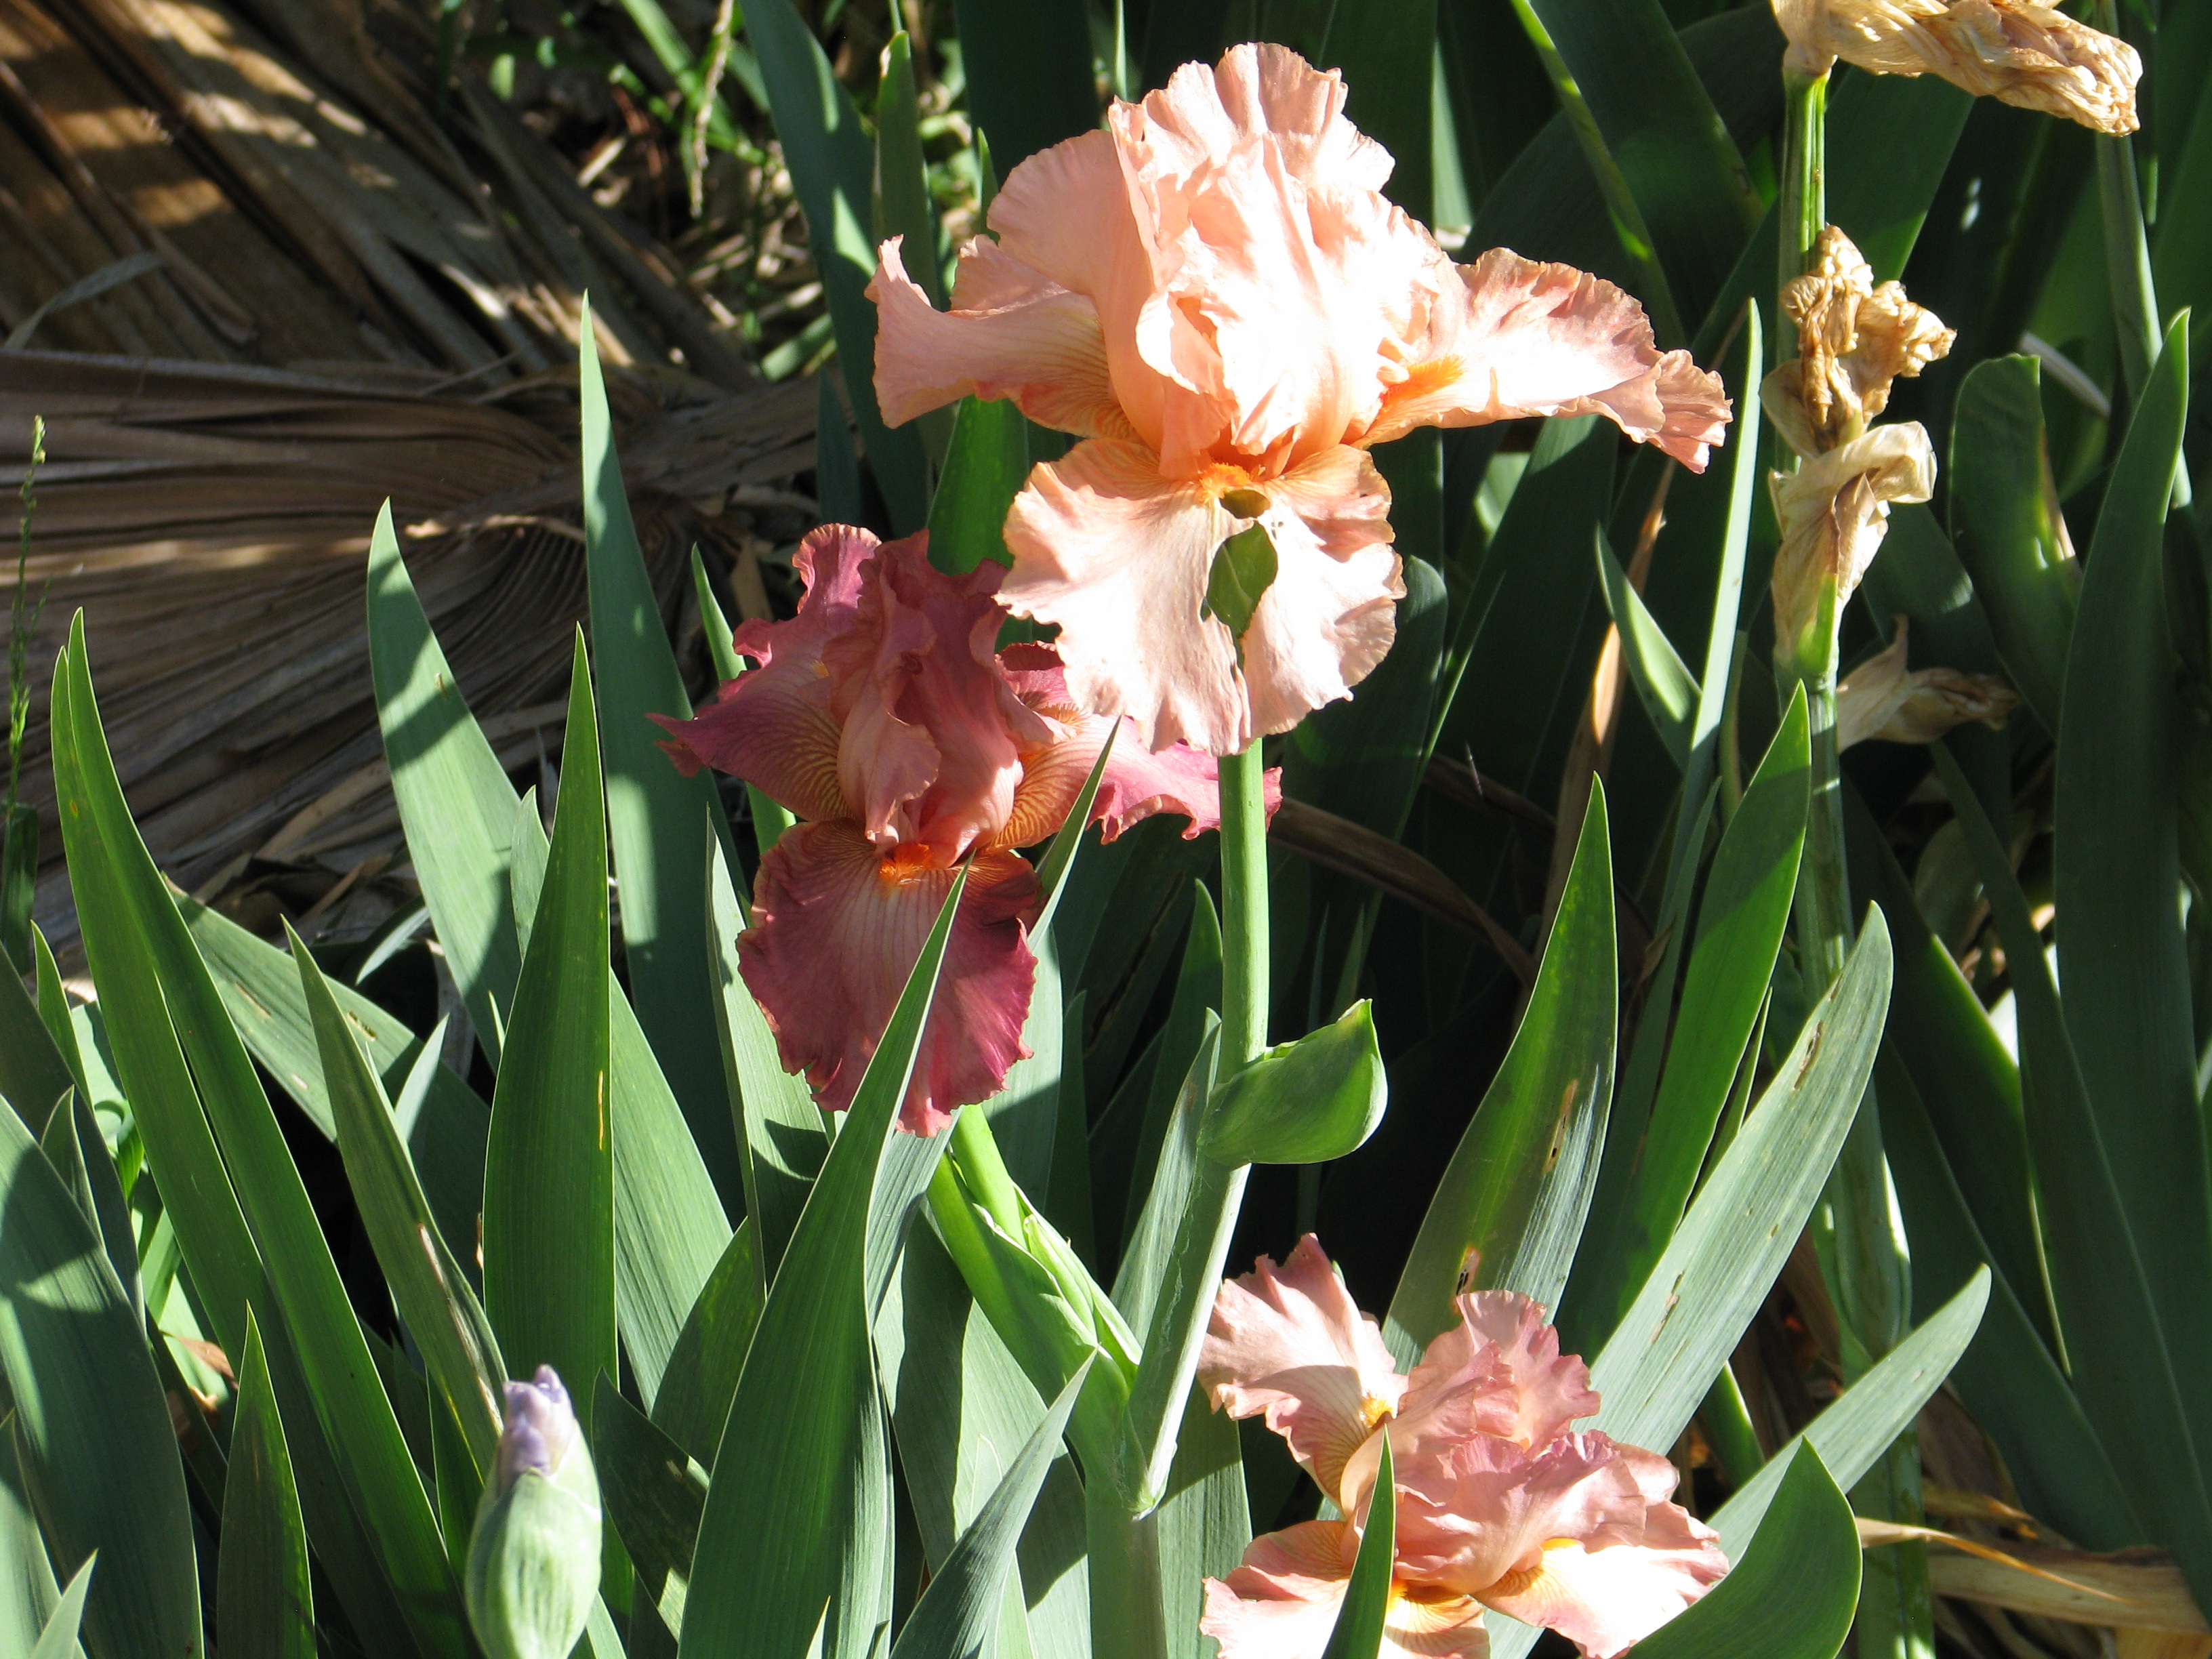
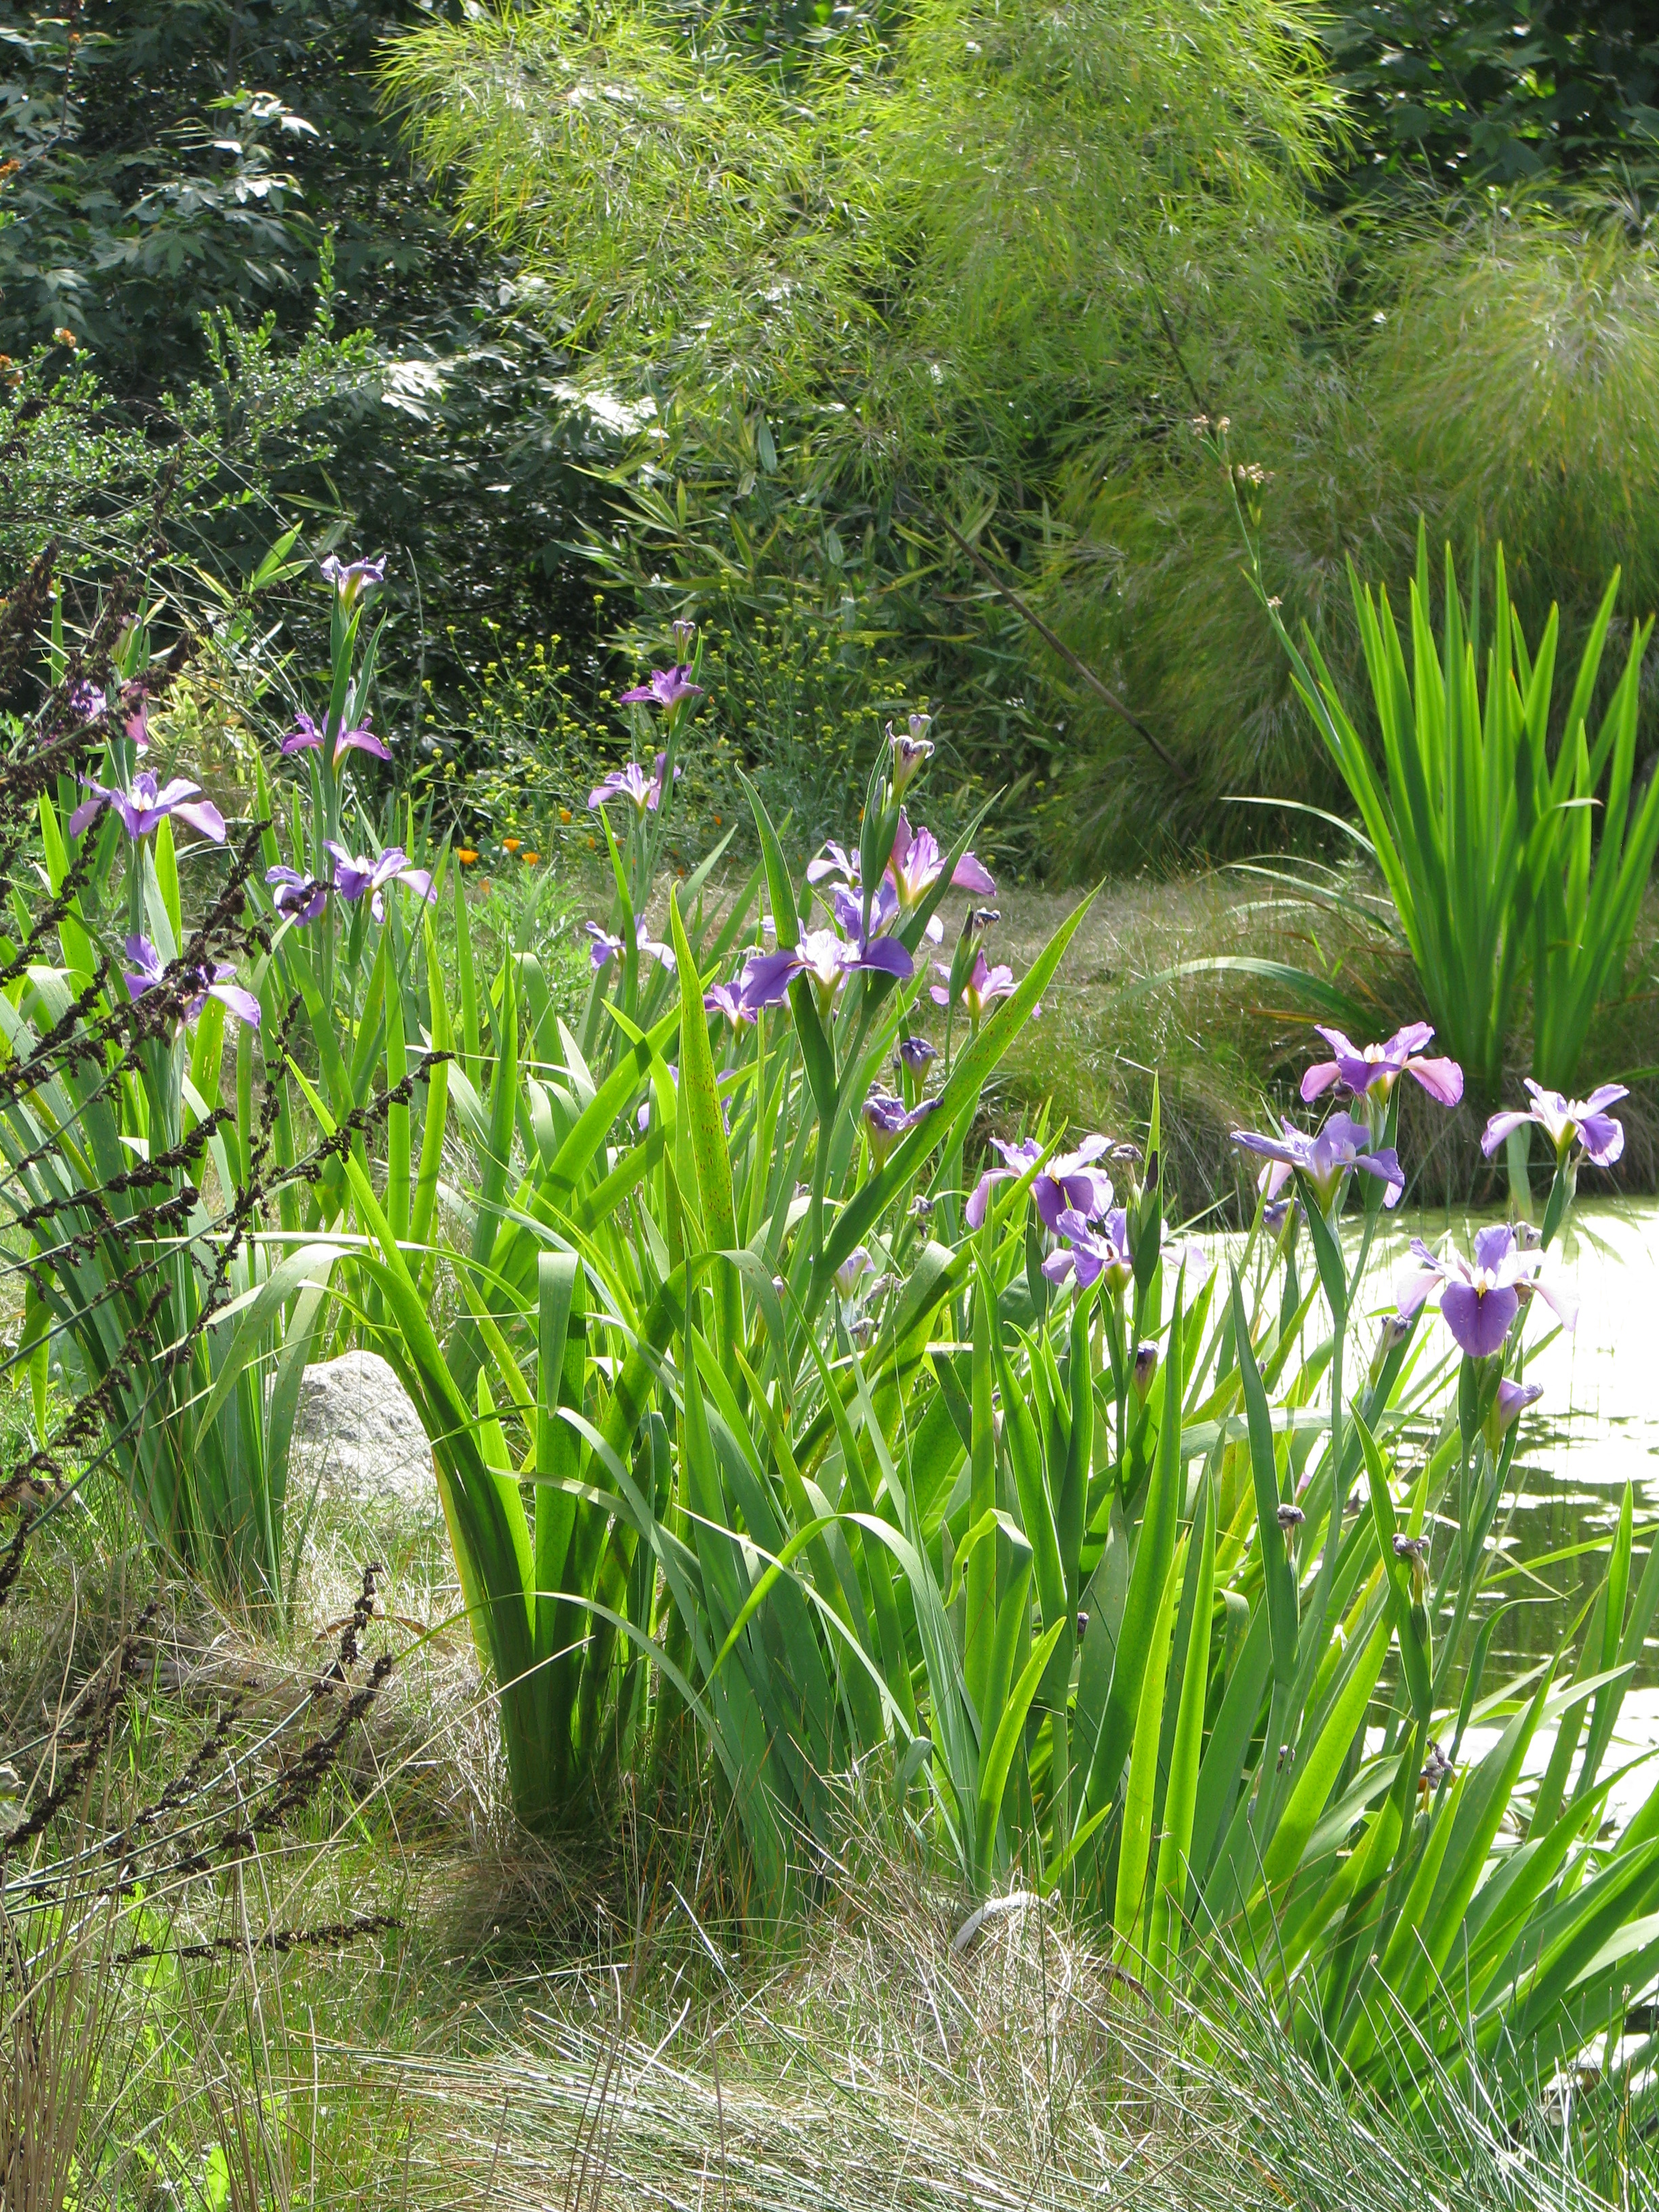
Heirloom irises from my good friend Jean are blooming. 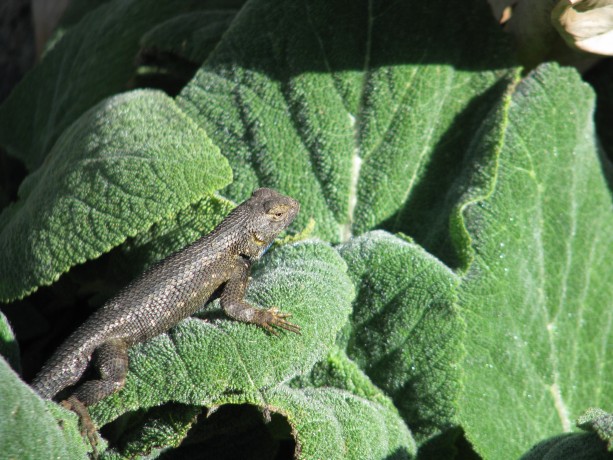
A Western fence lizard suns and guards his territory atop a clary sage leaf. See the flash of blue under his chin to attract the ladies? 
This green calla lily is gorgeous. 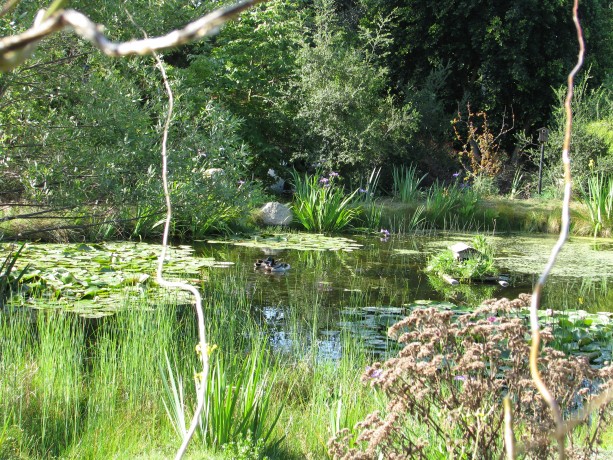
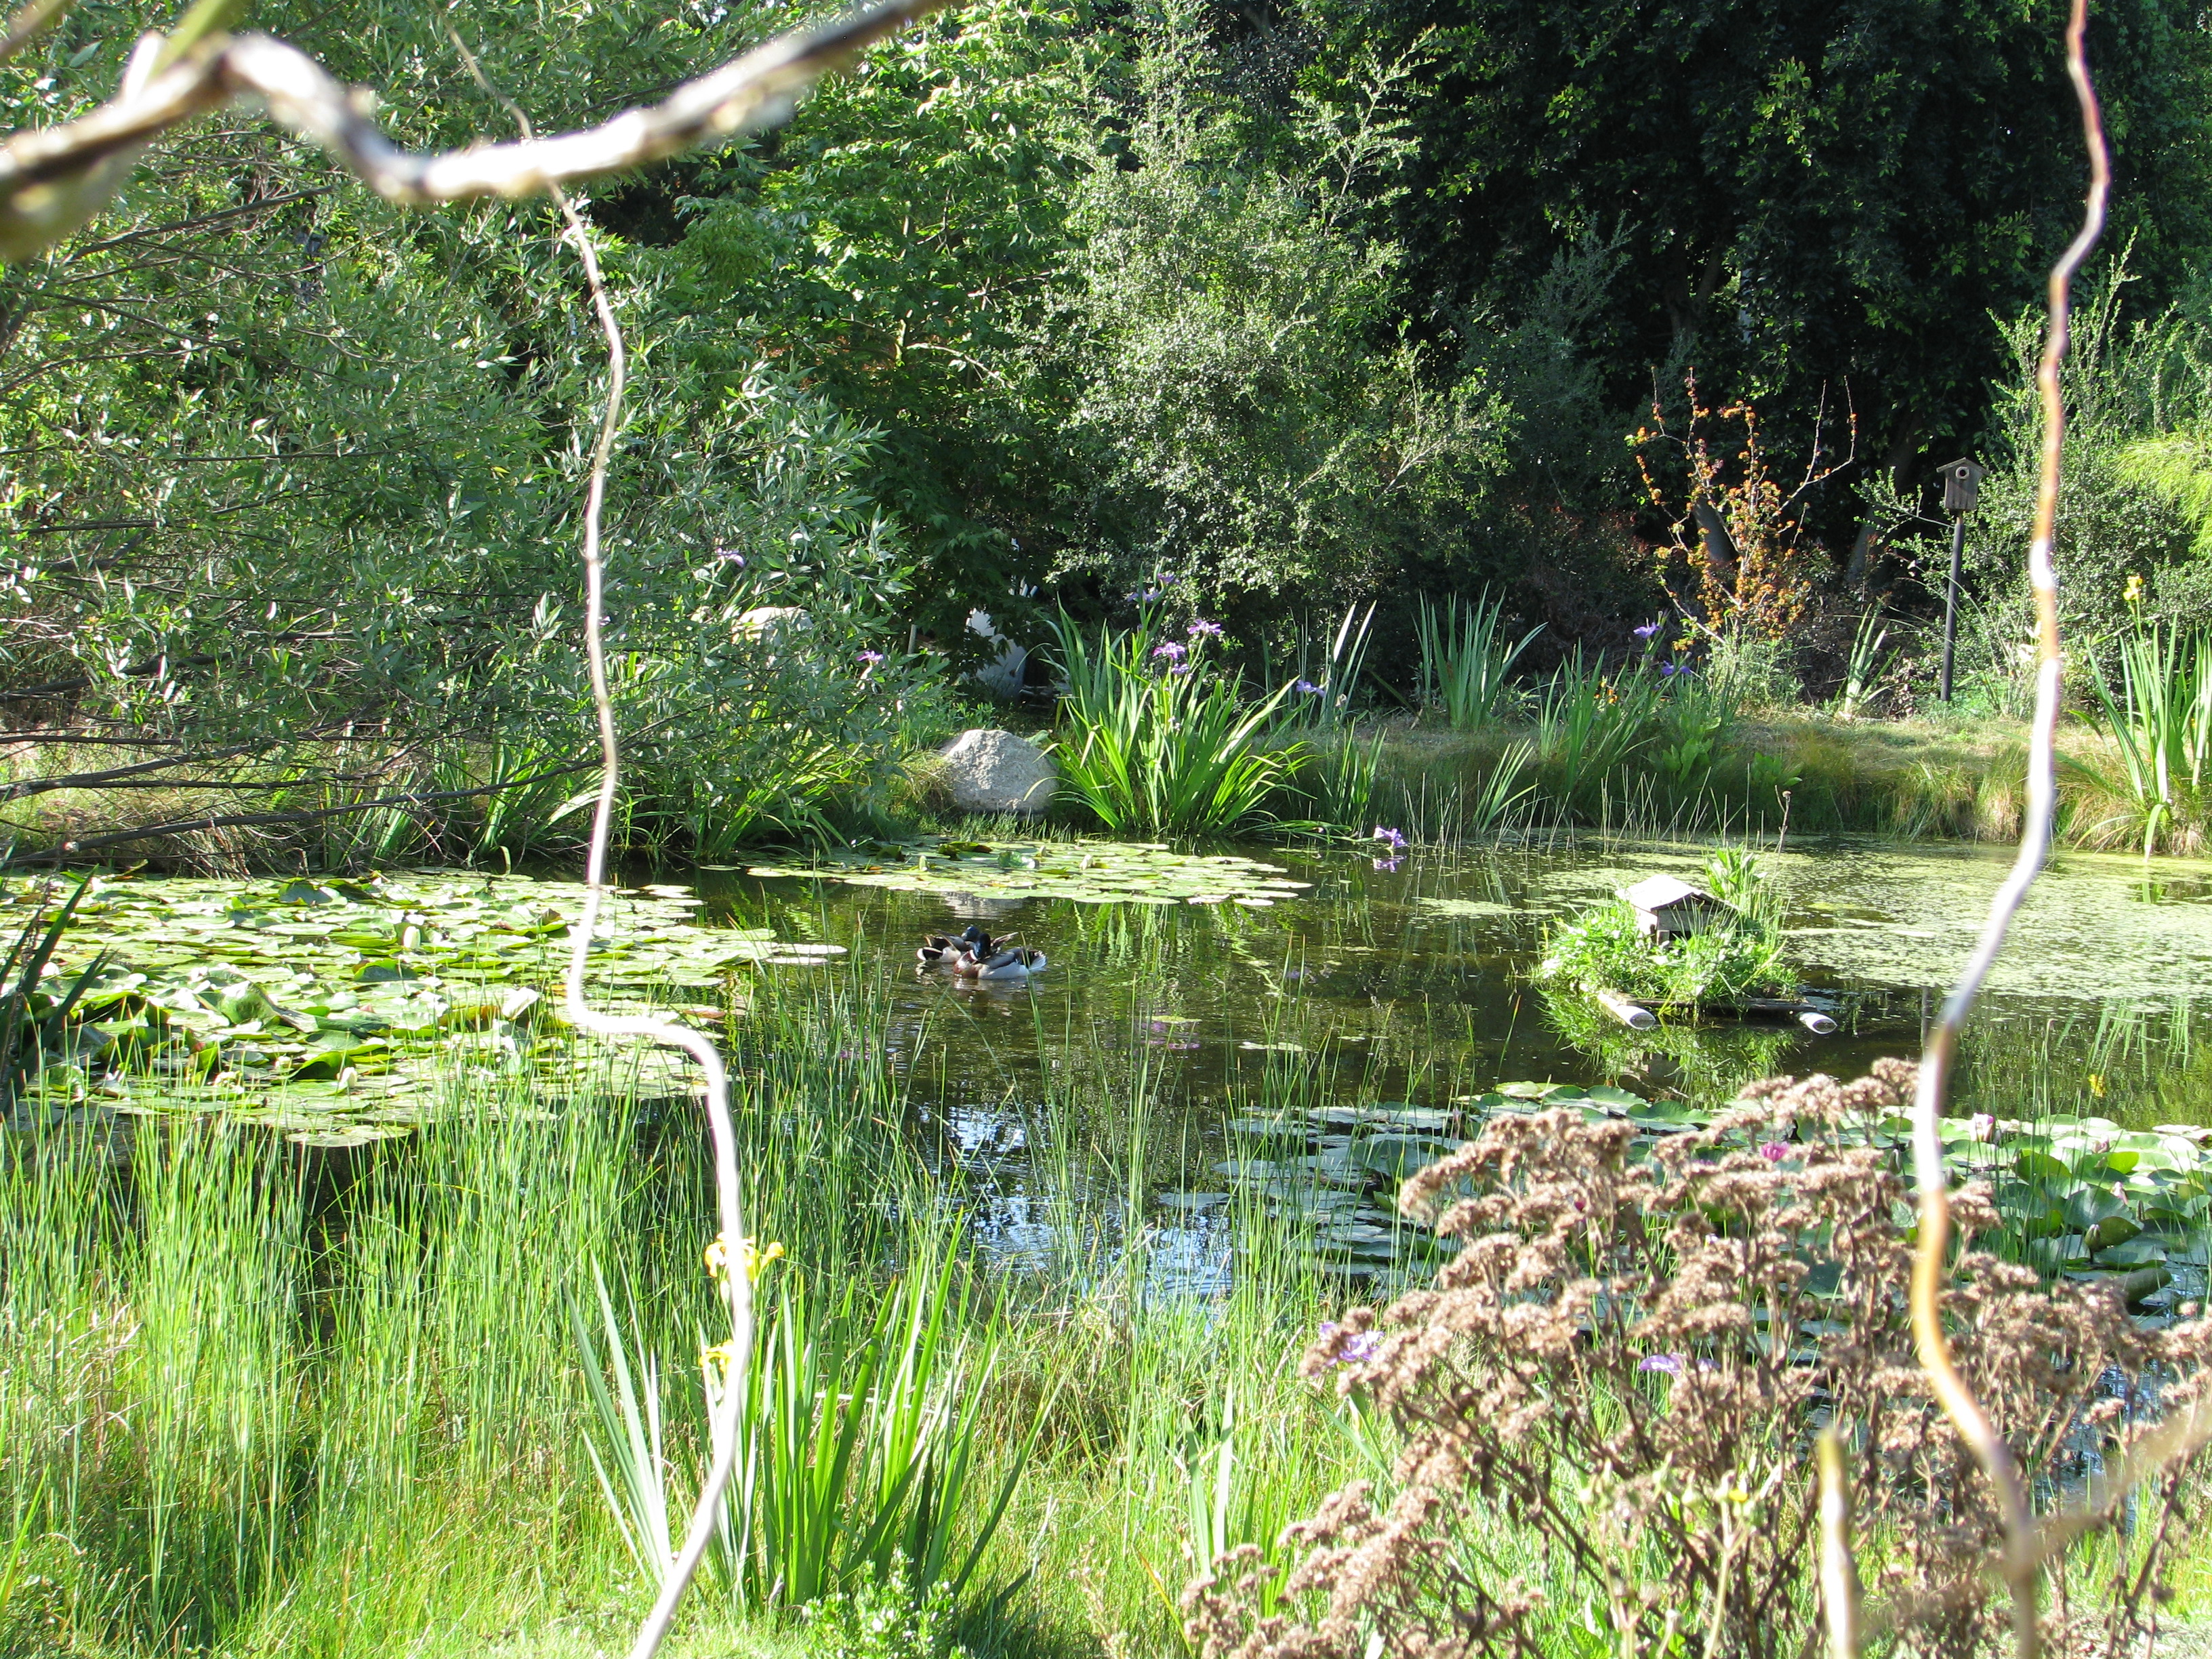
Framed by curly willow from the Withy Bird Hide, two drakes swim in the pond on Easter morning. 
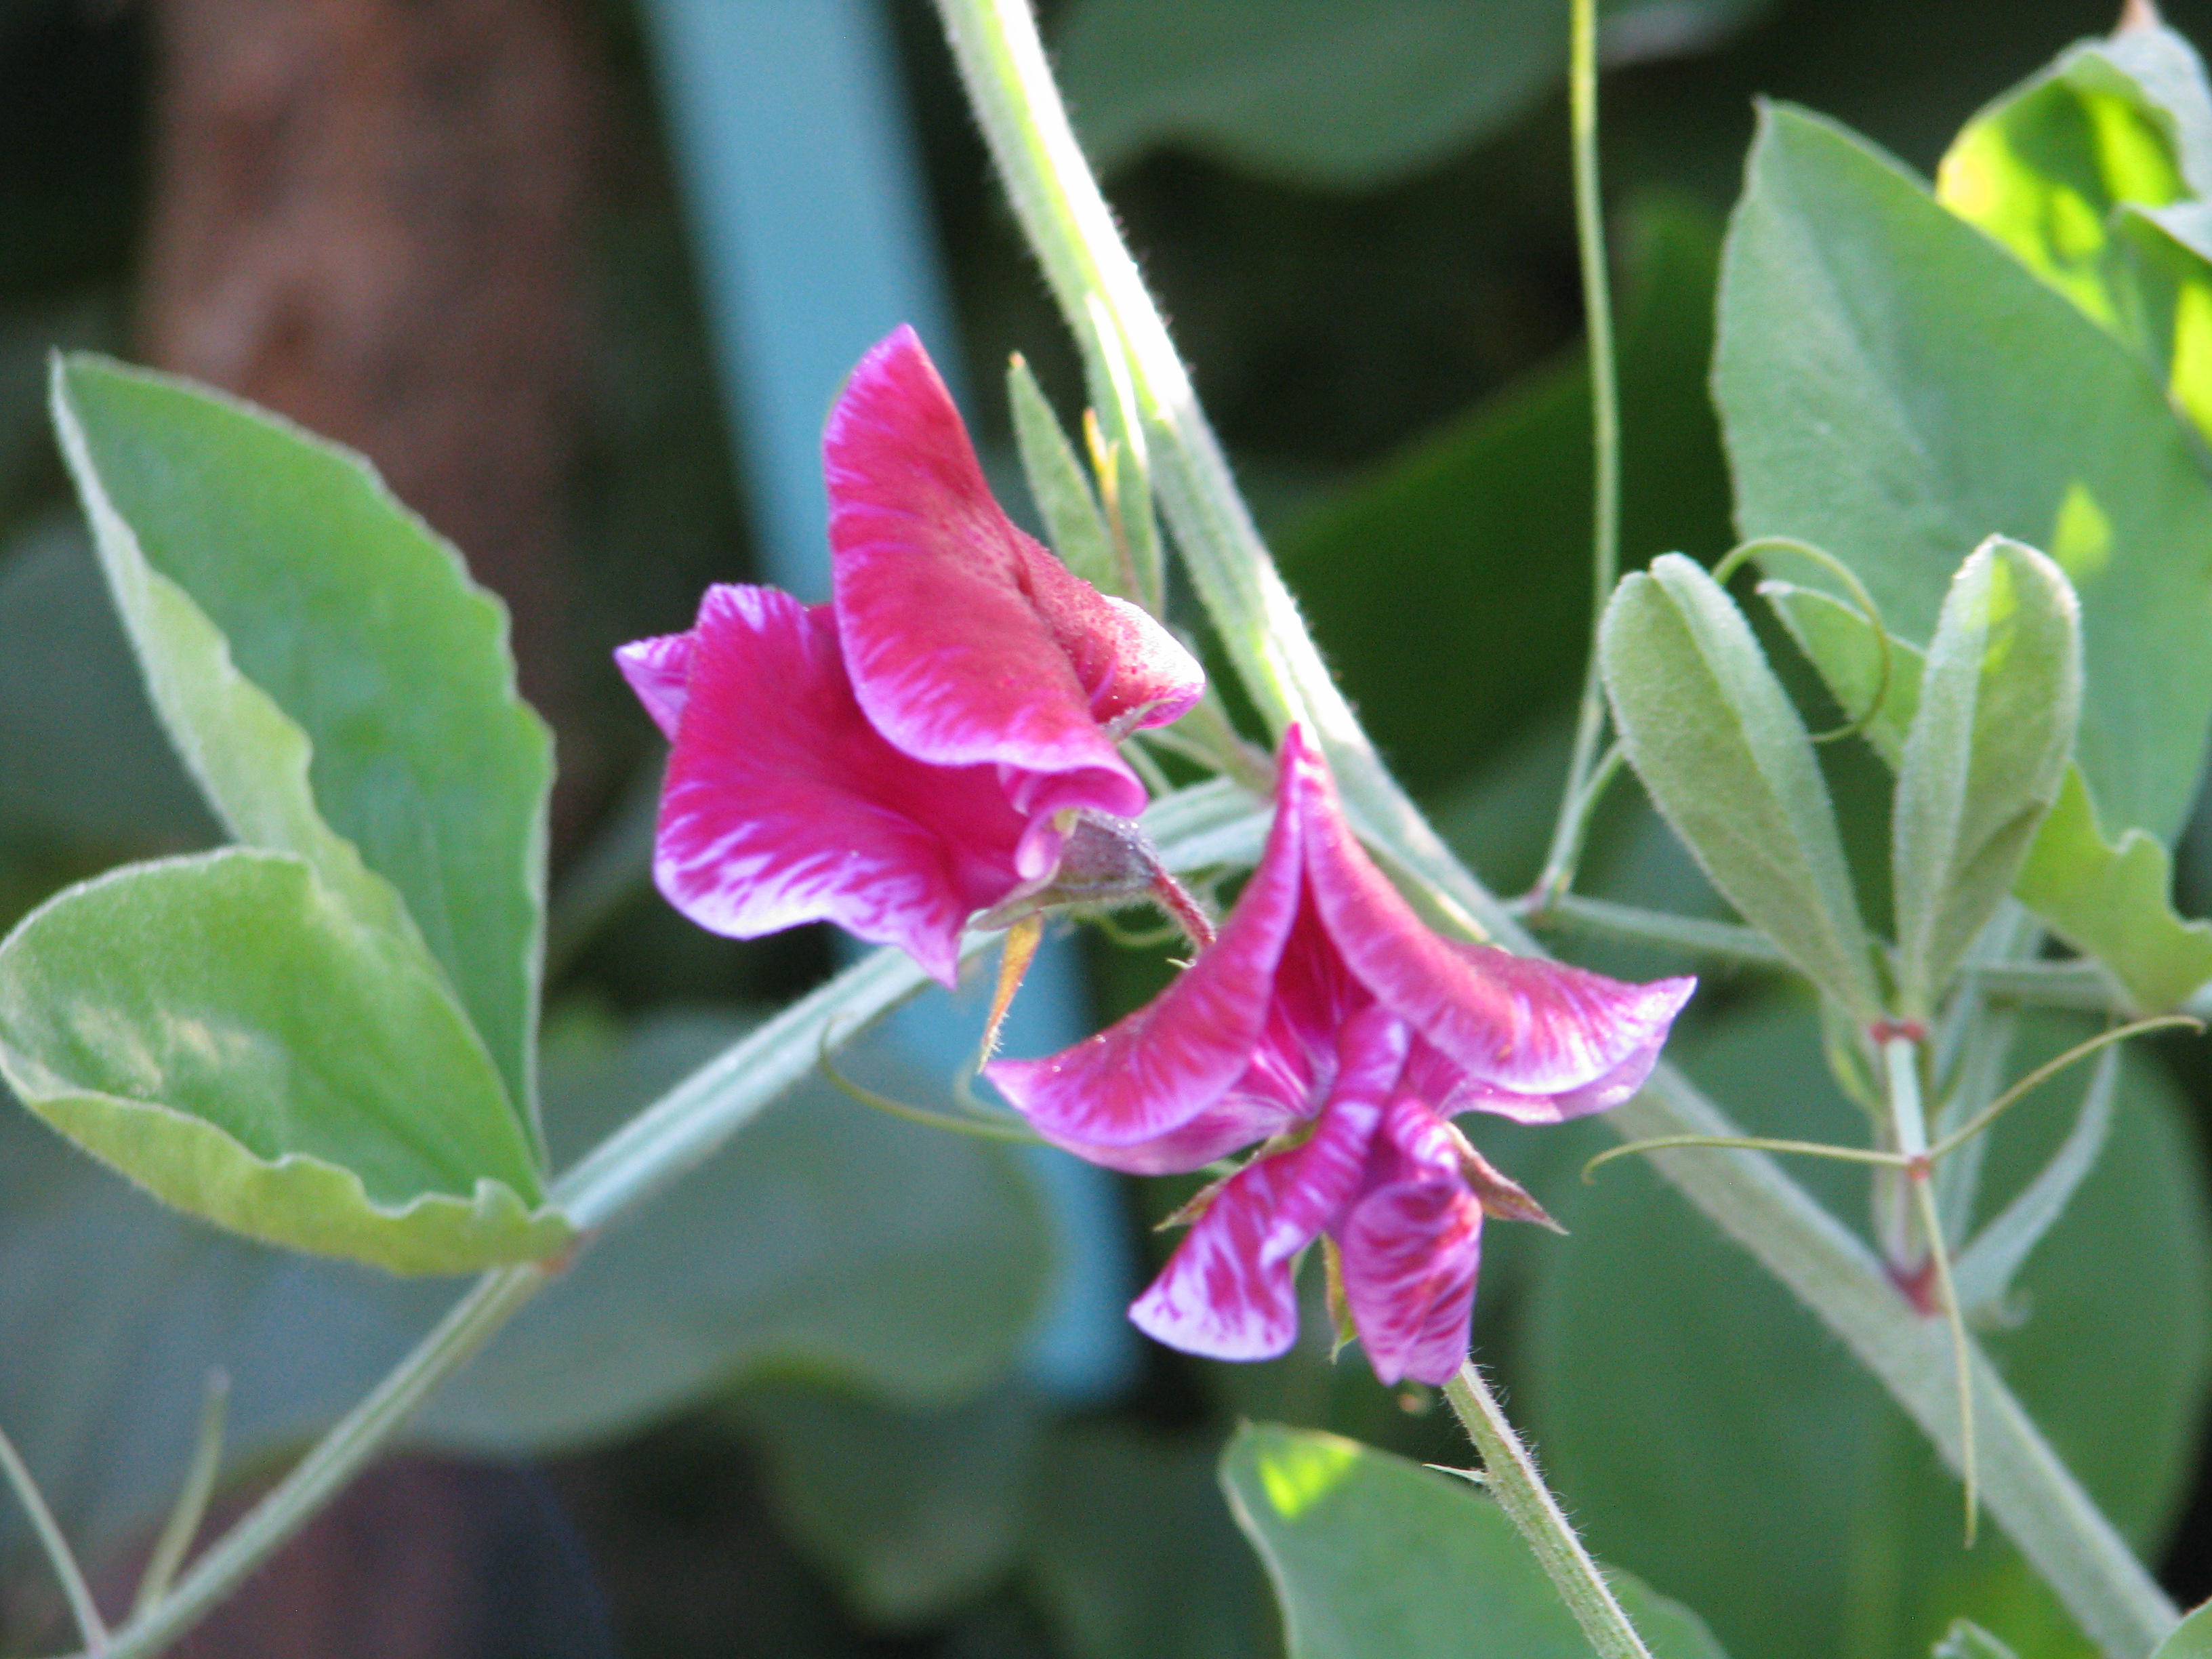
Sweet peas are still blooming. They hold the permaculture precept of everything having three purposes: they are nitrogen fixers, they are edible, and they are gorgeous. 
A fancy drake who showed up this morning. 
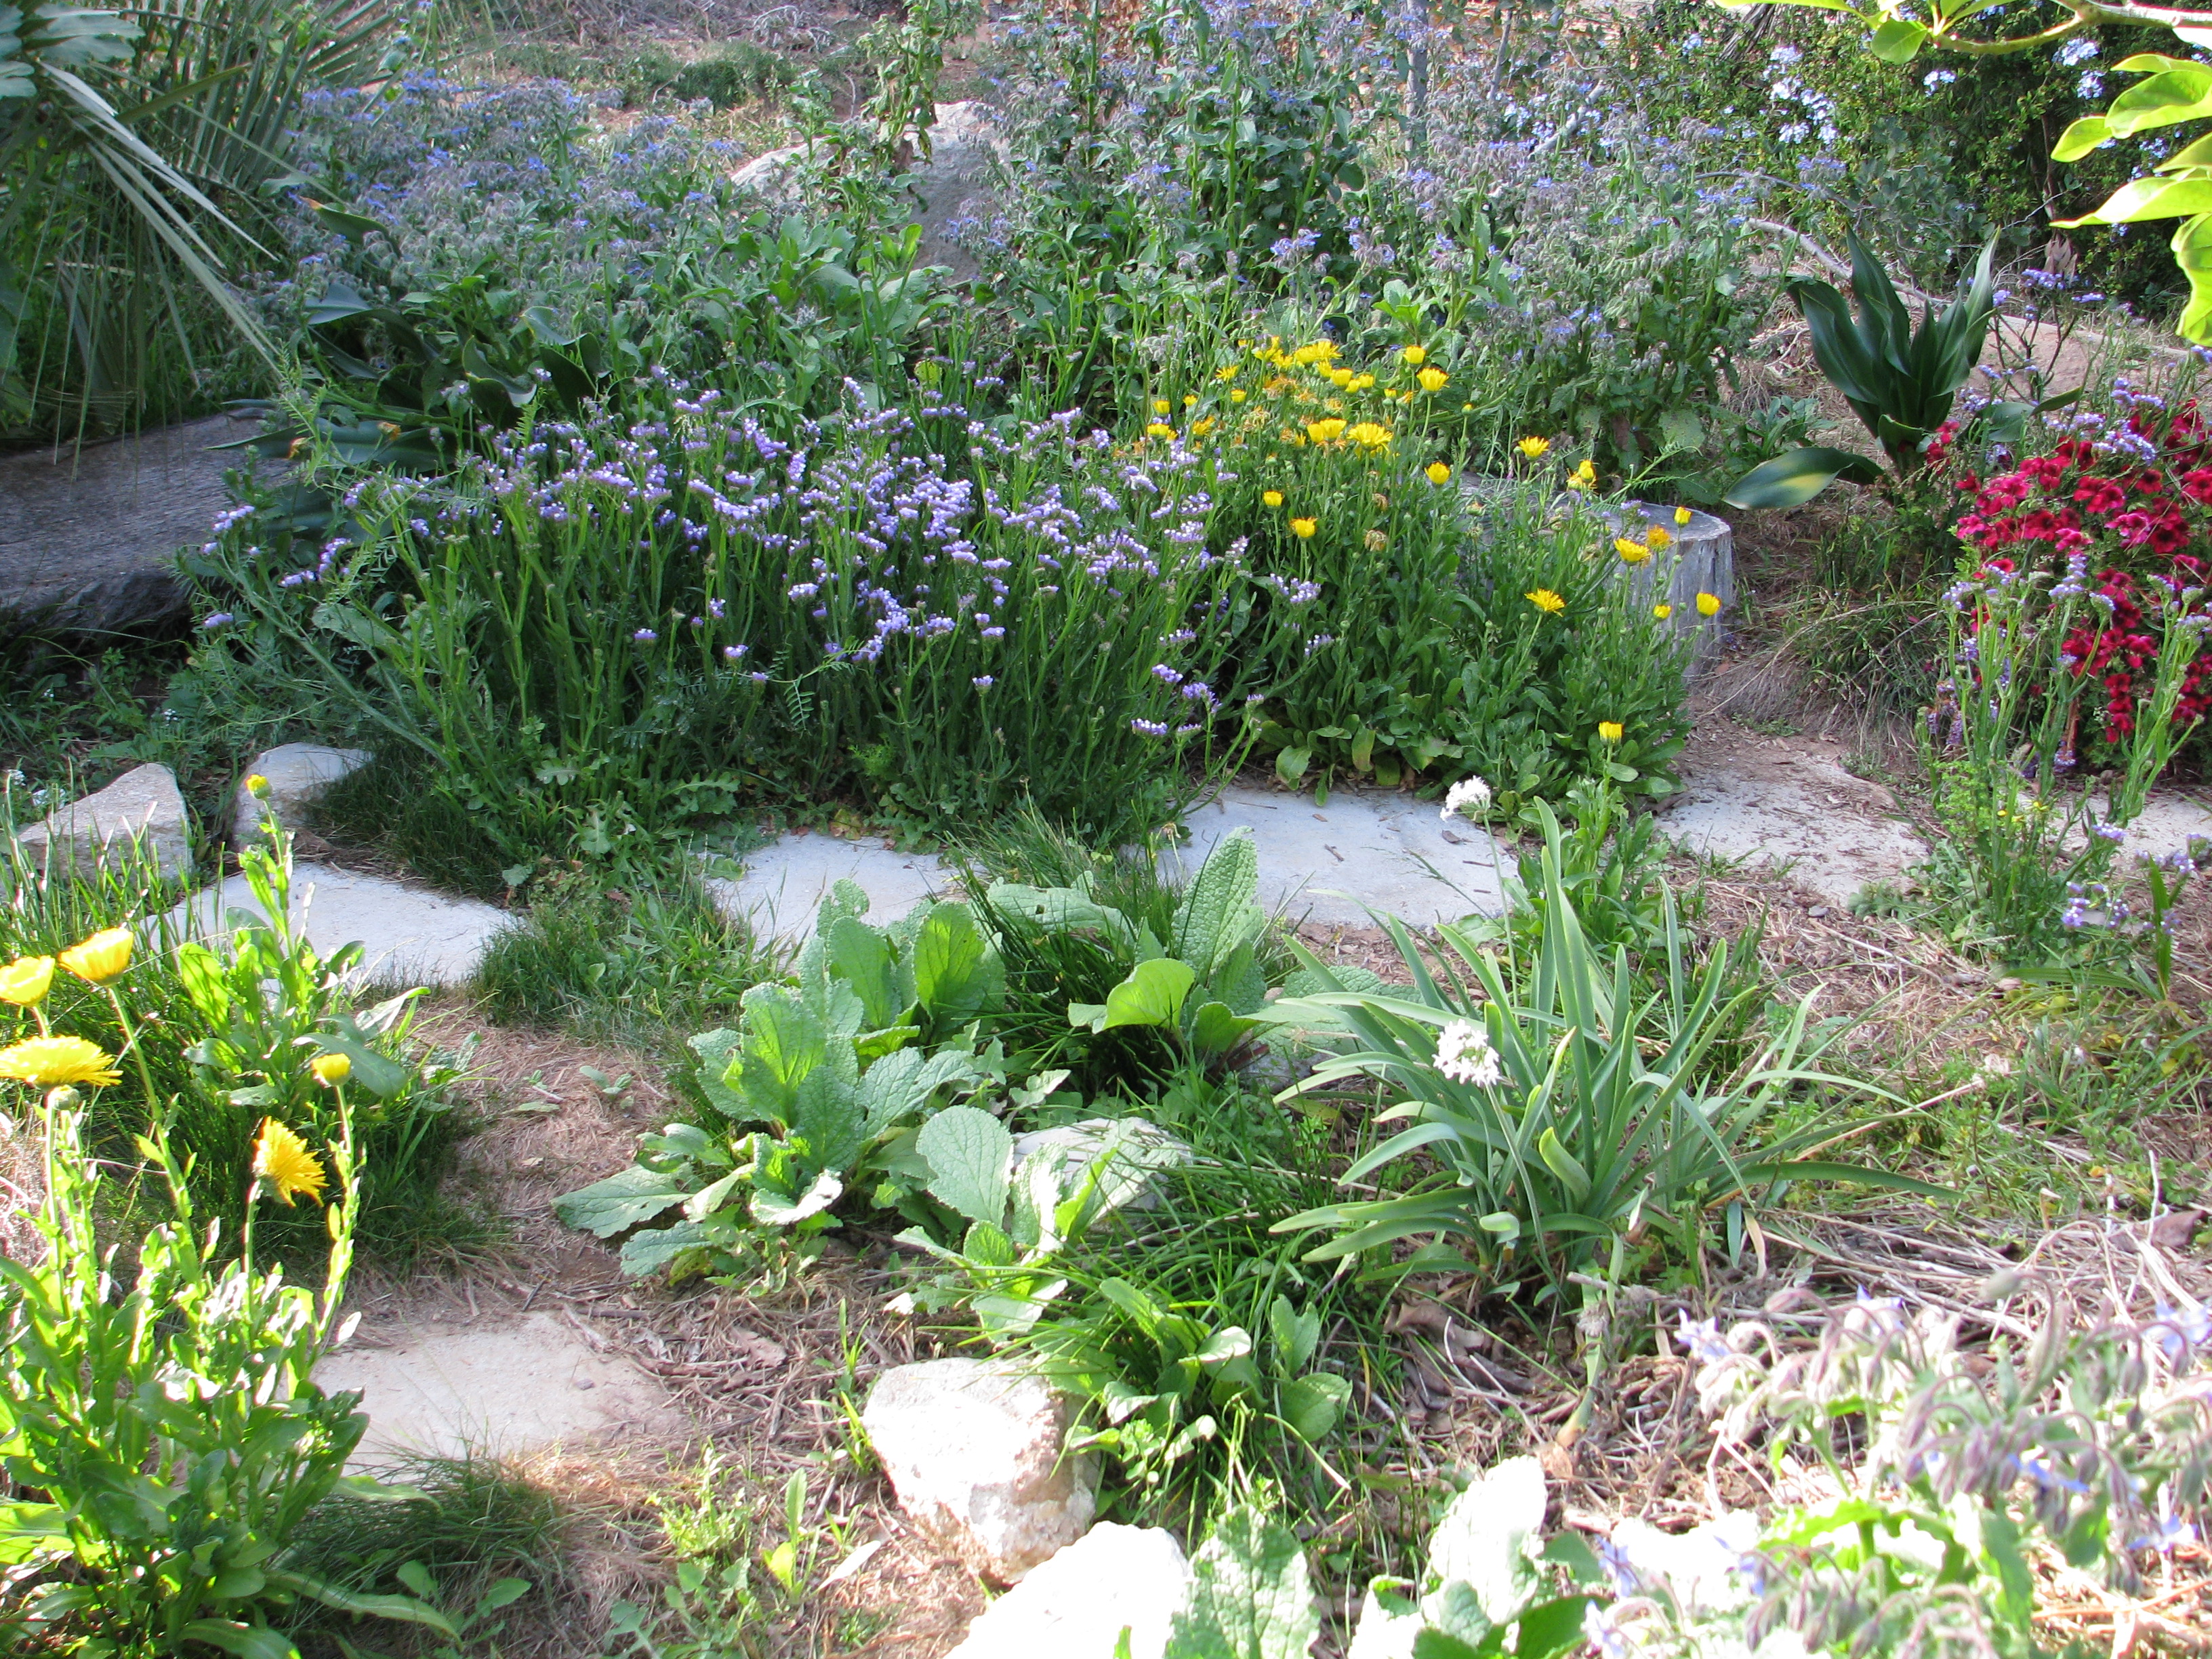
The irises surrounding the pond are spectacular right now. Blue, dark blue and yellow flag. 
Baby bunny has been growing out his ears. He’s enjoying a warm dirt bath. 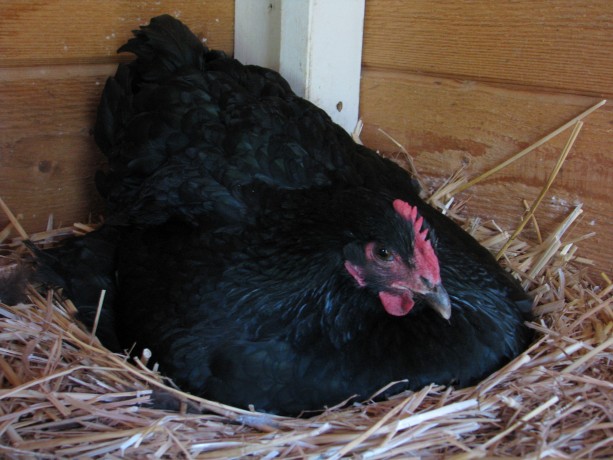
Mulan has gone broody. Such a large chicken puddles out over the wooden egg she’s trying to hatch. We’re feeding her an oatmeal mixture in a dish because she won’t come down during the day. 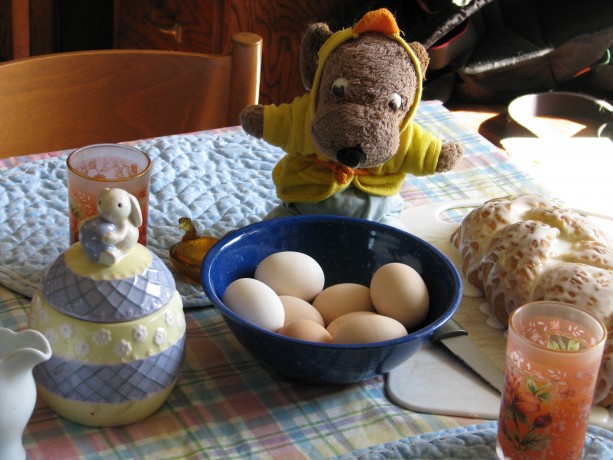
Easter breakfast. Hard boiled eggs, naturally colored by our hens, fresh tangerine juice, our traditional stollen from my mother’s recipe, and Peanut in his chicky robe ready to launch into the food. Peanut doesn’t act his age, of about 40+ years, but has traveled and been photographed extensively in Europe and Ecuador. Its nice that he wakes up for holidays. You May Also Like

Native Insects and IPM
- Animals, Compost, Fungus and Mushrooms, Gardening adventures, Permaculture and Edible Forest Gardening Adventures, Soil, Water Saving
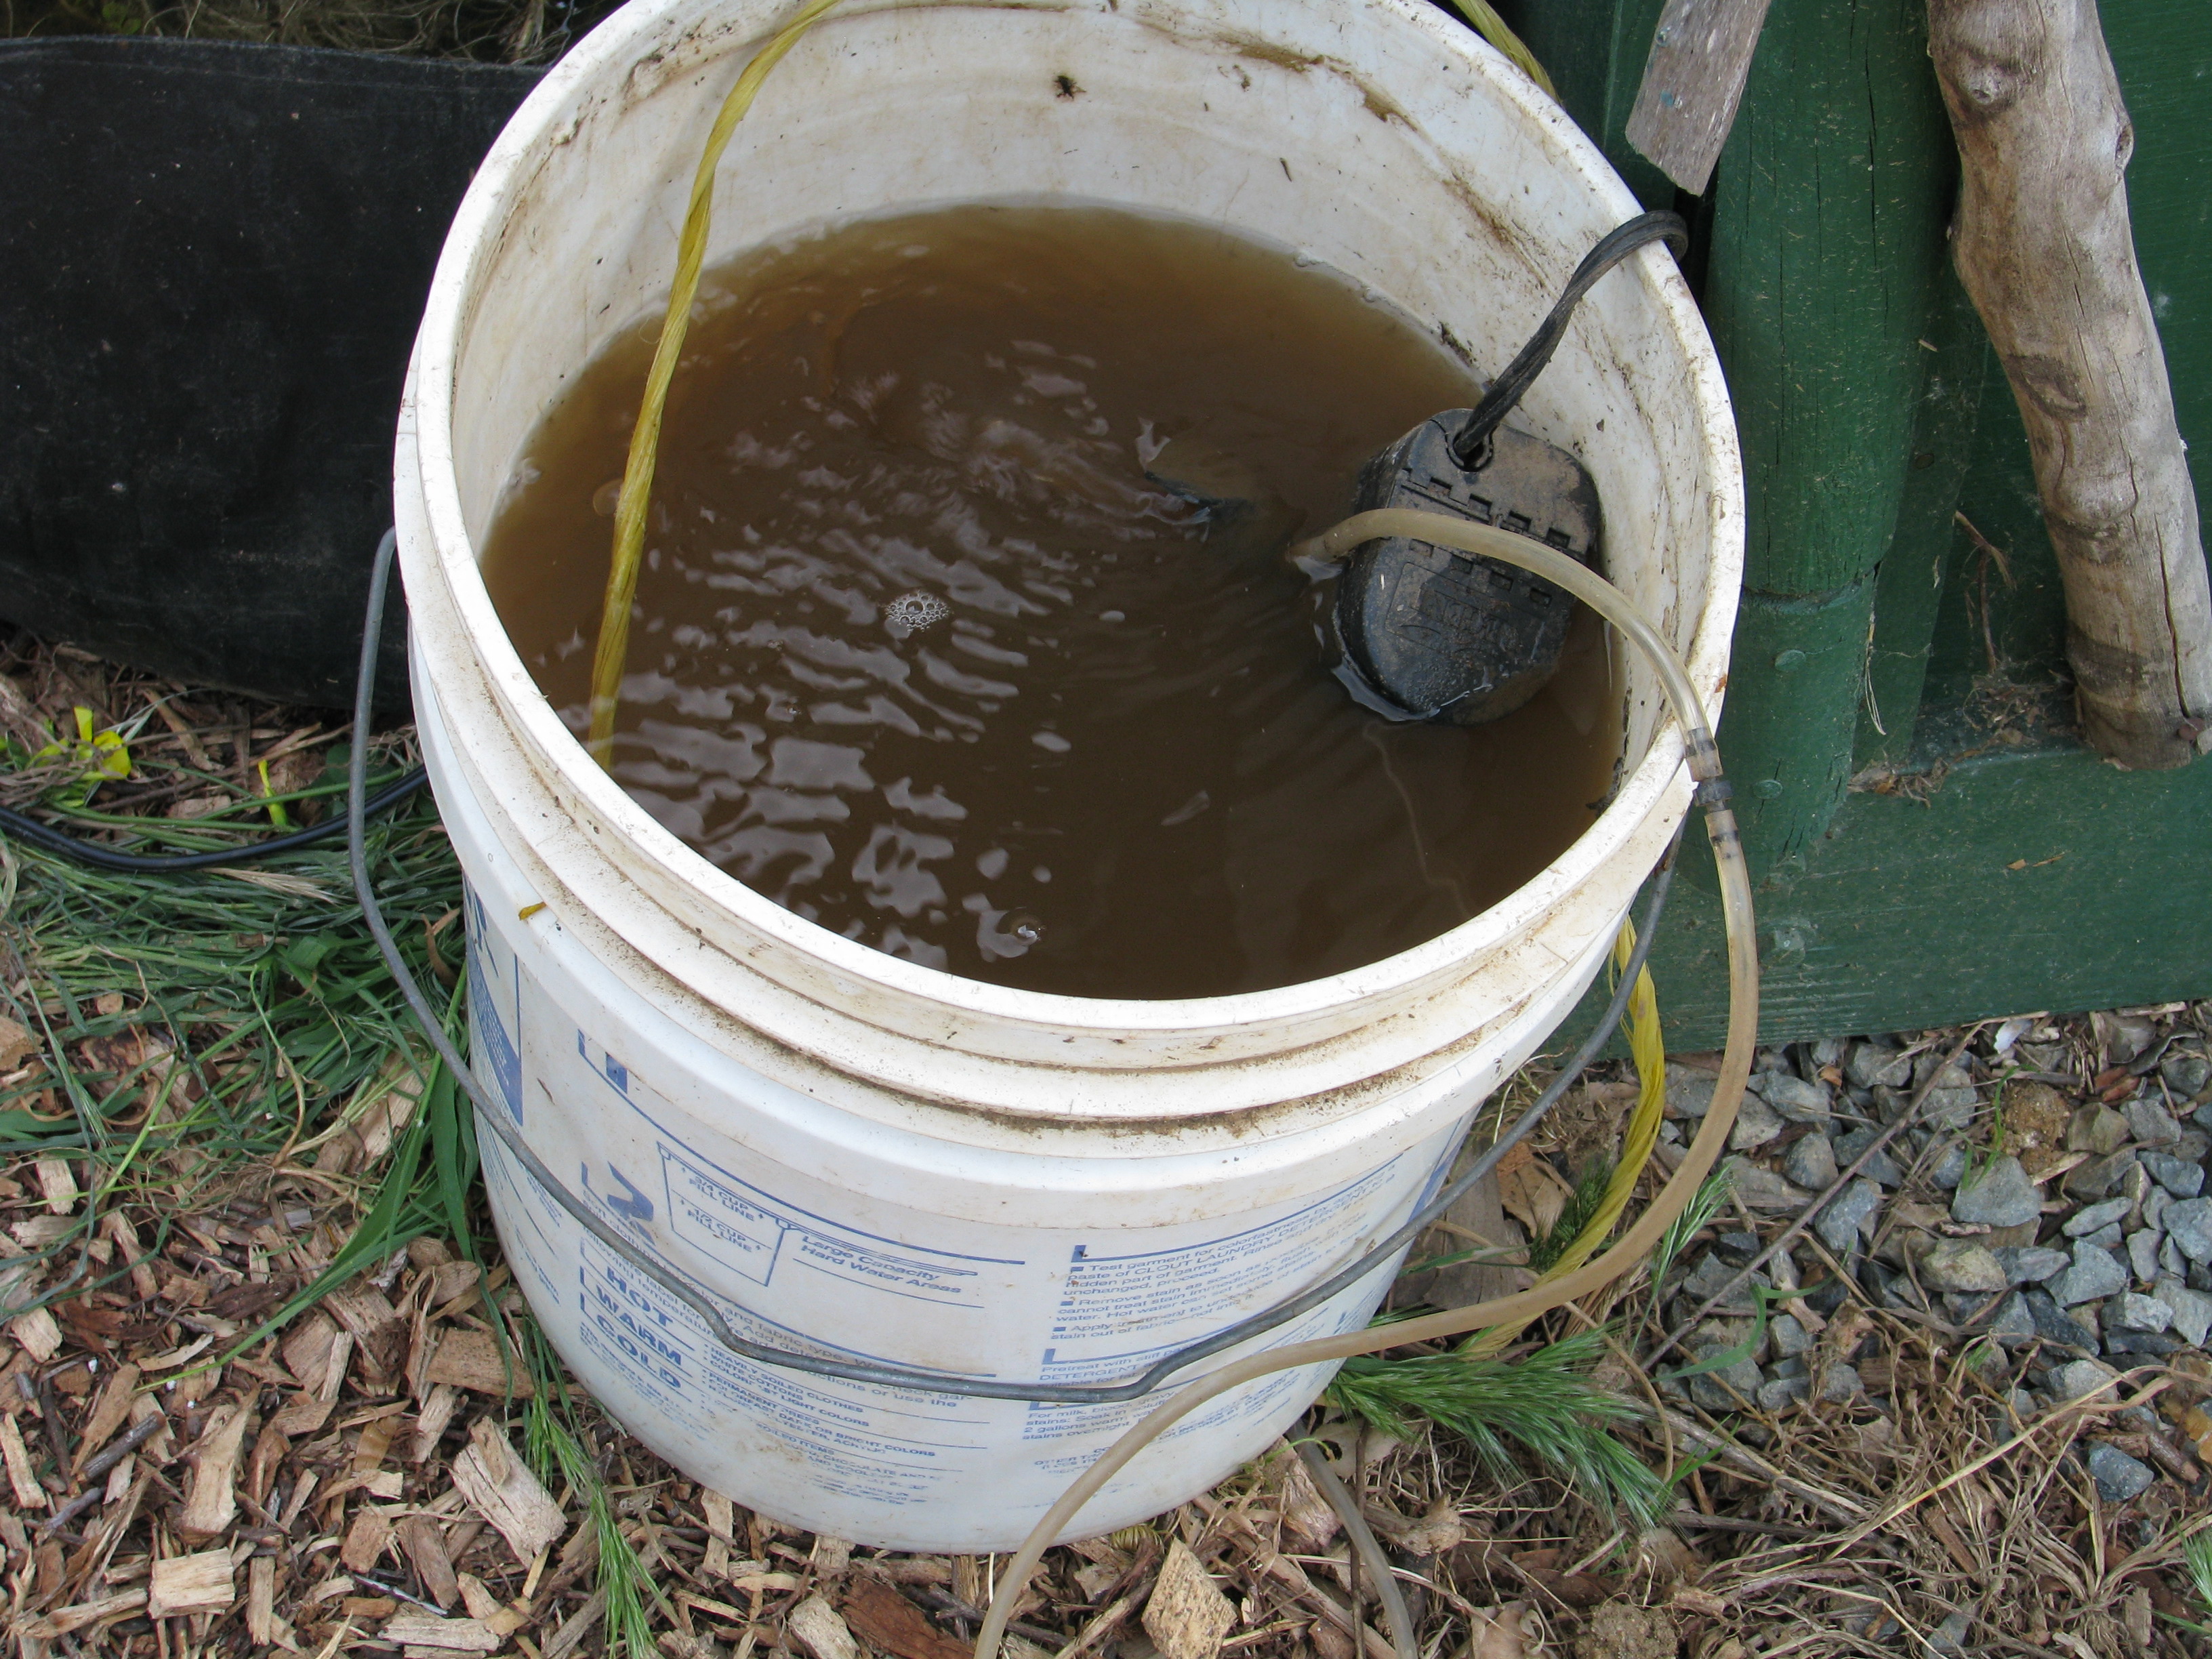
Actively Aerated Compost Tea

Aerator, molasses, a paint strainer full of compost and a bucket of water. There are many teas for the garden. Manure tea is made by steeping… you guessed it… well-aged manure in water for several days. Well-aged is the key. Many years ago I gathered horse manure, made a tea and righteously spread it – and all the Bermuda grass seed that was in it – all over my vegetable garden. I’m still battling the grass. With fresh manure you are also brewing some nasty bacteria with which you really shouldn’t be dealing. Allowing well aged or composted manure to brew for a couple of days will produce a nice nutrient tea for your plants. There are better brews for your effort.
Plain compost tea is when you take samples of good soil and allow them to steep in water for several days and use that. This brew has some microbes and basic nutrients in it and is better than plain water for enhancing your soil and as a foliar spray.
However there is a super brew called actively aerated compost tea. It is very simple and inexpensive to make and it works wonders. There are many recipes for it, depending upon how analytical you want to become. Studying your soil under a microscope and following the advice of Dr. Elaine Ingham will give you the premium tea for your particular soil. Dr. Ingham and Dr. Carole Ann Rollins have many books out on the subject of microorganismsin the soil which are all fascinating and well worth the read; if you ever have the chance to hear Dr. Ingham speak, take it!
I don’t tinker with my tea at this time because I just don’t have the time for it. You may not, either. So this is the basic aerated compost tea recipe that will revitalize your soil:
You will need a 5-gallon bucket, a paint strainer or cheesecloth or an old sock, a fish tank aerator or air bubbler, and one or all of these: organic unsulphered molasses, organic flours, organic corn meal, kelp. I have had excellent luck with TeaLab’s Bubblesnake Compost Tea Brewer. I don’t get anything for the plug, I just found that the kit really works and is easy to buy. I purchased through AmazonSmile.

Fill the bucket with either rainwater or tapwater that has stood for at least a day for the chlorine to have evaporated.
Take the paint strainer or sock and fill it with samples of good soil from around your property. If you don’t have any good soil, then add the best you have and then take good soil from areas as close to your property as possible. If you will be using the tea on bushes and trees, then be sure to take soil from under the same. Woody plants like highly fungal soil. If you will be using the tea for annuals and veggies, then go heavy on fine, well-composted soil that is bacteria-rich. Do the best you can; you can’t go wrong unless you take soil that has been sprayed with chemicals, use treated wood chips, or anaerobic soil (you’ll smell it if you do).
Tie the top of the cloth and put it into the bucket. You may tie twine or something around it so that you can haul it out of the bucket if you’d like. This is important on larger containers, but not so much with the small bucket.
Place the aerator or bubbler in the bucket, making sure the air intake hose is clear, and plug it in.
Add about a half tablespoon of molasses. It is important that the molasses is unsulphered and organic for the same reasons that the water shouldn’t have chlorine in it or the soil any chemicals: those things will hurt the microbes that you will be growing. For growth of other microbes, add about a teaspoon of any or all of the following: organic cornmeal, organic wheat flour, liquid kelp, and if you have it tucked away in your shed, bonemeal and bloodmeal (otherwise don’t buy it specially!). So the more different foods you add, the less of each that you use. Two tablespoons of food is about all you want; don’t have a big glob of it floating in your bucket.
Allow the aerator to do its thing for about 13 hours. When its done it should look and smell like sweet tea. Use it within a couple of hours or the creatures will use up all the oxygen and it will go bad. There is much discussion about how long you brew it, etc., just as there are hundreds of stew recipes. This is the recipe taught me in my PDC and one I’ve heard elsewhere. If your tea smells bad, any hint of ammonia or ‘off’ smells, don’t apply it to your plants. You’ll be hurting them. Be sure you have good compost, fresh water and proper aeration, and don’t let it sit too long.
What you are making is not just tea, it is soil inoculant. The micororganisms in the compost will feed on the molasses and oxygen, reproducing until at about 13 hours their numbers will peak and begin dying off a little. The tea should be used within a couple of hours.

Brew the tea for 13 hours then gently apply as a soil drench or foliar spray. What this tea is doing when applied, is establishing or boosting the fungus, bacteria, amoebas, nematodes, and other soil inhabitants in your dirt, all of which are native to your particular area. If you have decent soil already, then you can use this tea 1:10 parts dechlorinated water. If you have rotten dirt, use it straight along with a topping of compost. Compost, whether it be cooked composed compost, straight leaf matter, shredded wood, logs, damp cardboard or natural fabrics, all provide shelter and hold moisture in so that your microbes have habitat. Compost, of course, is the best source of food, moisture and shelter for them.
Apply the tea with a watering can, or a sprayer that has a large opening for the nozzle if you are using the tea as a foliar spray. A squeeze-trigger bottle used for misting has too narrow an opening and will kill a lot of the little guys you have just grown.
Using the tea as a foliar spray will treat disease, fungus and nutrient deficiencies, and help protect plants against insect attack. Instead of spraying sulfur or Bordeaux solution on your trees as is preached by modern gardening books, use compost tea on the leaves and around the drip line. When applied to leaves, the plant’s exudates hold the beneficial microorganisms to the stomata or breathing holes protecting them from disease and many harmful insects. You can’t overdose with compost tea.
All the additives that are recommended to ‘improve’ your soil are bandages not solutions. Think of the billions of soft-bodied creatures living in your soil, waiting for organic matter to eat. Then think of the lime, the rock dusts, the gypsum, the sulfur, the NPK concentrated chemical fertilizers (even derived from organic sources), poured onto these creatures. It burns them, suffocates them and kills them. Your plants show some positive results to begin with because they’ve just received a dose of nutrients, both from what you applied and from the dead bodies of all those murdered microbes. However the problem still is there. The only long-term solution to locked-up nutrients in the soil, hard pan, heavy clay, sand, compaction, burned, or poisoned soil, is good microbe-filled compost. Remember that microbes turn soil into a neutral pH, and allow more collection of neutral pH rainwater. Nutrients in the soil all become available at a neutral pH; there is no such thing as an iron-deficient soil. The nutrients are just locked away from the roots because of the lack of microbes and the pH.
There are compost tea brewers of all sizes, and lots of discussion about how well they work and whether they actually kill off a lot of microbes. See Dr. Elaine Ingham’s work for discussion on different brewers. For large scale operations there are large tanks with aggressive aerators, and the tea is sprayed from the tanks from a truck bed directly on the fields. If you can’t compost your entire property, then spraying compost tea is the next best thing.
If you’d like to be more involved with the biology of your tea, see Qualitative Assessment of Microorganisms by Dr. Elaine Ingham and Dr. Carole Ann Rollins. This book has photos of different soil components as they appear under a microscope, identifying and explaining them. By studying your soil’s balance through a microscope and then tweaking your tea to compensate you’ll be making the most powerful soil inoculant you can.
You May Also Like
Native Insects and IPM
- Arts and Crafts, Gardening adventures, Heirloom Plants, Living structures, Permaculture and Edible Forest Gardening Adventures, Seeds, Soil, Vegetables
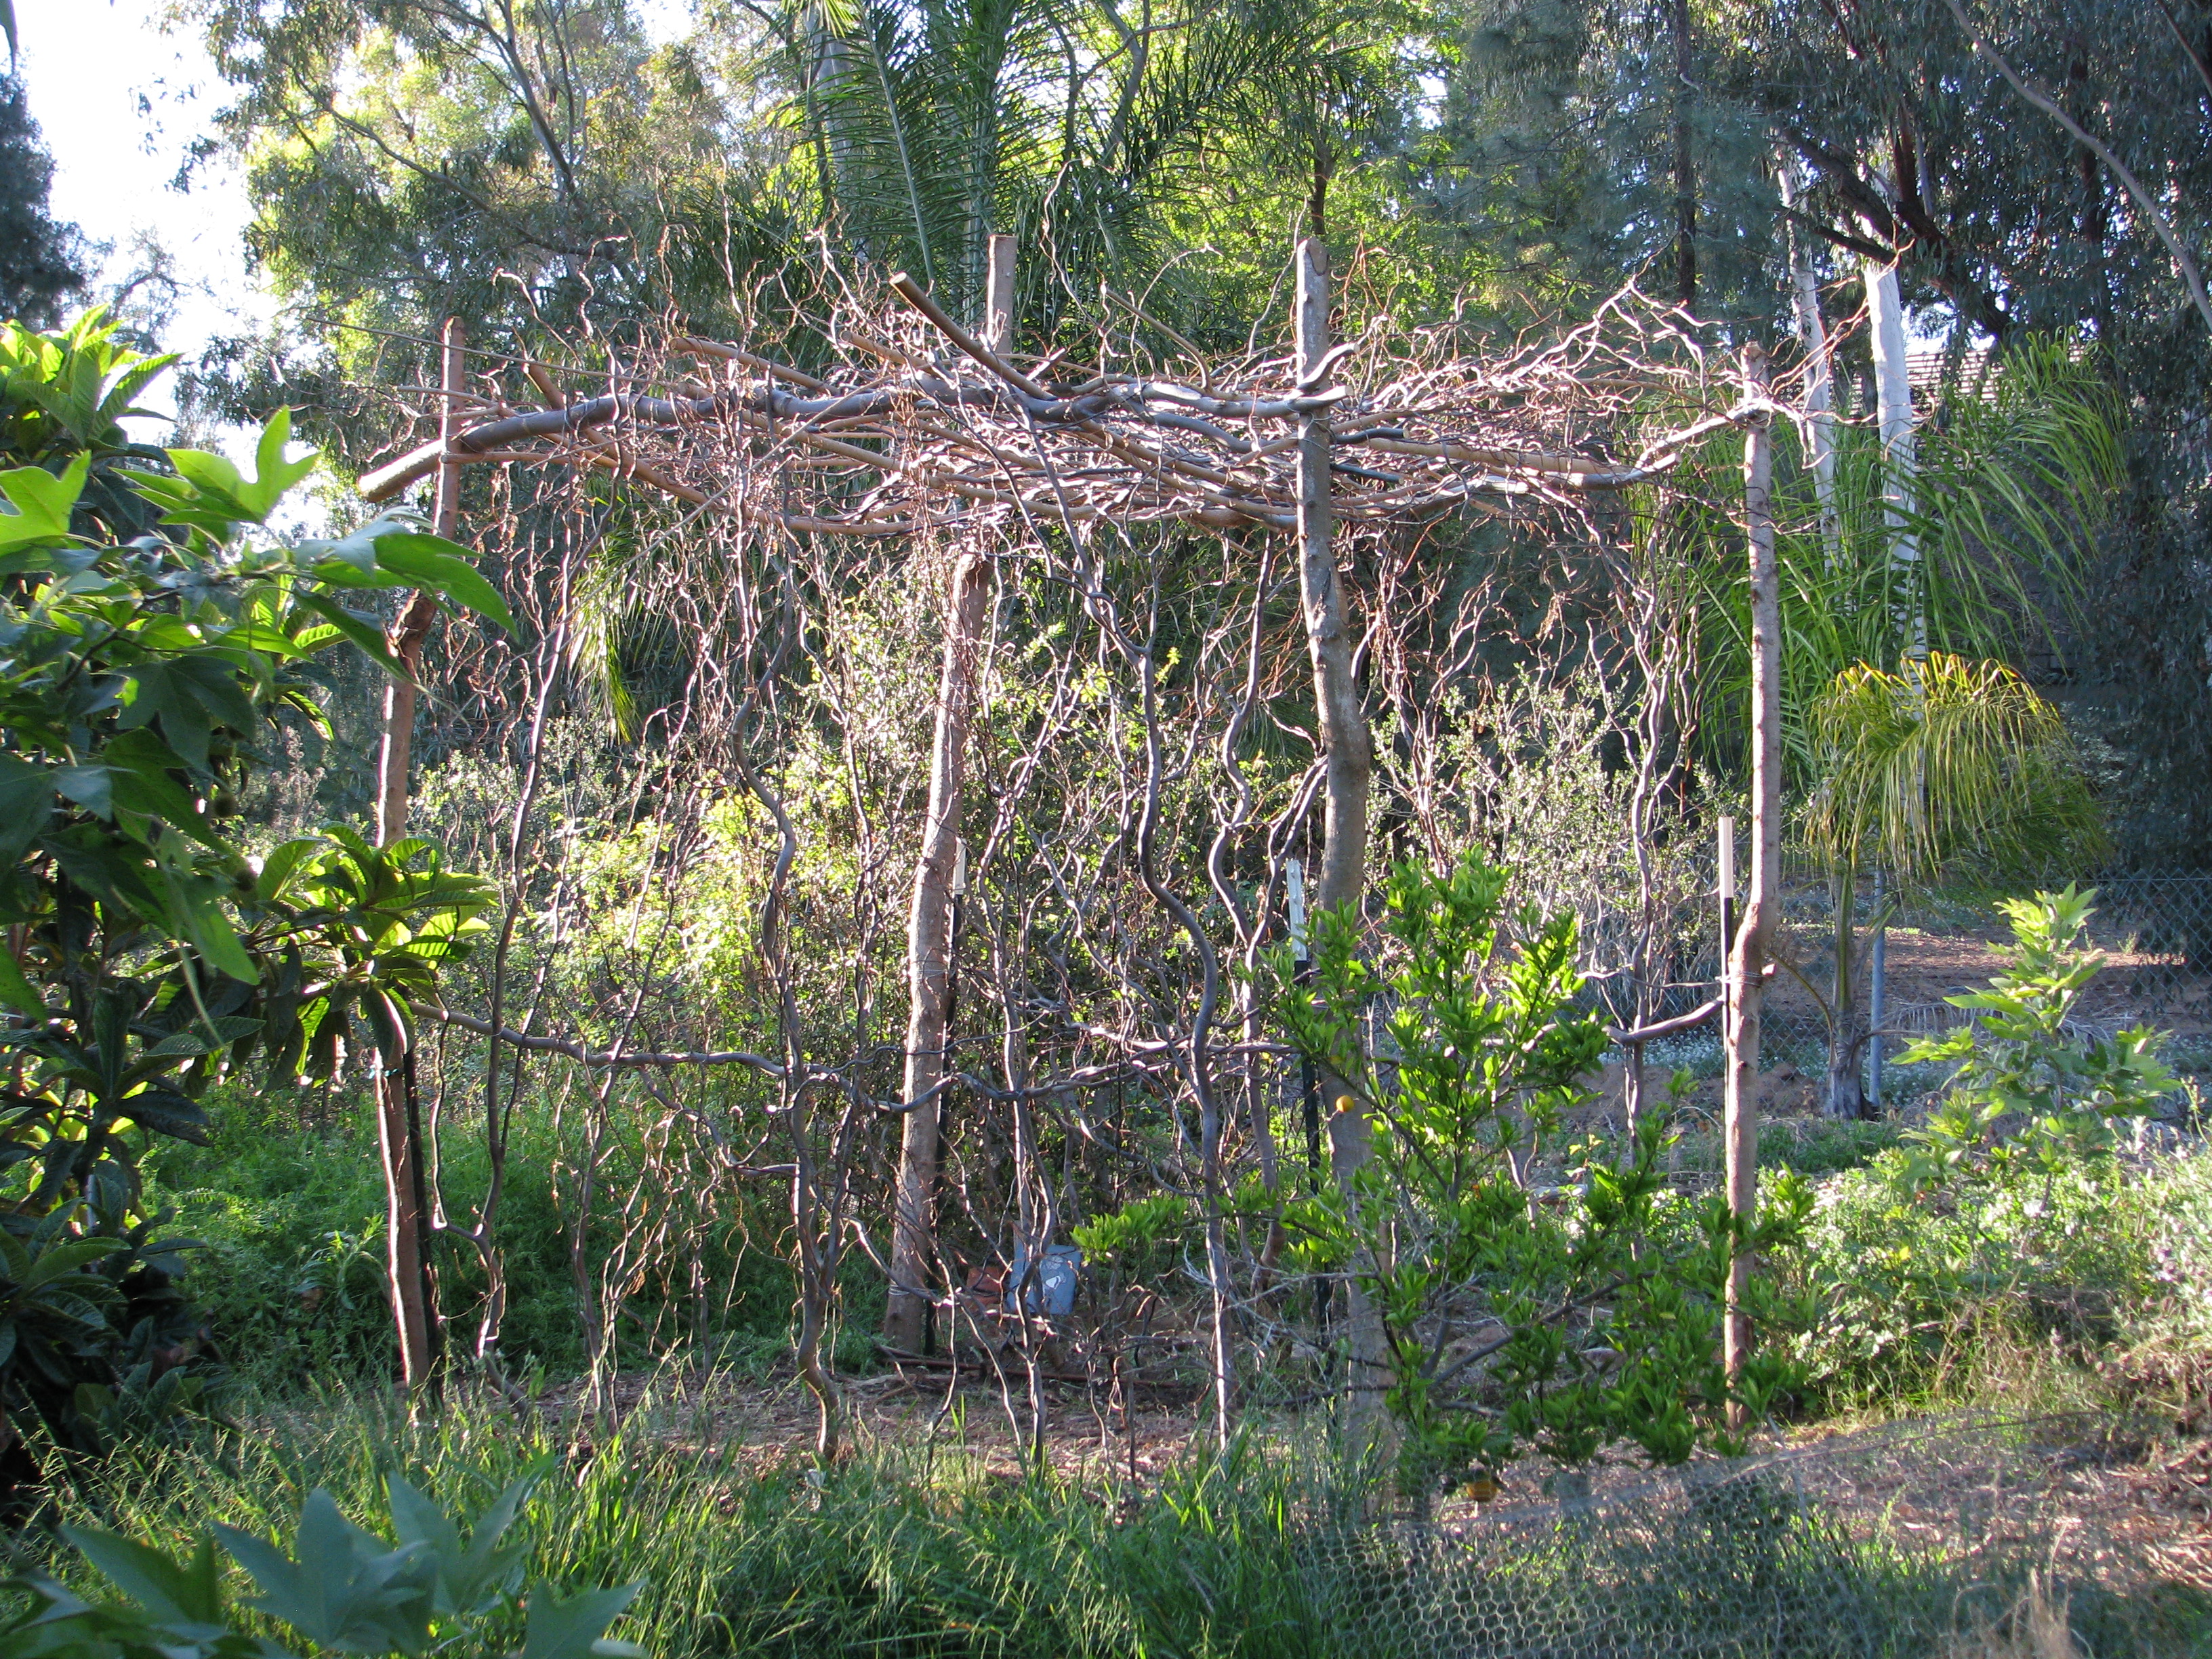
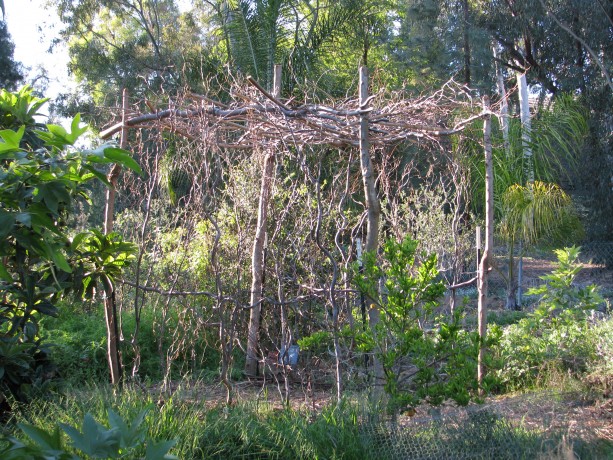
Curly Willow Trellis
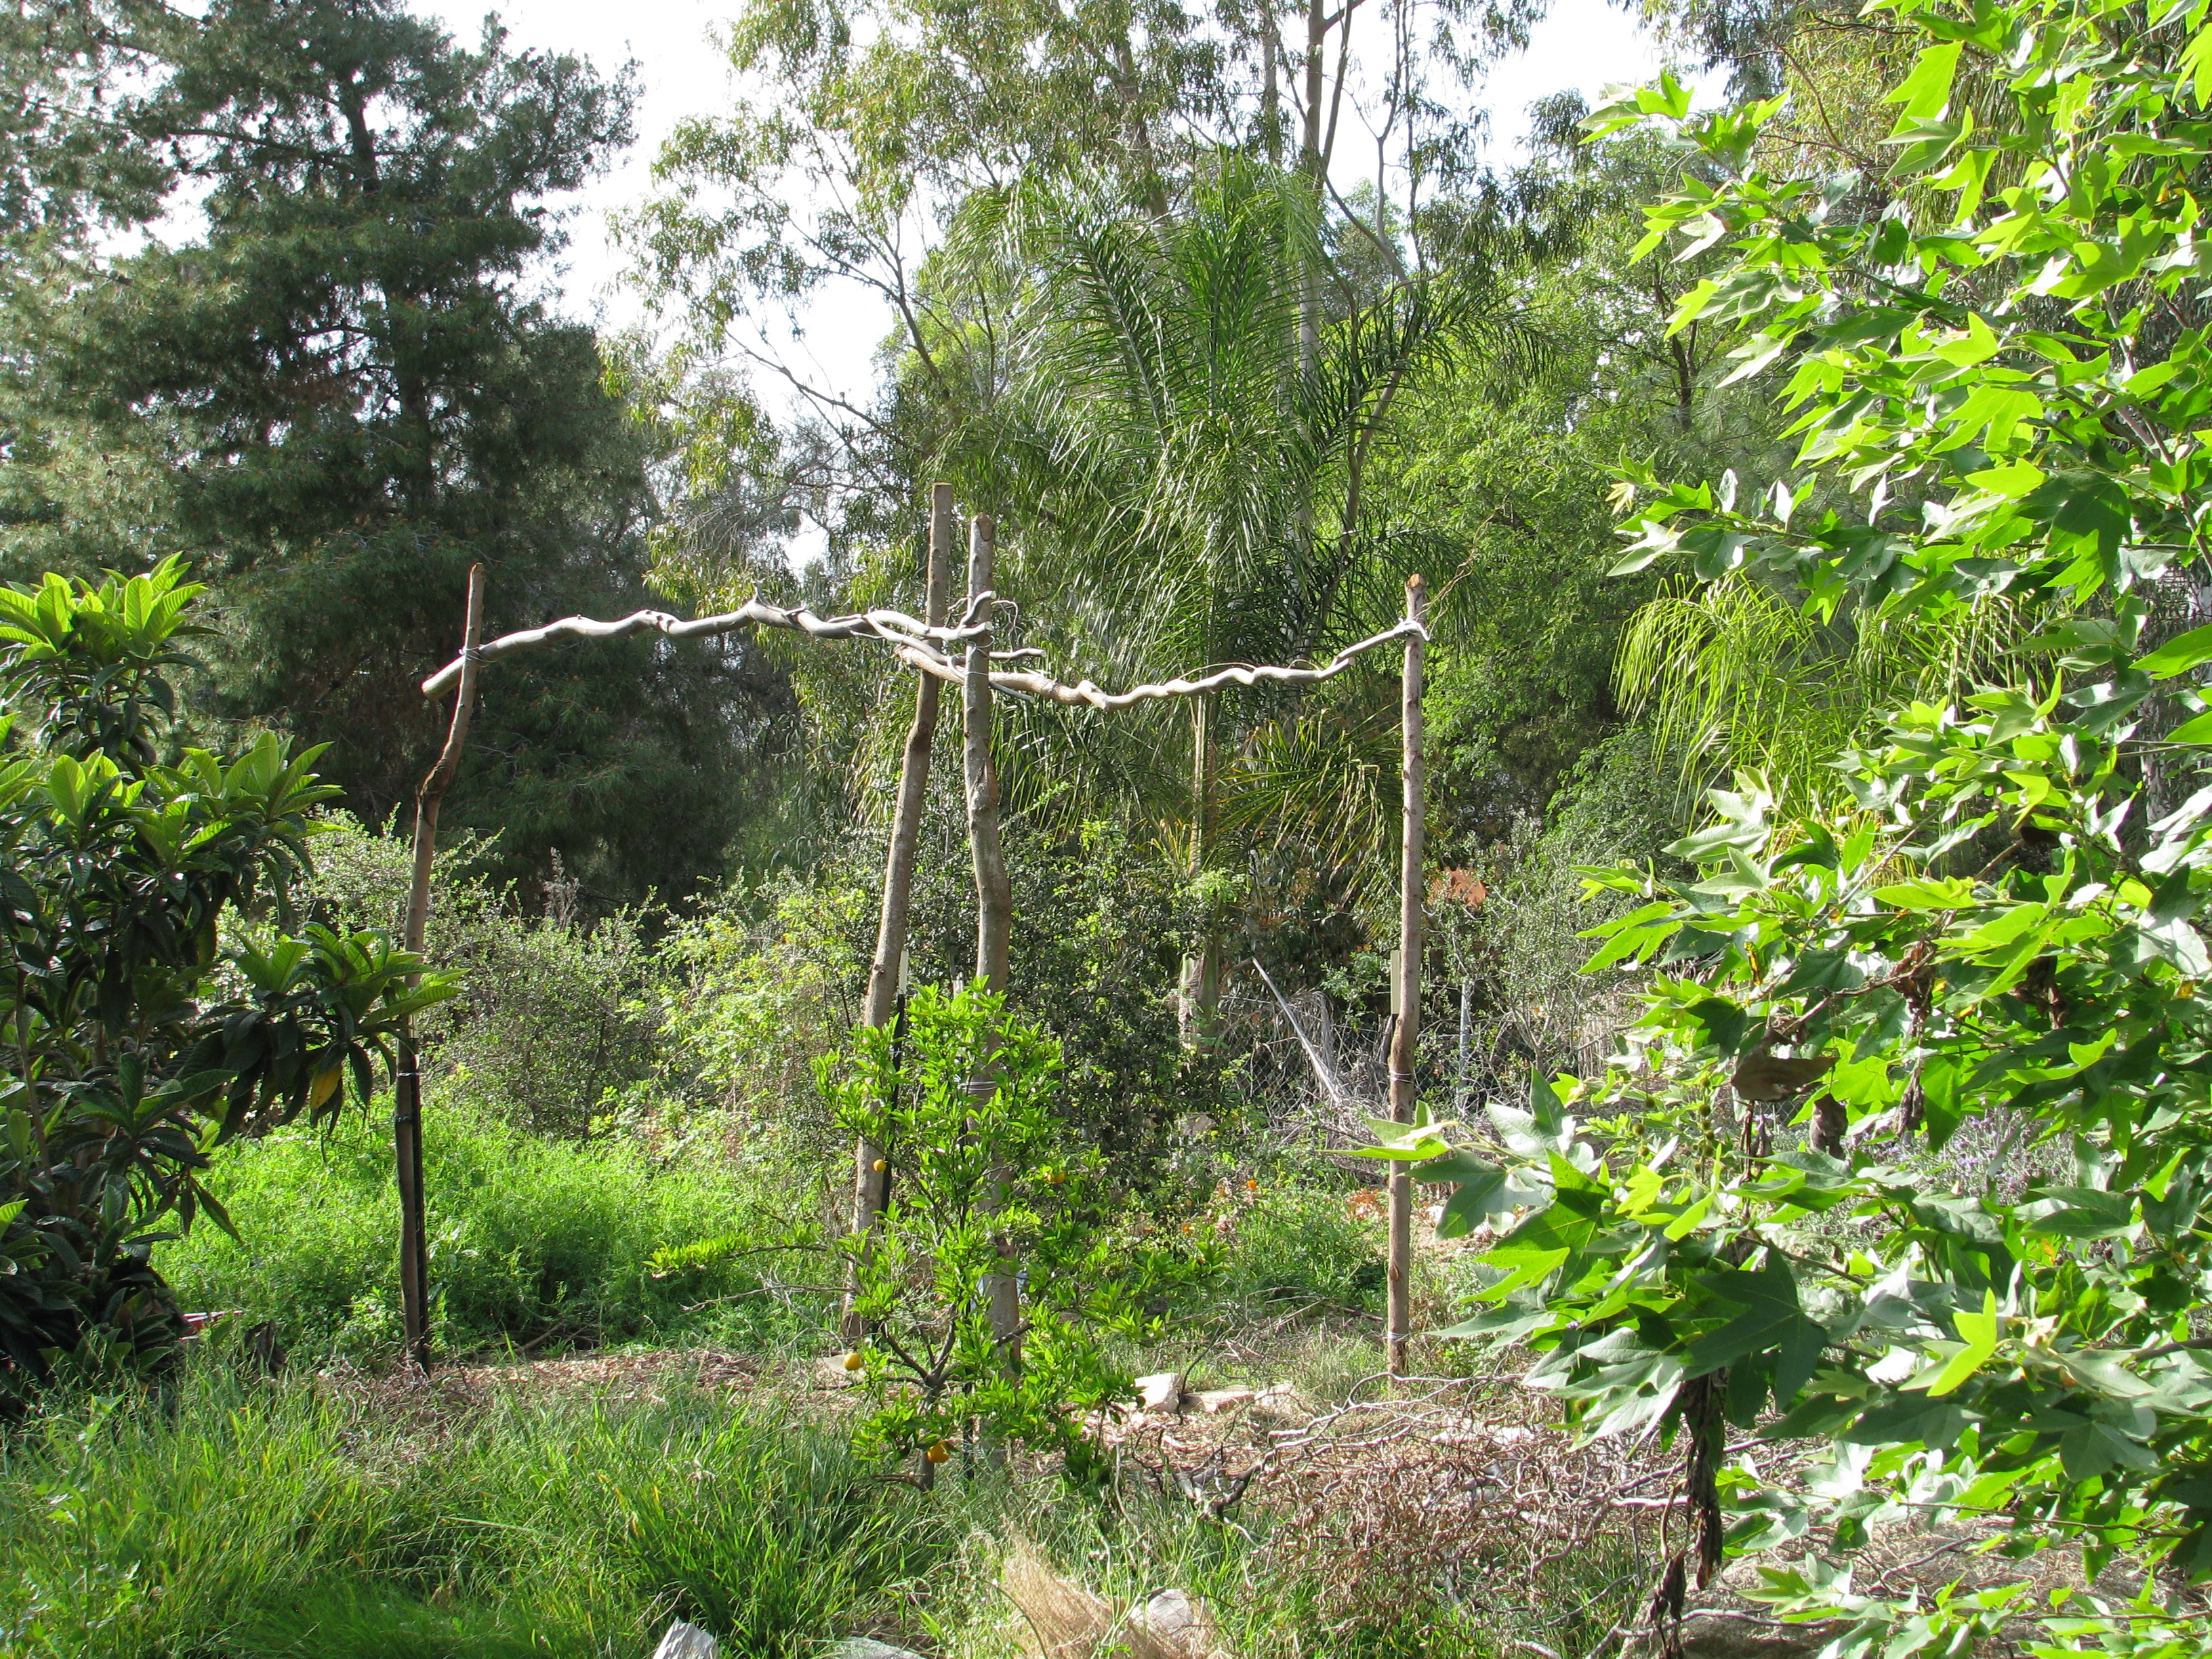
A walk-through squash trellis. The vines will give it stability, and hang through. Thanks to generous friends, free seed opportunities and wonderful seed catalogs, we have many, many squash varieties to choose from this year. We also want to grow vertically where we can to save space so my daughter and I are creating trellises. No builder, I, but we’re hoping these will last for years to come.
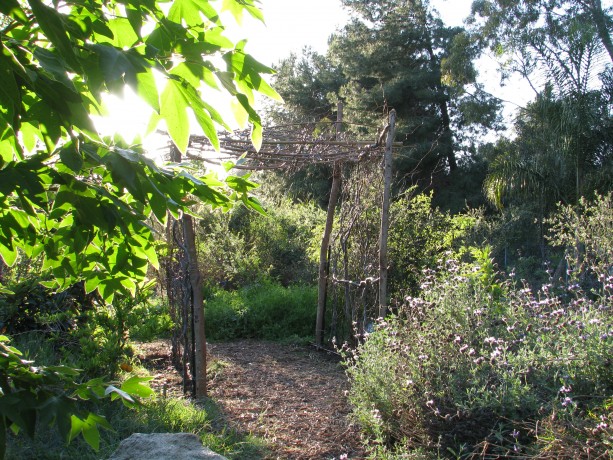
This part of the trail was perfect for vertical growing space. This area of the upper trail isn’t lovely when not covered by vines. It is also quite warm when people are touring and it could use some shade and interesting focal point. Miranda had cut down a large curly willow tree a few months back (it was taking too much water from an avocado). We used a couple pieces of the trunk to inoculate with mushroom spores, and the rest was fair game for a trellis.
Curly willow (Salix matsudana ‘Tortuosa’) has wonderfully shaped branches that twist and curl naturally. You’ll see it often in bouquets, where it usually roots while in water. This willow enjoys more sun and a little less water than native willows do. Willows all produce salicin, the pain-killing ingredient that has now been synthetized as aspirin. Willows also produce a rooting hormone which can be used to encourage sprouting and rooting of other plants. Cut up a willow branch, soak it in water for a couple of days (if water is chlorinated, leave it sit for a day before adding willow) and use to water seedlings.

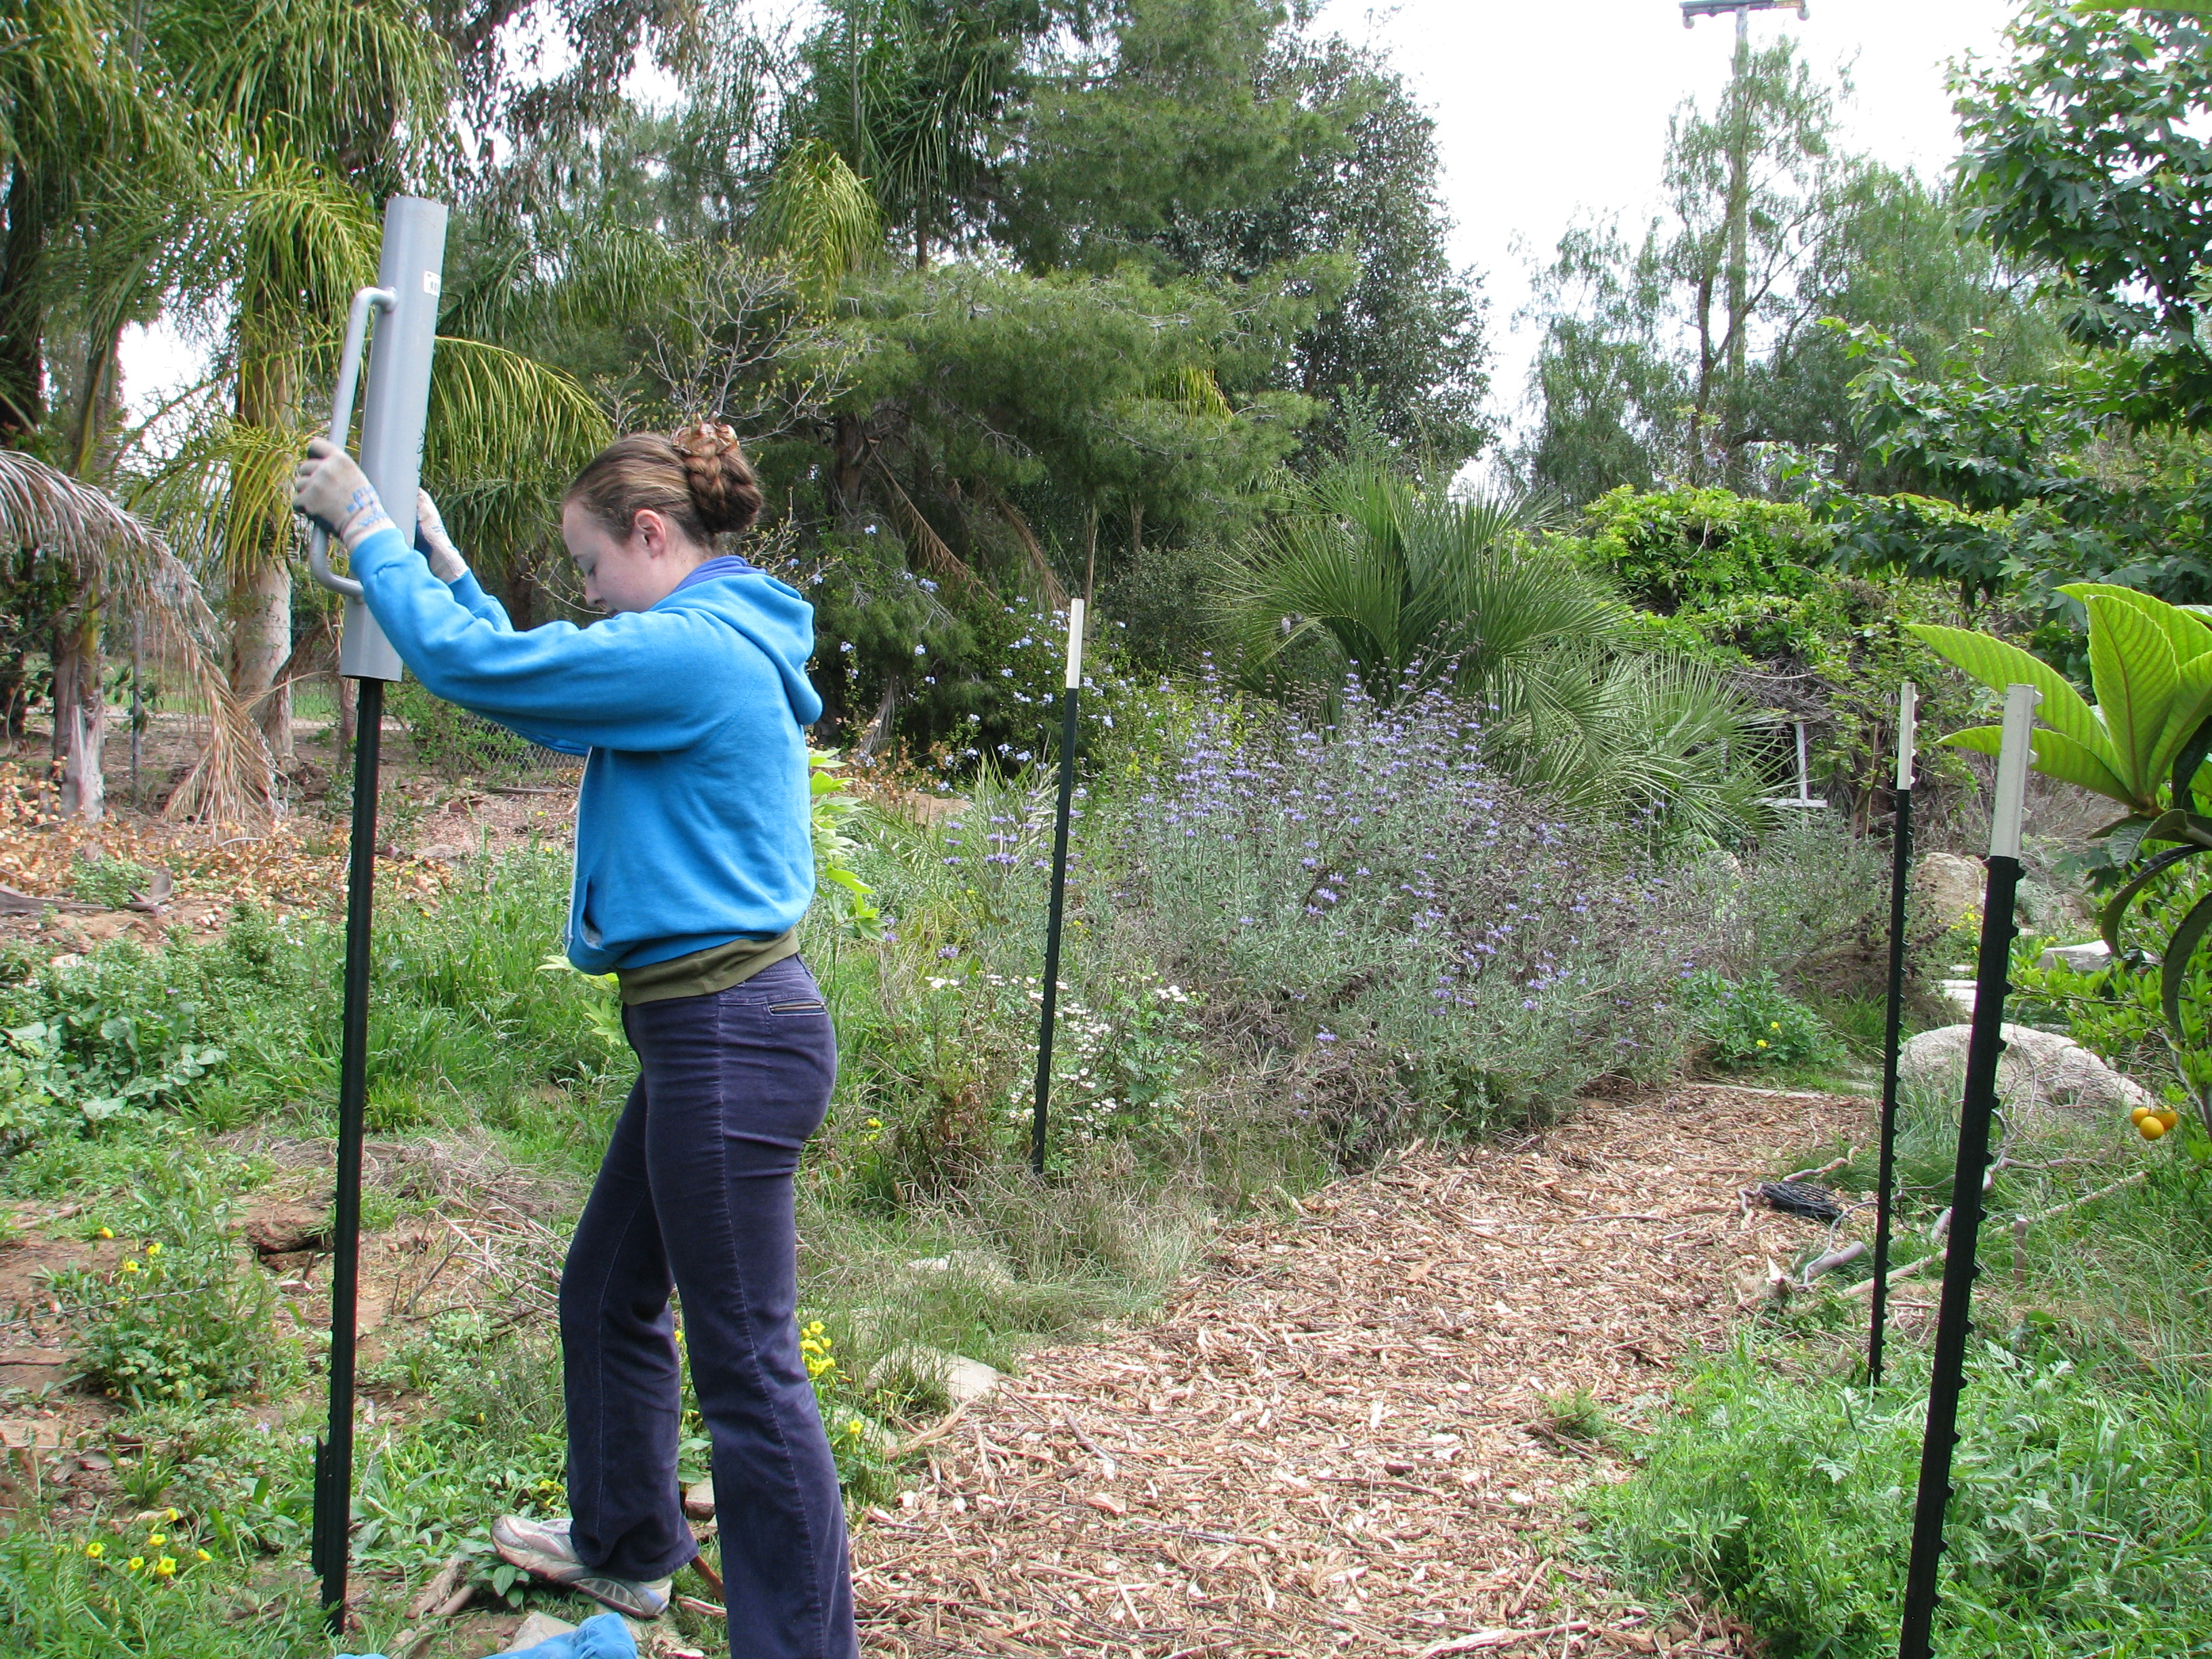
Miranda makes this look so easy! After we’d put these in, a friend recommended sliding the post pounder over the post before standing it up… for we short people who have trouble lifting the really heavy thing over our heads! Wanting to avoid cutting wood and nailing things together, we sunk four T-posts into the corners. The trellis is six feet across and eight feet wide; any wider and we would have put a center post on each side as well.

We wired on curly willow trunks in the corners, and wired long branches across the tops and the middle. We wired on the side posts and cross posts, cutting long branches from the willow. This willow was long dead; fresh willow could be sunk into the ground and it would root to make a living trellis, like the Withy Hide. We didn’t want that here, though.

We laid long whips from a Brazilian pepper tree across, then wove curly willow through for the top. We stood smaller branches upright along the sides and wired them on, keeping in mind spaces where the squash vines will want to find something on which to grab. Over the top we laid long slim branches from a Brazilian pepper that is growing wild in the streambed and really needs to come out. By pruning it and using the branches, we’re making use of the problem. In permaculture, the problem is the solution! I wanted to make an arched top and tried to nail the slim branches in a bended form, but this was difficult and didn’t work for me. I didn’t want to spend days finishing this… too much else to do! So we laid the branches over the top, wiring some on, and then wove curly willow branches long-wise through them. This weaving helps hold the branches in place, will give the vines support, and brings together the look.
We planted four kinds of squash along the poles. And it was done. It should stand up to wind. We may need to add some vertical support depending upon the weight of the squash vines. We planted four varieties of squash that have small (2-3 lb.) veg. We planted four seeds of each, two on either side. We also planted some herbs, flowers and alliums, and some perennial beans, the Golden Runner Bean.
Architecturally interesting when not covered by squash as well. If nothing else, it is lovely and interesting to look at; better in person than in the photos. We can’t wait for the squash to start vining! Now, onto the next trellis.