- Animals, Chickens, Compost, Gardening adventures, Permaculture and Edible Forest Gardening Adventures, Soil, Vegetables, Worms
Fifty Ways To Leave Your Compost

Its not fruit; its pre-compost! I have no idea how many years I’ve composted kitchen scraps. So many that when I see anyone dump veggie bits, egg yolk and shells, plate scrapings, old leftovers and even floor sweepings into the regular garbage it sets off all of my alarms. How can anyone waste all that good stuff? That is like throwing gold away! Its not dead stuff… its all living and ready to transform in to perfect soil, which shoots health into your plants! Most people say that they don’t have the time to compost, or they don’t want to turn a heap.
Well.
Here may not be fifty ways to compost easily, but certainly enough for ANYONE to keep their compostables out of the mainstream trash. And apologies to Paul Simon.
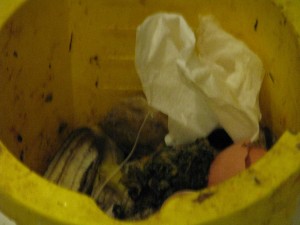
A blurry glimpse into my sink composting bucket. Egg shells, tea bags, banana peels, and tissues! 1. You Just slip out the back, Jack, with that little pail you have in or under your sink, into which you scrape everything compostable. They warn you about bones and meat because of animals digging through your heap to get to them, but if you bury your compost deeply, you won’t have that problem. I use a little bucket that they gave me for heaven-knows-what-reason at the hospital when I had my gall bladder out. It isn’t pretty, but it does the job. When I had both my children at home there was a lot more veggie peels to deal with, so in my kitchen I had a woven laundry basket, and inside I had two plastic liners, one for recycling and one for compost.

Big ol' basket, divided in half inside. One part recycling, the other compost. I only emptied it once a week. I didn’t like using so much plastic, but I’d put the plastic bag in the recycling. They sell all kinds of really nifty compost buckets now. Get one with a lid to keep those annoying little fruit flies from developing. Or if you have an open bucket like mine, just fill it partly with water so that the compost is submerged. It is easier to dump out that way and keeps cleaner, too. Especially if you’re going to…
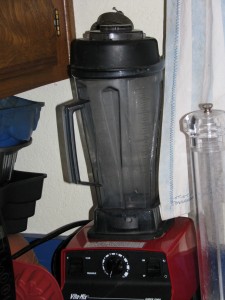
Is it a Vita-Mix, or is it a composting machine? Make a new plan, Stan, and instead of making a compost heap, you put all those scraps (barring big pits and nut shells) with water into a blender and whip it up. Then march outside and pour that brew around your plants! You can always kick a little dirt over it if its thick. This gives your plants a fantastic compost boost. Since it is undecayed pureed plant matter, you don’t want to bind up the nitrogen around seedlings or young plants, so pour it outside the drip line (how far the roots come out), or in an area you are preparing to plant in the future. This compost will decompose with days, depending on how warm the ground is (cold weather kills off or slows down microbes and wormies). If it is snowy winter where you are, then you might just freeze the stuff, in ice cube form or in paper cups. When the soil warms, plant those cubes! (Be sure to label them when in the freezer so no one thinks they are smoothie-pops!)

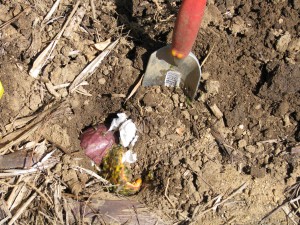
Freeze your blended compost, then empty the cubes into a bag and LABEL. You don’t need to be coy, Roy, but depending on your neighbors you may not want them to see you burying your compost. That’s right, you don’t have to make a heap, or blend it up. Just march outside with your bucket and a shovel or trowel, dig some small holes and bury it! The wormies will turn it into soil for you in weeks. Sometimes you’ll get surprises, like when a potato sprouts…. free veg! Here again for those who have frozen winters, you can pop the compost as is in a bag in the freezer. The only problem is freezer space. Just think, though, every bit you can save helps your garden!
Dig it in! Just get yourself free from all your hangups about compost heaps and go buy a compost bin. I’ve a Rubbermaid bin for about twelve years. When my compost container is full I march it down, open the top, toss in the contents and away I go. When I pull weeds or thin the garden, I throw that in there too. Do I turn it? Heck, no! But if I wanted to I could very easily. The sides and two halves of the top fit together like enormous puzzle pieces, so I just need to take them all off, reassemble them right next to the heap, then pitchfork the compost back into it. The stuff that was on the top would now be on the bottom. Fresh compost can be shoveled out of a hole in the side on the bottom. Compost that is turned is not only matured faster, but is of a better quality and more broken down than that which isn’t turned. But as the bumperstickers say, compost happens! Stuff breaks down. Throw stuff into the top of the bin, and rake it out the bottom. Free your mind from compost regulations! Just go for it!

Throw it on! Compost happens! Hop on the bus, Gus, and become a real composter. You can build compost bins very cheaply. If you can nail things together so that they actually stay together (I can’t), you can build a three-section compost bin out of old pallets. There are lots of YouTube videos showing how. The best kind have removable slats in the front so that you can start low and gradually add to the front as the heap grows. Then when you want to turn it into the next bin, you may easily remove the slats for quick access. You can also just take a section of wire and make a cylinder out of it, then pitchfork in the weeds, grass, and throw in the kitchen trimmings. When its time to turn it, just undo the wire or slip it off, and set it up next to the pile again. Or have a line of wire cages. I have three, plus my bin. Do I turn them either? No. I keep throwing on excess weeds, and it keeps sinking down. Remember: compost happens!
You don’t need to discuss much with wormies because they can’t answer you: their little mouths are so full of your kitchen waste that they can’t talk! Make yourself a worm bin. Or buy one. You’ll need two dark plastic bins (one fits inside the other). Drill holes all through the lid for ventilation, and in just one of the bins drill some holes along the top of the sides, then drill tiny holes in the bottom for drainage. Fit the drilled bin inside the non-drilled bin. Put wads of newspaper, or paper from your paper shredder (unless you are saving it all to pack your mail-out Christmas gifts with instead of those nasty Styrofoam things) in the bin up to about half way. Lightly sprinkle with water. Throw a little soil in there, but not much for these kinds of worms. Find someone who has worms, or buy some red wigglers. You don’t want earthworms. Put these little guys gently into the bin. Take your compost and put it into one corner. Cover with a dampened sheet of newspaper and put the ventilated lid on the top. Keep the wormies from extreme temperatures. Some people keep a bin under their kitchen sink. Many school kids keep wormies as projects and for fun (baby wormies are white and wiggly!). As the wormies devour your compost they’ll leave behind castings, which look like sticky dirt. This is gold. If they had worm castings in Fort Knox instead of all that gold bullion our dollar would never fluctuate. What collects in the bottom bin is ‘worm tea’, which is just as valuable. Pour this stuff into your houseplants or directly on your plants. Commercial worm bins have several sections to hold more compost, are a little easier to manage and have a spigot for the worm tea. A perfect Mother’s Day gift! That or a compost bucket or bin!
Just drop off the key, Lee, with your housesitter when you go on vacation, and don’t forget to let her know to throw those kitchen scraps in with your chickens! Or goat! Or miniature pig! You don’t even need a heap when you have beaks! All those scraps are pure vitamins and minerals and chickens will not only devour them, but give you the best eggs you have ever tasted. Don’t forget to crush eggshells and give them right back to the chickens! They need that calcium to keep their eggs nice and hard. Chickens turn your compost into great eggs for you and great poo for the ground. Chicken manure can be used right away in your garden. Goaties will eat just about anything, as will piggies, so kitchen waste is perfect (slops).

Feed it to the chickens! And get yourself free from all that guilt that you shoulder when you throw food into the trash. Oh, and separate your recycling, too!
-
A Painless Breakfast, and a Bombilla
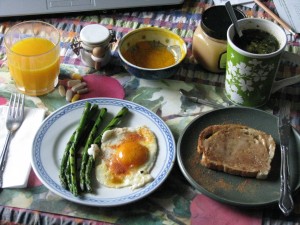
I'm all over this medicine! Food is the ultimate resource for health. As my body complains ever louder about all the years of abuse I’ve put it through, I’m turning to diet to help with the pain. Certain foods have anti-inflammatory properties, and they aren’t hard to eat at all. Cinnamon, turmeric, and ginger are high on the list. Cooked asparagus is excellent for kidneys and liver, and there is speculation that it cures serious illness as well. Whole eggs are much more healthy to eat than separating out the white and throwing away the yolk. The two parts compliment each other. As well great sources of protein, eggs are excellent for the eyes. The vitamin C found in fruit is an essential boost to your immune system, and helps other vitamins work better.
I also take some supplements. I take a multi-vitamin, a couple of natural menopausal relief pills, a vitamin C, and a couple of glucosamine/chondroitin tablets. G/C is a miracle supplement if you have arthritis. It helps keep the joints juicy.

Hot ginger tea; good for your tummy and good for your joints. So for mornings after a full day of weeding, carrying, hauling, flinging, and planting, I need everything I can get to help get my hands and back moving again. My ideal painless breakfast is: an egg from one of my hens, sprinkled with a turmeric and pepper combination (pepper is supposed to aid turmeric), some Trader Joe’s frozen grilled asparagus, heated, a piece of toast liberally sprinkled with cinnamon and coated with organic (sometimes home-harvested) honey, orange juice and a hot cup of ginger tea. I keep a small white container of cinnamon on the table, as well as a small bowl of the turmeric and pepper combination. That way I don’t forget to sprinkle it on my food. Inflammation is the source of almost all illness. If you can fight inflammation naturally, you’ll be a long way ahead health-wise. You’ll be relieved from pain that you never knew you had!
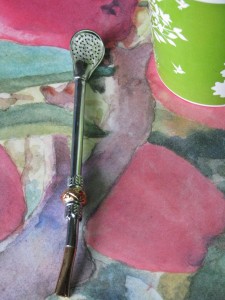
Bombilla I considered giving the bombilla its own post, but it was in the breakfast photo so I’ll talk about this wonderous gadget here. A bombilla is a metal or bamboo straw with a strainer on the end. Ingenious! Common in South America, it is commonly associated with the drinking of the new old fad tea yerba mate. However, to my delight it works perfectly with loose leaf and herbal teas! Instead of snapping and screwing and pressing tea strainers, I just put loose tea in my cup, brew it and drink it via the bombilla! So easy! Afterwards I scoop the spent tea into the compost, rinse the cup and the bombilla, and its good to go for the next batch. Loose leaf tea is such a better experience than using tea bags. With the bombilla, I now have herbal or loose leaf tea almost every time. Bombillas have transformed my drinking experience! I believe they are available at international marketplaces, but I bought mine online at Amazon.com. I bought two for me and my daughter, who took hers to college, and another as a gift for my son, and then two more as extras at home. Never can have enough bombillas! What a concept! A perfect drinking implement! My life will never be the same. Better still, I can now sip hot tea without losing my place in my book, or steaming up my glasses!
- Animals, Gardening adventures, Heirloom Plants, Permaculture and Edible Forest Gardening Adventures, Ponds, Reptiles and Amphibians, Soil, Vegetables
Earth Day at Finch Frolic
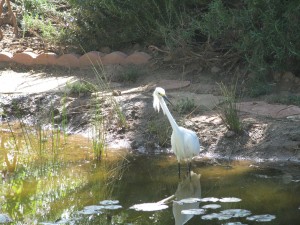
Snowy egret hunting. "Get the bullfrogs!" In celebration of Earth Day, I worked in the garden. You can stop laughing now. Yes, I know that I work in the garden nearly every day, and then spend time not volunteering or exercising, recovering from working in the garden. It was an overcast day, which beach-bound teenagers probably cursed, but I found perfect for working outside.

Roses in bloom everywhere. I had a visitor wishing me a Happy Earth Day.
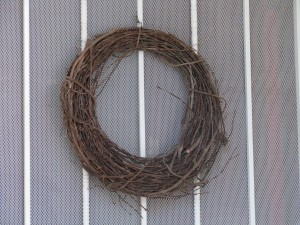
Do you notice anything about this wreath? This is an alligator lizard.
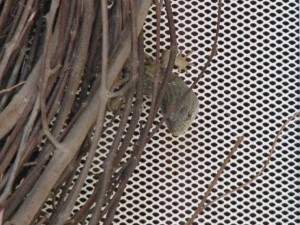
"Hello!" Hopefully he enjoyed the ride as I opened and closed the door several times to photograph him.
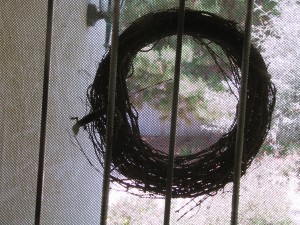
Alligator lizard from inside. Among other things today, I sifted compost. I had moved my compost bin, and this good compost was still on the ground from where it had been.
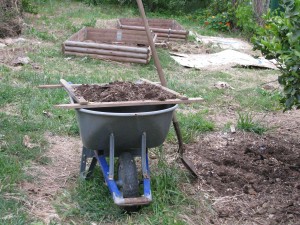
Sifting compost through a screen. I put it into a new raised (and wire-lined) bed.
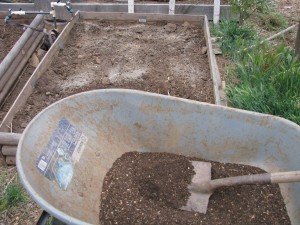
Adding sifted compost to the bed, which has been dusted with organic non-animal based fertilizer. Then I planted two rows of rice in it. Yes, rice. It is an heirloom variety from Baker Creek Organic Heirloom Seeds (http://rareseeds.com/rice-blue-bonnet.html), and it doesn’t need to stand in water to grow. Just something new and fun to try out.
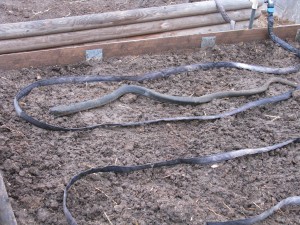
The rubber snake guards a freshly planted bed of rice. I’m also growing red seeded asparagus beans, the seeds of which were given to me by the woman who made the quail house. She also introduced me to Baker Creek, and for that I’m sincerely indebted. (http://rareseeds.com/red-seeded-asparagus-bean.html .)
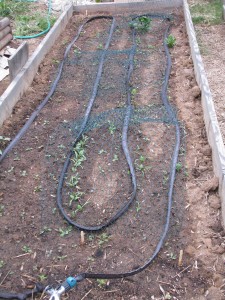
Spinach, carrots, edamame, sesame, Kentucky pole beans, endive and tomatoes are finally coming up. The other veggie beds are finally sprouting, now that the evenings have warmed up.
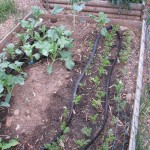
Collards and carrots, transplanted from another bed and doing well. 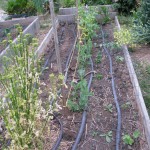
An incredible parsley setting seed, peas, parsnips, spinach, rhubarb, carrots and beans. 
Castor bean seeds were in the mushroom compost, and I'm pulling them quickly. Here are a few views from other areas of the garden. Three weeds until the AAUW Garden Tour. Yikes!
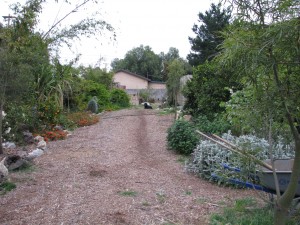
General Mischief waiting near the quail house for dinner. The hose connects to the 700 gallons of cootie water (compost tea) and is irrigating native plants. 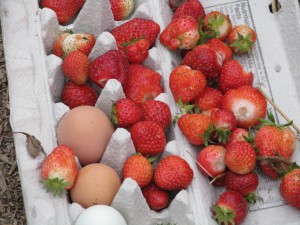
A happy harvest. Strawberries and eggs. I'm freezing the berries for later to make jam. 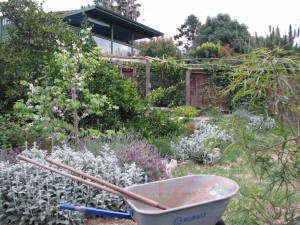
Lamb's Ear, whitebud, passionfruit and Bermuda grass 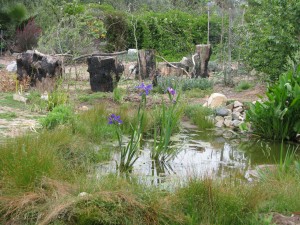
Stunning blue iris in the pond. 
Fringe tree in bloom. 
Iris -
They Followed Me Home, I Swear

Viola and Madge How many times do you go to the store for a couple of items and come back with a bag full? Too often for me. Yet, I persist in shopping. I went to the feed store for chicken scratch, and came back with new friends.

Madge's bad eye. She can find her food pretty well, though! These are two Rhode Island Red hens, about a year old, who had been victimized to the point of injury by sister hens. Too many birds in a small holding pen will do that, plus the whole pecking order thing. Most of us are familiar with that from living through middle school.

Viola's limp isn't this bad; she's just being dramatic for the camera. The larger bird is blind in the right eye. Her name is Madge (she looks like a Madge!). The smaller girl has a limpy leg, and her name is Viola (Twelfth Night). (Have you ever really looked at the word twelfth? I spelled it phonetically as twelph, and knew it was wrong but then had a hard time figuring the real spelling out after seeing it. Sorry… digression). Both are missing a lot of feathers in various places. These two were in a cage by themselves, and get along famously. The poor dears each laid an egg in the cardboard box in which they were transported.

A surprise in the box. Poor girls! I’ve put them in Emerson’s old run (oh, and his price has gone down to $15 and the warning sign is off his pen) until I can build the Hen House of my Dreams.

Temporary shelter in Emerson's cage. My other three girls, Lark, Chickpea and Miss Amelia are a happy trio and I don’t want to upset the apple cart, nor have the newbies subjected to pecking order again.

Lark (getting a bit fat) with Chickpea and Miss Ameila. I bought this fantastic chicken house some months ago, thinking it would be a warm spot for my three hens (wasn’t that a TV show? It should be one!) but they rejected it wholeheartedly. My girls are used to more space. I figured this pen would be good for some smaller breed. I’ve been looking for frizzle hens, but no one seems to have them. If I order from a hatchery it is straight run, which means unsexed chicks, and I don’t want to do the rooster thing again.

The Quail House. I’d like to establish California quail on the property, but since they are the state bird it is illegal to farm them here. Hatcheries in other states will send eggs, but at this moment I don’t have the time to care for eggs (and I’m too heavy to sit on them, although I do get broody a lot). I contacted Project Wildlife for rehabilitated quail for release, but they release within three miles of where the animals were found, which is an excellent policy. I’ve posted on Craigslist for both frizzle hens and Ca. quail, but no responses yet.
The quail that is commonly sold is the coturnix. These are Japanese quail. Because of their looks they are also called Egyptian quail, Pharaoh quail, and other names. They are less nervous than Bobwhite or button quail, they don’t fly up a lot so they don’t bang their heads on the top of the cage. They lay delightful brown speckled eggs. The feed store had a new shipment in, and they weren’t just selling pairs, so I bought three beautiful little girls, about six months old.

Saki. Very contempletive. My daughter did a quick and imaginative search for names and came up with a lot of really good ones. With a nod to the breed’s origin and alternative names, the dark brown one is called Saki, short for sakura which is Japanese cherry, rice wine, or also short for the Sakkara, which is an Egyptian city of temples. Covers all bases there. The mostly white one is called Benu, which is an Egyptian bird god you can read about here: http://www.thewhitegoddess.co.uk/articles/ancient_egypt/the_benu_bird.asp . The light brown one, incongruously, is named after Agatha Christie’s character Miss Felicity Lemon, most notably played by Pauline Moran in the Poirot television series. It was too good a name not to use, although rather long for such a handful of a bird.

Benu in the back, and Miss Felicity Lemon in the front. The quail don’t have much personality as yet. Of course, they had been raised crammed in cages with many other birds, shipped through the mail service, then moved to another cage with many other birds. They had arrived at the store on Sunday. These three are settling in slowly, enjoying the personal space and the tall weeds that have grown inside the coop (it is bottomless). After all the strange sounds and smells become commonplace, they’re personalities will emerge. They don’t scare or fly when approached, but hunker down in a fatalistic “this is my last moment on earth” kind of way. Already they are showing more hope in small ways as they react to my voice. I put them upstairs in the coop last night, but they were down again this morning. Their cage has handles so it can be moved when they’ve thoroughly manured that area. (There, I’ve said the ‘m’ word again!).

The RIR's eggs are on the left. Americauna and Silver Wyondotte on right. So more beaks to feed. At least I’m staying away from the Fallbrook Animal Sanctuary, at least for awhile. General Mischief and Sophie are too old for a new dog, and I certainly don’t need any more cats.
Of course, the llamas at the feeds store, and those really cute guinea pigs, could really use a home….
-
Harry Mud Has a New Look
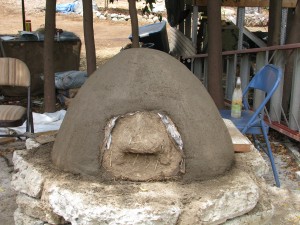
Harry Mud with his bald pate This morning a Meetup was held at my property (Finch Frolic) for the San Diego Permaculture group (http://www.meetup.com/SanDiegoPermaculture/ ). The agenda was to tour the garden and build the second layer – the insulation layer – on Harry Mud, the cob (earthen) oven begun at a similar Meetup last July. There are three installments posted on my blog; you can search for cob oven, or read about the third installment here: http://www.vegetariat.com/2011/07/cob-oven-3/ ) (sorry, I can’t seem to get the hyperlink to work).
During all this time Harry has patiently sat under his tarp awaiting a second layer. Today was his day.
One of the reasons I wanted to work on Harry is that my garden will be on the Association of University Women’s garden tour on May 12th (OMG! Only four weeks away!!!). I’m hoping to inspire a lot of people to research permaculture for their own properties, and to show off earthen building. Harry will be a star.
With 29 people signed up to come today and projected rainshowers, I scrambled a bit to make sure there would be cobbing opportunities for all. However about 15 people toured, the weather although windy was dry and beautiful, and all goals were accomplished. Hopefully everyone came away with what they wanted to hear about, and not so much dog poo on their shoes.
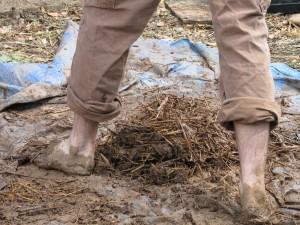
A dirt and straw pedicure. Although I enjoy speaking with groups of people, the drawback is that I don’t have the chance to speak with individuals and find out their stories or learn from them. Everyone has wells of experience and tidbits of knowledge (or buckets full!), and you never know how your life can change with just a passing comment or chance encounter.
Anyway, many of us had mud manicures and pedicures, the group dwindled, and Harry became even more handsome, if that is even possible. Three intrepid souls stayed for Harry’ First Fire, and we lunched and chatted about all kinds of interesting topics, such as communication between plants. It was a good day. Now that I’ve soaked the mud off of myself in a hot bath with epsom salts, I’ll show you what went on.

Sifted soil in wheelbarrow being resifted through smaller mesh. To create the insulation layer, we sifted dirt through two progressively smaller screens.
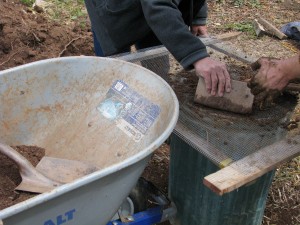
Screening dirt. That was mixed with water and a lot of straw, which took a lot of time but was fun.

Fancy cob footwork. Cob is a community event. That cob mixture was formed in a four-inch layer around Harry.

Harry looks as if he's going bald, but he's actually getting a straw afro! Just in case all 29 people showed up, I had prepared an extra cob project. I thought a work table next to the oven would be a good idea, so stacked two old tires, topped by a tire with the wheel still in there. These had been part of the fill on my property when I moved in 13 years ago. Two intrepid permaculturalists then filled the inside with rubble (small bits of urbanite left over from walls) and sand left over from Harry Mud. A piece of wood was propped in the center to hold the top in place. At some point the entire thing will be cobbed.

Filling stacked tires with cement rubble and sand for future cob table. Harry’s First Fire was set. Handsome, isn’t he?

Harry Mud, all fired up! He is a little thicker towards the bottom (I know how he feels!) because the mixture slumps a little, but he’s thick enough all over to insulate well. Harry will eventually receive a slip coating on the outside, which will help protect the insulation layer and be decorative. The urbanite base will be covered as well. I’d like a shade structure over the area, built out of the shed leftovers of which I have plenty. Harry will have to be protected from rain by a tarp as usual.
Thank you everyone who helped out!
-
Emerson and the Frizzle
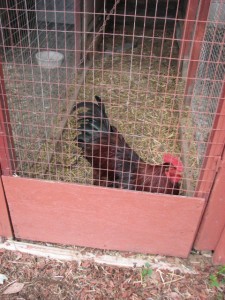
Emerson in Rooster Row Do you remember Emerson, the hen that turned into a rooster? (Read about it here: http://www.vegetariat.com/2011/07/segregating-rooster-building-bachelors-quarters-pvc/ ). To review, last year we chose several breeds of chicks, all of which were supposed to have been pullets (females, rather than cockerels). My daughter chose the smallest Rhode Island Red chick, knowing that she would grow to be one of the larger hens and not wanting her to be a bully. That adorable chick turned into Emerson, a huge, handsome rooster. And vicious. After growing up as a pet, as soon as his hormones kicked in he became a nasty attack rooster, flying up to try for our faces, hitting us with his wings (they really are strong and it hurts!), and practicing with his feet for when his spurs grew in. Since we didn’t want fertile eggs, Emerson lived a life of frustrated celibacy next to the girls. I’d asked around at feed stores if they wanted him, but no one did and they said they’d eat him or just kill him. Until a month ago when on a visit to the Vista Country Feed Store I asked again, and they wanted him! They had about thirty one-year-old Rhode Island Red hens they were going to throw him in with. Sorry ladies!
Getting Emerson out of his pen and into a dog carrier was hazardous and scary. My daughter used strawberry on a string as a lure, but darn him, he just wouldn’t step into the box. We tried for almost an hour. Then Jacob came to work on the ponds, and volunteered his services. He said he thought it would be fun! Using his jacket and sheer determination, he captured Emerson without injury to anyone. Amazing!
At the feed store a pen in a line of pens was made available for Emerson. He was temporarily in Rooster Alley. There was a Polish rooster, with the funny head feathers, and a couple of others, all of whom Emerson tried to challenge through the wire. Testosterone Central.
And then there was the frizzle rooster.
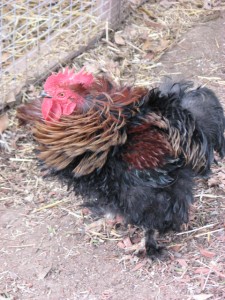
Mr. Frizzle and the Forward Feathers I saw the frizzle rooster there last year, after someone had dumped him there. He strutted around crowing and posturing, with his curly feathers and diminutive size. I fell in love. He was funny all over.

Mr. Frizzle Means Business. He Really Does. Everything he did was funny, although it was all rooster behaviour. Well this year he was still there, and apparently had been turned out of his pen for Emerson.
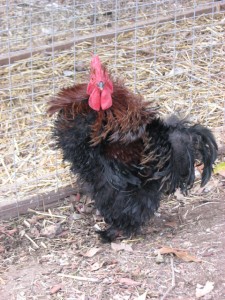
Mr. Frizzle Takes Time Out From Attacking Emerson To Pose For Video. That didn’t make him back down, though! That little guy challenged Emerson through the pen.
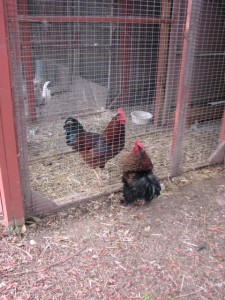
"If only this wire wasn't here I'd show YOU who is bigger!" What was truly hilarious was that after he’d crow, he’d breathe in air while still making sound, like a wheeze or a deflated bagpipes. Listen carefully on his last crow; you can see him (with Emerson) here: http://youtu.be/ivtpeHfOSDM . Thanks to my daughter for the video. Happy Days, Emerson! And much love Mr. Frizzle!
-
What To Do With Grapefruit
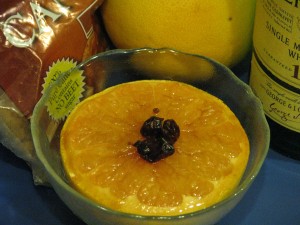
Grapefruit, all grown up. Every once in awhile someone gives me a grapefruit. One or two a year are just about all I can eat. Its not that I don’t like grapefruit. I certainly respect it. It is high is vitamin C and is supposed to be a good diet food. I think that is probably because it is so sour and bitter – even the pink kind – that you can’t taste anything else for hours after eating one.
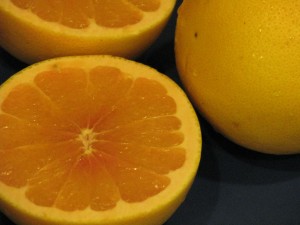
Bare naked grapefruit. My mother would serve us grapefruit halves. She had a set of grapefruit spoons I always coveted that had serrated edges, but they disappeared at some point and I’ve never seen any like them. The sharp edges would allow you to dig out the grapefruit sections without actually arm-wrestling with the fruit. She’d also often ‘section’ the halves, using a paring knife to cut each section free so that all we had to do was scoop them out. She left little reason for us to not eat them. Of course, not eating my mother’s cooking was unheard of anyway.
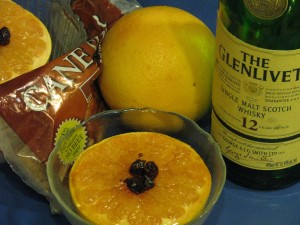
If you section the grapefruit first, you could probably get more whiskey in there. To make grapefruit much more appealing, she would doctor it up with brown sugar, whiskey and then broil it and serve it warm. Wow did that ever improve the taste! Since grapefruits are making the rounds right now, and no one else I’ve spoken with seems to have heard of this method of serving them (their ears sure perk up when I tell them, though!), I thought I’d do everyone a favor and print the recipe. The Grapefruit Diet suddenly doesn’t look so bleak.
Broiled GrapefruitAuthor: Diane C. KennedyRecipe type: SidePrep time:Cook time:Total time:Serves: 2This method of preparing grapefruit I learned from my mother, Beth Cywar, a fabulous cook and a nutritionist before her time. She also believed that food wouldn't do anyone any good if they wouldn't eat it.Ingredients- One grapefruit, cut in half widthwise.
- 1 - 2 teaspoons brown sugar
- 1 - 2 teaspoons whiskey
- A few fresh or dried berries (optional)
Instructions- You may section the grapefruit or not; your choice. Sectioning would probably allow more whiskey to seep in, and would be a little easier to eat, but it is optional.
- Place halves on foil or an oven-proof dish, or on a broiler pan.
- Start the broiler. A toaster oven works great.
- Sprinkle the grapefruit halves with the brown sugar.
- Slowly drizzle the whiskey over the halves.
- Broil until warm and slightly brown and sizzling, about ten minutes.
- Adorn with fresh or dried fruit, or if you want to be retro, a marashino cherry, and serve.
-
Passionfruit Curd
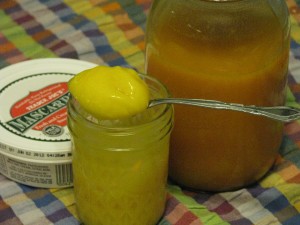
Passionfruit curd. Yum. Rather than post photos of the rabbits eating my vegetables,
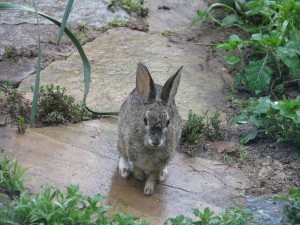
or other Eastery things, I thought I’d put in a recipe that is rather exotic. If you have a passionfruit vine (the ones that produce edible fruit) you may be inundated with the fruit about now. Also the flowers were named passionflowers because of the Christian symbolism read into the shape of the flowers. I always wondered about this, but I figured that faced with ‘heathens’ who ate this aromatic, voluptuous and kind of sexy fruit, some Christian missionaries decided to put the stamp of Christianity onto the plant rather than try to ban its consumption. That’s just my theory, of course, but it makes sense. Therefore a post on passionfruit for the passion of Christ on Easter. Yep, I’m stretching it, but you’ll like the recipe.
Anyway, passionvines have abundant growth (as I mentioned in my post about building a trellis for them http://www.vegetariat.com/2012/03/questionable-carpentry/).

Gorgeous flowers. There are many colors of flowers of both the ornamental and edulis varieties. The flower has a tiny fruit all ready to go and awaiting some friendly bee to come rub herself all over the anthers and stamens (the missionaries are shuddering) and pollinate.
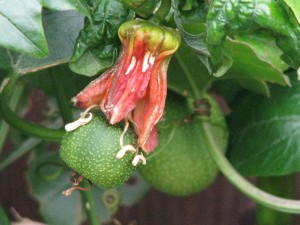
Looks like the fruit is wearing an Easter bonnet! Kind of. Okay, it doesn't. The fruit grows as the flower fades. There is some mother-child allusion somewhere in there but you’ll have to go there yourself.
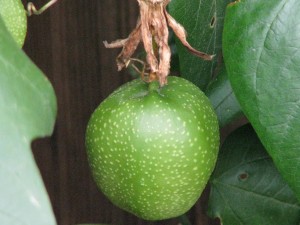
A developing passionfruit. When the fruit is ready to fall, a good shake of the vines will make them come down. Usually they are still smooth-skinned at this point. You want to wait until the fruit starts to wrinkle before it is sweet, ripe and ready. (I’ll not touch that one at all.)

The fruit falls off still smooth... wait until it wrinkles to use Don’t eat the skin, but cut the fruit in half. Many people like to eat the seeds as well as the pulp. I’m not one of them, and neither is my daughter who very patiently sieved the insides of about 80 passionfruit to obtain the juice. I like to add the juice to tangerine juice for breakfast. We’ve also successfully made a hedonistic passionfruit ice cream that was stupendous. This time we decided to make passionfruit curd.

Wait until they're wrinkly, then scoop out the insides. I’ve posted already on how to make lemon curd (http://www.vegetariat.com/2011/03/when-life-gives-you-lemons-make-lemon-curd/). (You’re wondering, what is UP with this woman and curd, anyway?). The passionfruit curd is slightly different, but yet has that nice bite to it that doesn’t make it too sweet. I thought this curd came out tasting a little eggy, but I believe that is because we used eggs from our own spoiled hens, which have a definate healthy flavor to them. The eggs, not the hens (that we know of, nor will we find out). It was all okay, though.
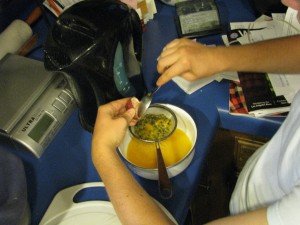
Scoop and strain. We made two half-pints, and I didn’t ‘can’ them. However you may sterilize the jars and lids, add the hot curd, and give them a 15 minute hot water bath and the curd will last for months. I still refrigerate it, just to be on the safe side.
I found the original recipe in Nigella Lawson’s How To Be A Domestic Goddess. She stirs some passionfruit seeds back into the curd, which looks nice (if you like the fish egg look to your food) and can certainly be done for all of you who enjoy the seeds. I like my curd seedless. On scones. With mascarpone cheese. Mmmm.
Happy Easter!
Passionfruit CurdAuthor: Diane C. KennedyRecipe type: SpreadPrep time:Cook time:Total time:This wonderful spread based on Nigella Lawson's recipe can be used to top baked goods, put in a pie shell, in a jelly roll cake, or used any way you would lemon curd, jam or jelly. It makes an exotic gift, too!Ingredients- 12 passionfruit
- 2 large eggs
- 2 large egg yolks
- ½ cup granulated sugar (superfine if you have it)
- 8 tablespoons unsalted (good quality) butter
- 2 sterilized ½ pint jars
Instructions- Cut the passionfruit in half and scoop out the insides into a sieve.
- With a spoon, strain the juice into a measuring cup. You should have about 10 tablespoons, or a scant ⅔ cup of juice. If you'd like seeds in the curd, reserve the pulp of the 12th one instead of straining it.
- In a bowl beat the eggs, yolks and sugar together.
- In a saucepan, melt the butter over low heat.
- Stirring continuously, add the passionfruit juice and then the sugar mixture, being careful not to cook the egg.
- Keep cooking and stirring until the mixture thickens, about five minutes. It should coat the back of the spoon.
- Take the pan off the heat. If you have reserved the pulp of that one last fruit, here is where you whisk it into the mixture.
- Pour the curd into the jars and seal.
- Store in refrigerator. Try it on scones with mascarpone cheese. Really. I mean it.
- Makes two half-pint jars full, about 1¾ cups.
- Gardening adventures, Humor, Permaculture and Edible Forest Gardening Adventures, Rain Catching, Soil
Seven Hundred Gallons of Cooties

That's a lot of tea. One of the amazing and useful things I learned in my Permaculture Design Course was how to brew microbes in a bucket. Yes, I know, most women like champagne and jewelry. I like compost and worms. Whatever. Microbes are the microscopic creatures that make dirt into soil. By brewing a microbial tea you can so supersaturate the water with microbes that giving your plants just a small drink of it will greatly improve their health. That is because microbes eat plant litter and other decaying things and make available (and by ‘make available’ I mean ‘poop out’.) (Sorry.) more of the nutrients such as minerals that can be locked in the soil. Adding microbes to poor soil is a good thing.

Fish tank water, paint strainer and aerator: tools for microbial brewing. To make a microbial brew, you put good compost in a mesh bag such as a paint strainer or layers of cheesecloth. Obtaining compost from various sources gives you a good mix of microbes because not all the same microbes live in all soils. Suspend this bag in a five-gallon bucket of water, add a little organic molasses for the microbes to eat (like sugar to yeast), and if you want other soil additives such as rock sulphate, blood or bone meal, etc. I used water from my fish tank. Then you oxygenate the water with a fish tank aerator. After thirteen hours the microbes will have reproduced to a maximum capacity and the brewing is finished. You should use the brew within a few hours.

I'm not sure what made it foam, but it looked more like a brew. So, I did this a couple of times last Fall. Meanwhile, Jacob, who still maintains the Aquascape projects and volunteers some time here, managed to have donated to me a 700-gallon tank. It had been used for organic fertilizer.

The tank. The target: under the balcony. Jacob brought it over in his pick-up, and with the building of an impromptu scaffold he, my daughter and I (but mostly him) rolled it into place by my garage without damaging the propane tank or each other. Then he re-routed a rain gutter from my paltry 50-gallon rain barrel into the 700-gallon tank.

Trying not to crush the propane tank. The tank filled after a few rains, and I used most of the water recently between rains. Then the last two rains filled it to the top. Jacob, who is into aquatic microbes with which to balance natural ponds, microbes being referred to as ‘cooties’, suggested turning the entire tank into a cootie-brewing container. That way I’d not just be watering the plants, I’d be giving them a microbial smoothie. A cootie cocktail.

The tank, full of rainwater from the gutter, becoming a microbe farm. Always up for doing the improbable, I filled a paint strainer with some fine samples of soil from several long-established areas of my yard, and suspended it inside the tank. In went an entire bottle of molasses, which is a drop in the bucket, so to speak. Then in went my little fish tank aerator, quivering in fear at the impossible task of aerating 700-gallons of water. I took a water sample and then plugged the thing in. That was a few days ago. I have no idea how well the microbes are brewing, since the aerator is barely stirring the water. The water has turned brownish, which I take to be a good sign. The warmer temperature is perfect for the little guys; springtime for microbes. I think I may have a microscope left over from my older brothers – circa 1950-something – in the garage somewhere, with which I can compare water samples to see if anything is happening. I figure, even if it isn’t, there is no harm done, and even if some microbes have flourished the water has improved.

The aerator down inside the now-brownish cootie water. There are many quips I can make about this whole project. For instance, here are several million pets I don’t have to take to the vets. Or, I really love to cook, and since I enjoy making soup this project is a natural. However I just think the whole idea of making 700 gallons of microbial tea is so funny that no matter how the project ends up, I think the laugh is worth it. If I can’t do something bizarre, it isn’t worth doing!

Microbes are amazing, aren’t they?
And so are tadpoles, which are thriving not unlike microbes, but in my pond. (A belated happy April Fools.)
